


govtmule
-
Posts
238 -
Joined
-
Last visited
Content Type
Profiles
News and Information
Tutorials
Product Reviews
Supplier Listings
Articles
Guitar Of The Month
Links and Resources
Forums
Gallery
Downloads
Posts posted by govtmule
-
-
I have a customer who wants a large decal on the top of a guitar body that I'm currently building for him. I have he color shot and am ready to start he clear.
I assume that I want a level surface for the decal right ? So should I:
1. Follow my shooting schedule including leveling first, then apply the decal, then shoot a ton more clear to try and make the decal edges disappear, and then level again
2. Shoot a few coats of clear, apply decal, and then continue with shooting schedule
All of the info that I've been able to find concerning water slide decals has been for headstocks or applying decals to an already finished body.
Thanks
-
Thanks a lot for the input guys. I'm gonna double check with the client but I think routing from the rear, just enough material to make room for the pickups, is the way to go.
Thanks
Steve
-
Yeah but a strat still has a decent amount of unmolested wood on the backside before the trem route kicks in.
-
I’m building a Grover Jackson Schon inspired seven string for a big Neil Schon fan. I want to route for the pickups from the rear because we are going for a recessed/ultra clean look for the top.
The body so far:
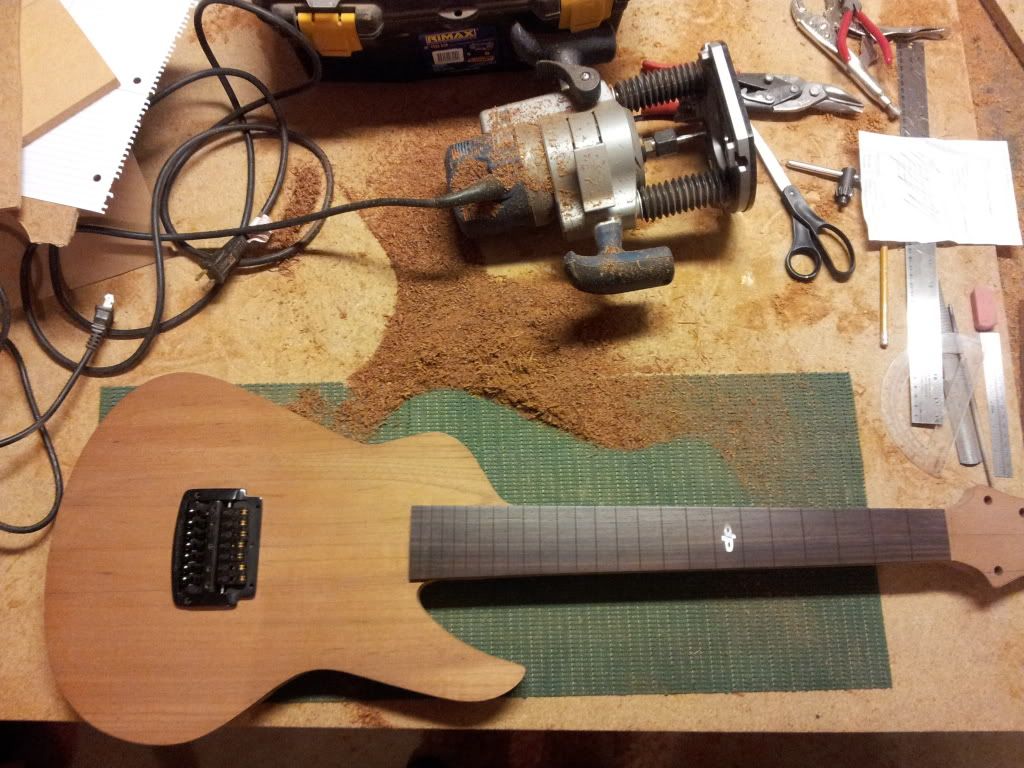
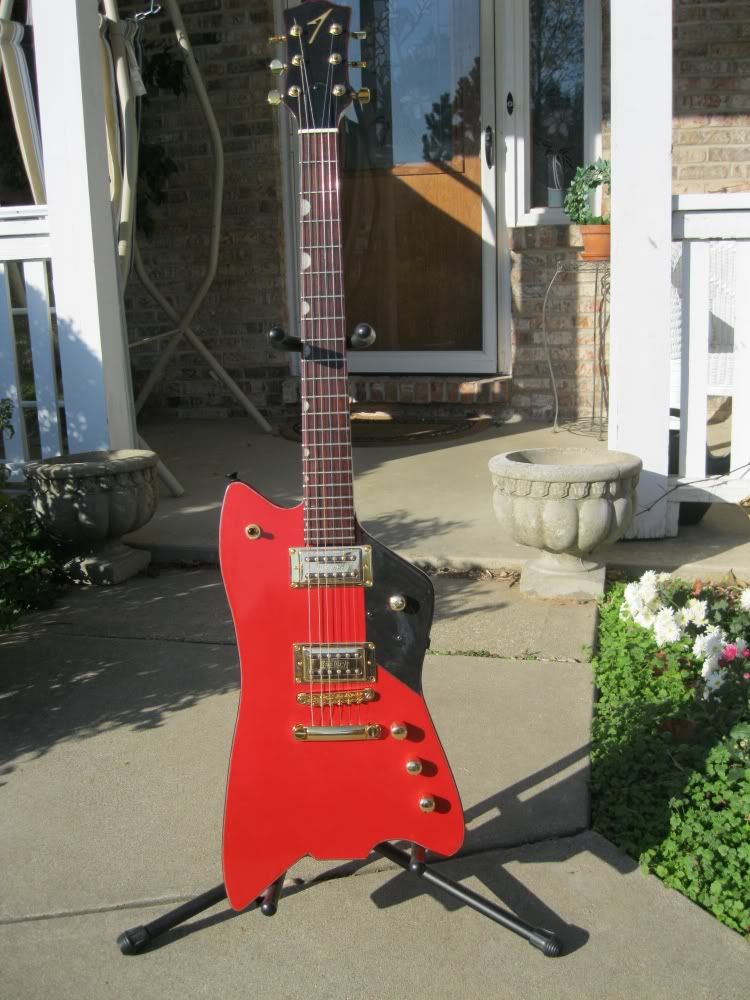
For the pickups I only want to see the height adjustment screw heads and the pickup bobbins. Like this look:

If I route from the rear, a bathtub type route to accommodate any pickup, do you think this will remove too much wood and create strength and stability issues ?
Lower drawing shows what wood will remain down the center block of the body:
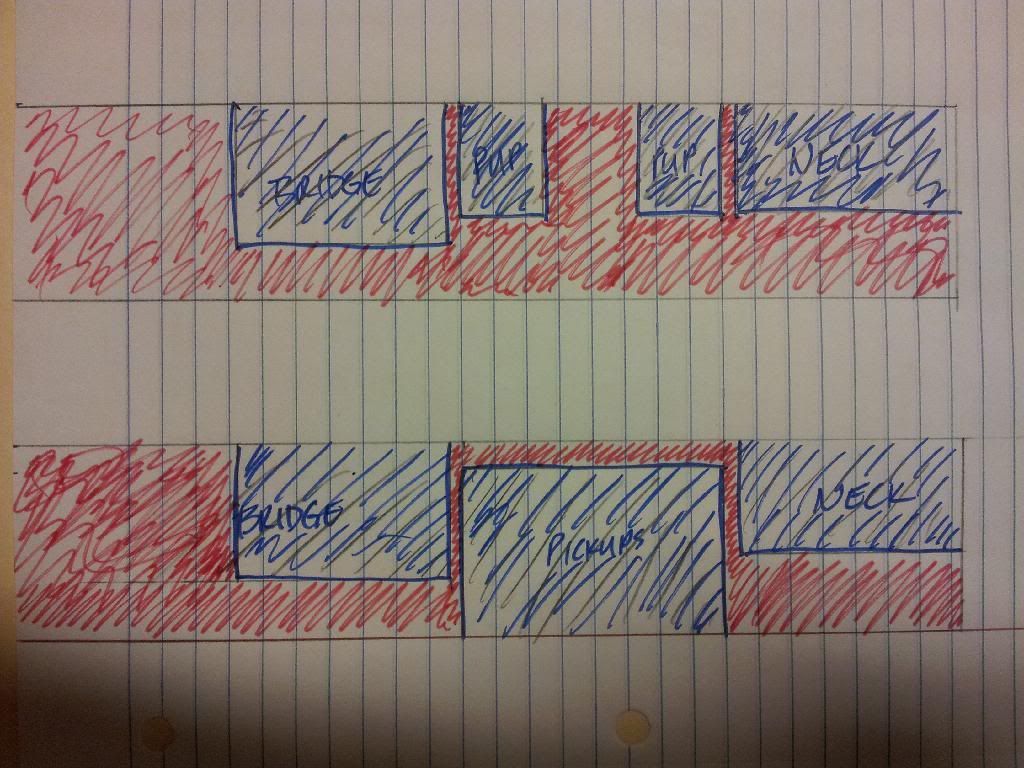
There will be wood of course on either side of this swiss cheese but I’m afraid it won’t be enough.
Opinions ?
Thanks,
Steve
-
Did you save some for a headstock veneer or do you have other ideas? To my eye, when a body is exclusively featuring one wood it reflects best in the headstock also. Off the top of my head, Pukko springs to mind as somebody who has an excellent eye for balancing out all of these aspects.
I was wondering when I might see somebody making one of these. Paul Gilbert has to be one of the nicest guys in rock short of Marco Minneman and Guthrie Govan.
Yes I saved a chunk for the headstock if I need it. I actually have a ton of the veneer. Enough to do 10-12 guitars. It's already pre-joined in 8" or so wide sections in big paper backed rolls. Got a few big roles of it from a millwork shop that was just looking to clean out their shop...$0.00

I met PG once back in 90 or 91. Mr. Big came to town with Badlands and The Cult opening. I won back stage passes and met Paul, Eric, and Pat. I said nothing intelligent but yes, he was very nice. He actually said "hey i have to go brush my teeth I just ate something with onions", and then he came back out and found me to continue our conversation.
-
Not sure I want to cover this top up with the Fireman style pickguard...we'll see

-
Out of the "press" with a little naptha ...


-
PG Fireman copy.....sort of.
African mahogany body, pommele sapele veneer top, black limba neck, Ib Gibraltar bridge....not sure on rest yet

Squeeeeeeeeeeeeeeeeeeze

-
And my first attempt at binding a fretboard.

-
Got the ebony fretboard sanded to thickness and fret slots cut.

-
You know, as long as it is the carbon and not the truss rods the necks should be fine. You just need to accept the cosmetic appearance or paint them. The carbon - when set in - might as well be part of the wood.
DAMN...that's a good point. Thanks Prostheta.
I've have to give painting the necks some thought. I planned on a tru-oil finish for them which still may work as well.
-
Awesome wood choices !
Where the heck did you get that acrylic ? That's beefy stuff.
-
I was able to salvage one neck. I can only imagine how much meat is NOT left between the rods and the sanded surface....I'm guessing a few passes with some 400 grit may start to expose the rods.
I'm going to keep moving forward with this one to at least get SOMETHING out of this "build in batch" experiment.
Having one completed, I at least can get a feel for some of the things that I may want to change for future builds of this model. Like electronics and hardware choices, strap button locations, jack location, control locations, etc.
I already know that I'll going to incorporate a better pickguard design and an actual logo.
-
Good points...
Thanks for the question sdshirtman but I think I'm gonna toss them rods and all.
-
What a bummer. Can you salvage the carbon fiber rods too?
Not sure....they're set in with CA. Any ideas ? Since the necks are toast I could bandsaw it close and sand the rest.
-
Looks good !
-
It did give me the opportunity to try my hand at steaming off a fretboard.

That's one.....five more to go...

-
Some dumbass (me) FORGOT that each neck has two carbon fiber rods running down the length of the neck. Not as deep as the truss rod, but deep enough to poke through the now carved neck.
Awesome...

ALL SIX.....firewood.
-
I decided to go with a semi-trapezoid neck profile. I thicknessed the back and used a chamfer bit to rough in the sides.
All looked good at this point. Then the approach of doing these guitars all at once, six at a time, bit me in the ass.
I started to finish sand the necks....some dark streaks started to appear.

They got worse....

-
HA....thanks guys ! I think I'll wait it out. I have the time.
-
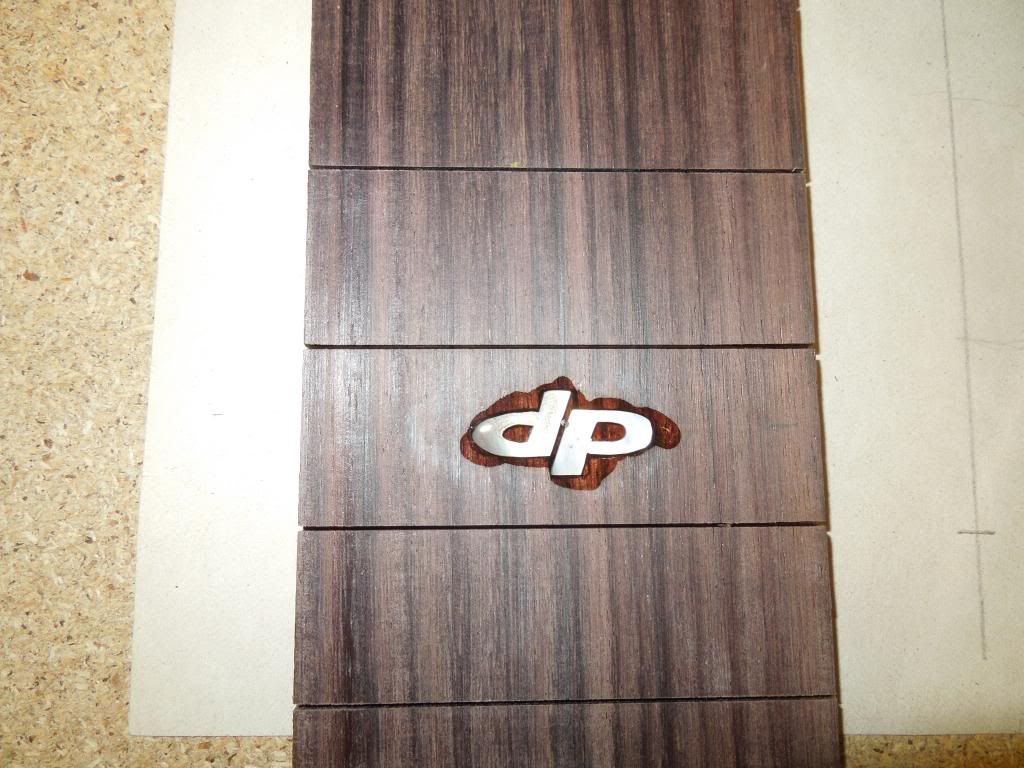
I didn't fill the inside of the loops on the "d" or the "p" thinking that the CA glue would fill the gap. That worked fine but when I poke that area with an exacto blade it feels a bit soft.
I covered the entire inlay 3 times about 12 hours apart with med CA glue.
Should I drill out those areas and re-fill with CA and rosewood dust ?
-
I made one a while back. Mahogany back, 1/4" plain maple top, chechen neck, cocobolo fretboard, Gretsch pups.
Yep...loved it. Shout out to Rev Billy G.
-
That is one of the best bookmatch I've seen in a while.
Thanks...got it from someone on ebay a long time ago. Whoever it was offered free resawing so I bought a slab that they bookmatched into 3 tops for me. I can't remember who it was unfortunately.
-
Maple top glued and routed to size


African Mahogany neck glued up


Large Decal....level finish first ?
in Inlays and Finishing Chat
Posted
Thanks for the reply.
That was my first thought too. I wanted to kill two birds with one stone, using the normal build coats of clear to build enough to hide the decal edges. But I'm afraid of sanding through the color on the initial level to give the decal a level surface to begin with. Plus the color is a metallic, Shoreline Gold, which I'm not sure would respond to leveling too well.