


dayvo
-
Posts
163 -
Joined
-
Last visited
-
Days Won
1
Content Type
Profiles
News and Information
Tutorials
Product Reviews
Supplier Listings
Articles
Guitar Of The Month
Links and Resources
Forums
Gallery
Downloads
Posts posted by dayvo
-
-
-
Funkymann1
Nice work
-
 3
3
-
-
-
Some really magnificent guitars in the lineup, but for me Shad Peters
-
-
-
Daves Koa build

-
There are not too many LPish single cutaway styles I like, other than the original, but your design I love
A lot I've seen out there almost achieve getting an individual look away from the LP, but there's usually
something missing or not quite right
To me yours is a standout
I particularly like the Zebrawood one
I look forward to seeing them completed
Dave
-
just go with the humbucker at the bridge and nothing at the neck if you need to keep the wiring simple., although HSS or H-S might be interesting
+1
-
I think this is the first lap steel that i actually like the look of. Well done, awesome guitar.Very simple and elegant design ! Congrats !
+1 on both of these comments
Very nice
-
 B)
B) 
I'm a fan of SG's
They look awesome
I especially like the bottom one without the scratchplate
And I like the positioning of the jack plate on the side, instead of on top
Dave
-
That looks sweet
Love the inlays
Look forward to seeing it all done
What finish are you going to use?
dayvo
-
-
Thanks for the positive feedback, guys
This site and its members have been a massive help to me
Even though I don't post a lot, I come here almost every day to check other members
builds, ideas and advice, and I think this forum is the best of its type
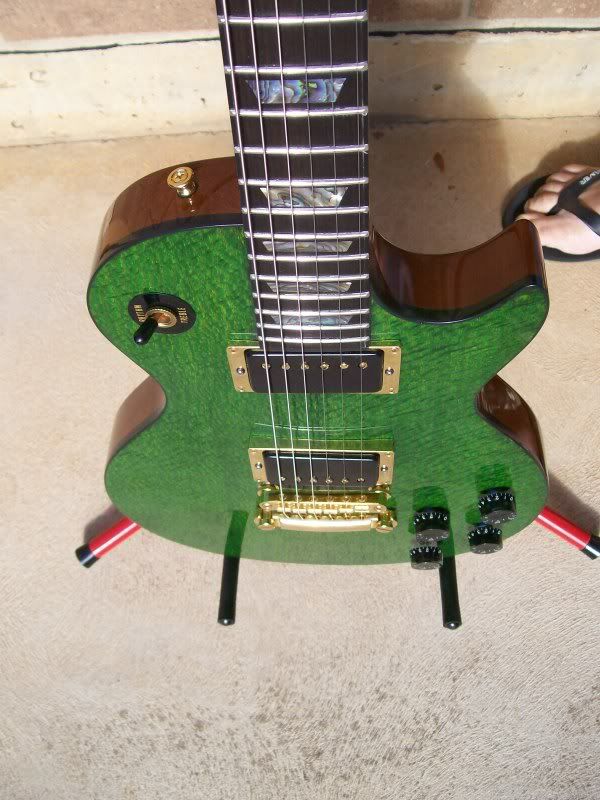
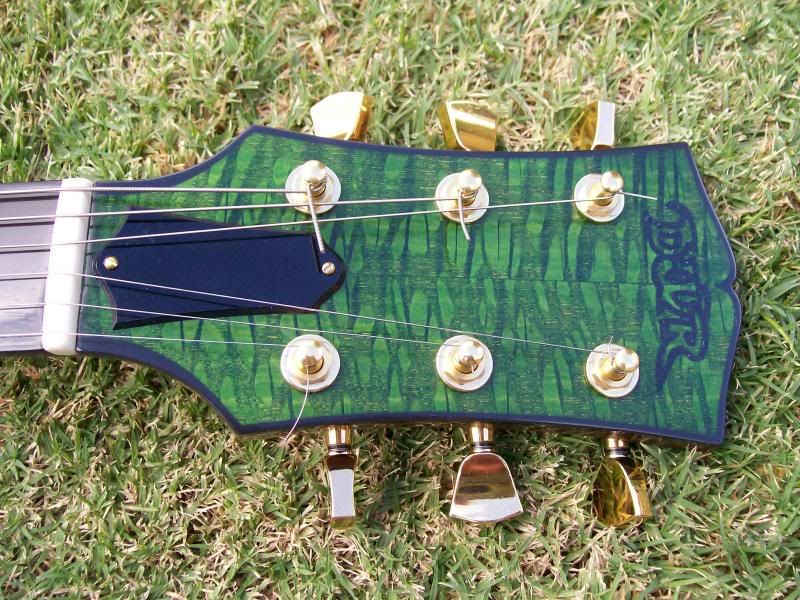
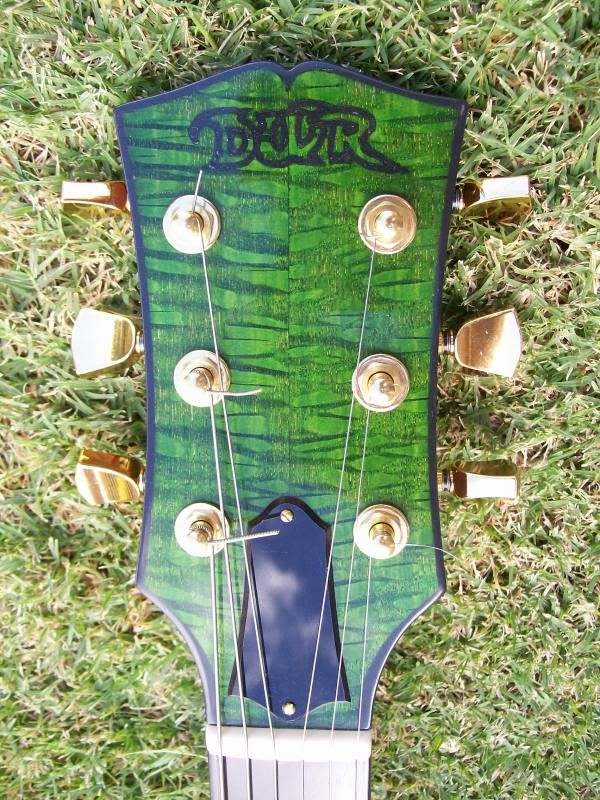
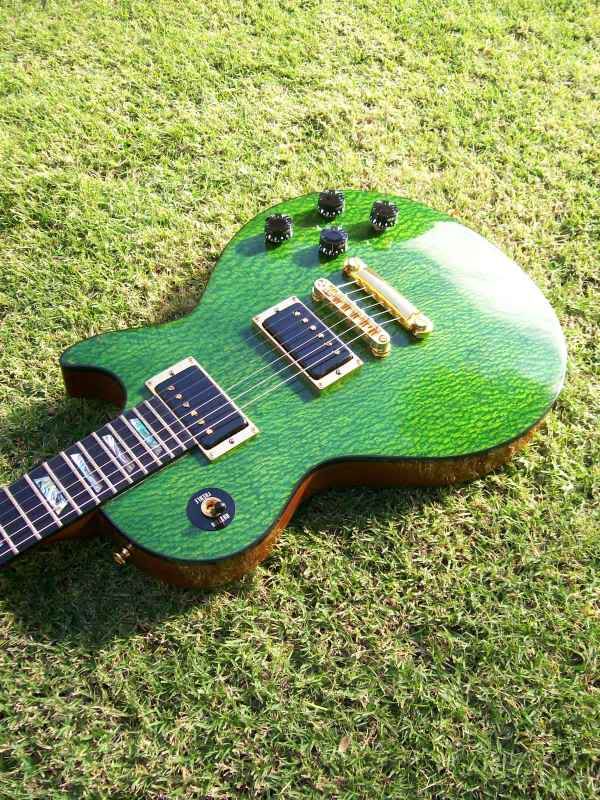
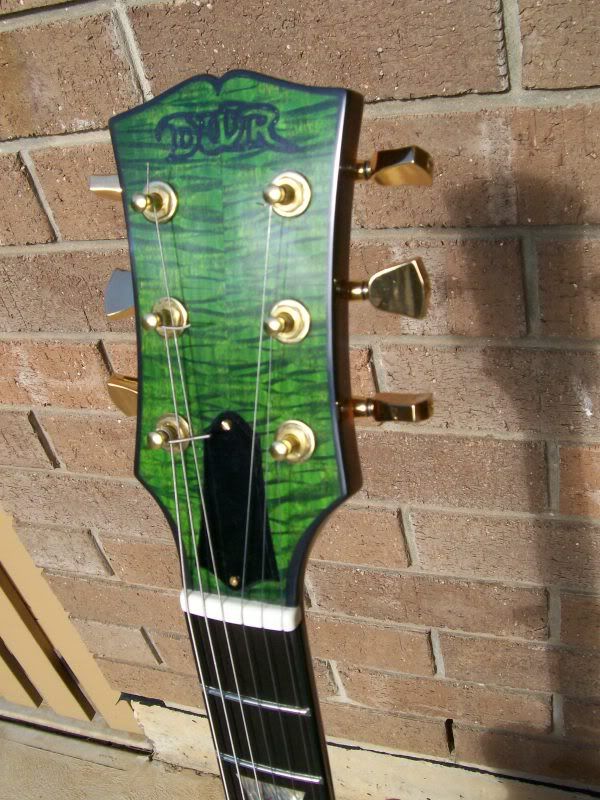
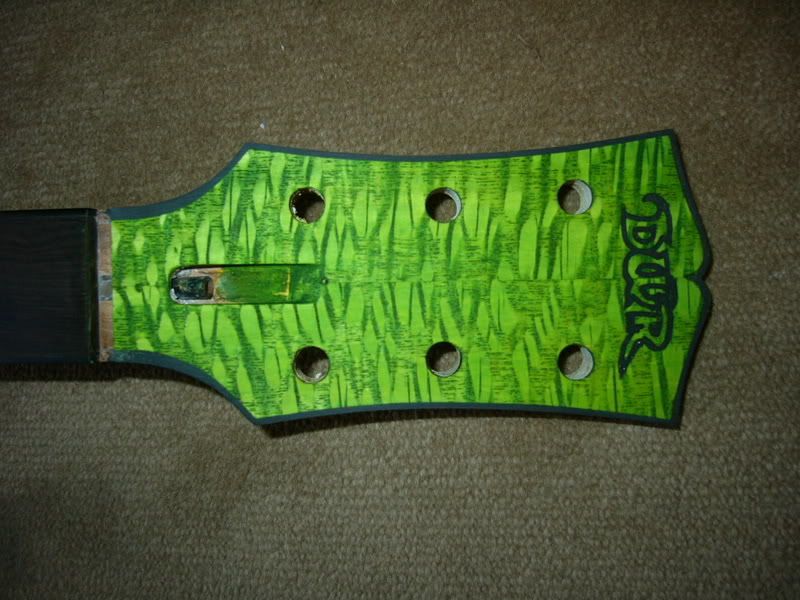
Donovan, the top is Lacewood, and the green dye did not look good over the natural colour
I had to do several goes of bleaching it to get it almost white, then the green looked fantastic
I am still looking for the picture that first inspired the colour scheme I chose. It was from the EMG pickup site from 3+ years ago
If I find it I'll post the picture against one of my guitar
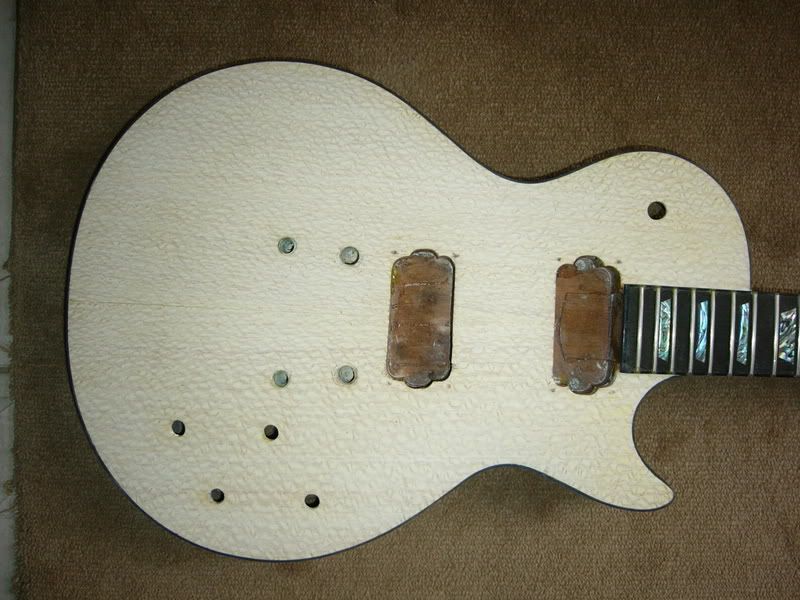
ericbojerik, I got the pickup covers from Guitar Parts Resource
From memory, they didn't have black ones then, so I bought nickel ones and painted them black
westheman, if you can vouch that the burro will service my needs, we may able to come to some agreement
I may post a couple more pics later
Regards
dayvo
-
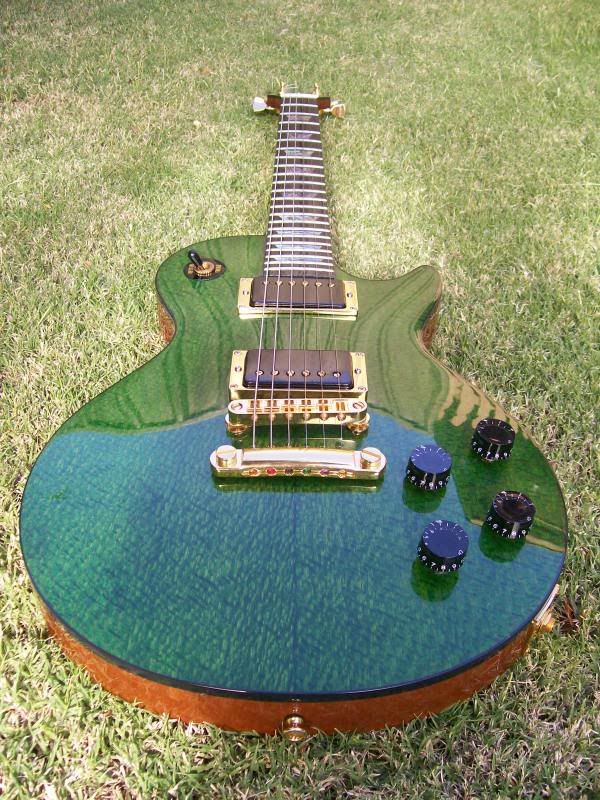
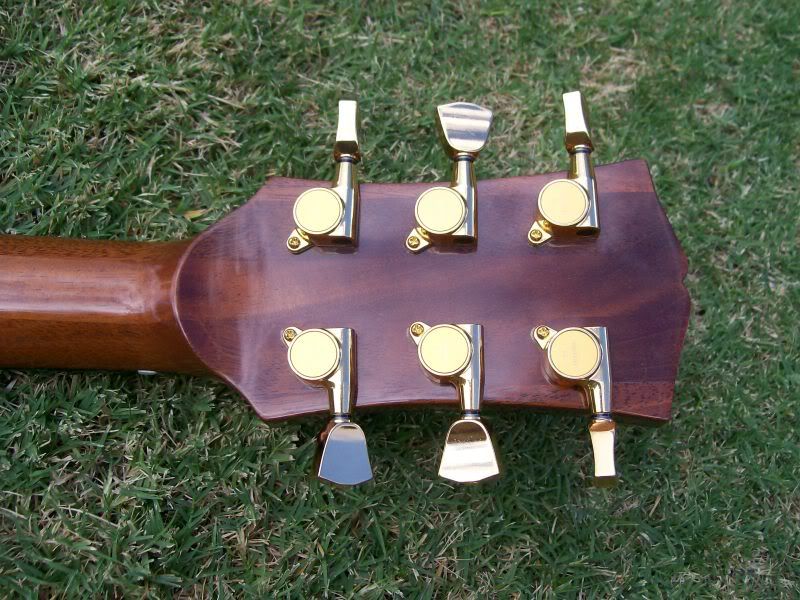
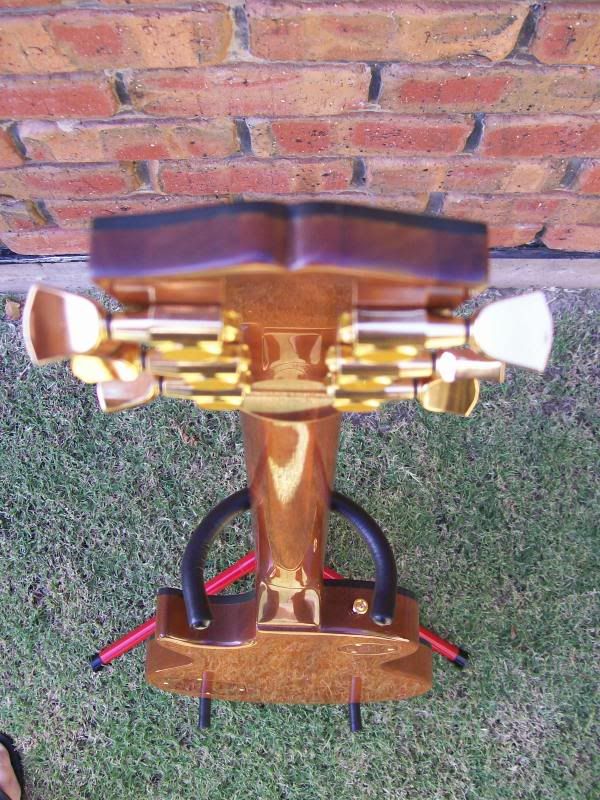
Its been a long time coming to enter in GOTM
Another Les Paul
The DWR LP1
Specs:
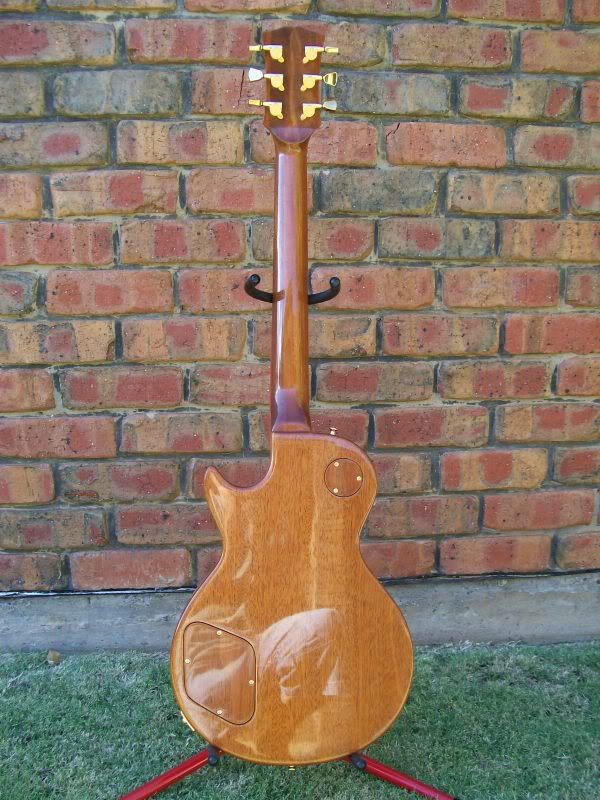
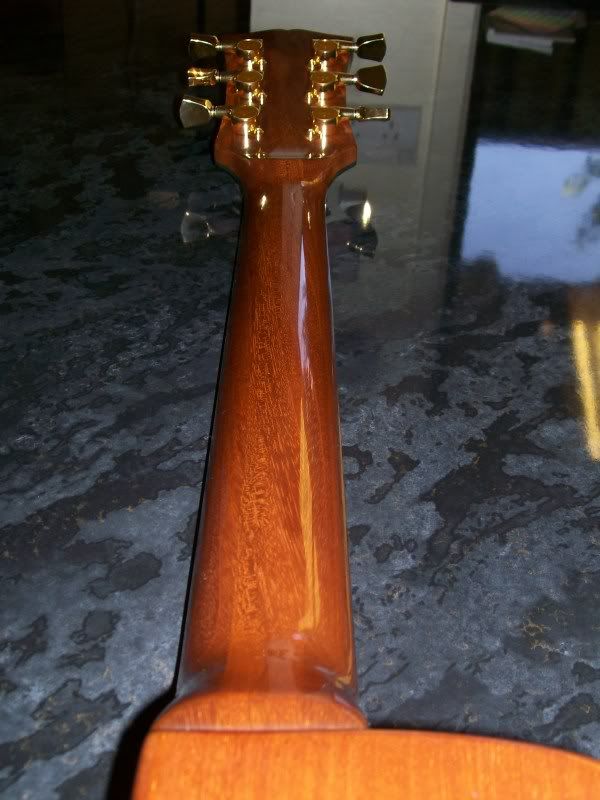
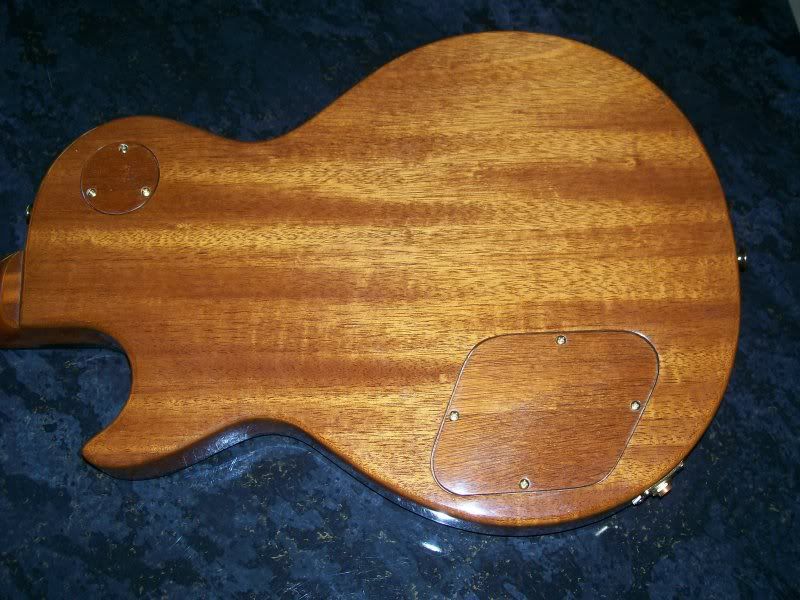
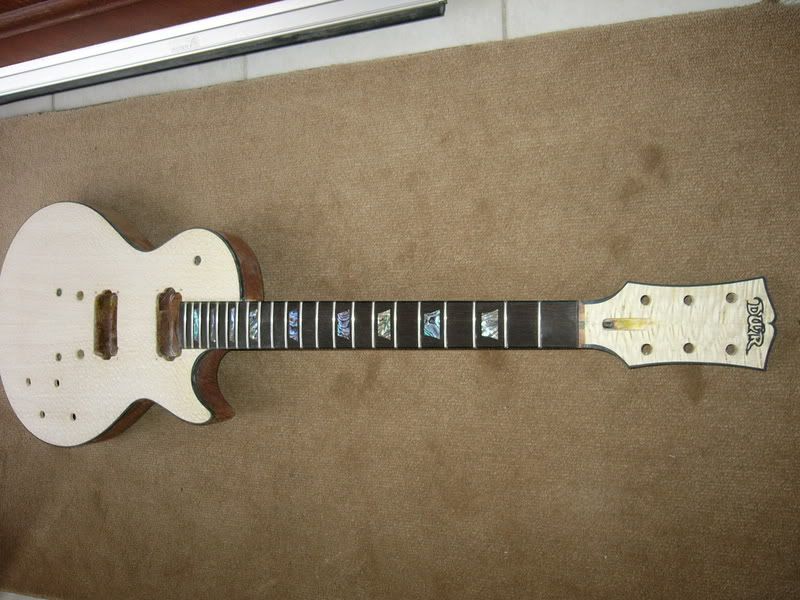
Brazilian Mahogany body and laminated neck
Ebony fretboard
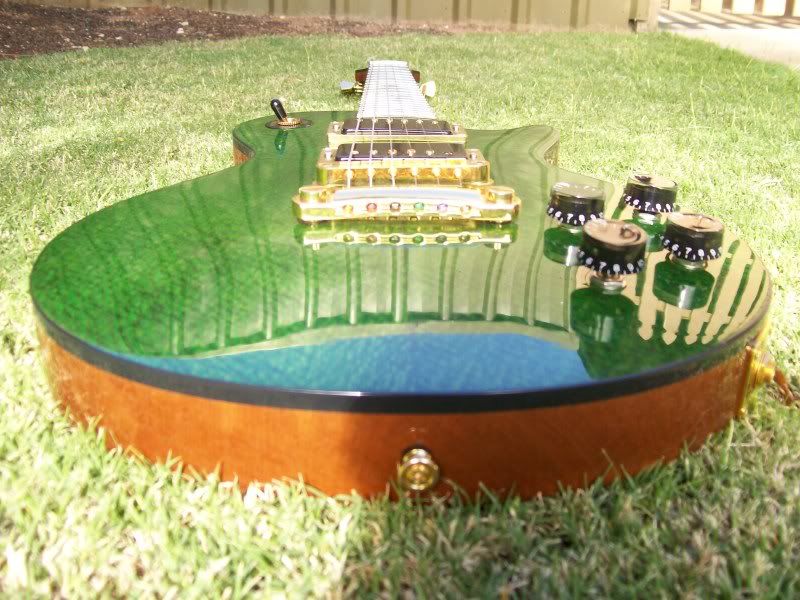
Lacewood caps
Paua trapezoid inlays
Bone nut (handmade)
Black binding on body, neck and head
Finish, gloss nitrocellulose lacquer
D'Addario strings
Hardware, Gold Gotoh tuneomatic bridge and tailpiece, and tuners
Gold pickup surrounds, toggle switch, strap holders and various screws
Stewmac jumbo frets
Pickups: Neck 8.5k, Bridge 14k. They were made by Mick Brierley here in Oz
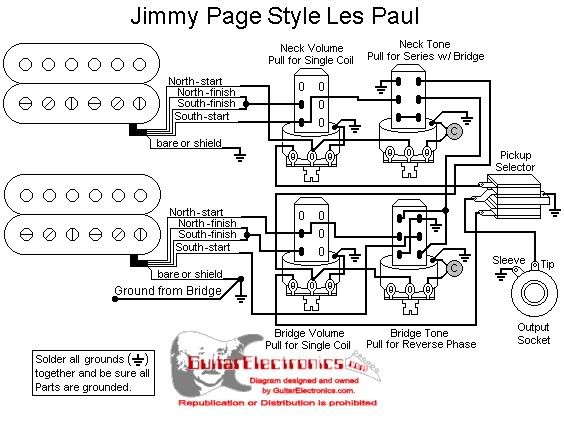
Electronics: I have the Jimmy Page Mod using 4 push-push pots and a 3 way toggle switch to allow for coil, series/parallel and reverse phase switching
Here is the link on this site to various stages of the build
dayvo

-
Here we are, 2 years since my last post on my Les Paul build and I've finally got around to finishing it
I had a lot of problems with the nitro lacquer and as a result had to completely strip it twice before
getting it right, solvent popping being the culprit both times
What is the saying, 'patience is a virtue'
Anyway, rather than ruining all my hard work (I was tempted to drop kick it across the garage more
than once), I put it aside and concentrated on my first amp build (all the electronics are completed, I
just have to finish building the cabinets), and making myself a decent work bench
Specs:
Brazilian Mahogany body and laminated neck
Ebony fretboard
Lacewood caps
Paua trapezoid inlays
Bone nut (handmade)
Black binding on body, neck and head
Finish, gloss nitrocellulose lacquer
D'Addario strings
Hardware, Gold Gotoh tuneomatic bridge and tailpiece, and tuners
Gold pickup surrounds, toggle switch, strap holders and various screws
Stewmac jumbo frets
Pickups: Neck 8.5k, Bridge 14k. They were made by Mick Brierley here in Oz
Electronics: I have the Jimmy Page Mod using 4 push-push pots and a 3 way toggle switch to allow for coil, series/parallel and reverse phase switching
dayvo
http://i39.photobucket.com/albums/e187/dayvo/102_0213.jpg
http://i39.photobucket.com/albums/e187/dayvo/102_0211.jpg
http://i39.photobucket.com/albums/e187/dayvo/102_0183.jpg
http://i39.photobucket.com/albums/e187/dayvo/102_0180.jpg
http://i39.photobucket.com/albums/e187/dayvo/102_0178.jpg
http://i39.photobucket.com/albums/e187/dayvo/102_0181.jpg
http://i39.photobucket.com/albums/e187/dayvo/102_0216.jpg
http://i39.photobucket.com/albums/e187/dayvo/102_0190.jpg
http://i39.photobucket.com/albums/e187/dayvo/102_0189.jpg
http://i39.photobucket.com/albums/e187/dayvo/102_0208.jpg
http://i39.photobucket.com/albums/e187/dayvo/102_0210.jpg
http://i39.photobucket.com/albums/e187/dayvo/P1010724.jpg
http://i39.photobucket.com/albums/e187/dayvo/P1010725.jpg
http://i39.photobucket.com/albums/e187/dayvo/P1010696.jpg
-
Hey Jules,
If you're interested in buying locally made pickups at good prices with great customer backup
try Mick Brierley and if you checkout
this website, you'll find a lot of positive feedback on him
dayvo
-
Hey Zeb
As you're in Oz, check out Mike Brierley
He is becoming quite well known
Have a look at this site and check out all the positive feedback he is getting
dayvo
-
Another option is to go to your local hardware store ( I went to Tractor Supply Co.) and get a set of welding torch files. They are a set of varying sized round wire files. They will match your strings almost perfectly. I paid 6 bucks and I belive there are about 15 files in the set. They come in a little metal case. They might take a little longer, but you can't beat the price.
-John
Here's a link to similar files
I picked up a set here in Oz for $AU5
With a bit of patience good results can be achieved
dayvo
-
So, what does the average worker earn at Maton?
-
Thanks for all the input, guys
dayvo
-
I recently read to avoid your stain coming out blotchy/patchy a washcoat of shellac or lacquer
should be applied first to the bare wood (in my case, lacewood), a light sand then apply the stain and it should come out quite evenly
My question is will this method work if I use waterbased analine dye (its all I have) and if so would I need to
spray it or can I wipe it on?
dayvo
-
I recently bleached the figured cap and headstock of my guitar and was very pleased with the results
Here in Oz not being able to get a manufactured product to do the job I had to source the raw materials
Ammonia and Hydrogen Peroxide
If you do end up bleaching think safety as products like these can be quite dangerous i.e.
respirator, eye protection, gloves etc.
To try and achieve a similar colour may involve a little trial and error
Other members may offer simpler or better options to you
dayvo
-


 B)
B) 
Guitar Of The Month vote - September 2015
in Guitar Of The Month entry/poll archive
Posted
Mr Riddler