


steve1556
-
Posts
108 -
Joined
-
Last visited
Content Type
Profiles
News and Information
Tutorials
Product Reviews
Supplier Listings
Articles
Guitar Of The Month
Links and Resources
Forums
Gallery
Downloads
Posts posted by steve1556
-
-
StratsRdevine - thanks for the advice! That picture looks absolutely stunning, I'll definitely be giving it a go in the near future and on a guitar/inlay. I would try it for this guitar but I don't have all the equipment and bits to do it at the moment (and this Strat build is slowly costing me an arm and a leg with buying tools and that, anyone want to buy a kidney from me?). I'll be trying the powders on the back of my hand when I next go out to the garage to see if they would be suitable to try it with though.
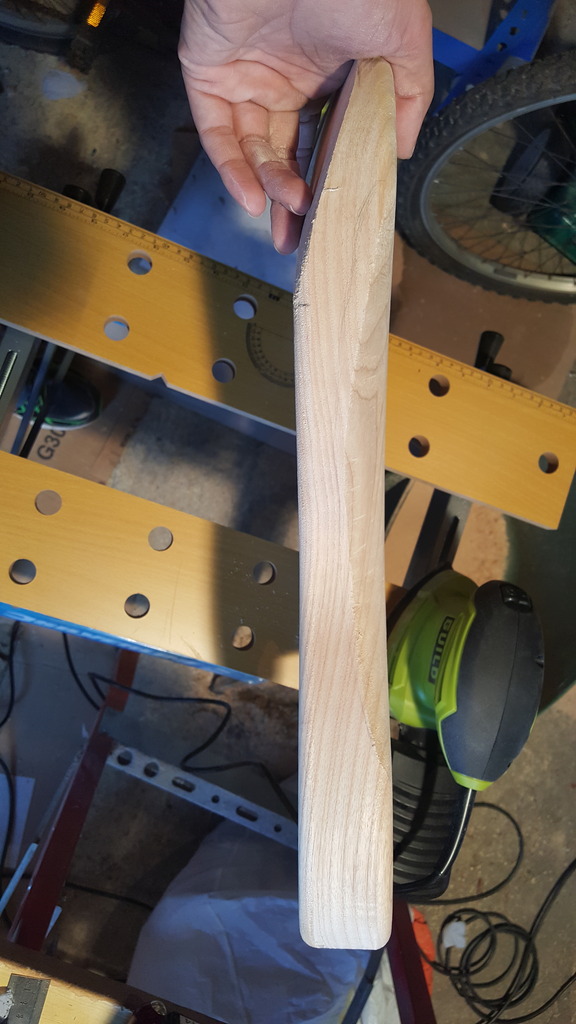
A small update. I'm struggling to line up the fretboard onto the guitar neck properly, so the other evening while sipping on my favourite whiskey (Sortilege Canadian whiskey with maple syrup), I had the brainwave of roughly mounting the fretboard, draw the neck around it and trim the width of the board down while putting the fret centre line, 12th fret and nut positions in pencil on the back of the board. I'll leave more then enough width of the fret board after cutting so I still have a fair margin to position it correctly.
I've ordered more burr bits for my Dremmel style tool, and they still didn't work great (although a lot better then the previous ones). I did some more research, and it turns out the diamond ones I've got (first set) are more for sanding. The 2 sets I ordered from eBay (like mini drill bits) are designed for cleaning up, and I just had some more arrive (Saburrtooth) which are designed for ripping the wood out. So the plan is to hopefully test the Saburr ones tomorrow after work, I've ordered 3, one is a flame burr, one is a bull nose burr and the last one is a flat end burr. Including postage, they were just under £43, so quite pricey, but if they work really well then I'll be happy.
I gave the inlay tests that I did the other day a very quick sand (80 grit and 300 grit), and in no way did I sand them properly. They do look really good so far though, so the plan is to try out these new burr bits, then clean them up with the drill like ones, then finish them off with the sanding ones, and do inlay tests again to see what the final result will be, as the last thing I want to do is mess up that bubinga fretboard as I've got an estimated 8-10 hours invested in it so far (I'm never sanding bubinga again).
Does anyone know how to use the new Photobucket app? The old app would let me upload photos from my phone to my account (I get 50Gb of 4G internet so only takes a minute or two), but the new app is useless. I'm now back to transferring photos to my laptop through Airdroid, then having to upload them through my home internet which is rather slow.
Drill style burrs.


Saburrtooth burrs.


Inlay test before and after sanding (I took the after shot in my shadow as I was rushing and on my way out of the garage).


Off topic, but the reason why I didn't get any work down today as I planned I would, was because I went out for a bike ride as the weather was nice. It's lovely down the river at this time of year and wasn't too hot. I've got a Cyclocross bike so it's like a road hybrid, in that you have a thicker frame and tyres (can put thinner ones on if need be), but it's got the speed of a road bike while being able to go off road thorugh forests, tow paths, etc. I prefer being off road so it's the perfect bike in that respect.

-
58 minutes ago, Prostheta said:
Those metal powders look good. Source?
Looks like you could make thermite too.
I got the powders from here link, you can buy them individually though. Their website says they don't ship them outside the UK, but with my knowledge of dangerous goods for air transport, metal powders aren't on the list. If you wanted some and can't source them locally, then I'm happy to post them out to you (or any other member that wants them).
Thermite, mmm, if it's what I'm thinking it is, it could be used to do some interesting burn marks/designs on a guitar!
-
On 01/04/2017 at 3:18 PM, Prostheta said:
I don't like Sketchup much either. I'm really into Solidworks for project planning (work things, like furniture) and TurboCAD for guitar stuff.
Same plan as myself most of the time as far as the fret slots go. I just finished up the board for Nina's SG in the mitre box, so after that's radiused I'll chase out the slots to depth the same as yourself.
I've been having a play around with Inkscape and seem to get on much better with that, I'm finding that it's very similar to CorelDRAW which is making the transition easier.
I've just had 4 days off work but I haven't had any time to do anything on the guitar build until today. I put the board back in the mitre box and did a small test cut to make sure it's still cutting at right angles, and it is. I redid the slots, then took the board out and put the depth gauge on the saw, but found using a masking tape depth line was easier. I also padded out the extra depth in the cavity for the truss rod as I did it slightly and found that using 2 layers of flame maple veneer was sufficient, and also got the truss rod access hole drilled.
I've got a ever so slight issue with the fret board though, in the fact that it's not completely level, depth wise. On one side the board is roughly 2.9mm and the other side is roughly 3.1mm, both measurements are consistent down the length of the board.. Is that within tolerance or should I try moving the centre line so both sides will be the same depth? I know how it happened, I taped the board down next to one of the guide boards I was using, and not to the centre line of the radius block, but I'll know for next time. On the plus side, according to my radius checking tool, it's a consistent radius for the whole board.
Earlier in the thread I tried using the Crimson Guitars inlay powders, but I recently ordered some metal powder inlays from somewhere else. I tried rough engraving some wood again (my engraving bits aren't the right ones) so it wasn't very good/easy, but the metal powder is definitely less messy, and it flows into the cavity much easier. I covered them with some wicking super glue and I'll check on them either tomorrow or Friday. I was going to ask about my engraving bits but found some much better sets of them which are supposed to be more suited for wood (I've now got some on order).
Would it be advisable to move my centre line on the fret board so that it's roughly 3mm along each edge, or just leave it as it is? I was hoping to glue the fretboard to the neck today but didn't want to as I'm currently unsure on what to do at the moment.
How the fret board started.

In the mitre box.

Saw with depth gauge on and the fret wire that I'm using.

Using masking tape for a depth marker was easier.

Cutting veneer to pad out the truss rod cavity.

Access hole drilled (not very well though).

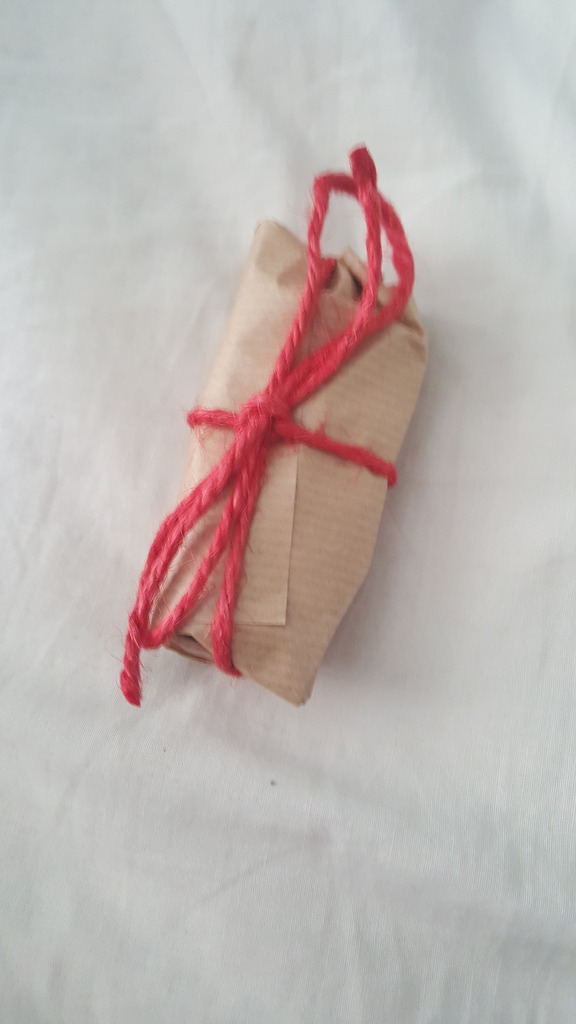
New metal inlay powders!


Getting ready to test the new metal inlay powders.

Fills the gaps very easily. This is before I put super glue on them.

These are my current engraving bits, they really don't work well for wood. The new ones that I have coming are like mini router/drill bits, and from watching a few videos and using Google, they seem much better suited for what I need them for.

-
Wow, guys, I really don't know what to say, but thank you so much! I wasn't expecting anyone to offer to do the image for me at all, so thank you for offering, and thank for to psikoT for doing it. And all from a post where I was just looking for pointers on how to do it myself.
I've had a play around with Sketchup and can't get on with it at all, I completely forgot about Inkscape so I'm going to have a play around with that over the next few days to see what it's like. The only reason I downloaded CorelDraw was because I was given a very quick crash course in it by a guy at a company that laser etched the labels for my guitar pedals when I started selling some, and then just stuck with it for designing artwork, and as an added bonus it allowed me to export the images directly to the program that my laser cutter uses. I need to get building some more pedals soon, may do a little thread for them when I do as I design my own circuit boards in SMD, as well as my own powder coating.
Prostheta - I'll be redoing the fret slots using the mitre box for the initial lines, then I'll finish them off using the fret saw with the depth stop on it. The plan is to then get the fret board glued onto the neck and then get the inlay carved out.
-
This isn't an update, but more of a plea for help. I've approached a local design company who gave me a verbal quote of £25 to redraw a picture someone had drawn for me for my 12th fret inlay in a Vector format and to print it out on a clear sheet. However, when I got the official quote a few days later, it was £60 plus VAT, so I'm a bit reluctant to use them. I've got a very limited amount of experience with CorelDRAW so I've downloaded a trial version of it, but I'm wondering if anyone has any experience in it to trace the picture out. The picture is made of multiple pencil strokes, so I'm trying to copy it but having a bit of difficulty and was wondering if anyone had any experience in doing it. If I can get it created in vector format, the plan it to either print it out on paper with some guide markers or to fire up the laser cutter and cut it out of either OHP film (that I use for solder paste stencils) or 3mm acrylic.
Also, if you were putting it on a guitar, would you have one wing on the 13th fret and the other on the 11th fret, or have it big enough to span over the 11-13th frets?
Here is the picture that I'm trying to work with.

-
I'm loving watching this build come together! Looks great so far. I'm only just getting into playing acoustic guitar (after playing electric for many years) and really starting to appreciate the design and looks of them.
-
On 15/03/2017 at 1:33 PM, ScottR said:
The clumps of sawdust are caused by the resins in your wood. All woods have some and some types have quite a lot. High end sandpapers can usually go longer without corning up. I usually keep a scrub brush handy and run the sanding block over it just before those start to build up. Then blow the paper off with compressed air.
Looks like you should also recut your fret slots about now. Any little raggedness left behind from that can get cleaned up with your finish sanding.
SR
Ah thanks for the explanation. I won't worry too much about the clumps then and just clean the sand paper more often.
My next stage like you say, is to recut the fret slots. I was hoping to have done it yesterday, but the CD player in my car has stopped reading discs so I spent the afternoon trying to sort that. Long story short, my local car audio place wanted a ridiculous amount to fix it, but an old work mate does car audio repairs and can do it for me much cheaper. But it took me 2 hours to get the radio out, note the model number, then stick it all back together again.
I'll be getting the fret slots recut over the weekend, and on Monday I'll be chasing up about the 12th fret logo design so I can start cutting that out. That's where I'm at now, I've got a week off work from Monday so hoping to get a fair amount done next week, but I am rather worried on how I'm going to get the neck pocket cut out, and to work out the depth I need to make the pocket.
-
On 13/03/2017 at 8:14 PM, ScottR said:
Is this a misprint or did you go to coarser grits to try to get something to happen?
It shouldn't take 5 ours to radius a fretboard by hand....and then I see your board is bubinga. I've said this more than once: I've sanded harder woods than bubinga, but I've never sanded a wood harder to sand than bubinga. That is some tough stuff. You do want to have a care about how coarse of grit you go with though. Once you get it radiused, you will need to sand those coarse scratches out. And I've sanded harder woods than bubinga, but......
SR
Unfortunately, no, it's not a misprint. I went to the coarser grits as the 80 grit didn't seem to be doing anything! Although the near finished board looks stunning, grain wise, I don't think I'll ever be doing a bubinga board again!
Good news, today went a bit smoother! Managed to get up to 300 grit on the board, I'm going to get the 12th fret inlay done before going to 400 grit and maybe higher.
Went on a bit of a shopping trip today, had to buy a new mask as I found a small amount of mould in my current one (I think it's where when I take the mask off I then put it straight into the plastic storage bag while there is still moisture in it). Also bought some very long drill bits, and 300 and 400 grit sand paper. Later, I decided to buy a small hoover to help with clearing up the sanding dust. When I was clearing up the wood chippings from the router with a dustpan and brush it was fine, but with the dust from the sanding it just ending up chucking most of it up in the air.


Current position with the board, sanded up to 300 grit.


What's causing the build up of hard lumps of saw dust on the sand paper? I can pick them off with the stanley knife, and they happen even after 10 strokes with the radius block on a board that has just had all the saw dust hoovered off of it.

Not sure how much I'll be able to get done tomorrow as I've got a fair bit of stuff to do as I'm back to work the day after. I am hoping to get the 12th fret inlay template sorted, I want the lines from the picture to be solid and ideally printed onto a transparent film so I can cut the different sections out for templates. I quite like the inlay powders that I got from Crimson Guitars, and I want to practice a few more times with them before committing to it, and I've also ordered some metal inlay powder to see if that's any easier to use (just waiting for it to turn up though).
-
So, a little update, I spent hours sanding, sanding and more sanding today. Nothing seemed to go to plan at all. I tried to use double sided tape to hold the fretboard down. It didn't work and created a hell of a mess to remove it, and worse is that I used the same double sided tape to put the sandpaper onto the radius block. I had to use a lot of acetone to remove all that crap off of it, so I'm currently back to the masking tape and super glue trick.. The sanding didn't go to plan today, I started off with 80 grit, then 60 grit, then 40 grit and it's still going really slowly. Towards the end it started going a bit quicker as I was changing the sand paper a lot more regularly, even though it still felt rather rough on my hand. I'm using a metal radius block and now using gardening gloves with it as my hands became very sore (may just be a case of needing to man up though).
This is what nearly 5 hours of sanding looks like (minus the time taken to remove double sided tape, etc). Tomorrow I'm hoping to get the sanding finished off, at least to the point where its fully carved, but if I can get up to 400 grit that will be a bonus. Going to be up earlyish tomorrow and straight out there. I've highlighted the middle bit with a pencil (more for me to see the progress more easily). Also, the guy that planes the wood for me said that bubinga is stupidly hard and makes great flooring, maybe that's a reason why it's taking me so long. The grain is really starting to show now and it already looks great, can't wait to see when it's all finished.


-
On 10/03/2017 at 9:43 PM, curtisa said:
Start low (60-80 grit) to get the radius going, work your way up through the grits (120, 180, 240, 320, 400) once the radius is on the board. Go beyond if you're after a super smooth, semi-reflective finish.
Use firm, even pressure and take care to not skew the block as you pass it up and down the fret board. It's easy to accidentally change the radius or sand one edge lower than the other if you're not paying attention.
Once you're past 400 grit, you can stop using the radius block. Your chances of removing too much timber and altering the radius are pretty slim with the super fine grits, so there's no need for the block.
I think I've got all those grits, I need to get a long drill bit so I can drill the truss rod access so if need be I'll buy some more grits. I've trimmed the fretboard down to fit the radius block and stuck it between 2 neck blanks to prevent any twisting. I'm not sure how shiny I want the board, but I'll see what it looks like when I hit 400 grit.
On 11/03/2017 at 5:39 AM, Prostheta said:Also, full long passes end to end. Don't scrub. The abrasive should have equal contact across all parts of the board. Sounds difficult, but it's just keeping technique orderly.
Thanks for the tip there, I was only going to take half the block off the board, but then realised after reading your comment that the middle of the board will be radiused quicker then the ends.
On 11/03/2017 at 7:44 AM, Andyjr1515 said:The other thing I did last time was add a couple of sacraficial blocks of the same thickness either end of the fretboard to allow a little overrun - previously I was finding I was tending to 'dig in' at the end of my sanding stroke, resulting in the first few or last few frets ending up lower than the rest. Mind you, that might just be me and my poor technique....
THat's a really good idea! I've got a new 6mm MDF board so it's the same thickness as the fretboard, so I'll stick some of that on the ends of the board.
13 hours ago, curtisa said:I've seen some people clamp a couple of guide fences either side of the fret board being sanded, spaced just far enough apart to sit the radius block in between. The rails guide the block up and down while preventing the possibility of accidentally skewing the block to one side.
I didn't post the picture of my fretboard sanding setup that I've done as for some reason the picture didn't upload. I've slimmed down the width of the fret board so it fits the radius block, and put 2 neck blanks either side of it so the radius block will be straight the whole way through. It will prevent me from moving twisting the block and messing up the radius. Worse case scenario if I do mess it up, is that I've got a Pau Ferro fretboard blank to use (I've got it ready gor guitar number 2 so hoping I don't mess this one up so I can keep it for that).
The current setup how I left it the other day. I didn't get a chance to do any on Saturday as planned as I ended up working, and yesterday I was helping my running club give out Lucozade to the runners running the Silverstone Half Marathon (I ran it last year and it's a great one to do if you like F1), but managed to get today off so going to get the board radiused, truss rod access drilled, and possibly the fretboard glued on if I get time.

-
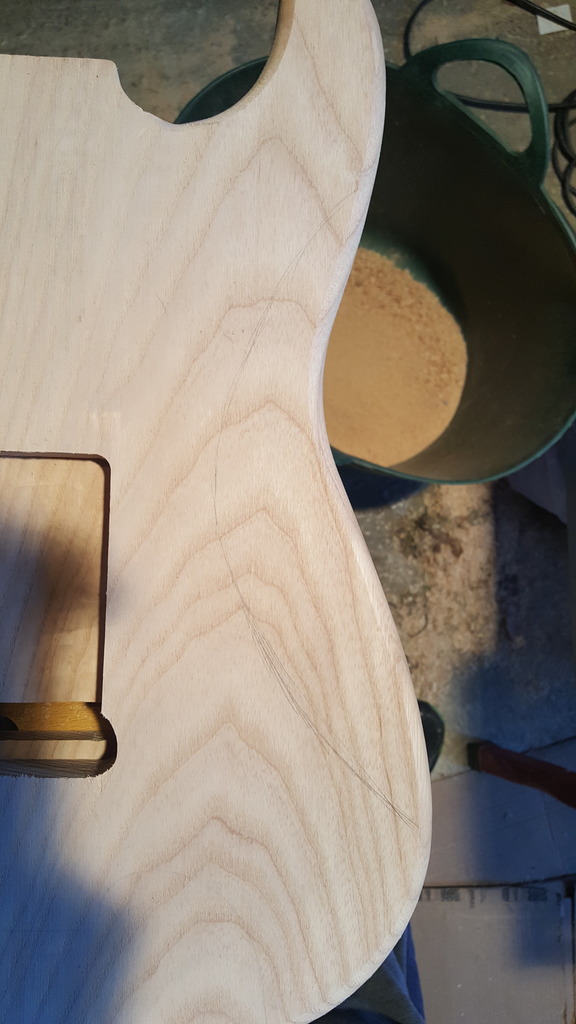
I'm back! Finally finding some more time for the building and really enjoying it.
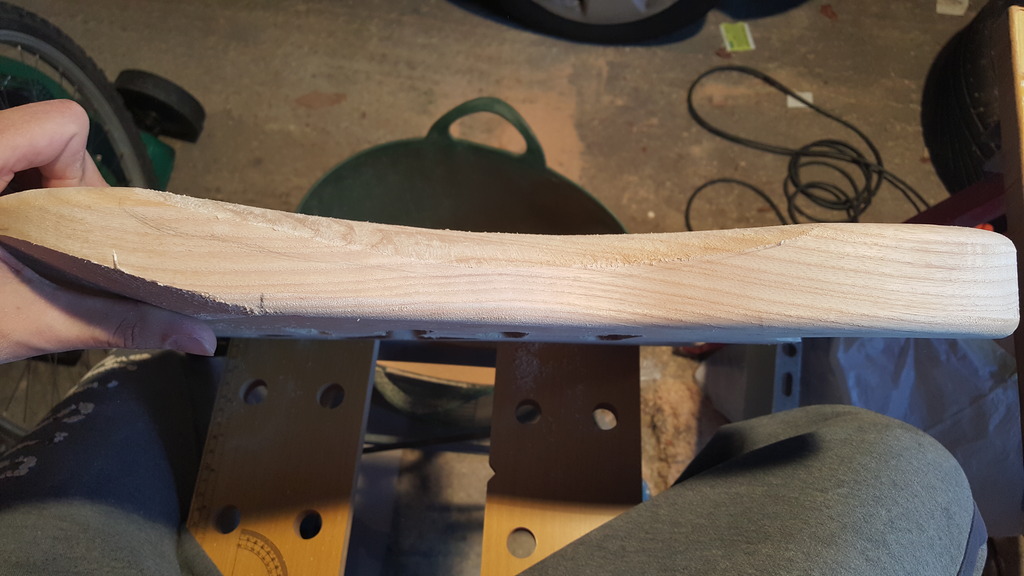
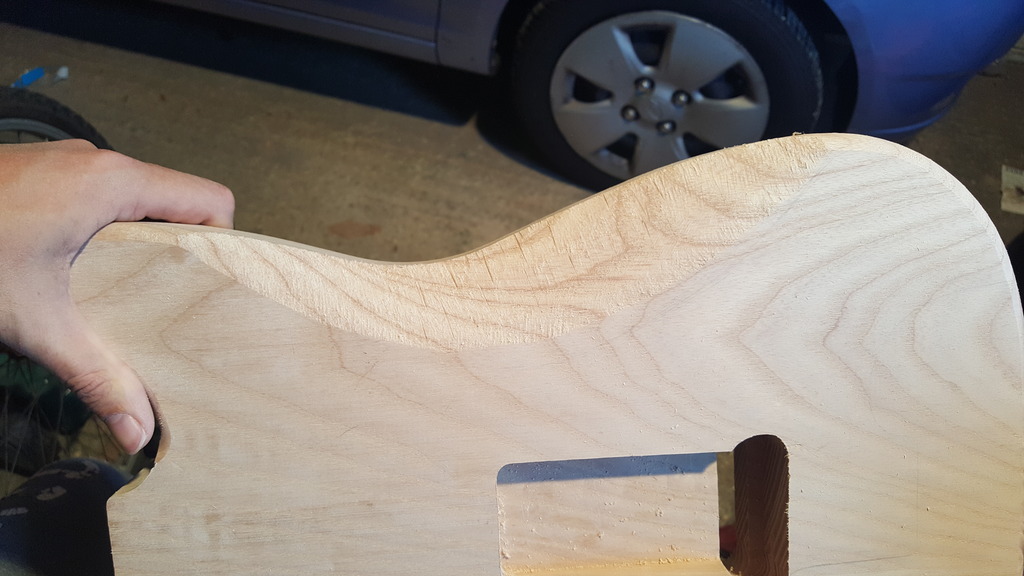
Managed to get out in the garage twice this week after doing early shifts, the first time was to radius the fret board. However, the board is wider then my radius block, so I tried several ways of sanding the edge down without too much luck, and realised that it would take me far too long to do. I roughly marked out where the excess needed to be taken off, and clamped the board to a neck blank and set to it with the router.


The next day I managed to drill the pilot holes for the tuners and thin out the head stock. I guessed about how much wood to leave after the nut before it drops to go thinner because I don't have a Strat to compare it against. I realised afterwards that I've got the Jim Root Tele that I could have compared it to, taken measurements from, etc, but I'll have to make do with what I've done now. I used the headztock template to mark out where the holes for the tuners will be, then roughly marked out where the centre of each hole is. I used a 3mm drill bit for the pilot hole, then marked out the area that I wanted to thin down. I set the neck between two neck blanks and set to work with the router. I was about to do one last pass, but something told me to Google the headstock thickness before I did, and it's a good job as the thickness is dead on 15mm now.


Hoping to get the radius done on the fret board tomorrow, it's mostly all set up, I've stuck the fret board down between two neck blanks, and stuck some 80 grit paper to the radius block ready. I've measured the one on the Jim Root Tele, it's roughly 5mm at the thickest point and 3mm at the thinnest. My fret board is currently at 6mm so it should work out perfectly. What grades would be recommended to do the radius with, and the finer sanding of it.
-
Really looking forward to seeing how this turns out, and especially about your thoughts on the bridge when it's been built.
-
I'm glad to hear the mistake wasn't any worse! I got complacent when I was putting down my router once and never repeated it. I got into a habit of routing a part of the body or neck (can't remember which), and while the router was spinning down I would take it off the work piece and place the cutter part into a hole on the work bench so the router base would sit flat on it. I changed the bit to a bigger one, tried putting the router bit down the hole and it caught the wood, ripped upwards and damaged the work bench, but if it came up a few centimeters higher then it would have caught my hand. Always been a lot more careful since!
-
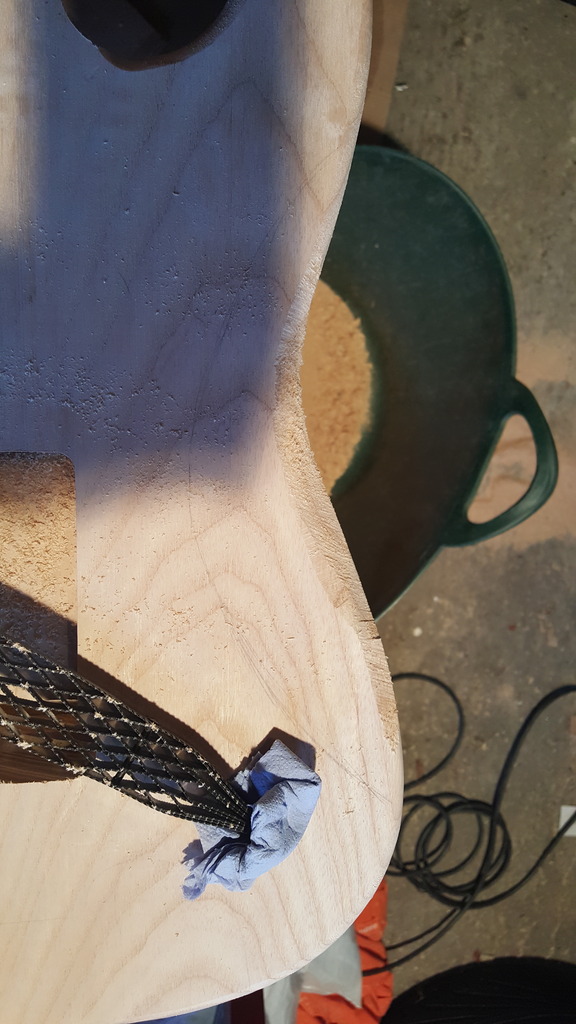
Just been in the garage and gave the test inlays a very quick sand with 80 grit. Both methods came out surprisingly well, going to try it again in the next few days but making the cut out for the inlays neater around the edges. The inlay that I put super glue in first then the powder sanded a lot easier then the other two which had the powder in first then the super glue. I'm pretty sure the dark spots on the middle one is where the black powder got onto it.


-
Haven't had any progress on the build for a while as I just haven't had any time. I've got 1 day left at work then I'm off until the new year, so in my down time on my 2nd job I'm planning to get a move on with this build. First job will be to finish sorting out the garage to give me a big amount of working space, and I'm thinking about changing the bulbs in the flood lights to the non energy saving ones so they chuck out more heat as it's starting to get really cold out there.
Crimson Guitars had a sale on so I took the opportunity to order a few bits. I love the way they individually wrap everything, it was like receiving early xmas presents!

I got a levelling beam, more superglue (normal and a thin version), some of their Stunning Stains (decided I'm going to get those small errors in the body corrected as best as I can and then stain it), fret polishing rubbers and the full set of inlay powders. I'm thinking the inlay powders will be easier to do instead of cutting inlay material, and if it works well, it will be a lot cheaper/quicker to do.


On a bit of old body scrap, I roughly engraved it (not very well as I was rushing as it was cold). The first 2 I packed powder into the engraved hole and covered it with wicking super glue, I read this method works well for metal powder (which these inlay powders are not). The 2nd one I filled with super glue, filled it with powder, put some wicking super glue on top along with some more powder and pressed the powder in. I'm going to sand them down later to see how they have come out.


I've decided this will be my 12th fret inlay design. The plan is the top and bottom sections will be the same colour, and the middle part will be a contrasting colour. The middle part will be on the 12th fret, and it will go accross the 13th and 11th frets as well.
-
I've just had a lot of my time freed up so I'm hoping to get a fair bit more of the Strat build done this week, so thought I would start designing my 2nd guitar as well. I've decided to build a headless guitar as my 2nd job involves a fair bit of waiting around so it would be good to have something to practice on that doesn't take up too much room.
Specs:
- Mahogany body
- 5 piece neck (maple, sepele, black walnut, sapele, maple)
- Cheap hardware
- 1x bridge pickup 1x neck pickup
- 25.5" scale length
- Vaneer top with a stain and oil finish
I've got some old scraps of mahogany from my local wood guy. Just checked the moisture content and it's around 15% in all 3 pieces. I assume I need to dry them down to around 8-9%, so at the moment I've put them in the airing cupboard, but unsure if there is a better/quicker way of drying them. I've already got the neck wood, in the next day or 2 I'll get the wood cut and put somewhere to start drying out (they are currently in 3 meter long boards so need to cut them shorter). For the pickups I was thinking about those mini humbucker kits as space will be at a premium for them. The hardware I've got is the cheap Overload Of Music one on eBay, as it's a 2nd build I didn't want to spend a lot of money on hardware, and the plan is to build another headless with better hardware in the future when I've got a bit more experience as I don't see the point in spending a lot of money on hardware
The body blanks are 410 x 235mm and 360 x 230mm. Both pieces are 65mm thick, and style wise I'm thinking of a Steinberger style body (my friend has one that I can borrow to help with the initial designing, then slightly customise it afterwards.
I won't start cutting the wood or anything else until the Strat is finished though, but this is just preparing the groundwork so I can start building it sooner.
The wood!

The really expensive hardware!


-
That's looking great!
-
Thanks for pointing out that there is a dog face in the wood, not going to be able to cut into it now! However, I think I see some kind of demon or demon style mask.
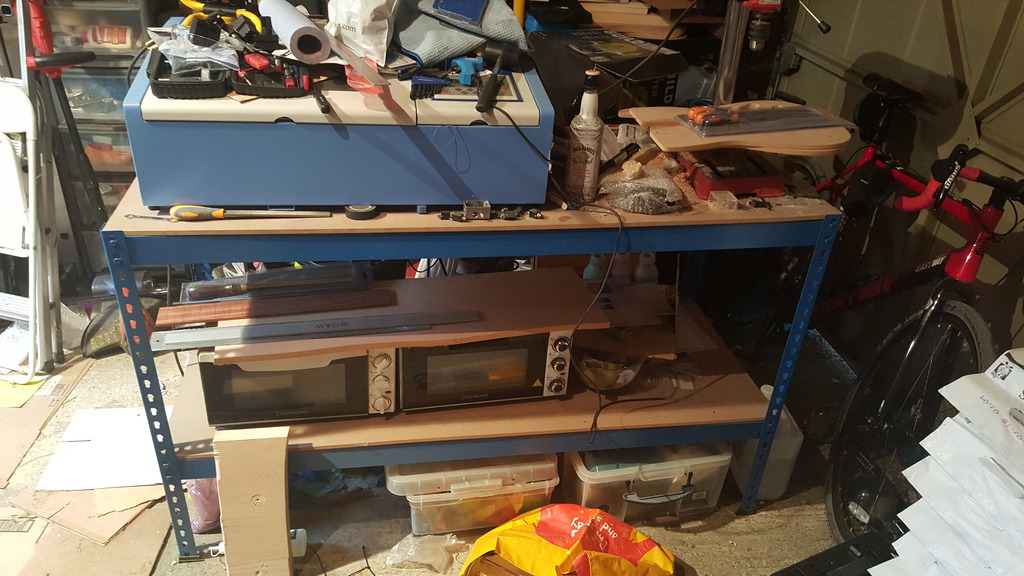
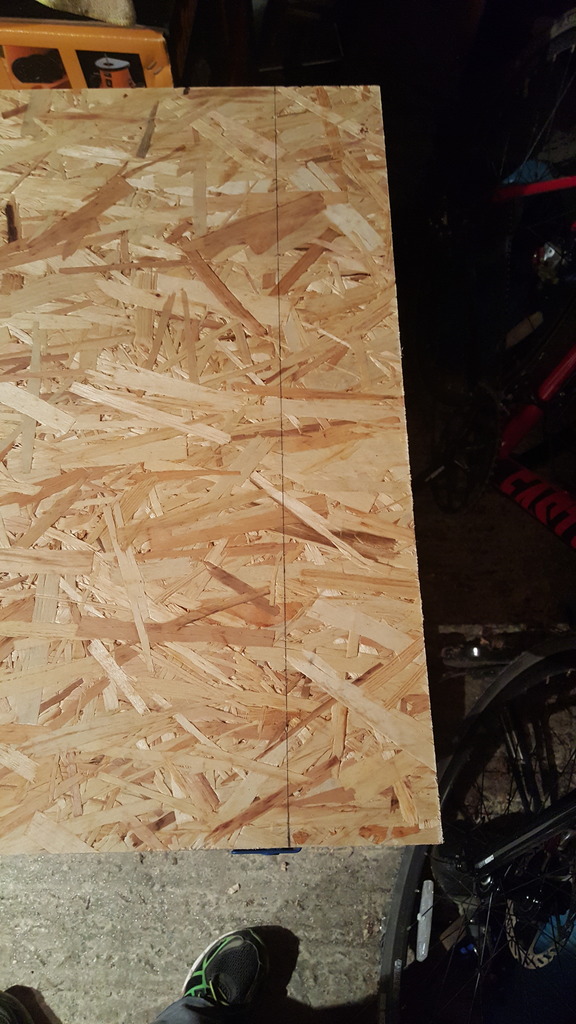
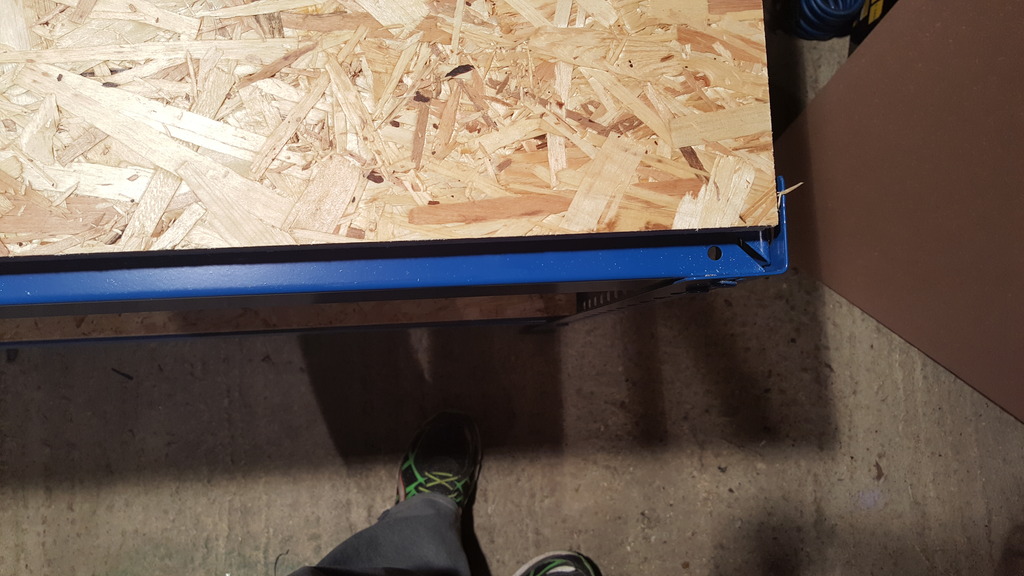
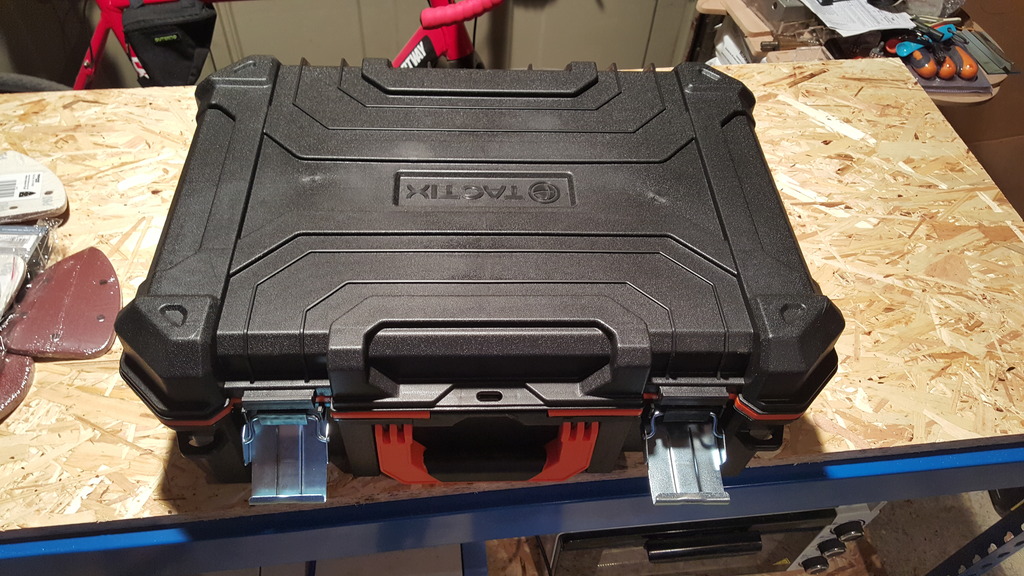
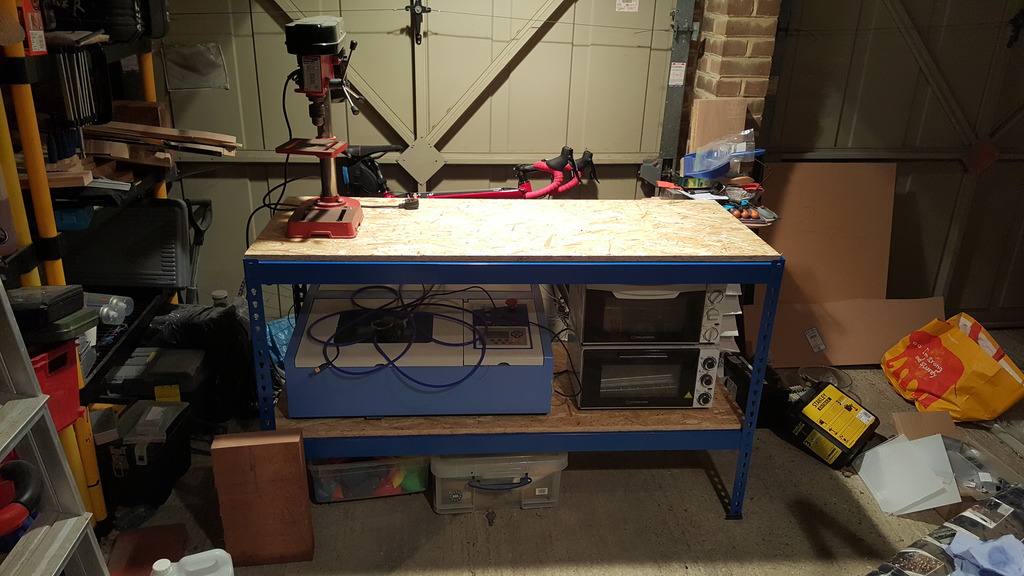
I've had a really bad case of man-flu this week, it was bad and I didn't think I would make it through it. I decided to try and drag myself out of bed today and get to a couple of shops, and started to reorganise the garage (as it just gets messy again after a tidy up). Decided the time was right to change the MDF boards from my table to OSB boards, and the shop I got them from had some offcuts a bit bigger then I needed, so they cut them down for me and only charged me £5! Because of the saving, i treated myself to a box to hold my 2 sanders in, and their sandpaper. Was hoping the router would fit as well but it doesn't.
Old setup.
While moving everything off the table I found this circuit which I was using to test a drill template for an enclosure. It's the dual version of a booster, the first stage is an amazing transparent booster, the 2nd stage kicks the amp in the nuts, hard. Had a prototype working, but the actual model I wired up the foot switch wrong. Need to revisit this pedal again soon.

I gave the guy in the wrong dimensions, and had to trim the boards down slightly.
The area of the garage where I was moving the table to isn't well lit so I attached the other floodlight to the rafters and stuck the spare 400W bulb in it. That bulb chucks out a ridiculous amount of light!
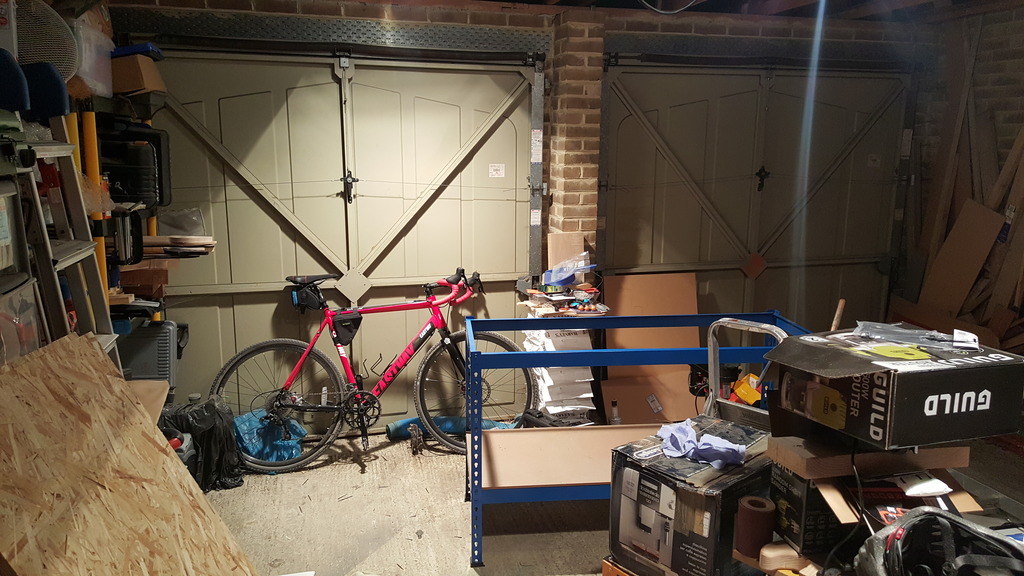
Table in position and with the new boards on it. It will make getting things from the shelfs easier.

Got the width slightly wrong. Going to cut some small blocks to wedge the shelfs into place so they don't move when sanding and that.
The palm sander and random orbital sander didn't come with storage cases so I'm going to put them in here along with the sanding papers for them. Going to remove the 2 storage containers in the lids for other bits (thinking router bits in one of them).
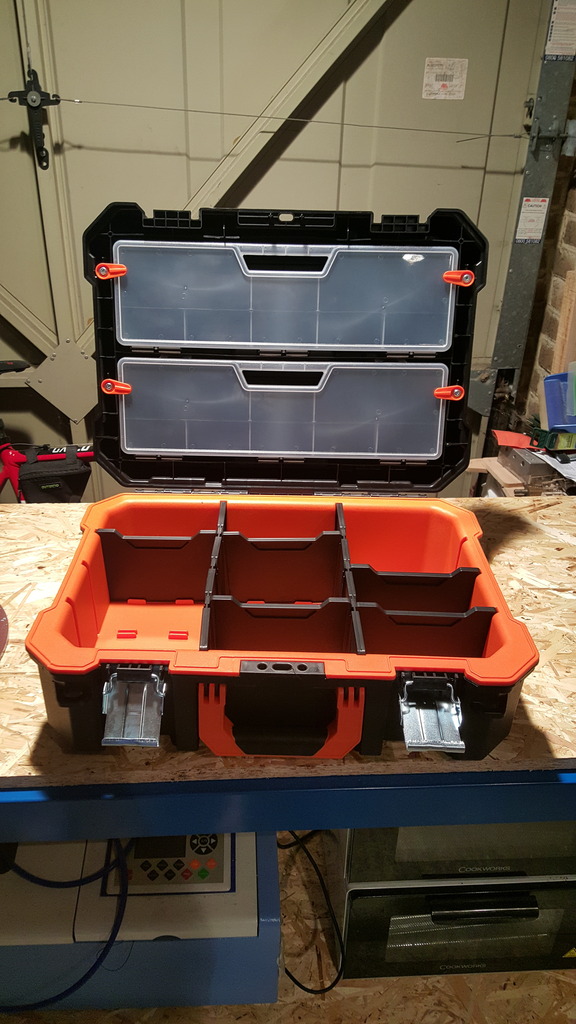
Picked up loads of sand paper today! The palm sander pads are 60,80,120 and 240. The random orbital sander pads are 40, 60, 80, 120. The rolls of sandpaper are 40, 60, 80, 120, 180 and 240. Also got a sanding block. I just got the cheap budget line of sandpaper on the basis that if each sheet lasts for 50% that a higher quality sheet does, I'm still saving a fair bit.

As the setup currently stands. If I feel better tomorrow then I'll get out there and carry on sorting it out. It will be great to work on a proper bench rather then a workmate stand, more room, higher height, etc. Only thing is I forgot how bloody heavy that laser cutter is!
-
I used my belt sander as that was all I had to use but it worked really well, I did a trial on a piece of scrap first and when I started on the body I keep a keen eye my pencil lines to make sure I did'nt take too much off, It didn't take very long before it was ready to finish off by hand but it is very messy saftey googles and a good marsk are a must and I recommend that it's done outside..
My son's Strat copy is a Yamaha Pacifica and there has been no attemt to blend those carves in and looks quite bad but then it is a cheap copy.
Ah a Yamaha Pacifica. A friend sold me one for a tenner as he couldn't play, used it once in the several years that I had it, and then it found it's way onto eBay. I started with a Squire Strat, then got a Ibanez S470, then never touched the Strat again. I'm beginning to think I won't use this guitar now!
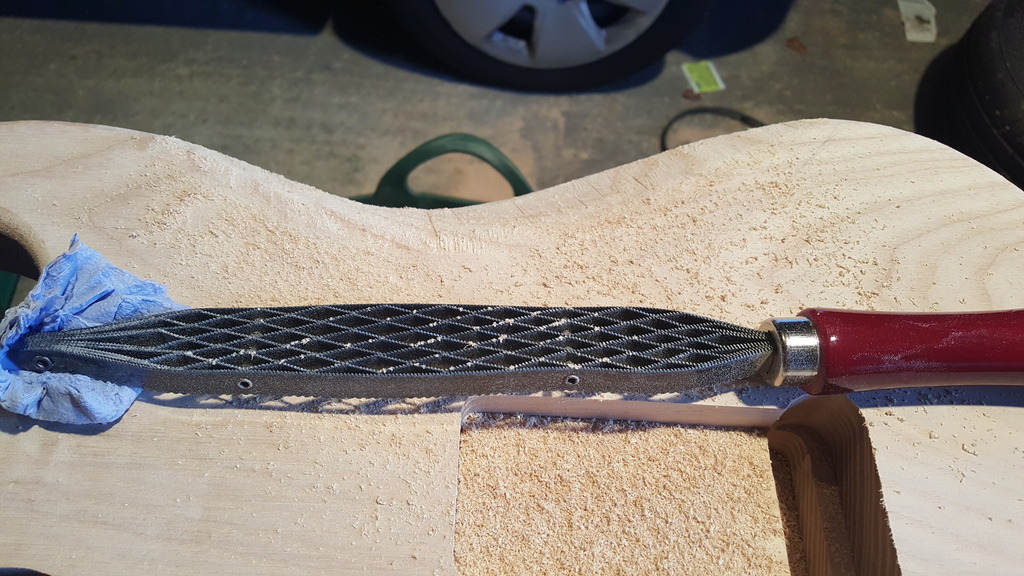
I think next time I'll try using a belt sander, just to see how much quicker it is then the Shinto rasp!
I've also just bought a wood moisture tester, and although I'm not expecting it to be 100% accurate (as it's a very cheap one), I'm hoping it will give me a rough guide. I've got the spalted ambrosia maple top and the spare maple neck blank sitting on top of my wardrobe and they are testing at 8-9% moisture content, which i would assume should be roughly correct. The wood in the garage is a ash body blank, black walnut, sapele and maple neck blanks are testing between 12-13%. My question is, is that going to be fine or will they need drying out a bit? It's no problem to cut them into smaller chunks and bring them indoors to dry out a bit, but would it be a case of sleaving them on top of the wardrobe or under a radiator? From what I've found out, I think I need to dry them to 8-9% before planing and gluing them, but if someone can confirm that, that would be great.
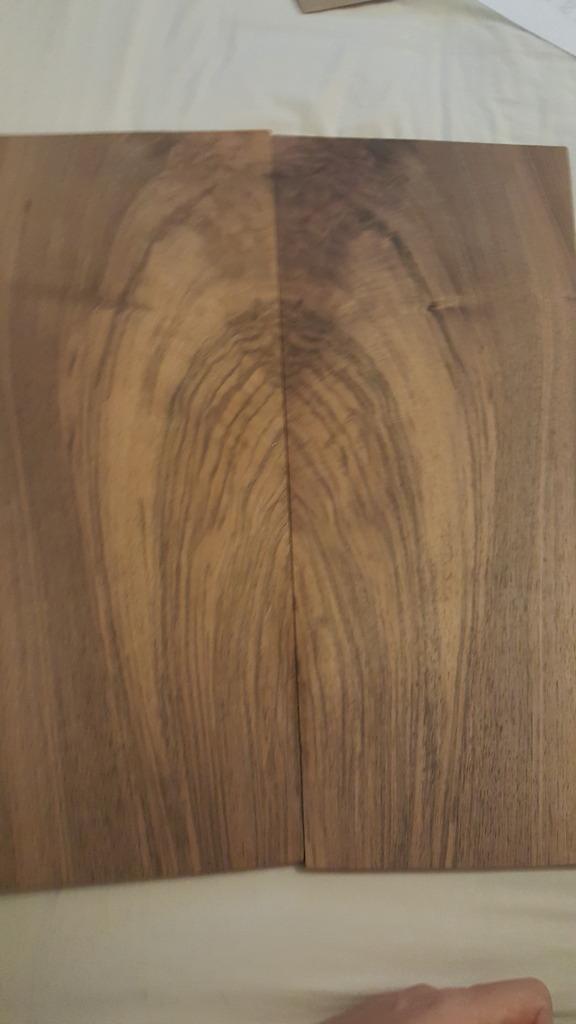
Little update, haven't had any time to work on the body yet (hopefully tomorrow though), but the walnut top wood has finally arrived! It looks great, just need a guitar to put it on now. Thinking a Tele or super Strat style guitar.
-
7 hours ago, Prostheta said:
They're great fun! Nice score on the pick.
Those files will not remove material at any high rate, but are great for refining shapes. A trick to using those is to scribble with a pencil first and watch how and where material is removed. Fantastic for transitioning around the neck-to-headstock area or extending roundovers into areas where bearings can't reach for example, but too small for big carves like tummy tucks and forearm contours. Good to have around. I use files a lot for refining templates.
They most certainly are! It was my 3rd time seeing them, They have a new album out in Feb so I'm hoping they tour again next year and I'll try and get the VIP backstage tickets then.
Thats the plan with the files, not massive stock removal but to refine bits. I'm going to use them to shape the round over part on the arm and belly cut outs first. The plan is to use the rasp to do the basic shape of the neck, then use the files to refine it, and like you say, the transistions in the neck (I'm a little bit worried about them but may practice on the neck that I ruined first). My first set of templates didn't go too well, and I need to make my next set from scratch so I was hoping the files will help to make them as close to perfect as I possible can get them.
-
On 10/15/2016 at 1:01 AM, Andyjr1515 said:
Looking good
")
Cheers buddy, getting there slowly but surely.
22 hours ago, meatloaf said:Coming alone nicely, I used my belt sander when I did mine but had to be careful that I did'nt over do it as they do tend to take out wood at an alarming rate. I did finish off with a lot of hand sanding untill I was happy with the shape, not sure how it compares to Strat but it's a lot better than my sons copy that I have been using as a reference
I was tempted to use the belt sander by my dad said it was rather brutal on removing wood so I decided not to use it. Which Strat copy are you using for reference? Would you recommend the belt sander technique?
I picked up some files yesterday, and also some needle files, although now I've got them I'm not 100% sure sure I'll ever need them, but it's good to have just in case. I forgot to pickup sanding sheets so need to go back tomorrow to get them.


Didn't get time to do anything yesterday as I went to see the greatest band ever, Steel Panther! Satchel must have liked my t-shirt as he chucked his plec at me, so it's a nice addition to his signature model guitars that I've got (Had to order both colours!).


-
7 hours ago, Andyjr1515 said:
Hi. Steve
Can't wait to see the pics. I thought it was my PC at first! I got fed up with photobucket and now use imgur.
Mind you, bear in mind that this is also one of the few forum sites where you can download your photos directly. Ever so easy - just click 'choose files', browse to your pics and download onto the site, then just hit the + on the downloaded thumbnail to place it in your thread...
Andy
Cheers, I'm hoping it won't take too much longer to finish now, although I'm giving myself until the end of the year to do it. I've just noticed when I finished work tonight that I've got a weeks leave + 2 days booked off next month that I forgot I booked, so I'm hoping to get a fair amount done then.
I've just downloaded the Imgur app, but is there anyway to make my photos private unless I put them onto a forum? I detest PhotoBucket because of the amount of bloody ads! I've found I can upload direct to PhotoBucket direct from my phone using their app which made it much quicker and easier, but their site is absolutely horrible to use, and DropBox doesn't seem to let you imbed pictures into threads.
7 hours ago, Prostheta said:That's one of the big features that I really wanted to build into ProjectGuitar.com is in-line image hosting. It kills our server space, however I think it's important to embed here since Photobucket, et al. are notorious for leaving dead image links across forums. What we do here should be made accessible to other builders for years to come rather than letting things degrade thanks to link rot.
I was a senior mod on a forum several years ago and I saw just how much server space and bandwidth used up, and was shocked by just how much it was! That's the main reason that I don't upload pictures direct to the site. Do you know if their are any plans to put the Tapatalk software onto the forum, as for other forums that use it I use the Tapatalk hosting for my pictures and it automatically imbeds them into the thread.
I'm volunteering at my local ParkRun tomorrw as I'm still carrying my running injury and can't run it yet, but on my way home I'll be passing a shop that sells files. I'm going to pick some up and hopefully get more work done on the body late morning/early afternoon.
PhotoBucket seems to be working now, so here's the pictures of todays progress.
Where I was initially wanting the carve to goto.

Making a start on it.
Slowly getting there.
It was just after this point that I realised i quite liked it being around this shape/size/depth.

After smoothing out the main bumps and tidying up.
Didn't sand properly, it was more of a quick test of the sander. *****product placement in the little hope I may one day get free tools*****
After a very quick sand with 80 grit. Hard to see in the pictures, but I've gotta get more sand paper and sand it properly, either tomorrow or Sunday. It also made very light work of blending the carve into the back of the body.

Had a very quick go on the arm rest as well. Again, it made very easy work blending it into the body, still needs a fair amount of work.
-
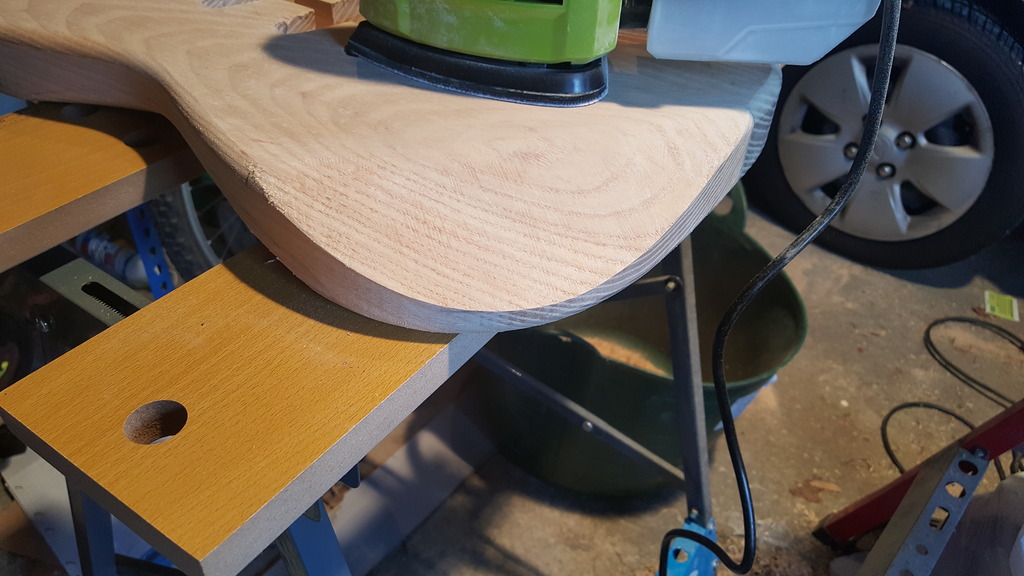
Build update!!!!!
Now I'm starting to get a bit more free time again I feel like I'm really starting to make some progress on this build. I marked out a rough outline for where I wanted the belly carve, but then when I was carving it I reached a point where I really liked the size/curve of it so I tidied it up and started to give it a brief sand just to check the palm sander. First impressions, just like the router, it's well designed and built and works great. Best £8 I've ever spent I think!
Can't upload pictures at the moment because PhotoBucket doesn't seem to be working. Hopefully when I finish work tonight it's working so I'll try again then to upload.
-
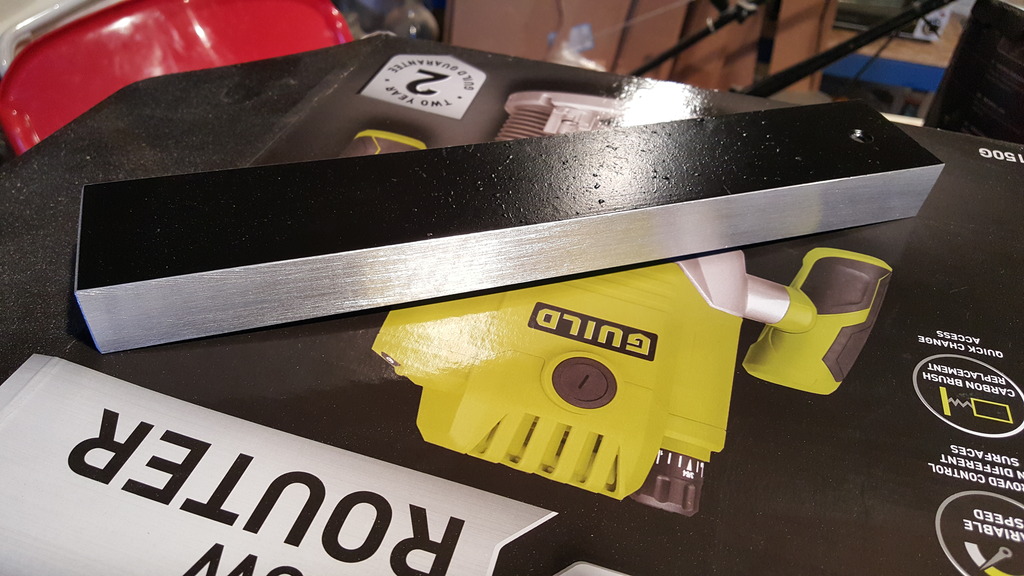
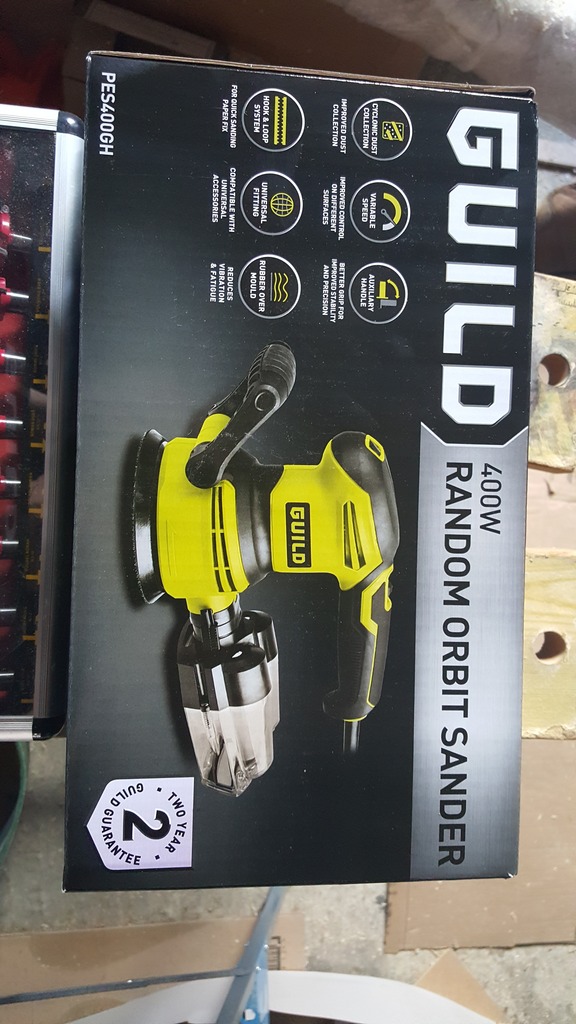
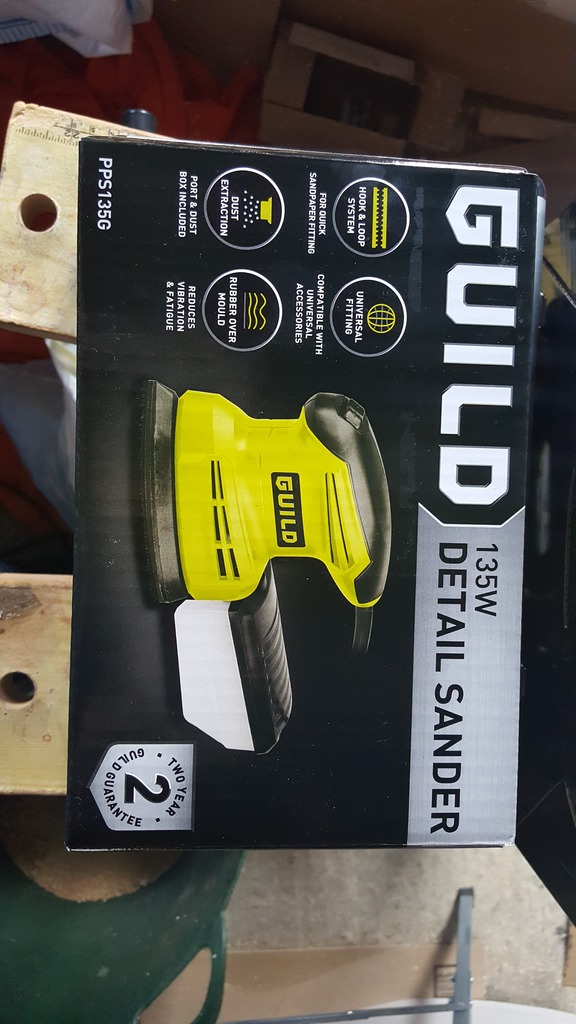
No build progress update yet, but I have just bought some new tools! Popped into Homebase (a DIY chain) to return those outdoor floodlights that I was planning on using in the garage, and saw a stand of Guild tools by the door. They are selling them off cheap so picked up a 400W random orbital sander and a 135W palm sander for £34! Couldn't say no for that price, especially as they make good tools (couldn't be happier with the router of theirs).


First ever build, 60's Strat
in In Progress and Finished Work
Posted
That sounds like a challenge........!
I tried doing that, but this pencil must have ridiculously soft lead, after one line it will need resharpening again, so I now just use it for rough markings out. For the finer detail stuff, I now use a propelling pencil as it always stays sharp.
You're right, those bits are no good for the inlay work, maybe the bigger stock removal parts but not near the edges. I've just ordered a set of those router bits. A base for the Dremel is £45 on Stewmac, but £24 on eBay so I'll get one of those ordered as well shortly.
This is starting to turn into an expensive month now.