


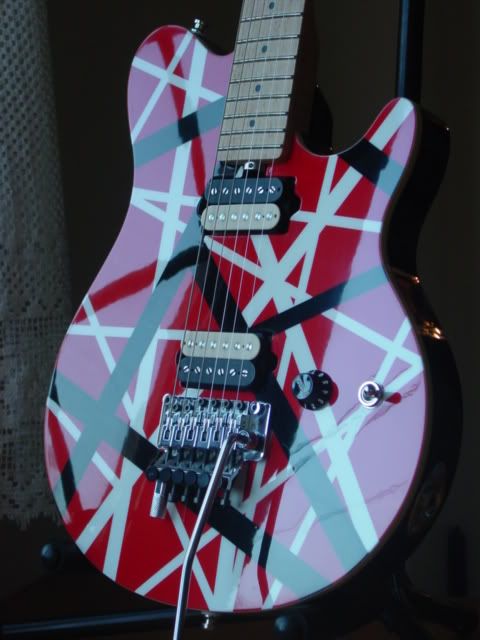
DGW
-
Posts
131 -
Joined
-
Last visited
Content Type
Profiles
News and Information
Tutorials
Product Reviews
Supplier Listings
Articles
Guitar Of The Month
Links and Resources
Forums
Gallery
Downloads
Posts posted by DGW
-
-
Wet sanding with TruOil is a common way of pore filling for TruOil. Sand till it thickens into a slurry and work side ways into the pores. After drying recoat a couple of times and then repeat until you're satisfied.
SR
Thanks Scott!
I tried this last night before even reading this, looked at it today, and it seems to be working!
Thanks so much!
-
You would need to do a compatibility test, but shellac with talc suspended in it is a useful clear filler.
I just found this ... http://www.amazon.com/dp/B001MQNJ40/ref=nosim/?tag=telecasterdis-20&link_code=as2&creativeASIN=B001MQNJ40&creative=374929&camp=211189
It's made by the same folks who make the Tru Oil and the bottle says it's a clear filler.
Filling the grain half way through this whole process wouldn't have been my first choice but it might just work.
-
You can level,reapply,and repeat until it is all flat ...
I think the problem I'm having is that it appears the wax that I applied (and stripped) is preventing the Tru Oil to fill the pours.
There's probably some wax residue in the pours that I just can't get to. And there's really not much to "level" as I've done a pretty thorough job with the steel wool process between coats.
Can I maybe wet sand with a mixture of Tru Oil and mineral spirits to try to fill it?
I'm just throwing stuff out there cause I really have no clue.
-
I've been finishing a black walnut body in Tru Oil and have run into some problems.
Let me start by saying that my first mistake was not sealing the grain BEFORE applying the Tru Oil.

After applying 20 coats of Tru Oil and using 0000 steel wool between each coat, I thought it looked good enough to try applying a wax. Specifically Birchwood Casey wax. The same company that makes the Tru Oil.
Once I applied the wax, it brought out a lot of open grain the size of tiny pin holes that I didn't notice before. (see pic). I read some Q&A's from the Birchwood Casey website, which said the the wax could be removed with rubbing alcohol, so I did this and went over it again with 0000 steel wool, in hopes that I could maybe apply more Tru Oil to seal the grain, but it's just not working.
Does anyone know what I can use to seal this grain completely?
It looks pretty good but it could look so much better, and I'm SO close!
Any help would be greatly appreciated.
Thanks so much!


-
nitrocellulose is naturally hairy
huh??!!
I know, you cant make a statement like that without being able to back it up, so here's a picture of some red lacquer i just sprayed (which i intentionally sprayed badly to show this effect): hairy lacquer
If it starts to dry out in the air it likes to stick together in long hair-like strands as opposed to blobs, so = hairy

It looks like you've sprayed paint onto dust that was already there, but really it's the paint itself.
Me thinks what you're seeing is just the fibers from the cardboard you sprayed it on.
-
Get busy and clean your basement. And those paper coveralls you see painters wearing aren't just to prevent them from getting their clothes dirty. They also prevent dust, lint ...and hair from contaminating the work.
So true .... that's why I paint naked.
-
Take a spray bottle and lightly spray down the floor and walls of your booth with water before painting.
The water will help control the dust and debre and keep it away from your paintjob.
It also helps prevent static charge.
-
+1 for 2k urethanes.
If you don't have a compressor/spraygun, you can maybe try this ... http://www.levineautoparts.com/aeromax.html
I've personally never used it but it looks like a good alternative.
-
Sorry....well spotted!
So it's a conversion to ringless pickups?
Is that a new top, or has it just been sanded?
DJ
It's a cheapy OLP guitar.
I replaced the neck, installed new pickups, installed an Original Floyd and refinished it for someone.
I also did a couple little things like replacing the 4-screw neckplate with 5-screw neck ferruls.
The top had a cheesy photofilm "quilt" that I sanded off.

Here's the mock up.

And here's the finished guitar ...
The original pickups used foam to support them.
It worked, but IMO it was just cheesy.
The new pickups were taken from a Peavey Wolfgang and the shims worked perfect.
Even if there are no tonal benifits, it still makes for a cleaner build IMO.
-
Sounds like the locking nut may be loose ...
If it's rear mounted, maybe try tightening the (2) allen screws on the backside of the neck.
-
That said, if we're building the guitars from scratch, why not make those routes the perfect depth to begin with?
...ahem....yeah, I kinda wondered that too......
DJ
If you look at the neck pocket of that guitar it looks like he's refinishing it. There seems to be leftover paint in it.
If you're refering to the pictures I posted, yeah ... it's a refin.
-
You can use foam, springs, tubing, washers, etc ... if you just want the "look".
But if you're one that believes that hard mounting a pickup effects tone, than I would think all of these methods would be pretty pointless.
I fabricate wooden pickup shims that help raise the cavity to the proper height so the pickups can be mounted directly to the wood.
Just place masking tape over the cavity, trace the outline, and use this as your template.
Thickness may vary from one guitar to the next, so a mock-up is always a good idea.
BEFORE:
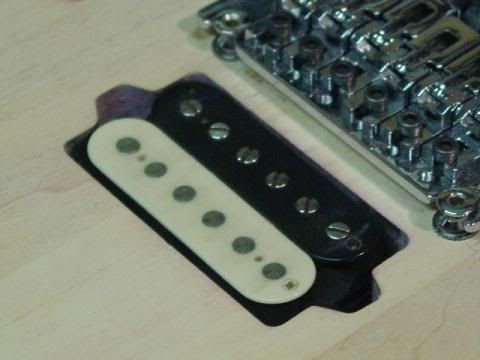
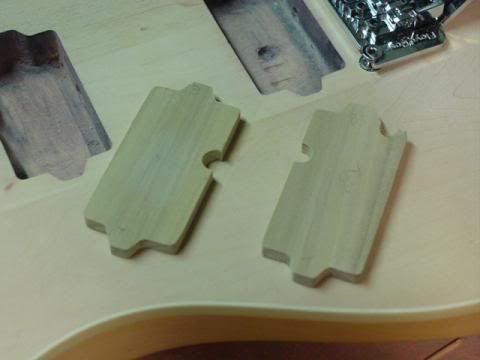
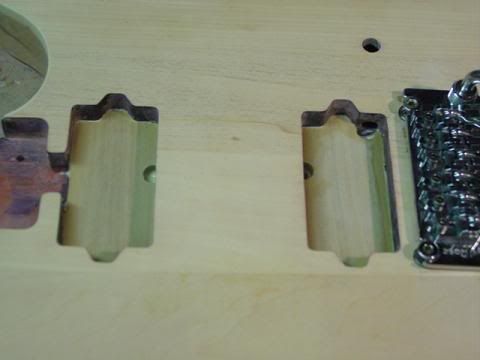
AFTER:

-
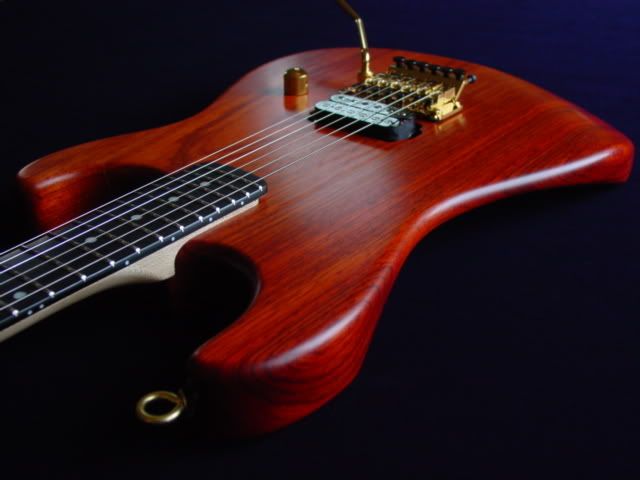
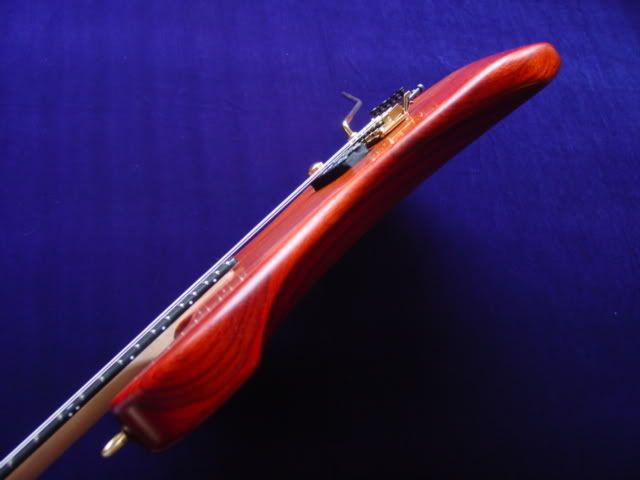
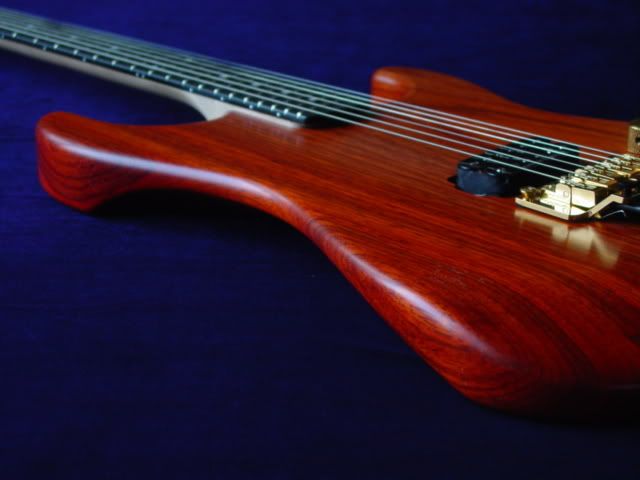
WoW ... That's a beautiful piece of paduak!
I finished this padauk body with Tru Oil ... NO filler.
I just applied several light coats and used 0000 super fine steel wool before applying each coat.
After several coats, the Tru Oil will begin to fill the grain.
When I achieved the results I wanted, I just wiped it down with bees wax.
Worked out real nice for me.
-
+1 on what Jim said.
I'll only add that if you're clearing over any sort of marker, you should first shoot "dust coats" to help lock-in the ink.
If you shoot wet coats from the start, the ink may have a tendency to run.
ps: wazzup Kammo1!
-
Do you have a pic of the actual body you want finished?
Stain and finish is no problem, but you have to have a nice figured top in order to even come close to what you want.
Oh ... and by "band", I'm guessing you mean binding?
-
-
I'd recommend Menzerna compounds for use on a wheel.
http://www.stewmac.com/shop/Finishing_supp..._Compounds.html
Works really well for me.
-
What type of buffing compounds are you using?
And are you doing this by hand or on a wheel?
-
I would stay away from spraypaints if at all possible.
Here's a pickgaurd painted with acrylic urethane.
It's the same stuff they use to paint the plastic parts (bumpers, skirts, etc..) on cars as well, which are exposed to extreme weather conditions, rocks, etc ...
It works and it lasts.
-
I've painted plastic pickguards and truss rod covers before with no problem.
I use an epoxy primer/sealer, acrylic urethane basecoat with an acrylic urethane clear.
Once it's finished and buffed out, it looks like colored plastic, not paint.
-
I'm not crazy about the choice of stain, but that is one incredible build!
Really, really, really nice work.
-
I did the spraycan thing too.
I was able to acheive really nice results (looks wise), but you're absolutely right ... it's way too soft to use on a guitar and it won't last.
It will pick up impressions on just about everything it comes into contact with including carpet, your clothing, and even the fur lining of your guitar case.
Not only that, but the soft finish serves as a sound blanket to the body and causes your guitar to sound like poo.
No tone, no resonance ... it's horrible.
I bought a compressor/spraygun years ago and never looked back.
I use acrylic urethane and have been extremely happy with the results.
The paint fully cures in a day and is rock hard, which helps preserve tone and resonance.
It's a TRUE factory finish.
-
Thanks for the responses (and the grammer lesson
).I found exactly what I was looking for.
Thanks again.
-
Do you guys know where I can find them?
In the past, I've taken potentiometers apart and have been able to loosen them up a bit, but if there's a place that sells pots that are already "low friction', I'd just assume buy em from them.
Thanks.


Tru Oil Problems
in Inlays and Finishing Chat
Posted · Edited by DGW
Thanks Bob! I might give it a try.
I wet sanded with Tru Oil last night and spent about two hours using steel wool tonight.
It looks better but it's still not 100%.
After 22 coats of this stuff, my arms are about to fall off. lol