


Calum_Barrow
-
Posts
159 -
Joined
-
Last visited
Content Type
Profiles
News and Information
Tutorials
Product Reviews
Supplier Listings
Articles
Guitar Of The Month
Links and Resources
Forums
Gallery
Downloads
Posts posted by Calum_Barrow
-
-
Cheers guys.
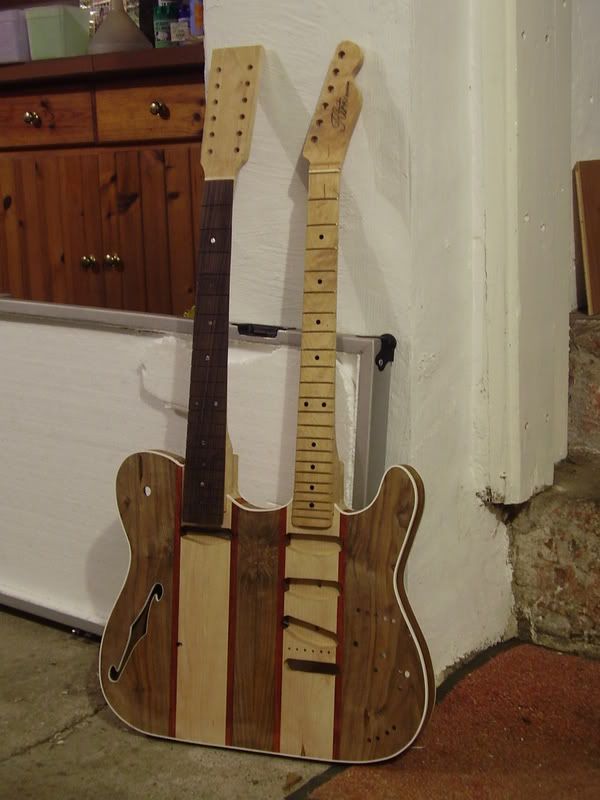
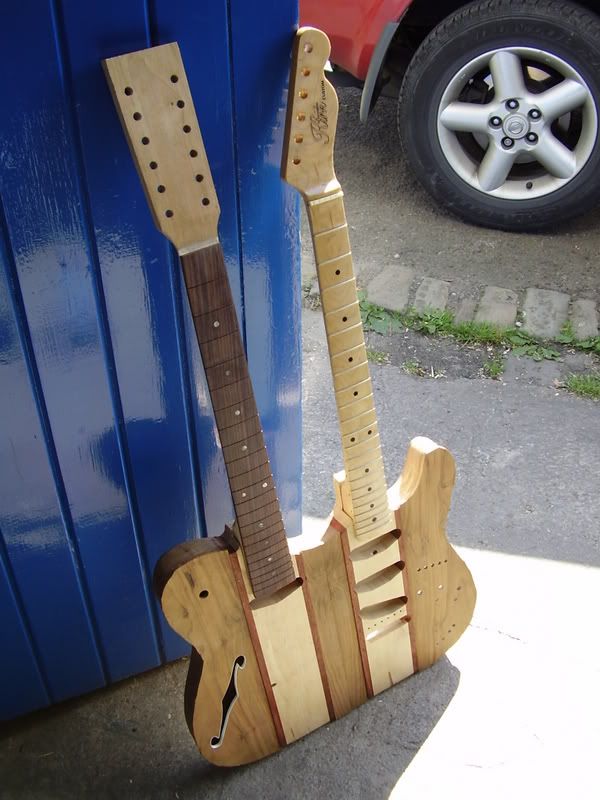
Wez, it's not actually that heavy, thanks to all the chambers and cavities in the guitar. I hope I can get it to be under the 10lb mark, but I doubt that is going to happen once all the hardware is on (might be alright before the hardware though).
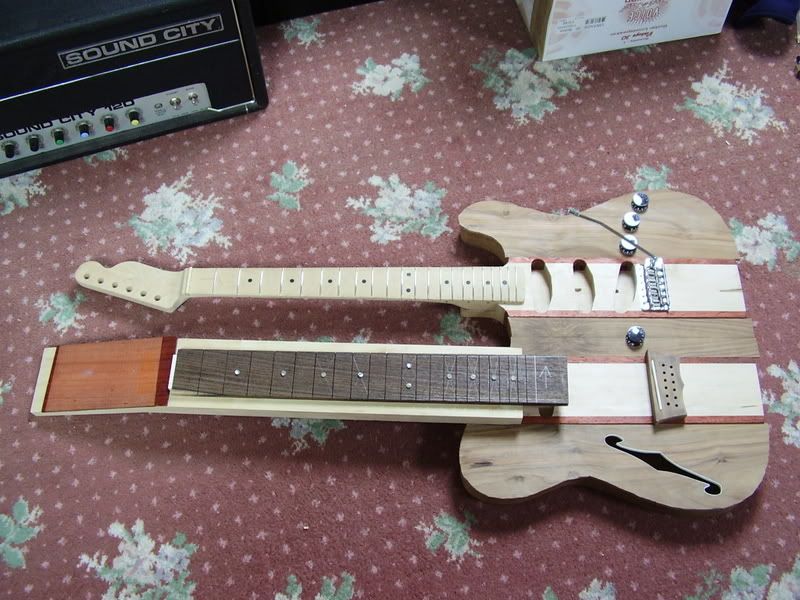
I know the necks are very different, but that is what I wanted. I pretty much wanted it to be two guitars put together. The 12 string should give a more acousic sound, but the bottom a nice Strat sound. I wanted the warmer sound of the rosewood board on the 12, and the acoustic style headstock too, as I don't like the flat Strat style headstocks on a 12 really. The pickups are very different on each, but that is the style I wanted again. I didn't want to have to make the two the same just because I was making a double neck.
EDIT: On UG I just put all the photos up, which is much better IMO, but we're not allowed on here are we?
-
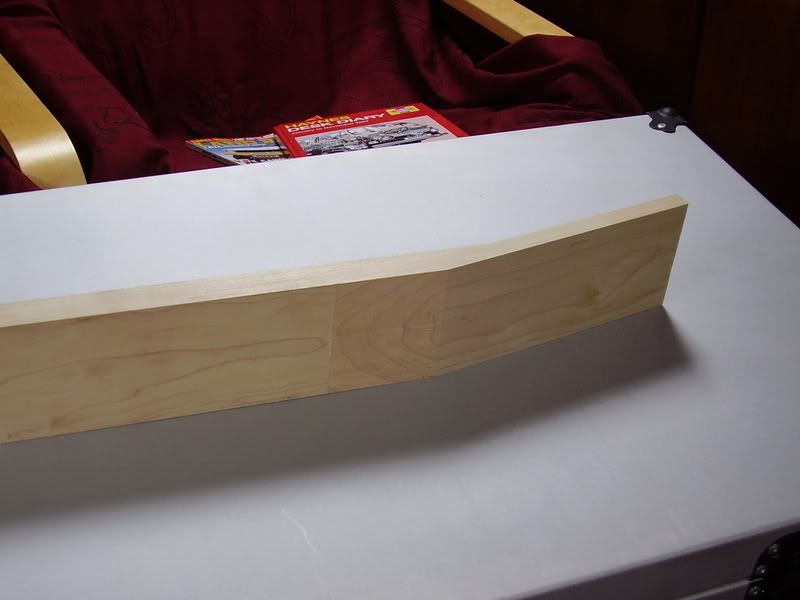
Ain't updated this. This is the progress of the last few days (bar today as I was out).
Started by taking the clamps off the top.
http://img.photobucket.com/albums/v200/Calum/245.jpg
Then started planing the top flat.
It's getting there....
http://img.photobucket.com/albums/v200/Calum/251.jpg
Pretty much done!
http://img.photobucket.com/albums/v200/Calum/254.jpg
As it stands after the top has been flattened.
http://img.photobucket.com/albums/v200/Calum/258.jpg
Top binding channel routed
http://img.photobucket.com/albums/v200/Calum/261.jpg
Top binding in place and drying
http://img.photobucket.com/albums/v200/Calum/265.jpg
Top binding dry and trimmed and scraped etc.
http://img.photobucket.com/albums/v200/Calum/271.jpg
Bottom binding drying
http://img.photobucket.com/albums/v200/Calum/272.jpg
All binding done!
http://img.photobucket.com/albums/v200/Calum/275.jpg
http://img.photobucket.com/albums/v200/Calum/276.jpg
Top of guitar scraped over with epoxy to fill the grain on top. Of course, the epoxy really brought out the colour and grain, and I love it!!
http://img.photobucket.com/albums/v200/Calum/277.jpg
More updates as I do more!!
-
First thing was to fill in the inlays on the 12 string neck with epoxy to make them a perfect fit (they were good anyway, but some had little gaps that I wasn't happy with). While that was drying, I went and glued on another part of the walnut top.
http://img.photobucket.com/albums/v200/Calum/218.jpg
Then I put that to one side to leave it overnight. I then turned my attention to the neck and sanded back all the epoxy and inlays so they were all smooth.
http://img.photobucket.com/albums/v200/Calum/227.jpg
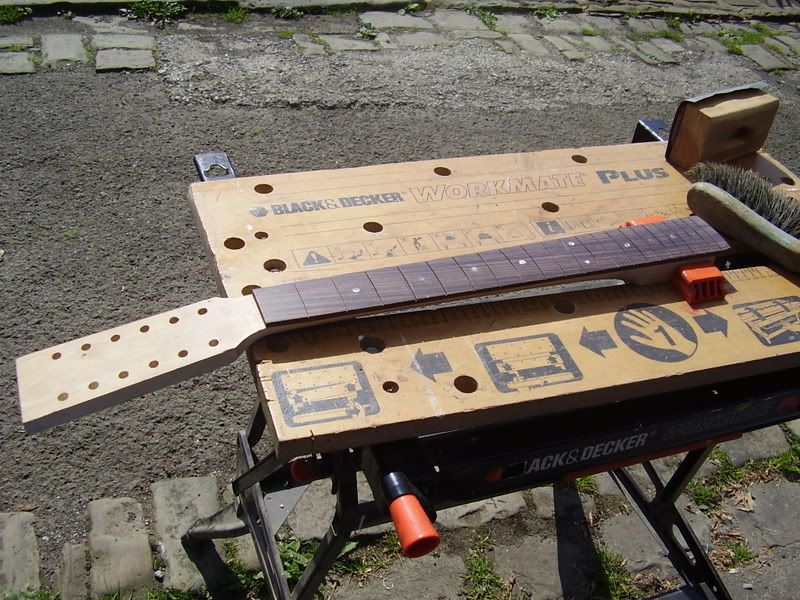
Then I got my free bandsaw out and gave it a clean, adjusted the blade and whatnot, and then set about making a shim as the nut is not high enough to clear the fretboard. I am really happy with the bandsaw, and I am very grateful to the man I got it from. Works perfectly, and came with the instruction book and a good few spare blades too. It's not big, but it was FREEEE!
http://img.photobucket.com/albums/v200/Calum/224.jpg
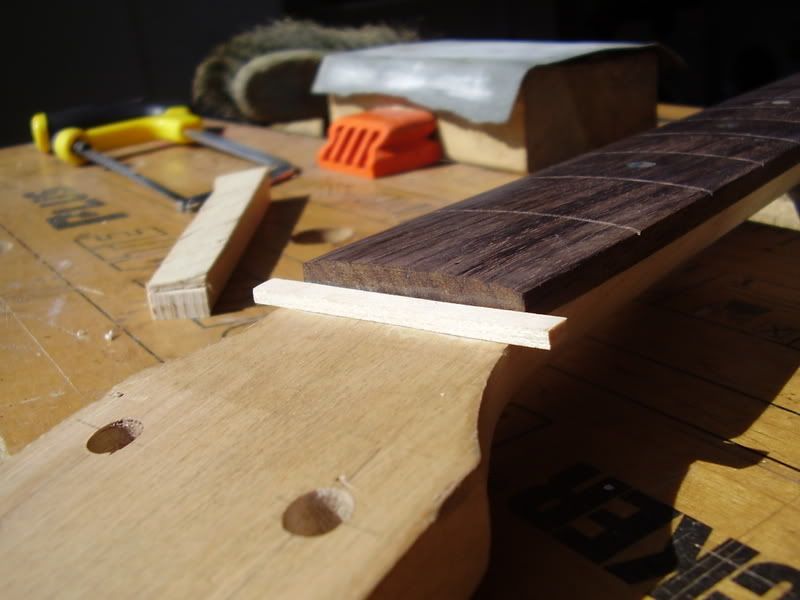
Here is what I was doing. This is a little ledge chiseled flat to accept the shim. The colour is because the headstock front has gotten dirty from lots of fretboard sanding. Needs lots of tidying up, but you get the idea
http://img.photobucket.com/albums/v200/Calum/228.jpg
http://img.photobucket.com/albums/v200/Calum/229.jpg
http://img.photobucket.com/albums/v200/Calum/230.jpg
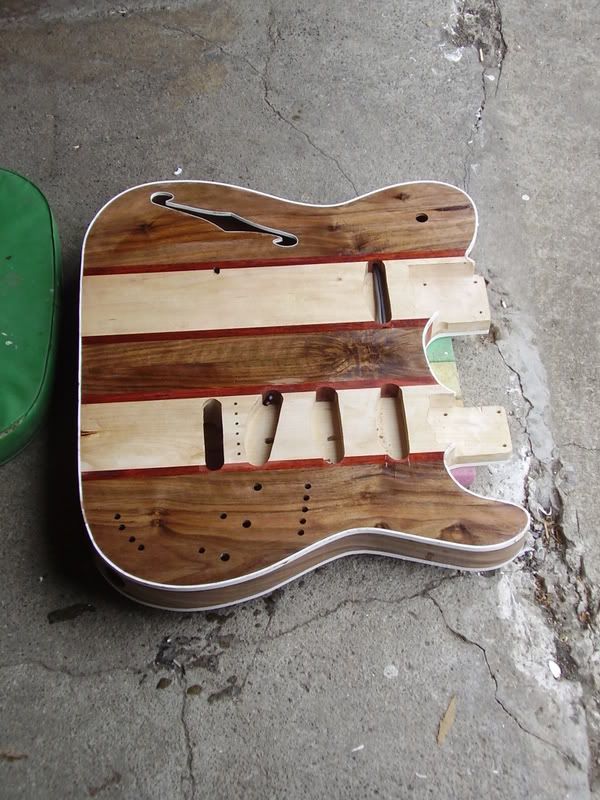
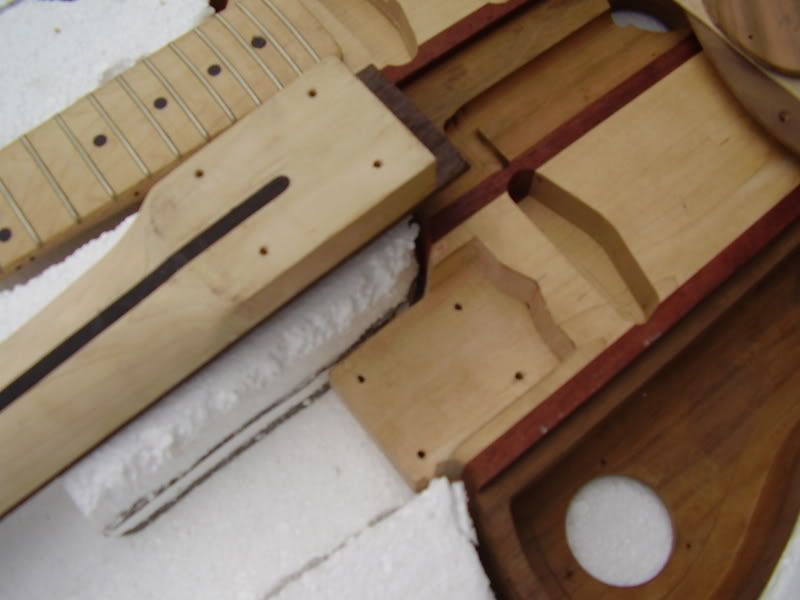
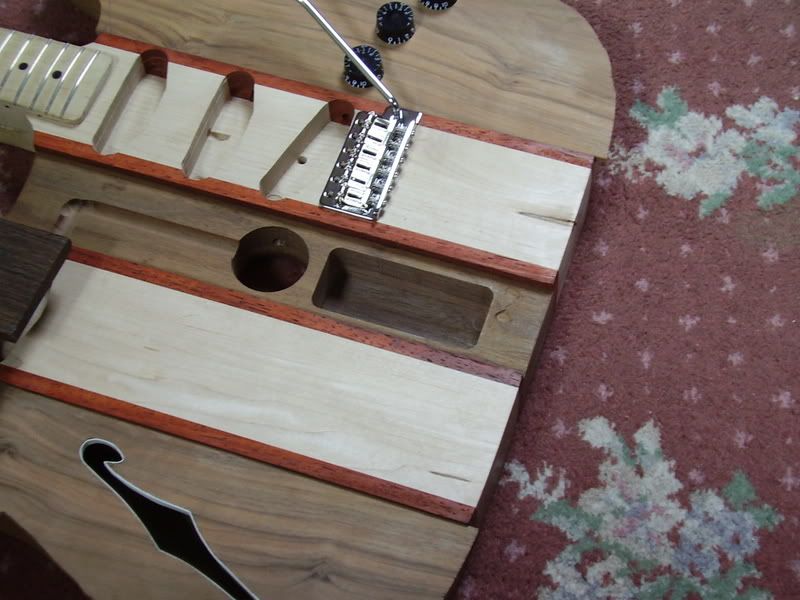
I routed out another chamber as a last minute decision to try and reduce weight on the body, and I fitted the last part of the top (after fitting the first part of the wiring!!)
As it stands at the moment (the middle top is just pushed into place for this pic)
http://img.photobucket.com/albums/v200/Calum/234.jpg
Extra chamber to further reduce weight
http://img.photobucket.com/albums/v200/Calum/238.jpg
First bit of wiring going in
http://img.photobucket.com/albums/v200/Calum/239.jpg
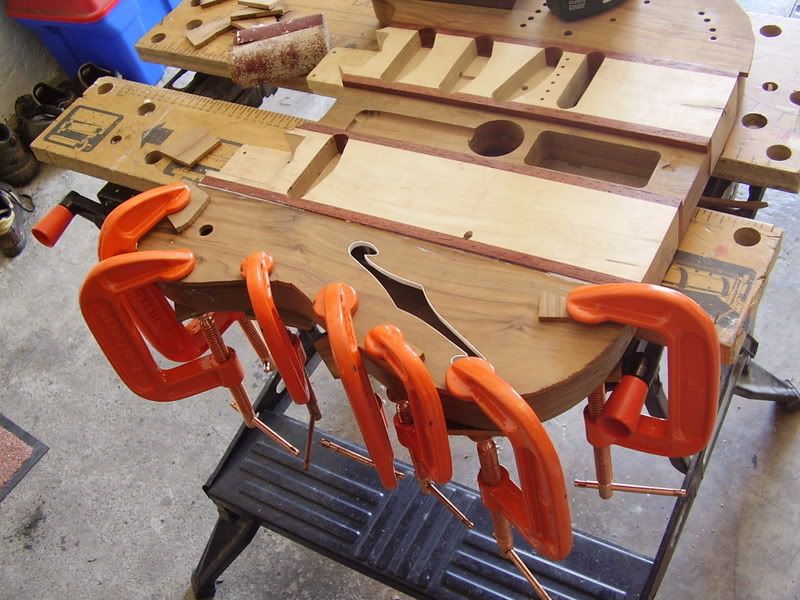
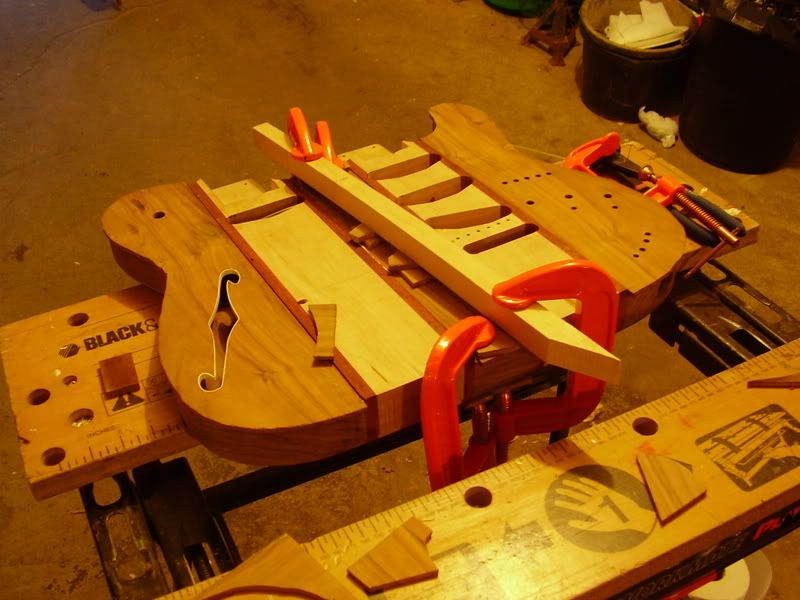
Top clamped using my fabulous designed on the spot clamping method. I needed to get the middle bit clamped but don't have any clamps that will do the job. So I got an offcut of maple from one of the necks, and clamped it onto two bits of scrap in the middle to clamp it down. The maple only rests on these so that all pressure is on the middle, and the maple bends quite a lot from this.
The maple was put diagonally across the top so that I could still fit a clamp at either end of the top too.
http://img.photobucket.com/albums/v200/Calum/242.jpg
http://img.photobucket.com/albums/v200/Calum/243.jpg
That's it for now! Tomorrow I shall take off the clamps, trim the top back with the router, plane the top all to the same height, and probably rout the binding channel for the top too, then think of a way to do the bit of channel the router bit wouldn't get into (I think I have a bit that will do the job though - I'll explain more tomorrow). I might do some other things too, depends on how much time I have and whether I can be bothered (If I can't, I shall make myself be bothered!)
Calum
-
^ Never really thought of that. My RG has SD on its pups, but not on the neck, as its a '59 without writing (guitar is for sale anyway). But yes, the BKP scroll writing looks great. I quite like how it looks on black covers, but then again I don't like black covers.
-
Nice pups. I'm going to get the tele neck pickup I'm using in my double neck engraved like that too - looks really good (and it's a nice advertisement for them I suppose).
-
EDIT: Removed as I was beaten to it and didn't realise

-
^Cheers Ben!
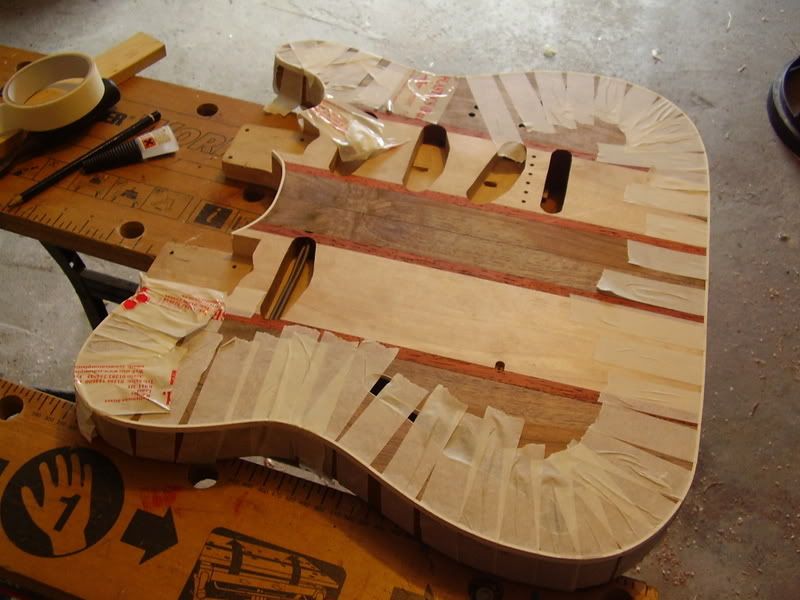
i really wish your back cover had the red (possibly padauk?) laminates in it to have more asthetics; but either way it looks phenominal, i like how your doing the channels with sperate tops!I'm still debating on whether to do that or not. I've got plenty of padauk and maple left so I may well do the trem cavity like that and then thickness plane it. Worth the effort? I think you just made me think so!
Dunno if I should do it with the middle cover as well or not. Think I should?
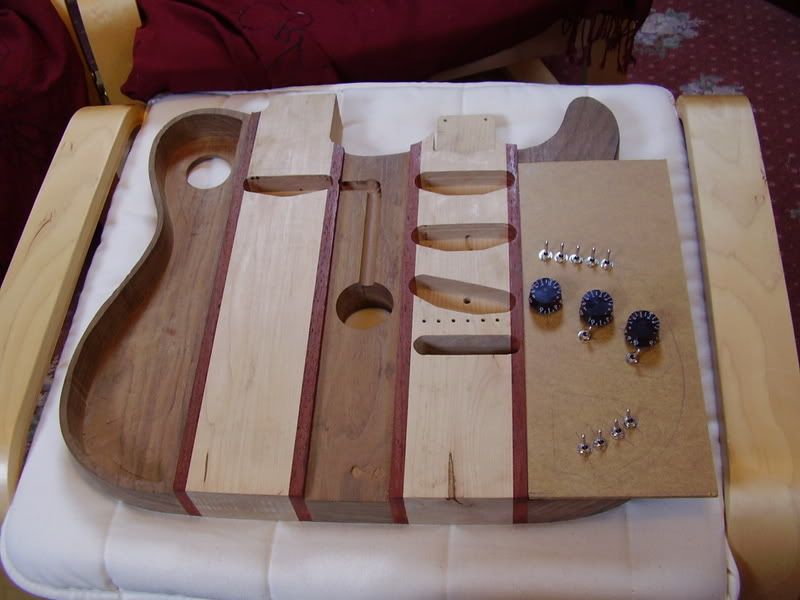
I did the inlays on the 12 string neck, so the fretboard now needs sanding down again to level it out and get rid of any glue. I also carried on on the cavity covers on the back, but I am going to redo two of them as said. I also drilled the holes for the 12 string neck screws, and test fitted it and am happy with the results at the moment. I also finally got around to making some wooden knobs that match the rest of the guitar!
Here are the inlays done and awaiting the fretboard to be sanded down to make them smooth.
http://img.photobucket.com/albums/v200/Calum/212.jpg
Bad and blurry pic showing the 12 string neck attachment (I know, not that great a pic or very interesting, but I'm keeping a good photographic document of the progess of this build, so I took it anyway)
http://img.photobucket.com/albums/v200/Calum/214.jpg
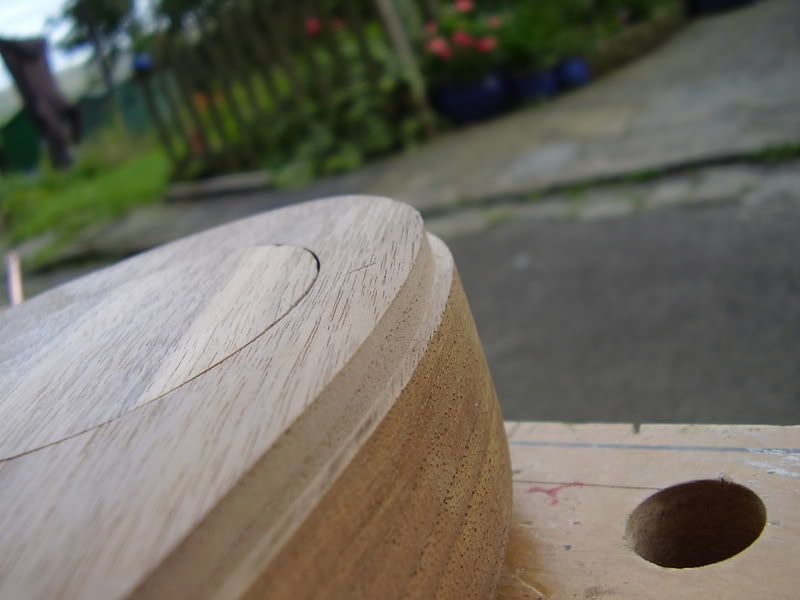
And here are the knobs I made just drilled out with a holesaw. This explains the slight burning on the sides still and the general appearance. I am going to make them a little smaller in diameter as they are rather large, but the next holesaw down was too narrow, so it was better this way.
http://img.photobucket.com/albums/v200/Calum/216.jpg
Calum
-
I keep forgetting about this thread!!
I ain't posted for like three months, but I'll update you on it all.
Basically, since late May when I had all my exams I haven't done much at all. I was busy with exams, and then I was away a lot. I'm not going away for a while now, so I've got a few weeks to do some work on the guitar. Work really resumed today.
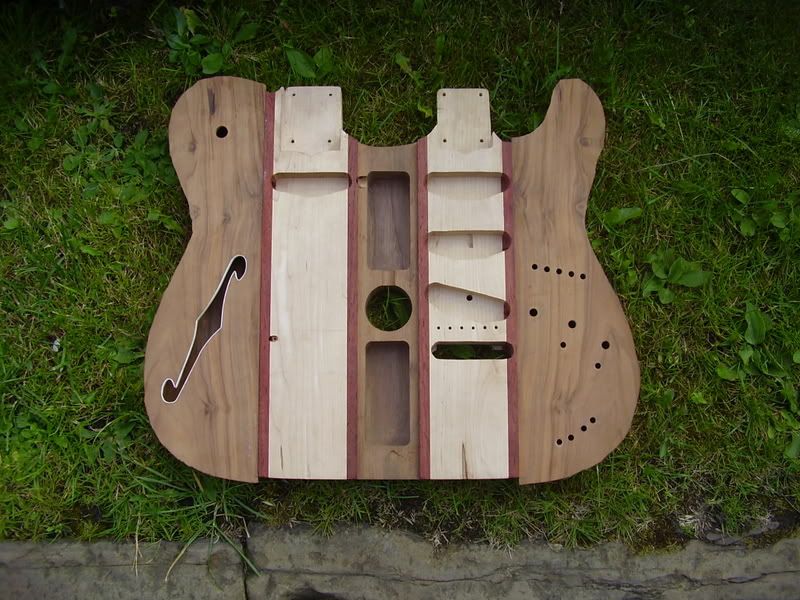
Finished making the electronic cavity covers for the back, and started to fit the top too.
Couple of pics of the binding channel on the back that I did a few weeks ago now.
http://img.photobucket.com/albums/v200/Calum/207.jpg
http://img.photobucket.com/albums/v200/Calum/208.jpg
Pic of the cavity covers
http://img.photobucket.com/albums/v200/Calum/203.jpg
And I glued on the first part of the top today too.
http://img.photobucket.com/albums/v200/Calum/210.jpg
Once the top is on and I've done the top channel I will really feel like I'm getting somewhere. Tomorrow I am going to attach the 12 string neck properly, which means lots of measuring and looking along the neck to make sure its straight before I drill the neck affixing holes. I'll also do the inlays on the top, and maybe rout the binding channel on the fretboard too.
That's it for now, but hopefully this project is finally back on track!
-
I'd be tempted to use something like a low angle block plane, but even with one of those as opposed to a bench plane there is still the risk of tearing at the end. There are ways to overcome that though.
-
Cheers Guys
Updates:
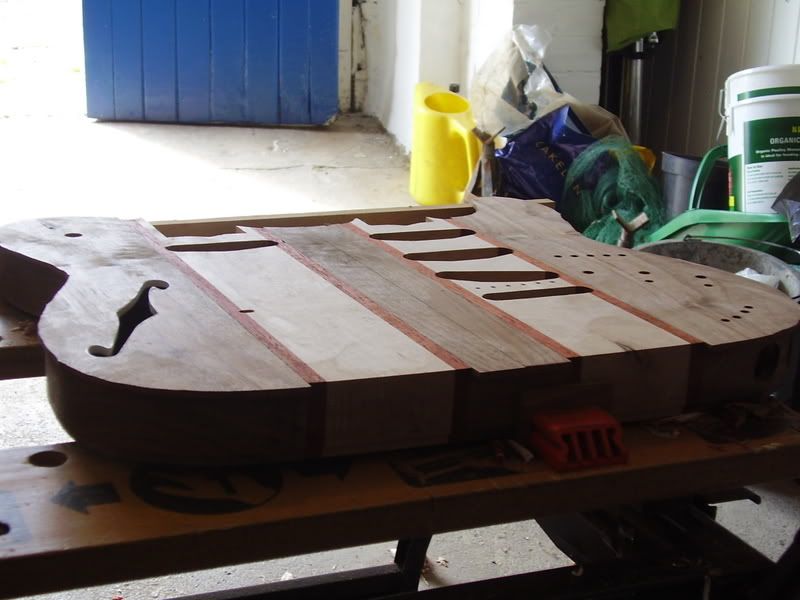
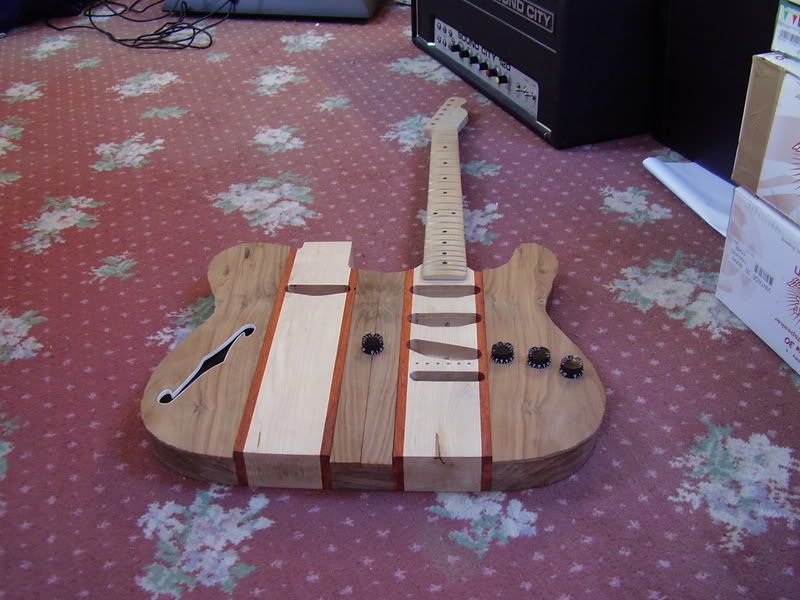
Drilled holes for the controls on the main control panel and on the upper bout of the chambered bit too. Also, you can just see the first of the two holes I cut in the side for the outputs to go through.
http://img.photobucket.com/albums/v200/Calum/195.jpg
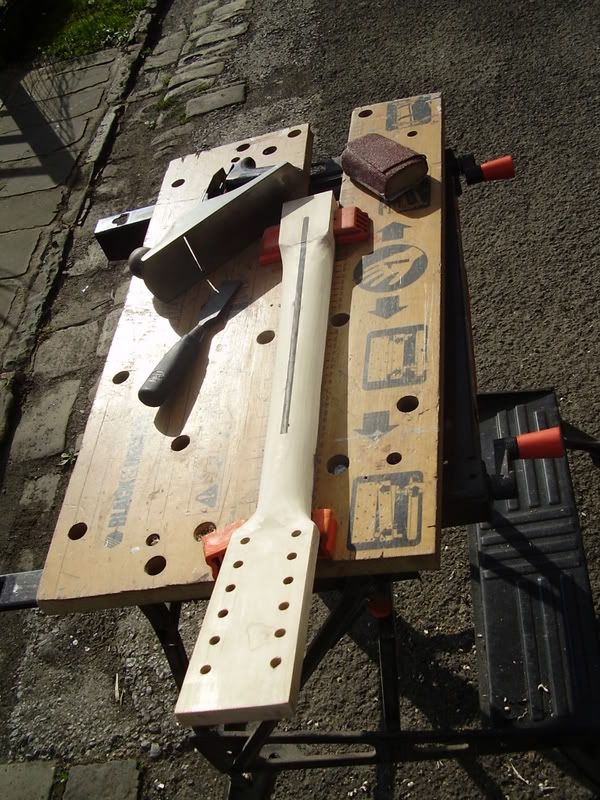
Pic showing the stage of shaping I am up to so far. Still very rough around the heel transition as you can see. It's actually still pretty rough around the headstock transistion, (and by that I mean I want to do more work on it) but it doesn't really look it.
http://img.photobucket.com/albums/v200/Calum/196.jpg
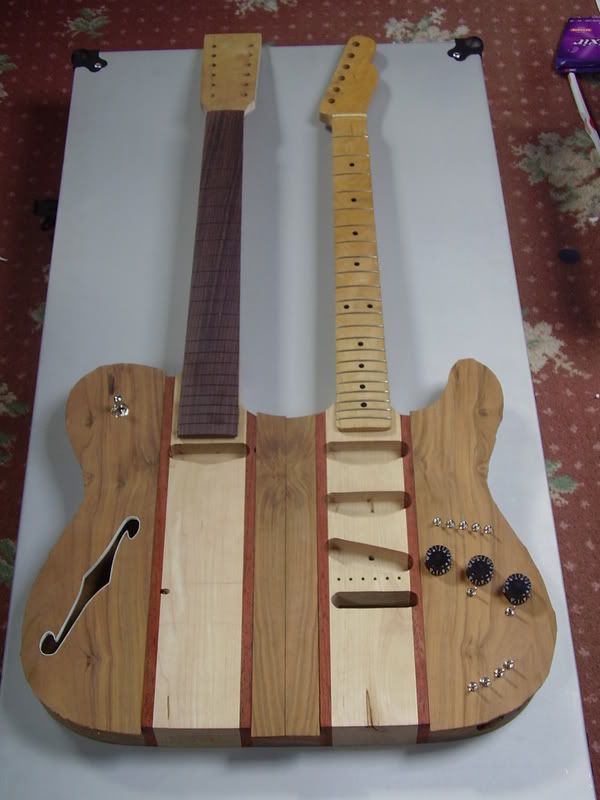
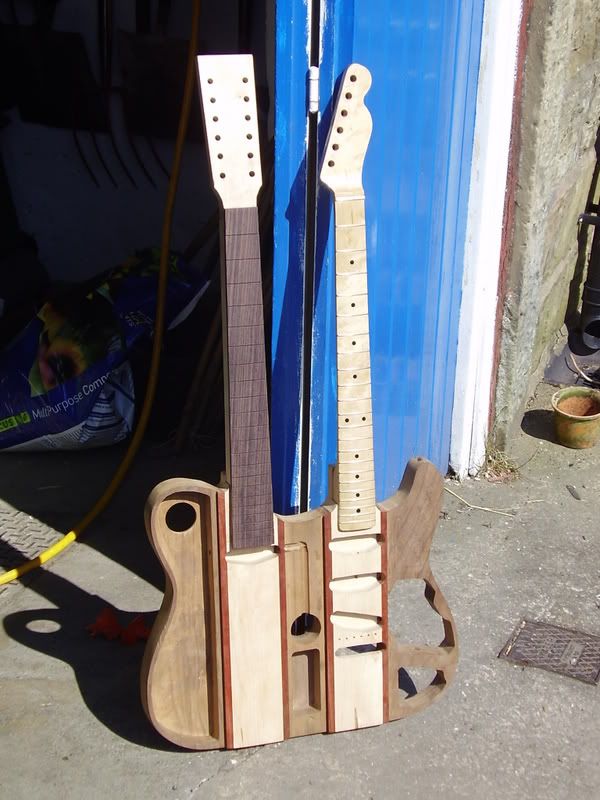
Mockup of where I've got to.
-
They probably don't to a lot of peoples', but that is what I decided on, mainly because the 12 string neck is modelled off of my 70s Hohner 12 string acoustic, and it wasn't all that easy to get one that matched the tele headstock. Also, I don't really like the Fender XII headstocks anymore (I sued to a bit, and did consider one).
-
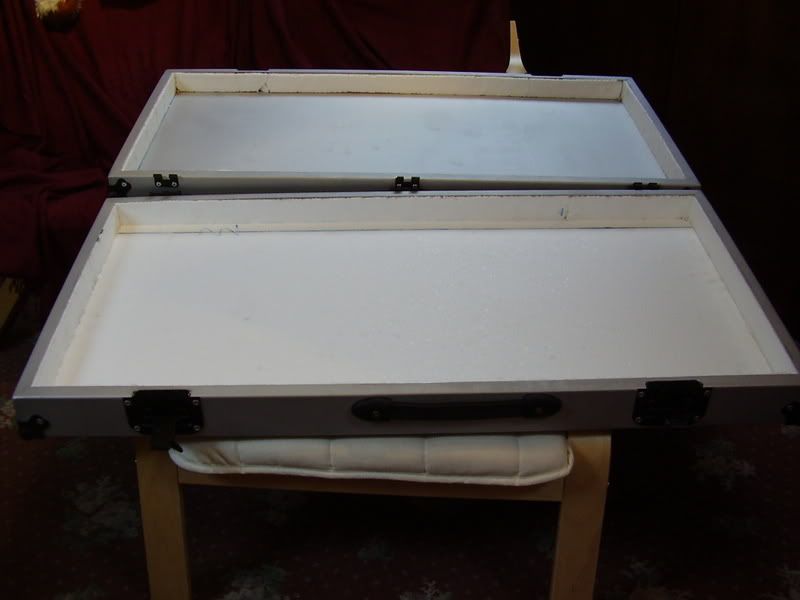
Started fitting this to the guitar now that I have the second neck pocket routed and I know where the neck is going to sit.
http://img.photobucket.com/albums/v200/Calum/190.jpg
http://img.photobucket.com/albums/v200/Calum/192.jpg
Not much work left on this now apart from final shaping and extra padding in the lid. Might make a compartment in it too, and then it all needs covering in black fake fur.
-
Ain't posted in here for ages, and I've got some updates (though admittedly, not many)
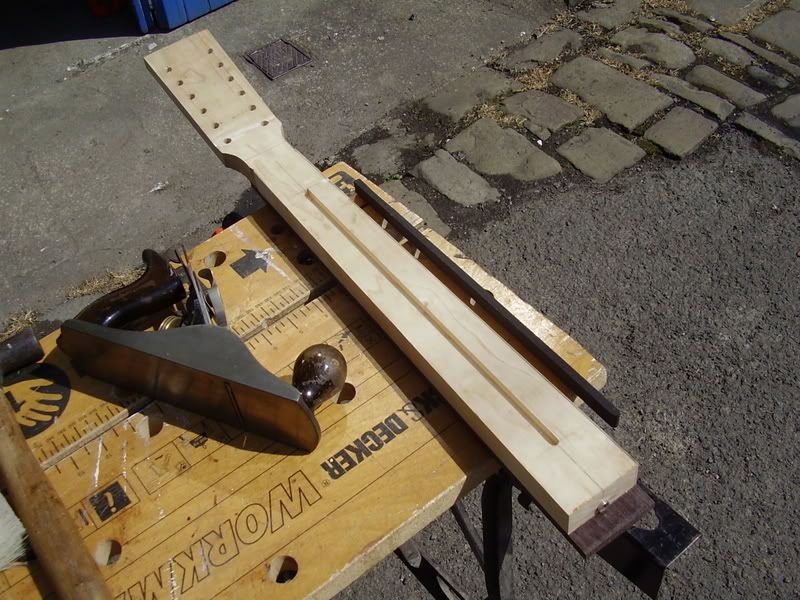
Routing the truss rod channel:
http://img.photobucket.com/albums/v200/Calum/152.jpg
http://img.photobucket.com/albums/v200/Calum/155.jpg
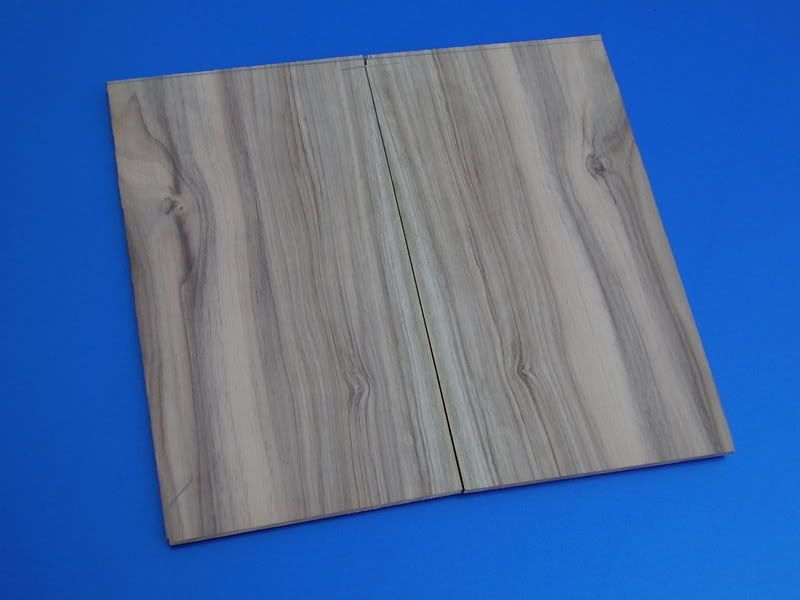
Headstock veneer (May or may not be used)
http://img.photobucket.com/albums/v200/Calum/156.jpg
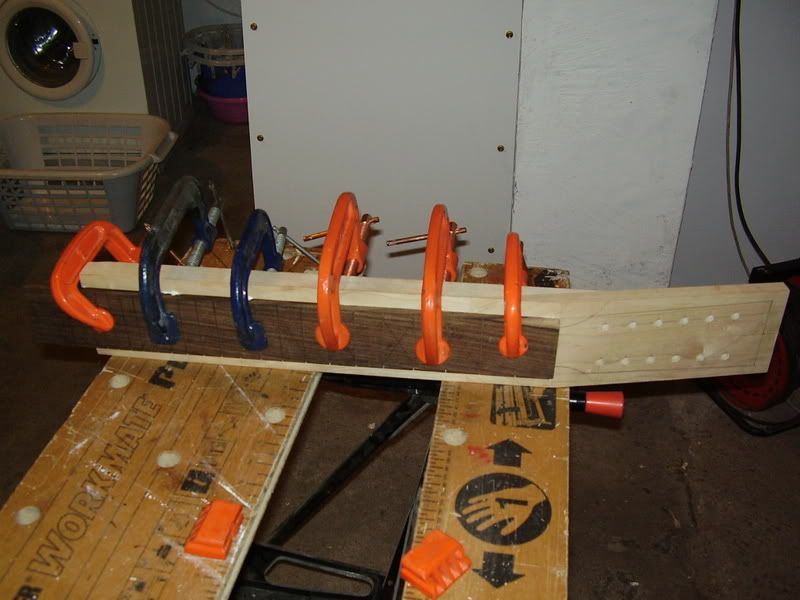
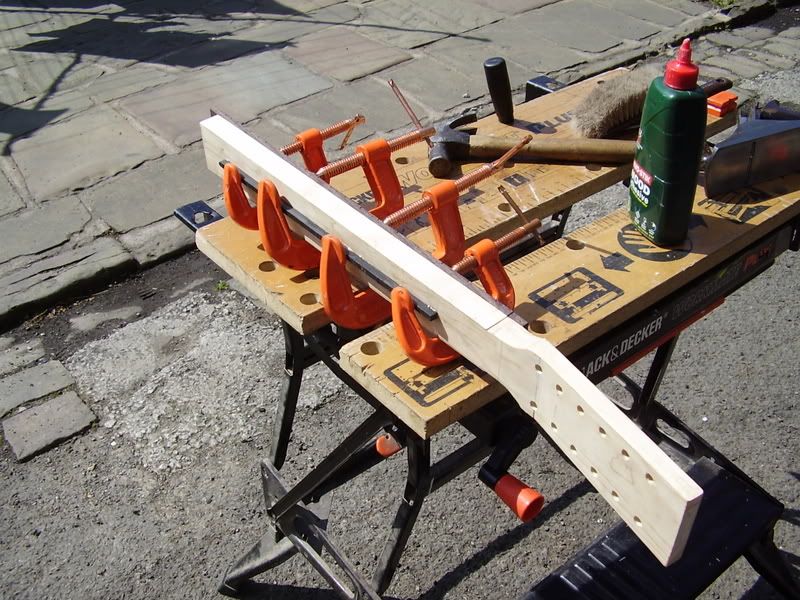
fretboard clamped:
http://img.photobucket.com/albums/v200/Calum/160.jpg
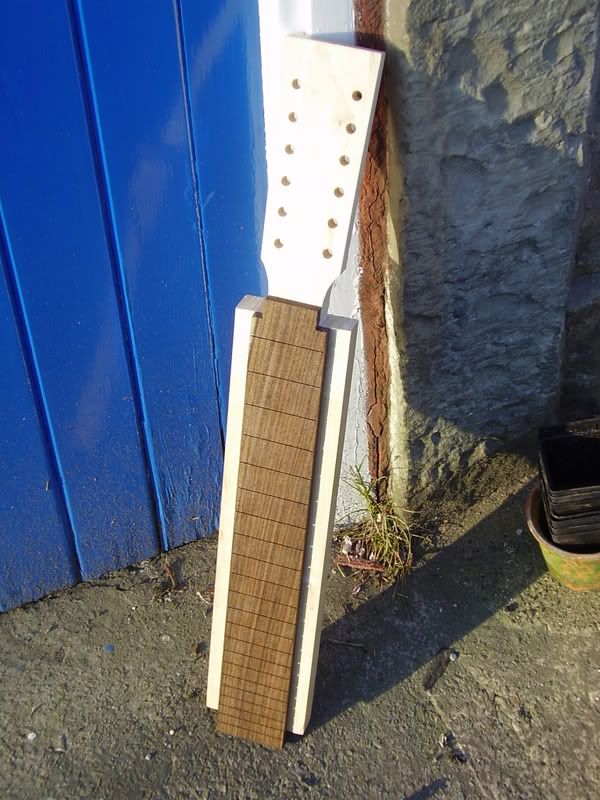
After cutting out headstock:
http://img.photobucket.com/albums/v200/Calum/161.jpg
Fitting skunk stripe:
http://img.photobucket.com/albums/v200/Calum/165.jpg
http://img.photobucket.com/albums/v200/Calum/168.jpg
http://img.photobucket.com/albums/v200/Calum/176.jpg
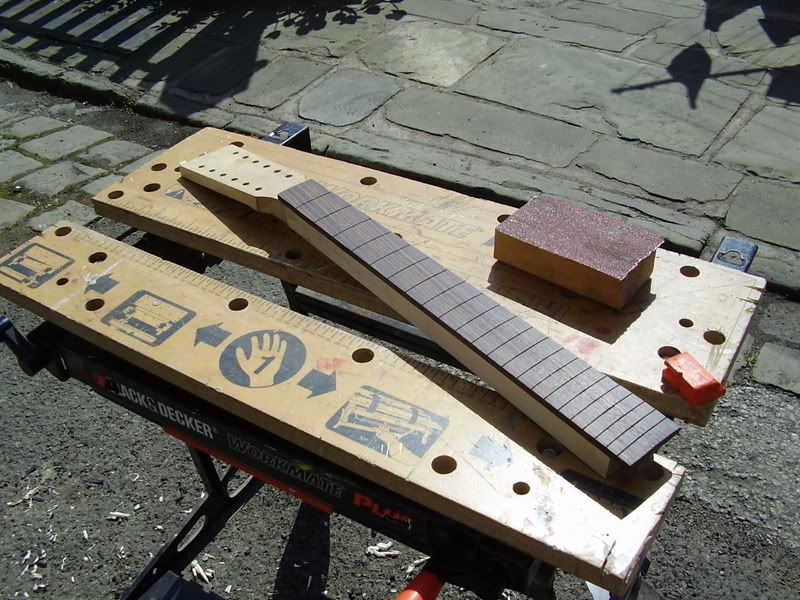
Radiusing the fretboard:
http://img.photobucket.com/albums/v200/Calum/178.jpg
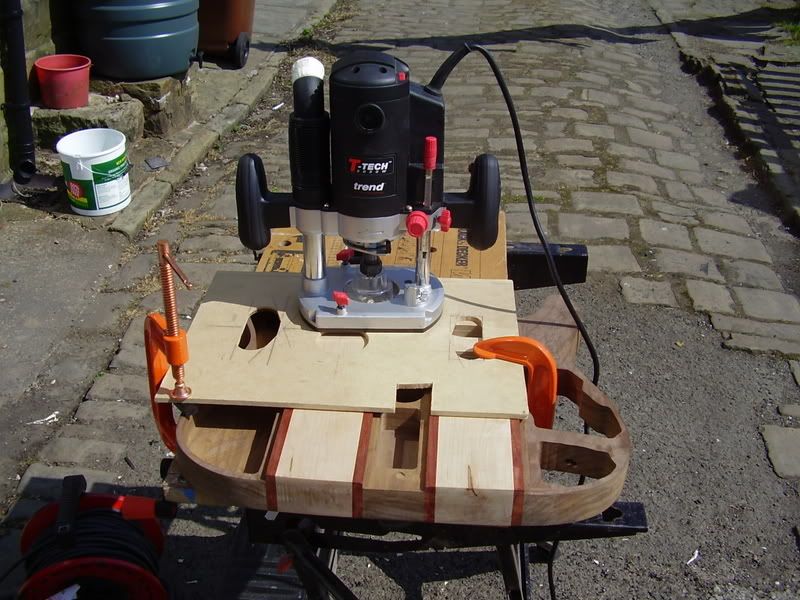
Routing out the neck pocket:
http://img.photobucket.com/albums/v200/Calum/180.jpg
http://img.photobucket.com/albums/v200/Calum/181.jpg
Getting there!:
http://img.photobucket.com/albums/v200/Calum/184.jpg
http://img.photobucket.com/albums/v200/Calum/186.jpg
I've also done some more work on the case, and I've done some shaping and such on the neck since these picks were taken. I'll do some more work tomorrow and take some pics. I've got GCSEs at the moment, but I should find some time in between revision to work on it. I've only got two exams this week anyway (English Lit 1 and Tech).
That's it for now,
Calum
-
Hi guys
I was doing some work for school this morning, but I'm now going to go and rout out the truss rod channel and then the skunk stripe channel, and probably insert the skunk stripe. I may also cut the walnut laminate for the headstock, as I've decided to use a bookmatched walnut laminate on the headstock instead of the padauk one I have (it's too small, but I could still make a new one by laminating some of the masses of padauk I have left). It's only because while padauk is very colourful, it has a pretty boring grain, and the walnut looks much better.
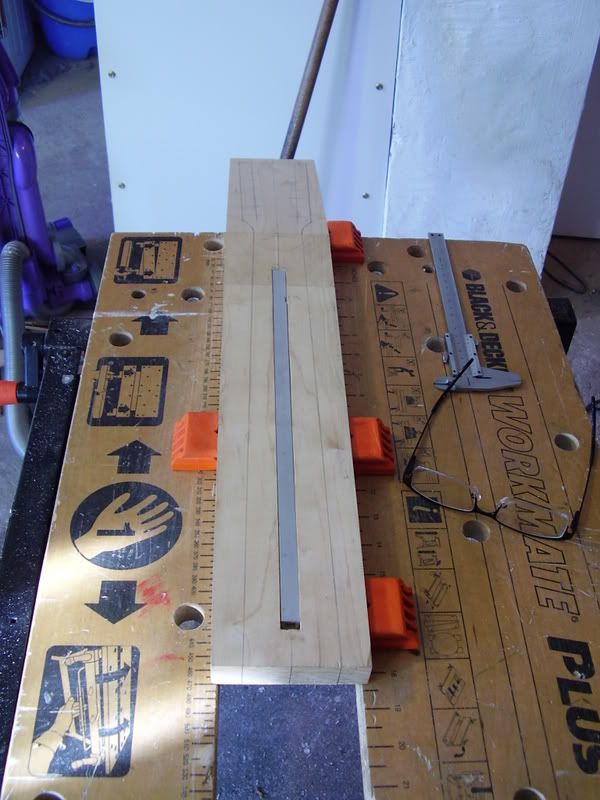
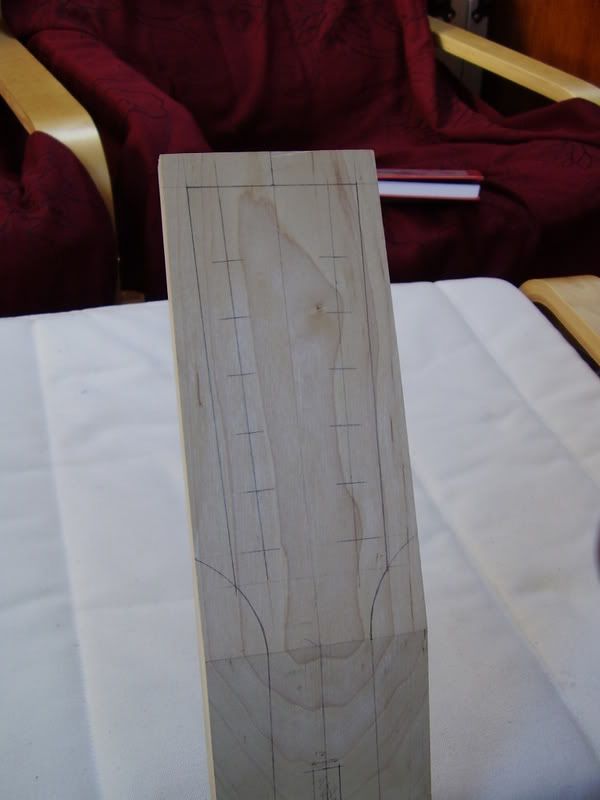
Anyway, here are some pics of it all marked out before I go and cut into it:
http://img.photobucket.com/albums/v200/Calum/148.jpg
http://img.photobucket.com/albums/v200/Calum/151.jpg
Calum
-
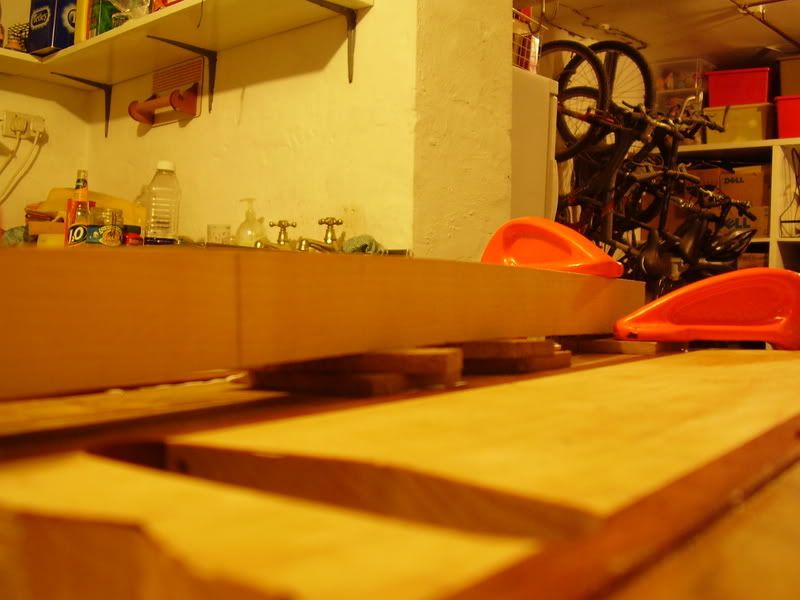
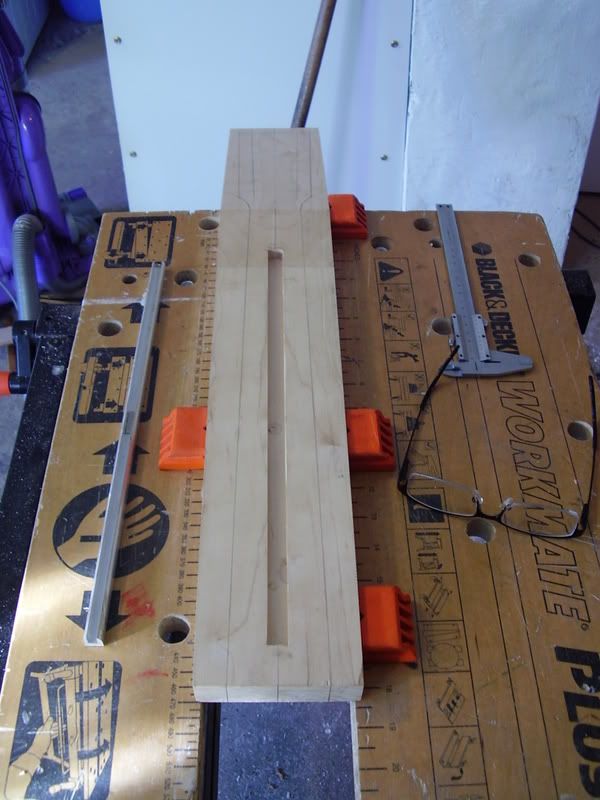
^ None of them are level even though they may look it (some are nearer than others though I had to admit). I left them high on purpose so that I would flatten them down to match afterwards. And to flatten them all out I shall use a Stanley number 4 1/2 smoothing plane (the iron is 2 1/4" wide rather than the 2" of a number 4 plane). The plane is my favourite tool, and thankfully I can use and tune it well, so that is what I shall be using.
-
Right-O, got some pics for you all.
This is the scarf joint after being taken out of the clamps and just ran over once or twice with the plane to tidy it up a little.
http://img.photobucket.com/albums/v200/Calum/142.jpg
http://img.photobucket.com/albums/v200/Calum/144.jpg
Here is the chamber I routed out yesterday, and tomorrow I will do another one or maybe two (didn't have time today).
http://img.photobucket.com/albums/v200/Calum/147.jpg
Here's what I've got so far!
http://img.photobucket.com/albums/v200/Calum/146.jpg
Calum
-
Thanks guys. Help has come from a few sources, and the only bit I didn't do myself was cut the body and headstock out roughly on the bandsaw, as my tech teacher had to do it. This was because of insurance (my favourite thing after health and bloody safety....). Mainly though my dad would help me for some things (University lecturer on Mechanical Engineering), but a lot of help and guidance would come from a friend of mine. He's been a joiner and pretty much everything else for almost 50 years now. Being a fellow guitar player, he has strangely never made one himself, and he doesn't really know why. He has extensive knowledge in woodwork, mechanics (built his own car, and wanted to be a mechanic when he was younger), construction, plumbing, roofing, pretty much everything, but he's good at them all. I also use his workshop from time to time, for things like his circular saws, thicknessing planer and whatnot.
But to shorten that answer, it is all my own apart from the rough cutting of the body and headstock which my tech teacher did on the bandsaw.
Also, erikbojerik, it's just a good job I don't have a band then
(I would love to be in one, but no one likes good music like me )Today I went into Manchester, however before I went I got time to do some more chambering on the body, and the weight went down a whole 10th of a lb from 6.9lb to 6.8lb. I'll do some more tomorrow too probably. I'm keeping all the chambering to the walnut so that things like the sustain and tone aren't affected too much as the maple is left as solid as possible (other than the pickup, bridge and neck routs). I'll put some pics up tomorrow.
-
^ 14 when I started, 15 now
, 16 later this year. Thanks though! -
Good news people; I finally got the scarf joint glued up yesterday. Was a bit of a pain to stop it from moving when I tightened the clamps, but once I get them tightened and the joint back in place it was fine. I'll take it out of the clamps on monday afternoon, and I'll have pics then. Then I can start marking out for the truss rod channel and the neck taper, headstock etc. Two or three days after taking it out of the clamps I'll begin work on it (want to leave it to dry fully first).
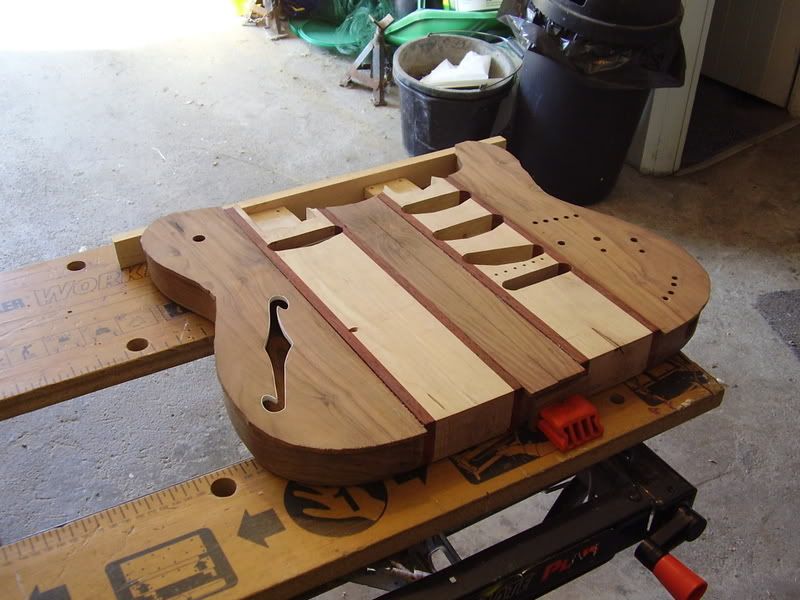
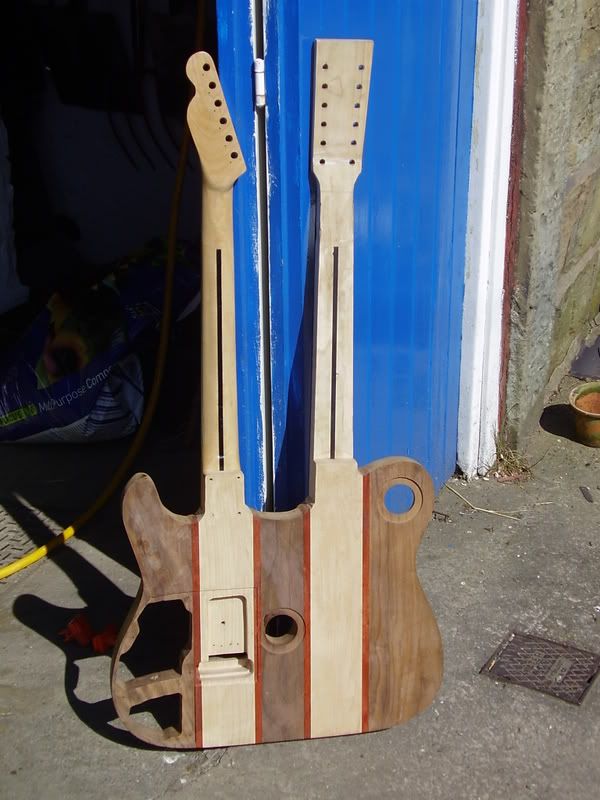
Today I rough cut the top to fit the body (oversized still of course), and fit the middle part of the top (not glued yet). There is a small gap between the pieces towards the bottom of the body though, but I can fix this later, proably by filling it with epoxy or maybe inserting some more walnut down the middle or whatever. I'm not sure yet. Tomorrow I will be doing some more routing on the body as I have decided to chamber some more to save weight. I am leaving the maple "cores" solid apart from the necessary routs to aid with sustain. The parts I am going to rout are on the lower walnut blank above the control cavities, and in the middle walnut blank below the cavity for the 12 string volume pot. Might get rid of some above it - not sure yet.
http://img.photobucket.com/albums/v200/Calum/141.jpg
That's it so far, didn't get chance to do a full mockup picture to keep you all occupied so I'll probably do one tomorrow, but don't quote me on that. Glad I've got the ball rolling again now!
-
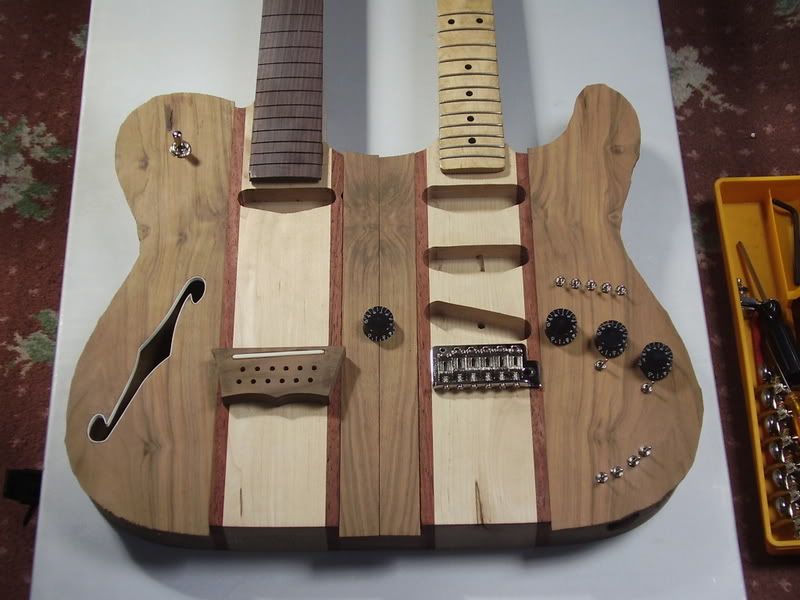
> That row of five contains an on/off switch for each of the single coils, and the other two switches are a series/parallel switch and a in/out phase switch. This allows me to get a LOT more combinations than the usual 5 position switch (which is great).
> There are two tone pots on there (one for each neck), both with a toggle next to them. The toggle selects between two capacitor values for the tone pot, to give me more tonal options again. This addition of these two toggles cost me like 50p for the two toggles, I already had the caps (they came in packs of three) and the wire of course (got a 100m roll). As it only cost 50p or something, I thought I would add it. The switches at the bottom are two lots of two.
> There are two outputs on this thing, with an on/off switch for each neck on each output jack. This allows me to send them through seperate effects/amps or whatever, send them through the same, and get some stereo effects going or whatever. Opens up loads of options, which is what I want. For example, I could send the 12 through one output, and the 6 through the other, or both through one output, or both through both, or just one through both, or both through one and one through the other etc. etc. All in all there will be several hundred switching options on this thing (there's still another pot and a three way toggle not on that picture too).
Thing is, I like lots of switches and stuff on my guitar, but I like my amp rather basic. My amp head has 6 knobs, and no drive channel (just normal and brilliant). I wanted a guitar that was versatile. With spending so much on things like the pickups, I didn't want them to be stuck with one tone (even though I love strats and the pickups are just what I am looking for). The 12 string can sound acoustic (piezo) or electric (neck pickup), or a mix of the two. The 6 string will obviously be a Strat sound, but it should hopefully be able to emulate a Tele or Les Paul too. I can select the bridge and neck in parallel (a la Tele), and I can select the humbucking positions of the single coils in series (a la Les Paul). This switching arrangement is pretty experimental. Granted, not all the positions will be strikingly different, and some positions I think are even dead positions, but it still opens up a lot more options for me.
Also means anyone else who picks it up is a little lost
-
If you want any wiring ideas for a double neck, just shoot me a PM or better yet, an email. I decided against the standard two circuits connected with an LP toggle, and went for something a little different. Also, the diagram for mine is a lot bigger...
Good to see someone else doing a double neck though.
-
NO PLANES!!
I'd have to get a vintage Bailey plane or two, I don't know what I'd do without em (planes being my favourite tool)
-
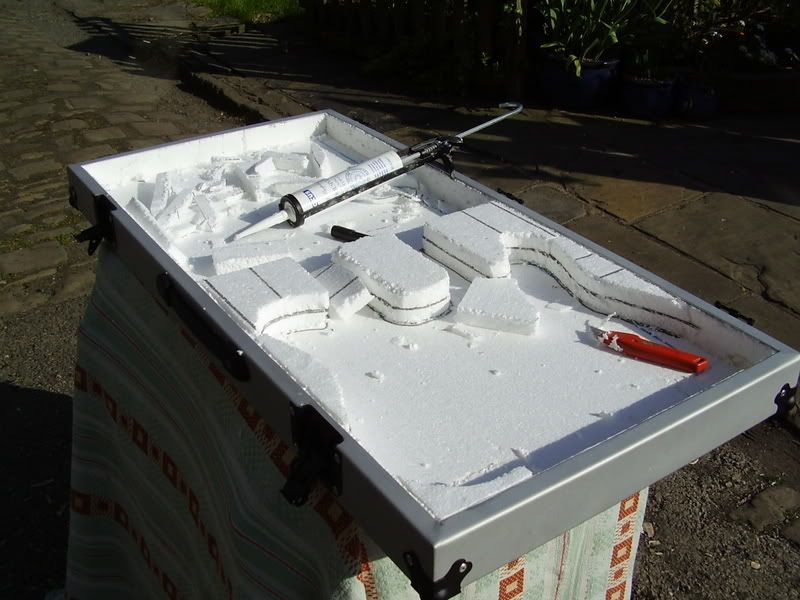
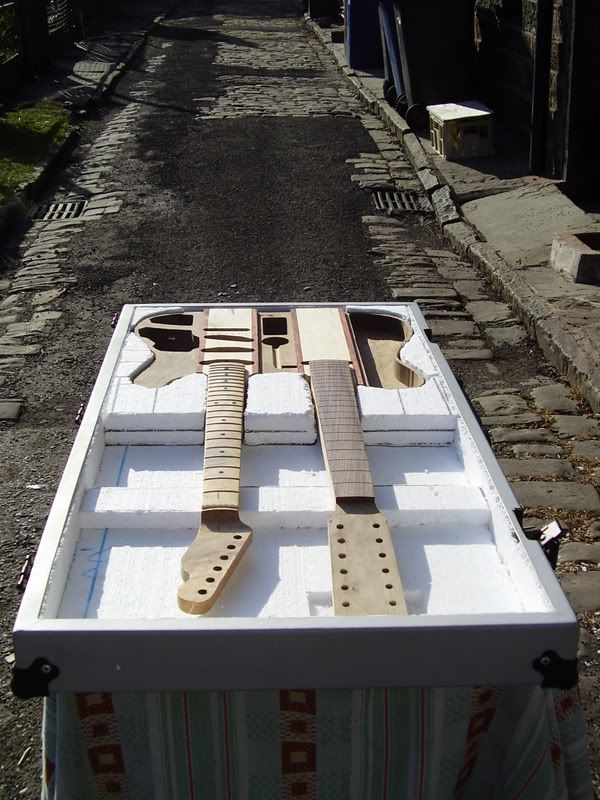
Ok, took some pics today, but I'll just show you this one. I started by filling underneath the return bend. This is nice and tight, so tight that when I pushed it in it broke in quite a few places, but this is fine. The idea now is to fill the middle bit with layers of polystrene sheet. It's better with layers as it is easier to cut out a shape of a guitar in one layer than try and rout it out of one lump or whatever. Placing the guitar in it at the moment, it is rather deep, so I should be able to get away with a full 1" layer at the top and bottom, and have cut out layers in between. Think I'll stick some cardboard over the polystyrene on the inside to give it a bit of protection from the inside, and also it might help on the lid where the tuners, bridges, switches, knobs etc. will press against it. It might help the lid "mould" to these features a little better. We'll see, cause I might well need to do some packing later to make it a nice snug fit (though the fur should help somewhat too).
http://img.photobucket.com/albums/v200/Calum/PC280010.jpg
Calum
-
Thanks guys!
So far today I've made a template for the electronics for when the top goes on. I made a template before, but it was wrong so it went with the scrap wood. Done another today, and it's just how I want it. Now when the top is eventually added, I will know exactly where to drill for the pots and switches (there are a lot too!)

Calum's Project
in In Progress and Finished Work
Posted
Thanks guys.
Aye a bolt on neck does mean they can be easily replaced, but then again they have to be made exactly to fit the scale etc. Further down the line I may well change one or maybe both - who knows! I think at the moment the body is under 7lbs, but I can't remember really. I'll weigh it again tomorrow since I made another chamber but also added the top since last time I weighed it. I'll do it with the necks on too to get a good idea.
Yes, the wiring is a bit mad on this thing, but that is what I like. There are hundreds of switch combos, but then again I wanted it to be versatile, and to get loads of tones out of it. Anyone who tries to pick it up and play might find themselves a bit lost with the controls!!
The 12 string bridge will have a piezo yes, and there is a hole drilled for the pickup wire to exit through in the top of the maple, and this goes into the hollow bit to the left, where it will be wired up to the toggle on the top horn. Should be easy enough to put a new one in or whatever since the hollow bit is well, hollow and it can get accessed through the hole at the back.