


bancika
-
Posts
99 -
Joined
-
Last visited
-
Days Won
1
Content Type
Profiles
News and Information
Tutorials
Product Reviews
Supplier Listings
Articles
Guitar Of The Month
Links and Resources
Forums
Gallery
Downloads
Posts posted by bancika
-
-
You are right, there are no rotary switches at the moment. They are in the queue with higher priority. Working on slide switches at the moment at rotary are next.
Also, as a note, schematic ground symbol does not come into play with guitar diagrams, analyzer will not figure it out. There should be a wire connecting ground points, like on my drawing in the original post.
Also, you are using labels on short leads coming from pickups and then again on short leads on the switch. This will not work, you need to have actual unbroken direct connection via a wire. I will consider adding a dedicated "label" connector or something that joins points with the same label together. That would make it possible to have drawing similar to yours.
-
 1
1
-
-
You are right, there are no rotary switches at the moment. They are in the queue with higher priority. Working on slide switches at the moment at rotary are next.
Also, as a note, schematic ground symbol does not come into play with guitar diagrams, analyzer will not figure it out. There should be a wire connecting ground points, like on my drawing in the original post.
-
Cool, thanks for the comment!
-
1
-
-
Hi!
Disclaimer - DIYLC is totally free and even open source, so I'm not doing this for profit
")
I'm the creator of DIY Layout Creator app that is widely used in the DIY community to draw pedal and amp layouts and schematics. It's been around since 2006 and it is constantly evolving to cover more of what we do as DIY enthusiasts.
Few years ago I started an effort to extend DIYLC into a guitar wiring designer tool because there's no such thing as far as I know on the market. I usually receive comments from people who are using it for amps and pedals, but rarely for guitar wirings, so I just wanted to raise awareness that it's there.
It uses the same UI/UX for drawing guitar wirings as you would use to draw a pedal or amp circuit, but I made some tools dedicated to guitar wiring debugging and analyzing that were helpful to me in my builds. Hoping someone else might find them useful.
For example, I used it to draw this layout of my travelcaster guitar. Drawing in itself is simple and it involves dragging components from the toolbox to the canvas and connecting them with wires...but what's really cool is the new feature that can analyze what we draw and tell us how that wiring is going to work in real life.

From File > Analyze > Analyze Guitar Diagrams we can access the analyzer tool that can do the following:
- identifies all the switches in the diagram and analyzes how the circuit behaves in each of the combination of switch positions. For example, if we have a 3-way Les Paul switch and one push-pull potentiometer, the diagram will show six different switch combinations and would analyze all of them in detail
- in each switch position, it checks which of the pickup coils are activated,
- checks whether they are in split-coil mode or full humbucking (in case of humbucking pickups),
- checks if the coils are wired in series or parallel mode,
- checks the phase of each coil and in case there is more than one active coil, checks if the coils are in-phase or out-of-phase,
- checks if the current pickup combination is noise-cancelling or not,
- checks if any of the potentiometers are wired as volume or tone controls
- checks if there is a treble bleed network installed on a volume control
In the example above there are 6 different switch position combinations (3 of the LP switch times two of the coil splitter push/pull). One of the switch combinations for the diagram above would look something like this
Switch configuration: [Split.ON1:SW1.Middle]

Parallel/Series connectivity tree:

(((Rbleed + Cbleed) || Volume.1-2) + ((Bridge.North<- + Bridge.South<-) || (Neck.South<- + Neck.North<-))) ||
Volume.2-3

Notes:
'Neck' pickup wired in humbucking mode with series coils
'Bridge' pickup wired in humbucking mode with series coils
'Neck' and 'Bridge' pickups engaged, wired in parallel
This configuration is hum-cancelling
All pickup coils are wired in-phase
'Volume' potentiometer acts as a volume control for 'Neck' and 'Bridge'
In terms of component coverage - most of the commonly used components are already there - different single-sized pickps (including stacked and rail humbuckers), full-sized humbuckers, soapbars, slide switches, LP and toggle switches, pots, caps, etc. I'm still working on extending the component base to include some less common components.
If this sounds useful to you, head over to https://github.com/bancika/diy-layout-creator and grab your copy of DIYLC to play with. User manual is located here https://github.com/bancika/diy-layout-creator/blob/wiki/Manual.md
Cheers!

-
2
-
Presenting Travelcaster, my dream no-expense-spared travel guitar built by my father and me. I wanted a guitar inspired by Richie Kotzen Telecaster model, but still very unique. A guitar that's easy to pack in a carry-on bag, but doesn't compromise on tone or playability. I never liked headless guitars because they are either not very comfortable to play or builders often get carried away with avant-garde design and take it too far...so I set a goal to make a classy headless guitar that I actually like
My father builds guitars as a semi-hobby, manages to do one or two per year. When it comes to guitars, I mostly work on the design and electronics. My specialty are tube amps/preamps and pedals and I also run a website with most of the project documented (http://diy-fever.com/). We already built one full-sized shred guitar for me some 12 years ago and it's been my #1 since. More info on that guitar here http://diy-fever.com/guitars/bancika-mk1/
Specs
- Alder body with 1/4" flamed maple top, contoured arm rest with cream binding and belly cutout. 80% size of the telecaster.
-
25.5" scale, quartersawn maple neck with slightly asymmetrical soft V profile and a separate piece of quartersawn maple fingerboard for added stability, Also added wenge skunk strip on the back, partially for stability, but mostly for looks . 41.5mm wide, 23mm thick at the nut.
- Hipshot Headless System
- Dimarzio Chopper and Fast Track pickups
- Custom machined gold-plated brass control plate with LP-style switch and a single volume control with push-pull that splits both pickups, giving a total of 6 different sounds.
- Jescar EVO gold frets
- Threaded steel inserts in the neck heel and gold-plated stainless steel allen bolts instead of traditional neck screws to improve neck contact and allow for easier disassembly in case of travel without risking of damaging the wood.
- Kinman-style treble bleed circuit
- total weight of 2.6kg
- glossy poly finish, tinted neck to look like aged nitro
For build pics, blueprints, details etc visit http://diy-fever.com/guitars/kotzen-travelcaster/
I recorded few brief clips of the guitar, all played with my laptop running S-Gear sims, will add more soon


-
1
-
thanks. He doesn't use EVO gold, I wanted to do something special and these seemed like a perfect cherry on the cake
As for the binding...no special trick, I'm afraid. The part around the armrest is done by hand. My father is really good with fiddley woodwork.
-
Thanks. I'll see if I have some big enough washers.
-
finally finished! Took over two years, mostly because of the issues with finishing. I designed the guitar and my father helped build it from scratch. It's heavily inspired by Kotzen Telecaster model, but made a bunch of changes: headless design based on Hisphot system, 20% smaller body (alter + flame maple), quartersawn maple neck with asymmetrical soft V profile (23mm tick at the nut), Dimarzio Chopper and Fast Track 1 pickups with LP switch and split-coil push-pull volume pot, EVO gold jumbo frets.
We don't have equipment to do finishing ourselves, so we are at the mercy of people who do it, and they stalled it for years doing bigger jobs that pay more. But happy to report that it's done and loving it so far. It’s portable and light (weighs only 2.6kg or 5.7lbs) and even though it’s not as loud played unplugged as my other guitars, it sustains as good or better than my other guitars. Hipshot headless system works pretty well.
Chopper and Fast Track 1 are perfectly balanced and work great on their own and combined. The sit right in the middle between Strat, Tele, LP and modern guitars. There’s more power than Strat/Tele, but not too much. They are not harsh, but also not honky or muddy. Enough output to push the amp hard, but still can clean up nicely. Very usable sound that can be shaped to do pretty much anything. Splitting the coils roughly halves the output and adds some sparkle to the tone, so it can be used as a clean/drive or rhythm/lead switch.
for more info and more photos from early stages of builing visit http://diy-fever.com/guitars/kotzen-travelcaster/
Few clips, guitar into interface, S-Gear VST with Plexi-style factory preset. No additional effects or adjustments
Cheers,
Bane


-
This Squier Strat is my first guitar I got 15-16 years ago and over years I've done quite a few things to improve it. It's more of an emotional thing, I could've bought a MIM Strat for the money invested, but it's my first guitar and I plan to keep and play it forever. One of the first things I've done is get rid of the horrid pickups it had. Replaced them with two Kinamns (AVn-62 for middle and AVn-56 for neck) and one Dimarzio Virtual Vintage Blues in the bridge. Then I replaced the bridge with GFS brass block, replaced fretwire with medium jumbo, re-radiused the fingerboard to 12" (Eric Johnson style), scalloped the fretboard asymmetrically a'la Ritchie Blackmore and swapped the tuners for Grovers.Few weeks ago I finally decided to refinish the body as I always hated the metallic purple finish and took the body to a local car paint shop to respray it in sonic blue (used the PPG code 11475). It's finally done and assembled back. I'm pretty happy with the results. Over years, the pickguard has aged a lot, so I used some coffee to age kinman pickups and bought a dimarzio aged white pickup for the dimarzio, as it didn't take any stain I tried. Knobs were also resisting, but I managed to age them a bit using stewmac vintage amber liquid wood dye.
for more information, photos and some clips visit http://diy-fever.com/guitars/squier-upgrade/
Cheers


-
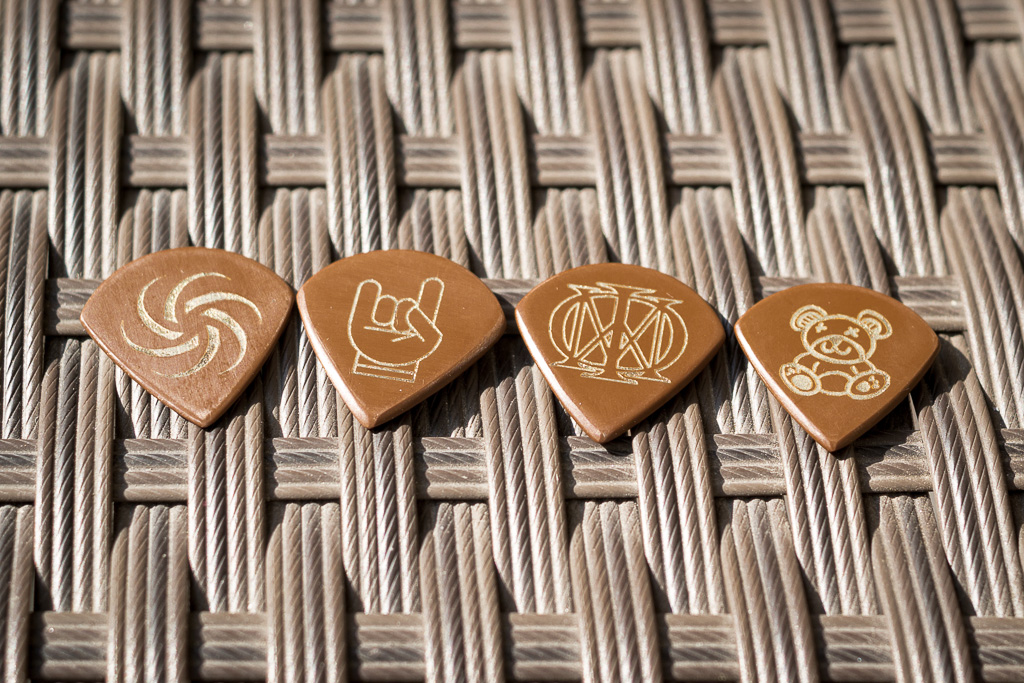
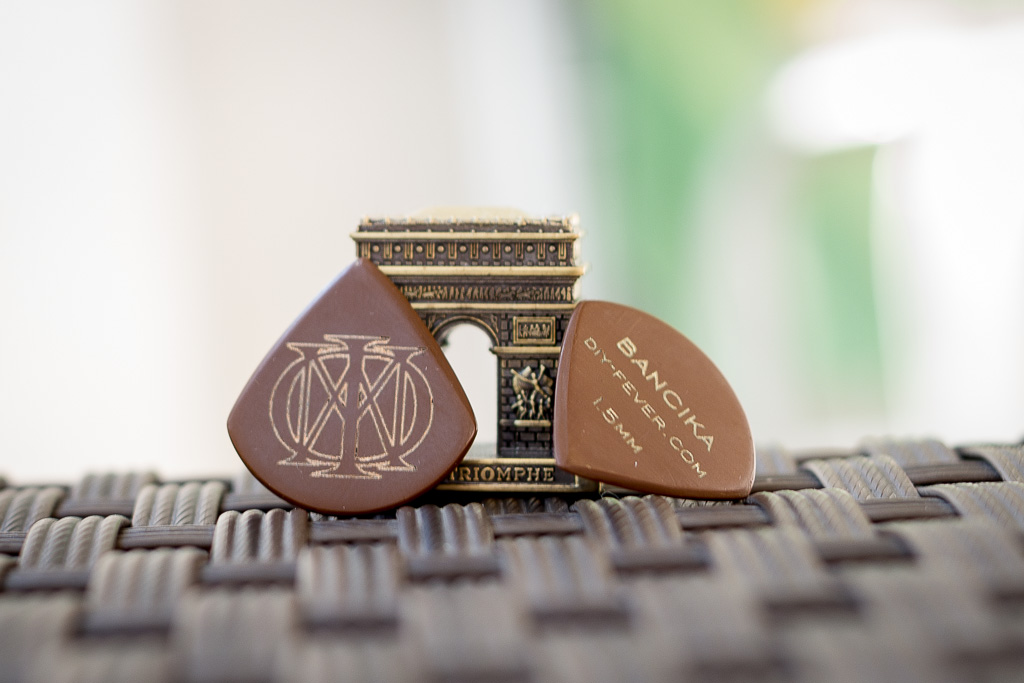
Not really a DIY guitar, but it's kind of relatedI wanted to try Blue Chip picks that everyone raves about but didn't want to invest 50 bucks for a pick, so I decided to make my own. Investigation lead me to material they are made of and it's pretty expensive, but I was able to buy some scraps from ebay for much less. It was enough for about 8 picks. As far as pick shape is concerned, we went with my favorite - Gravity Sunrise. I don't have photos of the process, but it's all manual and described on my blog. No fancy tools are used, but requires certain level of craftsmanship.For more info see http://diy-fever.com/misc/diy-vespel-picks/Here's the end result

-
Thanks for the reply. Routing is one part, but installation also worries me. Will the binding follow contour if it's not straight?
cheers
-
Hi,
any advice on installing the binding around armrest contours? It will be a gentle contour, but still, I'm concerned about getting the binding to follow it. Something like this
Thanks!
-
I need only a little to stain the travel sized guitar and neck before finishing them with tru-oil. Anyone has some extra?
Can do paypal, located in NY
Tnx,
Bane
-
I'm doing a travel guitar based on gibson road worn LP with mahogany body and neck. Any ideas how to do that finish?
Do I need to stain the body in brown a bit? I planned to use gunstock oil and wax to get the satin, natural finish. Won't go for shiny, already have that on other guitars


Thanks,
Bancika
-
I repaired some strat clone which seems to still have a hum in positions 2 and 4 which leads me to think it might not be reverse wound. Would hum cancellation work if I just swapped hot and ground wires?
Tnx
-
Thanks!
I do engraving in a local design shop here in Serbia. Doing one fingerboard costs 10-20$ depending on complexity.
-
Hi,
I need to make a design for inlays to be engraved with laser (so almost anything is possible). Guitar will be 7 string, RG style with one pickup only.
Any ideas what I could engrave? Some sorts of vines come to my mind, but still not sure
Cheers,
Bancika
-
Thanks for the answer, I'll start with 3.5mm and change it if it feels wrong.
Cheers
-
-
How about these
aluminum wraparound

Another wraparound

Schaller

Similar one with fine tuning (I have it on one of my guitars)


-
Hi guys,
I started 7 string project and I need to make a nut for it (nut width is 49mm like petrucci musicman 7 model). My question is, how much should E string be spaced from neck ends. On 6 string guitar it's common to have it at about 3.5mm, does that apply here as well? I ask because making outer spacing 3.5 mm will leave less space between strings compared to 6 string models.
Thanks,
Bane
-
Slotted would be fine, don't care about radius. I'm in the US
Thanks!
-
Those I usually find are only 6cm wide so they can't do it.
Thanks!
-
It looks great! The only thing I hate on S series is the switch, it's so ugly and bulky...but if you like it that's ok
Cheers


Paint code for Suhr graphite metallic
in Inlays and Finishing Chat
Posted
Can anyone point me in the right direction please?
Trying to do something close to this finish in the attachment. My car finishing guy wants to help but needs a paint code for the mixers.
I'm guessing this has metallic flakes in the clear coat and the base is black or very dark gray. Does it need additional clear coat layers above the flake clear coat?
Thanks