

Search the Community
Showing results for tags 'bridge'.
Found 18 results
-
 so, a few days ago i replied to an add for a "beginner japanese guitar" because i was looking for a deal on a hard case for another guitar of mine. $30 for a case is a good deal, right? free "beginner japanese guitar", too. score. i didn't even look at it when i was at the guy's place. i haggled him for some free picks (he didn't have anything thicker than 1 mm.) but, when i got the guitar home, i realized it's a solid body takeharu guitar built in 1971. yeah.. i know it's solid body due to the grains, and also due to the soundboard. unfortunately, the bridge was falling off and it looks like there was some repair to the cross-section underneath. but, whomever tried to glue the bridge on seems to have done so very poorly - and repeatedly. it was clear from the start that he used some kind of crazy glue, but when i got the bridge off i actually found three different types of glue on it, none of them applied very well. i'm guessing that the crazy glue was try number three, and it doesn't look like it was ever clamped. yeah. so, i'm hoping that if i just glue it back on right with the right kind of glue and a good clamp it should sit tight. the operative word is hope - this is a 50 year old guitar, and i don't know exactly what's been done to it or what's wrong with it. the guitar appears to be a martin copy with a solid spruce top with lines running parallel to the strings. but, when i took the bridge off, i took some wood with it (damned crazy glue.) and it seems to have uncovered some kind of secondary piece of wood underneath the bridge. now, i'm imagining that this was put there as reinforcement, but i don't exactly understand why. if i look carefully underneath this wood, i can see some grains running in the right direction, so i'm tempted to just rip the layer off and glue directly, even without knowing why it's there. but, i'm concerned that it might be the plate rather than the wood. if i pull my hand underneath and feel around, i'd guess that the width of the plate is too thin, and it must be the body. but, that's just intuition... i've been playing guitar for a long time, but i only do repairs when i have to, and i'd appreciate running it by somebody. what do you think - did i hit the body underneath some kind of added plate, or the plate underneath the body, as i was scraping? 1) wood peeking out: https://drive.google.com/file/d/17KKkfjqcd2tY8oXL91FO82ZykmT-XC1D/view?usp=sharing 2) soundboard: https://drive.google.com/file/d/1mzLm5eLqCuJbCOB0fUw3_q9QXVhhAStU/view?usp=sharing now, if i've hit the body, i'm going to scrape the wood off and glue it flush. but, if i've hit the plate, what's the better idea here? if the logic is that this is worth saving because it's solid body, is pasting some kind of plate in going to defeat the purpose? further, if i'm concerned about action on an old guitar like this, wouldn't it be better to keep it lower and just glue it to the plate, anyways? is that structurally terrible, or just merely inadvisable?
 -
For as long as I've been building guitars and basses, the classic Hipshot hardtail bridge has been the mainstay for builders needing a friendly, easy-to-implement 6, 7 or 8 (and now 9!) string hardtail bridge. This classic hardtail became synonymous with single-scale extended range instruments, gracing guitars by both amateur and boutique custom-builders alike. You could even suggest that it played a pioneer role in driving the development of these instruments and it's still just as popular over ten years later, regularly appearing on member builds here on ProjectGuitar.com. Hipshot have released a new alternative to the classic hardtail, adding a compelling new tool to a builder's armoury! ----==---- The simple unassuming exterior hides a whole lot of brass.... Overview The Hipshot Ibby HM is a part-for-part retrofit for the Ibanez Gibraltar Standard I and II, with a range covering the 6, 7 and 8 string versions in chrome, black and gold finishes. As is the norm for Hipshot, the bridge's baseplate is milled from a block of solid billet stock; in this instance brass. All one has to do is unscrew the existing bridge and drop in the new part with zero modification required. High mass components are part of a tone chaser's armoury of tricks in perfecting the sound of their instrument. Whilst some advocate lightweight or other specific materials for dialling in or restraining certain aspects, the visceral sonority that brass add to a guitar or bass's timbre is the strongest draw for most. In its intended form of being a retrofit for Ibanez Gibraltar bridges (cast zinc alloy?) the use of a heavy brass baseplate unlocks aspects to an instrument's tone that simple die-cast materials don't. Fine as many Ibanez instruments can be off the shelf, basic upgrades such as this only make them finer. However....if you're reading this then the chances are you're not interested in this unit as a retrofit item, and want to know how it fares as the basis for a custom instrument. For the most part, the same things apply. Brass is a fantastic material for a bridge, and a great choice to spec in from the outset. ----==---- Fundamentally, the bridge is a simple string-through-body unit fitted individual steel saddles. The baseplate is patterned to match the string-through holes of the Gibraltar bridges it is intended to replace, with six in-line holes and additional staggered holes at either side. These staggered holes allow the saddles for lower strings to intonate further rearwards (lower strings) without creating a sharp break angle over the witness point. Staggered holes feature on both sides of the baseplate, allowing it to be used in both a left and right-handed context. As with any string through body setup, the instrument will require a set of ferrules or a string retainer block to be fitted at the rear of the instrument. For instruments that refuse to co-operate when intonating, Hipshot also include additional adjustment screws of differing lengths to ensure you can dial it in just so. ProTip: Use the bridge itself to mark out ferrule locations on the rear of the body....just remember to get the staggered holes on the correct side! The baseplate mirrors the staggered holes for both righties and lefties! The saddle height adjustment range is broadly similar to the classic hardtail, with a minimum saddle adjustment of 0.33" (8,4mm) from the face of the instrument through to 0.5" (12,7mm) max. This falls almost exactly in between the ranges of the 0.125" and 0.175" base hardtails. Intonation is readily-accessible from the rear via six screws. String spacing is an even 10,7mm (0,423") centre-to-centre for 6, 7 and 8-string models. This slightly wider spacing may require the use of an F-spaced pickup (DiMarzio term) or trembucker (Seymour Duncan) pole spacing. In general it is right on the margin, so either pole spacing should work fine. This is slightly wider than the classic Hipshot hardtail bridge (10,5mm/0,416"), which I presume is down to the spacing on the Gibraltars. Easy access to intonation adjustment. The bridge mounts to the body using two finish-matched screws (supplied). For additional bridge-to-body coupling (a tone-chaser's favourite) these could easily be swapped out for a pair of machine bolts (M4 or 5/32") with threaded inserts sunk into the body, or even through to a custom-made string retention block at the rear of the instrument. It even looks heavy.... The fit and finish is what we have come to expect from Hipshot; the "show" faces are carefully milled and mirror-smooth with little in the way of machining marks or tool artifacts visible in the unseen areas. All hard edges are broken nicely resulting in a comfortable-feeling unit against your hand. Additionally, the string through holes in the baseplate have a softened lead-in to eliminate string breakage. The plating is consistent and clear, with those nicely-broken edges ensuring durability. Overall the unit is smooth and unobtrusive. The 6-string chrome version reviewed clocks in at a whopping 195g/6,9oz; around a third heavier than some zinc alloys! My only gripe is that the outermost saddle adjustment screw's clearance clips into the otherwise smooth internal curve out of necessity to the design. Certainly no issue beyond a minor point of aesthetics. "She may not look much but she's got it where it counts, kid" Conclusion It's maybe true that you can have too much of a good thing. The classic Hipshot hardtail bridge is still as relevant as ever, but ubiquity often makes it difficult to find something that looks different to everything else. Outside of its intended retrofit purpose, the Ibby HM delivers just that; a familiar drop-in format with a fresh alternative look on top of the consistent standards expected of Hipshot. The Hipshot Ibby HM bridge range is available directly from Hipshot (hipshotproducts.com) and via distributors worldwide. Watch our for the bridge appearing in one of our Season One YouTube build videos!
-
-
Definitely still a WIP and I don't have a real one to take measurements against so this is strictly pieced together from the installer pdf. If anyone has more info on the saddle dimensions please let me know. I don't have access to post to Uploads, otherwise I'd have posted it there. Evertune_FT6_v4.dxf
-
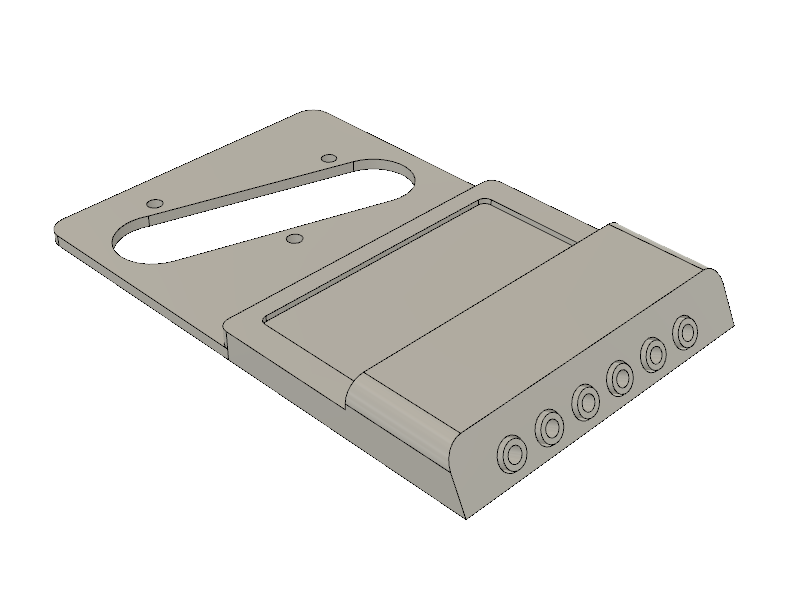
Let's start from the beginning: why a headless? I've always like the small and confortable guitars like Kramer Baretta, Washburn Steve Stevens and Nuno Bettencourt, and finally Music Man. To have a small body the bridge should be positioned as close as possible at the end of the body. Consequently it must have a small headstock not to unbalance the design. In a headless the bridge is placed at the end of the body to be able to easily access to the intonation adjustment, and the headstock is so small that you can't see it. I've never been interested in the egonomic design guitars. A guitar should be confortable to play (I had a Jackson Randy Rhoads and I know what it means plays an unconfortable guitar) but it should be also nice, otherwise we'd all have a Klein. Design a guitar trying to make an original design is something very difficult. After the aluminum GL replica I decided to try to realize a new original guitar, this time entirely made of wood. I decided to create an asymmetrical design, a carved top, and ribs that I have always liked in Parker guitars. I start from two different design: a single cut and a double cut which share the lower part of the body. I derive from these two design the headless version: hence four different guitars. It took me about a year to get to this first guitar. I've had two body blanks: a poplar one and a flamed poplar one. I split them so you get two guitars with figured top. Once glued them I cut out the body. As you can see it came out a hole in the top. I have to fill it. at this point, however, I have to hide it with the paint. I decide that I will use a sunburst. I draw directly on the wood the curves which the will report to CAD. Here begins the most time consuming and hard work...
-
Hi, this is my first post on this site so I apologize if this topic is misplaced. I'm building a custom RG and I am going to use the Gotoh ge1996t bridge, but i can't find the routing dimensions for the actual cavity. Does anyone know these dimensions or have a link to a plan? Or does anyone know for sure if it will fit in a OFR cavity?
-

hipshot Hipshot Tone-A-Matic Guitar Bridge/Stoptail
Prostheta posted a product review in Guitar Parts
Hipshot are a savvy bunch, and to bring a new bridge system onto the market you have to know exactly the features it needs for the end user without making it a stiff and boring-looking item, or worse....an overburdened contraption that only a marketer can save. The Tone-A-Matic effectively addresses the most common issues found in traditional TOM-style systems with a neat attractive unit; both a one-shot retrofit for Nashville-style TOM bridges and a simple-to-implement high grade boutique bridge for new instruments. Generally here on ProjectGuitar.com, the average reader is a builder, so let's get the retrofit stuff out of the way first. After all, this is the primary market for the Tone-A-Matic.....then we can concentrate on the really fun stuff to show how well this bridge works for us in new builds! ----==---- Retrofitting, or "when they didn't do it properly in the first place" Primarily, the Tone-A-Matic is aimed squarely at owners of guitars fitted with Nashville/Epiphone/import-style bridges; those with standard large-diameter adjustment posts rather than the ABR-1 thumbwheel style. This isn't to say that you can't pull out that weedy ABR-1 and upgrade, however that route will involve a careful invasive surgery. Like all of Hipshot's products, the system comes complete with everything you need, including replacement Metric (M8) bushings should your existing ones happen to be a smaller M4 or Imperial threading....or simply if you prefer to renew everything. Optionally, Hipshot can provide Imperial-threaded posts should you be transplanting onto say, an American-made Gibson Nashville. Having all of the parts and setup tools you need right there in the package gets this changed over in one sitting, and is super convenient. None of this "getting the parts in, only to find you need to buy other bits" time-wasting. If you can operate an Allen key, you're golden. Height adjustment of both the bridge and stoptail studs are both managed using the same included 1/8" Allen key whilst the bridge locking mechanism uses a 1/16" key. Obviously the line was drawn at including a screwdriver for intonation! Tailpiece (top) and bridge (bottom) studs/bushings - click to enlarge Stud spacing of the bridge matches the Nashville-style configuration, with a distance of 2-15/16" (2,94"/74,6mm) whilst the stoptail is spaced 3,2"/81,3mm. It is worthwhile confirming that your instrument matches this spacing, since exceptions can occur out in the wild. ----==---- As per Hipshot's usual modus operandi, the parts are precision milled from solid high-grade alloys (in this instance, aluminium and stainless steel) ensuring a durable, effective top-drawer unit. Rather than slavishly copying the well-worn (and somewhat mundane) TOM look, Hipshot elected to produce an aesthetically-elegant unit, reminiscent of those found on some classic Japanese instruments of the 70s/80s. (the best-looking TOMs ever in my humble opinion....) . click to enlarge Bridge detail - click to enlarge Tailpiece detail - click to enlarge click to enlarge The bridge has a mild radius milled over the top face side-to-side and front-to-back with saddles placed to match a 12" radius. Hipshot fit saddles notched and gauge-sized to create a spacing of .406" string-to-string, however saddles are also available un-notched (or left-handed) should you want to tailor saddles to your own personal spacing scheme. Front view - click to enlarge Intonation of each saddle is carried out from the rear using a small Philips screwdriver. It's notable that the adjustment screws are offset from the centre of each saddle keyway, making for easy access between the strings rather than being blocked by them as on standard bridges. The offset adjustment screws are also responsible for a unique feature of the Tone-A-Matic, which may not be perfectly obvious on the first inspection (quote from Hipshot product description): Many people might gloss over this simply as an exercise in marketing speak, however this is a very understated and fundamentally important aspect of the design. It can better be explained through the following diagram: A combination of the offset adjustment screw and specially-shaped saddles allows slight pivoting motion around the adjustment screw's thread. Downward pressure from string tension over the saddle forces the saddle-to-bridge witness point down into the body of the bridge itself. Physically, this produces an efficient, tightly-coupled system and in theory, direct exchange of energy between the vibrating strings and the bridge body. This is what we want from a bridge. Traditional TOM saddle designs often lose this crucial direct coupling, with that energy needing to travel through more components which are often far less "locked together". Whether this makes the bridge sound better is of course up for discussion. What counts, is that if it is possible to improve sound through better coupling, then this is exactly how you go about it. High quality solidly-locked components with the shortest paths possible for energy transfer to reduces losses within a mechanism. Detail of saddle design - click to enlarge In addition to the capacious intonation range, the entire bridge itself is able to be offset on the mounting studs by around 7/32" (5,6mm) through milled slots on the underside and locking set screws. The Tone-A-Matic system comes complete with longer and shorter set screws, allowing you to choose the correct sizes for an invisible fit. Again, this locking mechanism strongly couples the bridge to the studs. Detail of bridge offset mechanism - click to enlarge Detail of bridge offset mechanism range - click to enlarge The normal procedure for most TOM setups is to offset the bass side of the bridge backwards in order to eak out the most from available intonation range. From a retrofitting standpoint, we don't need to have this offset any more. The Tune-A-Matic is more than capable of handling the intonation range required compared to original units. Instead, the Tone-A-Matic can occupy an existing offset stud pattern but be re-aligned so that it is perpendicular to the centreline....if you want! As a builder, figuring out ideal placement of a Nashville or ABR-1 bridge requires us to calculate in the offset to compensate for the limited intonation range the traditional units offer. ABR-1s are notoriously fickle, requiring that the bass-side of the bridge is offset backwards simply so that the instrument can be intonated at all. Nashvilles are more relaxed in this regard, but still need a little babying to find their ideal location. Quick Tip: The Tone-A-Matic makes this consideration for bridge compensation meaningless. Line your stud centres across a point 1/4" (6,4mm) back from the theoretical scale intonation line of your instrument. To confirm why this is so, consult Hipshot's comprehensive specification sheets. A welcome addition to the stoptail is the inclusion of two strong retention magnets. These simply prevent the stoptail from falling off the instrument during occasions when the instrument is without strings. Whilst not a ground-breaking innovation or even something that it is necessary, that Hipshot added this into the stoptail design shows that this is not a product where corners were cut for purposes of economy. Stoptail magnetic retention - click to enlarge click to enlarge The Tone-A-Matic is wider than traditional TOM designs, meaning it can be shallower without reducing unit strength. Not having bulk under the body allows the bridge to be laid closer to the body for slighter neck angles without need of recessing, or used higher as commonly found on more traditional TOM-style instruments. Bridge height comparison - click to enlarge click to enlarge Conclusion The market for TOM-style bridges is hugely competitive, with top-drawer offerings from ABM, Graph Tech, Tone Pros, etc. vying for sales through tit-for-tat marketing speak, voodoo and intangible claims. From a personal standpoint, this has always been a complete turnoff for me. Unless a claim can be proven or have some demonstrable basis in reality, it is likely just marketing. That's how the world works, and how company X spends big dollars to get their hand in your wallet. Hipshot's introduction of the Tone-A-Matic has been comparatively free of this thin veneer of marketing and presents a real and very solid product showing the quality engineering and pragmatic thought behind the design. Hipshot bridges always tend to be highly configurable and sell themselves off good old plain capability and stellar rep. That's what counts, and this is where smart money should be spent. I'm looking forward to seeing this bridge on more builds in future! A solid showing from the guys and girls over at Interlaken. Perhaps we'll see a wraparound one day? ----==---- At the time of writing, the Tone-A-Matic is available via the Hipshot Products website and should be filtering through to your local Hipshot distributors. -
Hey all, new to this site and hoping someone on here can help a brother out! Yesterday I replaced the bridge pickup in my telecaster (a Seymour Duncan Hot Rails) with a Rio Grande Vintage Tallboy (single coil), and I have since lost all connection in Bridge and Middle positions. I redid the solders, and to no avail -- still no signal coming through. The switch is brand new as well, and it was all working before I took the Hot Rails out, so I am at this point dumbfounded as to what the problem may be. When I was troubleshooting, I came across this -- when I am in the Middle position, I am getting signal from the neck pickup as long as the hot wire from my bridge pickup is not touching the switch. The moment I touch the hot wire from my bridge pickup to the switch, the signal gives out. Does this indicate a short circuit? Hoping someone on here has some experience they could share, or any ways I could troubleshoot this to see what the issue is. Thanks for your time -- any assistance is appreciated.
-

Headstock Angle / Bridge Height for Dummies
Wireboy posted a topic in Solidbody Guitar and Bass Chat
Hi all! I am new here, just getting started on my first custom electric guitar and thought I'd ask for a quick bit of advice as I am concerned that I have made some mistakes already. I am building a guitar from parts that I am getting from a variety of places; a Gibson RD shaped body and a 25.5" scale neck so far. I am basing things on the RD of my youth that I sold for some stupid reason that I can no longer remember. The first issue I am wrestling with is neck angle. The neck that I purchased has none whatsoever as that was all I could find at the time with the longer 25.5 scale of the original RDs, which I think may have been a mistake since the body has pre-drilled holes for a stop tail bridge. Assuming the pre-drilled stoptail holes mean I am locked into a tune o magic bridge, does this mean I am going to have to angle the neck, which sits os so nicely right now, so as to get acceptable action? What about string trees for pressure against the nut? Can anyone recommend a low profile bridge that I can use with a standard Gibson style stop tailpiece which would be low enough to allow me to have acceptable action without angling the neck? If so, is there anything I can do to get the non-angled headstock working? String tree perhaps? Would I be better off scrapping this neck, writing off the $125 as lesson learned and getting something angled? Please excuse any obviously stupid questions! Any advice would be greatly appreciated! Thanks! -
-
File Name: Hipshot 8-String Fixed Bridge File Submitter: curtisa File Submitted: 24 Jun 2014 File Category: Bridges DXF drawing of Hipshot 8-string hardtail bridge for models 41160 (0.125" floor thickness) and 41165 (0.175" floor thickness). Dimensions in mm.
-
-
File Name: Hipshot 7-String Fixed Bridge File Submitter: curtisa File Submitted: 24 Jun 2014 File Category: Bridges DXF drawing of Hipshot 7-string hardtail bridge for models 41150 (0.125" floor thickness) and 41155 (0.175" floor thickness). Dimensions in mm.
-
File Name: Hipshot 6-String Fixed Bridge File Submitter: curtisa File Submitted: 24 Jun 2014 File Category: Bridges DXF drawing of Hipshot 6-string hardtail bridge for models 41100 (0.125" floor thickness) and 41105 (0.175" floor thickness). Dimensions in mm.
-
-
product review Hipshot SuperTone retrofit bass bridge
Prostheta posted a product review in Guitar Parts
Up until 1973 Gibson's bass bridges were fairly primitive and somewhat fault-prone but still relatively advanced in comparison to those in use by Fender. The introduction of their "three-point" bridge eliminated most of the existing problems of older bar or "two-point" bridges but introduced many of its own quirks. Still in use on modern Gibson and Epiphone basses, the three-point bass bridge is a proven design albeit mired in its traditional roots with much room for improvement. Up until the introduction of the SuperTone, upgrades for Gibson basses were near non-existent. The wide mounting point footprint, obligatory Gibson neck angle and modifications required to accept a new unit complicated the issue. More often than not any of these would leave the instrument devalued and impossible to restore to original spec. Hipshot certainly need little introduction to even the least experienced instrument modifier or builder. Their extensive history in producing premium hardware and drop-in retrofit upgrades makes them a regular byword and a go-to company. Hipshot are based in a substantial manufacturing facility located in Interlaken, NY which allows virtually all stages of production from material stock to boxed item to be carried out under one roof. As would be expected of dedicated retrofit items, Hipshot's SuperTone bridges match original mounting patterns for both two-point and three-point instruments. Simply removing the existing parts and dropping in the new unit is as complicated as fitment gets. By using the original mounting point locations and in-situ studs, owners of vintage instruments can confidently maintain 100% of the instrument's value by being able to return to stock invisibly. Common weak points with the original Gibson designs include two-point bridges bending forward under string pressure, saddles/intonation screws falling out three-point bridges, intonation difficulty and primitive adjustability. As is a common theme with Hipshot bridges, the SuperTone provides comprehensive independent adjustability in all dimensions with components sprung or tensioned against the bridge. SuperTone bridges are CNC milled from solid metal stock, in this case high grade Aluminium. This produces a tough, lightweight bridge with high tolerances and fantastic finishing in comparison to the rough variability of cast parts. Edges and corners are milled smooth with no seams, sharp or fragile areas. Saddle keyways share much of their design with the established Hipshot A-style bass bridges. Each keyway consists of a milled slot housing a large independently-adjustable saddle block which is itself milled from solid stock. Adjustment is possible in all three dimensions to dial in specific string geometries. The rear of the bridge is slotted allowing either bridge string capture or through-body stringing if the instrument has that option. Saddles possess grooved barrels instead of sharper notched string witness points virtually eliminating string breakage at this point. With the original bridges the saddles were fixed in height and radius or were compromised of a fixed "bar" witness point. This required that the entire unit be raised or lowered via the bridge posts. Primarily this restriction meant that instrument setups were coarse and a balance of compromises in setup geometry. Less noticeably the arrangement of some bridges - such as the three-point - also produced a weaker bridge-to-body coupling due to reliance on string tension holding the otherwise-loose bridge in place to the posts. The SuperTones lock down tight to the body of the instrument via two finish-matched mounting bolts producing the best coupling possible whilst the independent saddles a capacious level of intonation and geometry adjustment not previously feasible. Access to intonation adjustment screws is via the rear of the bridge. The screws are Phillips type in comparison to the slotted types of the original which prevents the problem of flat-bladed drivers slipping and scratching the instrument. The popular Hipshot saddle design is individually adjustable in height with ~1/3" (~8mm) of range via two hex set screws. The saddle barrels themselves can be unlocked via the third set screw with provision of side-to-side adjustment in a range of ~1/8" (~3mm) depending on string gauge. Whilst not designed for massively altering string spread, it does allow string spacing to be adjusted should the player want to take into account favourable string-to-string/equal centre spacings. As a retrofit item, the SuperTone admirably solves the shortcomings of the original bridges and introduces adjustment capabilities not previously possible. Although visually quite different to the originals, the appearance maintains a blend of both refreshing modernity and classic automotive age looks which are as pleasing on a new Thunderbird as on a 70s EB-0. All adjustment tools (other than a Phillips screwdriver for intonation) are provided along with two sets of mounting bolts to match both the Imperial and Metric threads. Setup is a breeze and free of frustration due to the excellent accessibility of all adjustment components even when strung up. From the standpoint of a custom luthier, the SuperTone bridges present interesting design options for different visual ideas to the norm. The intrinsic "Gibson nature" of the bridge requires a little forethought for correct instrument geometry however. A slight neck angle to maintain low body-to-neck join height or a small recessed footprint may be necessary. The substantial mass of the bridge lends a muscular design point which many bass designs would benefit from. As with most Hipshot's hardware it is difficult to find negative points to say about them. Their customer services guys know the value of listening to customers and apply this directly into the products without the huge inertia found with large corporations. Hipshot's email support before and after purchase is definitely key to their loyal customer base. With Hipshot carrying everything from design, manufacture and sales under one roof they definitely have the capacity to perfect their products as is demonstrated in items like the Supertone. If I were forced to hunt for negative points purely to provide balance for the huge number of positives, I would perhaps suggest adding a pad for the underside of the bridge to cushion the baseplate from pressing into soft or fragile finishes when locked down flat to the body. I can see this more being an issue for owners of vintage instruments. Most of the basses that these bridges are designed for command prices well into four figures therefore protecting the finish of investment quality instruments is important in maintaining the value of a bass that still works for a living. I also found that adding a pair of nylon washers underneath the heads of the mounting bolts was beneficial in helping keep them secure against loosening and preventing overtightening. The final twist of beyond "finger tight" snugs the heads secure. It should perhaps be noted that long-term use in exposure to direct sunlight may leave a light shadow underneath the bridge as the finish fades or reacts to UV. Overall I am surprised that new Gibson basses are not coming with this hardware as standard or at the very least as an option. If I came into possession of a stock Gibson Thunderbird (circa USD$1500?) with the original three-point bridge I wouldn't hesitate to upgrade it with this simple USD$120 bridge. Whilst it may sound and play well straight out of the box, without a doubt the addition of a Supertone puts it into a completely different league of instrument on both counts. In closing, the Supertone is a quality piece of hardware from a respected company that transforms Gibson basses into hugely adjustable, fuller-sounding and most importantly better-playing basses. For the builder these bridges offer a classy option for custom designs. I'm already itching to get one of the two-point Supertones into a future instrument. The three-point model installed here was acid fumed to add forty years of road hell; the modern styling certainly does not look out of place with a little antiqued mojo! SuperTone bridges are readily available direct from Hipshot at www.hipshotproducts.com or from many resellers worldwide. Bridges are available in Chrome or Black finishes with the three-point bridge also available with genuine Gold plating. Want a mix of parts such as a black base with gold saddles? Have a quick chat with the guys - Hipshot are some of the nicest in the business and love custom ideas. Tell 'em ProjectGuitar.com sent you :-) -

First Time Builder, Bridge Anchor Question
Bearzwud posted a topic in Solidbody Guitar and Bass Chat
A brief introduction, I am a skilled furniture builder and a musician of many years, but first time guitar builder. I received a guitar kit via the internet to try my first build. Its an SG kit. When I was test fitting all the pieces, the bridge and tail piece anchors fit loosely in their pre-drilled holes. I can install them and remove them freely. Now I'm pretty sure they should not be that loose. So, question being, what can I do to fix this problem? I am assuming as a craftsman I can, 1. Fill the holes with dowel material and re-drill the holes. 2. Epoxy the anchors in their hole. 3. Exchange the guitar body for another one from the manufacturer/seller. Thanks y'all -
Have been in the business of making superb instrument hardware for almost thirty years, the Hipshot name is synonymous with refinement, high quality and experience. Most importantly Hipshot maintain friendly two-way customer contact which - being fed back into the products - ultimately makes the products the result of players, luthiers and of course the expertise of guys at Hipshot. Products are manufactured and personally inspected at each and every process rather than dropping off the conveyor into the box. Aside from certain specialised processes such as gold plating, every process from the cutting of bar stock to final shipping is carried out in-house at Interlaken, NY. One of the more recent products in their line-up is this classy bass bridge system which co-mingles comprehensive adjustability, distinctive looks and solidity. The D style bridge is a two-part system consisting of a solid lockable bridge and tailpiece. The system is available with a range of common string spacing options, high quality finishes and in both four-string and five-string versions. Additionally the bridge itself can be bought as a standalone unit sans tailpiece for instruments using only string-through-body or alternative methods of string retention. Packaged, the system comes complete with all adjustment tools, threaded body inserts, mounting posts, through-body stringing ferrules (front and rear), nylon washers and alternative-length saddle intonation screws. All components (other than screws and springs of course) are machined from solid brass resulting in a feeling of substance straight out of the box. The noticeably weighty bridge sits on two height-adjustable posts which in turn are mounted to the body via two threaded inserts pressed into the body. Subsequent to basic height adjustment the body is then locked tight to the mounting posts via two hex nuts. Nylon washers ensure that these nuts remain secure. The tailpiece simply screws tight to the body using the finish-matched screws supplied. The design uses the familiar individual saddles found in other Hipshot bass bridges. Each saddle is adjustable in three dimensions; intonation, height and spacing. Intonation range is more than ample at a hair under 12mm/0.5" and is set from the rear of the bridge using a simple Philips head screwdriver. Unlike many other bridges the intonation screw is offset from the centre of the saddle, resulting in adjustment that doesn't require finagling around obstructions such as the string you are attempting to compensate! Two set screws either side of the string allow the saddles to be adjusted from flat up to a radii tighter than those found on vintage Fenders. Located towards the rear of each saddle is a third set screw for locking/unlocking the string witness point barrel. Unlocking this allows relocation of the barrel by pushing the string from either side giving additional control over string geometry should the player prefer equal string spacing centre-to-centre or string-to-string. It is more than likely that the initial intention for the D style bridge was specifically for custom instruments. It is however not unrealistic to expect it could be retrofitted onto existing instruments with a little modification work requiring nothing more than a ruler, hand drill and screwdriver. Given the comprehensive adjustment and setup range available, the system would happily work as a retrofit part upgrading the hardware on many standard basses. The unique appearance of this bridge sets it apart from the vast majority of bridges available to the custom builder/modder with the closest equivalent being the perhaps less elegant Warwick bridge, which of course screams "Warwick" and requires very specific surgery to install. The instrument onto which this bridge was installed was a long-scale Mahogany and Wenge set-neck 5-string bass with the pickups styled after the classic Music Man Stingray. In use the bridge is physically unobtrusive for what is undeniably a substantial item. I rarely play close to the bridge on my basses for pick or finger styles; I either anchor on a pickup, palm a little further forward than the bridge itself or thump/pluck/strum anchored closer to the neck. Forcing myself to palm ON the bridge whilst picking didn't reveal anything sharp, pointy or catchy. The only discomfort came from the weirdness that playing over the bridge gave me! Played acoustically with relatively old strings (to remove traces of "new string joy") the bass feels alive and open. I felt none of the "disconnect" normally found on instruments loaded with cheap/badly coupled hardware, bad neck joints or other weak links in the chain. On that basis the bridge definitely ticks the box as far as being "a solidly anchored resonant bridge" is concerned. Amplified and run open (pickup temporarily wired straight to a vol pot and parallel/series switch), the bass possesses a great deal of characterful growl when I dig in with fingers Burton style or hammer away a la Larry Graham. Mighty tone for such a basic circuit! The contribution that the bridge adds to this mix is difficult to quantify without a basis for comparison. Unplugged it definitely aligns with how the Aria Pro II SB-1000 feels, itself with its own high mass brass bridge. Notes "fill" the instrument if that makes sense? I am highly tempted to follow suit with the Aria on this bass and fit a brass nut.... Top shelf hardware naturally goes hand-in-hand with higher price tags, hence results always need to justify the expenditure. Bargain basement hardware is always a false economy for anybody wanting to imbue their bass with solid characterful tone. The bridge will more than satisfy the needs of the casual builder, repair/setup guy, pro luthier and player alike. The ease dialling in the perfect setup is akin to shooting a shotgun at a barn door and I managed my own within five minutes including a coffee break! This ease allows simple incorporation into instruments with all kinds of geometry whether one prefers a stepped body, high bridge, a larger neck angle for digging in or the flatter feel close to the body. The Hipshot D bridge system certainly satisfies my personal fondness for resonant brass hardware "in the chain"; this was again borne out after the first test string-up of the bass this bridge was fitted on; live and loud throughout the body (and my own body though my hip!) even before it got anywhere near being plugged in. That to me makes the mark of a mighty bass sound before any electronics even hit the instrument. Overall, the Hipshot D style bass bridge is an excellent option for a bass design with a head-turning unique look and flexibility to match. The units are available from numerous resellers worldwide or direct from Hipshot Products' website.


