


Quarter
-
Posts
391 -
Joined
-
Last visited
Content Type
Profiles
News and Information
Tutorials
Product Reviews
Supplier Listings
Articles
Guitar Of The Month
Links and Resources
Forums
Gallery
Downloads
Posts posted by Quarter
-
-
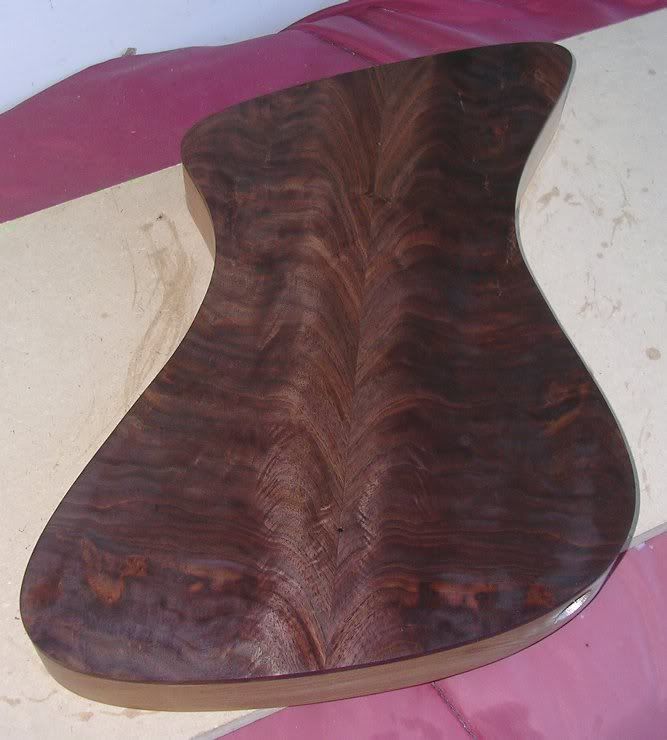
I'm pleased to say, she is done and I am extremely pleased with how she came out, both in looks, but more importantly her voice. As I said before, she is everything I had hoped and imagined.
The basic specs:
24" scale
3/8" string spacing
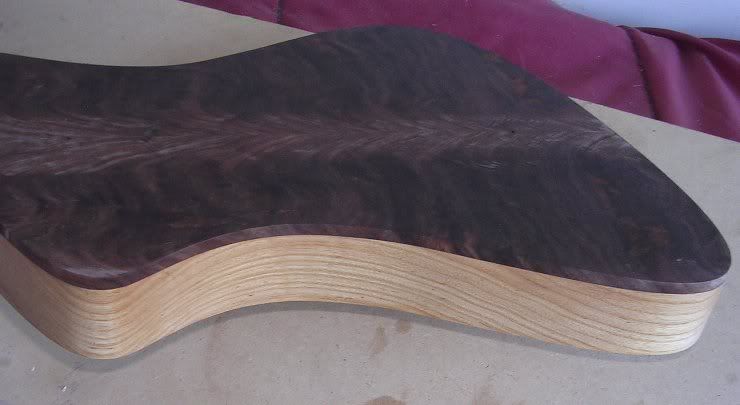
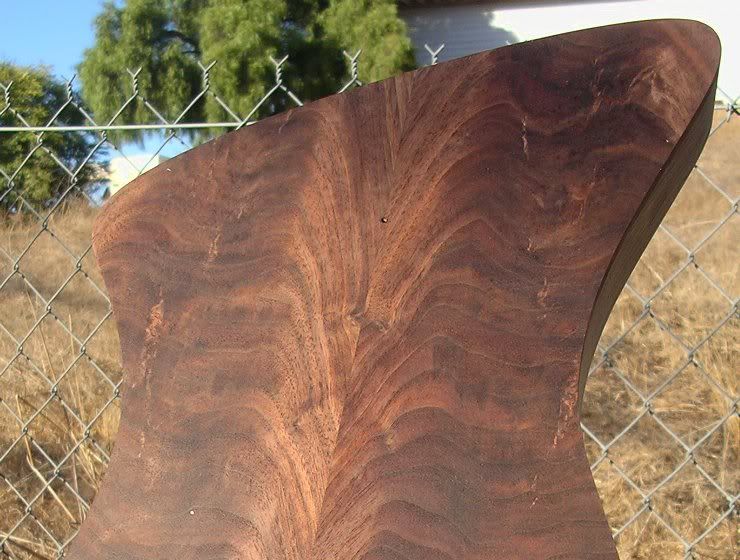
chambered swamp ash with a feathered black walnut top.
black walnut set neck with birdseye maple fretboard and head cap.
4 way rotary switching for versatility
matching knobs and pickup rings
string through set bridge with a phosphor bronze saddle
Grover Rotomatics
This one is kind of hard to get captured in pics, but here are a few that didn't come out too bad.
.
-
Thanks all
 Do you groove the rod for the bridge at all or just let the string holes hold them in place?
No groves, just the string holes to set the spacing. I do have to take care the first time its strung up to make sure that the strings are lined up correctly as once tension is applied, the brass string hole sleeves do deform a little and set the future position of where that string will naturally want to fall in place. That combined with a tight radius around the saddle locks them in tight.
I strung it up last night and will get some pics taken today. All I can say is I could not be happier, the tone is everything I had hoped and imagined it would be.
The pickups were a little pain in the rear, but after playing them, I'm happy I went for it. Major props to Bryan at BG-Pups for his contribution of vintage wire and copious amounts of magic pixie dust, dude has talent. He nailed the tone I was after first time, I would not change a thing.
-
I've had trouble with some oily rosewoods and True Oil, the natural oil gets into the mix and can take forever to cure, if it ever does. Wiping down with isopropyl alcohol first may help and a shellac seal coat should provide an effective barrier coat too.
-
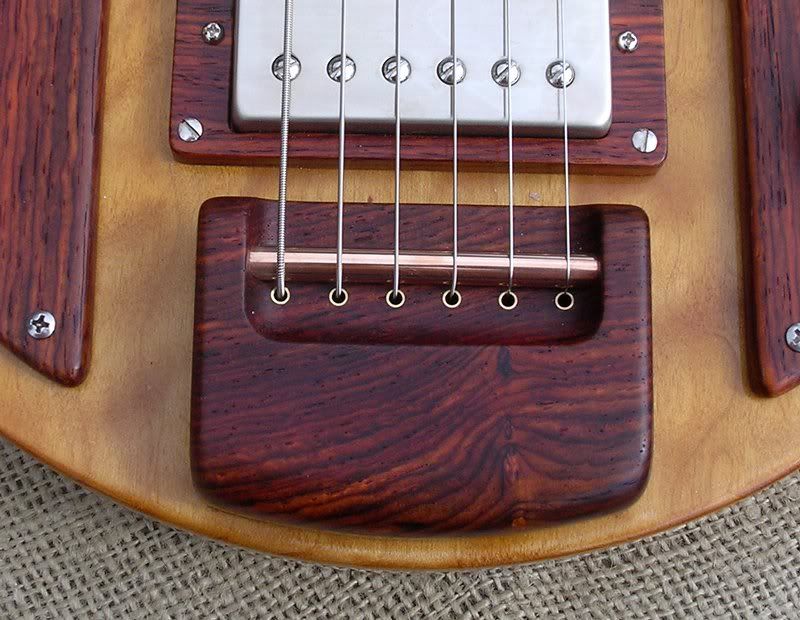
... what size rod do you use for the bridge?
Thanks ... the saddle is 1/4" rod. Depending on the tone I'm after, I generally use stainless steel of phosphor bronze ... this one is getting bronze like this version of that set bridge. Also in the second pic you can se how I leave the brass string hole liners long so they go into the body some. It makes it easy to re locate the bridge when its time to glue it down and also adds some forward shear strength.
.

-
Coming down the home stretch

-
You can buy brass sleeves to adapt split to take a solid shaft style knob
http://cgi.ebay.com/Adapter-Sleeves-5-Conv...=item20b4f8d6c4

I've also made them myself by drilling out some 1/4" od brass or aluminum tubing from the hobby store, 15/64", 6mm, bit is what you want.
-
Oddly enough (or not) I liked the hot bridge and the vintage neck best
Yea, Bryan is a talented winder and his gear is top shelf. And your selection its not odd at all really, hotter wound pickups in general will have a bit less highs which can work in a bridge position. Vintage wound in the neck will retain a bit more highs and tend to be a little more airy, a good thing in a neck. Cool thing about Bryan is he will custom wind them to taste too, just tell him what your looking for and he can dial you in ... bonus points for having realistic prices and being a good guy to deal with.
-
Thanks WezV, it was one of those head scratching moments followed by that all too brief moments of clarity.
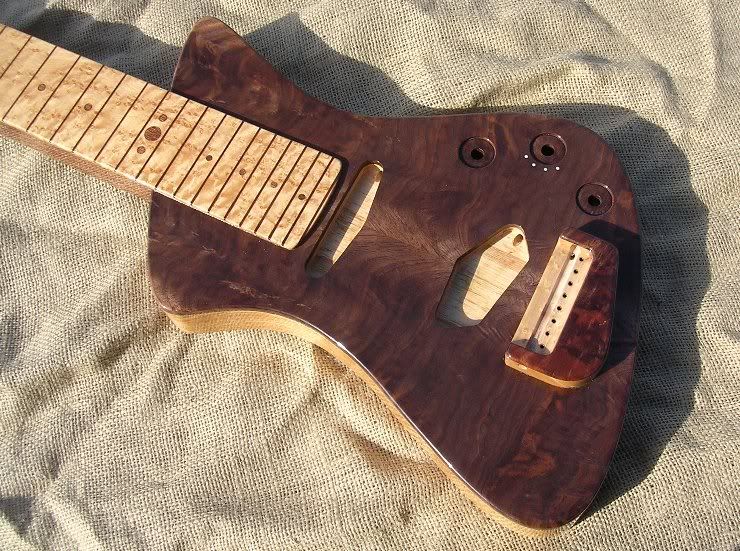
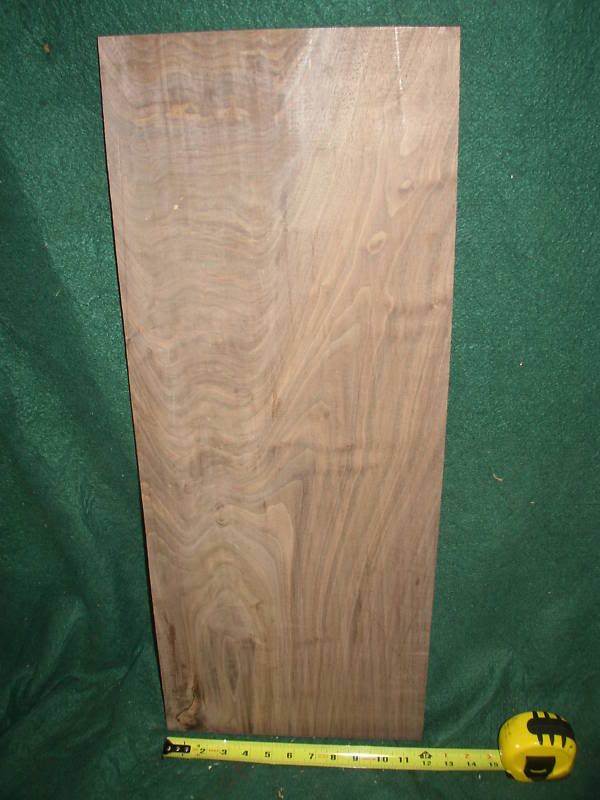
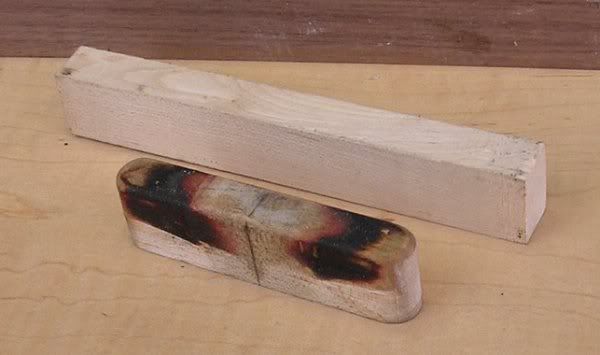
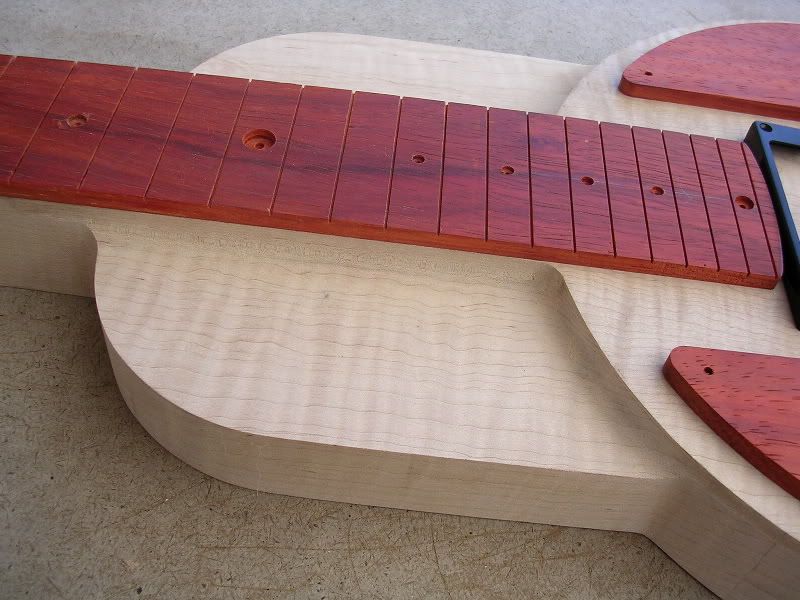
Body is chambered swamp ash with a crotch figured black walnut top. Here is a pic of the board I got the book matched top out of.
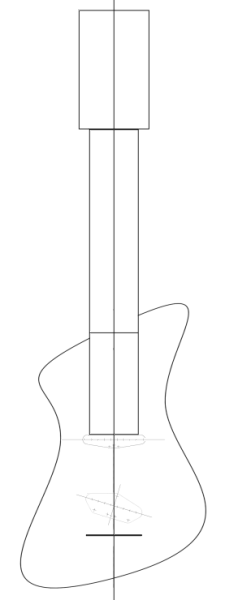
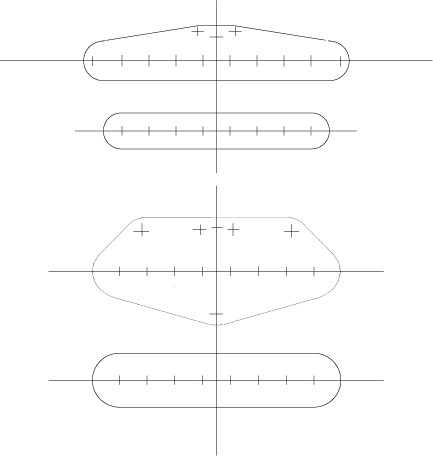
Here is the rough concept drawing I was going by
.
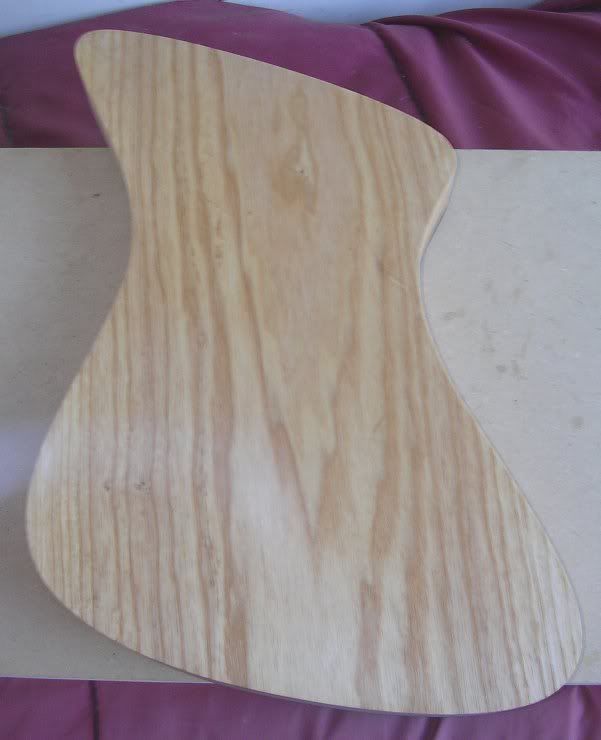
And some in progress pics
.

-
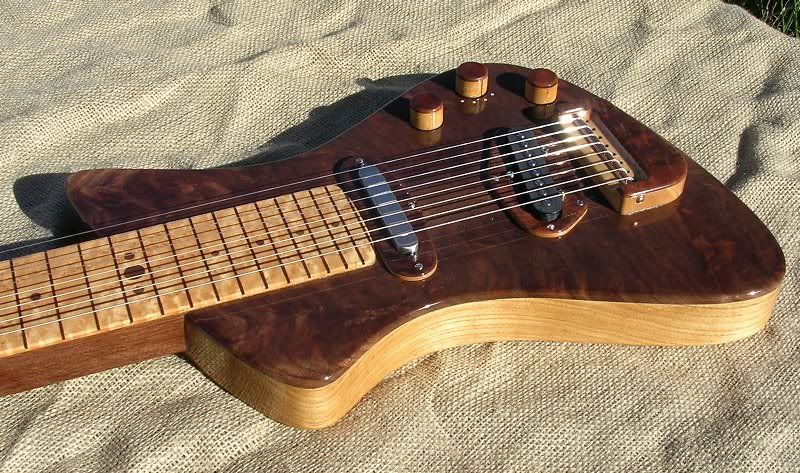
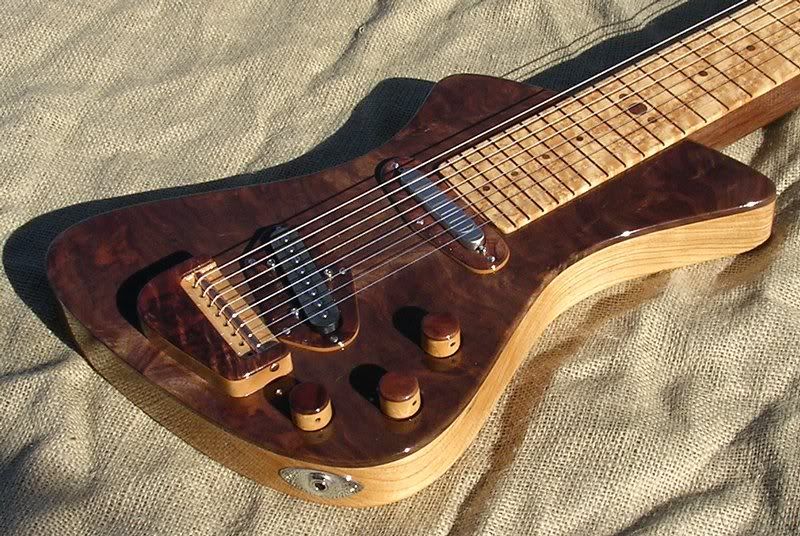
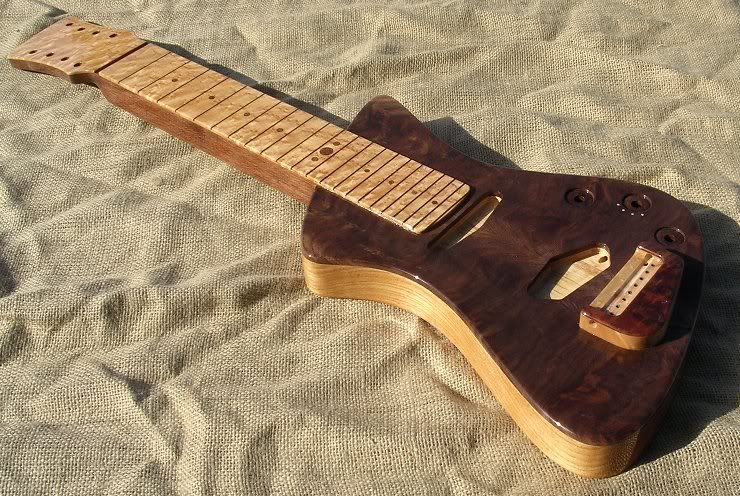
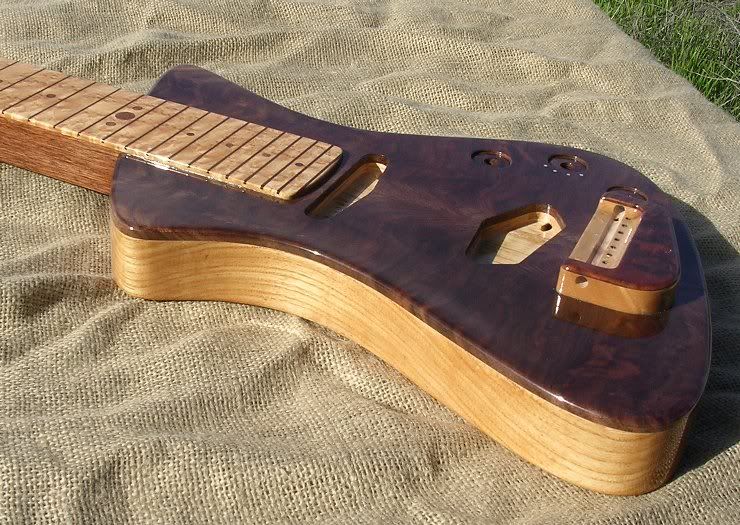
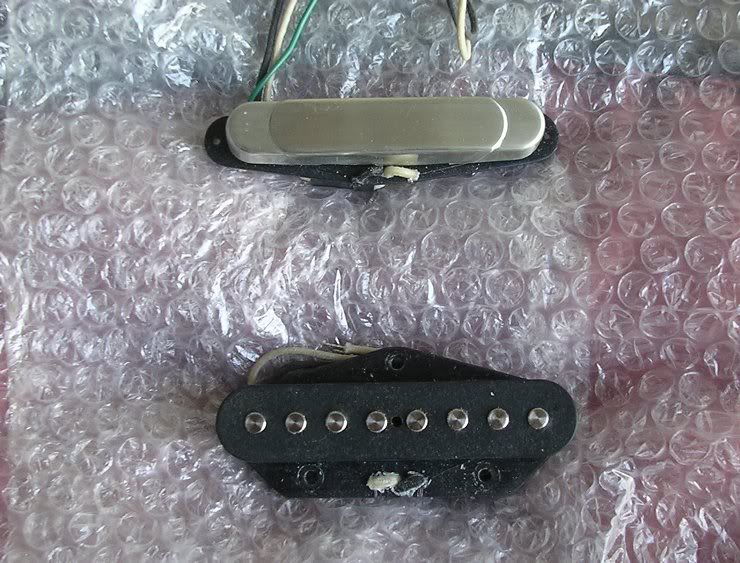
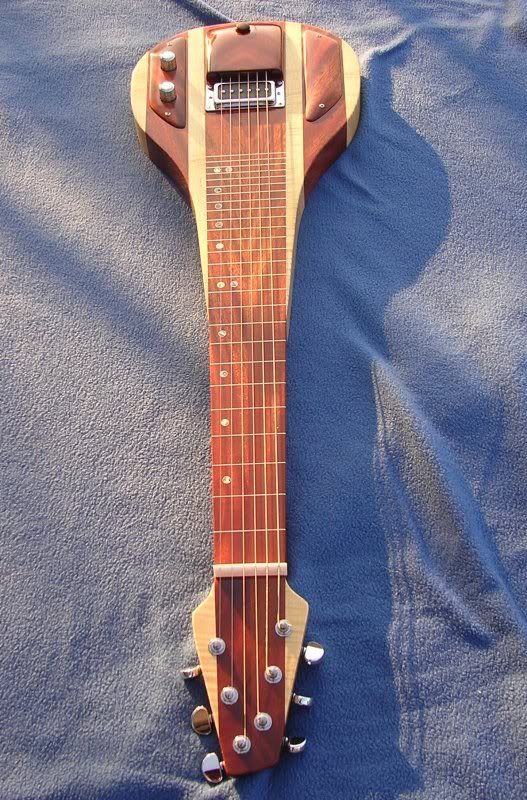
This has been a fun one, its almost done, but I'll start at the beginning ... so the story goes ... I have a customer that we were planning a lap steel build for based off some swamp ash and a set of BG-Pups Tele A3 Rockwind bridge and Blues neck. All was fine until the project got moved up to an 8 string steel. Unfortunately 8 string Tele pickups are as rare as hens teeth and so being stubborn, and a glutton for punishment, I jumped in head first and built a set of bobbins and send them off to BG for winding.
I fired up Illustrator, drew the basics, printed them out and used them as a paper template.
.
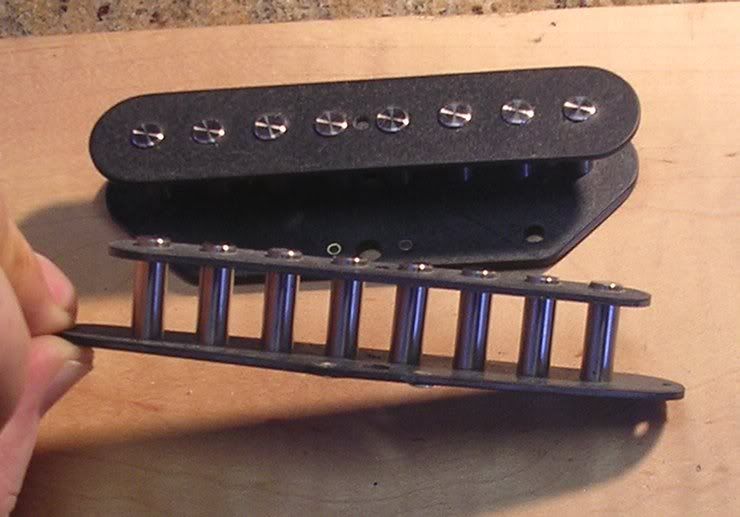

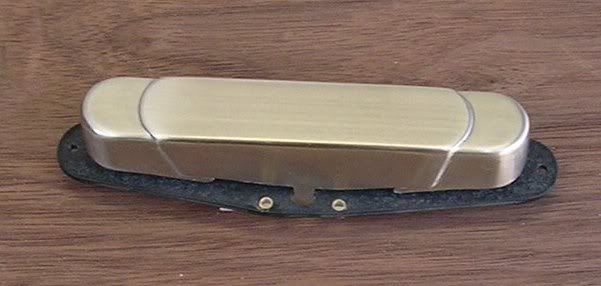
And the plot thickens, another rare item, 8 string Tele neck covers.
It was a pain in the ass, but I'm happy with how it turned out, its cobbled together out of 2 of the nickel silver covers from Mojo. There is no easy way to get a invisible butt to butt joint so I decided to embrace the seam and fancy it up just a little.
What I did was make a couple wood forms out of some scrap maple, one thicker piece to match to OD of the stock cover and one to match the ID cut to size and radiused to act as a solid form to work to. After cutting the ends off one cover and shaping the ends, I placed the center section over the large maple form and used my vice to squeeze it together to increase the ID dimension. I then took the second cover and cut sections off the ends to complete the assembly. In order to not have any doubling up of cover thickness over the magnets, the end pieces only cover the end magnet.
Once all was shaped and fit, I put a big tip on my soldering station and soldered it up followed by cleaning up the extra solder and finished off with some 800 wet / dry to give it a raw / brushed look.
.
-
Nice one ... a classic workhorse design well executed.
-
Love it
-
Cool to see some lap steel builds going on! ... looking forward to seeing her shape up.
-
There are lots of good P90's out there and one of my favorites is BG-Pups. For me, a great P90 needs to be clear and articulate with great pick response. It should have angelic cleans when played with a lite touch and get rude with an attitude when you dig in.
-
Thats shaping up great
-
Just another word of caution on acetone. You did not say what the inlays are made of and if they are a plastic or celluloid type material, the acetone will destroy them.
-
I've used the BC Sealer / Filler and was less than impressed with the fill part of it. A plus for it is that it pops the grain like Tru Oil and I've heard of some using it for that reason under a traditional clear.
The wet sanding with Tru Oil slurry fill does work, but can take a few sessions.
I've used the Zpoxy finishing resin a few times now and have had great luck so far. I apply with a squeegee like in this YouTube demo
I just did a swamp ash body with it and it was filled and flat in 2 sessions. Id also add that I've had no trouble with using Tru Oil sticking to it.
-
As a "locking" tuner, not so much, but they work fine as a regular tuner and the lower hole is handy for getting a little more break angle if you need it.
-
... There really is no safe finish except for Shellac but I dont suggest drinking it...
Actually, if you mixed your flake with grain alcohol, it would be drinkable, but I'd suggest having that shot before the flake
http://en.wikipedia.org/wiki/ShellacShellac is edible and it is used as a glazing agent on pills (see excipients) and candies in the form of pharmaceutical glaze (alternatively, confectioner's glaze). Because of its alkaline properties, shellac-coated pills may be used for a timed enteric or colonic release.[10] It is also used to replace the natural wax of the apple, which is removed during the cleaning process.[11] When used for this purpose, it has the food additive E number E904. This coating is not vegan and most likely not vegetarian either as it may, and probably does, contain crushed insects.
-
Hard to tell without a pic, but hairline checks in burl walnut is not uncommon. If the wood is dry and seasoned, and being that its going to be laminated to a stable sub surface, I'd say wick in some water thin CA and call it good.
-
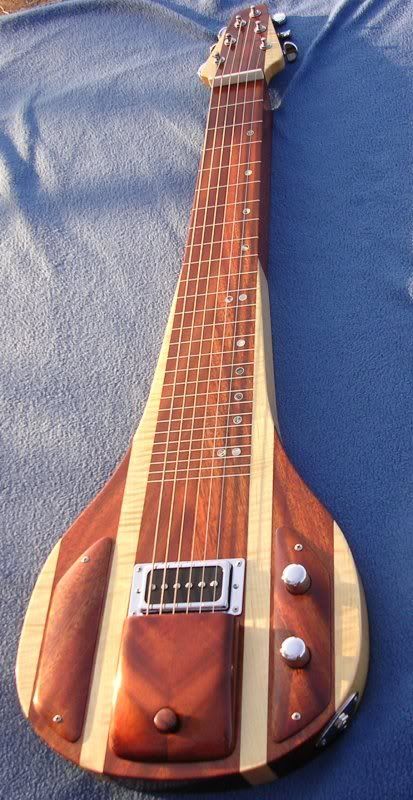
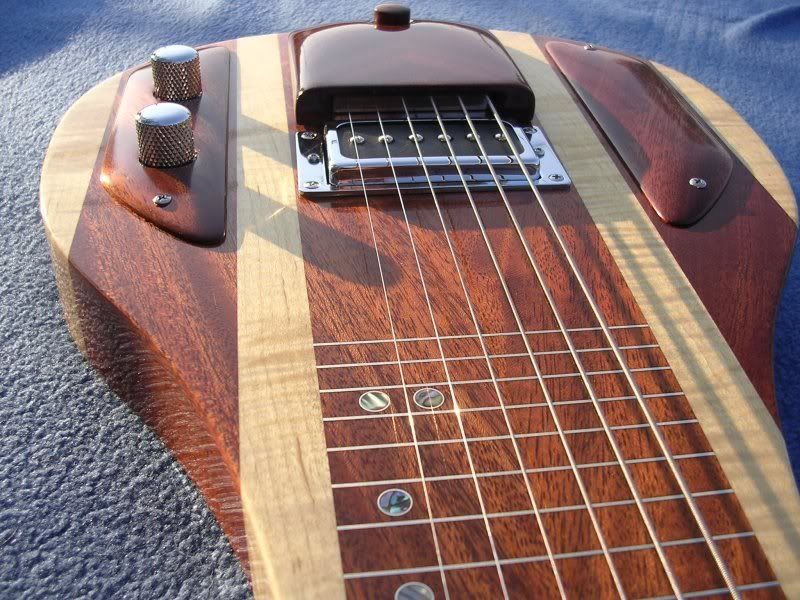
Kind of along those lines, I had this chunk of mahogany with the grain running at a fairly hard cross angle, so I ripped it and flipped it to get this chevron pattern going. To stay with the theme, I chose angled grain for the control covers and did a reverse chevron book match for the bridge cover.
.

-
Where are you putting it? Unless its on the fretboard, I'd consider just setting it "flush" after finishing and leaving the top of the coin natural and uncovered.
-
The thin stuff is what you want, it will wick in / soak in deeper into the grain than the others. You generally can not find the water thin CA at hardware stores, big box home centers, etc. Another good source for a full line of CA is hobby / model / craft stores.
-
I swap stops and bearings around on a couple different bits. Like to get the inside radius on my FPS I use a 1/2"bearing on a 1/2" box core bit. It can reduce your possible depth of cut, but in a specialized situation like mine, its a moot point.
.
-
Don't know the size, but if your working with project boxes, a set of step bits is real handy for drilling thin wall material and would cover just about any size you would ever need.
.


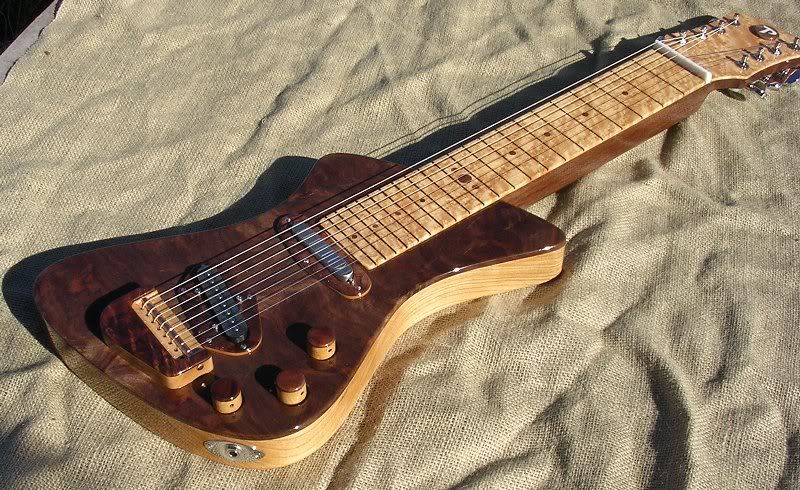
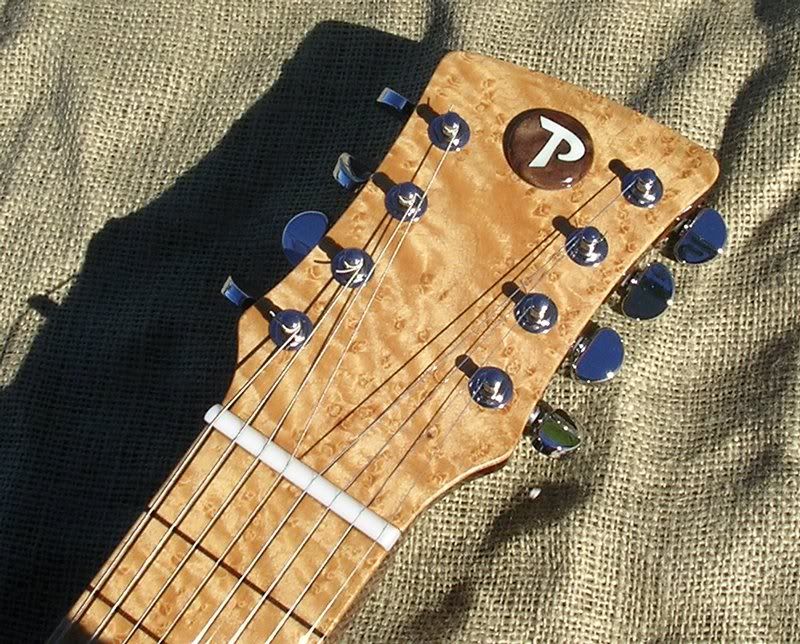
The Junkyard Dog ... 8 String Lap Steel
in In Progress and Finished Work
Posted
Getting good pics of this one has been a pain, but these don't suck too bad and show the detail a little better.
.