


Quarter
-
Posts
391 -
Joined
-
Last visited
Content Type
Profiles
News and Information
Tutorials
Product Reviews
Supplier Listings
Articles
Guitar Of The Month
Links and Resources
Forums
Gallery
Downloads
Posts posted by Quarter
-
-
Thats going to look sharp ... love Aussie woods

-
You might have a hard time getting one from MusicMan. They typically are very tight with any of their proprietary hardware.
-
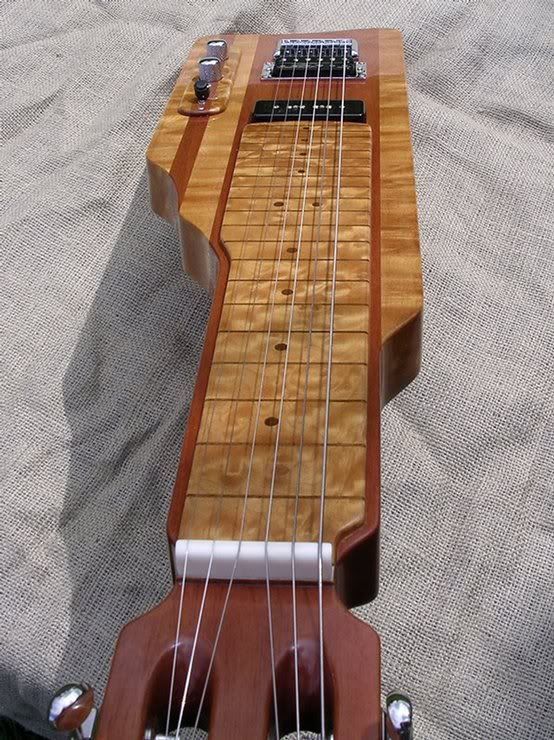
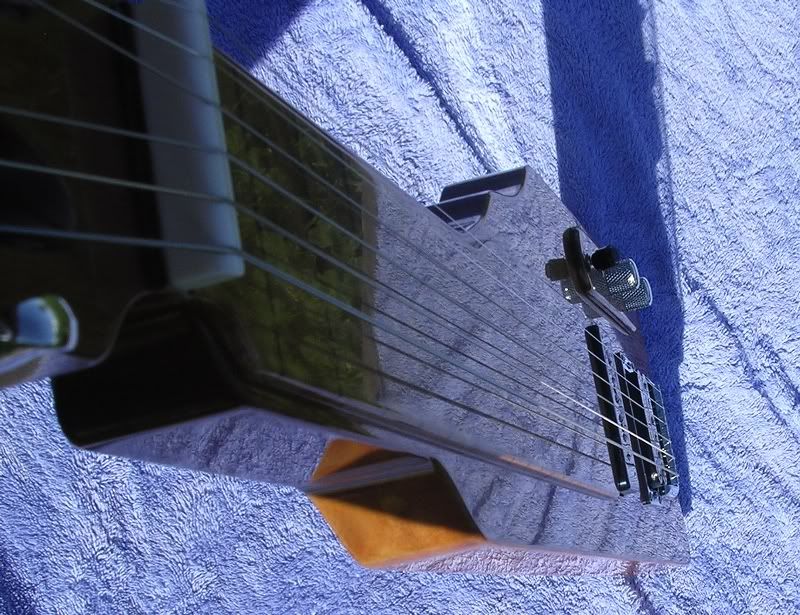
Great job ... lap steels are both fun to build and fun to play
-
One thing that may be trivial: because I didn't want to solder/desolder everytime, I tested it with long wires running from volume pot to input jack and connected the wires to the jack using metal clamps.
Did you by chance mix up the ring and tip connections? Reversed wiring on an output jack is Very noisy.
-
If you want that Bruce Springsteen vintage amber look, you are probably best using a tinted clear to get your color, ReRanch sells it in a rattle can.
Another option for a nice natural finish with some amber / butterscotch overtones is Tru Oil.
You don't have any veneers to worry about, so I'd probably give it a good sanding first then go to town.
-
A lot depends on how thick it is, weather, temps, etc, but a few coats is pretty resilient in a 4-5 days.
-
I do lots of high gloss Tru Oil finishes on my steels and have not found it to get "gummy"
Maybe if you slopped it on and didn't have any cure time, but then your not going to get a nice mirror finish anyways.
Multiple thin coats works great ... build it up and block it down. Truth is that by the time you get it leveled out, there really is not that thick of a film.
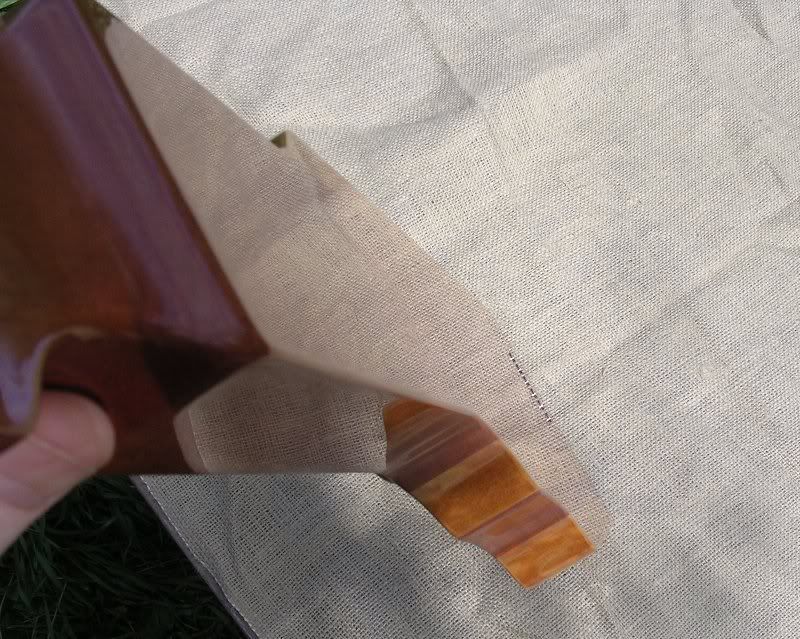
First shot is the back of a mahogany / maple laminate steel I recently finished.
.

-
I'm more wondering if an upgrade to a 15" is worth it
Well ... are you are doing a bunch of rough material wider than the 12" will handle?
-
Cool idea...but the green looks un-natural IMHO.
Yea, the green kills it for me too ... actually, all the applied colors just seem a bit too artificial.
The black lined version has potential with the right color palate.
-
It might be easier to find a tap and re use the old screws. Most common sizes are sold individually and fairly inexpensive.
-
Looks like a giant demonic butterfly. I like it.
LoL ... I like it too
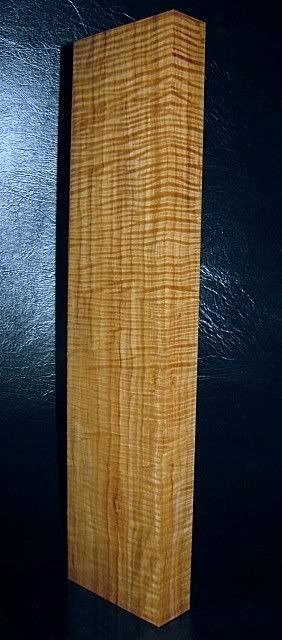
Here is a neat hunk of maple that was delivered today.
.
-
Very Cool
-
As was mentioned, asbestos is only an issue if it gets airborne. I'd probably give it a nice wet coat, (or two), of white paint to both seal it off and brighten up the work area.
-
I could use a handy jig like that. Is that a drawer slide he is using?
-
-
It's going to be very difficult to get an even color out of a tinted wipe on finish. Your best bet is probably to dye the body first and or spray a color coat(s).
-
Wow ... absolutely stunning!!
-
I was at the local hobby store yesterday and found some rattle cans of what is sold as transparent flower dye in the close out bin. I popped the top and sprayed a bit and as near as I can tell, its just a tinted lacquer, so I grabbed a can of daffodil and one of black cherry to check out.
The daffodil on maple has a sweet golden amber tone and the black cherry is a very nice black cherry.
Like I mentioned, I believe this is just some tinted nitro. It smells like, drys like, and dissolves like nitro. I don't have any clear at the moment to put over it, but will pick some up to further test.
Anyone seen or used this stuff before?
-
Lots of ways to go at it really. You can use commercial pore fillers or fill with just True Oil. It takes some effort to do a level mirror finish with True Oil, but the results can be stunning.
My methods have evolved a bit, but its basically just build it up and block it down. Here is a brief rundown on how I did this latest one.
The the bulk of the filling is by wet sanding with Tru Oil and 400, usually 2 sessions gets me mostly there. Then I do 3 coats a day for 5 or so days until I get a good level body going. I wipe it on using some 2 1/2" x 2 1/2" cotton gun cleaning patch's, ran out of old t-shirts. Forgot to add, I wet sand it with 1000 grit and mineral spirits before the start of that days coats.
Once I've a good film started and most imperfections filled, I spray 3 or so coats, (one a day), with a little detail gun. Again, I wet sand each day before that days coat, but move to 1500, then 2000 on the last two coats.
I've used the Tru Oil rattle cans and it works fine. I mix my own and spray with a small detail gun because its cheaper. You can thin Tru Oil up to 50%, thats 2 parts oil to one part mineral spirits.
Here is the back of a steel, its mahogany and maple
.
http://i54.photobucket.com/albums/g94/quar...04/R-004-17.jpg
-
I love all the maples, but if I had to chose one, quilted birdseye
-
Lots of good advice so far. I'd just re enforce the suggestion to take more wood shop regardless of when you start the guitar.
The most common thing for a first time builder is to over think the whole deal and design and plan the "ultimate" guitar.
Much time is spent obsessing over subtle choices in wood(s), hardware, and other bits.
Quite often, in the time wasted in over thinking things, you could have built 2 guitars.
I'd suggest that for your first one, pick something simple and just jump into it. A flat top Jr, Tele, Strat, or something.
You are young and have plenty of time to build your ultimate guitar. Use your time now to learn the basics and develop your skill set.
-
Wood: I find it sort of weird that people think I come up with crazy wood, because I normally just surf the 'net for it, and it's not hard to find. I think I got this top for about $25.00 give or take.
I think its more of a case that you have a talent for seeing the potential in a piece of wood that many might pass over. Add to that a good eye for color and finish and you have a winning combination.
-
As was mentioned, those are witness lines and sanding with 600 is a bit aggressive for Tru Oil's new thin soft film.
Here is a quick rundown of how I did the Tru Oil on my latest project.
The the bulk of the filling is by wet sanding with Tru Oil and 400, usually 2 sessions gets me mostly there. Then I do 3 coats a day for 5 or so days until I get a good level body going. I wipe it on using some 2 1/2" x 2 1/2" cotton gun cleaning patch's, ran out of old t-shirts. I wet sand with 1000 grit and mineral spirits between the daily sessions / before the start of that days coats.
Once I've got a good film started and most imperfections filled, I spray 3 or so coats, (one a day), with a little detail gun. Again, I wet sand each day before that days coat, but move to 1500, then 2000 on the last two coats.
I've used the Tru Oil in the rattle cans and it works fine, but prefer mixing my own and spraying with the small gun. You can thin Tru Oil up to 50%, thats 2 parts oil to one part mineral spirits.
Here are a couple pics
.

-
I would recommend a full size jointer over the benchtop models. My short experience with a benchtop planer was not so pleasant. one of those small aluminum table Deltas. The tables were not true and it just couldn't joint an edge strait enough for a glue up. That said, there may be a better model or a cast iron model, but then the portability thing is moot.
If you have the room, a good full size jointer is a pleasure to use. I ended up finding a sweet older, 1960's model, Craftsman on Craigs list for $125.

Installed Electrococket Crooked
in Solidbody Guitar and Bass Chat
Posted
Try using a center punch or something sharp and pointy to mark / start the hole first. Drilling in on an angle is especially tough to keep a bit from wandering.
.