


Quarter
-
Posts
391 -
Joined
-
Last visited
Content Type
Profiles
News and Information
Tutorials
Product Reviews
Supplier Listings
Articles
Guitar Of The Month
Links and Resources
Forums
Gallery
Downloads
Posts posted by Quarter
-
-
Filler that thick will most likely be noticeable., go with some binding.
-
I picked up a little gravity fed Harbor Freight detail gun for like $10 and its actually pretty decent, certainly better than a prevail or rattle can.
A tip if you have a smaller compressor, you can plumb in one of those cheap portable air tanks to add more storage capacity to the setup.
-
Definitely a scraper over sanding as sanding grinds the stained dust into the surrounding wood.
-
Grab a set of French curves, a strait edge, and a big fat pink eraser. Just keep sketching, something will stick.
-
I don't think I would want to build a Maple body and use SC's on it, that would sort of give me the shudders
Actually, that combo can sound pretty good. Here is a video of Albert Lee playing an all maple prototype of his MusicMan sig guitar. http://www.youtube.com/watch?v=VC9jHcmrE94
The production guitar ended up being "southern ash" according to the sales literature. The change was probably due to either or a weight or stock consistency, maple can be all over the map tone wise.
-
1/2" is about as thin as you want to go. You can always glue a veneer on top to beef it up some.
-
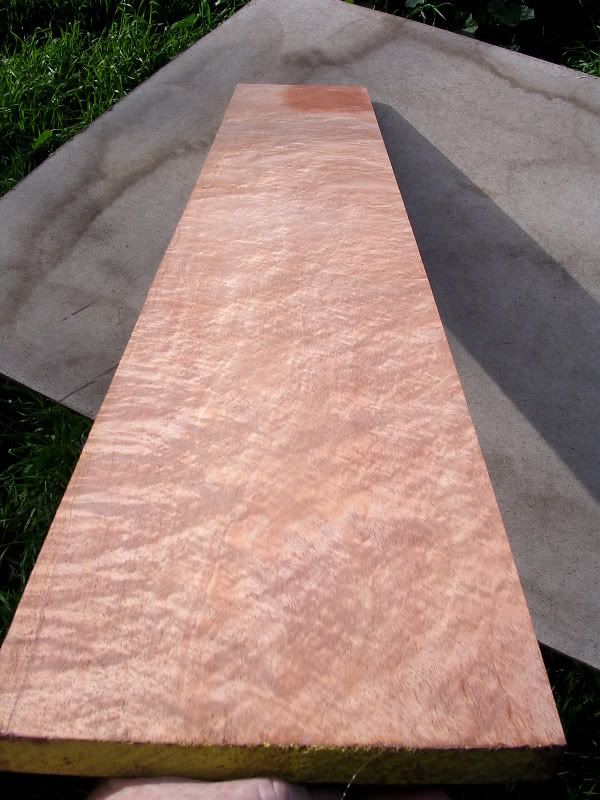
That mahogany is amazing, Quarter!
It was plain dumb luck to find it, needless to say I was quite tickled.
Cool thing is the place I found it, LSV Hardwood, does not charge extra for figured wood and will cut and sell short sections off a longer board as long as the remaining piece is at least 8'. I got that piece and this crotch piece for $35, about 7 bf total.
.

-
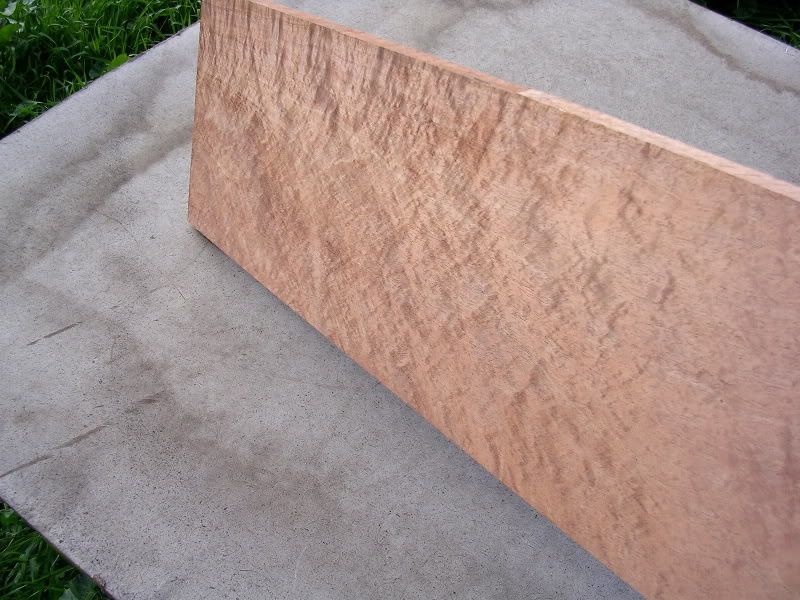
Here is a chunk of 4/4 quilted African mahogany I found while digging through a fresh lift the other day
.
-
Try a welding supply store
-
Tru Oil builds in very thin coats, so if over a dye, you do want several coats to build a film before cutting it back.
I do 3 - 4 light coats a day, then wool it down the next day before that days sessions. Lots of thin coats works best for me.
It would not hurt to initialy coat your test piece along with your main piece as you go. Try the wool on the test piece first to see if you have enough film before you go after the main work.
-
Here is a big chunk of 8/4 cocobolo thats almost ready to go. It was 1/2 dry when I got it and has been in my rack for a couple years now.
I'm thinking of doing a one piece carved steel out of it with MOP and nickel silver embellishments.
.

-
Outstanding work

-
Pearl Ex powders are very fine and might work for you. http://www.jacquardproducts.com/products/pearlex/
-
Cool project
What guts did you use? -
I'm a big fan of Tru Oil, check around this section for a couple threads on it.
I've got a bottle of their Walnut stain that I've tested on some misc scrap and its got a nice rich medium color strait from the bottle.
I'd think one bottle is enough for a Tele shape depending on how you use it and how deep a color your shooting for.
-
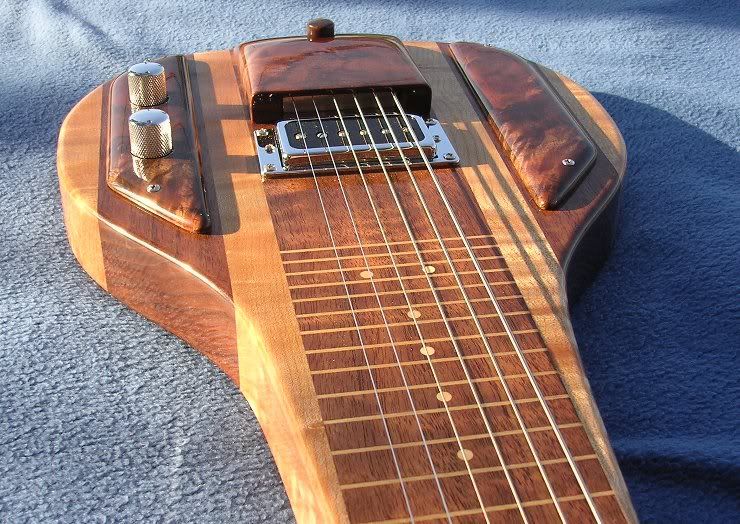
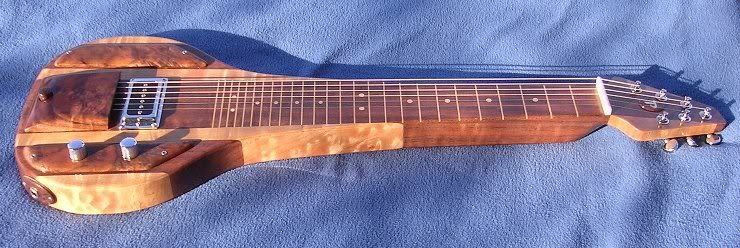
LoL ...I'm starting to get the hang of it ... here is one that just got shipped out.
.
-
Can you provide a little more detail on your wet sanding process?
For me its been an ever moving target, each time testing / trying / refining things a bit.
I use a big pink eraser for a block and work maybe a 2" wide x 3 - 4" long area at a time blending into the next section above as I go.
Once that vertical section is done, I lightly re-wet the whole strip and use a long strokes to burnish it in and smooth it out a bit.
The next days session, is a rinse and repeat.
I used to wipe it off cross grain, but now just let it build between sessions.
The long full burnishing stokes don't leave much surface residue to worry about and what is there just gets ground back up in the following session.
After the fill is done and dried, I lightlysand any surface buildup back down with some 800 and mineral spirits.
I've got a couple builds coming up, some walnut and some mahogany, and I'll try and remember to take some pics of the possess next time.
-
I think I've decided on tru oil because it seems a lot easier than other finishes for my acoustic build.
I love and use a lot of Tru Oil. but if you are going for a high gloss table top look, it takes some effort and is not neccesarly easier than other finishes.
On the BC filler / sealer, it works, but I was less than impressed with it. The way it smells and acts reminds me of airplane glue. As a filler, it was fiddly to work with and takes several coats and has a lot of initial shrink back.
For grain filling, I wet sand with strait Tru Oil and some 400 grit, it creates a oil / wood dust slurry. Depending on the wood you are working with, it can take a couple sessions.
Although it takes some effort, I go this route over other fill methods for consistent even coloring. I think that Tru Oil just looks better on bare wood than other product.
Once filled, I build up some body and wet sand / block it down with some 1000 and mineral spirits, rinse and repeat as necessary till you get it all built up and level.
I then spray a couple last coats, wait about a week, then rub it out.
You can buy Tru Oil in a rattle can or thin it for spraying, 2 parts oil to one part mineral spirits works well for me in a small detail gun.
Here are a couple pics that show the result.
.
Walnut / birdseye

-
Very cool stuff! On your web site, that acoustic overlay on the electric with the muse in the sound hole is killer. Great idea and wonderful execution.
-
I played around with some stuff called PearlEx the other day and was pleased with the results. Its a ulta fine powder used for scrap booking and other crafts etc.
http://www.jacquardproducts.com/products/pearlex/
I mixed it into epoxy, filled the cavity, then carefully leveled it off with a razor blade. The blade will pull just a bit of the mixture out leaving the fill a tad low, a good thing.
Once the epoxy starts to kick and firms up, I added a layer of clear over the top. You need to do the clear before the fill fully kicks or you will not get a good bond.
Once all cured, sand / scrape / level / polish / finish as needed. You don't want to get into into the powder layer, it goes dull and loses the pearl look.
-
Dam sweet ... love it
-
I've used a few of the GFS pickups and many compare well to the mass produced / mass marketed big name stuff.
Quality seems to be generally good, things like nickel silver base plates and Alnico magnets on the P90's for example.
-
its impossible to have too many clamps, I wish I had more.
So true.
-
Definitely check around and see if you have a hardwood dealer local, you can get nice 8/4 poplar for dirt cheap.

Stain / Faux Binding / Tru Oil
in Inlays and Finishing Chat
Posted
I've not used Tru Oil over sealer but have used it over shellac without issue.