


Stewey
-
Posts
141 -
Joined
-
Last visited
Content Type
Profiles
News and Information
Tutorials
Product Reviews
Supplier Listings
Articles
Guitar Of The Month
Links and Resources
Forums
Gallery
Downloads
Posts posted by Stewey
-
-
Looks very nice well done.
I like the carve, not too keen on all the switches though.
-
Ok here's the headstock pictures. The shape is PRS with a bit more swoosh to the curves and it's a little pointier.

Then I glued the body wings on. I was glad I saved the off cuts from the wings, they made clamping a lot easier on the curves.
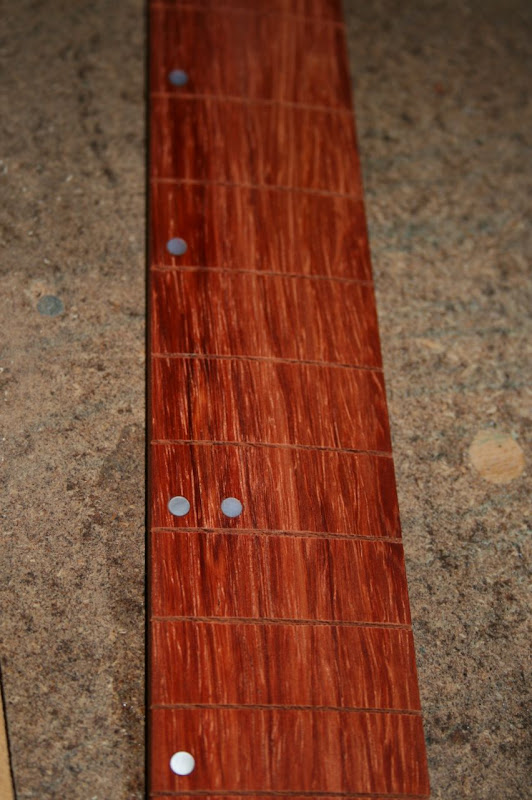
And I bound the fretboard, it's not scrapped down flush yet. I also managed to glue my fingers together and to my shirt.

Hopefully tomorrow I'll be able to continue on with all the routes on the body.
-
Thanks guys.
I managed to find some time this morning to shape the headstock and glue the body wings to the neck, it feels good to finally have some major progress.
I'll get some pics later, gotta go to work now.
-
Well a little bit more progress done, I finally got the neck profile cut which I had to do with a handsaw, damn that was tiring.
I also got the edges trimmed with my router and sander.
Next time I've got some free time I'll shape the headstock.
-
Yep, it looks like you've made life hard for yourself by tapering and carving before doing the other stuff.
I really like the logo, looks professional and retro.
-
Been a little while since the last update and I haven't really got much done in that time, damn work.
Got a camera for my birthday so no more camera phone pics.
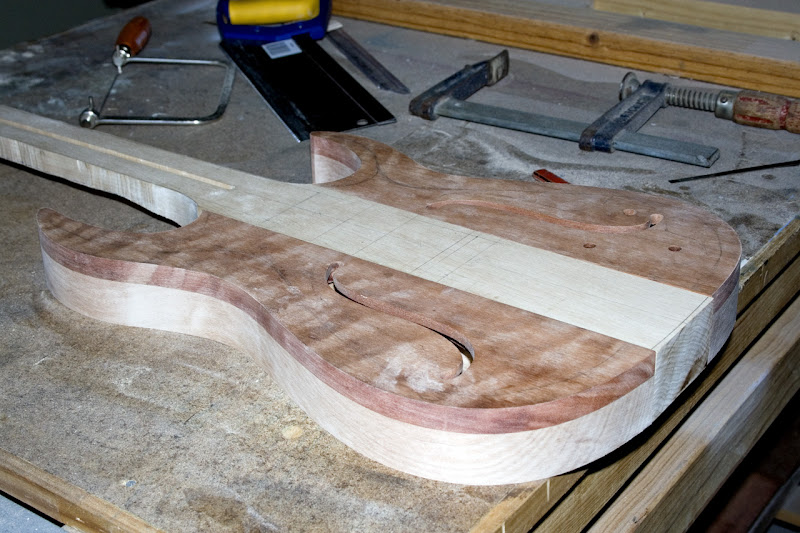
I finally cleaned up the f-holes and routed for the pots and switches which allowed me to glue the top to the wings.
And here is were the fretboard stands at the moment:
Now that the tops are glued on I have to work out how I'm going to cut the neck profile so I can glue the wings to the neck.
-
Man I could stare at that finish all day, +4 on best SG ever seen.
-
It looks so awesome that it nearly looks fake, very jealouse.
-
Very slick looking, I like how the headstock goes with the body.
-
Wow that turned out very nice, well done.
And that was also very nice playing.
-
Well I got a bit more done today. Firstly I roughly cut out the f-holes with my new coping saw. Then I tried routing the top to size using my template.
This timber really doesn't like to rout! I tried a few different bits in varying degrees of sharpness and all sorts of router speeds but it just kept chipping and grabbing.
In the end I gave that up and just sanded the top to size using my benchtop disc sander.

Here you can see one side of the hollowed out wings. http://users.tpg.com.au/stewart7/Semi-hollow/10082007332.jpg
And I ended the day by cutting the headstock angle with a handsaw because it wouldn't fit in my bandsaw
, damn that was hard work.I have no idea how I will cut out the neck profile, I might need to borrow a bigger bandsaw.
-
Thankyou everyone, I think after googling I will declare the mystery timber myrtle.
I really liked the figure, it seems to angle in two stages. The two pieces are just one board cut in two, so they are not book matched.
At first I had the figure angled downward but when I overlayed the shape of the body it looked better with the figure flowing up towards the horns
so I left it like that.
Does anyone have an opinion about the gluing question I asked a few posts up?
-
Redwood sounds good in terms of the colour, it's alot redder in real life than in the photos, plus its fairly heavy.
The Qld maple is supposed to sound a lot warmer than regular maple so it should be alright, I hope.
Thanks oblaty, its my dream specs too.
I do agree that darker wood usually looks best on the back but the qld maple is pretty boring looking timber.
Now, should I glue the top to the wings and then the completed wings to the neck or should I glue the wings to the neck
and then the top?
-
Hello all, after my first build turned out all right for a bit of fun (first build) I've decided to do a second build out of proper timber.
It will be 6 string, neck through with an RG body shape. The wings of the body will be hollow with some f-holes in the top.
I am using Qld maple for the body with a mystery, lightly figured top. The neck is rock maple.
It will have 2 humbuckers, wired like a PRS with a floyd rose trem.
This is were I'm up to now, I've hollowed out the wings:

Can anyone tell from this poor photo what timber the top is? Top
(Sorry about the pic quality, I only have a camera phone.) Thanks.
-
I'm considering having a local artist paint me an image that i can put on my guitar via
http://www.projectguitar.com/tut/mat.htm
does anyone have any ideas on what materials would be good/bad for this type of project?
I have used many different types of fabric and also paper and nothing has not worked. Just make sure you are easy with the glue so as to not smudge the pattern.

Opinions On Colour
in In Progress and Finished Work
Posted
Very nice, you're an inspiration.