


Phil Mailloux
-
Posts
639 -
Joined
-
Last visited
Content Type
Profiles
News and Information
Tutorials
Product Reviews
Supplier Listings
Articles
Guitar Of The Month
Links and Resources
Forums
Gallery
Downloads
Posts posted by Phil Mailloux
-
-
Anyone know where I can find specs for '63 P-Bass pickup?
Is this Wolfe Macleod from "Wolftone Pickups" or are you someone else? If it is you I'd assume you'd know that Fender only wound pickups until they felt the coil was large enough to stop winding wire onto it back then. i.e. there was no precise science or turns count to it back in those days.
In any way, the coil height on P's is 0.343". The pickups are wound with 42 awg wire and they usually have 10000 turns of wire on each coil.
-
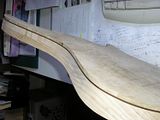
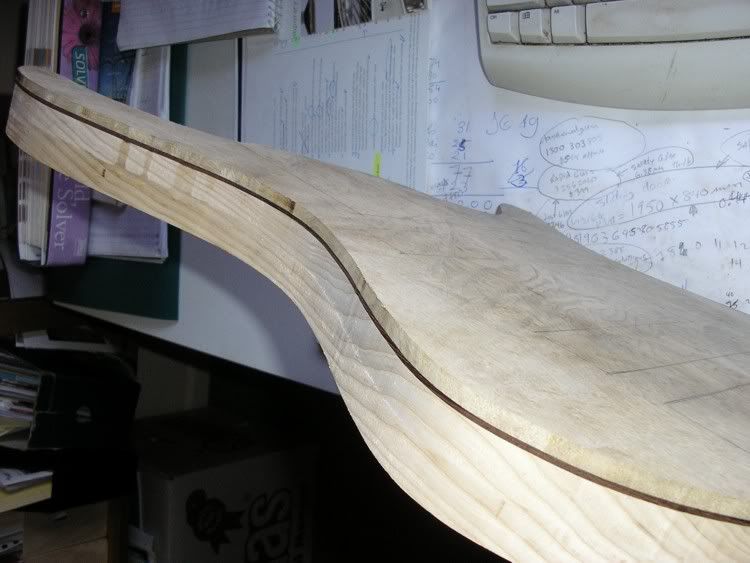
Whether they have the best resaw machine in the world is not going to do anything at all. When you expose a fresh piece of wood to the air it has a tendency to start warping. As soon as you take the wood out of the package it will start cupping. Wet the convex side lightly with water. The water is abosorbed by the wood and slowly "warps" it back flat. You may have to lightly stroke the wood with a wet/ humid rag over the course of an hour or two a few times to get it back to flat. Once flat sticker it and put some weights on it to let it acclimatise.
We would need to see how cupped the wood is to know if you can still clamp it flat on the body. A few milimiters of cupping is no big deal.
EDIT: Didn't see the pic originally. This looks like no big deal at all. Try to wet it anyway. If it's been sitting like this too long then it won't straighten out anymore though.
-
It's a simple enough idea. I'll bet that there's a DIY version that could be made. Perhaps not as adjustable, but something simple for reproducing the same radius over and over.
LMII used to have plans for building that same exact jig out of wood. Grizzly didn't invent anything here, they just made a pro version of it.
-
What I'm more curious about is how many horse power does a router need to have to cut a body with that much speed and ease.

-
Check out this thread in the Musical Section of this Aussie woodworker's forum
http://www.woodworkforums.ubeaut.com.au/sh...ead.php?t=56113
-
watch out...the 14 stringer will have a volume AND tone control....!!!
and maybe it will have a working pickup. Better tell him not to try making his own this time.
-
Not much point in doing a 14 strings + bass if you're going to use 3-4 sets of 4 string bass strings to populate it
-
I laminated a 3 pieces neck, purpleheart, mahogany, purpleheart, so, they measure : 2.1 cm, 2 cm, and 2,7 cm I feel bad for you, filing and sanding all that purpleheart. You couldn't pay me enough to do that job
-
Q: what gauge are the strings? 26-Jul-07
A: HI, THANK'S FOR THE INTEREST. THE STRING'S ARE SIZE'S: .45 .50 .55 .60 .65 .70 .80 .90 .95 .100 .105 .110 .125
 Q: Hello, Great Looking Bass! What kind of pickup does the bass come with and how is the instrument tuned? 26-Jul-07
A: HI, THANK'S FOR YOUR INTEREST IN THE SUPER BASS. THE PICK-UP IS A CUSTOM MADE SINGLE COIL PICK-UP. THE TUNING OF THE SUPER BASS IS UN-DEFINED, FREE FOR THE PLAYER TO TUNE AS REQUIRED AND CAN STILL PRODUCE DEFINABLE NOTE'S AT THE SLACKEST OF TUNING'S. THANK'S ONCE AGAIN, JIM.
In other words, "I bought three sets of different gauges of 4 string bass and mixed them all up together, so now you can play 4 string bass on 13 strings"
I especially love the construction grade Pine body and neck and the fact he bought the cheapest asian tuners he could find.
-
So can I find out who the supplier is or do I have to PM you?
I never even heard of local guys selling tops besides Gilet down in Sydney. I also usually have my stuff imported from the states and Canada. Wouldn't mind having a look at whoever this is though, he might have good stuff if you check it out in person.
-
You can write tutorials in the tutorials section without any problems on the forum. If you want to write a tutorial for the main website, there's not much of a point right now. The main site hasn't been updated in at least three years
-
I'd go for it if I lived in the states. I'm sure with just a bit of TLC it could be a good workhorse. The crack in the handle shouldn't be hard to fix. Better hurry up before someone takes it for the BIN.
-
It's safe to say he's a member here then. Think he'll show up on this thread?
-
It does, I got this tip from a pro archtop builder.
-
That cement thing is nothing more than the cement used to glue the plastic parts of those model cars/airplane/trains. You should be able to find it locally in any of those hobby shops.
-
All right there, stop beating on the guy. We're only here to talk about extened range intsraments here
-
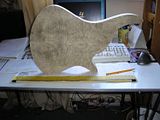
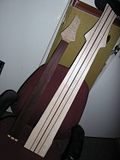
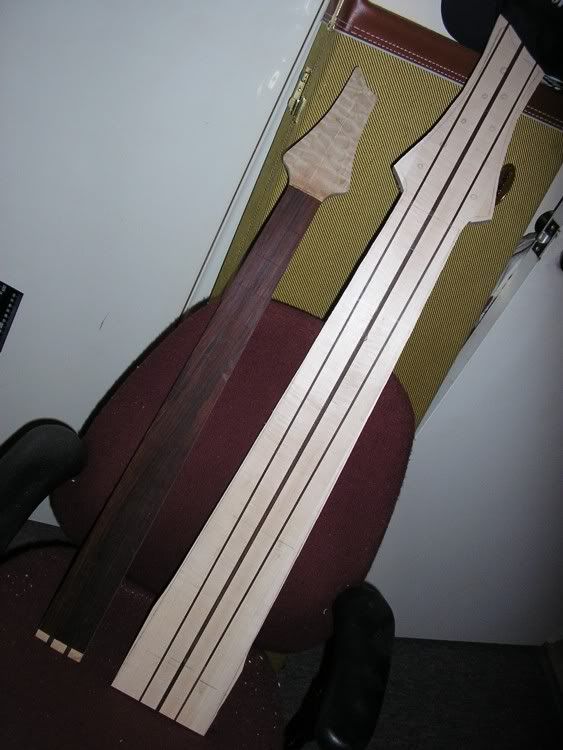
Here's my 9 string fretless bass in progress. It's got an 18mm spacing at the bridge, pretty large for an ERB. That Ebony fingerboard is 6 inches wide.
Why did I build it? Because my customer asked me
I do think these basses are cool though. I probably would've built myself one for the kicks if I didn't have to build this one.
The neck next to the 9 string neck is a 5 string bass neck, just to show the difference in size.
-
An easy solution would be to buy a metric straightedge from Canada. They usually have both Imperial and Metric scales on them. Lee Valley's site is something you could look into.
-
yeah, Jon's idea is pretty good. That would do a nice footswitch
Hey thanks Mattia and the other ones who defended my idea on the MIMF
-
Thanks for the nice words guys. I should note that this jig is being touted as enemy number 1 on the MIMF right now. They even added a "CAUTION!" in my original title.
So anyone willing to do this. Do make sure it's safe before you use it and make sure you don't cut anything more than 2 - 3 mm deep with it. I do think it wouldn't be safe to cut thick materials with it.
-
Phil,
Thanks for that - much better than "nice" IMHO - JUst one thing - don't quite understand where the pin comes in, but that's maybe because I don't own a template.
Thanks
Denis
It's an indexing pin.
Here is the the stewmac instructions on using the fret scale tempates. It's better explained than my explanations
-
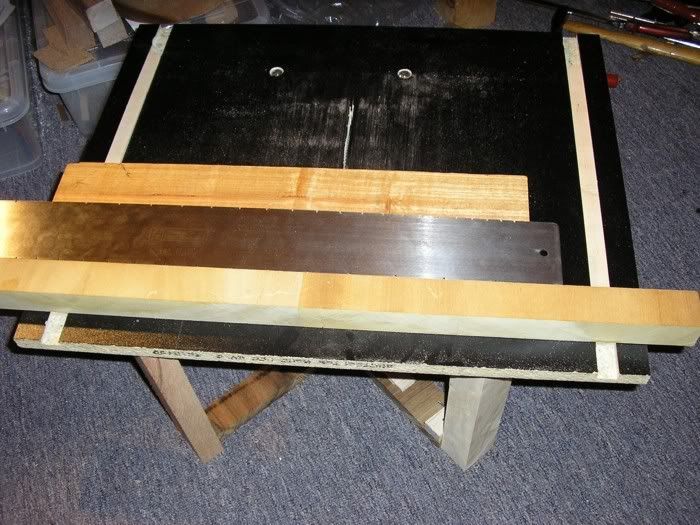
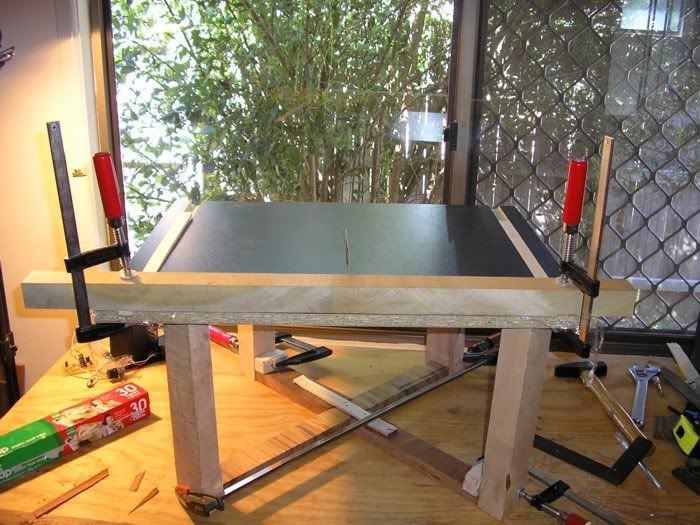
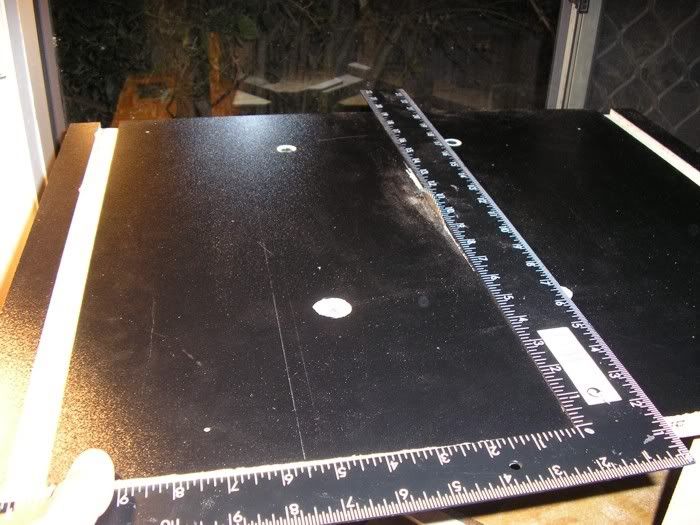
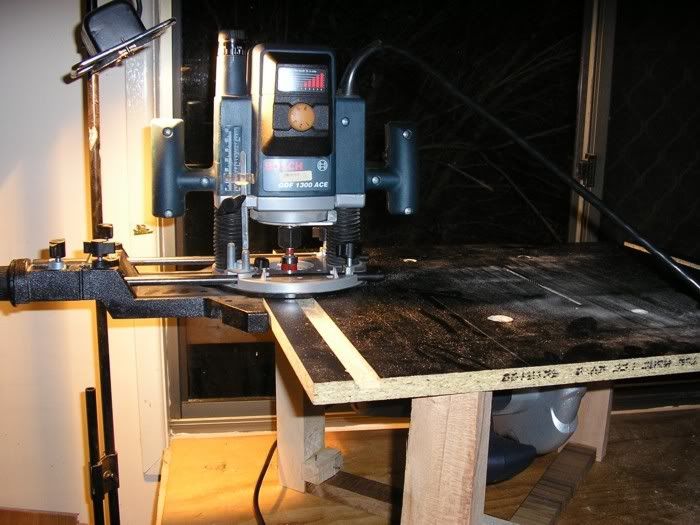
I took two scrap pieces of maple and cut them to fit the miter slots. I sanded and filed them until I could move them up and down the slots without any problems. After that I glued that long piece of wood to them inside the slots to make sure eveything was flush (I put cling wrap between the maple miter bars and the pb so the glue wouldn't stick the whole thing together)
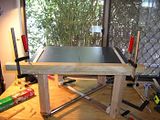
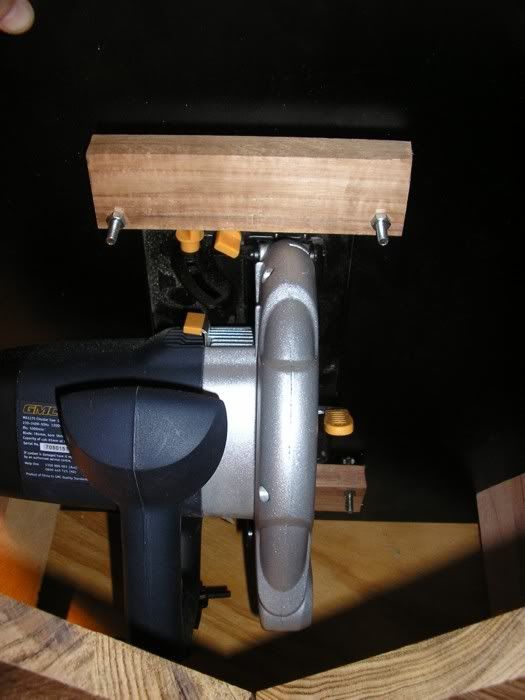
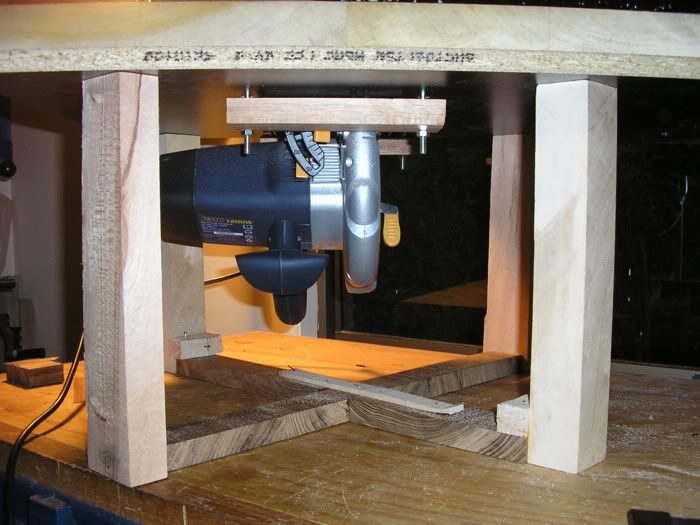
The next part was to fit the circulat saw under the table. I didn't want to cut any holes in the saw since it didn't have any extra holes or screw holes for jigs. So I opted to make wooden clamps. All I did was make 4 holes in the table slightly recessed for 4 bolts and nuts and stuck the saw under it. Clamped between two pieces of wood.
I used a large set square to make sure the blade was flush. I just moved the saw from under the table until the blade was flush then tightened the nuts on the wooden clamps. That was it. I clamp the ON button to operate the jig since theres no way of keeping the motor running if you don't hold the button.
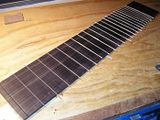
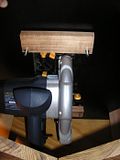
On this pic I've got a piece of scrap waiting to be slotted. The way the jig works (like all table saw jigs) is to leave a small pin inside the fence that fits perfectly in the holes of the fret slotting template. Tape the template on top of the fingerboard blank with double tape. Hold the piece of wood on the two sides of the template with the fence pin resting inside the first hole on your fretting template and cut the first slot. For the next slot, move the piece to the next hole in the template and do that until all slots are cut.
Here's what the scrap piece looks like once I'm done. Disregard the two crappy slots, they were done first without the template.
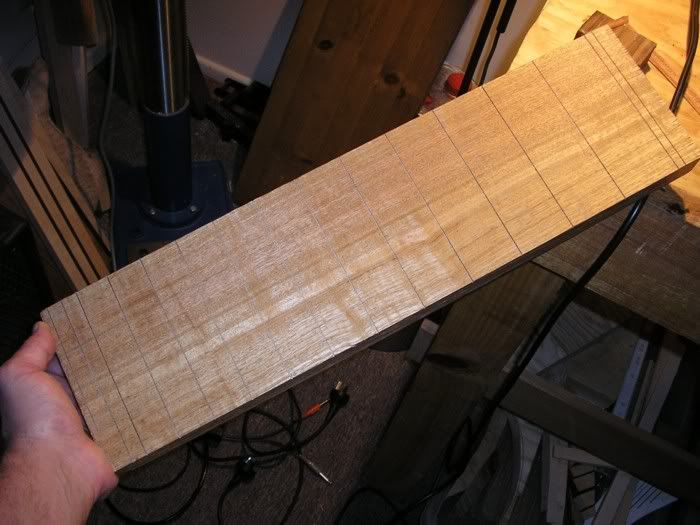
BTW if I had to do it again, I'd use aluminium bars for the fence/miter slots. The maple has a tendency to bind on the sides on humid days
-
I don't post much here these days. I did learn a whole bunch from this forum when I first started to hang out here a few years ago so here's something that might interest some of you guys.
This one's for people who don't own a table saw and think it's a major pain in the ass to slot frets by hand.
So what's needed for this jig?
- 1 circular saw with 3/8" arbor
- 1 stewmac fret slotting saw blade
- 1 stewmac fret scale template (or LMI)
- scrap wood
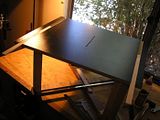
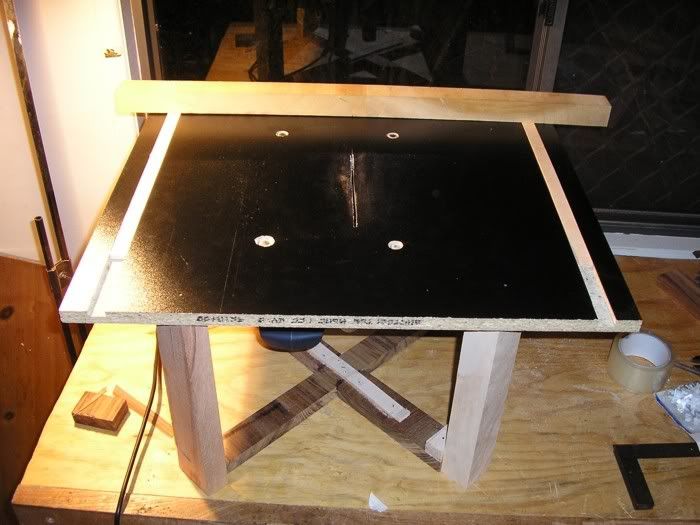
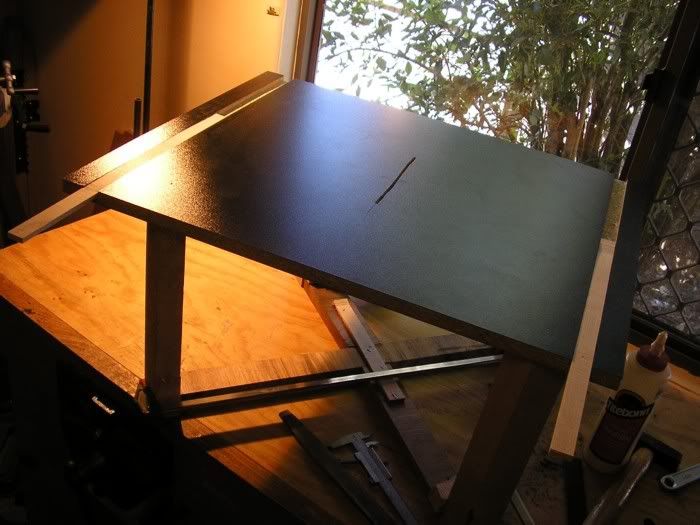
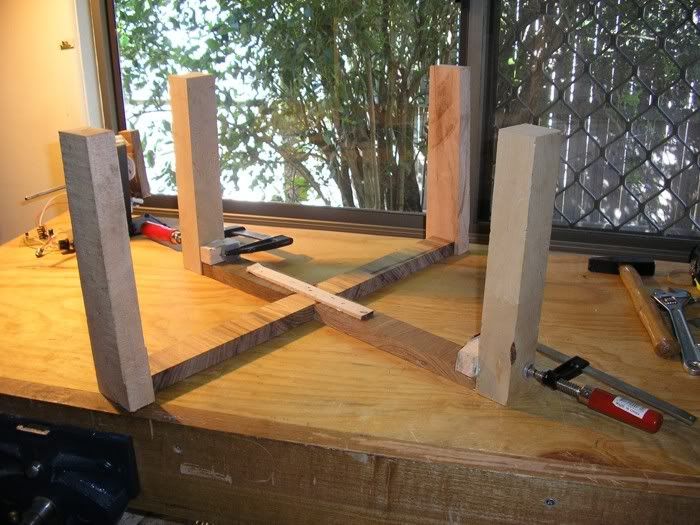
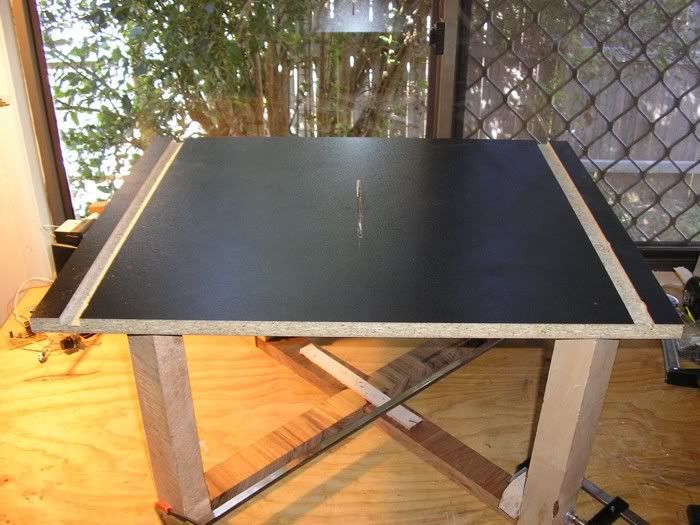
The table is built with particle board I got for free at the local wood yard. It was cabinet maker leftovers. That piece was cut on a panel saw so all angles were straight/flush. The legs were also scrap I had lying around. I just cut them all the same length.
I glued and nailed the legs this way (click thumbnail)

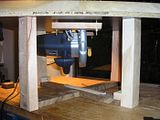
Next step was to cut two miter slots on both sides of the particle board. I used a 3/4" bit with with the router fence.

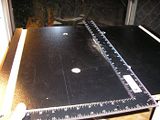
I then took the circular saw and slotted a hole in the middle of the particle board for the fretting saw blade and
nailed the P board on top of the legs. It was surprisingly pretty strong for how crappy the legs look

-
My post was for Garehanman who is looking for a way to rout corners of pickup routs in smaller diameter than 3/8. You obviously need to rout the holes with a larger bit, then finish off the corners with the follower bushings and the small size bit you need.


Ritter Bass
in Solidbody Guitar and Bass Chat
Posted
Ritter bridges are indeed made by ETS. They won't sell you the same exact design though. At least the model used for Royas and Classics. This model is just the saddle part with anchored strings into the body.