


Myka Guitars
-
Posts
753 -
Joined
-
Last visited
Content Type
Profiles
News and Information
Tutorials
Product Reviews
Supplier Listings
Articles
Guitar Of The Month
Links and Resources
Forums
Gallery
Downloads
Posts posted by Myka Guitars
-
-
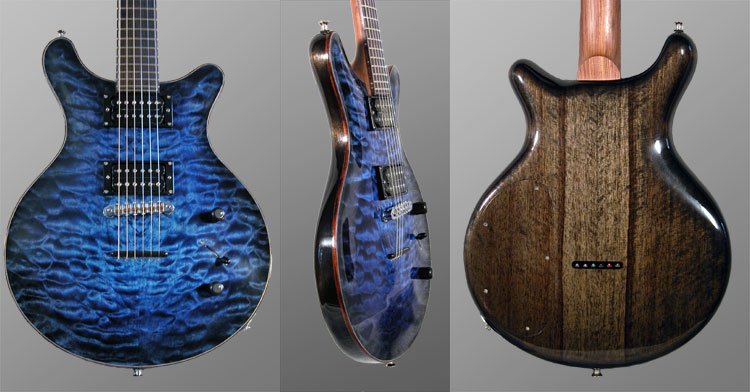
Here's my entry for the month of May. Here are the specs:
Body: Black Limba
Top: Quilted maple with a black/blue burst
Neck: Bolivian rosewod
Fingerbaord: Brazillian rosewood
Binding: Indian Rosewood w/5 ply purfling on body, fingerbaord, and headstock
Bridge: TonePros tune-o-matic with ebony string-through tailpiece
Pickups: Seymour Duncan JB bridge and 59 neck
Finish: Nitrocellulose on body only. Bare wood neck for that rosewood feel!
Switching: Master Volume, Master Tone, and a 5-way:
1. Bridge humbucker
2. Outer coils
3 Bridge and Neck humbuckers
4. Inner coils
5. Neck humbucker
A push/pull knob on the Tone puts the circuit into series/parellel for each position. Great selection of useable tones.
Here are the pics:
For more pictures visit my website: Blue Electric #010
Here is a page with some construction pictures: Blue Electric #010 construction process
-
I used water soluable aniline dye from StewMac. I mixed up some blue, purple, and black. All the blending was done on the wood. This is what I did for the stain:
0. Raise the grain with a wet rag and sand with 400 grit 3 times.
1. Apply black around the edges and purple for the rest, let it soak in.
2. Lightly sand (400 grit) so only the deep soaked stain remains and the white appears on top of the curl or quilt grain.
3. Apply blue all over, twice.
4. Let it dry and sanded again to lighten up the top.
5. Rub blue into the center and black around the edges and while it is still wet rub purple in between to blend the blue and black.
5. Rub more blue in the center and black near the edges.
6. Sand again.
7. Applied the final staining of black at the edges, touch of purple in the middle and lots of blue in the center.
My approach to staining is much like watercolor painting. It is a very forgivable medium. If you put on too much and make things too dark either let it dry and sand it back or wipe a wet rag over the dark area to remove dye. Also you can force lighter color dye over darker dye by saturating the area and rubbing it in. You can also fix a line of dye when you go over a dry area by rubbing it out with more dye.
I would suggest starting with a sanded piece of wood and practicing. Play around with it and you will get the hang of it. Start out with diluted dyes so you can see how they work. Then just keep adding more to build up the color. As you can see I used about 10 coats of stain altogether to get the color I wanted. It will come to you if you work with it.
I don't have a spray system either. All my coloring is with dye and I brush on nitrocellulose lacquer for the clear coats. It works pretty well even if it does take a little longer. The result is the same.
-
Try Gilmer Wood Company and ask for Marc Culbertson. He is a builder and will get you exactly what you need.
-
asm, I got the piece of Bolivian rosewood from Crosscut Hardwoods in Portland, OR when I lived out there last year. It was a 2" thick piece, 4" wide by 96" long. I think I paid about $100 for it and I'll get 3 necks out of it. I use a scarf joint for my headstocks to save on wood.
I know that Allied Lutherie carries Indian Rosewood neck blanks for $80 a piece. It is cheaper to find it in a retail woodstore, you just have to sort through the pile to get to the quartersawn stuff.
You can also try Gilmer Wood Company. They have everything for guitars. Ask for Marc Culbertson, he is a builder and will set you up with exactly what you need.
-
Nice inlay! I love the look of it with the red body. And great job for your first. Really a nice and balanced design. I have been thinking of something celtic, similar to this. Your work is definitely an inspiration. Can't wait to see the next guitar!
-
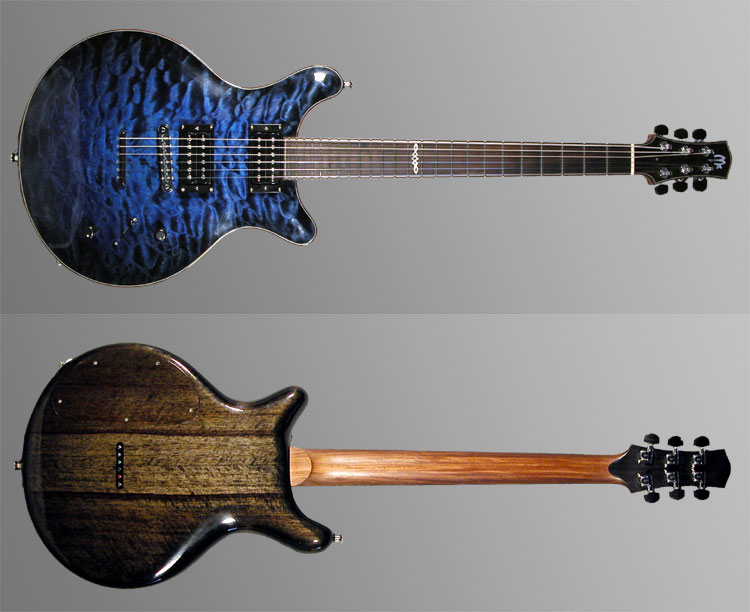
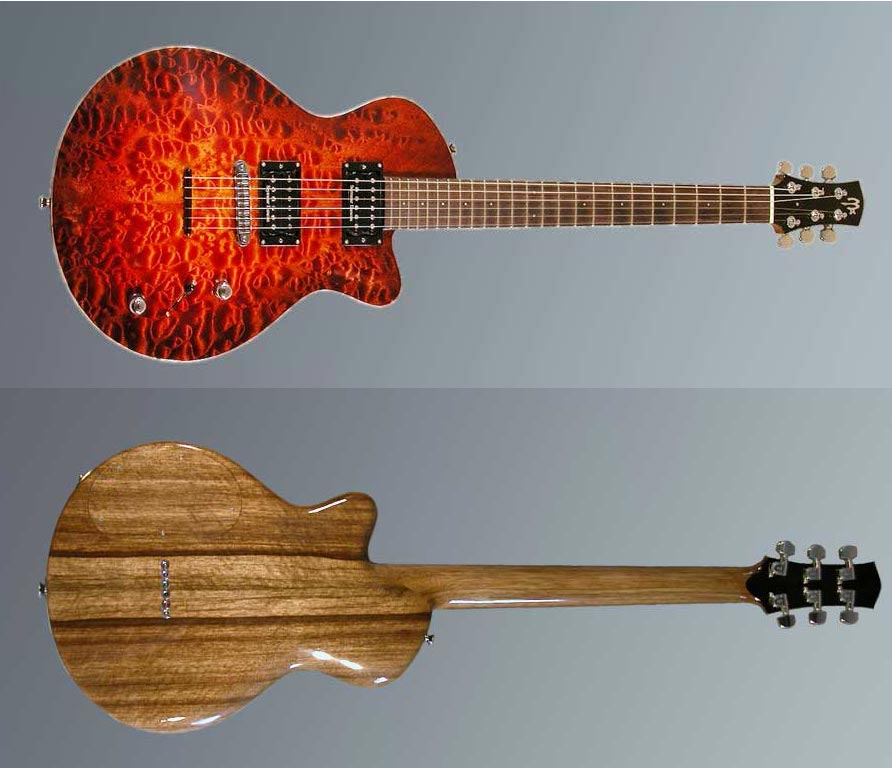
I just finished another electric gutiar. This one is a double cutaway with a quilted maple top, Bolivian rosewood neck, Brazillian rosewood fingerboard, and black limba body. The dye is a black/purple/blue burst on the top and a black burst on the back. This was all done with water based aniline wood dye. The body is slightly chambered for resonance and weight but not too much so it will balance nicely with the extra weight of the rosewood neck. The whole guitar is bound with Indian rosewood and a 5-ply b/w/b/w/b wooden purfling. The finish is a brushed on Nitrocellulose on the body and nothing but bare wood on the rosewood neck. It plays nice and is smooth! Here are a couple pics:
Top:
Back and details:
There is a page on my website with process pictures here: 010 construction process
Enjoy!
-
Wow! You have really done a fine job with this guitar. The details are perfect. You did a really nice job on this one. Can't wait to see more pictures!
I think whatever finish you decide will work beautifully but I second the subtle approach. I like natural finishes for my own instruments or some light bursting. I would just let the wood and fine details shine.
-
The black on the headstoack back is actually 1/16" thick ebony veneer, that's why it looks that way.
Thanks for checking out my site. I just updated it tonight. Let me know what you think of the redesign.
-
You are right about the recordings. I just recorded straight out from the preamp. The amp is a Fender Hot Rod Deluxe. It is basically a way to test the circuitry in the guitars when I wire them. The tone from the amp speaker with the cabinet and room resonance is actually pretty good but you just can't capture that through a line out. I know it's not the best way to do this but I don't have a studio setup (yet!)
Any tips for recording these?
-
I love the tone of this guitar. The limba has a very open sound, especially with the chambering. It is much like mahogany but a little bore brilliant and rich with overtones.
There is a sound clip on my website (830 KB):
-
Beautiful work, just awesome. I love the lines in the wood too. You could not have found a nicer piece.
I have a project that I just started with spalted maple. It is a strange wood indeed. As far as stability goes I think that using it as a top wood glued over a core of more solid wood it should hold up fine.
-
Setch, thanks for the comments. That is what I was hoping to achieve with this design. The Les Paul was definitely an inspiration for the design but I have to say that I am a huge fan of Jimmy D'Aquisto's work with archtop acoustic jazz guitars. These have been a huge influence on my single cut designs.
daveq, To answer your question. I brushed the lacquer on because it was the cheapest alternative to a proper spray booth. When you brush lacquer it goes on a little thicker too so it is easier to build up a good amount of material before you sand it smooth.
Litchfield Custom Guitars, You noticed the bridge idea from Jet guitars. I tried it on one of my guitars and loved the way it works. I always play with my hand resting behind the bridge and the stop tail always seemed too big. This is a great alternative and I can also run strings through the body for more solid contact.
-
Here is the full finishing process:
1. Sand wood to 320 grit.
2. Apply the dye:
a. Apply dark dye all over the top
b. Lightly sand to lighten the dye
c. Apply sunburst colors
d. Repeat until you get what you want
3. Seal with 2 coats vinyl sanding sealer
4. Apply 2 coats of lacquer
5. Wet sand with 400 grit until the finish is smooth (be careful not to sand through to the dye)
6. Apply 2 more coats lacquer
7. Wet sand with 400 grit then 600 grit
8. Apply 2 more coats laquer
8. Wet sand with 400 grit then 600 grit
9. If the finish is looking smooth then stop if not apply 2 more coats then sand.
10. Wait. 2-3 days minimun, 2 weeks is better for the lacquer to cure.
11. Buff out with coarse Mazerna compound (www.Stew-Mac.com)
12. Final buff with fine compund
Hope this helps.
-
Thanks for all the comments. I appreciate it.
I haven't had anthing but success with the limba for necks. It is just as strong and stable as mahogany and as long as the grain is straight I would use it for a neck.
The finsh was applied with a 1-1/4" watercolor brush with nylon bristles. This was the smoothest brush I found and it left very little brush marks. I applied 2 coats of sanding sealer and 2 coats of lacquer before I wet sanded with 400 grit. Then I applied 2 more coats lacquer and sanded smooth until I had 6 coats of lacquer. This was plenty thick enough to get a smooth finish. After a few days I buffed it out with a cotton buffing wheel using first coarse and them fine compound. Just be careful not sand too close to the edges and you should be fine. You can also be sure to always overlap on the edge so you always have enough material there.
-
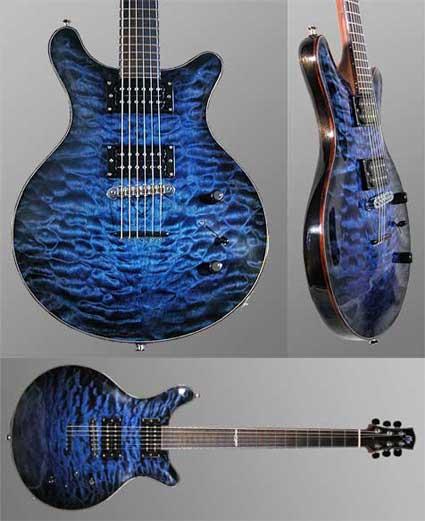
Hello all. I am new to the forum so I thought I would introduce myself. This is a great place. I have poked around a bit already. I have just finished an electric guitar for a client and I thought I would post some pictures of it here.
I usually take a lot of pictures of the process I go through and I would be happy to post anything you might be interested in seeing. I have been given a lot of help from the luthirie community and I enjoy giving back so let me know what I can share with you.
The specs:
Body: Curly Black Limba (heavy chambering leaving 3/8" back thickness)
Neck: Black Limba (2 grpahite tubes flank the truss rod)
Top: Quilted Maple
Fingerboard: Indian Rosewood
Scale Length: 25" (24 frets)
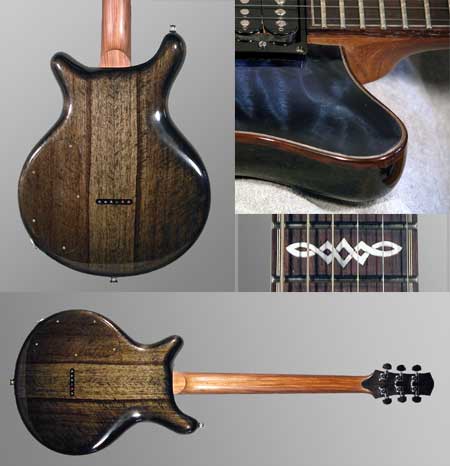
Pickups:
Bridge: Seymour Duncan JB Model (SH-2)
Neck: Seymour Duncan Jazz Model (SH-4)
Switching: 5-way, 1 Tone, 1 Volume with series/parallel push/pull
1. Neck Humbucker series/parallel
2. Inner Coils series/parallel
3. Neck and Bridge Humbuckers series/parallel
4. Outer Coils series/parallel
5. Bridge Humbucker series/parallel
Hardware:
Bridge: TonePros tune-o-matic with ebony tailpiece
Tuners: Schaller M6's
Finish: Brushed on Nitrocellulose Lacquer


New rosewood neck blue quilt electric guitar
in In Progress and Finished Work
Posted
guitar_ed, you are right about blue and quilted maple. I looked at your blue guitar. Very nice! I am amazed at how wood grows sometimes. That quilted maple is just incredible. That orange Tele is sweet!
mdw3332, I am working on a spalted maple top guitar right now. Spalted woods are inconsistent in density and the softwood does not machine well. If you want to do binding make sure your router bit is sharp and be prepared to touch up the binding ledge with sandpaper. The wood may want to chip out in the softer areas. If you take your time and route slower than usual you should be fine. And be sure to use a sanding block to make sure the softer wood does not sand away first and leave you with a bumpy surface.
Here is a pic of that spalted maple guitar: Spalted Maple Guitar