


adrock1740
-
Posts
28 -
Joined
-
Last visited
Content Type
Profiles
News and Information
Tutorials
Product Reviews
Supplier Listings
Articles
Guitar Of The Month
Links and Resources
Forums
Gallery
Downloads
Posts posted by adrock1740
-
-
my first "big power tool" purchase ever. i've owned so many power tools throughout my life, but never anything this big. it's definitely nothing too quality, but it's very solid, and runs/cuts very smooth. i'm sure some people around here will make fun of the brand. but it'll do for now, that's for sure.

-
as i said on ss.org, best js i've ever seen. love it, especially the black limba.
-
That's beautiful.
Oregon Wildwoods?
SR
Yes they are my emergency last minute I need a top supplier. I try to find crazy billets from other places but when I need a winner or Myrtle (Oregon WW is the best place to get Myrtle) that is where I go.
seriously, their myrtle selection is fantastic.
-
thank you all for the kind words!!
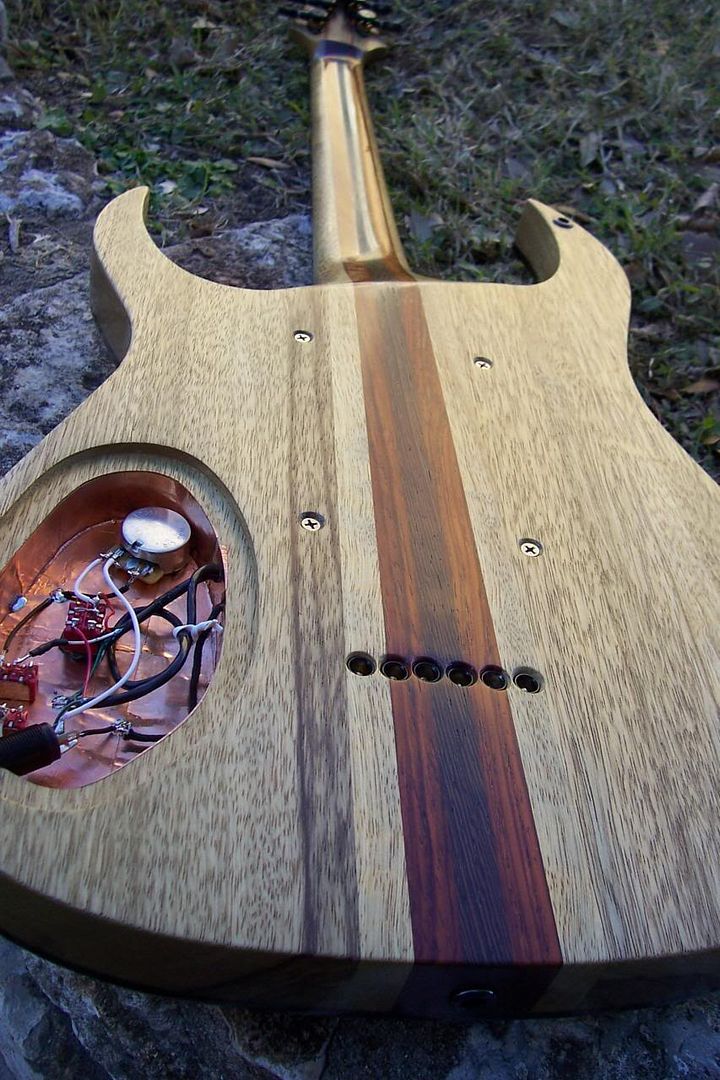
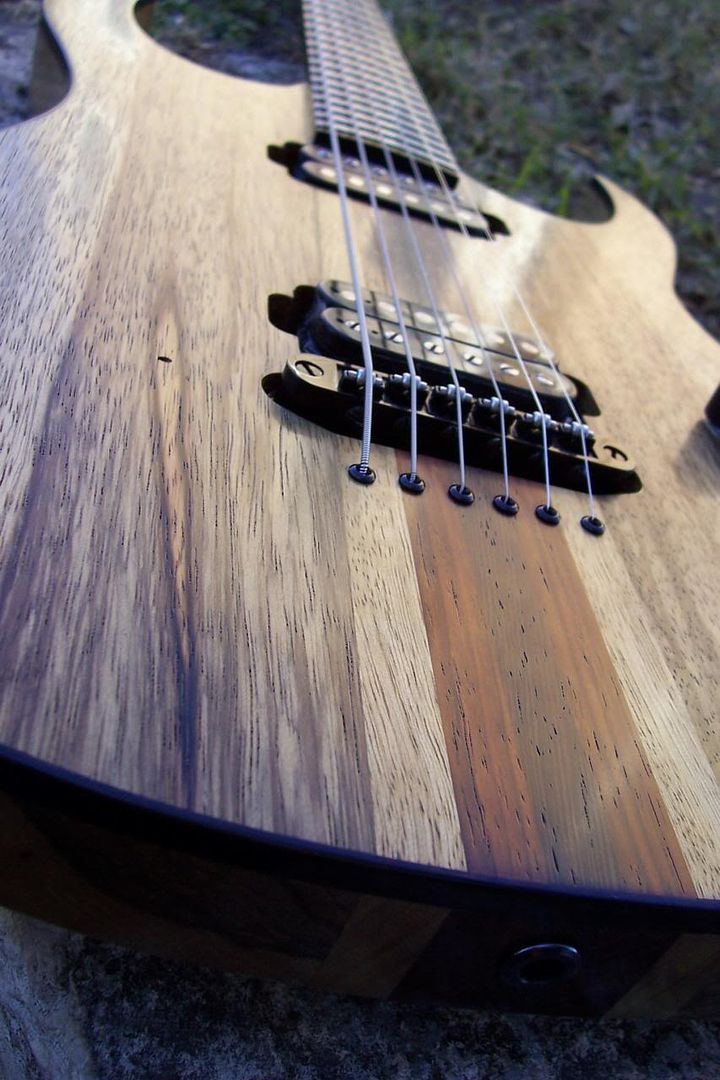
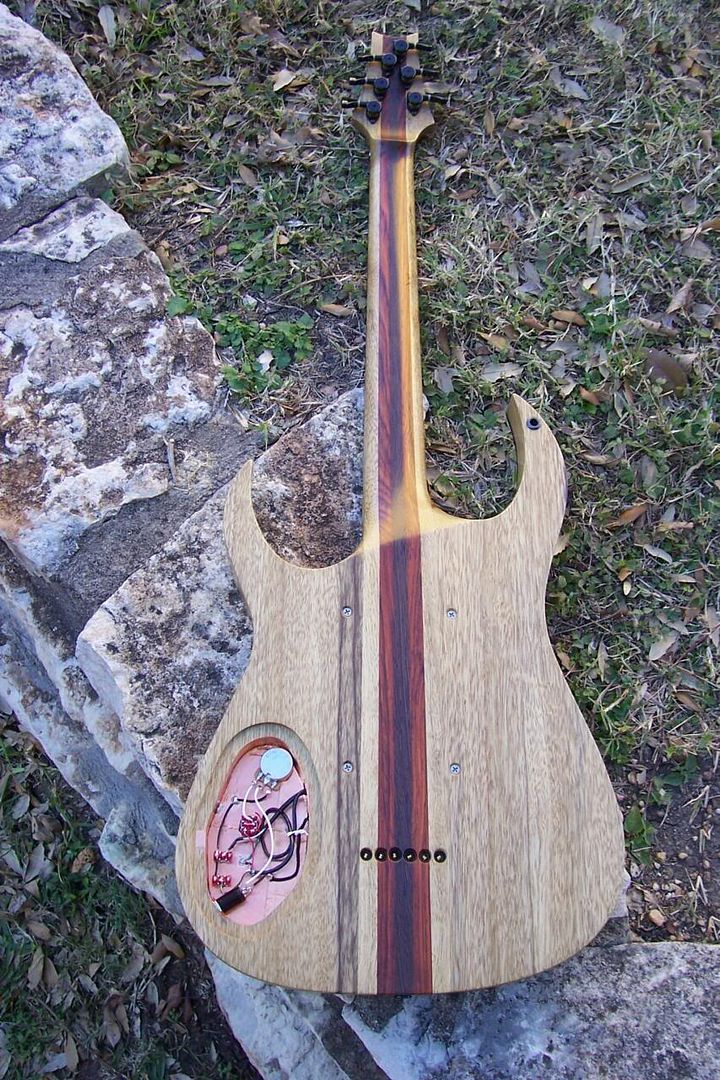
#1 is the pickup screws being mounted through the back. It is a unique way of doing it, which I like. But instead of a nice clean looking back there are four big honking screws in the back. If it was done with smalled screws it might not be as noticeable?this is true. i might try different sized screws in the future. it's really not that bad looking in person though, but i do get your point. the ability, and ease, of adjusting the pickups far outweighs the aesthetics in my opinion.
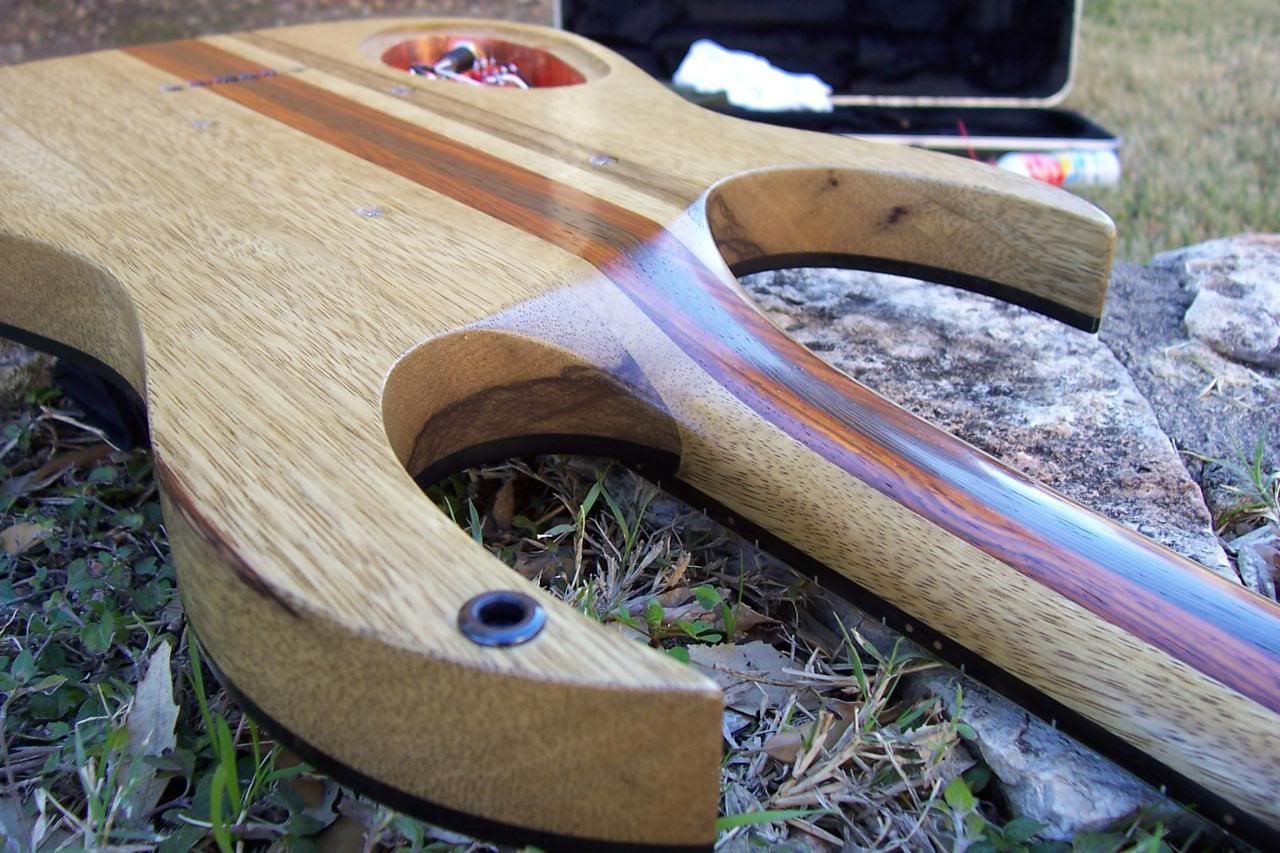
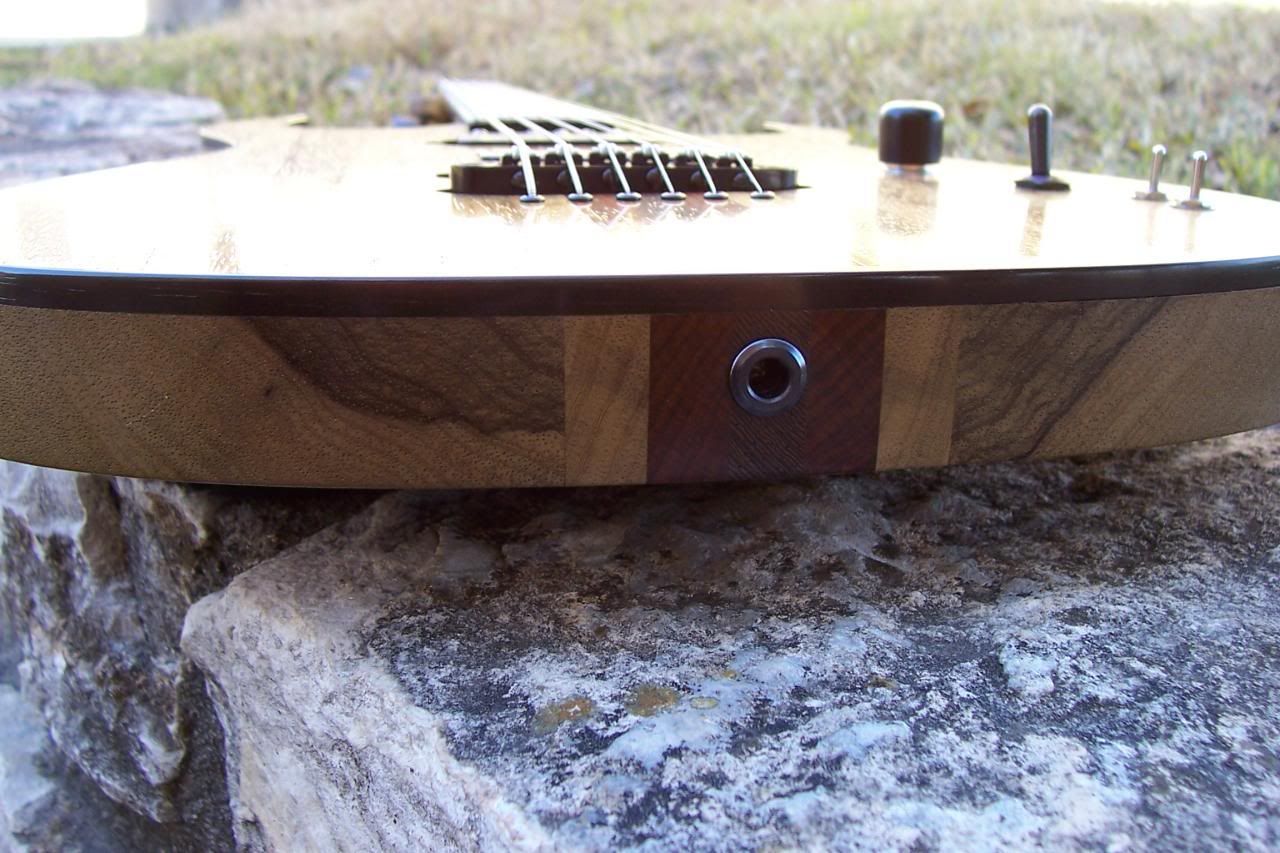
#2 is the recessed strap buttons. At first I thought it was a great looking idea and was a fan of it. But then it hit me, you can only use a strap with Dunlop strap locks on it. What happens when you, or whoever may buy a design like this, goes to a gig and forgets their strap. Or at least one with locks on it. You can't just borrow another strap, it must have Dunlop locks on it. So you get points for creativity with it, but lose a few as well for feasibility.this is a concern with any "strap lock" system. if you forget your strap, you're kind of SOL unless someone around has the exact same system...
and as wes and wez said, the strap lives in the case with the guitar. permanently. it is never forgotten. and this will be my guitar forever, so i'm not too worried about it. if someone wanted a guitar and HAD to have normal strap buttons, i would definitely do it. though i believe aesthetics far outweighs the strap issue in this situation.
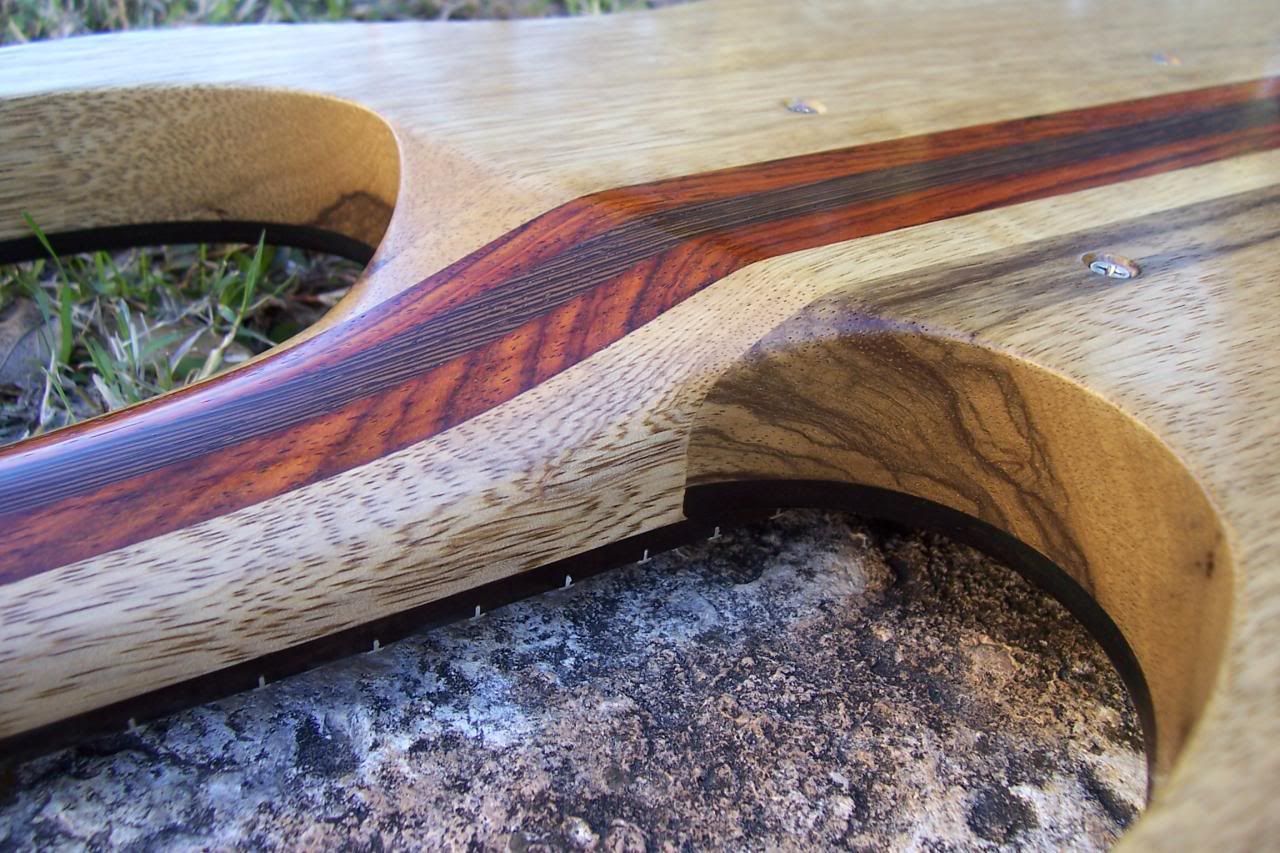
Very nice work, and great outdoor photos. The open grain on the cocobolo, wenge, and limba looks good with Tru-Oil.
The 4 rear pick-up height-adjustment bolts are an interesting twist that I don't recall seeing before. As with the mini-switches, they'll look better in black.
How is it for bending with those strings and dropped tuning on a 25" scale?
thanks man!! i don't really do much bending, so it's fine for me. and what little i do, i haven't noticed any problems with it fretting out.
-
sorry about the lack of updates guys. got busy finishing this guitar, and side tracked by life. i forgot to check back here when i was done

but i'm gonna try to be more active here, as i have more builds coming up in the near future.
and here is the finished guitar - http://projectguitar.ibforums.com/index.php?showtopic=44752
-
continued, due to picture limits per post....

i got the guitar done just in time for a special lesson last week. animals as leaders were in town...
tosin liked it a lot, and hopefully i'll be building him one just like it in the near future. with a few more strings of course.

had to get this shot with his custom ibanez LACS 8 string. what a beautiful instrument, played amazingly well.
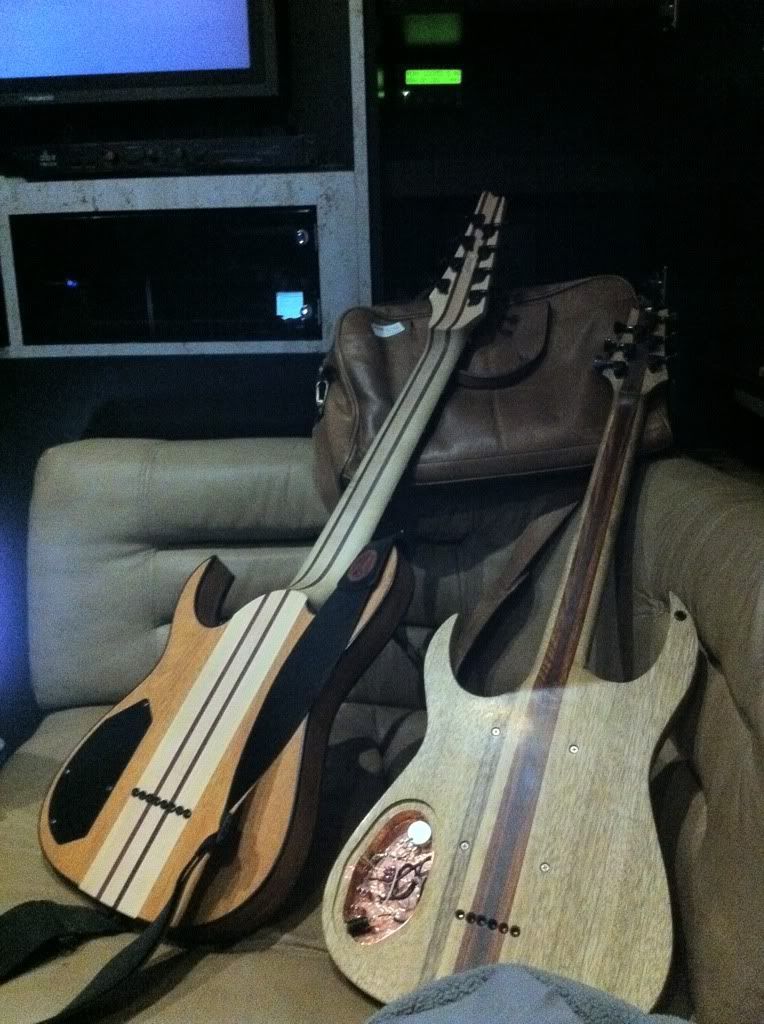
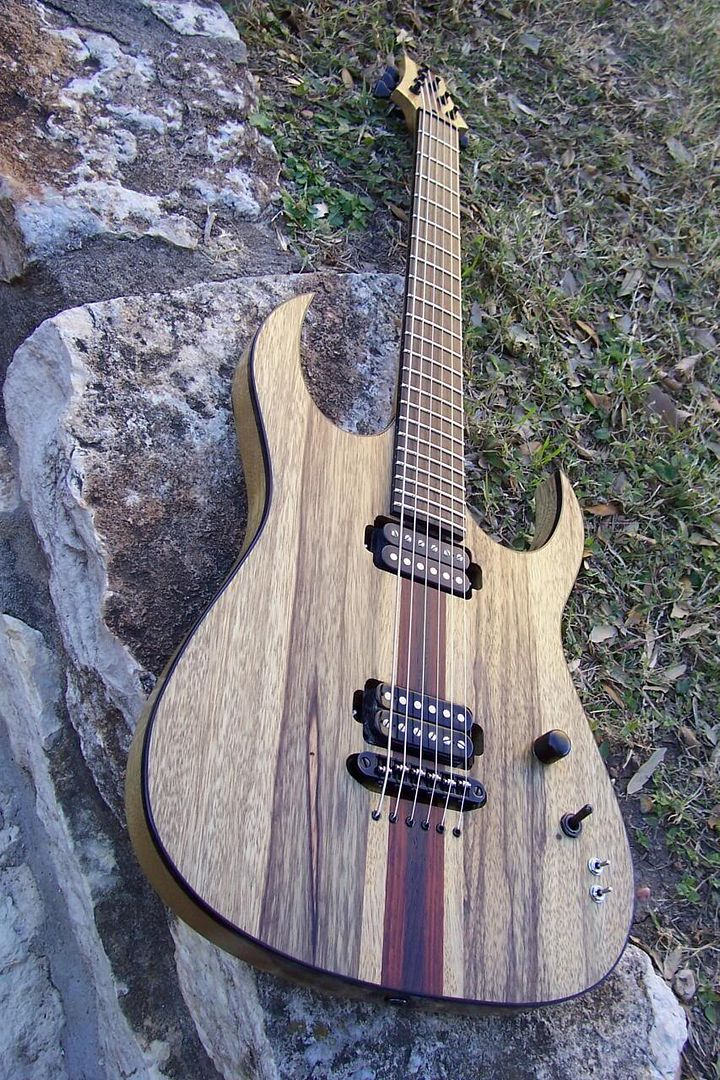
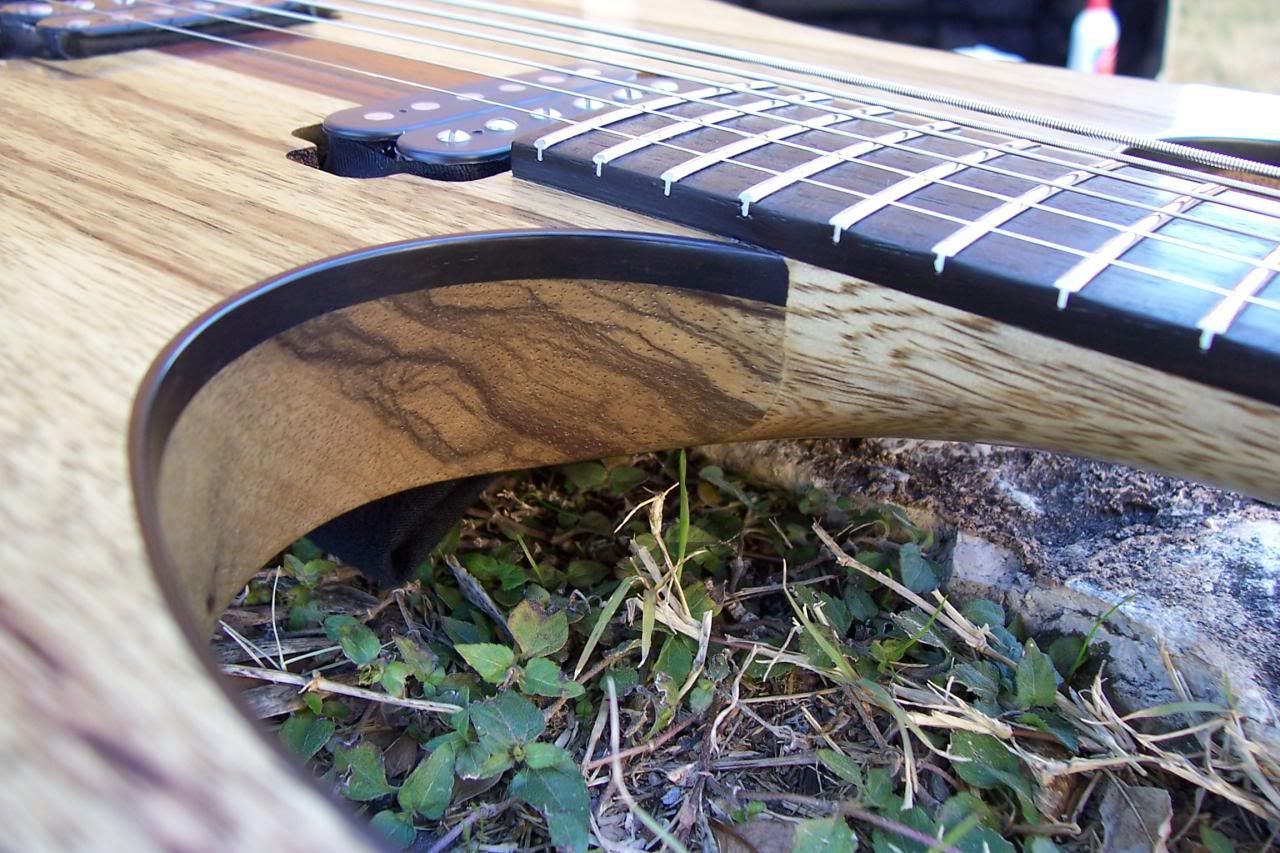
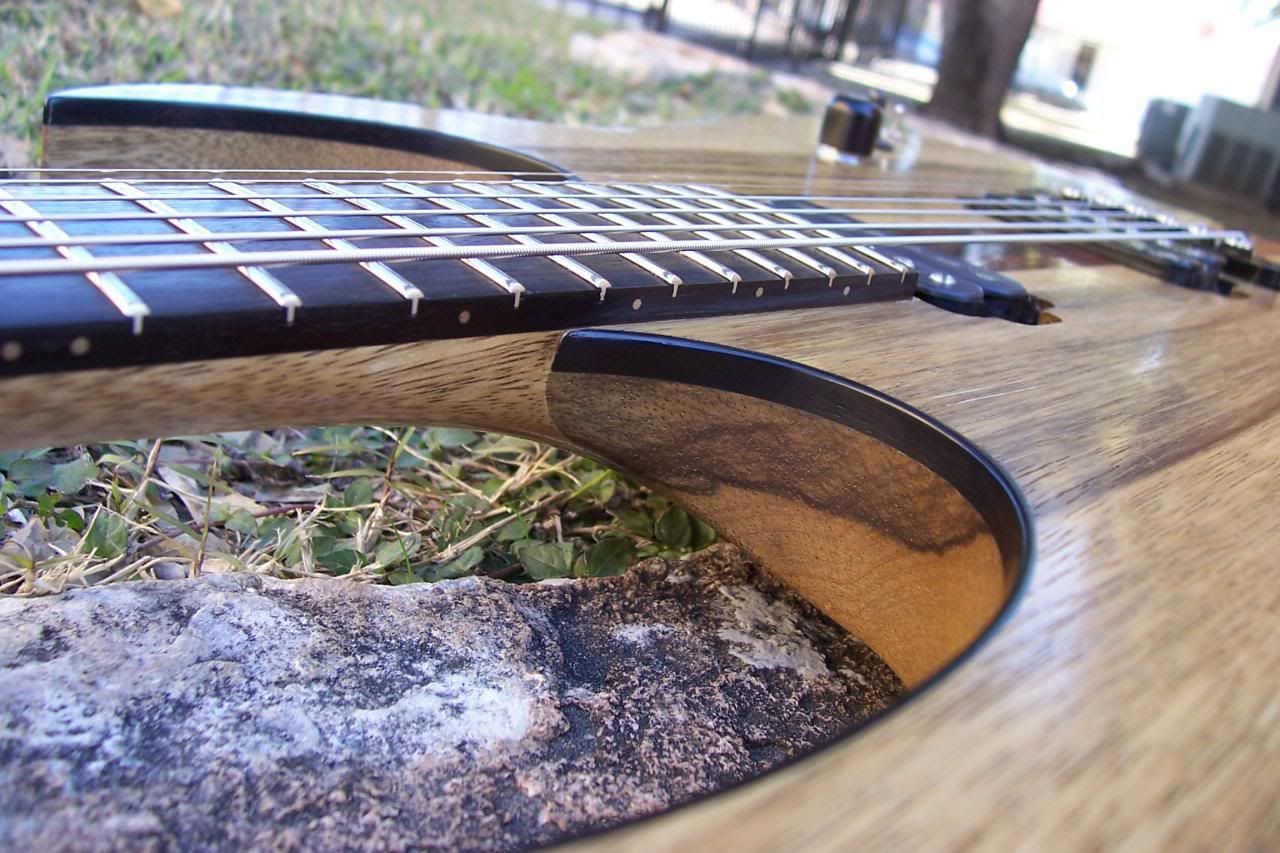
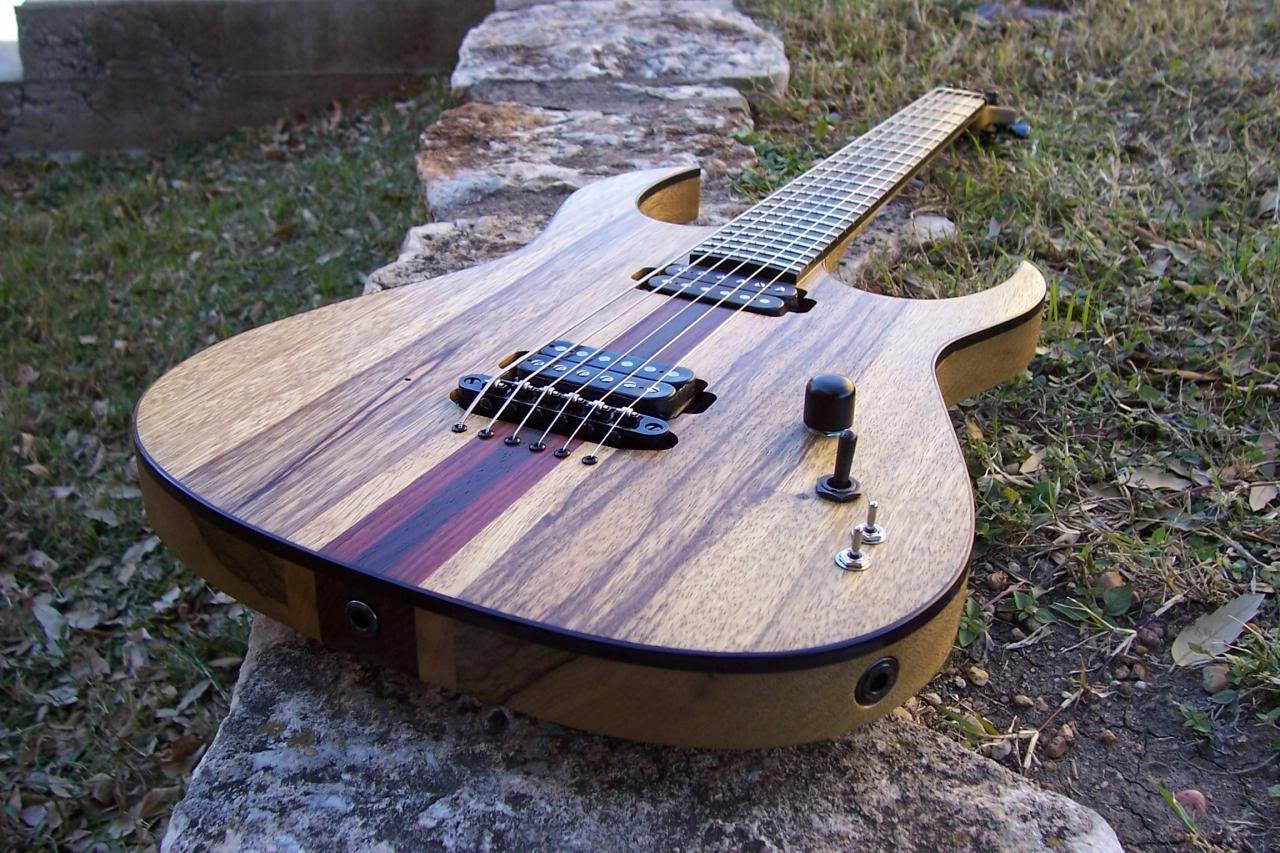
superstrat style body with black limba wings, and ebony binding
thin body, at 33mm
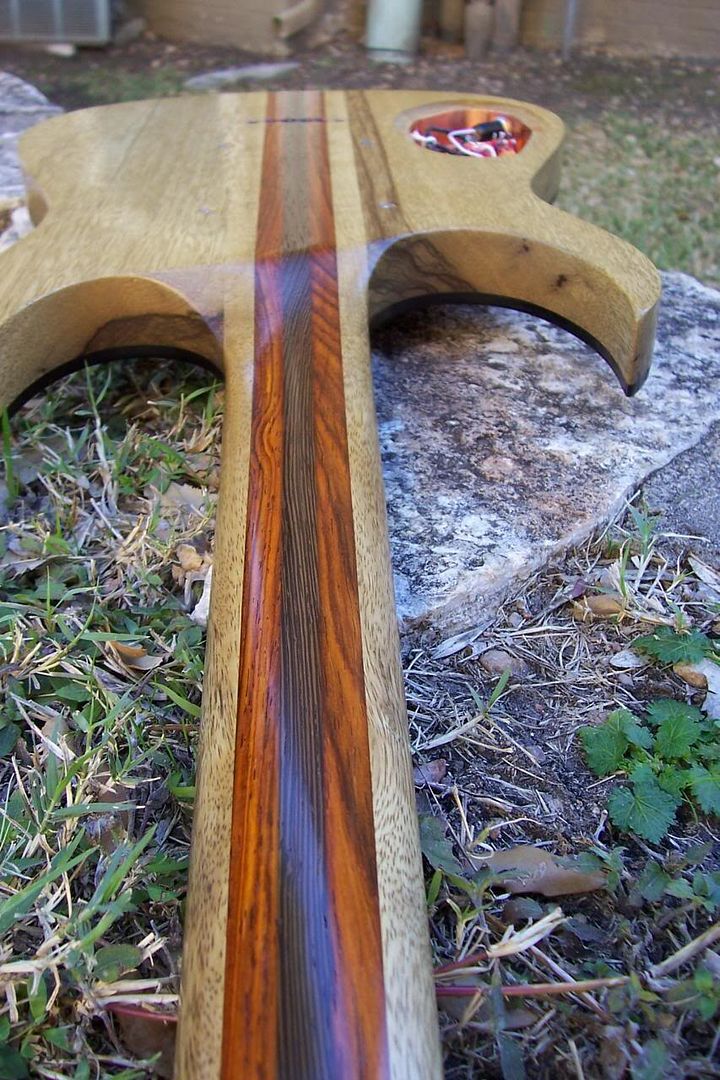
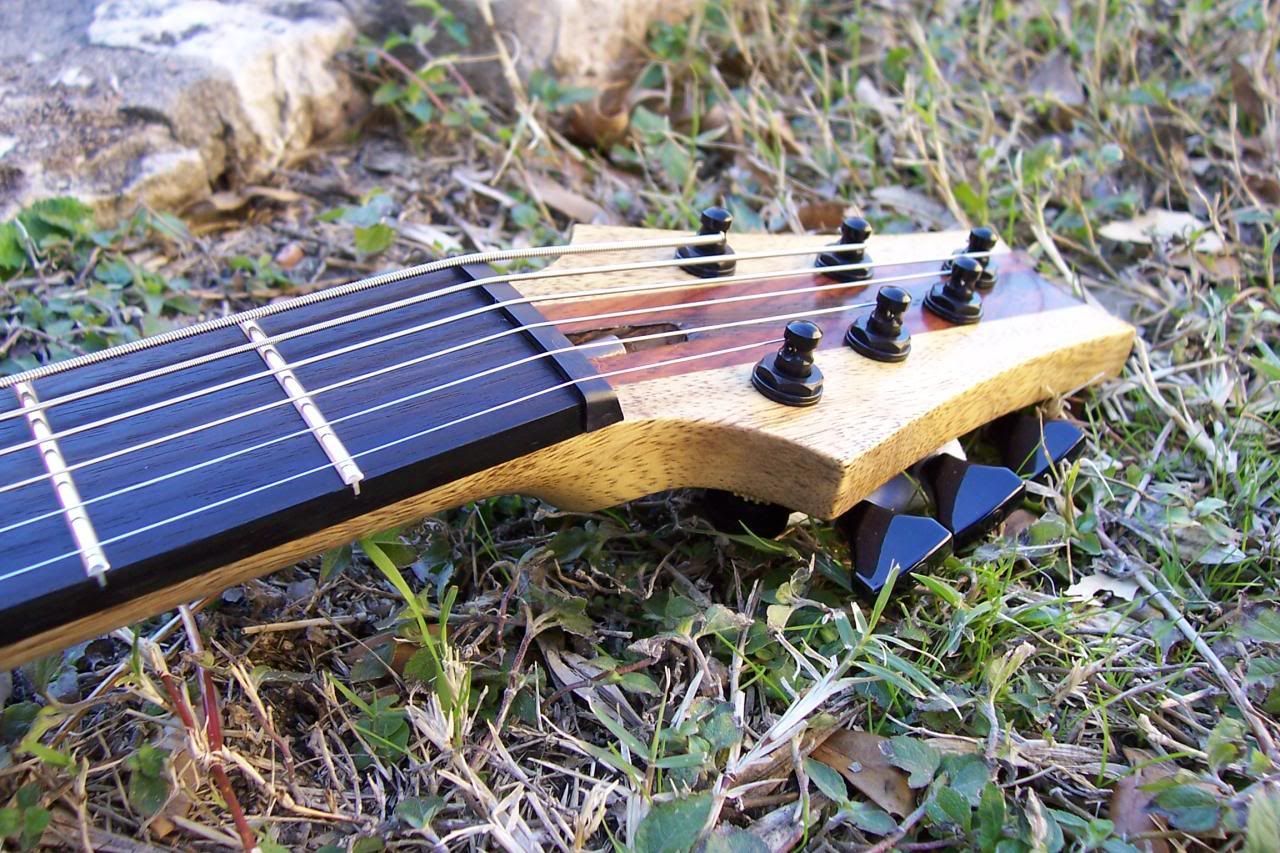
white limba, cocobolo, and wenge neck. with volute
satin tru-oil finish
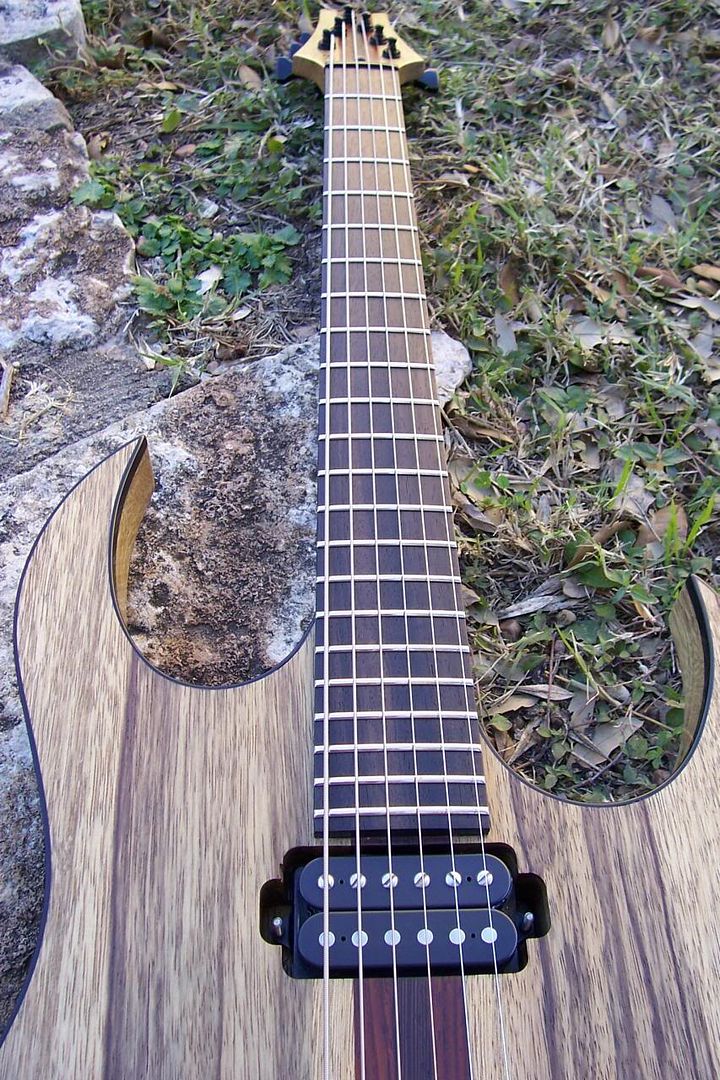
madagascar ebony fretboard, side inlays only
25" scale length, in drop b (.062 - .012 d'addario xl)
tom style roller bridge, string through body
hipshot locking tuners
ebony knob
recessed dunlop strap locks
bare knuckle nailbomb in the bridge
dimarzio air norton in the neck
one volume, three way pickup selector, mini switch for each pickup (just coil splitting, for now)
this guitar is all wood and metal were possible. no plastic. including the side markers...
i grew up learning to play guitar on rg's, and i always wanted a rgt style guitar. but i could never afford one, so i started building this a few years ago. i was building drums at the time, and had access to some good equipment. i've been working with wood my whole life, and grew up watching my grandfather build and design acoustics. i used to look forward to the newest stewmac catalogs all the time in school, even hiding them from my grandfather until i was done with them, haha. but yeah, i got away from the drum building and moved around a bit, holding onto this beauty until the time was right. and that time is now. enjoy!!!
-
i was gonna tell you guys a bit about my history, but i know how people are. i can't lie, i'm the same way. we just want pictures...
so pics first, specs later:
1. the nut is temporary. i'm waiting for my tax return to buy new nut files.
2. the mini switches will be replaced with black ones, don't worry.
3. the cavity cover isn't finished yet. waiting on said tax return to buy a new belt sander, so that the matching cavity cover is perfecto.
2. yes, the pickup routes are a bit large. lesson definitely learned.... the next will be air tight.

-
that looks beautiful quarter!!
so i bought some scrap cocobolo, a quart of zinnser seal coat, and a bottle of tru oil yesterday. i'm running four tests right now.
1 - all tru oil, wiped with alcohol.
2 - all tru oil, not wiped with alcohol (just to see what happens).
3 - two seal coats with tru oil on top, wiped with alcohol.
4 - two seal coats with tru oil on top, not wiped with alcohol (just to see).
i started tests one and two last night before bed, both of which are still slightly tacky. i started tests three and four about 15 minutes ago, both of which are already dry to the touch. i think i know where this is going to go...
-
You can apply as many coats as you want. It'll just take longer to cure. But I thought you wanted to still feel the wood?
i definitely do. i'm just not familiar with the coverage, or thickness, of shellac. 4 coats might be plenty. but i've been thinking about doing a 1 pound cut so it's thinner, and dries a bit faster. so the coats might be a little thinner than "average".
i'm having a pretty tough time deciding between three finish options.
1. all shellac finish
2. sealed with shellac and tru oil for the top coat
3. all tru oil, with a quick drying thinned down "seal coat". still have to test this to see how it'll work with the coco...
i don't know why i'm stuck on tru oil so much. i've never used it. it's just that i've heard such great things about it. and it seams a lot like wipe on poly, or tung oil, which both are super easy to use. and seamed to dry pretty quick. i don't really feel like mixing shellac and "learning" how to use it, but if it's what needs to be done then thats that. maybe shellac dries faster than what i'm used to...
i might have to bite the bullet and buy both and do some test with to see which i like better. didn't want to spend the money, or time, but i think that's what's going to have to be done
If you have a Rockler or Woodcraft store local they will have some flake.For a full on shellac finish, French polishing is the old school way to lay it down. Here is about the best French polishing guide around and even if you don't do a French polish, it has a lot of good information worth checking out. http://www.milburnguitars.com/fpbannerframes.html
we have a woodcraft here in Austin. i'm heading there today to buy some stuff
and thanks for the link, definitely gonna check it out
-
I've always used the canned stuff from the store without issue, but mixing your own would be a LOT better. Shellac has an expiration date. The older it gets, the darker it gets.
On a finishing note, I've put a few coats of shellac on stuff and then buffed it with steel wool. So long as you keep the coats to a minimum - say 2-4 - you'll get a matte finish and still be able to feel the wood texture. It won't be in any ways durable, but it should offer a reasonable amount of protection from moisture.
i have no problem mixing my own, i just need to find some locally, without having to buy a whole pound.
why couldn't i apply more coats, and just buff it with the steel wool or pad to get the same matte effect? i don't want more than 6-8 coats though, just depends on how it goes on, 4 might be enough. i'm going to give it ample time in between coats in any case, at least overnight, just to make sure everything is cured before applying the next coat. i'm gonna get some shellac and some coco tomorrow to do some samples.
-
Just yesterday someone posted a write up tutorial on French polishing (shellac) on another forum....
it's cool, i'm going for a very thing finish so...
Don't use the Zinnser Bullseye shellac sanding sealer as a finish on a guitar unless you want the finish to be very thin. When you apply it in multiple coats, the successive coats make the finish soft.
it's going to be very thin, maybe 6-8 coats total.
I had some problems with cocobolo once before. I emailed Marc Spagnolo for some info on the subject, as well as a couple dozen other websites. The response was unanimous: cocobolo is a real PIA to work with, and it HAS to be sealed or 1) a barrier finish will not cure, and 2) the color will eventually darken as the natural oils semi-dry on the surface.
The best sealer to use is shellac. It will keep those oils INSIDE, where they belong. Shellac also has the unique property of being able to stick to any other barrier finish out there. This makes it VERY useful as a selaer. It's also a fine finish in it's own right,but it isn't used as one very often anymore.
I agree that if you're sealing the coco, you should really just seal the whole thing. This would completely eliminate any possibility of some unknown weirdness later. I feel it's best to have a uniform base to work from.
Shellac isn't the fastest curing finish in the world when the layers are built up, but it's pretty fast when only one coat is applied. You can handle the item in just a few hours.
How should you clean off the oils before using the shellac? I used alcohol after I sanded off the top gunk, then applied the shellac immediately. Alcohol is shellac's solvent, so there was no need to make sure it was dry first. I came back the next day and used an aerosol polyurethane over the top. The color has remained exactly like it was for 2 years now.
thank you very much for this post, lots of useful info. i'm definitely just gonna seal the whole thing if i'm sealing the coco.
so i'm thinking my plan will stay the same. one or two "thin" coats of shellac, than 4 or so of tru oil and leave it at that. i guess i should get some flakes to make my shellac? i've heard that zinnser sealer coat is pretty good stuff for over the counter, and i'm just using it for a sealer...
-
I would go with what Quarter recomends. Oily woods can cause havoc with any oil finish. the oil in the wood is a non curing oil that will mix with the curing oils used for finishing and will cause the oil finish to never fully cure. This does not always happen, but it is not a fun gamble. The alcohol or acetone trick works well for gluing or rapidly curing finishes since they penetrate and harden before the oil has a chance to work it's way back into the wood. But some wood workers feel that technique can cause other problems, thinking that the lack of oil causes oil inside the wood to rush to the bare area and flood it with oil. If this is true or not I am not certain, but either way the area will have oil creep back into it before and oil finish fully cures and could cause issues.
Shellac is a great barrier coat, and if you are already using shellac why not use it as your finish. It is the easiest finish to repair and even easier and cheaper to buy then Tru-Oil.
which is gonna dry faster, just out of curiosity. the tru oil, or the zinnser sealer?
this is pretty much where i'm heading honestly. i was thinking a coat of zinnser bullseye sealer (which is basically shellac from what i've read), than a few coats of tru oil and be done with it. i've also read some about thinning the tru oil a bit so it dries faster, and using that as the sealer, just making sure to let the finish dry overnight before the next coat.
i honestly haven't thought about using shellac as my main finish. i've honestly never used shellac before. i have used numerous wipe on oils though (tung, wipe on poly, etc) with great success. and for the type of finish i want (satin, thin, easily repairable), i was thinking oil would be the easiest way to go. i've always thought of shellac as a spray finish, but i guess it could be wiped on...
-
so from what i have gathered from research and here, is that i need a good barrier/sealer between the coco and my top coat. i'd like to use tru oil, what are some good barriers/sealers to go under the tru oil? should i use the shellac method i mentioned earlier, or go for a dedicated sealer?
and thanks again for the help guys, really appreciate it
-
well from my understandings, putting a finish over cocobolo is never very certain. and also from what i understand, cocobolo and wenge are very stable woods even when uncoated. so my thought was just to get some protection and seal off the limba with 4-6 coats, leaving the cocobolo and wenge "raw'. i'd still probably go over them on the last coat or two, just so everything blends nicely. but there wouldn't be 6 coats trying to dry over the super oily coco...
-
hey everyone. haven't been on here in quite a long time. I started this build years ago, and I'm finally getting around to wrapping it up. I have some questions on finishing it though.
and yes I've searched and done research. just getting as many opinions as I can
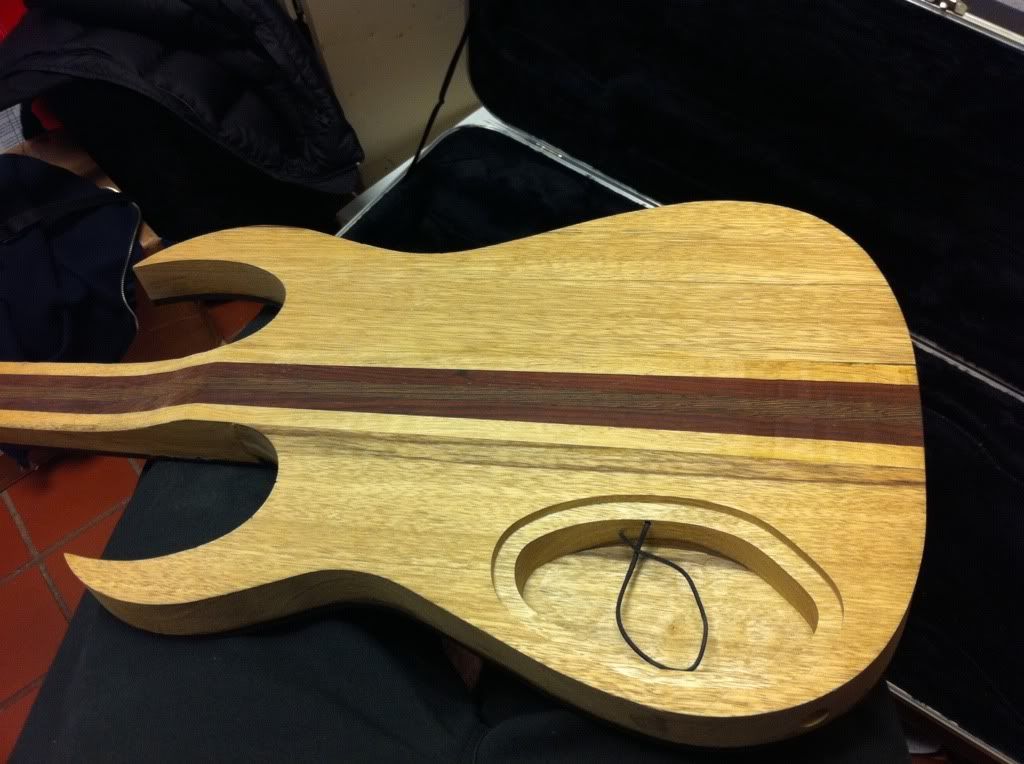
so it's a neck through, black limba for the wings. the neck is a five piece laminate. wenge in the middle, cocobolo on either side that, then white limba on the outside. I'm looking for a very thin, open grained, oil type finish. I've never used tru oil, but from my experiences with other wipe on oil finishes, I was thinking about 4-6 coats of tru oil. pretty thin and open. I'm only thinking about using tru oil because it seems to be highly regarded, easy to buy, and easily repaired. I'm open to any other suggestions.
my worry is the finish on the cocobolo. I was thinking of taping off the center (wenge, cocobolo), and finshing around that area. maybe get one or two coats on the center stripe after wiping it down with some alcohol. I'm worried about the red oil from the cocobolo staining my limba when I go to wipe it down though. I've also read about shellac to seal it first, than tru oil over it. just looking for everyones opinion about what might be the best way to finish my baby.
-
i actually just went through bending some ebony for my current project. its an RG syle body, so i was very concerned about getting the ebony to bend into the tight radius of the upper and lower horns. same size as yours, 1/4" by .08, got mine from stew mac though. i made a homemade "hot pipe" with a 200 watt lightbulb and a soup can. althought it worked for what i needed, i later used just a regular heat gun, and had almost better results. just make sure to wet the ebony very well, and crank away with the heat gun. dont force it, just apply some pressure and feel the wood bend.
also, i have no binding or bending experience whatsoever, just basic woodworking knowledge. i didnt break one piece bending the two pieces for the inner radius on the horns. just take your time and dont rush it, you'll be fine.
-
ok, i suck at explaining things over the net, ill try my best.
first, we determined that there would be a 3/16 taper over the length of the neck. (37.5" long, 1/2" wide at one end and 5/16" at the other for each laminate). than we got some scrap maple for the taper jig, cut it to 1 3/4" (thickness of the neck), by 2", and 37.5" long, and joined all sides. we than set the joiner to take off between 1/32" and 1/16". a little trick was used that i've never seen done. basically, with the joiner running, dropped the very end of one end of the maple on the outfeed side, than ran the rest of the piece through, keeping firm pressure on the outfeed and infeed sideside. this was repeated about 3-4 times to get the taper. we measured in between each pass until one end of the jig was 3/16" less thick than the other. than we ran the whole piece through to make sure it was straight. so basically, its like Russ' jig, but solid across the length, instead of having to put a support in the middle to support the laminate. we double stick taped the piece for the laminate to the jig, and went to town on the table saw.
like i said, i suck at explaining things over the internet. also, i have to say i cannot recommend this method, as it is not proper use of a joiner. if you choose to do this, i accept no responsibility, and you do so at your own risk.
-
started on my first build this weekend. got my neck laminated and glued up. tapered the neck laminates, did it a little differently than Russ' tutorial explained though. tapered them on the table saw. i'll spend the rest of the week drawing on the blank, than cut it up next weekend.
white limba, cocobolo, with wenge in the center.

close up of the neck.
http://i22.photobucket.com/albums/b315/adr...740/new0044.jpg
-
yeah, i did some digging and found your thread on that guitar. man, you wouldnt wanna sell one of the ones you have, would you? even for a little more than you payed.
if not, do you know if the ones that LMII sell are as good a quality as the ones from allied? of if possibly i could buy a bass length from allied and cut it down? im just not sure about cutting one down becuase of the reverse threads, and how i would go about doing it. i know i can figure it out if i had one in my hands, but i dont wanna spend the money if its not gonna work.
-
may i ask what truss rod your using there? i was gonna order one from allied, but they said it's gonna be a few months till they get there supply back in stock.
-
I use a template with a 1/2" slot cut in it a little longer than the truss rod. The router (this one is dedicated to truss rod slot cutting only) is set up with a 1/2" guide bushing and a 1/4" spiral carbide cutter.
wow, good idea. dont know why i didnt think of that. thanks man!
-
actually, got a question for you Russ, or anyone. a quick search returned nothing, and Melvyn doesn't cover this in his book. how would you go about cutting the truss rod route if your neck is already tapared. all im finding is to do it before you cut your taper. i guess you would have to make a jig with straight rails, perpendicular to your truss rod slot for the router edge to ride on. anyone have some insight into what would be the "easiest" way to do this.
-
that's what i assumed. i figured i'd ask you guys to double check though, 'cause you know what happens when you assume.
and yes Russ, i have you to thank for the tapered laminate idea. i'm gonna do it a little differently, but use the same jig. im just gonna do a full scale drawing, than measure the width of the stripes at the base and head, and use those.
-
well, i've been toying with the idea of building a guitar for a while now, and am finally jumping into it.
its gonna be a neck through, PRS body style, with a roller tune o matic bridge, 25" scale, 22 frets. neck will be laminated with cocobolo in the middle, wenge on either side of the cocobolo, and white limba on the outsides. body will be black limba. i have experienced wood workers and basically any equipment i need at my disposal, so hopefully it will come out nice. i have a decent amount of woodworking myself aswell.
onto the question. im going somewhat thin on the neck (.75-.8), and am going to use the truss rod from Allied. theres, and most all others, require a 1/4" wide slot for it. i really want to do the tapered laminates on the neck. my buddy told me i need to do at least a 1/2" at the thinnest point on the middle strip of cocobolo, to give 1/8" inbetween the glue joint and the truss rod route. i just wanted to know if this was true, as im trying to plan everything out, and wanted to know if it mattered how much was inbetween the truss rod route and the glue joint, or if the route can run right up to, or very near, the glue joint.
the thing is, my nut width is gonna be 1 11/16", ala wizard 2. if i do the center piece 1/2", the stripes outside that will have to be alot skinnier, and i was hoping to have all the stripe widths even. i hope you guys get what im saying, and can give me some advice on the matter.
EDIT: if i do 5 stripes of even width, under the nut the stripes will be .3375 wide, which will leave just under 1/16" on either side of the truss rod route before it hits the glue joint.
thanks
adam

Best Tops You Are Saving
in Solidbody Guitar and Bass Chat
Posted
i nice piece of redwood burl. not sure what i'm doing with it yet.
and some myrtlewood with a bit of burl and figuring.