


Kenneth
-
Posts
28 -
Joined
-
Last visited
Content Type
Profiles
News and Information
Tutorials
Product Reviews
Supplier Listings
Articles
Guitar Of The Month
Links and Resources
Forums
Gallery
Downloads
Posts posted by Kenneth
-
-
Nice! I always like i good PRS build. Especially yours.
-
So the body is routed except for the "wire channel" and it weighs almost exactly 2kg vs 1,8kg for the mahogany body.
That's 4.4 lbs vs 4,0 lbs for you non-metric folks


I got a big hole in the back to fill and level with epoxy. But since it's gonna be solid white, it's not a problem.
I gotta say though. Working with scrapwood is a lot more "fun" then standing with a piece of wenge or whatever that you paid a small fortune for. Waited for two weeks to be shipped from the other side of the globe and just hoping that you don't screw it up by making a measuring mistake or slipping with the router or something like that.
So next up is the top.
/Kenneth
-
So, rough cut complete. Compared it to a complete mahoganybody (without a top) I have.
The mahogany weighs in at 1,8kg with all cavities routed and correct thickness. This one weighs in at 2,6 without cavities and 0,5cm to thick.
The back on the chamber parts are 2cm thick. So I might get away with it.
-
I didnt actually give that much thought about the wood running sideways to be honest. It's been laying around for 15 years without warping in any direction. I just placed it where it fitted. Do you think it will cause a problem?
And if it gets TO heavy I might scrap it and go for some alder or similiar.
Basically I just wanna keep the cost down to a minimum since I never tried a multiscale and might just end up hating it
/Kenneth
-
I've read all the topics about multiscale and felt that I gotta try it out so this i build with wood that I have laying around and leftover hardware.
- Chambered oak body (probably gonna chamber it a lot to keep the weight down.
- Maple top
- Mahogany set neck
- pau ferro fretboard
- Scale 25,5" and 24,5" (not so much perhaps but...) "normal" 7th fret
- Inlays...haven't decided yet
- Black Gotoh tuners
- New black ABM 3210 http://www.thomann.d...itar_bridge.htm
- Seymour Duncan Pearly Gates bridge (anybody got a good matching neck pup for that!?)
- Color will be all white I think....
This is what I have so far.
The drawing:

And starting to chamber the body (yes it's an old table from IKEA
):
- Chambered oak body (probably gonna chamber it a lot to keep the weight down.
-
Did you buy them already? Found them at thomann.de for 16euro
http://www.thomann.de/gb/abm_3210c_single_guitar_bridge.htm
Don't know the height though.
-
Wow Wez. That blue one is absolutely beautiful :-)
I'll give it a go :-) I found some oak to make a chambered body with a maple cap and a mahogany neck with på ferro fretboard. Using up the scrapbook on this one ;-)
Will the nonslanted pickups just cause a bit thinner bass sound?
Never tried slanted on a normal guitar, except a SC on a tele of course ;-)
-
All the multiscale threads has really made me interested in making one. I made a cad drawing of a 24,5 and 25,5" neck. But I just don't like the look of the tilted pups...
Any inputs on keeping them the "normal" way?
I definitely will be following this thread. Looking nice so far :-)
/Kenneth
-
Dang!
That looks nice! Great job!
/Kenbeth
-
I found a cad drawing of DC that I updated to SC with a Tremonti as reference. I also found drawings of the "version 1" birds. Use as you wish.
I think I have it as 24 fret version as well.
http://dl.dropbox.com/u/33083441/PG/Tremonti%2022_v2.pdf
http://dl.dropbox.com/u/33083441/PG/Tremonti%2022_v2.dwg
http://dl.dropbox.com/u/33083441/PG/Tremonti%2022_v2.dxf
Edit:
Added links for dwg and dfg as well
/Kenneth
-
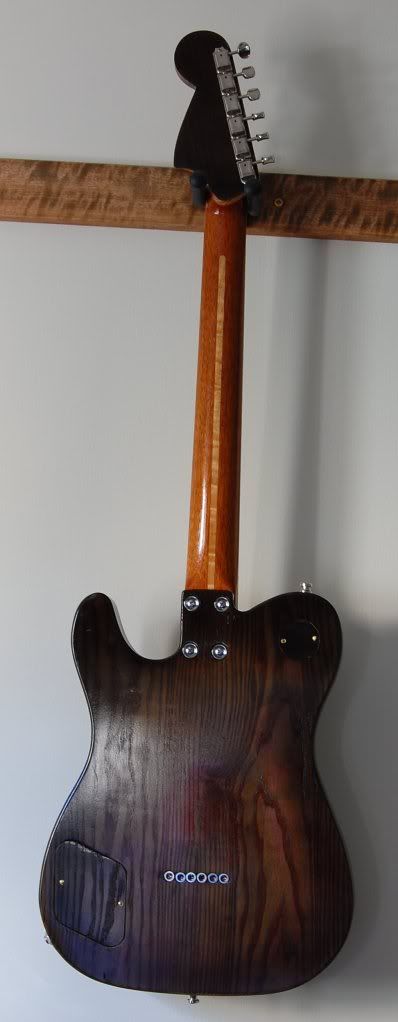
So after a while it's finally done...
I already used at a rehearsal and its sounds great.
The pickups are Wilkinsons Vintage HB Neck WVC-N-CR
and matching SC Vintage Bridge WVTB
I'm not completly sadisfied with some things but I see this (my second guitar) as a test for the next one.
The next project will be a Tremonti clone (yes anooother PRS
 ) More about that later
Here it is:
Same as above but larger:
http://i270.photobucket.com/albums/jj116/S...SC_0863_cut.jpg
Full front:
http://i270.photobucket.com/albums/jj116/S...SC_0858_cut.jpg
Full back:
http://i270.photobucket.com/albums/jj116/S...SC_0859_cut.jpg
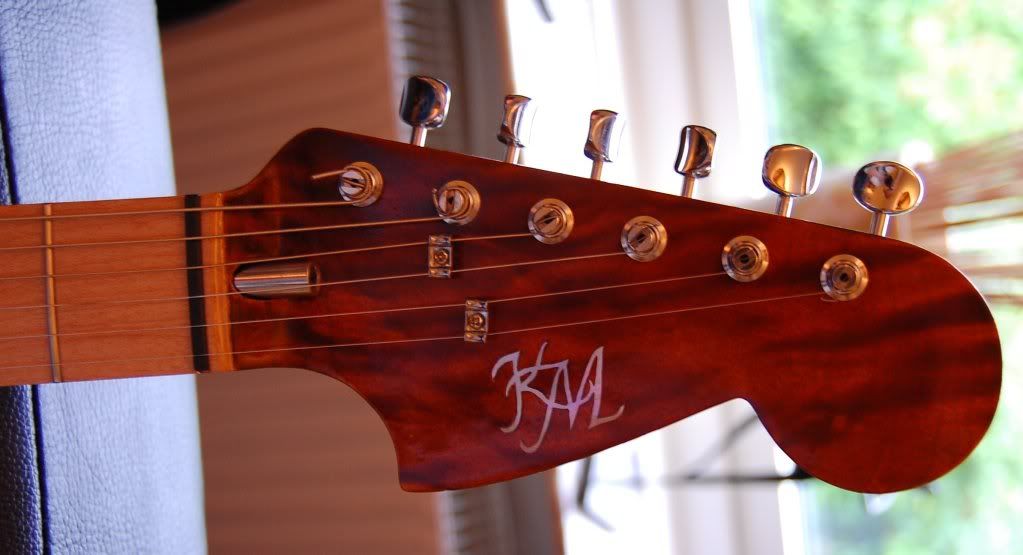
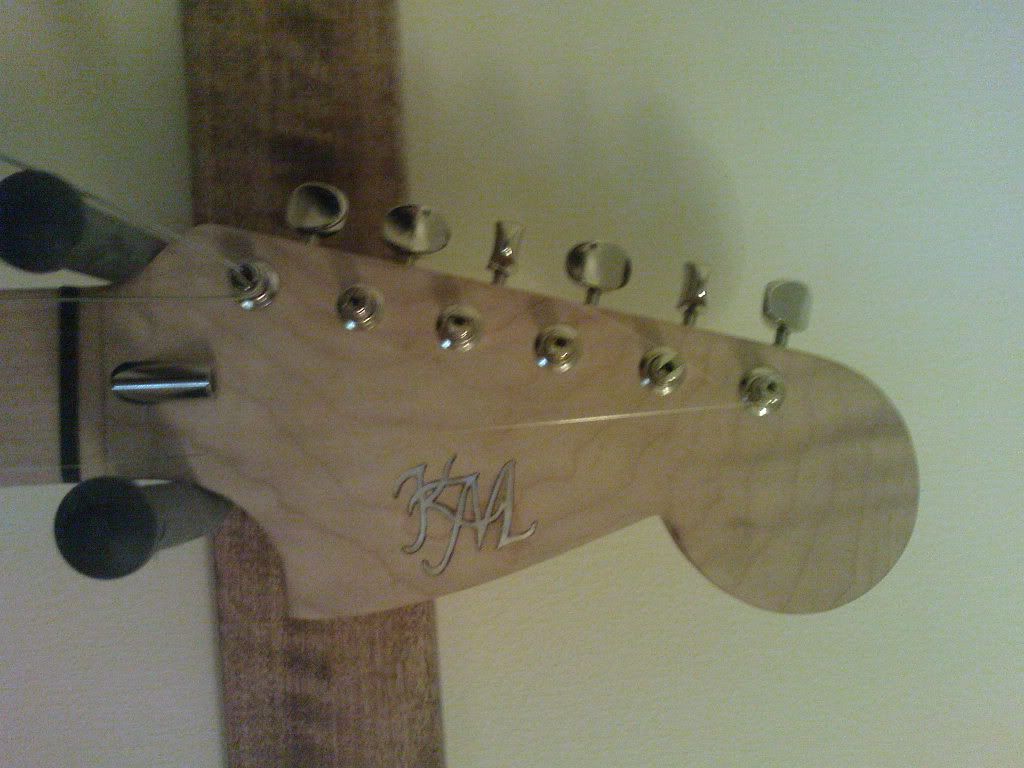
Head with MOP initials
http://i270.photobucket.com/albums/jj116/S...SC_0593_cut.jpg
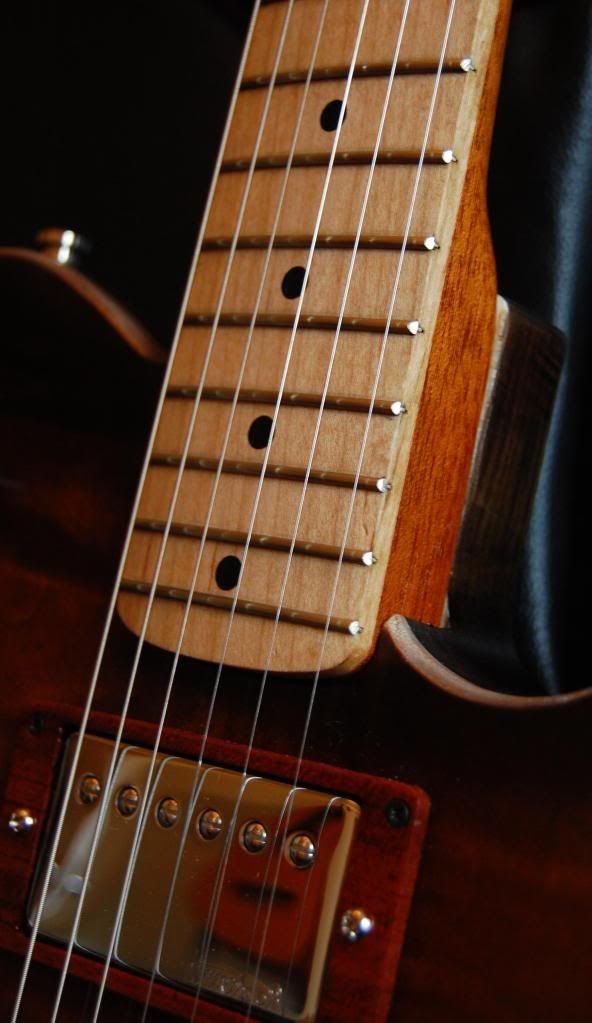
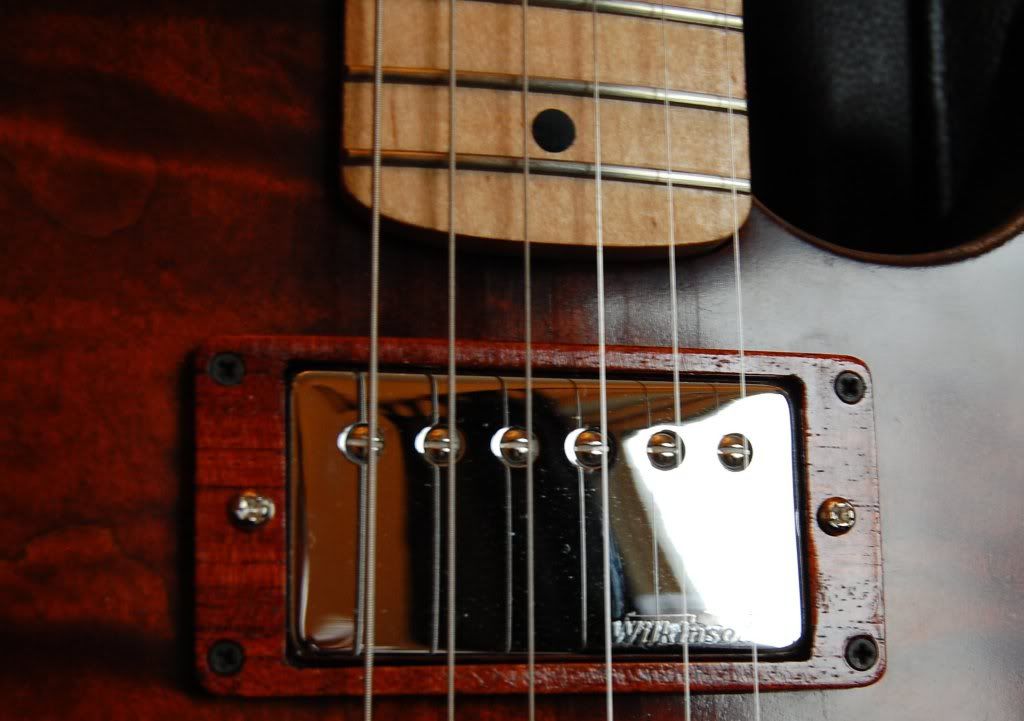
Some closeups:
http://i270.photobucket.com/albums/jj116/S...SC_0598_cut.jpg
http://i270.photobucket.com/albums/jj116/S...SC_0597_cut.jpg
/Kenneth
-
Looking forward to follow your build.
I'm working on a tele custom build as well.
http://projectguitar.ibforums.com/index.php?showtopic=35792
/Kenneth
-
Really nice RDub!
Thinking of the same color (little darker) on my next build.
Is it just black analine sanded down and clearcoated!?
How did it go with the inlay, did you try to scrape it with a razorblade like you mentioned!?
I have little sanding left on mine before I'll get to that but...
/Kenneth
-
Long time since any update on this...
Had to get married and pave my driveway and build a fence and.....
No more excusses.
Here it goes.
Neck is done and fretted, inlay glued in (lots more sanding to do...everywhere...)
Body cavitys are routed.
Cover for cavitys on the back made but not completely sanded yet.
Holes for ferrules drilled. The last one ended up a little out of position.
Got some issues to fix.
Worst one..
The neck isn't positioned right.
Not to big deal though. It won't show after I fix it.
Cant figure out why I funked it up...
Measure, check again, walk away, measure again, check before routing and still....BANG.
Well you learn from your mistakes
http://i270.photobucket.com/albums/jj116/S...stAssembly1.jpg
Body front:
http://i270.photobucket.com/albums/jj116/S...aster/Body4.jpg
Body back:
http://i270.photobucket.com/albums/jj116/S...r/Bodyback1.jpg
Neck (it's pretty close to a 60's oval 21mm about 0.8" thick at 1st fret) :
http://i270.photobucket.com/albums/jj116/S...r/Neckback1.jpg
Inlay its my first attempt so be gentle with me
:http://i270.photobucket.com/albums/jj116/S...aster/Head4.jpg
Bad quality again...
So next mission is to fix the neck position, and sanding, sanding, sanding.
And lots more to come...
/Kenneth
-
Regarding thickness you got some good info here:
http://www.tdpri.com/forum/tele-tech/13997...s-variance.html
/Kenneth
-
Thanx for all ideas. Ill give all a test on some MOP left-overs.
I plan on dye then sand of to enhance the maple. Then airbrush clearcoats with dye in....
I was just out fretting the neck so it's coming along nice and slow now
Thanx again.
/Kenneth
-
It's gonna be Tobaccoburst (or something like it at least
) -
So I have this question on my current (and future) build.
I have made my initials in MOP on the headstock
To the question....
What's the best/easiest way to mask (is that the proper word for it...!?) the MOP before painting.
When I was a kid and building models there was this "paint" that created a thin coat that you could peel of....
Could something like that be used!?
How do you do it otherwise!?
Edit...
MOP not glued yet...
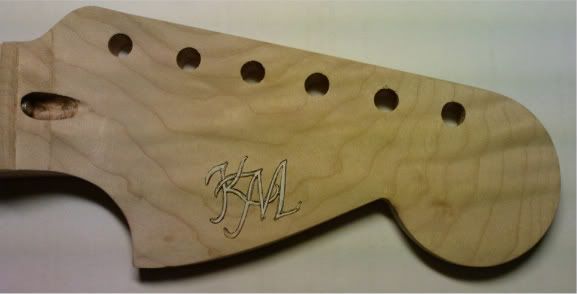
or this closeup:
http://i270.photobucket.com/albums/jj116/S...aster/Head3.jpg
/Kenneth
-
Boy thats handy with a sander disc as well. Does it have enough power for heavy sanding without slowing or stalling the motor?
Its important not to over-tighten the blade as it puts excess load on the bearings and blade. 1/4" free play is probably correct. The manual should give this detail anyway. Check the guide rollers are set as per the manual as well.
I haven't tried it that much yet, only on a scrap piece of maple and some ash.
So I can't comment on the heavy sanding part. But I'll get to that.
I checked the manual yesterday and couldn't find any tips on free play.
I'm gonna double check the guide rollers to day.
Guys never grow up, it's only the toys that get more expensive.... right
-
I wanted one for a looong time but yesterday....
My wishes came true

Got me one of these:
http://www.rexon.net/product/european/bs-10r.htm
or if you want the US specs
http://www.rexon.net/product/a_bs-10r.htm
Tried it out and wow
One question though...
How hard should I tension the saw blade?
I googled it and saw (haha) a reference that the flex should be max 1/4" when you have 6" saw height...
But doesn't that depend on the width of the blade!?
/Kenneth
-
I have to agree. Really nice carve!!
-
What accuracy do you aim for when building a jig?
I made a routerplanning for necks but I'm not satisfied with the accuracy.
The differance in height at most is 0,3mm (just above 0,01").
I'm guessing I'm way to picky, but I just wanted to check your opinion.
My opinion in these matters are that any errors will multiply as you go along.
Those 0,3mm will increase to 0,6 when I add the fretbord (routed in the same jig),
and after routing the radius I could end up with 3* the error almost 1mm...
/Kenneth
-
Hi !!
Currently building guitar number 2.
First one was a little bit of a failure. A PRS clone with mahogany body, carved maple top and mahogany neck.
Ok to play, bit to chunky neck and a mistake at fret 12 that made it hard to play solos on, but hey loosing your virginity isn't always easy...
Perhaps a bit too much as a "first-from-scratch-build" though
So... second build:
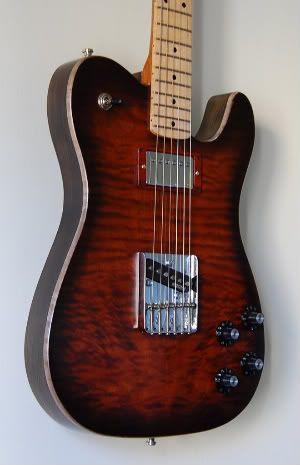
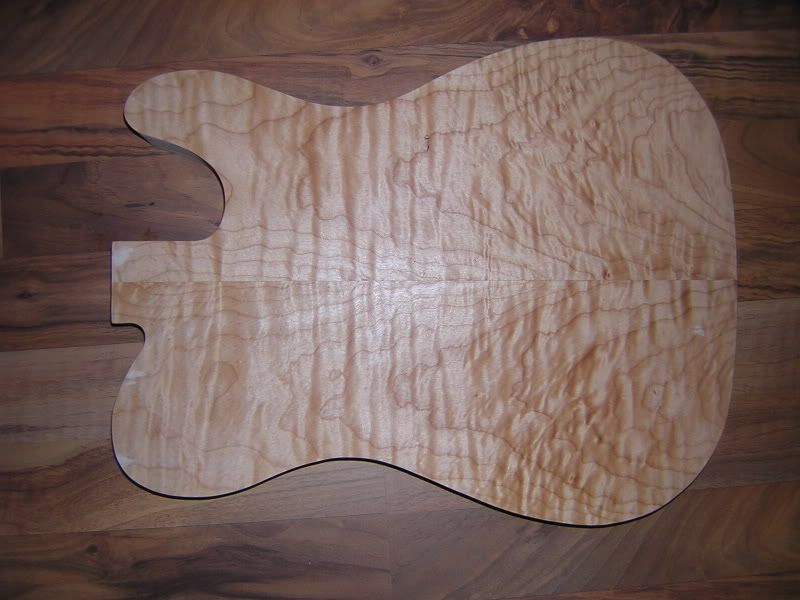
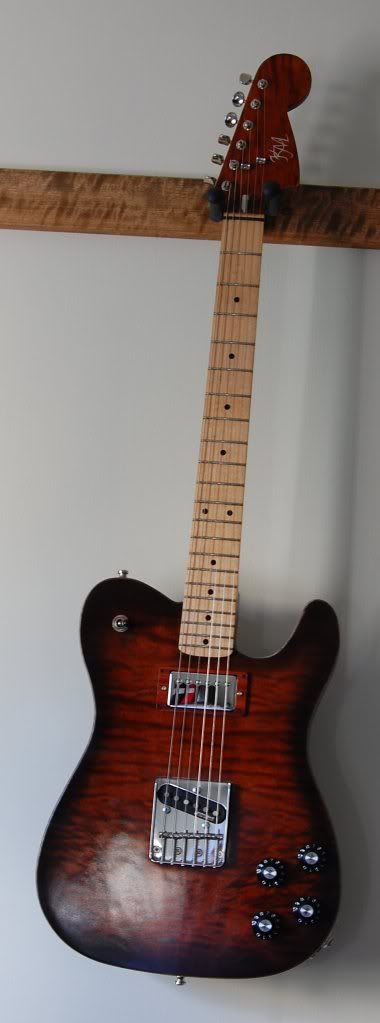
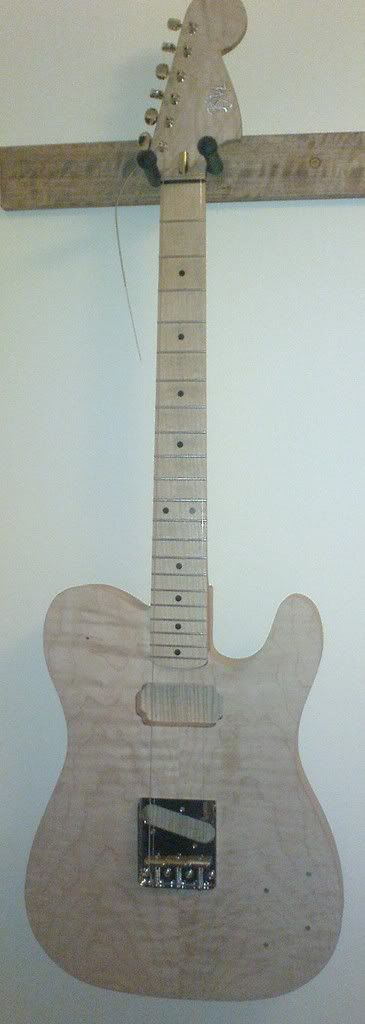
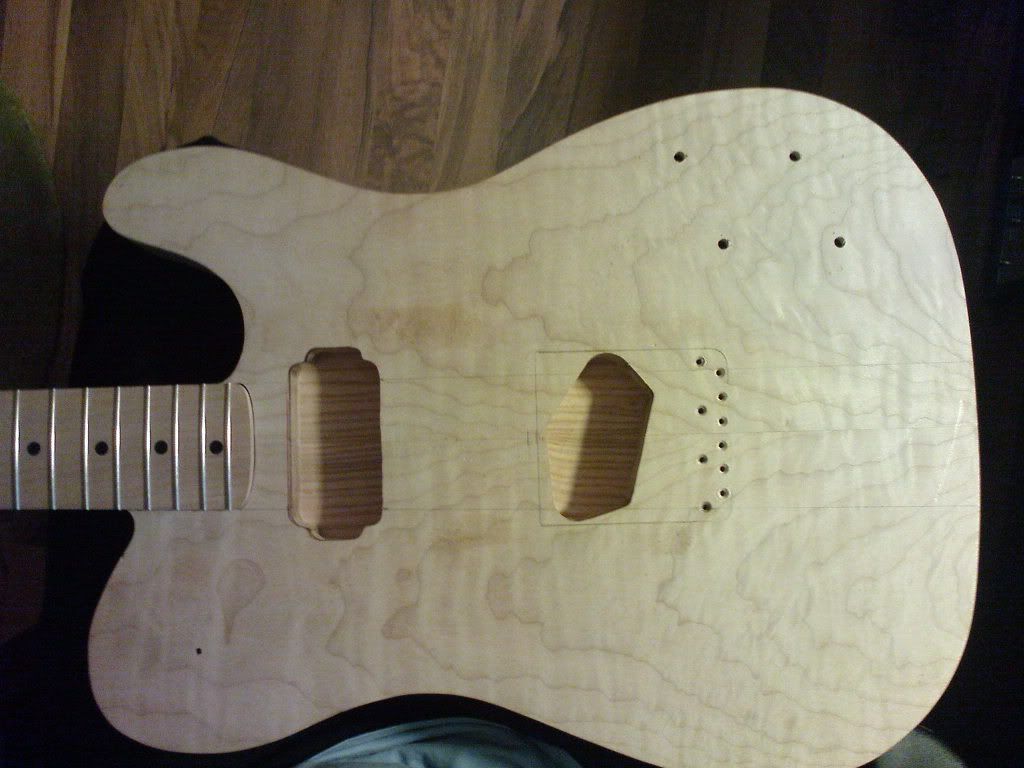
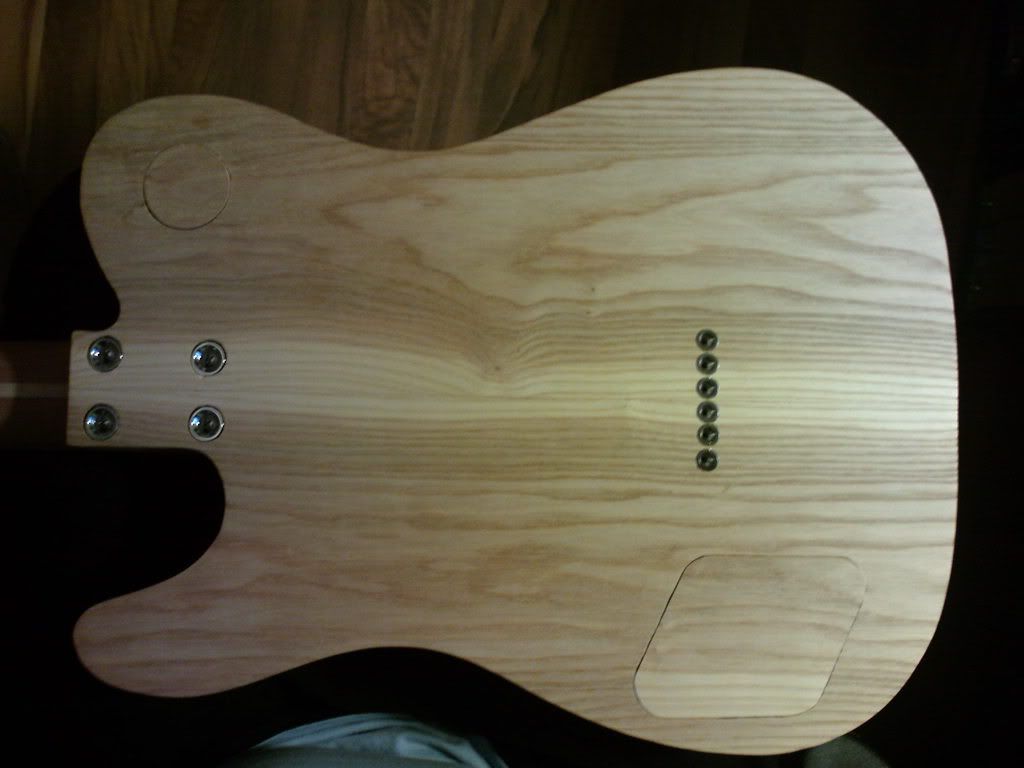
Tele Custom 70's style ( with some mods)
- Semihollow Ashbody
- Flame Maple top 6mm thick
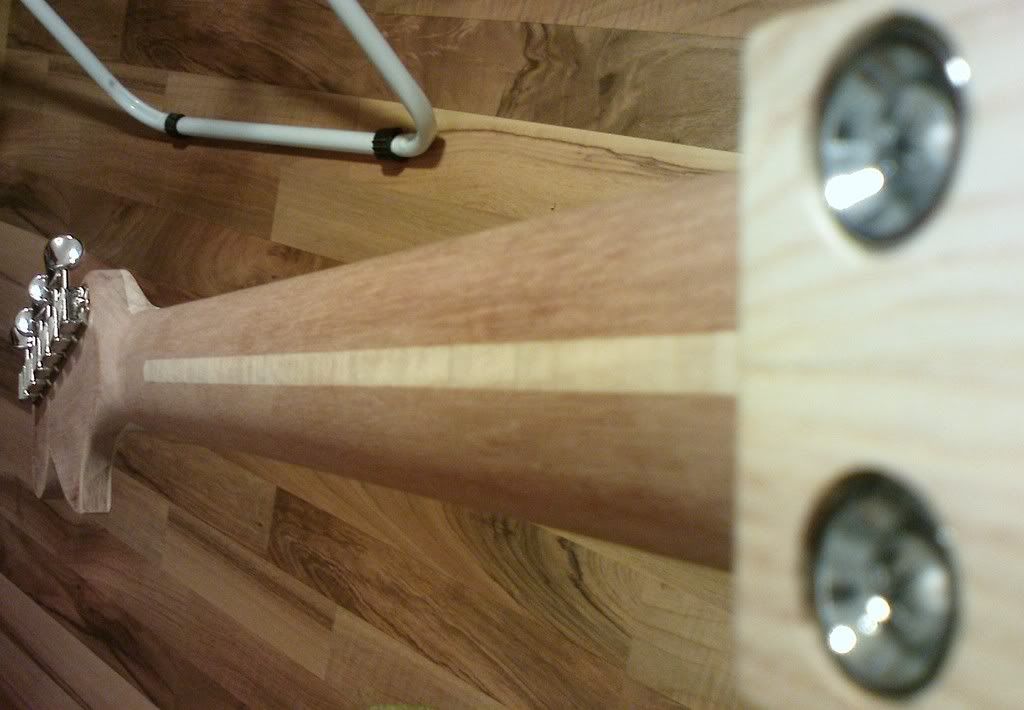
- One pcs Mahogany neck (had some to spare...) with bullet trussrod
- Bigsize head
- 25,5" Maple fretbord
- HB in neck position
- SC in bridge
- Std tele bridge with 3 saddles
- Pickupswitch in "LP position"
- Tobaccoburst with fauxbindning and black back
- No pickguard to spoil the paint
The body is roughsanded and the top glued on. Template made from MDF for the neck.
One pic of the top
The rest is here:
Wish me luck guys and girls....
/Kenneth
- Semihollow Ashbody
-
Thanks Blackdog, great explained!
I thought I'd make a template using MDF and check if the carving looks good using 6mm faux-binding and then make another without faux-binding.
This will also let me practise the carving-part. On my first build a made the carve like your first and recognize the issue with the horns you mentioned.
Thanks again!

 ) More about that later
LP carved top Metal Jr
in In Progress and Finished Work
Posted
Didn't notice the guitar

Looking good. The guitar that is...