


peterbrown
-
Posts
86 -
Joined
-
Last visited
Content Type
Profiles
News and Information
Tutorials
Product Reviews
Supplier Listings
Articles
Guitar Of The Month
Links and Resources
Forums
Gallery
Downloads
Posts posted by peterbrown
-
-
Hi,
Final pics
Cheers
Peter
-
Thanks,
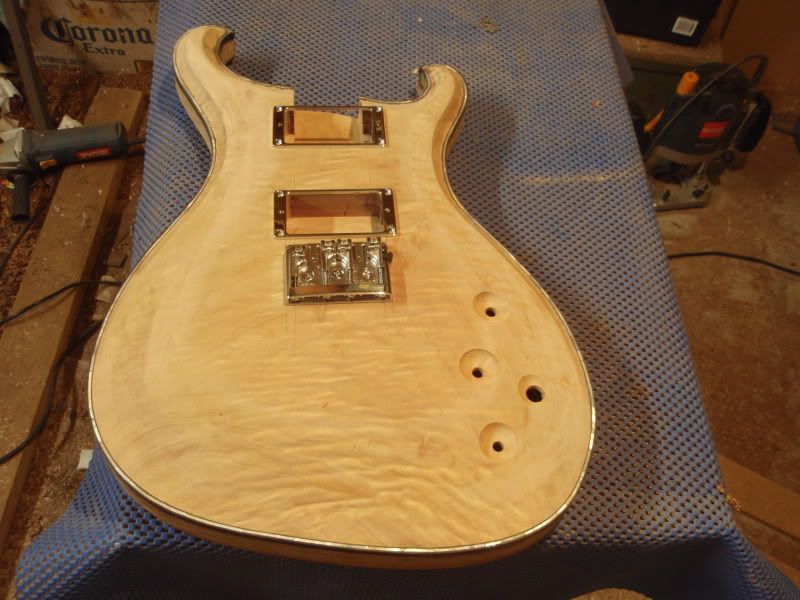
Pics of the sanding complete and a thinned coat of blonde shellac wiped on.

Cheers,
Peter
-
Wow...that neck is FANTASTIC!
Thanks
That's going to be one gorgeous guitar.
And Thanks
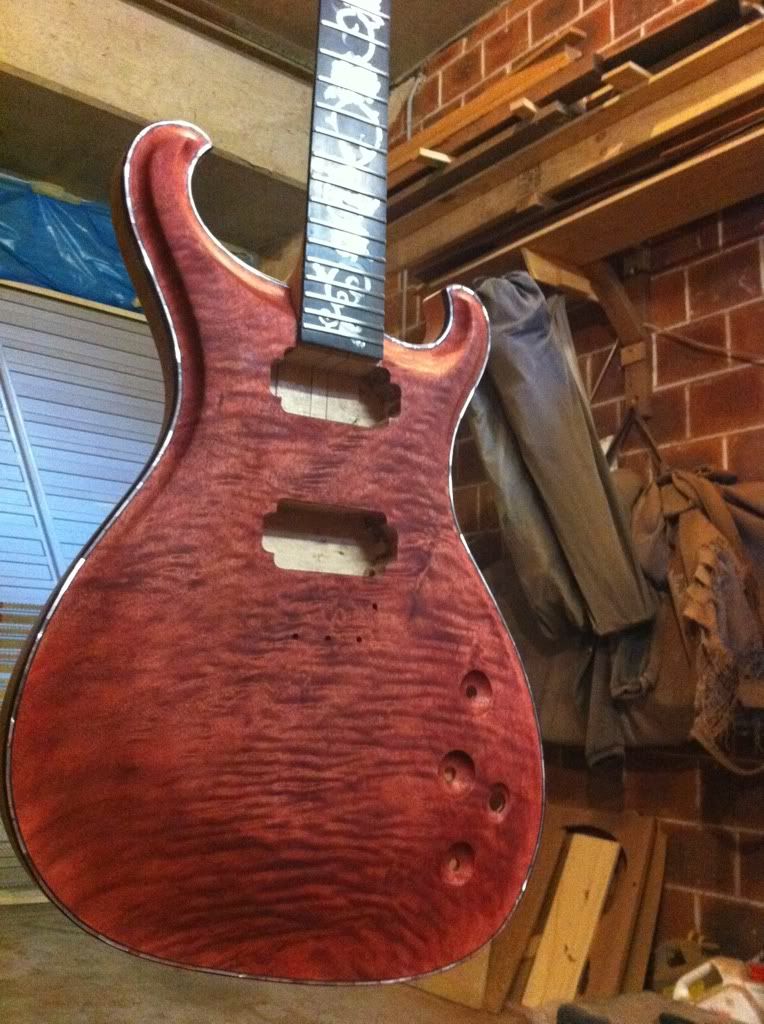
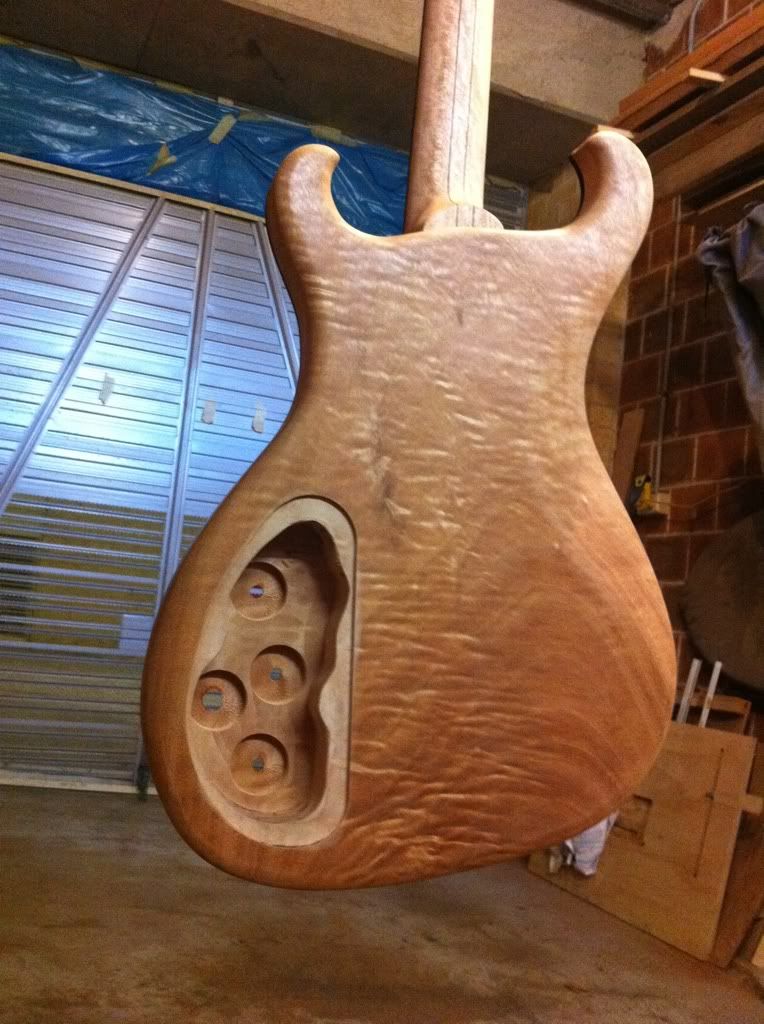
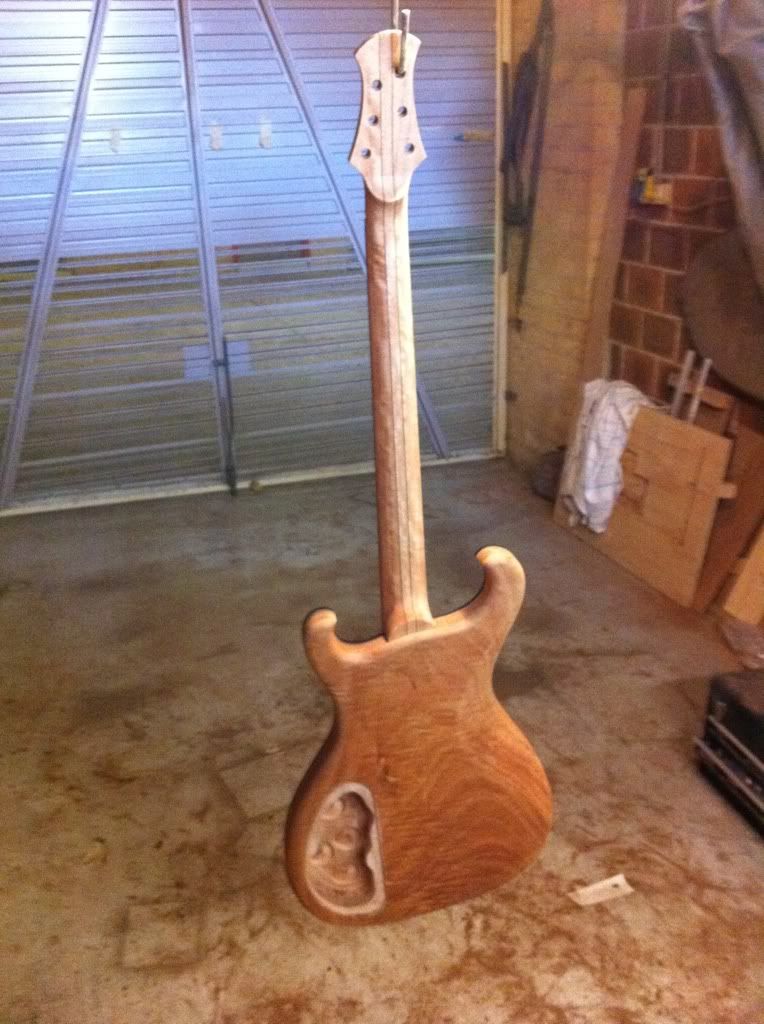
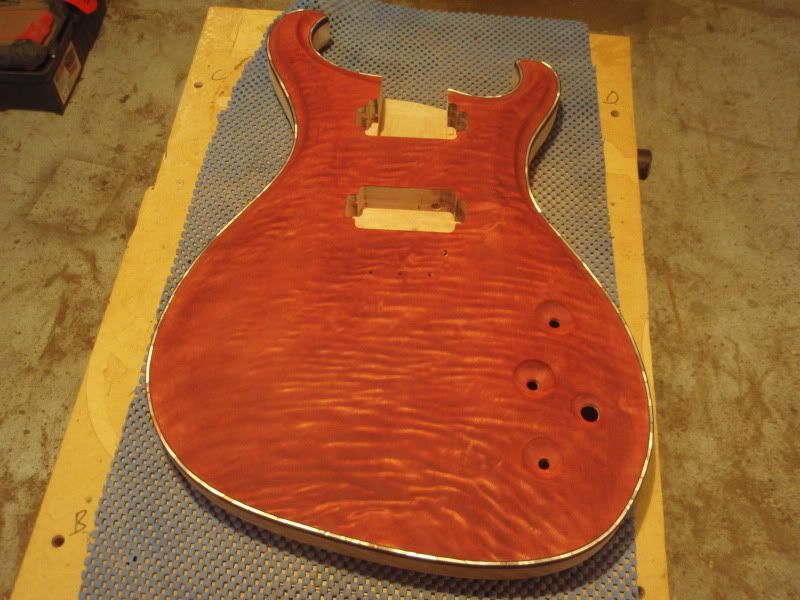
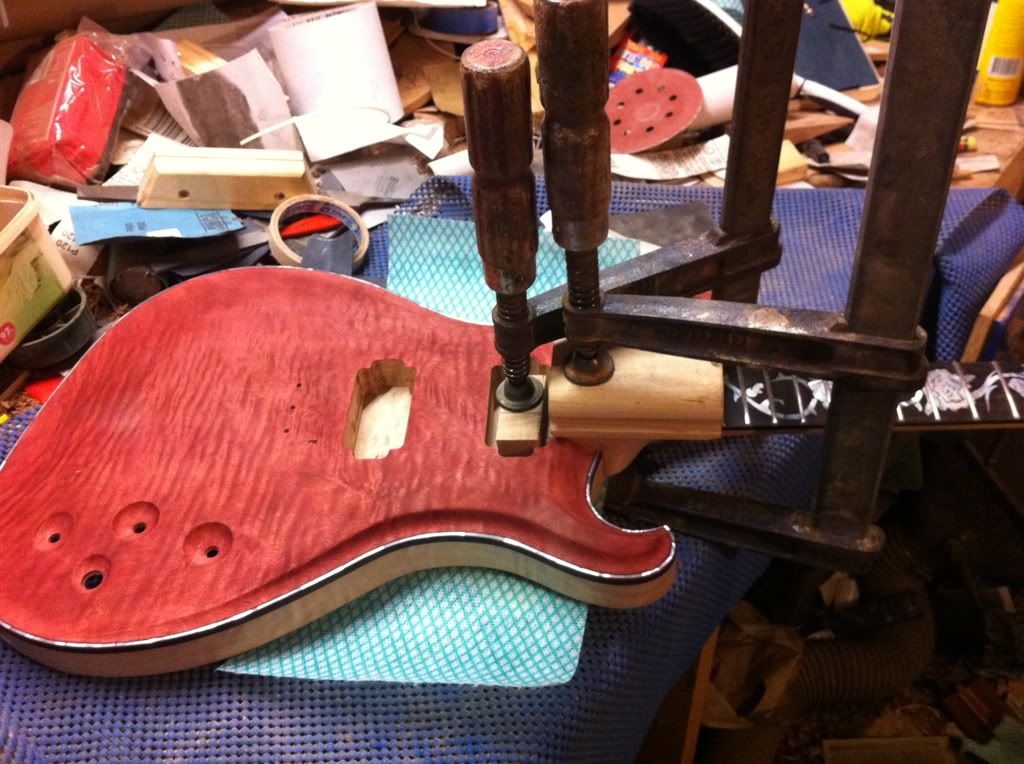
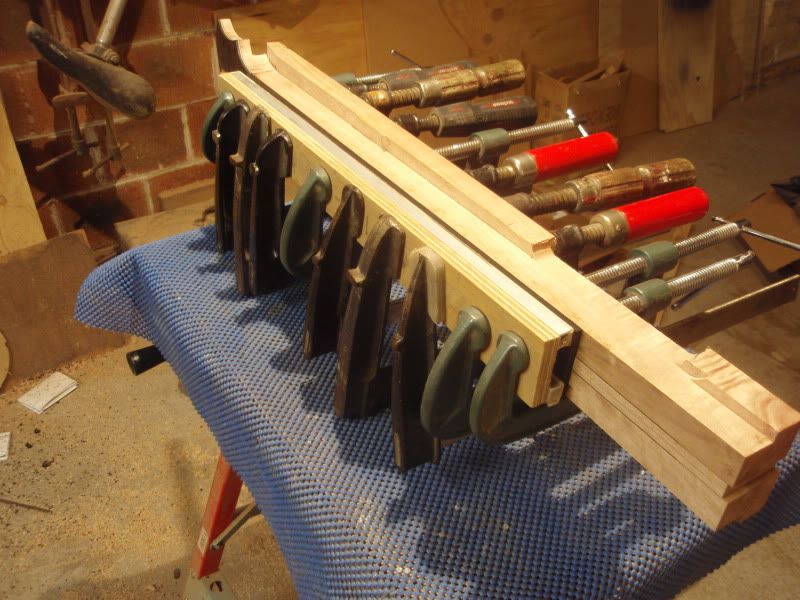
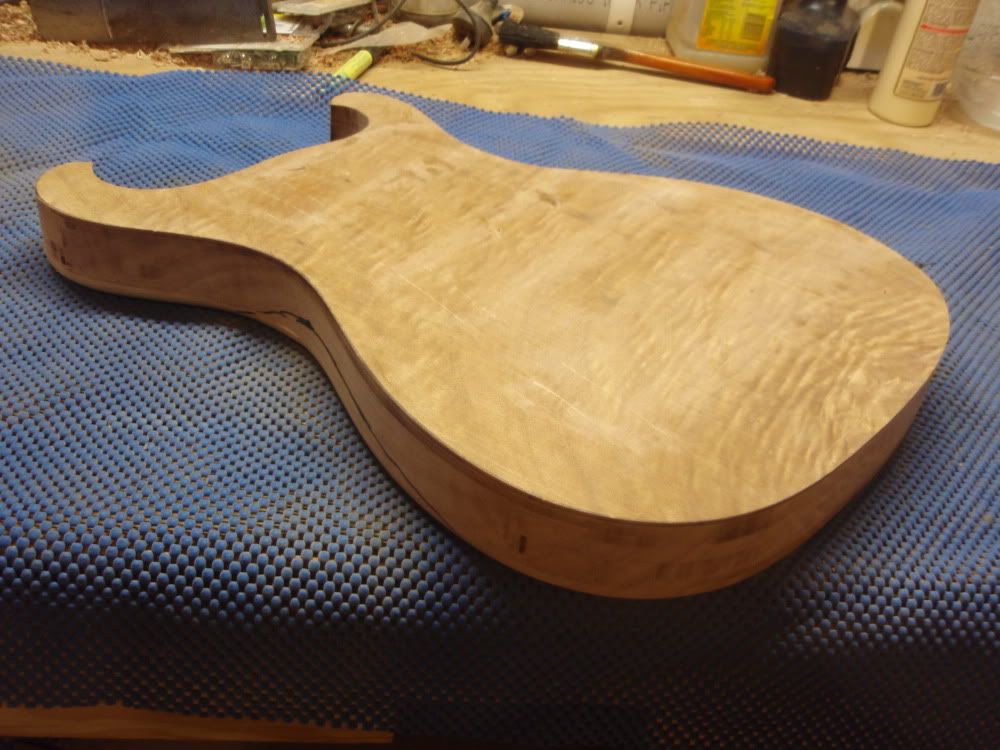
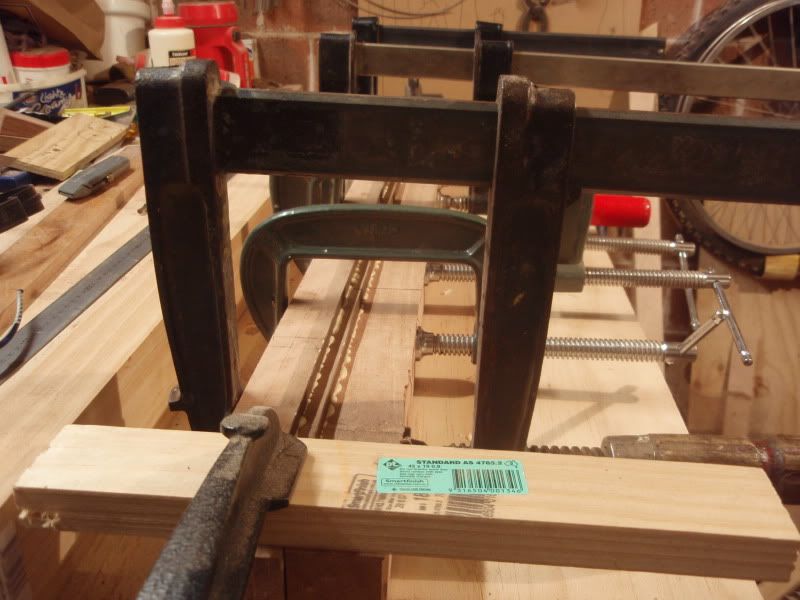
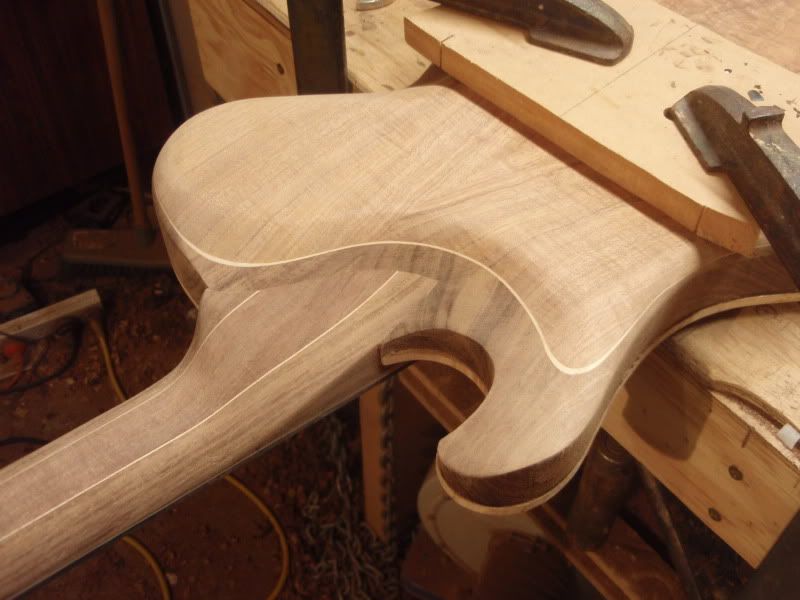
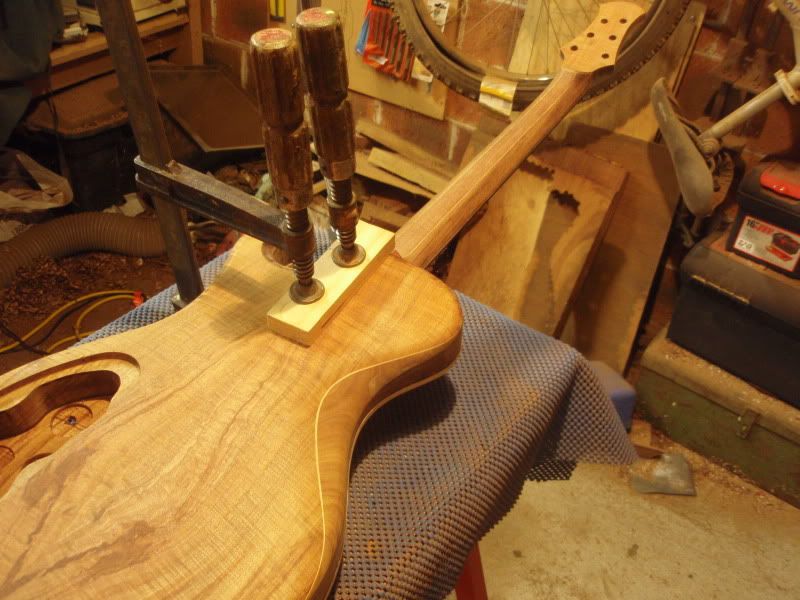
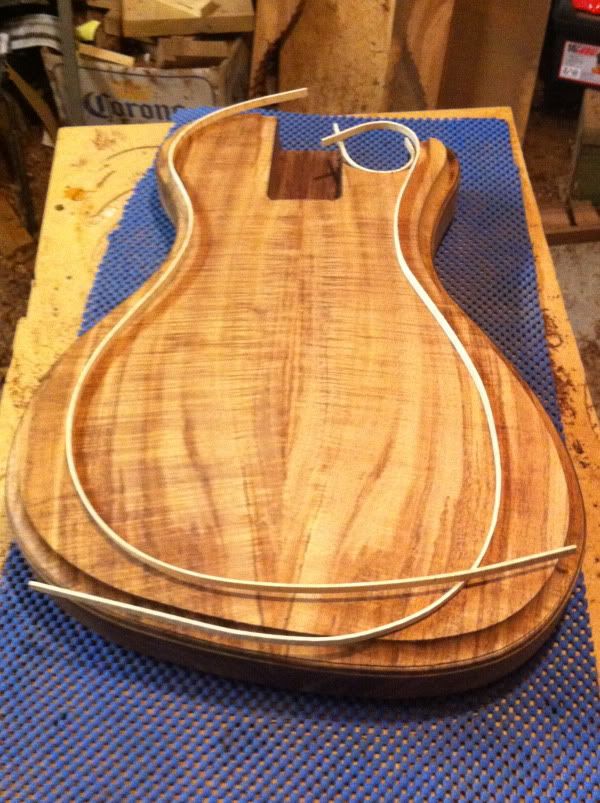
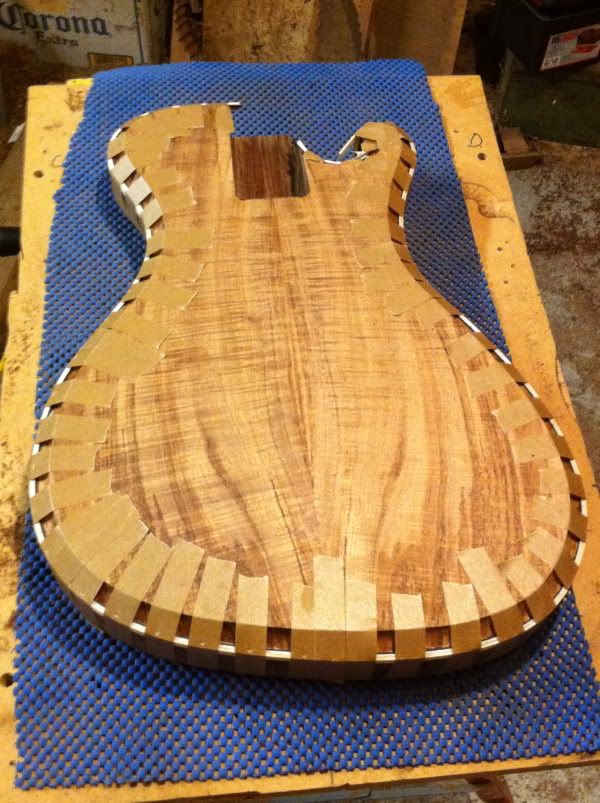
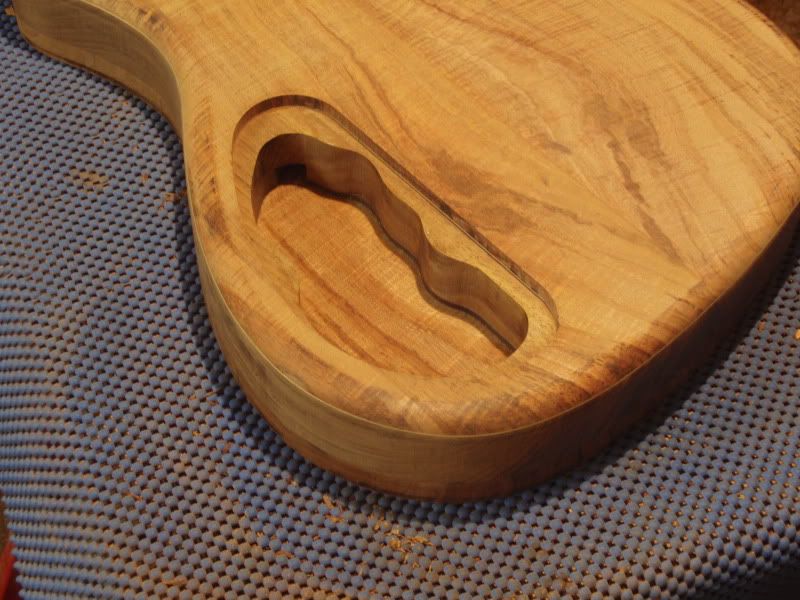
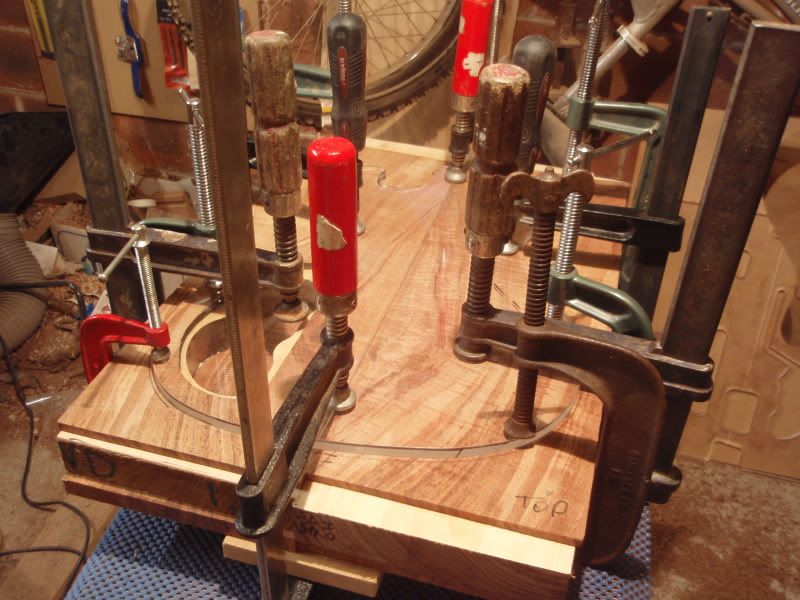
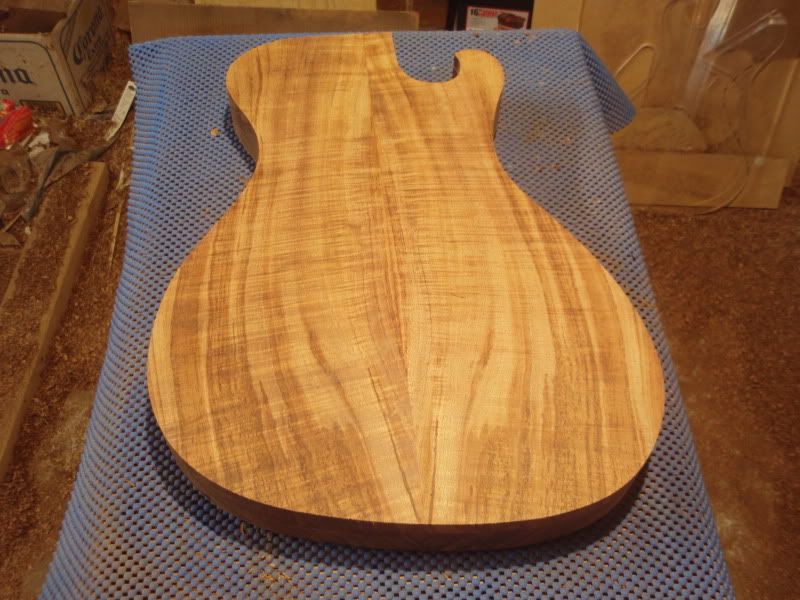
Pics of shaping the body,
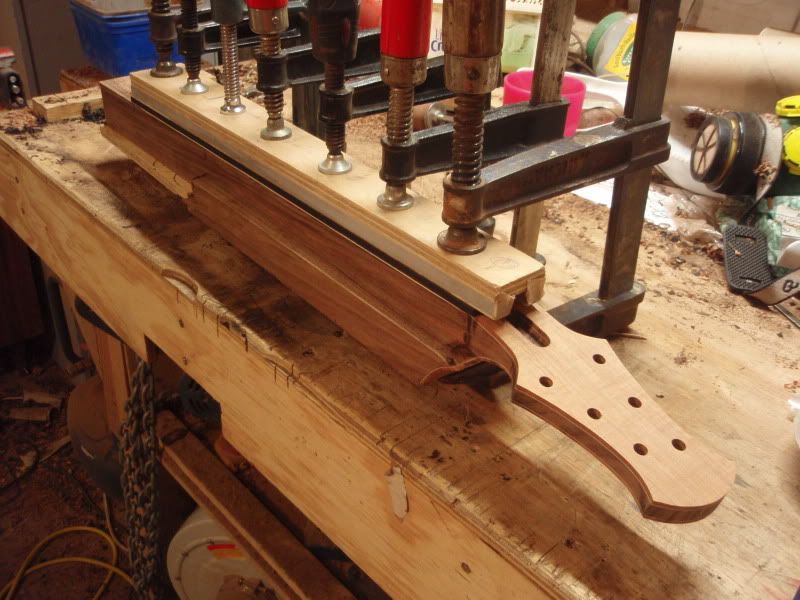
gluing the neck
Cheers,
Peter
-
Thanks for the kind words as always,
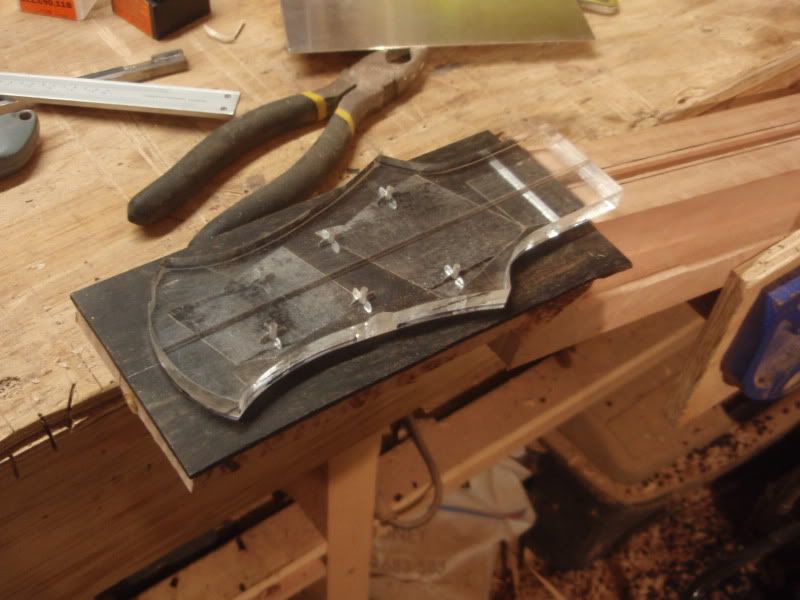
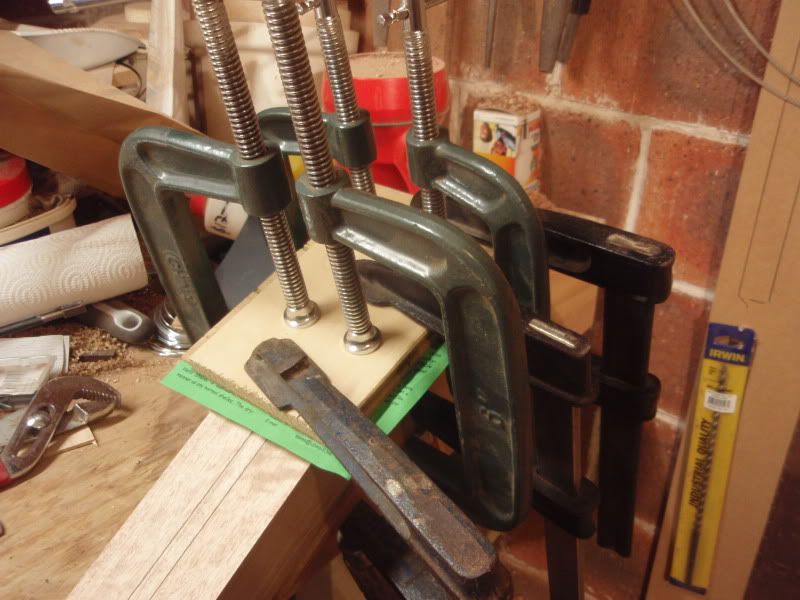
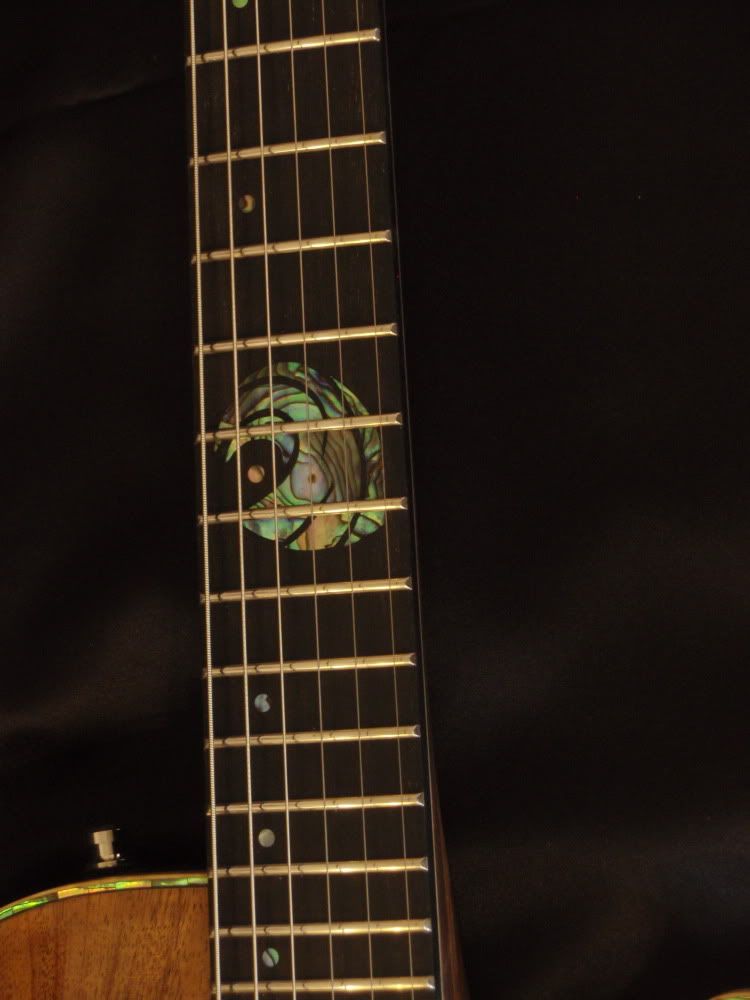
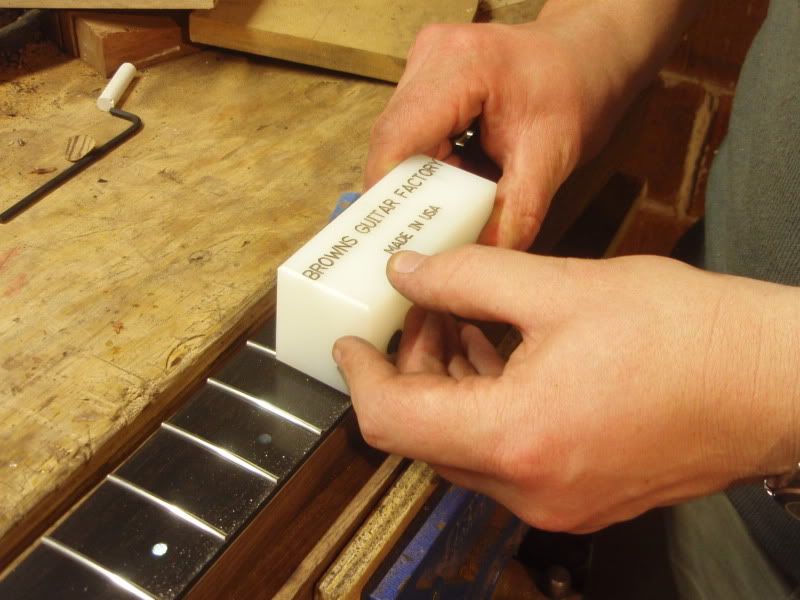
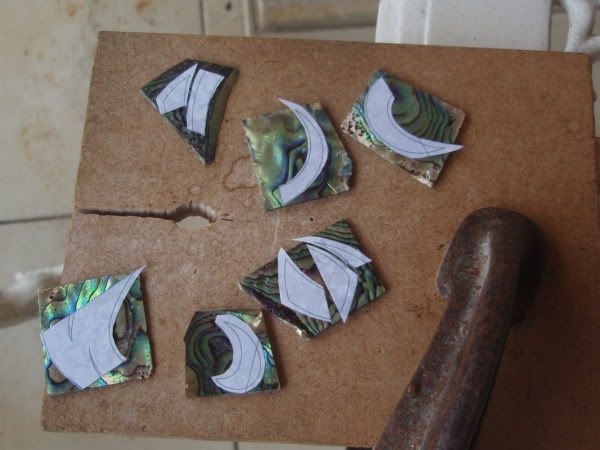
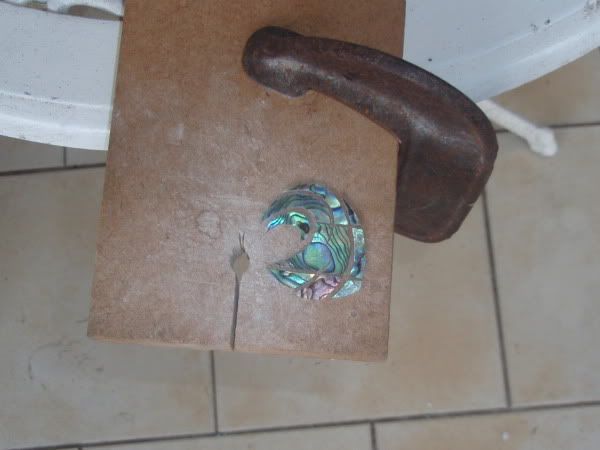
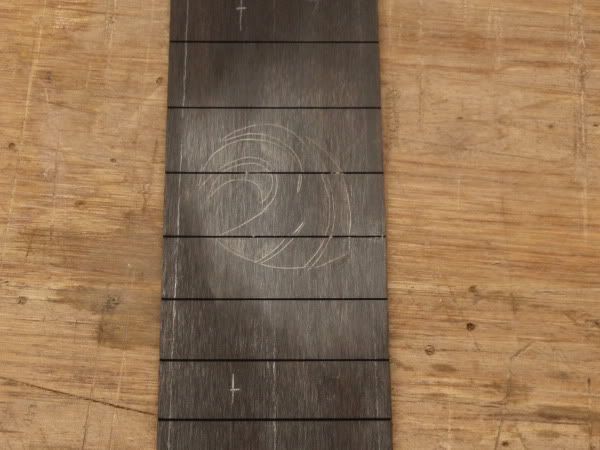
As far as tips for the inlay. Where do I start? I guess just take your time. For scribing I glue the inlay on with a craft contact adhesive. It is strong enough to hold it to scrib, but can easily be popped off for routing the inlay. Use a sharp scribe and work as close to the line as possible.
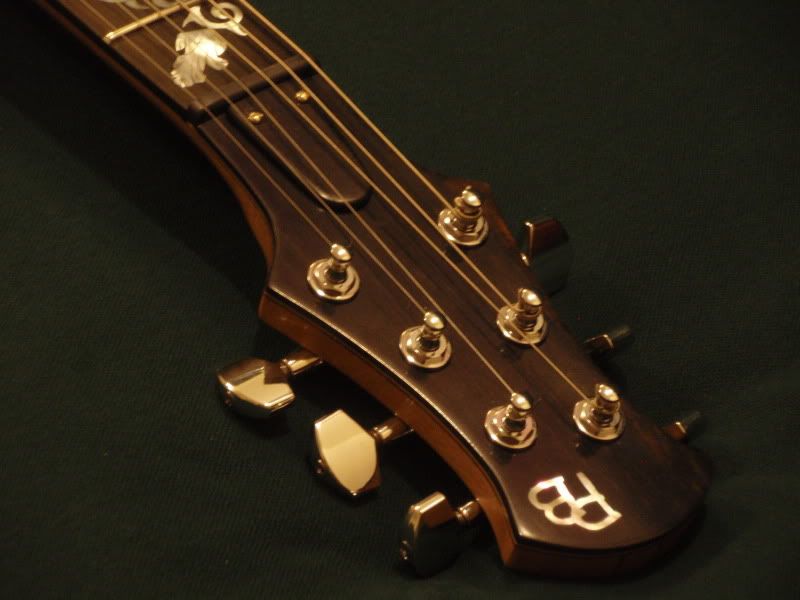
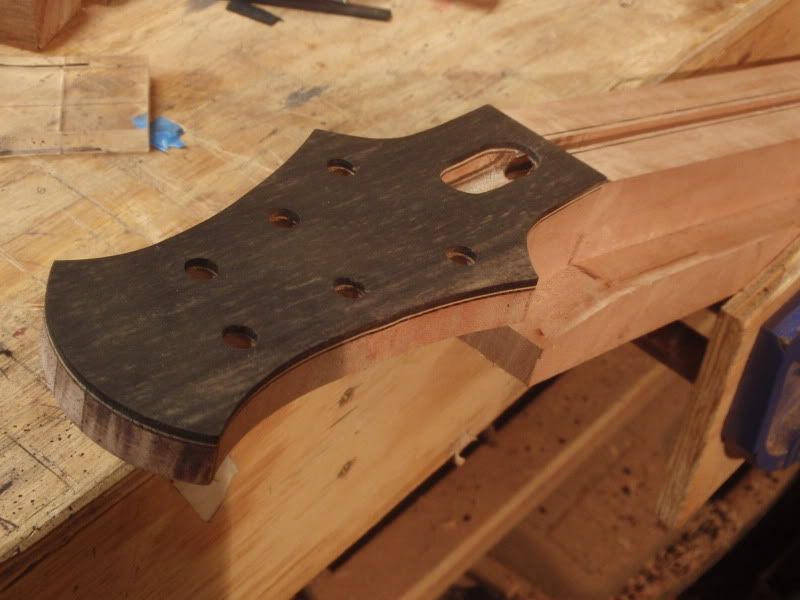
Scott, the binding is ebony. I call it "blind binding" virtually invisible and hides the slots makeing for a neater fretboard, and plus adds just that little bit of extra ridgidity to the neck.
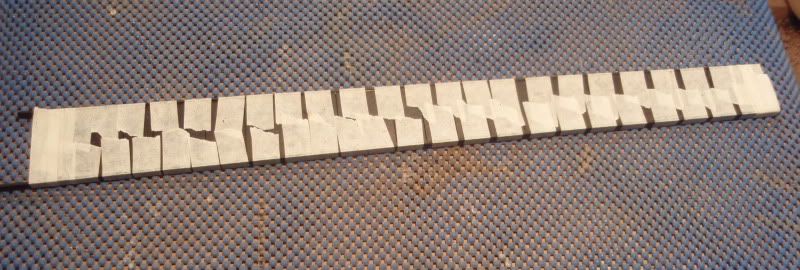
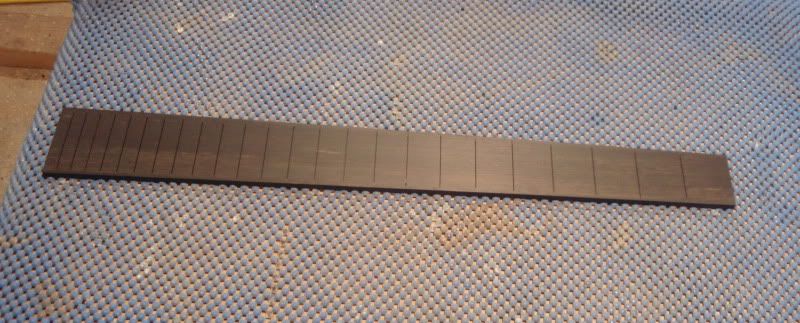
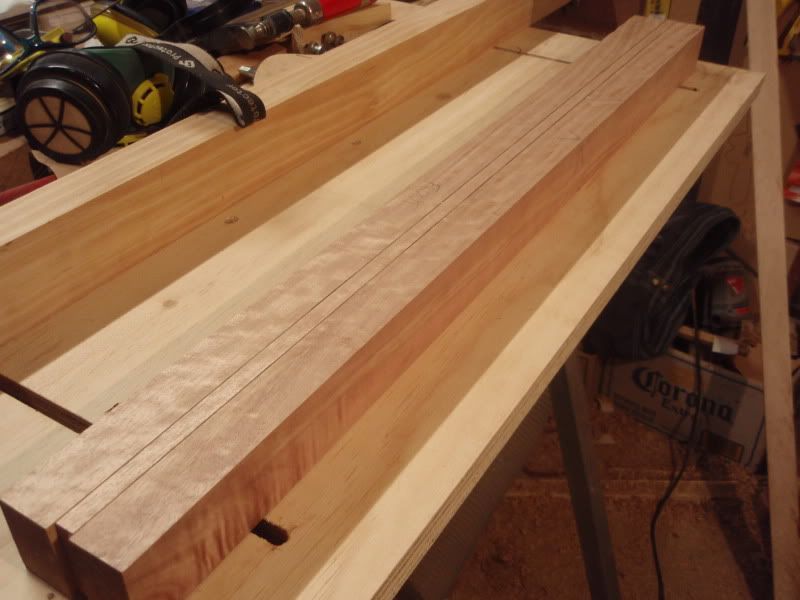
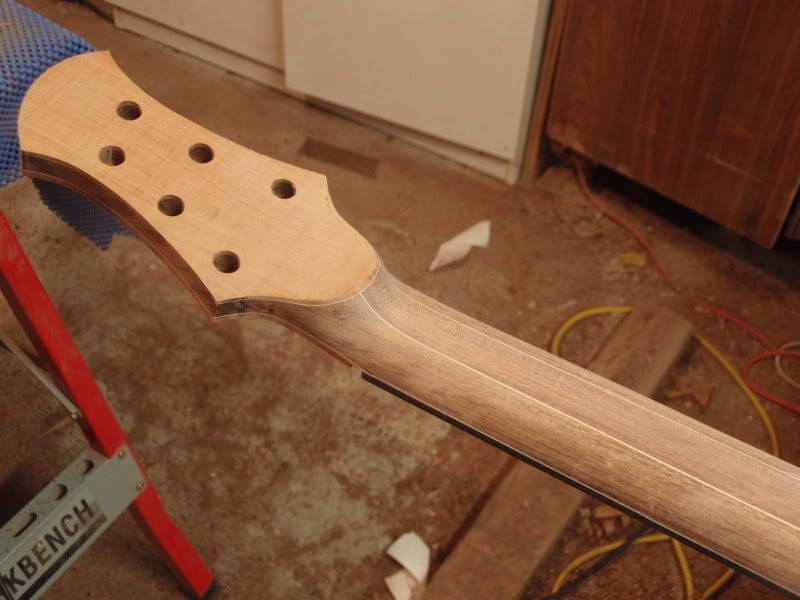
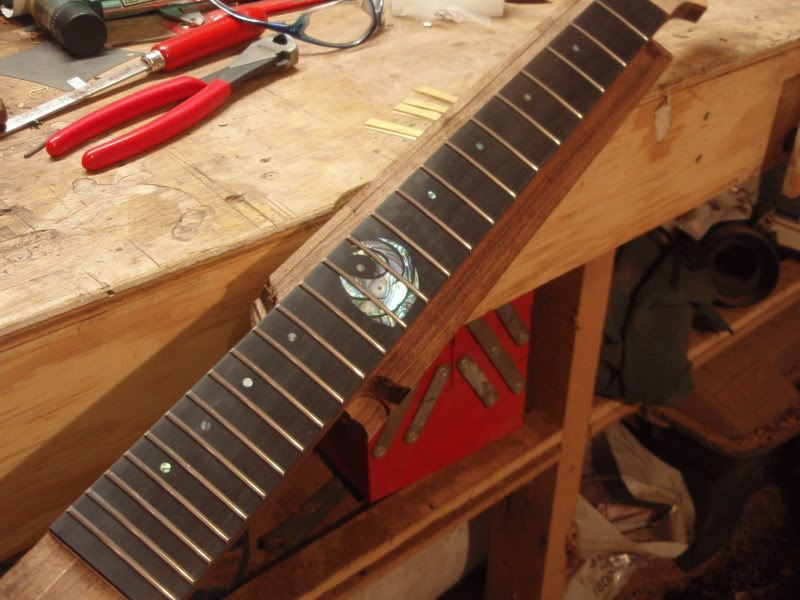
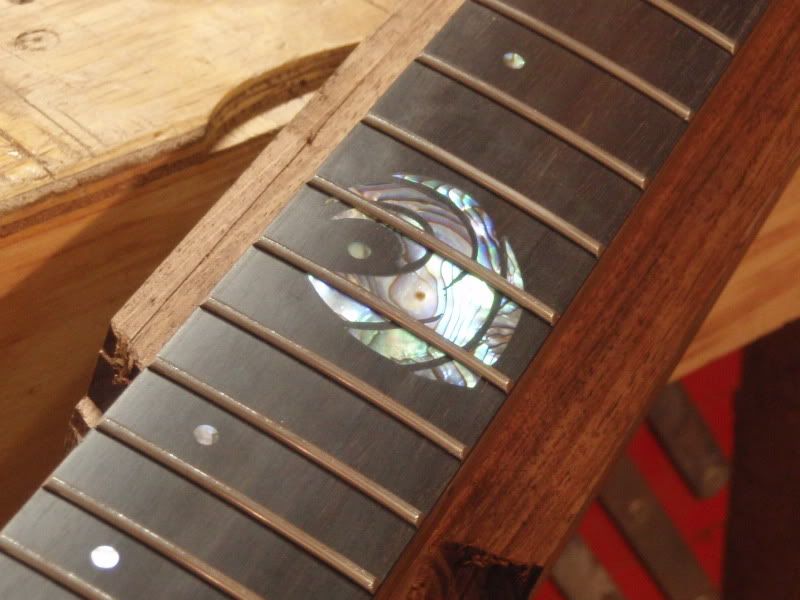
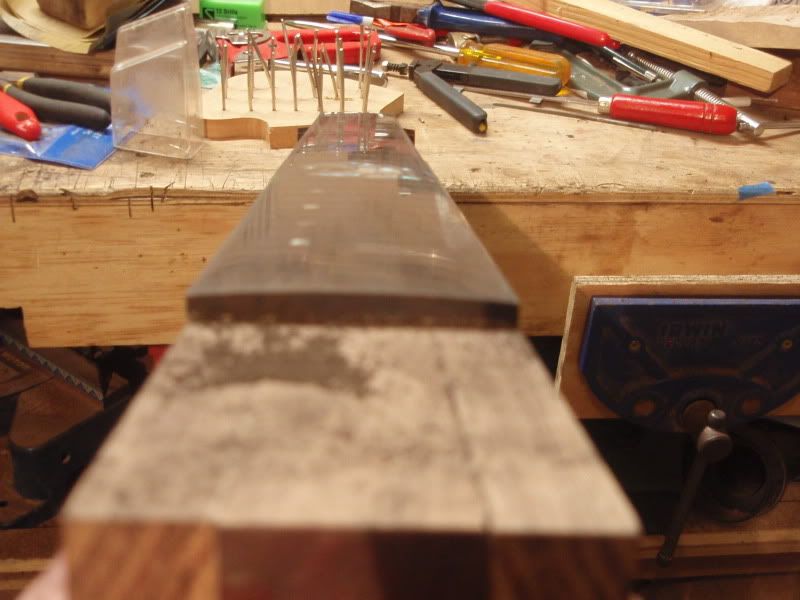
More pics of the fretted fingerboard
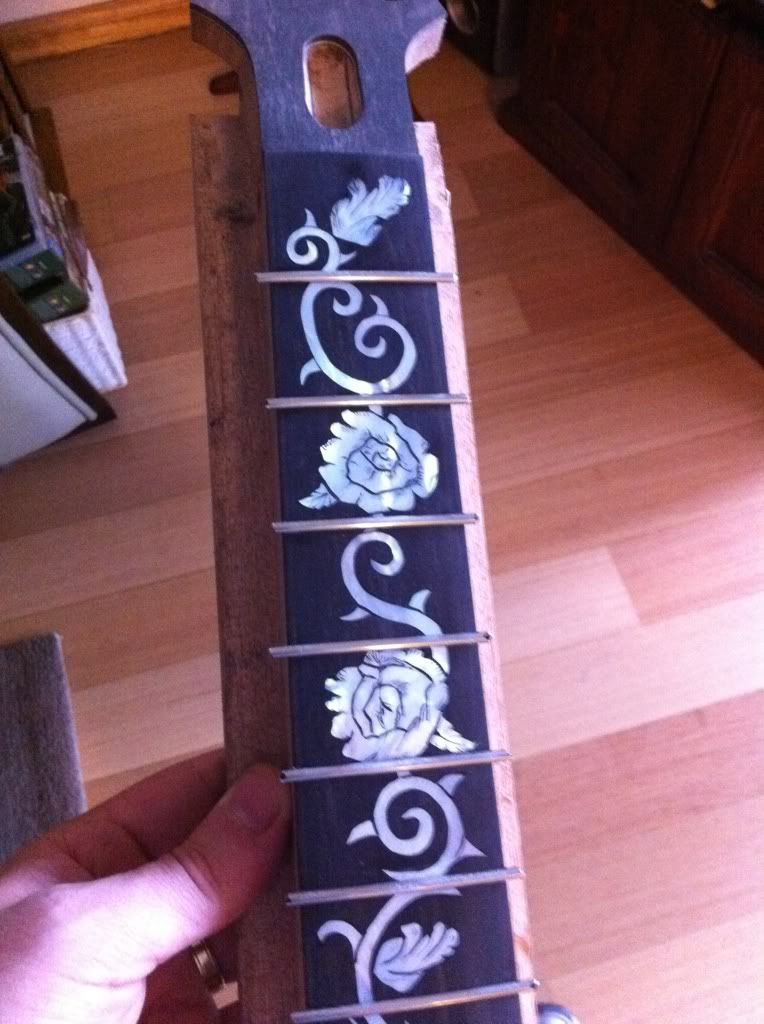
Shaping the neck
Cheers,
Peter
-
Looking good Peter...
Thanks Menapia,
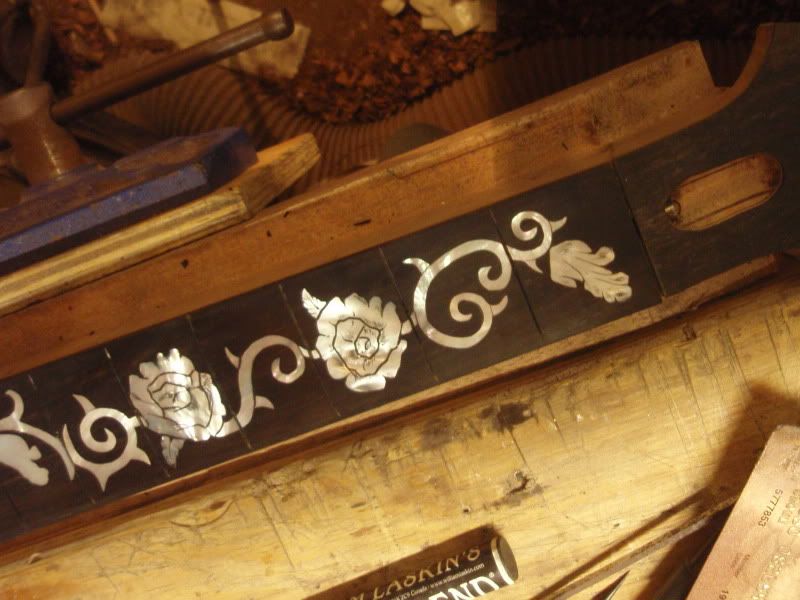
More progress pics of the inlay
Cheers
-
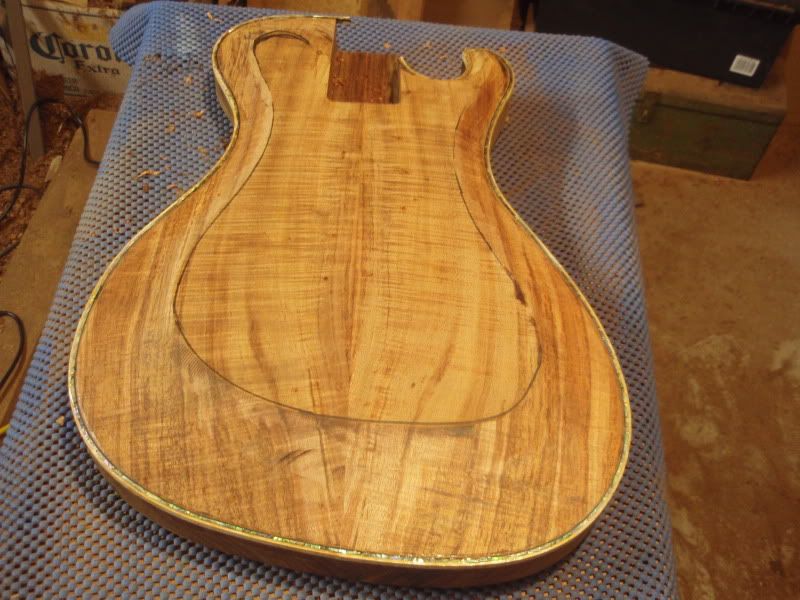
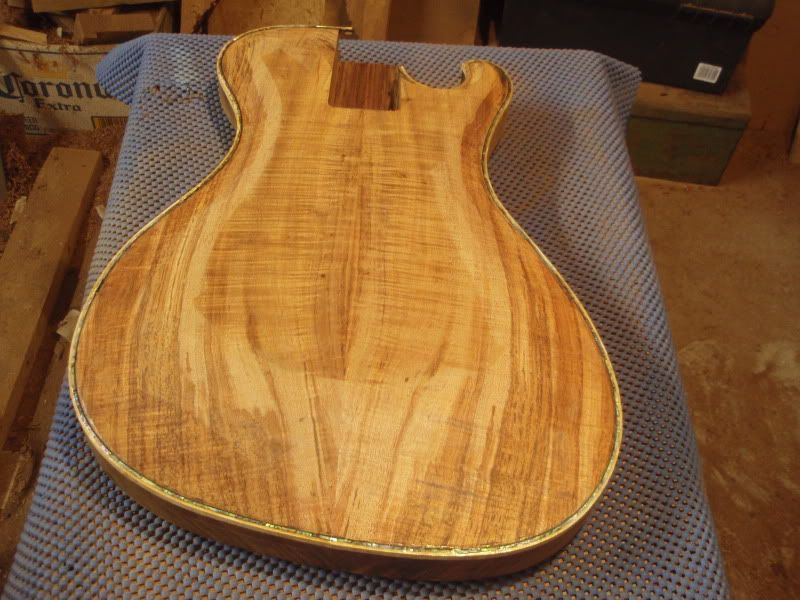
That top is sweet as. Definately a unique piece thats for sure. Cant wait to see this one set up.
Cheers,
Peter
-
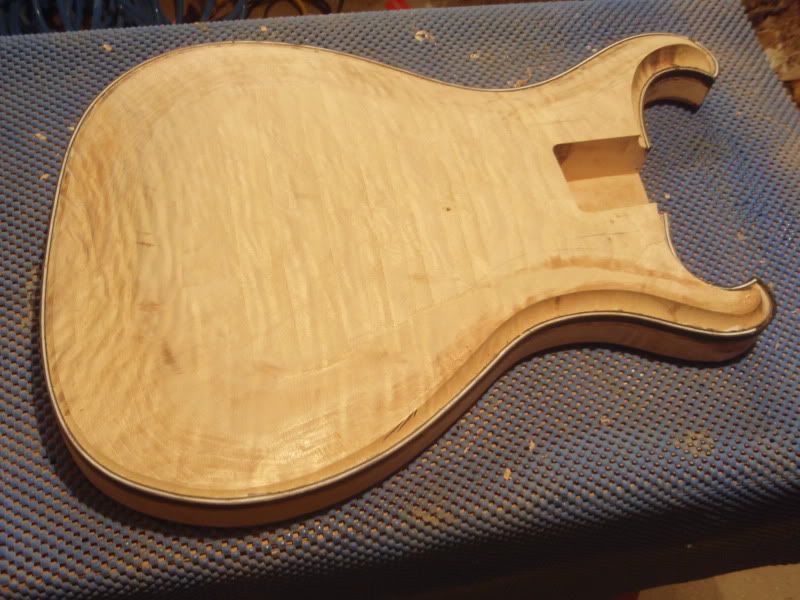
More pics,
Cheers,
Peter
-
Hi,
Here is another I have been working on. Nick wanted an 80's themed/inspired axe. An interesting challenge is just what the doctor ordered for me (guitar doctor)
Specs:
Body - 1 piece figured Queensland maple with ebony binding and pearl purfling
Neck - 3 piece laminated Queensland Maple
Fretboard - ebony with pearl custom inlay
Bridge - shaller stop tail
More spec details will be provided as the build unfolds.
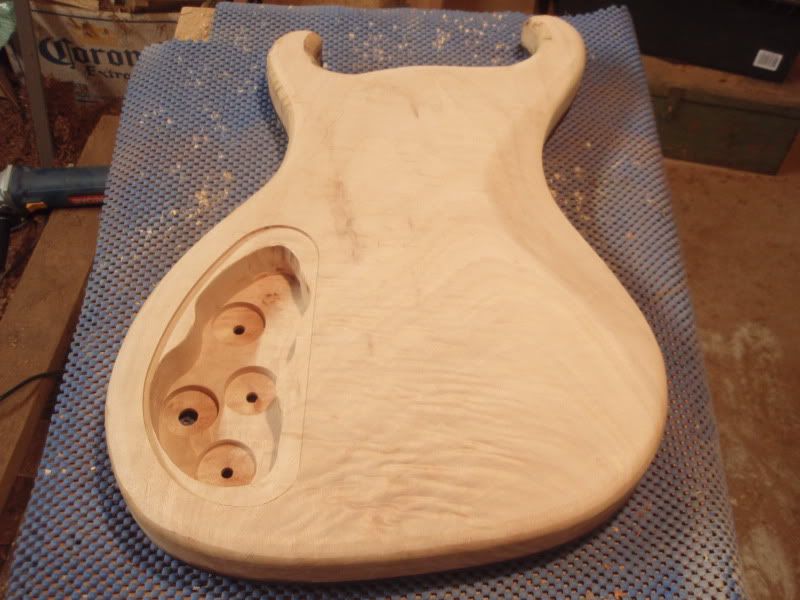
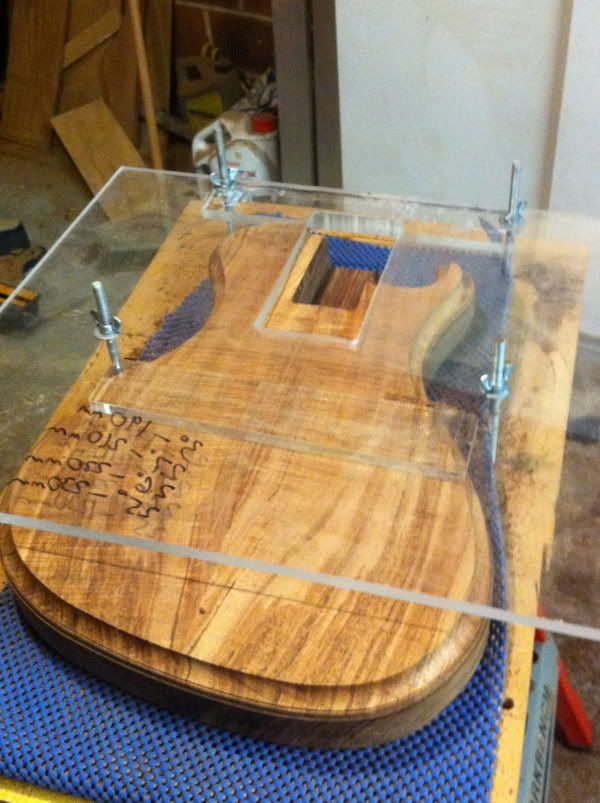
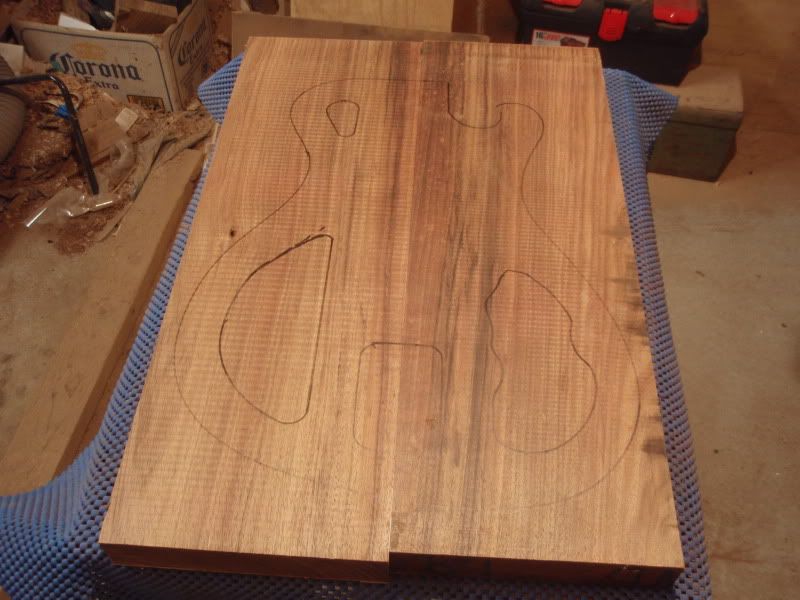
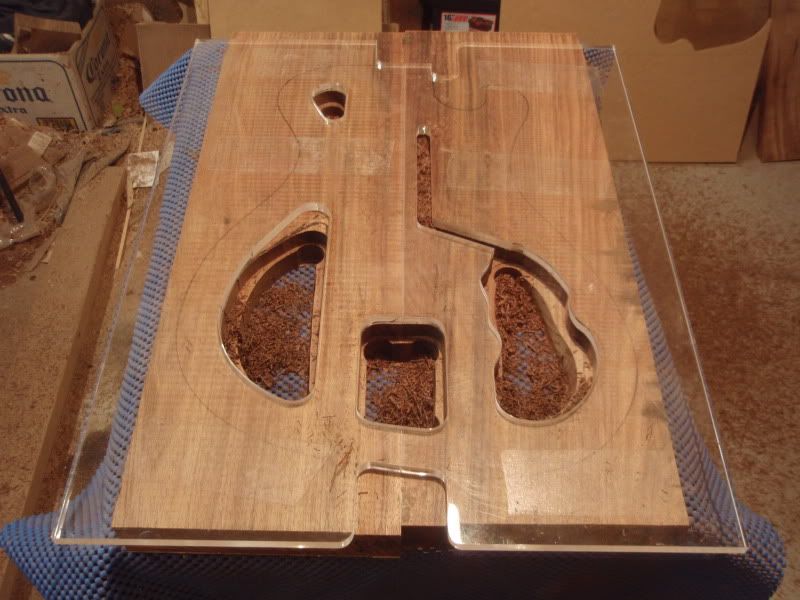
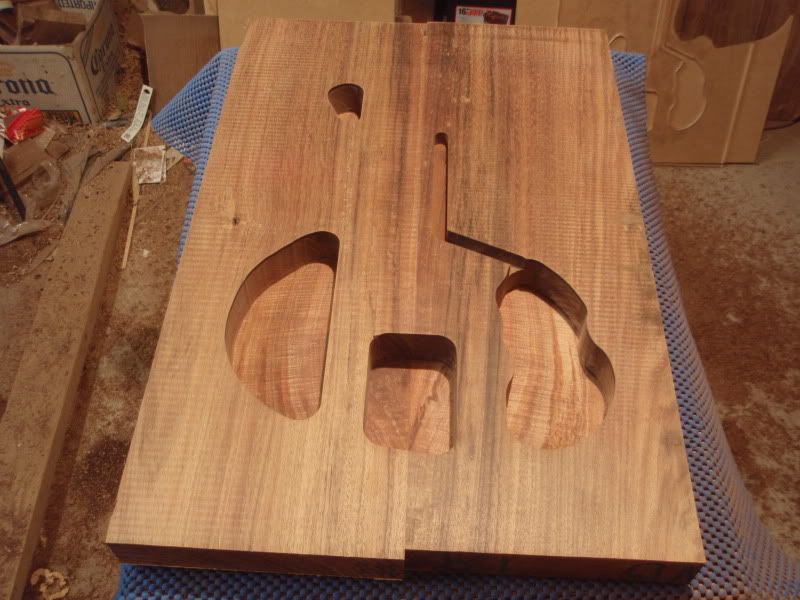
Starting Out with the CAD. I won't be chambering with the 1 piece body.

And lets get started
Cheers,
Peter
-
Thanks for the feedback again,
Prostheta, the bridge location is pretty much bang on where a traditional LP bridge is. the body is a little larger than a LP but not nearly as large as an arch top. The extra open space, visually appears that way for the combination of adopting a stoptail wraparound bridge as opposed to the traditional tune-o-matic and stoptail combo which extends the string length past the bridge position. In addition there is a full 24 frets as oposed to the traditional 22, which makes the illusion that the bridge is closer to the end of the fretboard, where as, it is the fretboard terminates a little lower. The guitar plays realy well, and if I had of shrunk the body and shifted the bridge back, it wouldn't feel the same to play, especially to a well seasoned LP player.
Matt, unfortunately I don't have an more details of the neck angle jig, however it is quite simple. It is just a flat piece of acrylic with bolt threads clear of the body and an opening to rout through. The bolts tighten down to the bench below and esentialy sandwich the body holding it in place. The angle is achieved by placing a riser on the underside of the board to lift it at one end, creating an acgled surface to rout on. The accurate angle is achieved by using trigonometry to calculate the required distance between the end of the body (the fulcrum of the top board) and the location of where the riser meets the body depending on the thickness of the riser (which is what I have written of the jig).
Regards,
Peter
-
Thanks for the kind words
Scott, The clear coat is waterbourne laquer sprayed on.
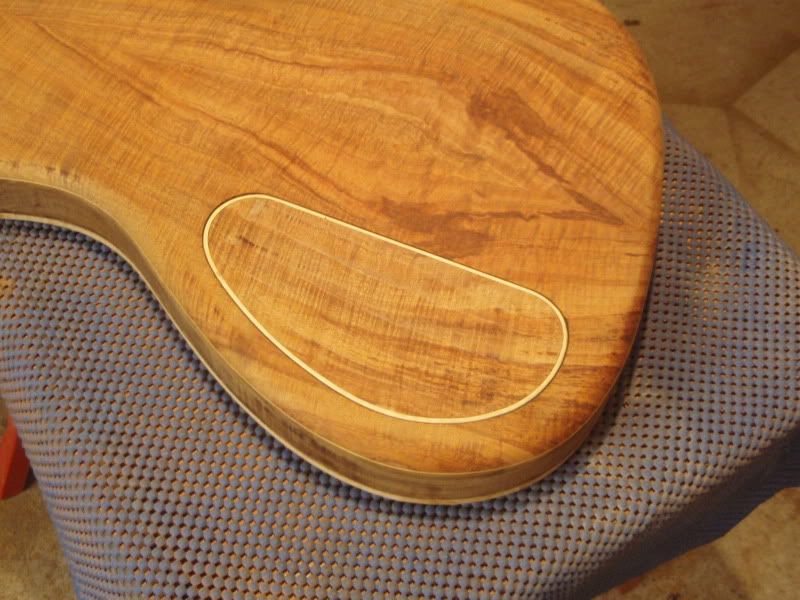
Charlie, The cavity cover I cut out of the back plate before gluing the back plate on. I cut the cover out very carefully using several passes of a dremel router bit. The gap in the cut is filled with the binding. So the garin matches because it was originally one piece.
More pics...


Cheers
Peter
-
Hi,
Dropped this off over the easter weekend
Final Specs
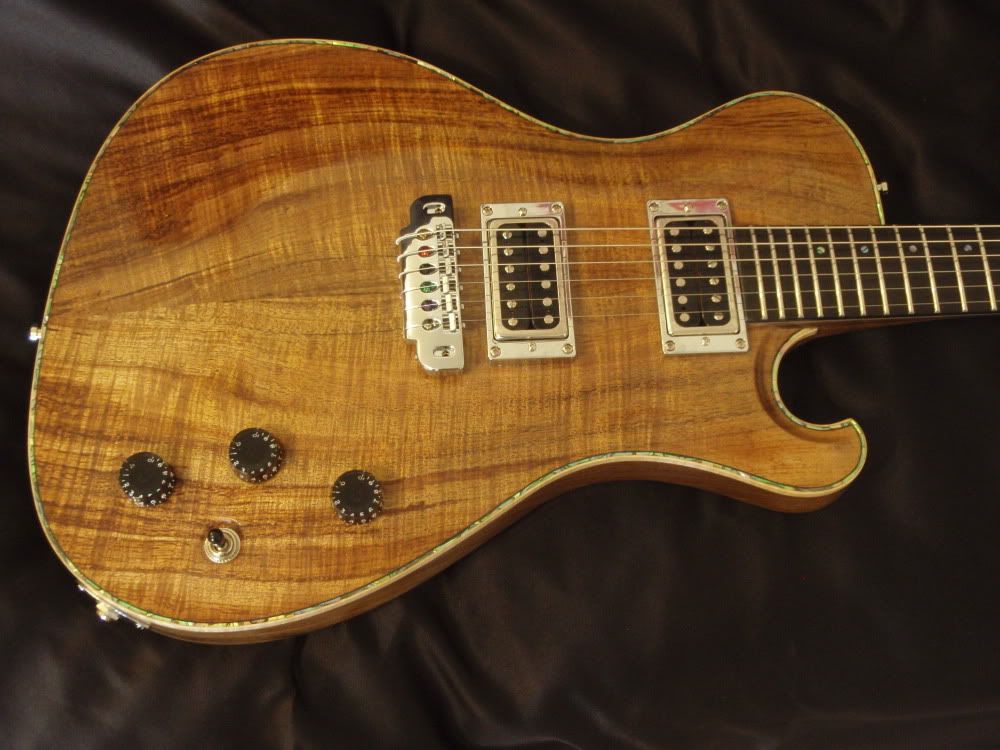
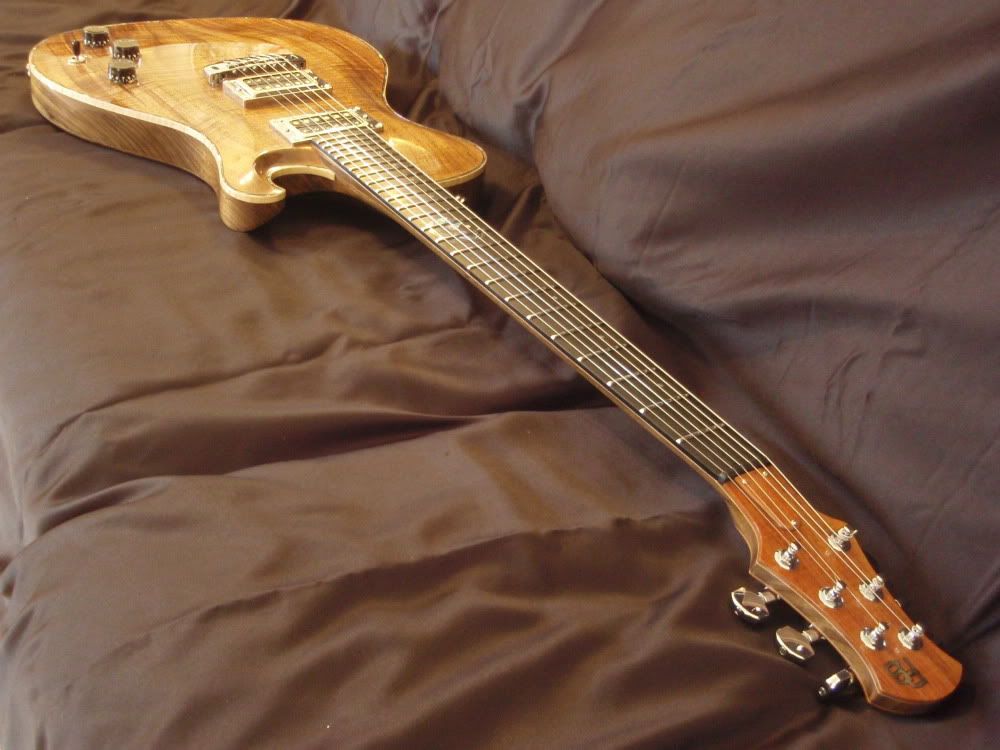
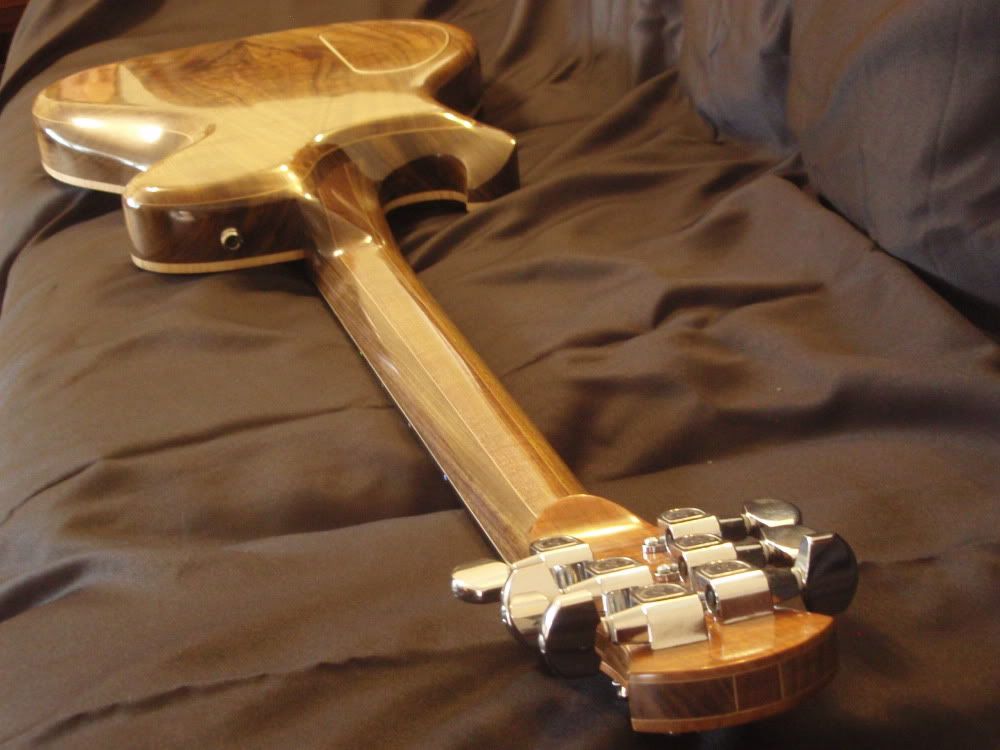
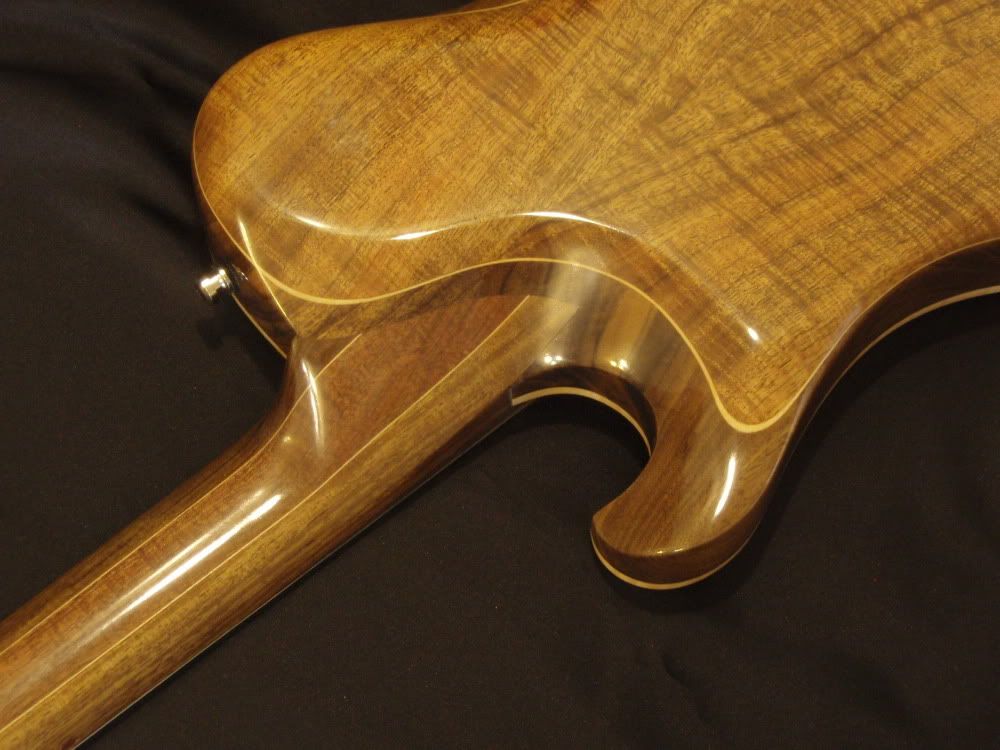
Body - Chambered blackwood with fiddleback blackwood carved top and matching backplate with maple highlights (cut from same billet) with cavity cover cut from the back plate. Binding is flamed maple with paua purfling.
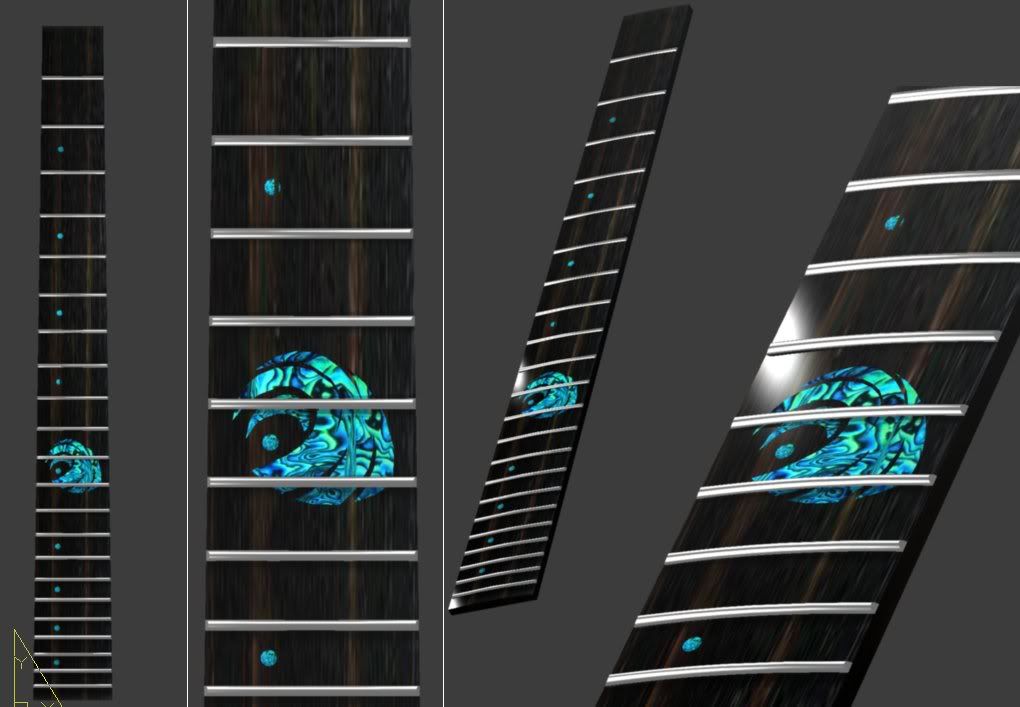
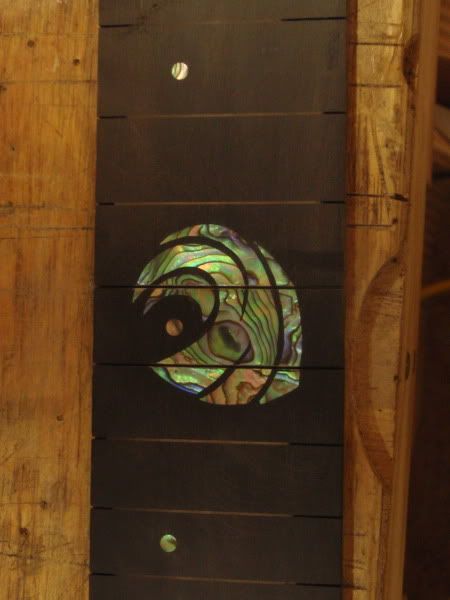
Fretboard - Ebony with blind binding (to cover slots) and tribal wave paua 12th fret marker and offset dots.
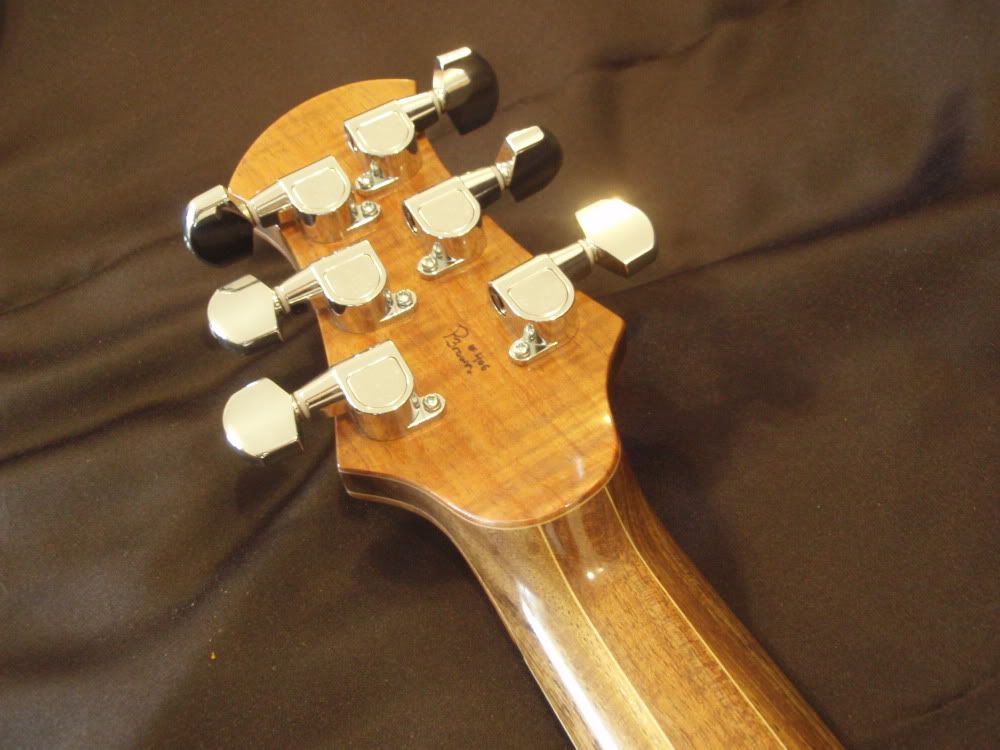
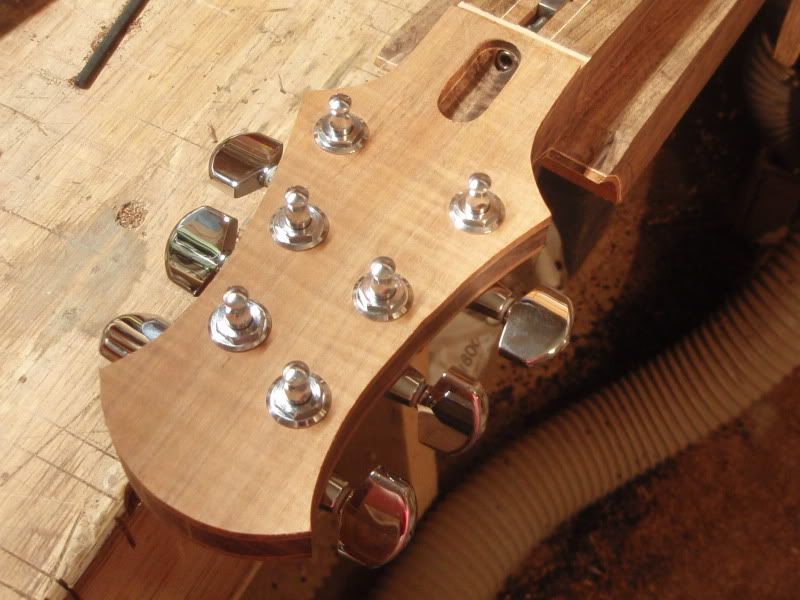
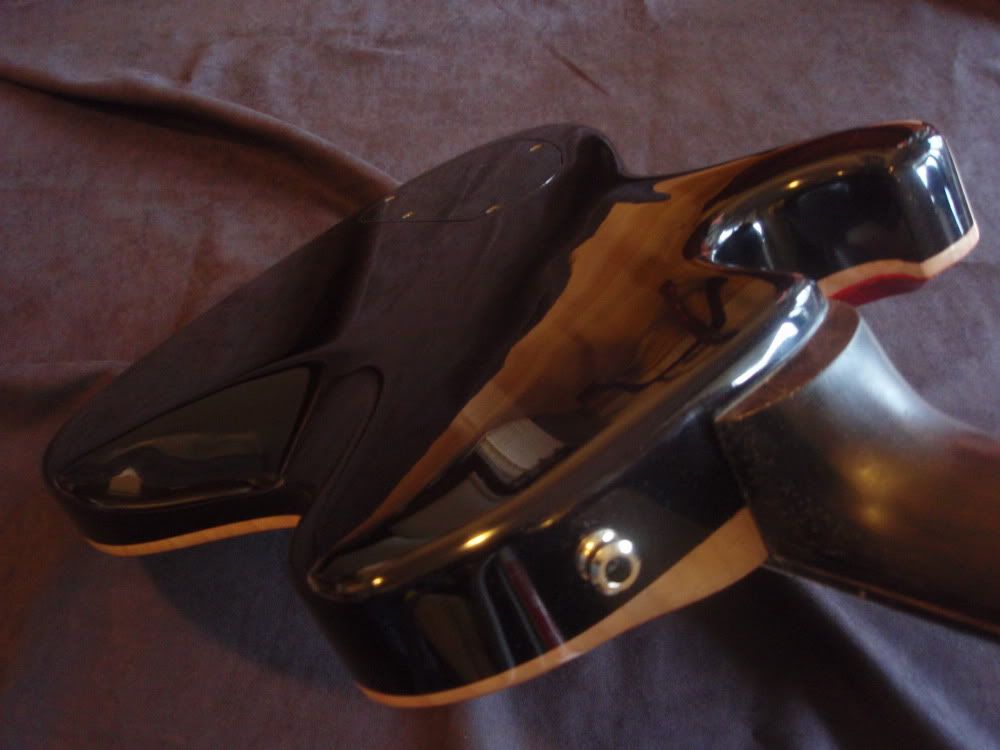
Neck - laminated quarter sawn blackwood with tappered fiddle backed centre and maple highlights. Headstock top plate and bent backplat is highly figured blackwood with maple highlight.
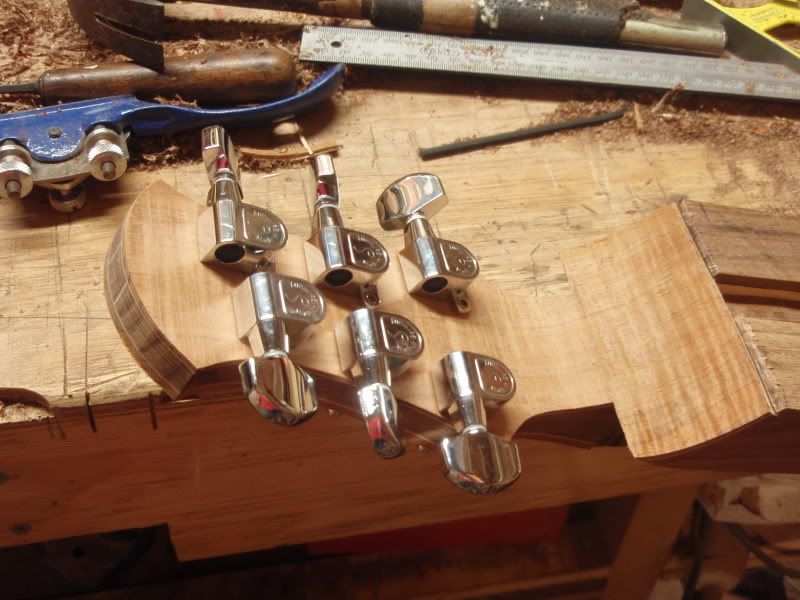
Hardware - shaller tuners and Gotoh 510 wrap around lockable bridge.
Pickups - PB A5 vintage wound missmatch in the neck for those sparkling clean tones and and punchy overdrive. PB A2 hot wound in the bridge for the smooth overdrive tones.
Cheers,
Peter
-
Great work. Nice clean lines all round. Very tidy indeed. 1+'on the heel design.
Any plans for the third?
-
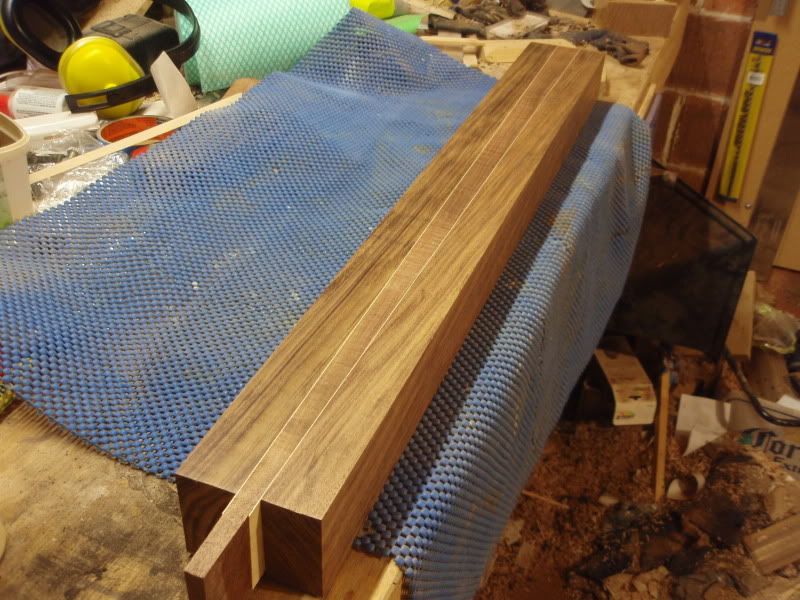
Hi,
The binding is timber. Flamed maple. The binding is bent in much the same way as acoustic sides. I wet the binding and then bend it around the bending iron. The same goes for the back plate of the headstock. It is necessary to pre bend the binding with heat especially around the tight bends to prevent tear out when gluing
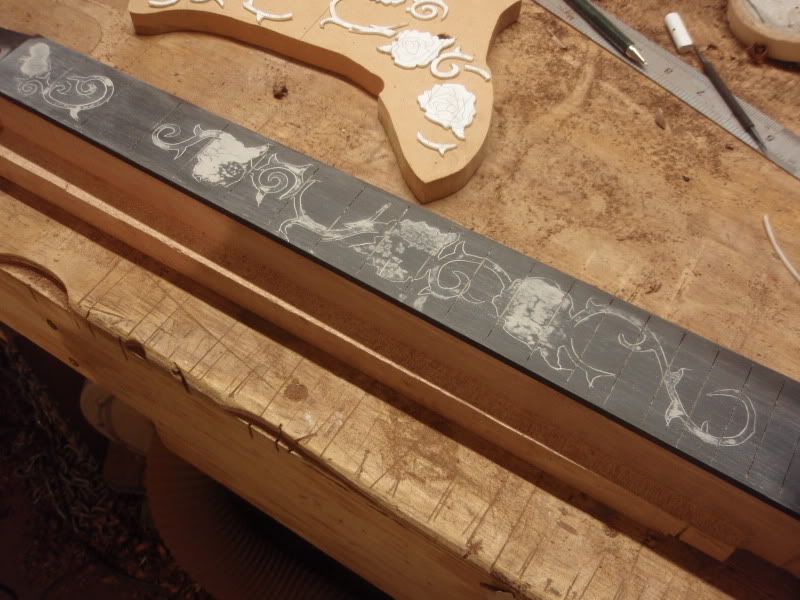
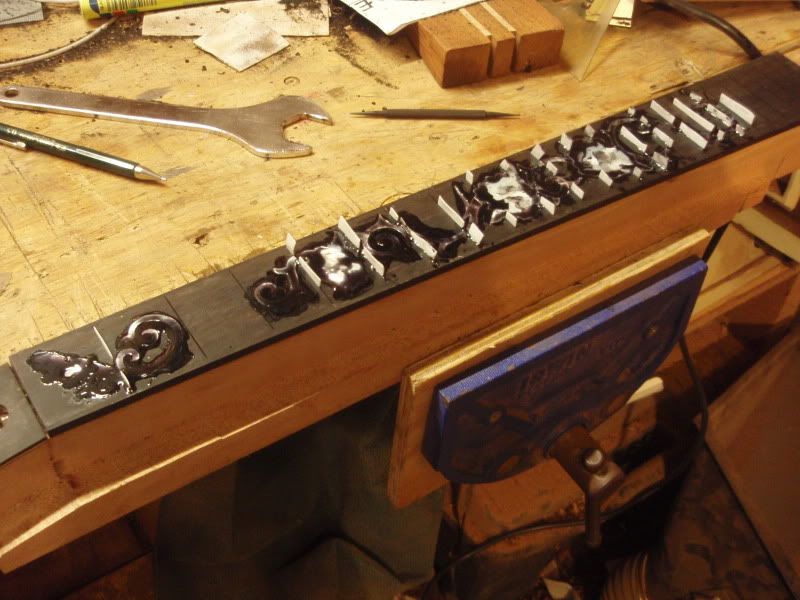
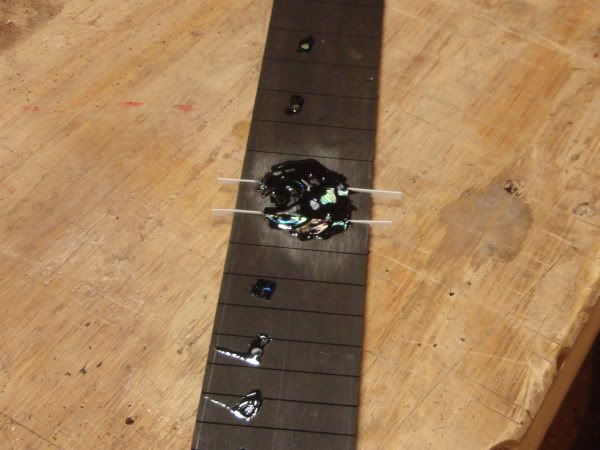
I rout the inlay with just a down cutting demel bit. I start with a small bit to goe around the outside. I rout just up to the chalk line just taking enough so that the chalk line disappears. Once the outline is routed I use a larger bit to take the bulk internal material out. I don't see the need to cut the top edge as the down cutting bits leave a clean edge. Plus as you radius the fretboard you are essentially removing the top edge anyway exposing a new clean edge at the interface. I use epoxy tinted with black stain to match the ebony. When using other timbers I mix in some filings of the timber I am inlaying into with the epoxy.
Cheers
Peter
-
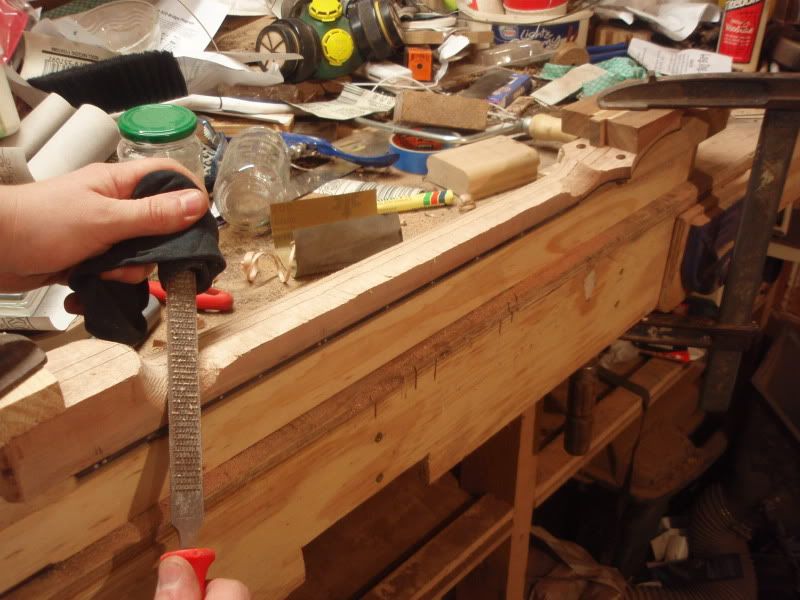
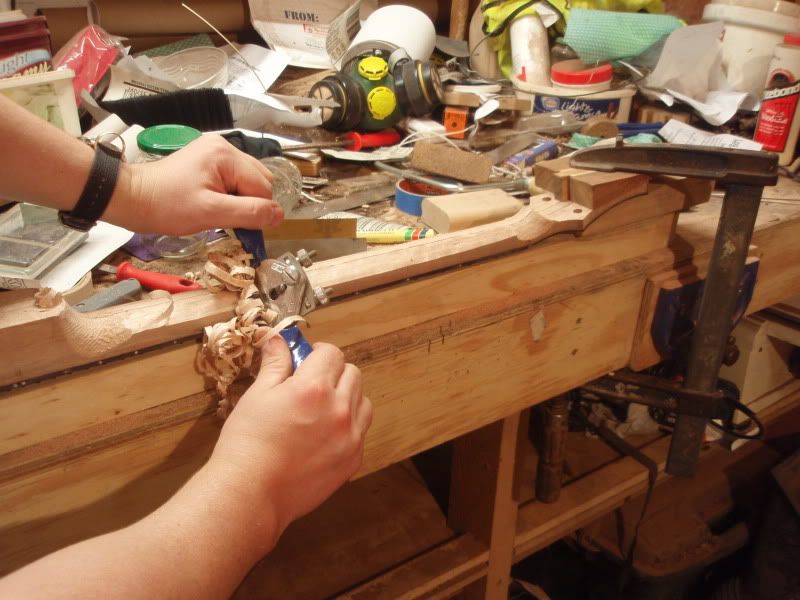
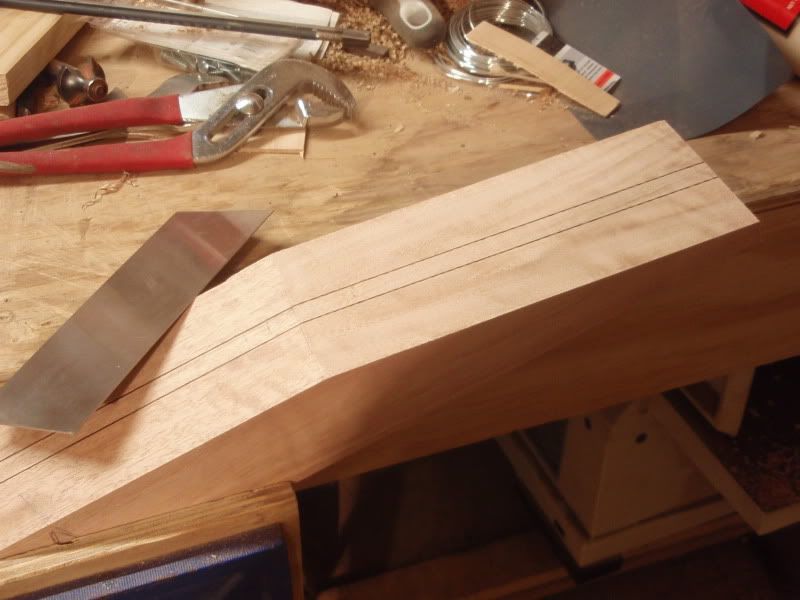
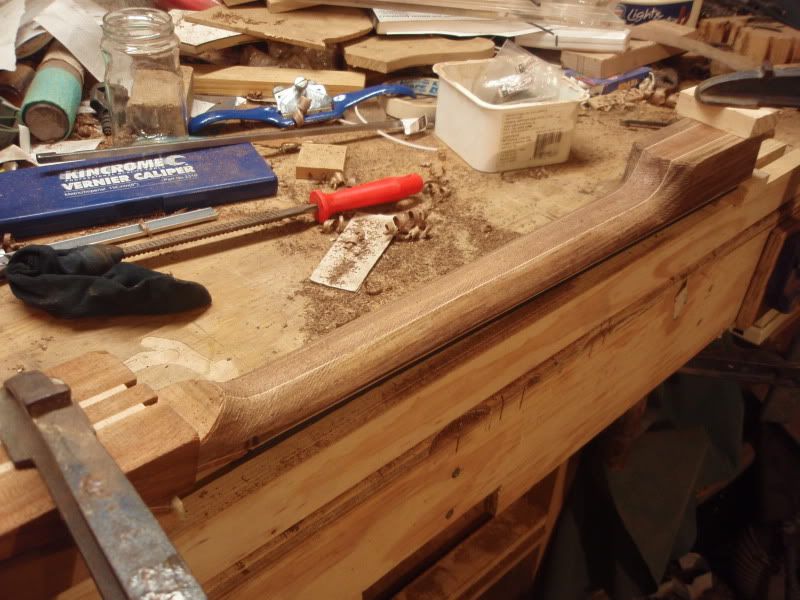
Hi,
More pics. Shaping the heal into the body for improved upper access and final shaping the neck to profile

Cheers,
Peter
-
Thanks Prostheta,
I am not sure that I quite get what you mean by neck movement after cutting to profile. How wuld this have been avoided, by cutting the neck profile prior to glueing? My experience has been that this is the most stable way of getting a flat fretboard. Ususally warping results from poor quality timber or a reaction to environmental factors such as heat and moisture.
More pictures of rough carving the body and rough carving the neck. I do the final shape to profile once the neck is in place. And Prostheta, you concerns should be relieved, as the neck is still straight.
Cheers,
Peter
-
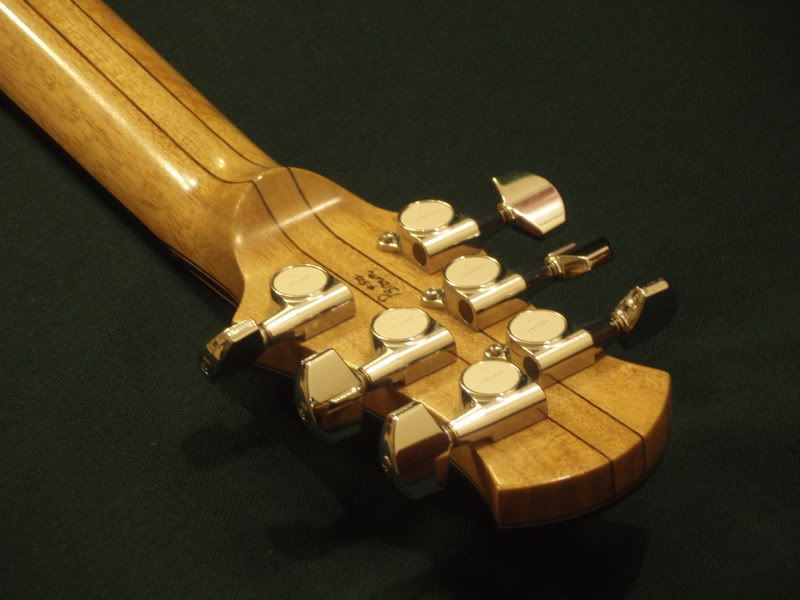
Thanks for the kind words fellas,
More pics of fretting. stainless Medium jumbo
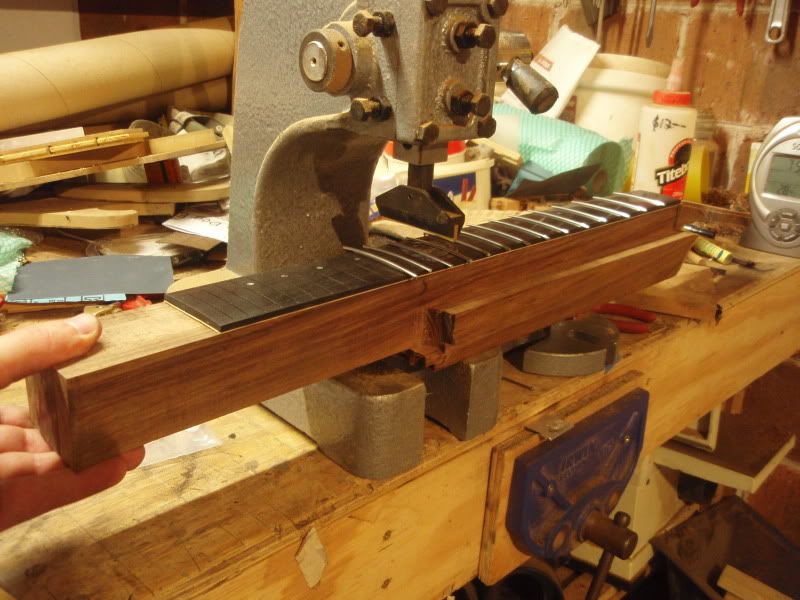
Cheers,
Peter
-
Hi,
More progress pics

Cheers,
Peter
-
Yes, top and back resawn from same billet.
And no this is not number 1 or2. I have done a few of these
Cheers
Peter
-
Thanks Fellas,
Chris, I have some plastic in the slots. Not sure what it is exactly. Stewmac calls it fret dam or something. It doesn't stick to glue so you can pull it staight out once the glue has set.
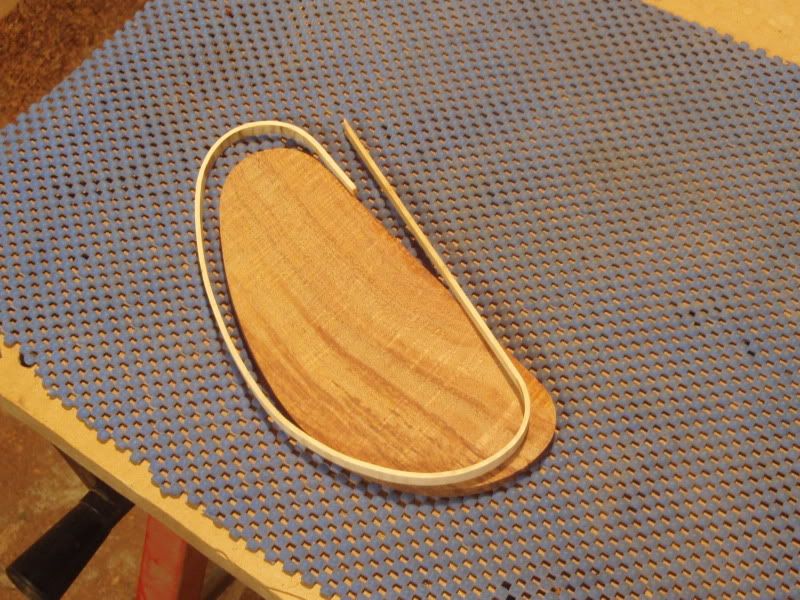
Scott, Yes the top is bound and has paua purfling as well. Pics below
Routing the neck pocket with 2.7 degree angle
The binding heat bent and glued
Fitting purfling
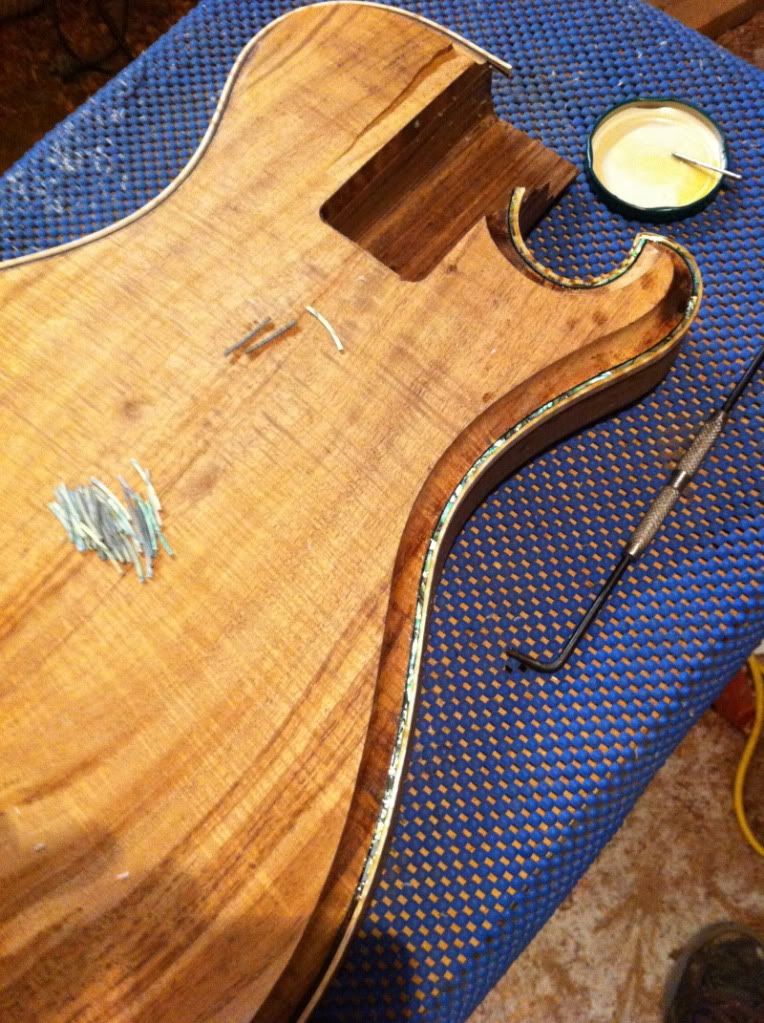
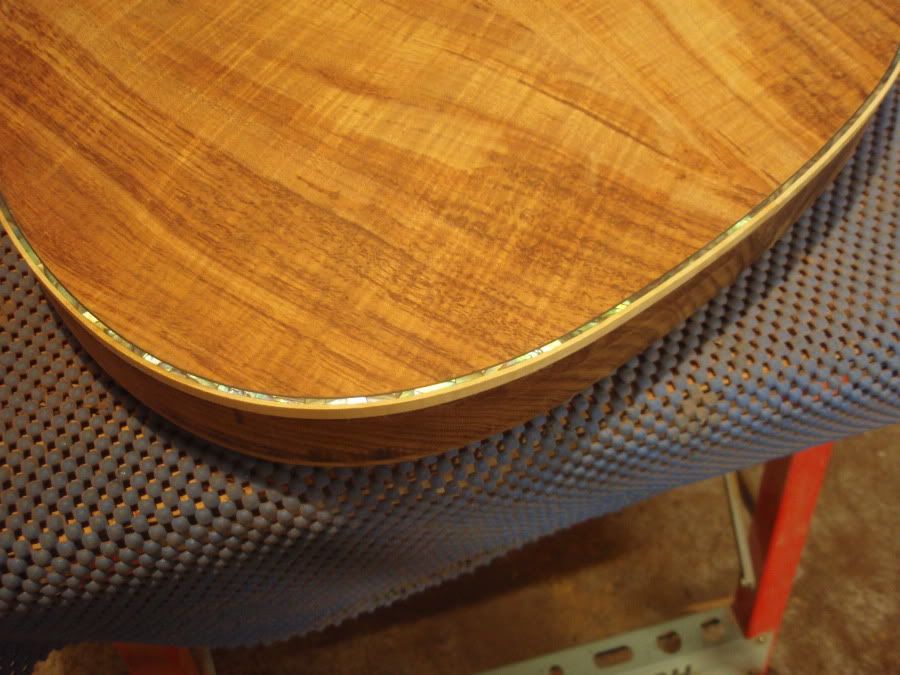
Cheers,
Peter
-
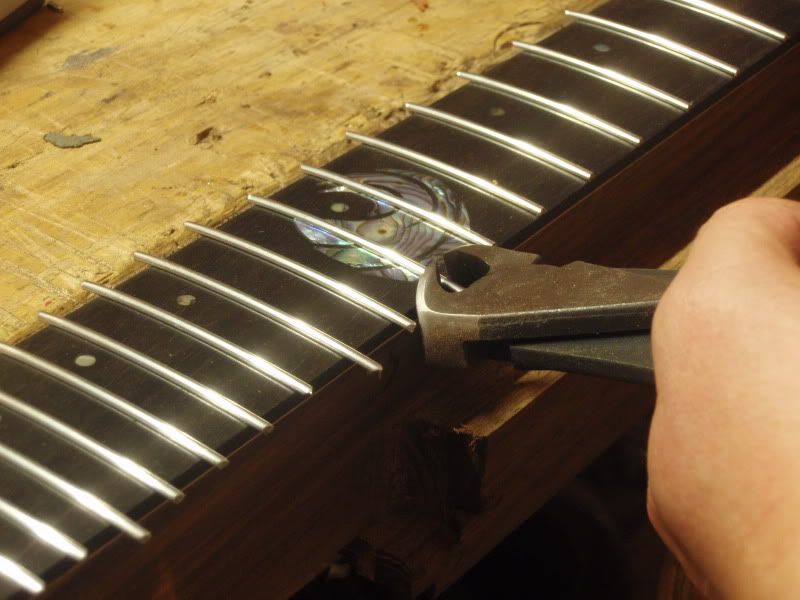
Thanks Ponticat,
It was just a case of making a thin cut out of the back plate before gluing and binding the cover in place of the cut.
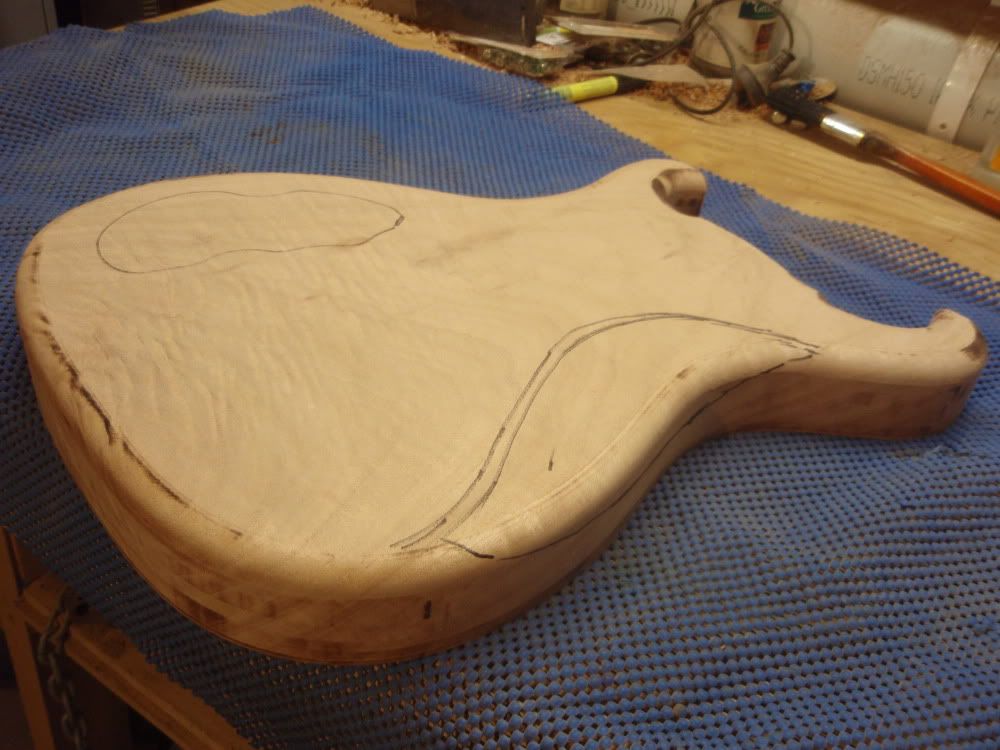
More progress pics of the inlay
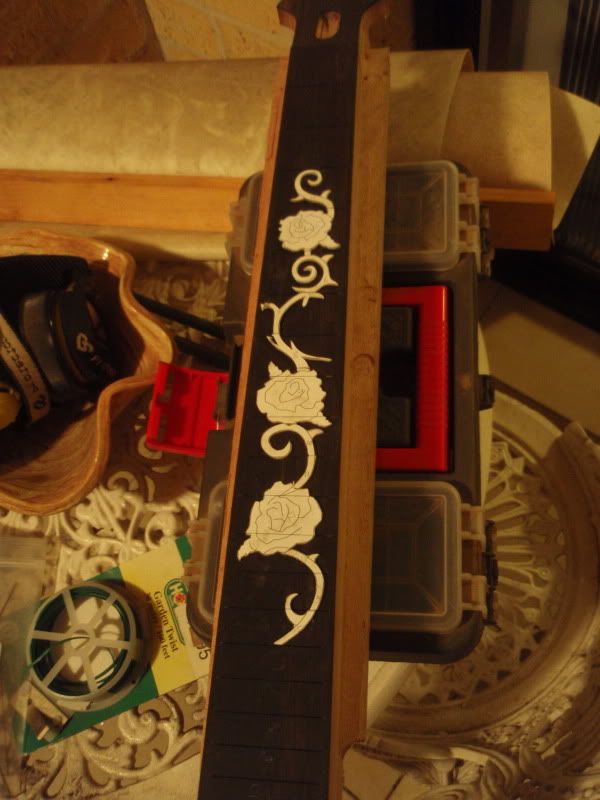
I did a mock up of the inlay first to give the customer an idea of what it will look like
And the inlay
Cheers,
Peter
-
Hi,
More progress pics as requested.

Cheers
Peter
-
Hi,
Have been working on this one for a while and thought I'd share it with you
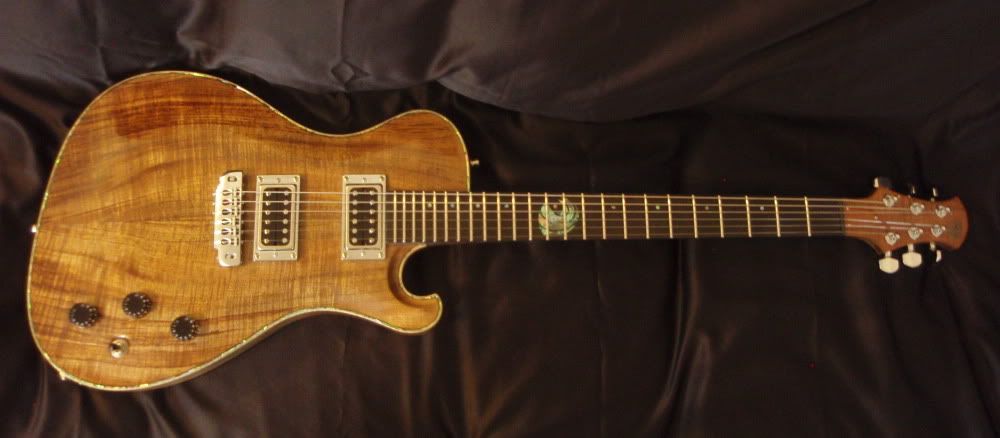
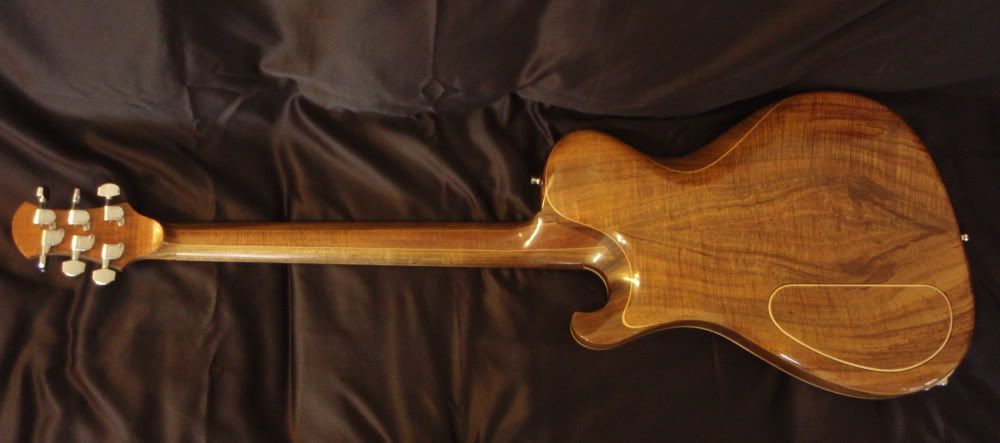
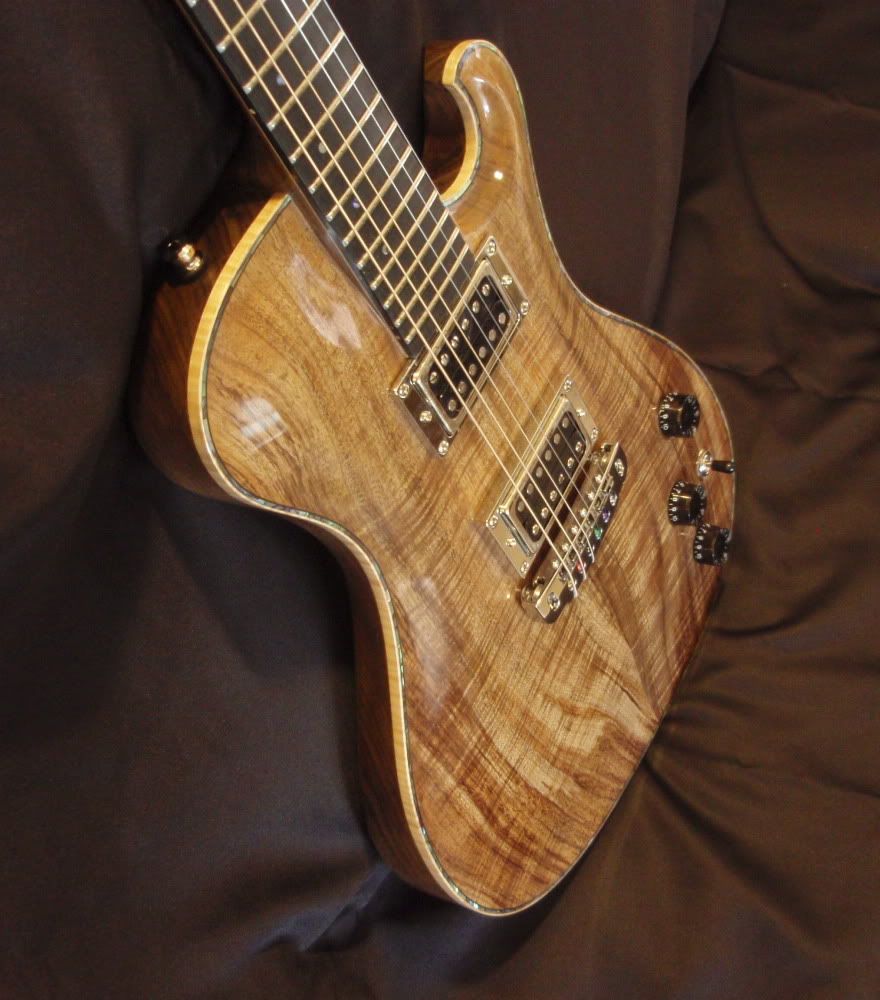
Body - Chambered blackwood with fiddle back blackwood top and matching back plate
Neck - Three piece laminated blackwood with atpered fiddle back centre stinger
Pretboard - Ebony with custom paua 12th fret inlay
Hardware - Gotoh 510 bridge with shaller tuners
Pickups - PB custom wound hummies
Cheers
Peter
-
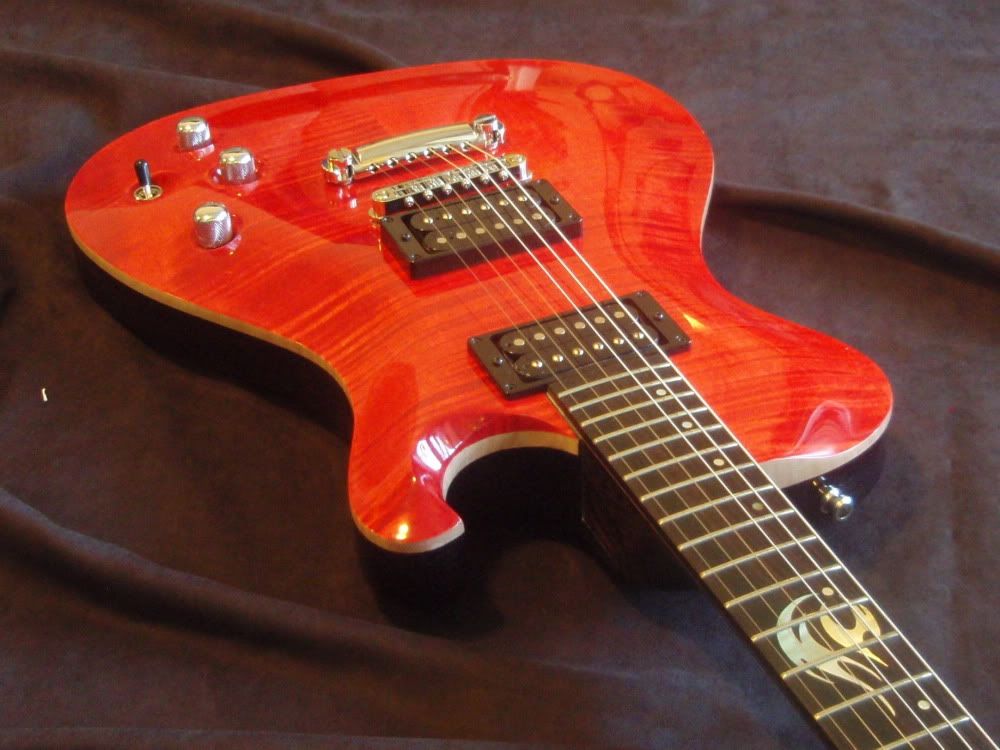
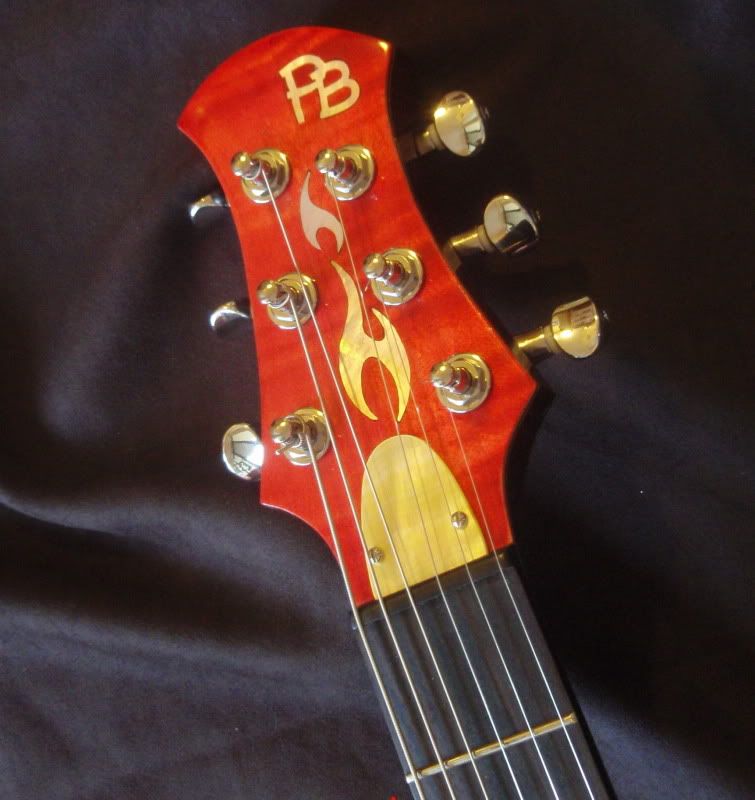
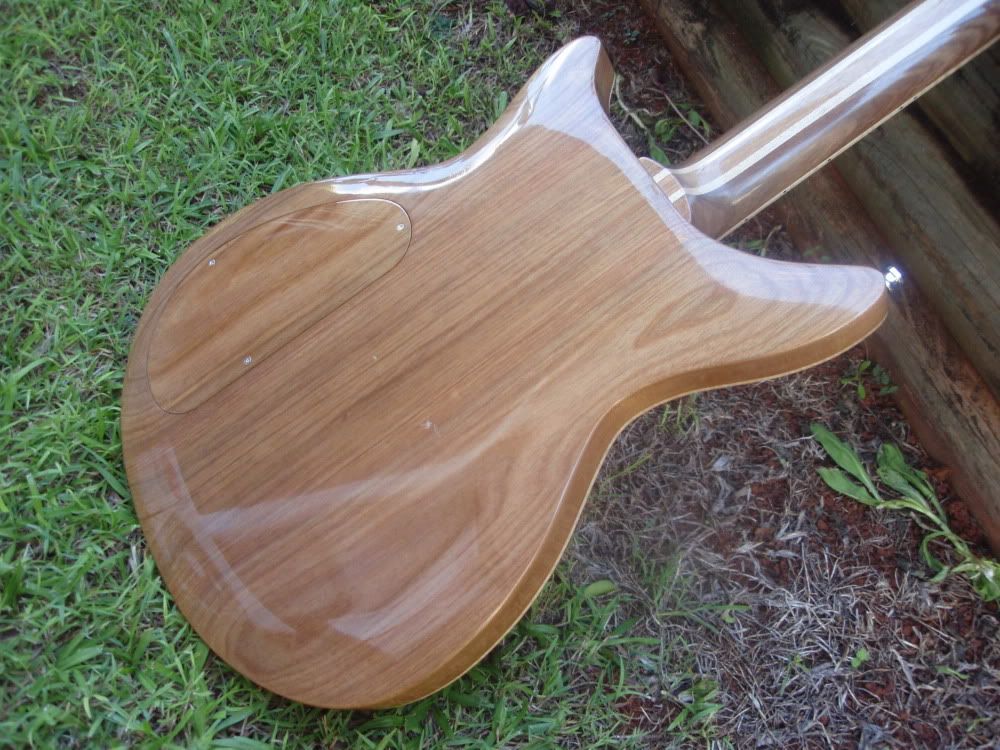
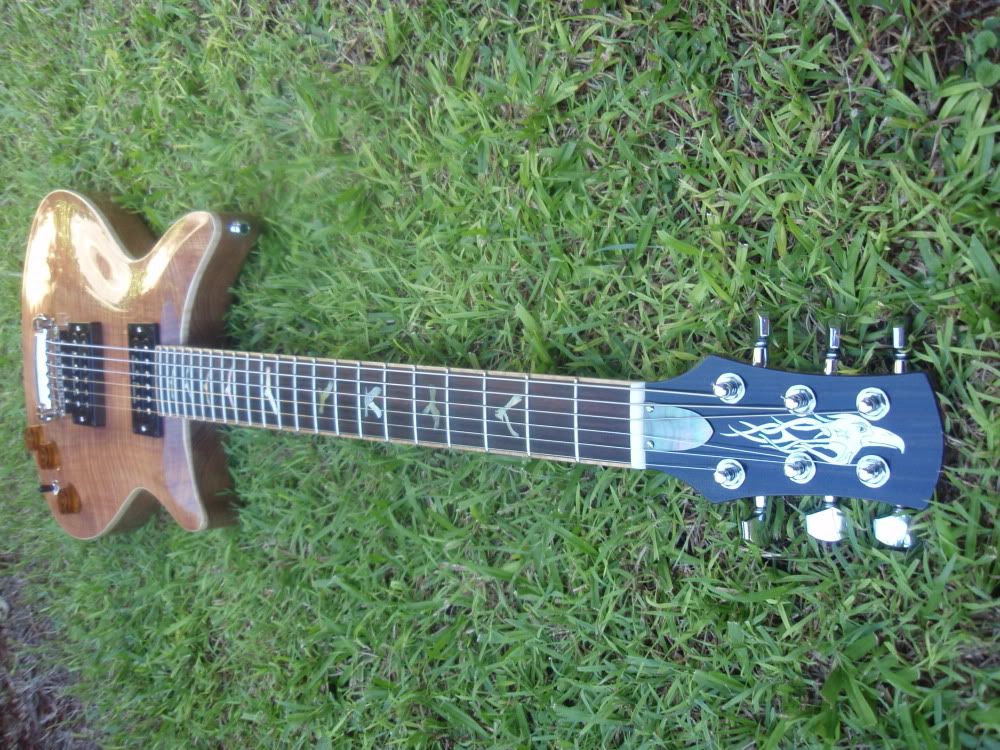
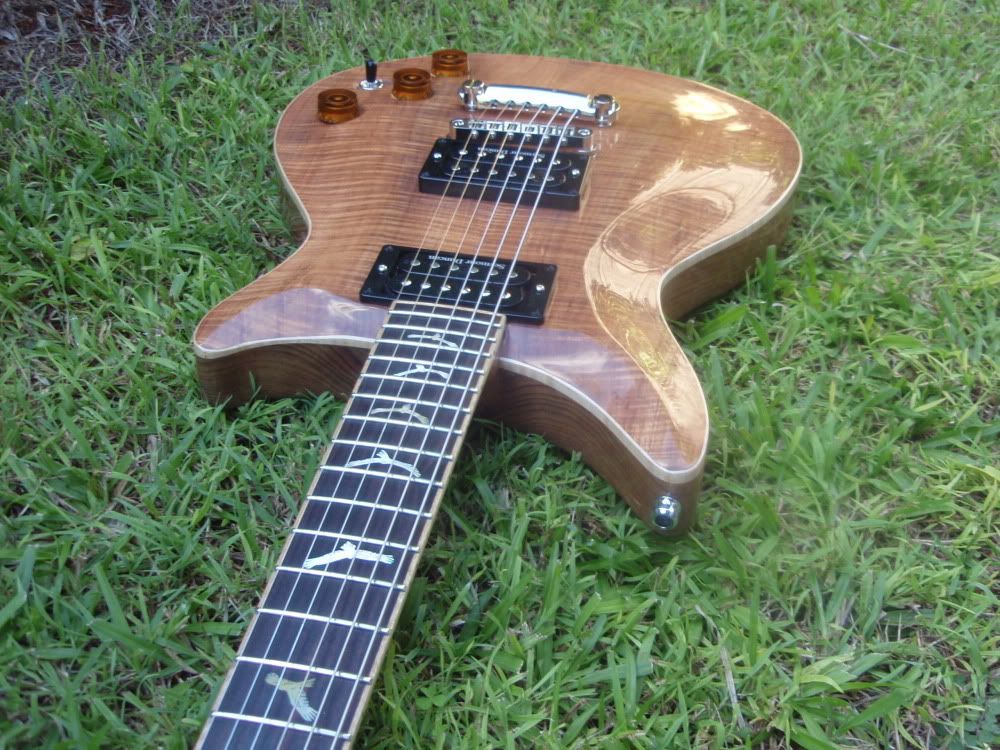
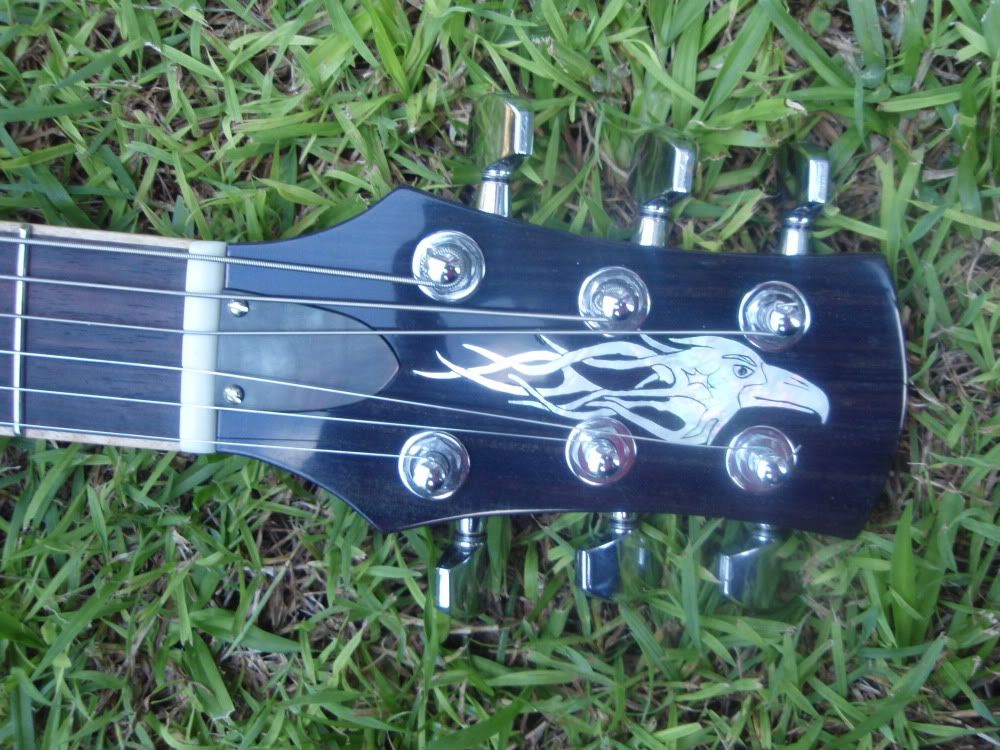
Hi,
I call this the "fire ball"
Body - mahogany body with carved flamed maple top
Neck - wenge with oil finish
Fretboard - Ebony with custom "fire ball" 12th fret inlay
Hardware - Gotoh
Pickups - PB custom wound hummies. Vintage missmatch winding in the neck and hot wound for bridge
Cheers,
Peter
-
Thanks fellas for comments fellas,
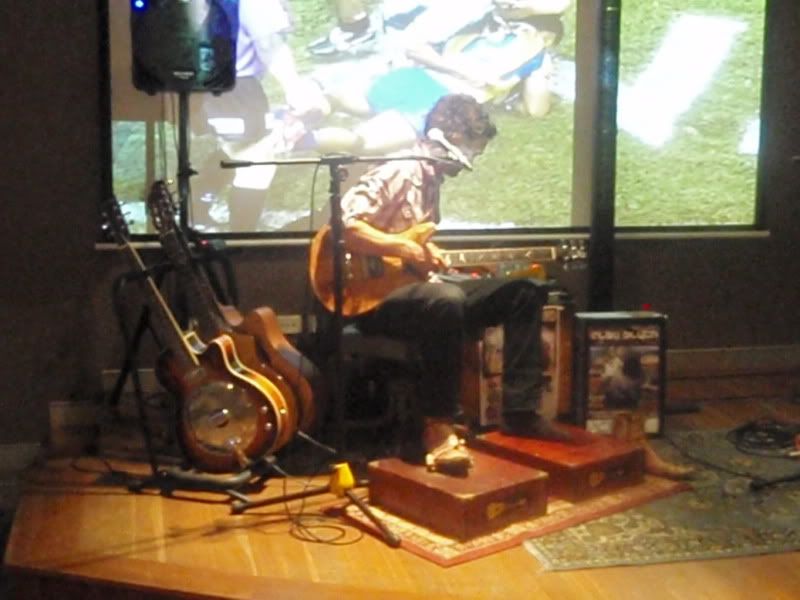
Chad as for the sound it has a real sweet depth in the cleans and edgy, but smooth the the overdrive cranked. Very good upper access and pleanty of sustain. I am very happy with how this turned out, and so is the recipient Dan (see below). I dropped it off to him just before his gig, and he couldn't help himself. He plugged it in and cut sick in his sound check, and now uses it as his main electric on stage.
Cheers,
Peter
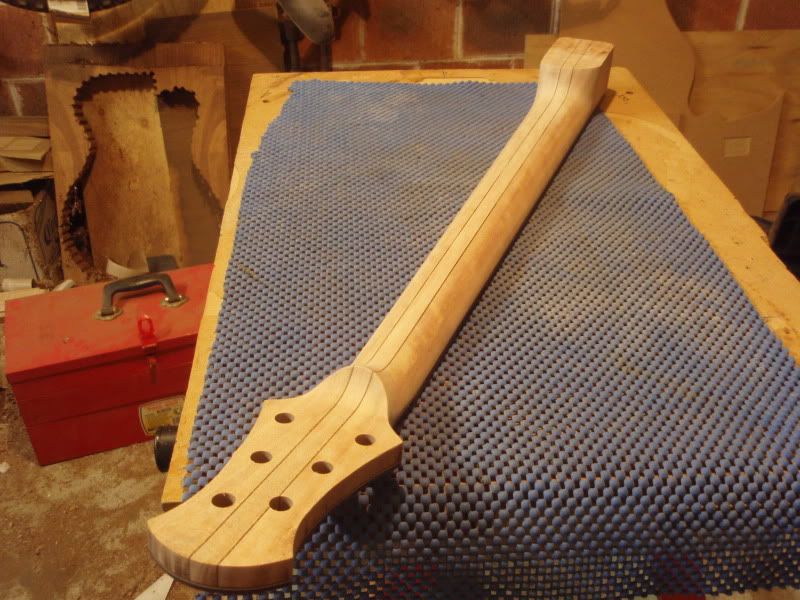
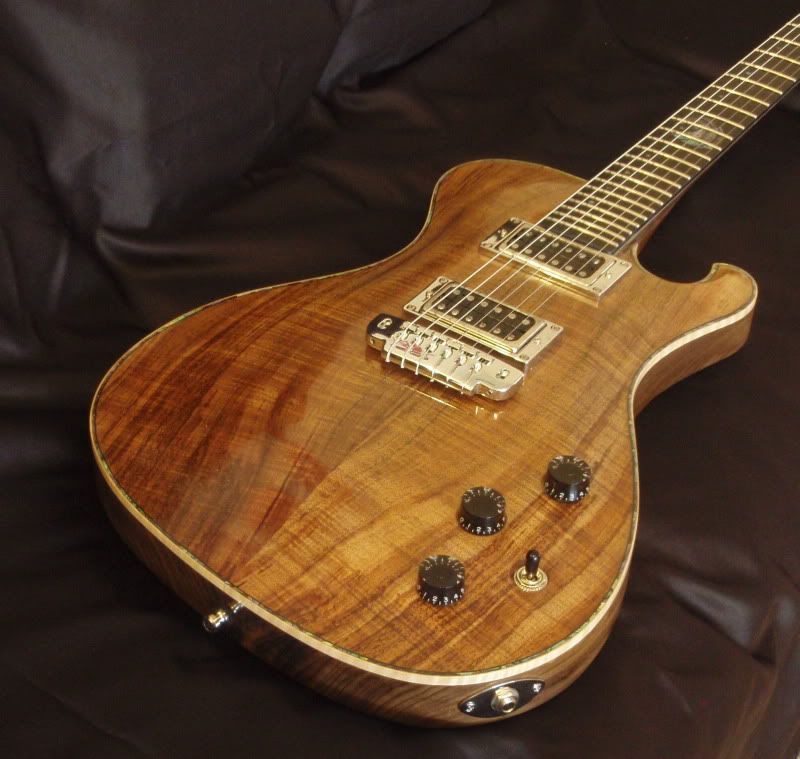
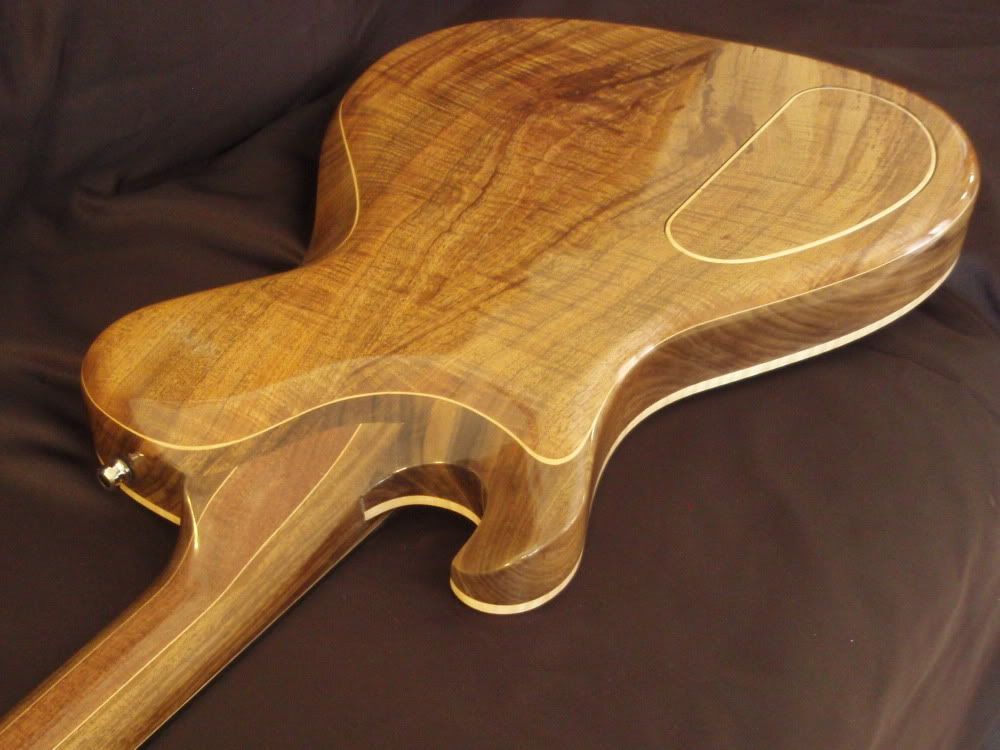
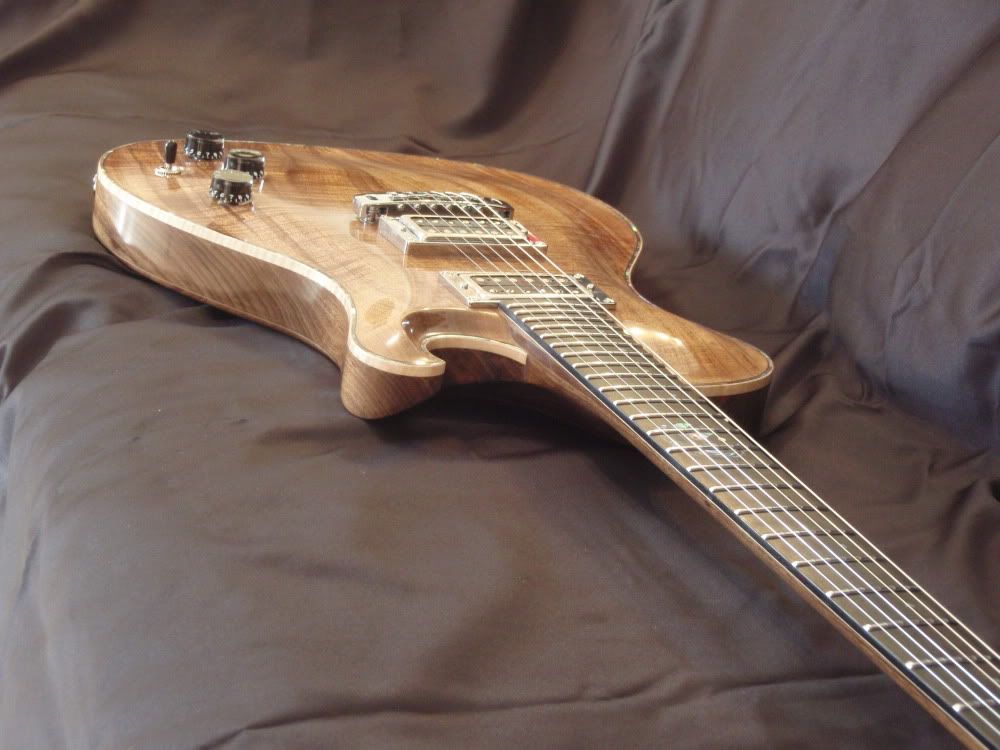
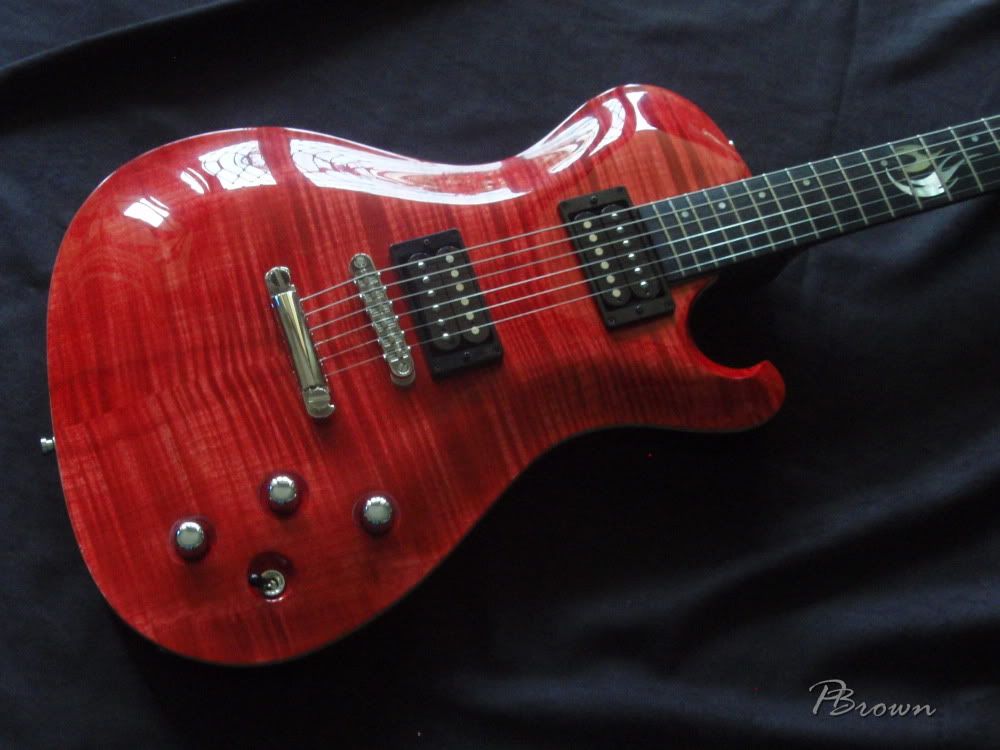
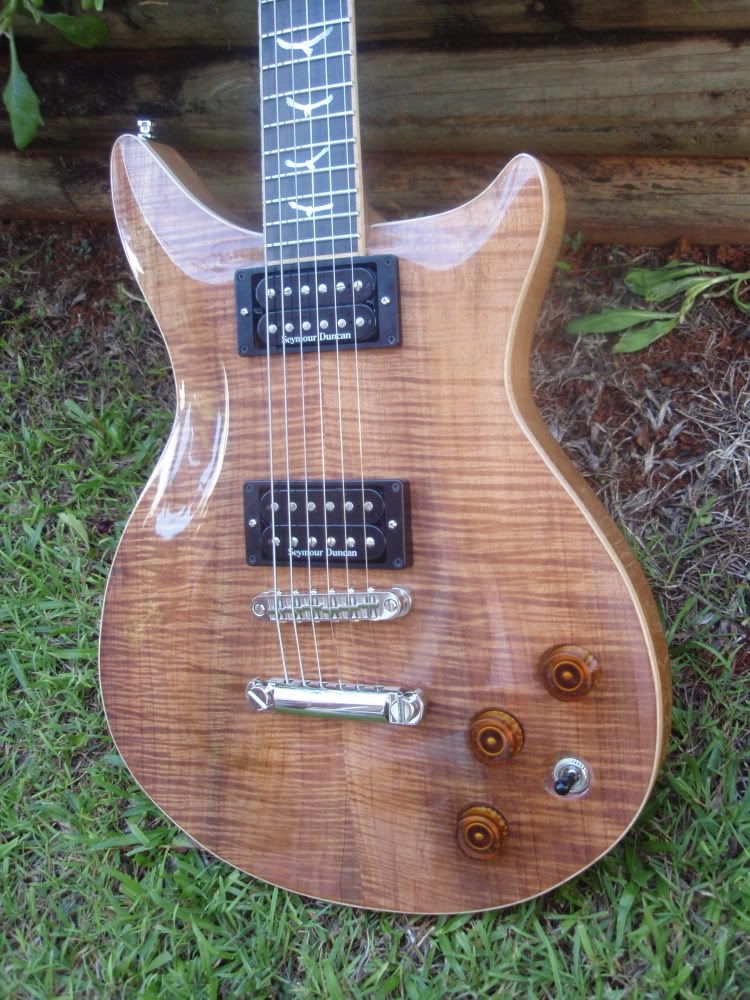
Queensland Maple Dc Hybrid
in In Progress and Finished Work
Posted
Thanks Oblaty,
To be honest I couldn't tell you exactly how long it took. I should keep track to it I know.
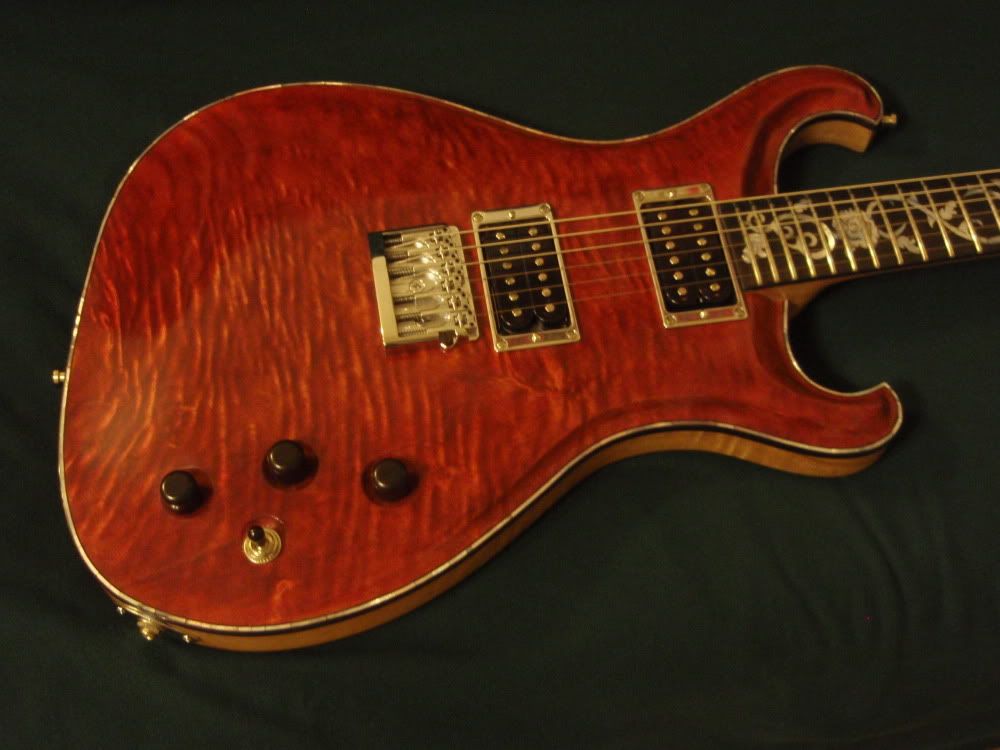
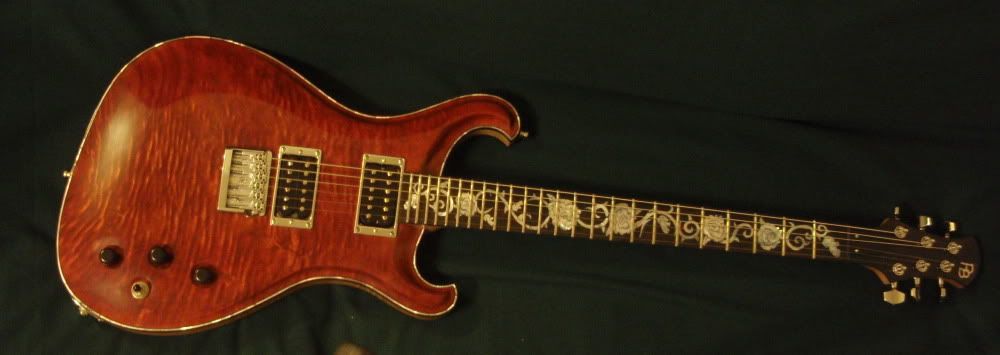
Final Specs:
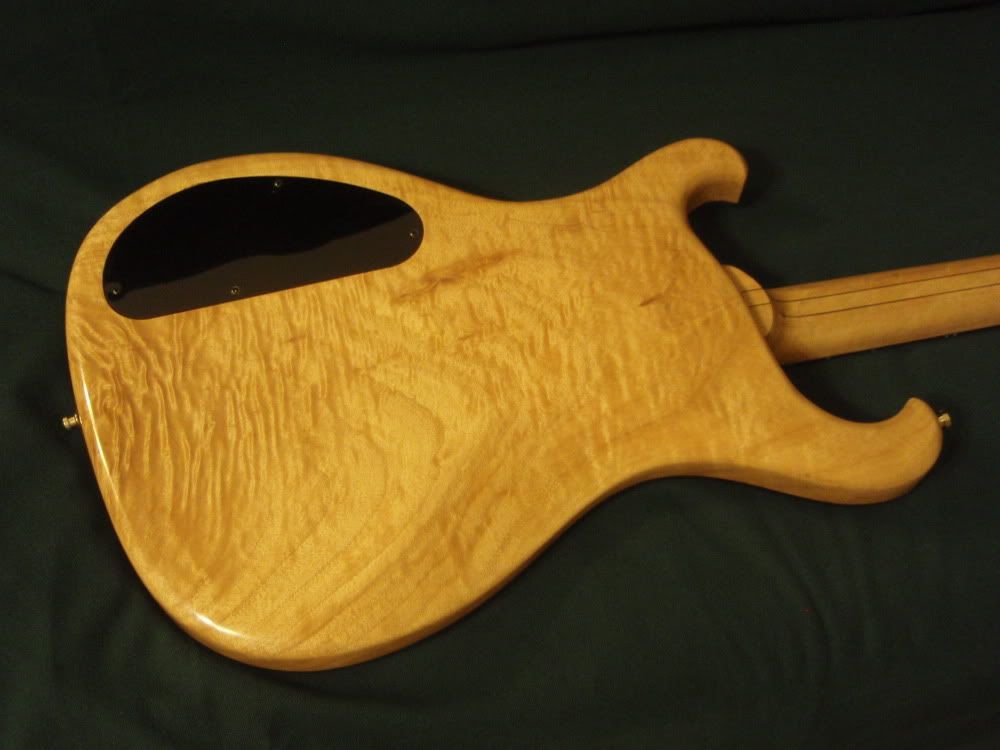
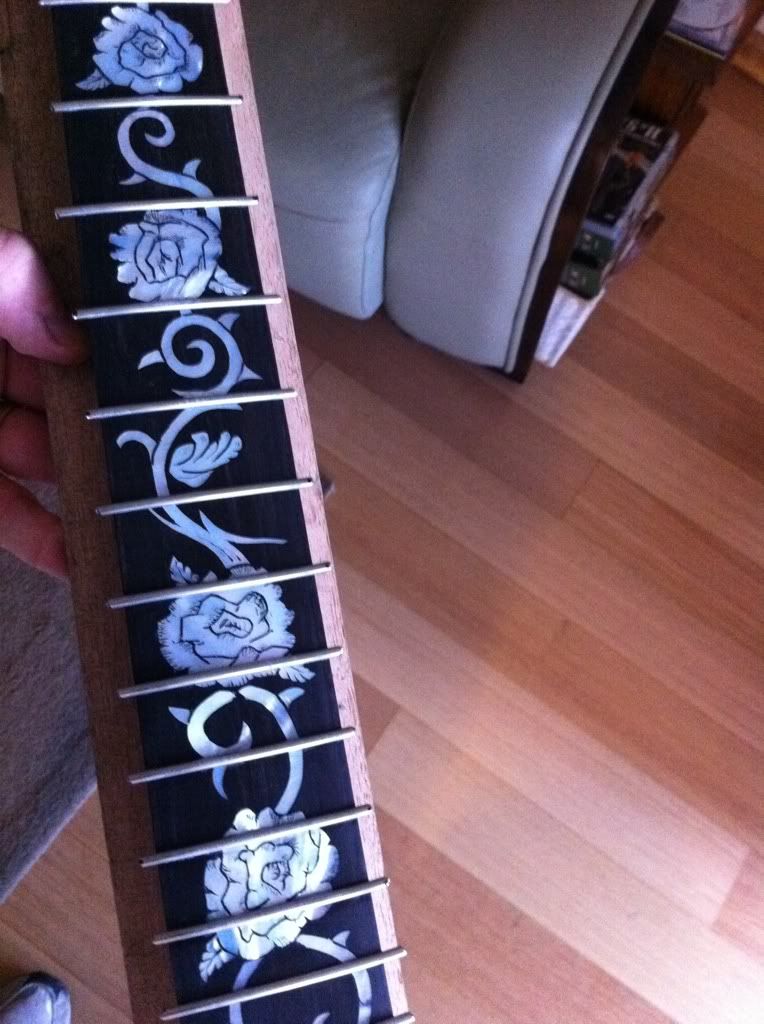
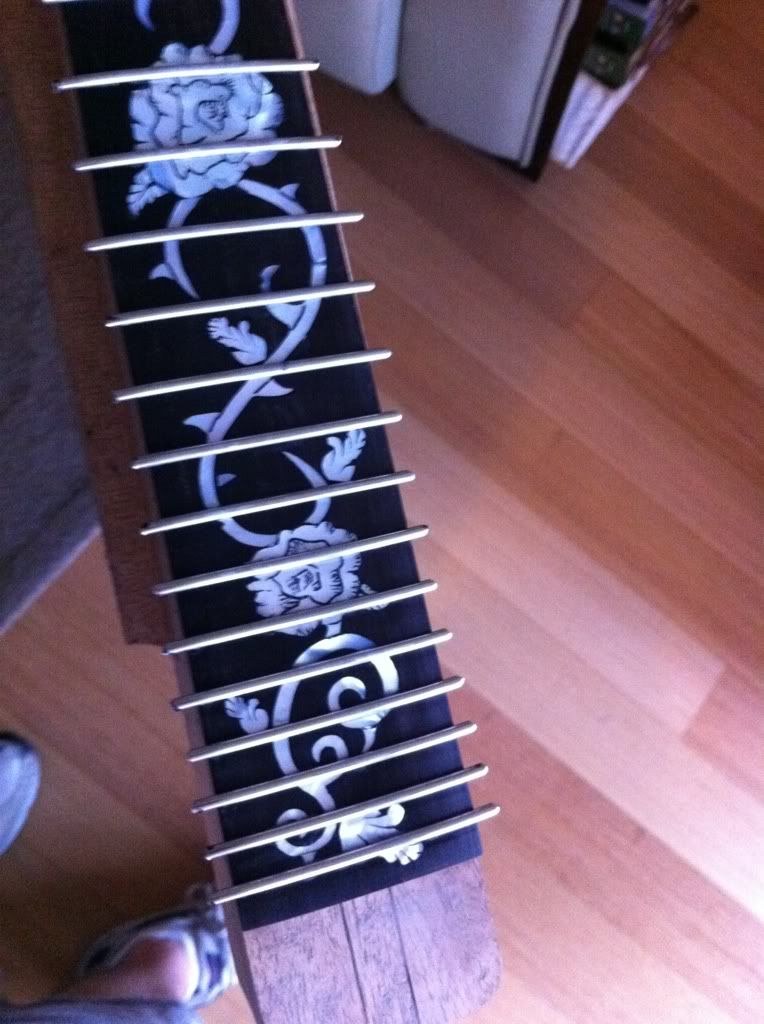
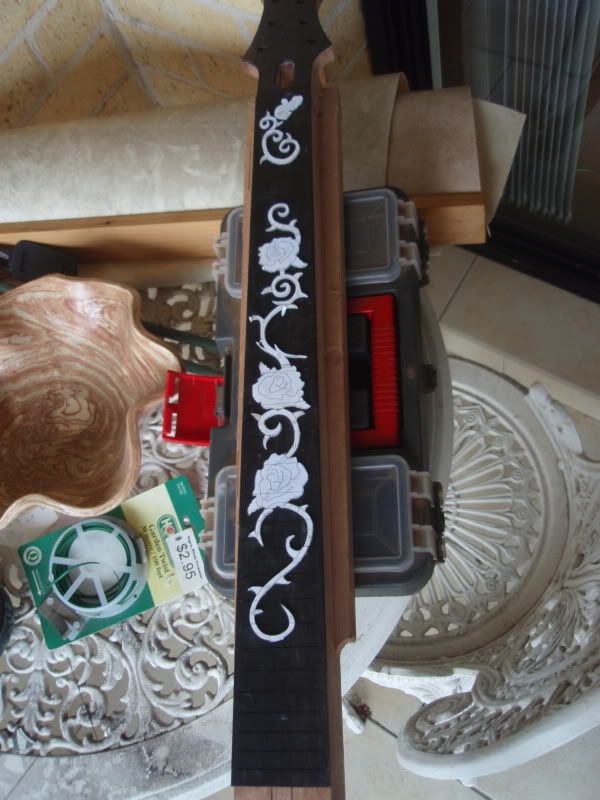
Body - One piece quilted Qld maple with ebony Binding and MOP purfling
Neck - 3 piece laminated Qld maple with wenge accent laminations
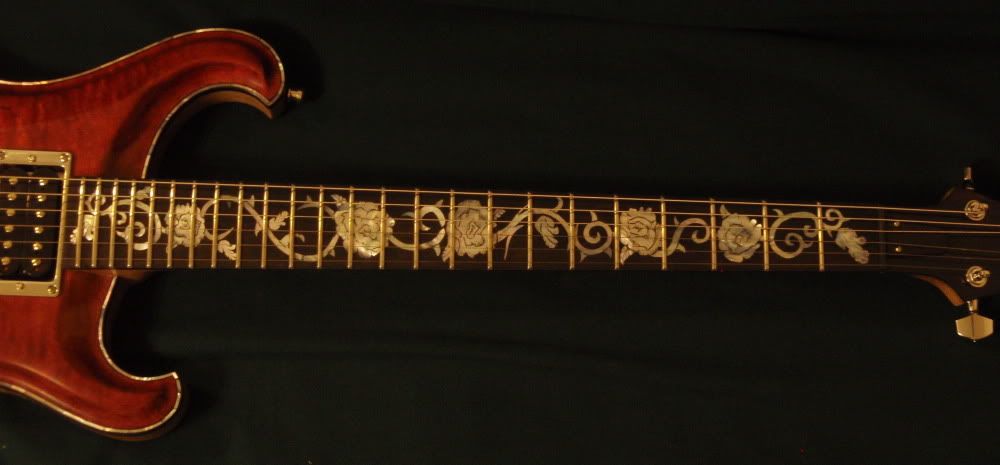
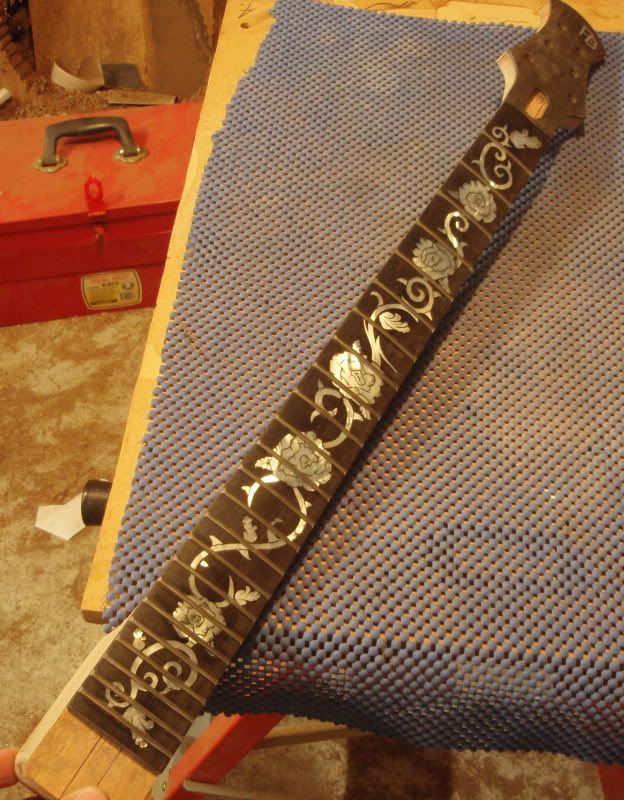
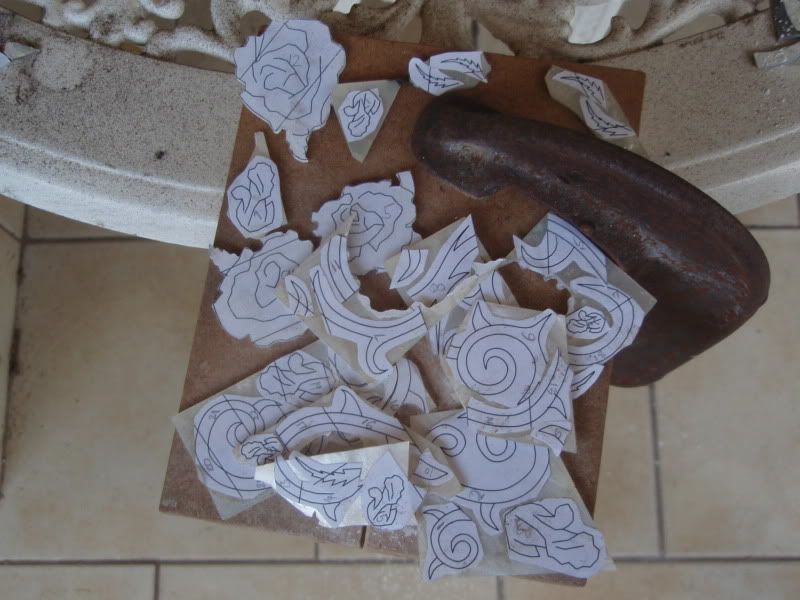
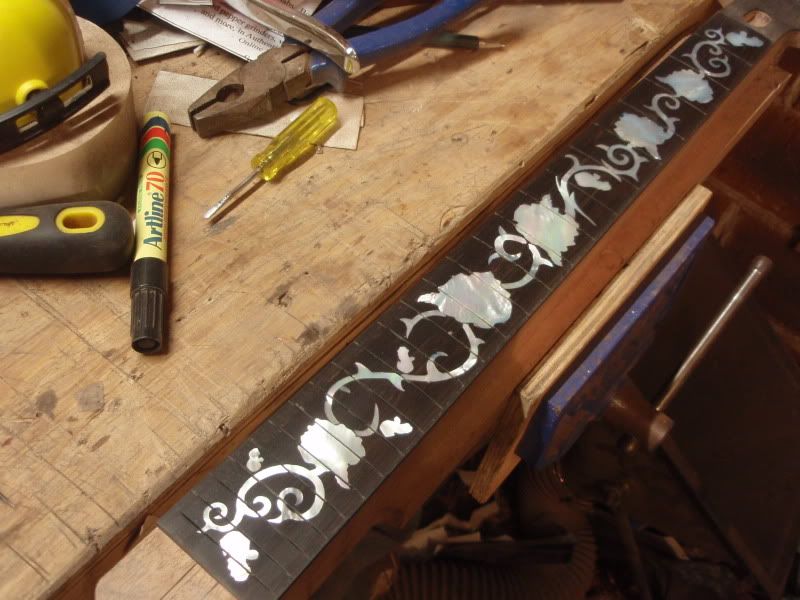
Fretboard - Ebony with engraved "Rose thorn Tatoo" MOP inlay.
Hardware - Gotoh tuners and Shaller top tail bridge with roller saddles
Picups - Seymour duncan "Slash signature" hummies
And more final pics
Cheers,
Peter