


peterbrown
-
Posts
86 -
Joined
-
Last visited
Content Type
Profiles
News and Information
Tutorials
Product Reviews
Supplier Listings
Articles
Guitar Of The Month
Links and Resources
Forums
Gallery
Downloads
Posts posted by peterbrown
-
-
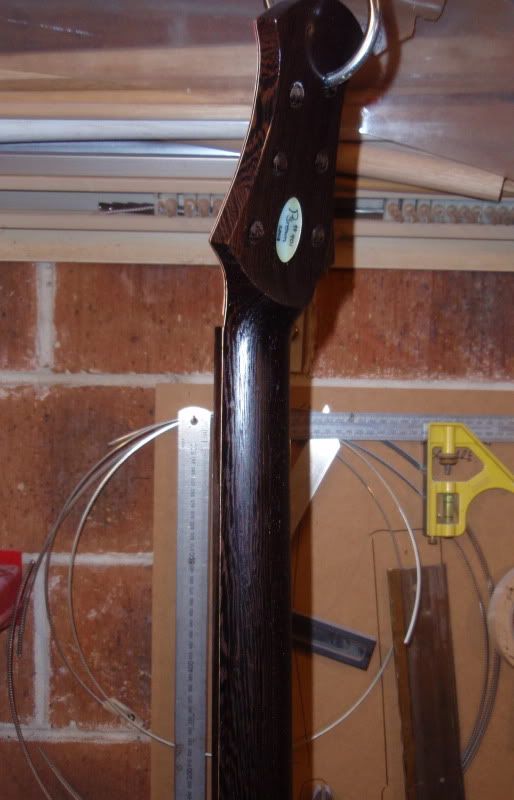
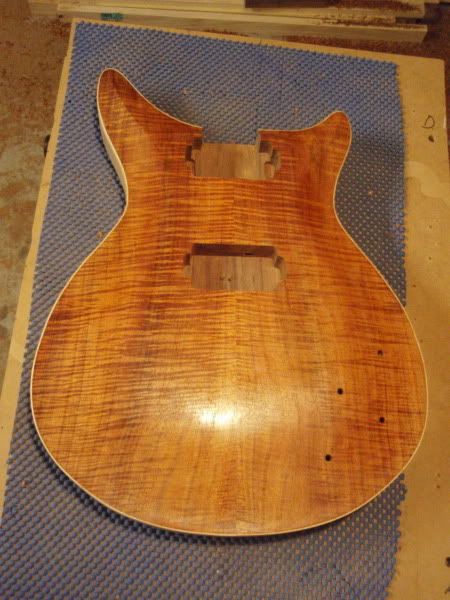
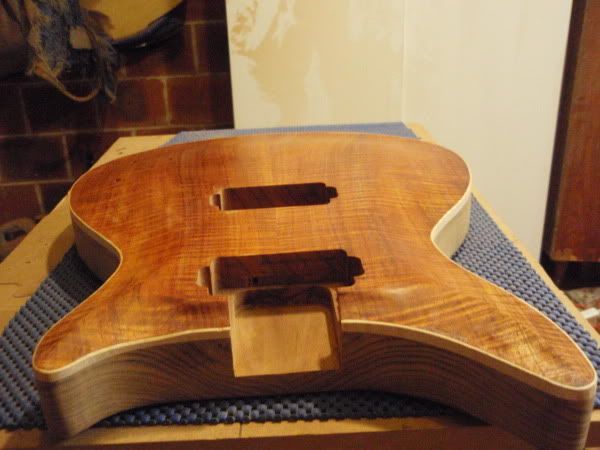
Just an update on progress. Finished spraying, and now just oiling the neck before setup.
Cheers,
Peter
-
.Thanks Peter, I'll try that out tomorrow.Just to confirm I've got it right here, I wrap the whole rod and casing bit in masking tape before gluing it in? Also what sort of glue would be best, just an epoxy?
Do not glue the truss rod in it needs to be able to bend when tension is applied. Make up some venirs ,1 each side and glue them in then reroute the channel for a snug fit.
That rod I am not familiar with but it must be fitted so that the glue from the fretboard will not get in and jam up the rod.The top of the rod must be flush with the top of the neck blank so that when the fretboard is glued on it is tight up against the truss rod. If its a U channel then place some tape over the open side to stop the glue getting in.
Good luck
I agree it needs to be a snug fit, however truss rods are susceptible to buzzing, and I find that glueing in the truss rod, you reduce the chance of buzzing. The purpose of the masking tape is to stop glue coming in contact with the truss rod so that it can slide. This is common practise as far as I know. Simon I just use whatever glue I'm using to glue the fretboard on. Usually epoxy or titebond original. You want to avoid glue coming into contact with the truss rod. For dual action truss rods, I usually wrap both rods and threads in masking tape. Obviously, this is not what everyone does.
Peter
-
Hi Simon,
Nice looking build. Great choice in timbers also. When I do my truss rods, I wrap mettal parts in masking tape and then glue it in. The glue stops it buzzing, and the masking tap keeps it sliding.
Cheers,
Peter
-
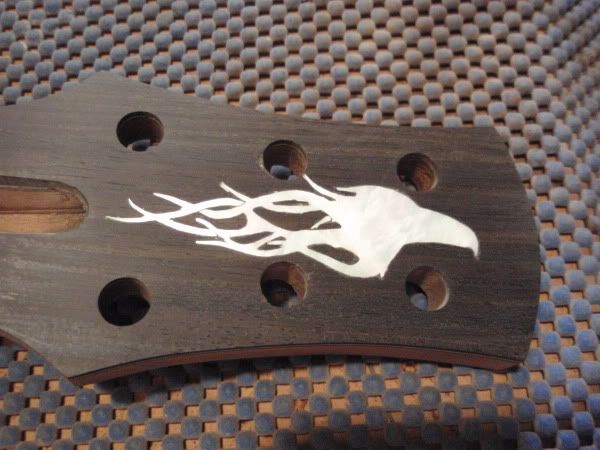
Here are some pics of the headstock inlay.
The pearl cut out. The inlay is too large for one piece, so I had to pick a join line that doesn't interupt the artwork.
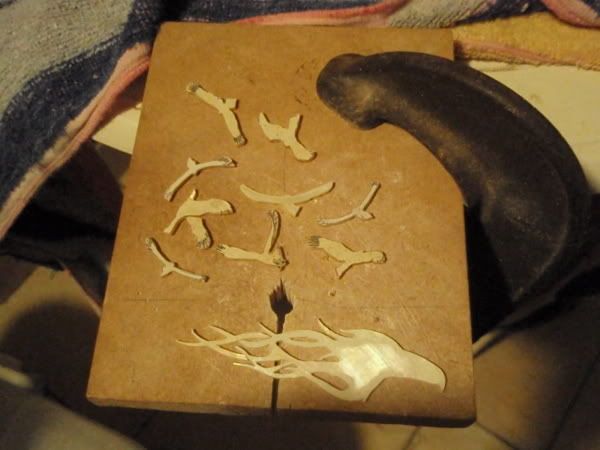
The pearl inlaid into the headstock and rough sanded.
The pearl sanded out to 600 and penciled the engaving lines
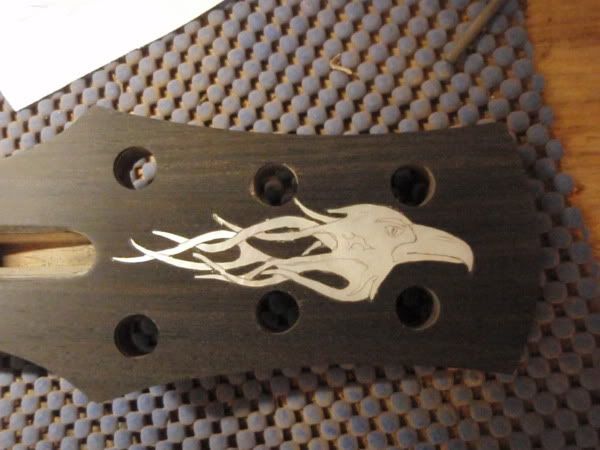
The engraded Pearl. The design was by a good friend of mine who is into tattoo style artwork.

Cheers,
Peter
-
I realy dig your inlay. Great idea, and very delicately executed.
Cheers,
Peter
-
Looks good to me chops. I wouldn't have tagged it as a PRS copy. Definately alot of options with the carving of the top. Can you tell me more about this burmese teak? I have never heard of it before? Cheers,
Peter
-
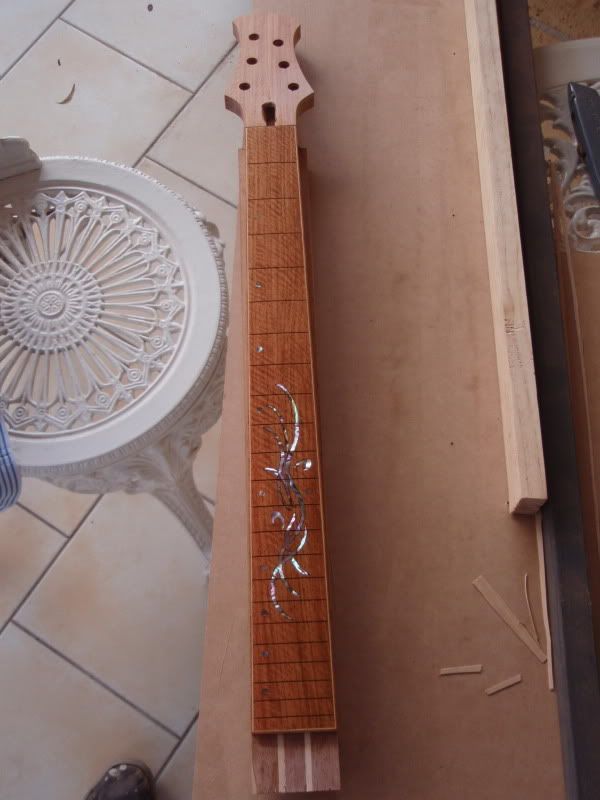
Thanks again for the positive feedback Kenny and Chops. Cam, that sounds like a great idea for a build. I can say from past experience that blackwood is a top coice for timbers in terms of sound and weight. If you are looking for a cheap alternative for timber, then consider New Guineau Rosewood works very well. Works nicely and looks good too. Here is a neck and fingerboard I am working on (another build) made from new guinea rosewood. The timber for the neck and fretboard worked out at $20Au. And a body only costs around $60Au
Cheers,
Peter
-
Thanks fellas,
Cam, what do you have planned for your build? Design and timbers etc? Where are you looking for your timbers etc?
Cheers,
Peter
-
Thanks cam.
Carving the top. The first pic is the rough shape done with an angle grinder and detailed with a thumb plane. The second pic is with it rough sanded out and a lick of diluted blond shelac.
Cheers,
Peter
-
Hey Keegan,
When I apply danish oil, I often apply it with 600 wet and dry. I use the oil as a lubricant for the sanding, and wipe off the excess, and you have another coat of oil done. Just a sugestion.
Cheers,
Peter
-
Cam,
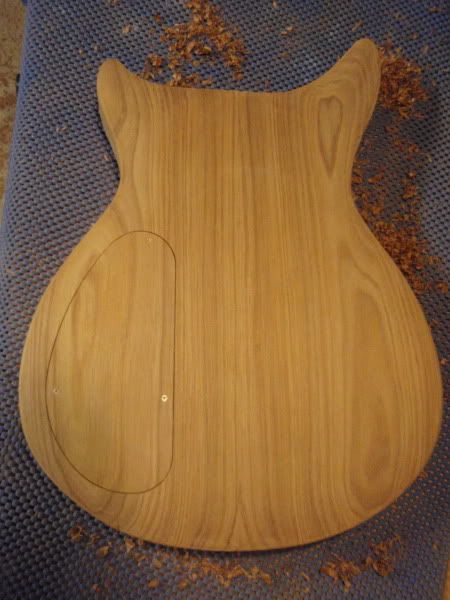
Getting the grain to line up is just a matter of trial and error. i find a piece of offcut that I think is a good match, then cut it out with a generous overhang so i can see where the grain matches up at the edges of the cover. Once I am happy I then stick the template on, and rout with my fingers crossed. i generally spend more time lining everything up than I do actually cutting and routing. A little effort that goes a long way I think. It also helps if you use a pick cut from the same piece as the body. PM me if you still want the price.
Cheers,
Peter
-
Davo, I am planning on finishing this one with colortone water based laquer. i have used it before and it works a treat!
Cam, Blackwood is pretty good wieght wise. Sorry. I don't have a scale suitable to weigh it. This is quite light with it chambered. Will be a very comfortable to play. Even without chambering blackwood makes for a moderatly weighted guitar.
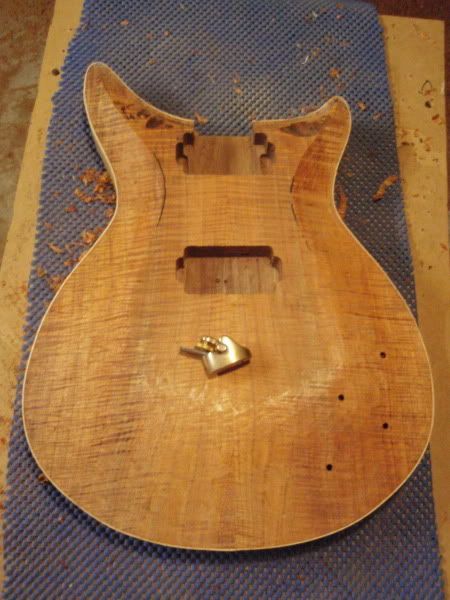
More pics. Pictured below shaping the back with a thumb plane, and the fitted control cavity cover.
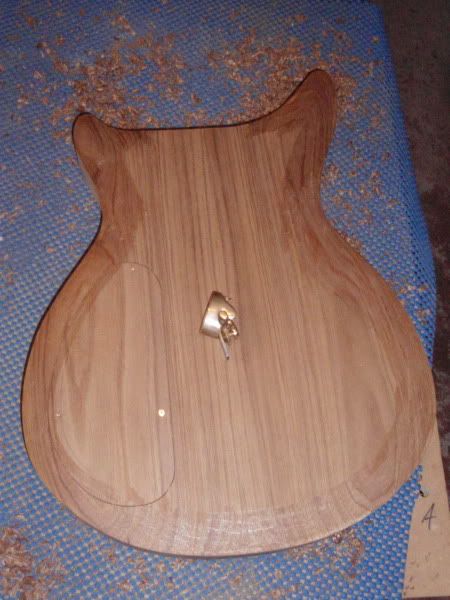

Cheers,
Peter
-
Thanks for the comments fellas. Chops, the inlay is done with a combination of different diameter downcutting dremmel bits from Stewmac. Depends on how fine the rout needs to be as to the diameter of the bit that is chosen.
Time for more pics I think. Shaping the neck.
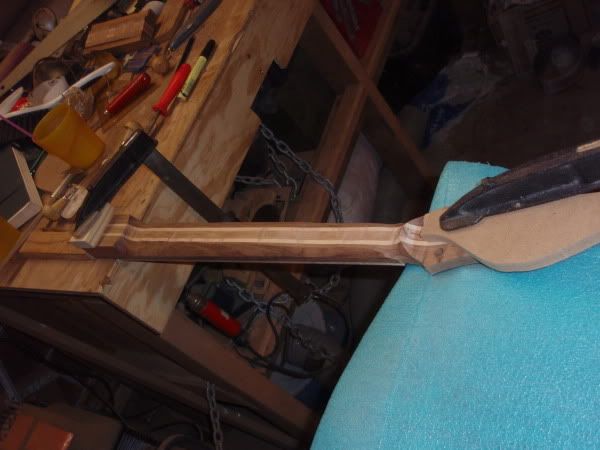
Cheers,
Peter
-
That is a nice slab of black limba. It realy suits the tele shape I think. What are your plans on the rest of the guitar?
Cheers,
Peter
-
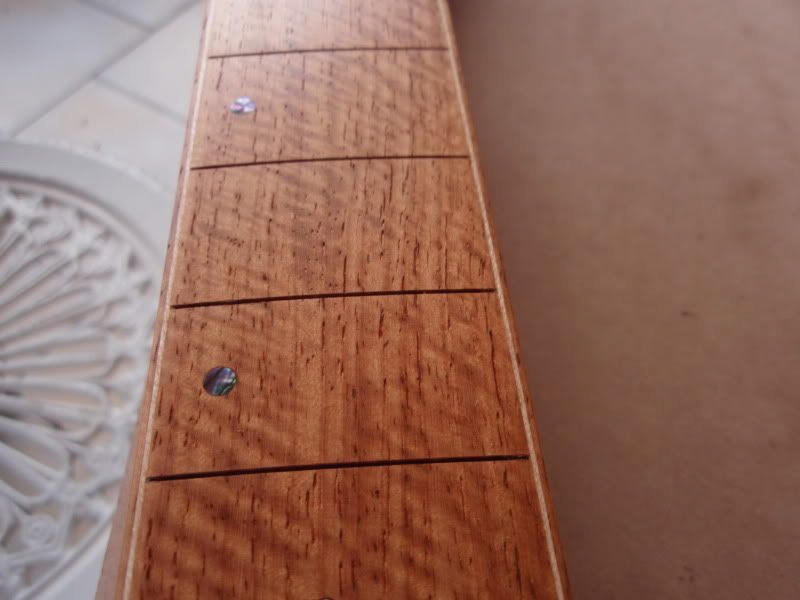
Thanks fellas,
some more pics of the inlays with details engraved on the pearl. All engraving is done by hand.
Before

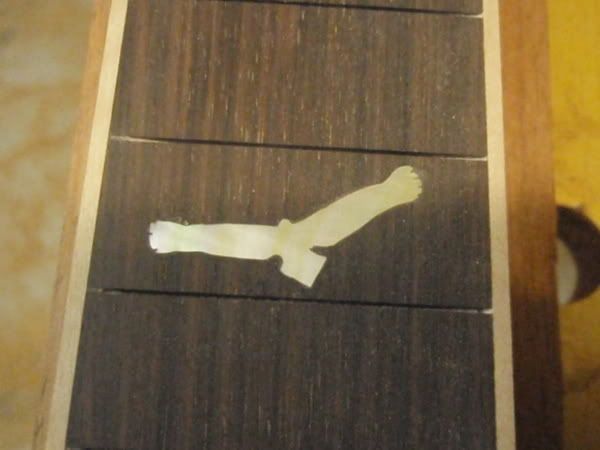
After
Cheers,
Peter
-
Hey FreakyShotGlass
I personally would avoid the ironbark for anything other than a fretboard purely for the weight factor, and not to mention what it will do to your tools. There are heaps of other timbers available in Aust that will result in a far more playable instrument. I get most of my stuff from Stewmac http://www.stewmac.com. Fretboards I get from Gillet Guitars http://www.guitarwoods.com.au (Sydney Based), however they have lots of other luthier supplies and are very very helpful when it comes to questions. Other Aussie suppliers are Ormsby Guitars http://www.ormsbyguitars.com/parts.html (Perth based) and Australian Luthier Supplies (based in south-east queensland I think?) just to name a few.
Look forward to seeing more progress.
Cheers,
Peter
-
Thanks Cam,
I got the body and neck timber from anagotte timbers in Marrickville (Sydney) the top I got from Australian tonewoods (WA). The fretboard I got from Gillet guitars in Botany (Sydney).
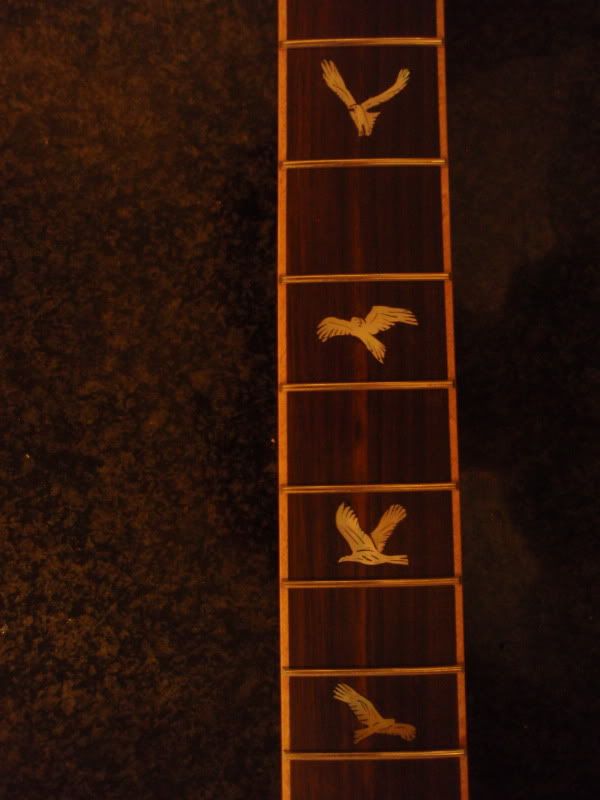
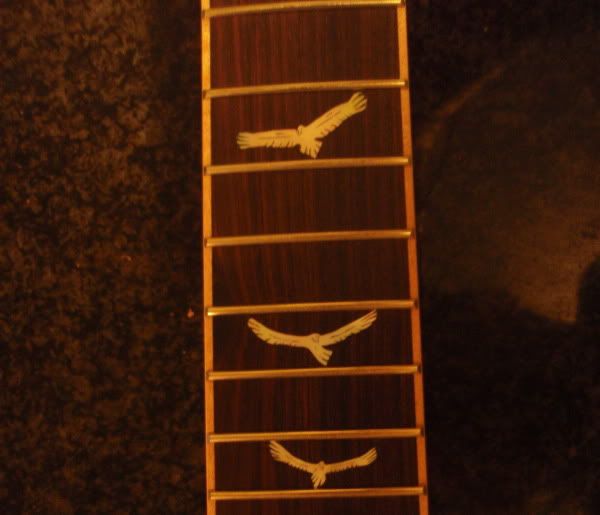
Some pics of the fretboard inlay progress. The fretboard markers are all different profiles of a wedge-tailed eagle in flight
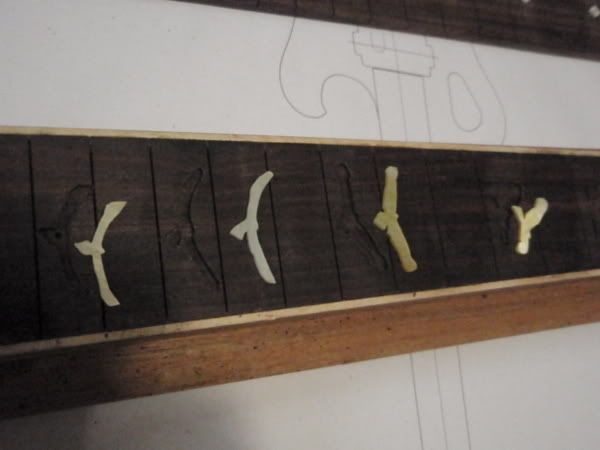
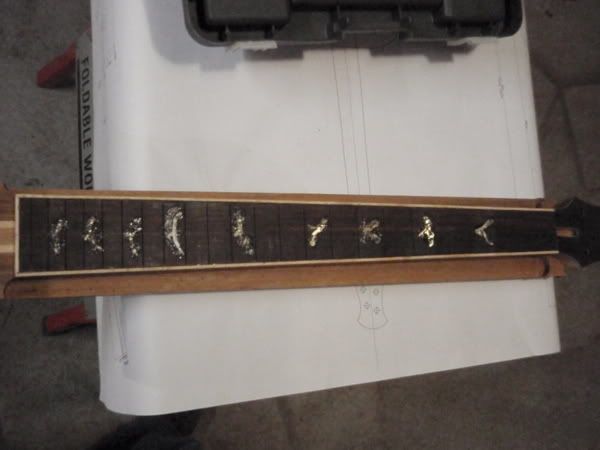
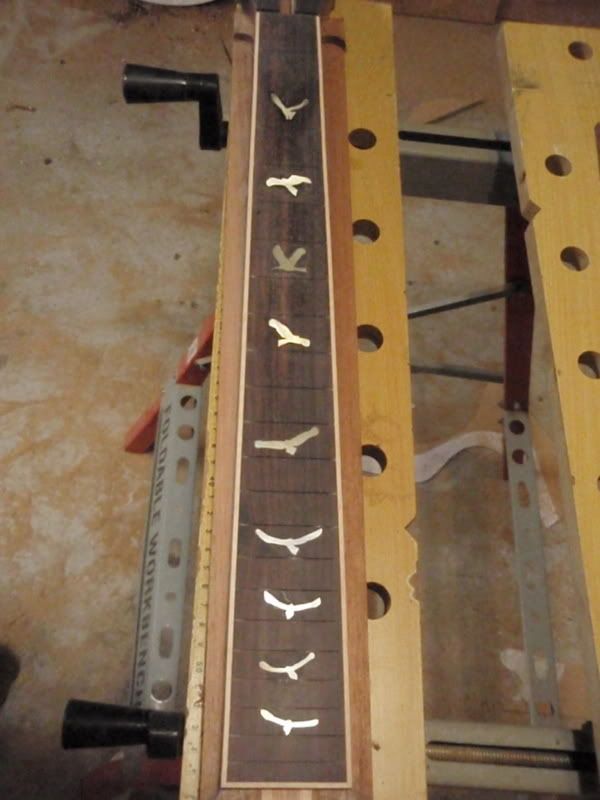
Cheers,
peter
-
I realy like the neck and the headstock. Realy works with the gold. That fretboard would have been a prime cantadate for gold frets!
 Nice clean inlay too by the way.
Cheers,
Peter
-
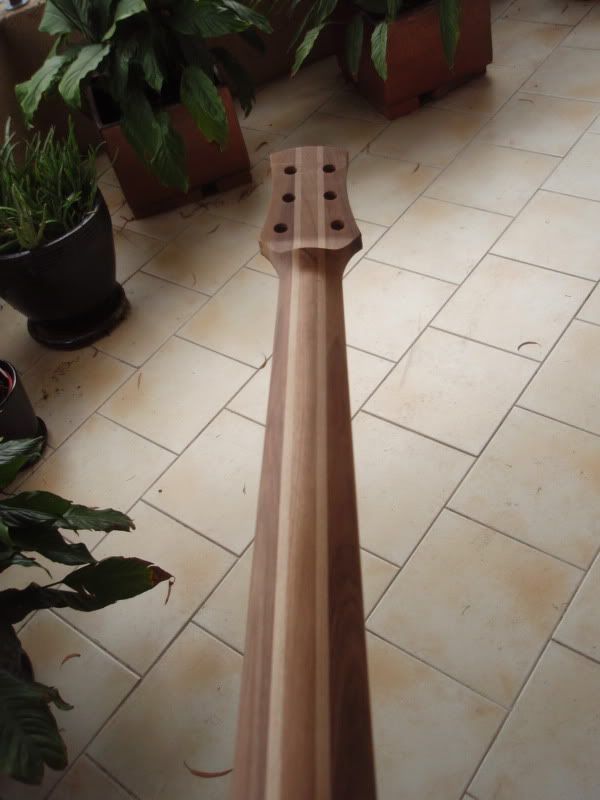
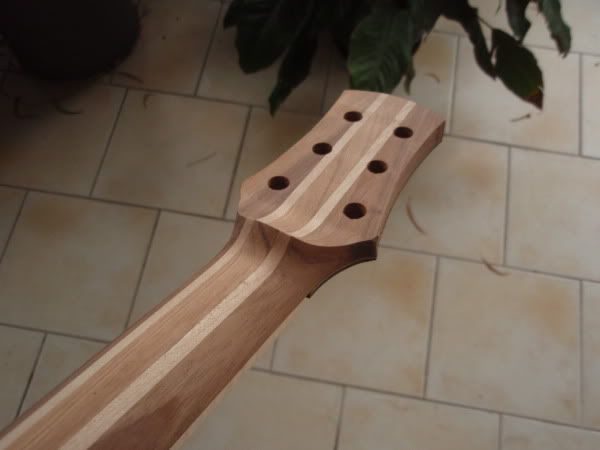
Hi,
I've been working on this build for a while and thought I'd share some pics.
Specs so far:
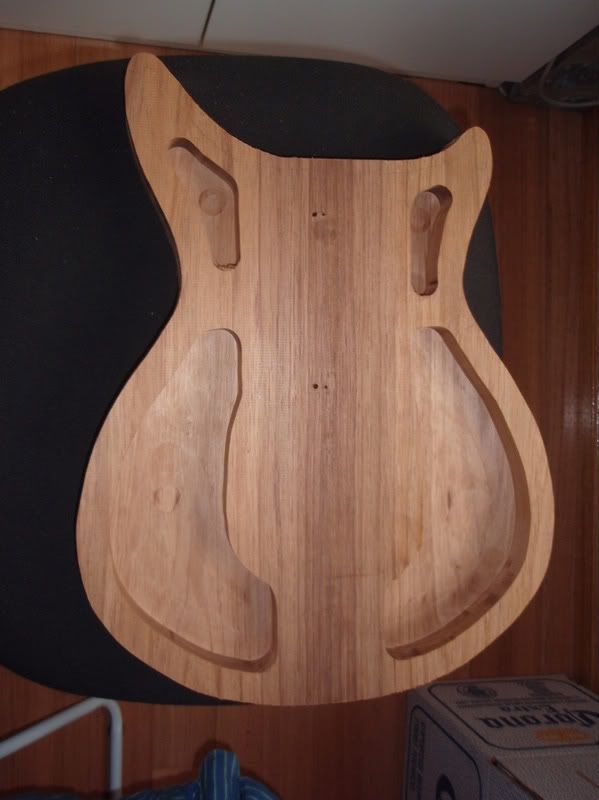
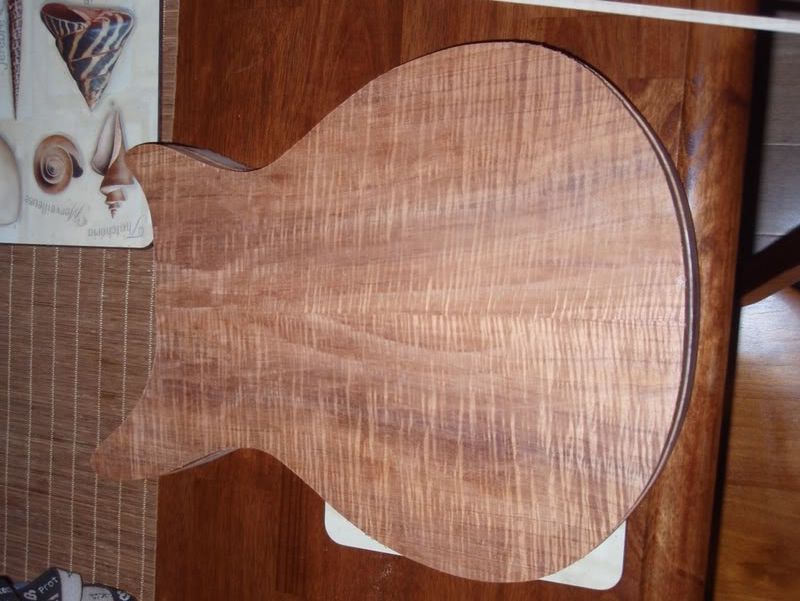
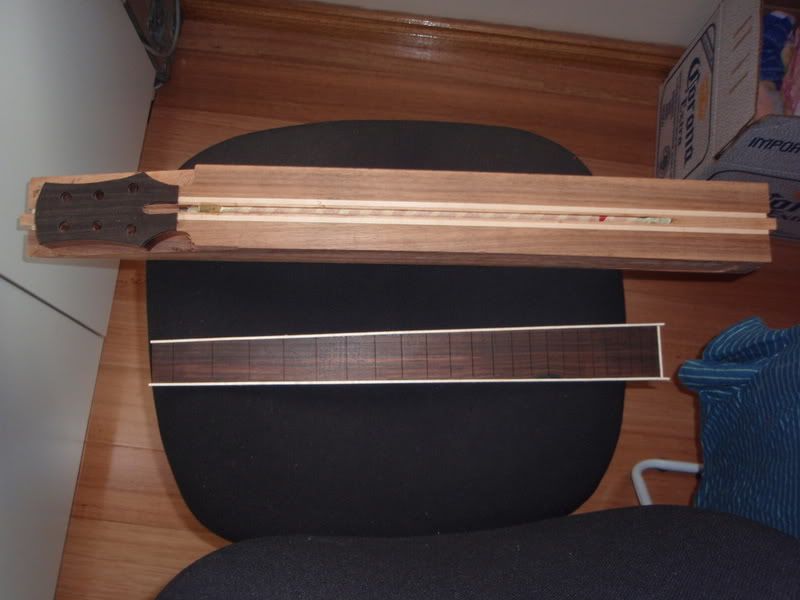
Body: chambered blackwood with bookmatched fiddleback blackwood top
Neck: laminated blackwood and rock maple
Fretboard: striped ebony with gold MOP inlay 25inch scale length
The chambered body
The body with the top glued on
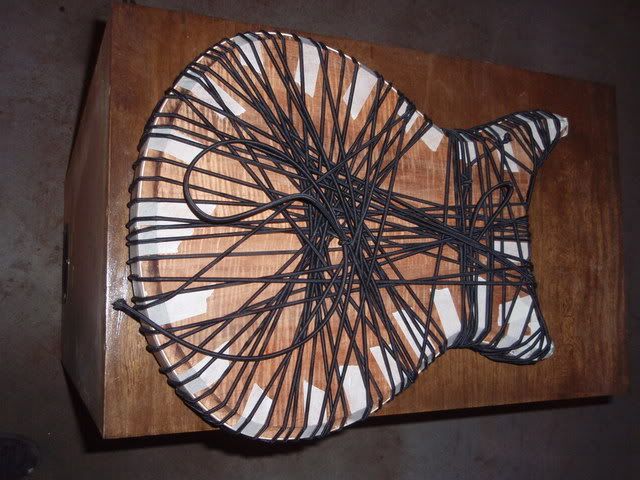
Gluing the binding on
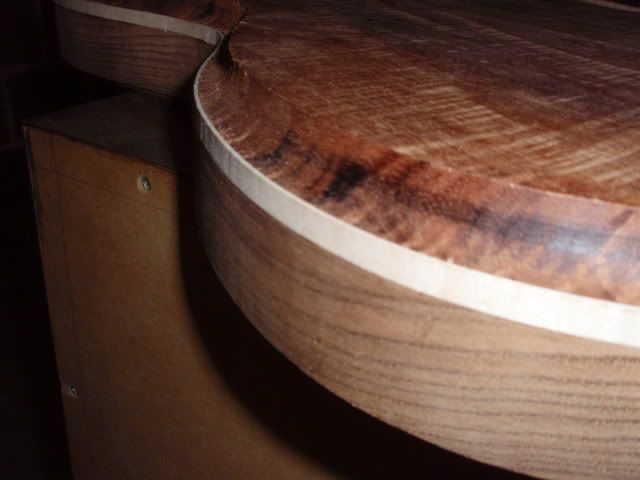
The neck blank and slotted fretboard
Cheers,
Peter
-
And regardless of whether the carvetop figure reminded me of a fat ladies derriere or a pig's arse really
didn't matter
I am just curious how Stu knows what a fat ladies derriere looks like?
Peter
-
Hey Cactus, I meant for my reply regarding fonts to be light-hearted. Please don't take my reply as a backhand. I suppose I should have put one of these after it.
.Diehardrocker, I have pics on page 1 of the thread. The first pic is where I route the depth, which determines wher I carve up to at the edges. The second pic is where I rough out the carve with an angle-grinder fitted with a sanding disc. From there (third pic) I refine and tidy the carve with a small thumb plane and file (where appropriate).And then sand with a 120grit sanding pad on an orbital sander to smooth out the curves. Hope this helps,
Cheers,
Peter
-
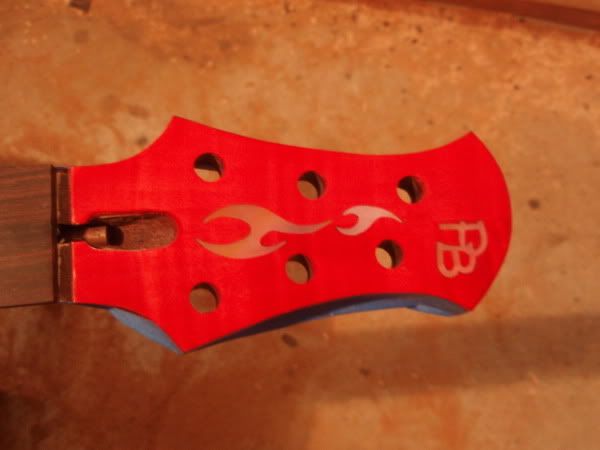
Thanks for the comments,
Comic Sans? Do you mean a font? PB are my initials, which I signed by hand, digitised, and cut by hand. No fonts used. What font would you recommend. Times New Roman?
I experimented with various combinations of stain with black on a piece of scrap, however the black, no matter how much I sanded back ended up making the colour more bougandy. I was after the fire engine red colour with the the figure demonstrating a variation in tone, rather than the the "tiger stripe" look you get with a black/brown understain. It would look good, just not what I was going for with this build.
Cheers,
Peter
-
Very, Very nice there Ethereal. I must say that this is a special guitar. Nice combination with the timbers and looks a stunner. Well done. Any more in the pipeline?
Cheers,
Peter
-
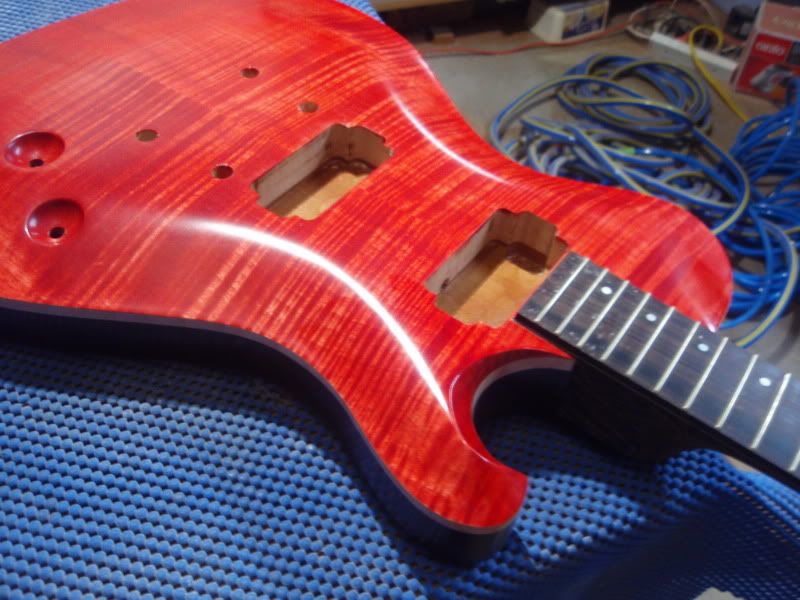
Hi,
More progress pics on this one. Have stained the top cherry red (colour in the pics is not quite right).
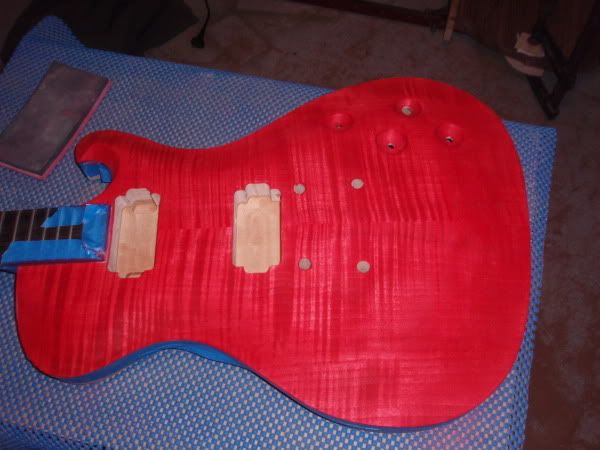
Cheers,
Peter
 Nice clean inlay too by the way.
"eagle" Double Cutaway
in In Progress and Finished Work
Posted
Hi,
It has been a while, but I have finished and handed over this one:
All hardware is gotoh and pickups are SD SH-2 in the neck and SH-11 in the bridge.
Oops, two screws missing and some nut bone dust to wipe off. Got sorted before the final handover
More pics to come
Cheers,
Peter