


xlr8
-
Posts
155 -
Joined
-
Last visited
Content Type
Profiles
News and Information
Tutorials
Product Reviews
Supplier Listings
Articles
Guitar Of The Month
Links and Resources
Forums
Gallery
Downloads
Posts posted by xlr8
-
-
xlr8, do you have a pic of the template you use for the tele neck? What bit do you use in the pin router for this? Also, how much do you taper the neck?
Hi Josh,
I'll dig out a pic of the template later, I use HSS end mills from the local engineering supplies, HSS is not a durable as Carbide but it does have a keener edge and you can tidy them up with a small diamond hone.
I taper the neck 3mm (1/8th) from headstock to heel and vary the overall thickness depending on whether I'm going for a chunky or slim neck - I use StewMac hotrods (for now) so you do have to take into account the depth of the truss rod channel as these are deeper than most other truss rods.
-
So glad I waited for a quiet month, doh!
-
Absolutely, provided people size their pics accordingly. I think I'm going to start using Photoshops 'save for web' feature to reduce the file size even further.
-
nice work using those jigs to speed up time! May I recomend doing more shaping at the heel of the paul. I think that you can make it look sooooo cool and comfterable. I dont see why gibson doesent do this. I mean there glued in necks thers no reason why you shouldent take off a whole bunch of wood to make it look good and play well. I think yours looks good but would be better if you took off more.
I thought about it but the Junior design does have a weakness at this point so I chose to stop at the first point the neck felt nice and comfortable - I have big hands

-
Shaped the heel body join this morning for a more comfortable fit.
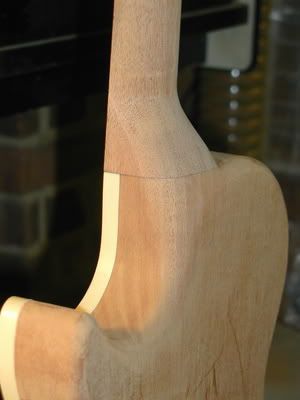
Also just about finished the neck for the Tele, after routing the trussrod channel I bandsaw the rough shape and then use the pin router;
http://img.photobucket.com/albums/v65/xlr8shun/8f52d94c.jpg
before I can shape the back of the neck I taper the thickness and roughly shape the transitions,
http://img.photobucket.com/albums/v65/xlr8shun/7e63e94a.jpg
Then it's back to the pin router to round over the rear using Mykas jig
http://img.photobucket.com/albums/v65/xlr8shun/0eddc650.jpg
About 10 minutes sanding sees it all done,
-
As a rule of thumb I use one year minimum per inch of board thickness when airdrying wood.
A cheaper and simpler method of accelerating the drying process is to stack your boards in a dry room and use a dehumidifier.
-
Sanded ready for finish? that's very fast, respect.
The router takes about three passes per side (5-10mins including setup in the jig) and the rest of the time is spent on the transitions and final sanding.
-
My pin router is single speed, 18000rpm, ideally I would like to run it around 10-12000rpm.
-
I use a 7/8" bit in my pin router, got the idea from Myka, and it works beautifully. I can carve the back of neck in 30 minutes from start to finish.
-
Also I think you should leave the back of the maple white and just stain the front of it. I think it looks awesome with the white maple next to the darker mahogany.
Nice idea, thanks.
-
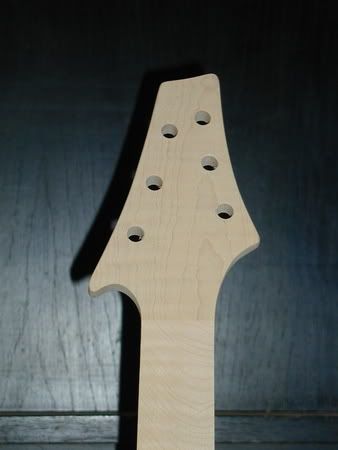
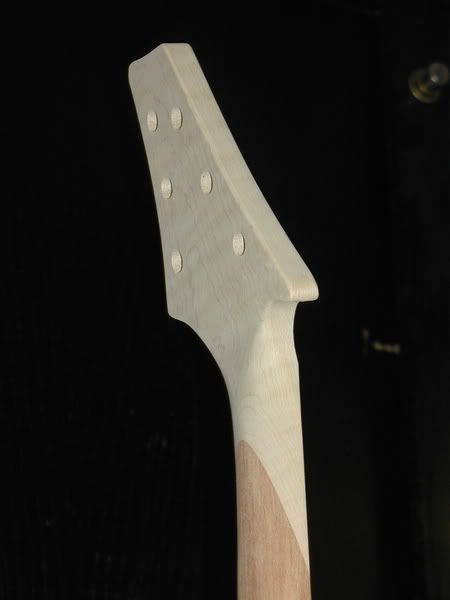
Got around to shaping the neck and adding my own headstock design to the LPJ.
http://img.photobucket.com/albums/v65/xlr8...PJ/fa3f4f5d.jpg
http://img.photobucket.com/albums/v65/xlr8...PJ/0518f3da.jpg
I'm really pleased with the scarf joint - I think it's going to look great stained to match the top.
-
Looking vey nice Carl. Personally I love the binding and the Ken Lawrence influence is never gonna be a bad thing
To me the body shape/colour is very reminiscent of Brian Mays Red Special.
-
Neck blank looks nice
-
Very nice, very '80s
-
I present for your consideration my first guitar


Specs are as follows;
Body
One piece Brazilian mahogany with flame maple cap and ivoroid binding. Recessed control and neck plates. Flame maple neck pickup ring and Bigsby B5.
Neck
Birdseye maple with Gabon ebony fingerboard. 22 frets with abalone dots and body end truss rod adjustment. Graphtec nut, roller string tree and Gotoh tuners.
Electrics
Bareknuckle pickups - 'Stormy Monday' HB in the neck position and 'The Boss' in the bridge. 300k pots, mylar capacitors, vintage cloth wiring and switchcraft jack socket.
Thanks,
Neil
-
Cheers Setch, I think I'll enter it and see how it goes.
Your blog is great btw. - regularly check in to see what's going on.
-
I thought about entering my first guitar;
But with Jeremy, Setch and GodinSD as competition I think I'll wait for a quiet month
-
Well, with a Bigsby, you have to make sure the ball end of the string stays onto the little peg they give you, while you're also trying to hold the string in place so you can wind the tuning peg...takes three hands and it's a real pain, but it's doable.
With locking tuners, you just pull the string pretty tight (which keeps it on the peg), turn the tuner a bit (which locks the string down) and you're set.
Place a piece of bath foam under the Bigby once you have fitted the string onto the pin, holds it in place and makes stringing a Bigsby a breeze.
-
Everybody makes mistakes, it's how you get round them that counts
-
XLR8, thats a pretty sweet pin router you have there. Much more my speed than BigD's monster. Where did you get it, how much?
I found it on eBay here in the UK, I think I paid around $1000 for it.
It is such a useful and versatile machine, my router table only gets used for rounding over the bodies now.
-
Hi Hyunsu,
The bodies are one piece Brazilian Mahogany, the Tele has a quilted maple top and the Les Paul Junior a flame maple top.
Neil
-
Wow

Makes my Elu look a little small,

-
Cheers Andy, it's a shame you're not closer as you'd be welcome to come round one day when I'm in the workshop.
ATB. Neil
-
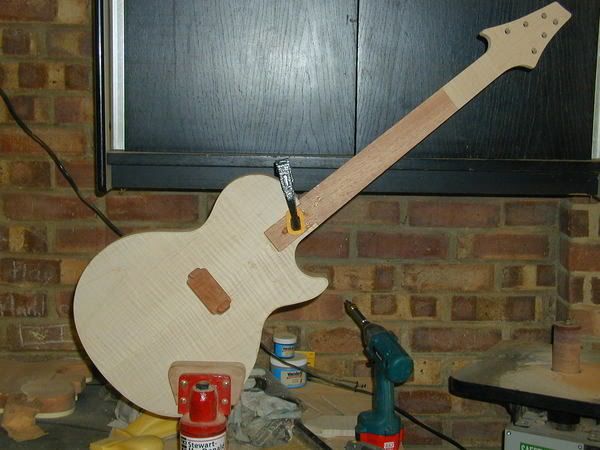
The LPJ got it's binding fitted today, the rear of the body rounded over and the neck carve finished, Which means next week I should be able to glue in the neck, drill the jack socket and then start the staining - going to be a bright green 'burst. I'm looking forward to finishing this one.
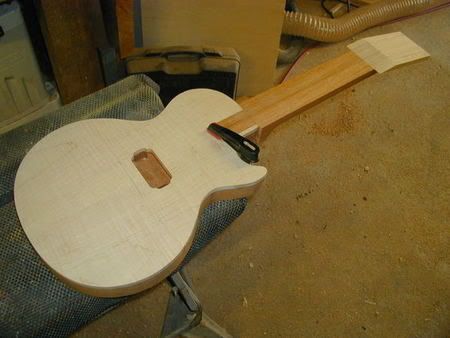
Tele wise I routed the recess for the neck pickup and control mounting plates, I then gave the body a couple of coats of black stain and let it dry for a few hours. After sanding the black back I then applied a couple of coats of my honey/amber stain. The quilt is by no means a AAAAA but I think it looks pretty nice considering this is just as stained. Once I spray the toner, shading around the edge and the clear coats it should get some nice 3d depth to it. I think I'm going to go for a one piece flame maple neck or maybe slice it down the middle before routing the truss rod channel, G&L style.
http://img.photobucket.com/albums/v65/xlr8...le/0a516d92.jpg


Substitute For Silicone When Installing T-rod
in Solidbody Guitar and Bass Chat
Posted
I use a little dab from the hot glue gun after I've placed the truss rod in it's channel.