


avdekan
-
Posts
76 -
Joined
-
Last visited
Content Type
Profiles
News and Information
Tutorials
Product Reviews
Supplier Listings
Articles
Guitar Of The Month
Links and Resources
Forums
Gallery
Downloads
Posts posted by avdekan
-
-
No problem. Traditional classical guitar bridges with scales from 640mm to 665mm all have the "same" straight saddle.
Not being able to individually intonate strings is a problem in itself though...
-
What type of glue did you use when you built it?
If it was hide glue you can detach the top using heat, a mixture of hot water and spirit, and some patience.
With carpenter's yellow/white glue (i.e. titebond) I wouldn't bother saving the top and just plane it off.
If you have a set neck you might want to remove that too before planing.
good luck.
-
I don't like it too close to the bridge (too much "twang").
I say locate the bridgewise pole at 25.80697580112788mm (the square root of 666mm) from the bridge

-
I think that unless the body design is radically different then the "traditional" centered mass approach, you can expect similar results from different body shapes using the same material and mass.
Doing a 'x' shape body that's one meter long using 1x2" beams will have enough mass, but the flexibility of the design will probably cause a loss of sustain.
-
Not sapele, but who'd care to hazard a guess as to what it is?
Ipe?
That fits the clues ...but no.
I suppose this game sucks?
SR
last try:
a weird subspecies of Bubinga?
-
Pin router for the rough thicknessing (without the pin!).
high angle (55 degrees or above) hand plane for the fine work.
about the home made drum sander- benedetto's archtop book has a nice description of one in which the drum is fixed and the bed is adjustable using a hinge on one side and a lifting screw on the other. in order to change the thickness you tip the bed's angle. Fairly simple after you can figure out how to construct a perfectly square and stable mounting for the sanding drum...
-
Not sapele, but who'd care to hazard a guess as to what it is?
Ipe?
-
If you build the guitar for yourself, and you don't use tune controls, I think not putting one is the right thing to do.
However, I would make the electronics cavity big enough to accommodate a theoretic tone potentiometer (at it's would-be place), so that if one day you will discover that you do want a tone control - you could easily add one just by drilling and rewiring.
-
Cool!
Melvyn's book on electric guitars is what started my journey into this addiction. I hope the informative and user friendly nature of his first book is present in this one as well. Will find out soon enough.
-
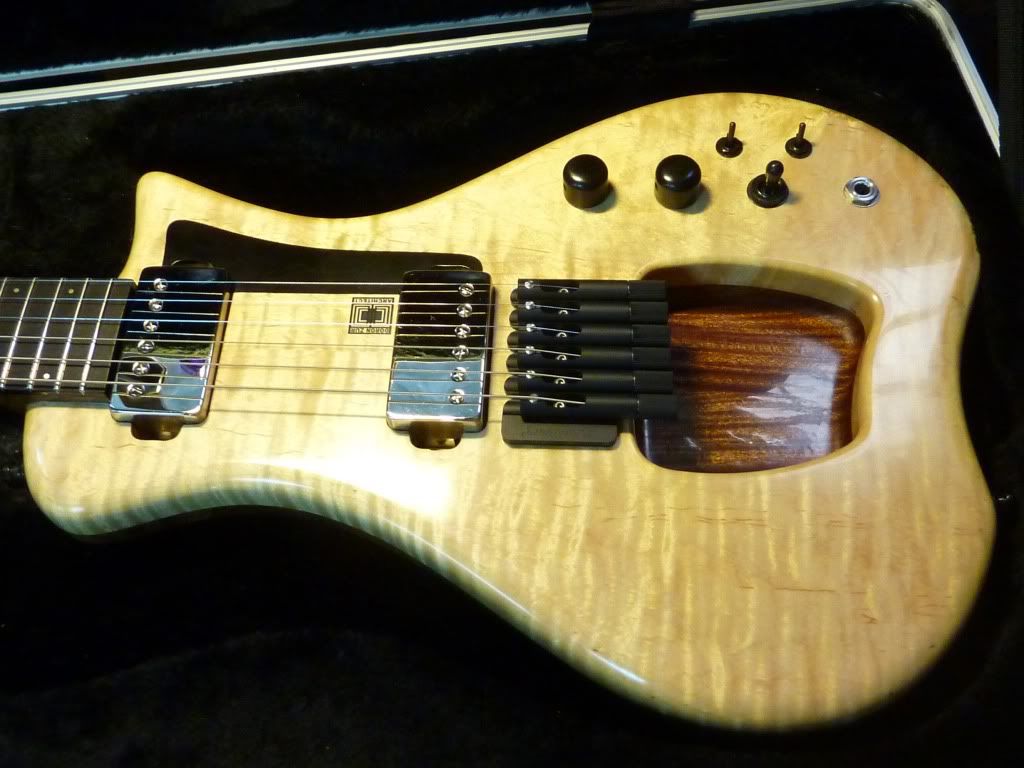
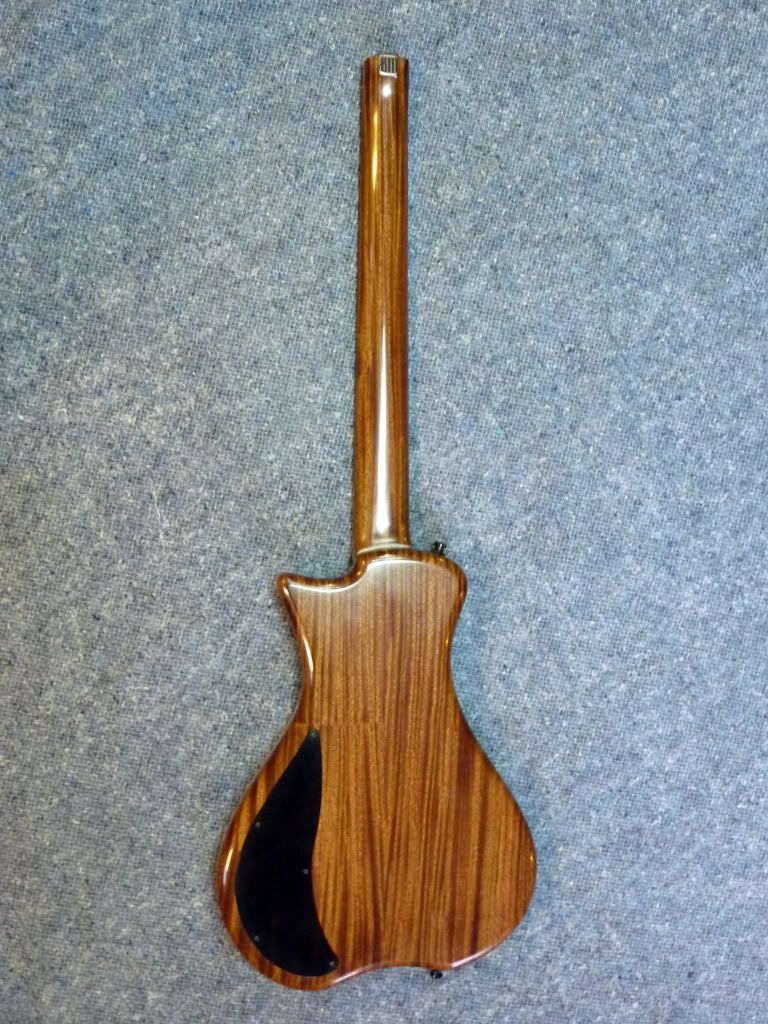
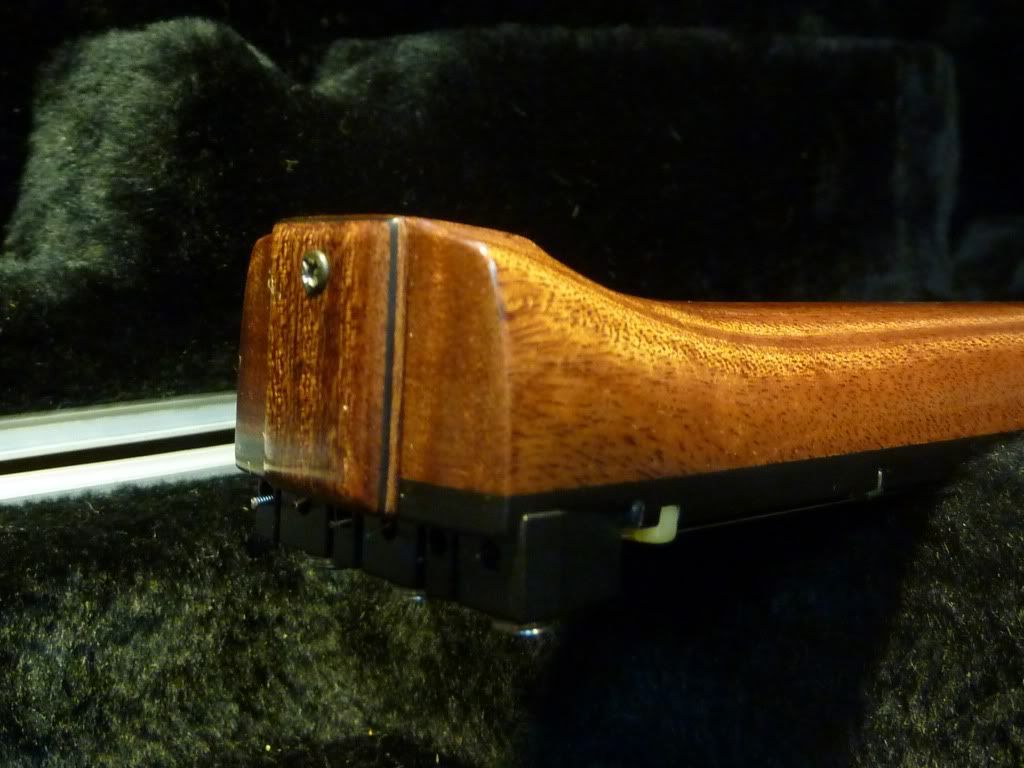
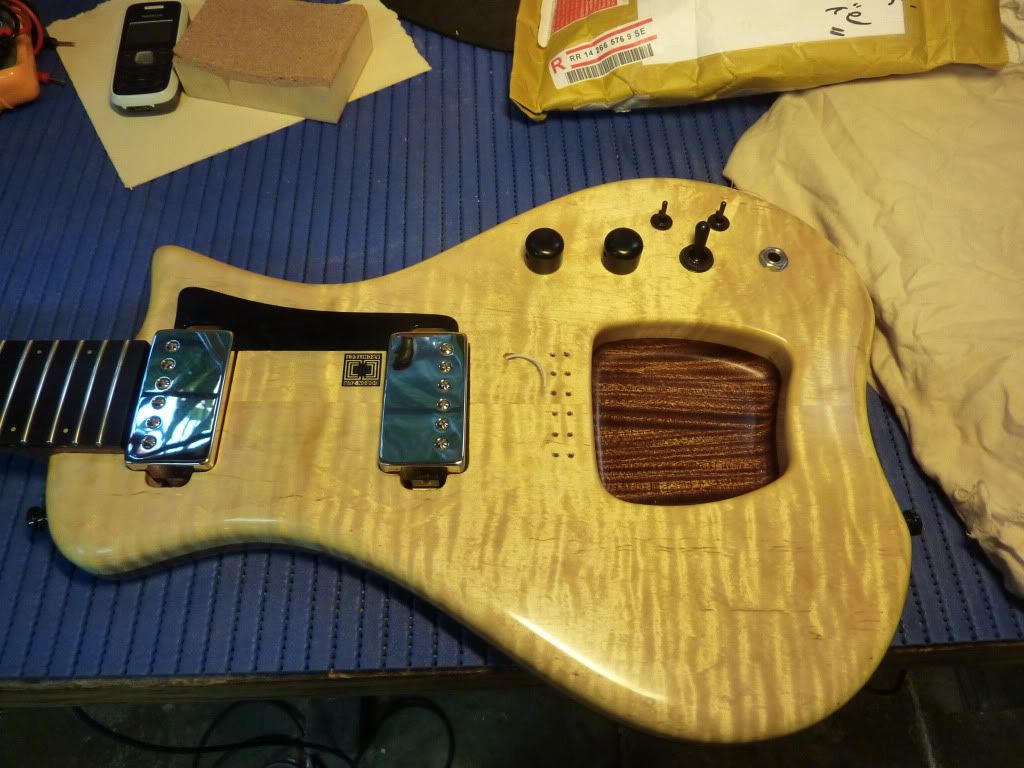
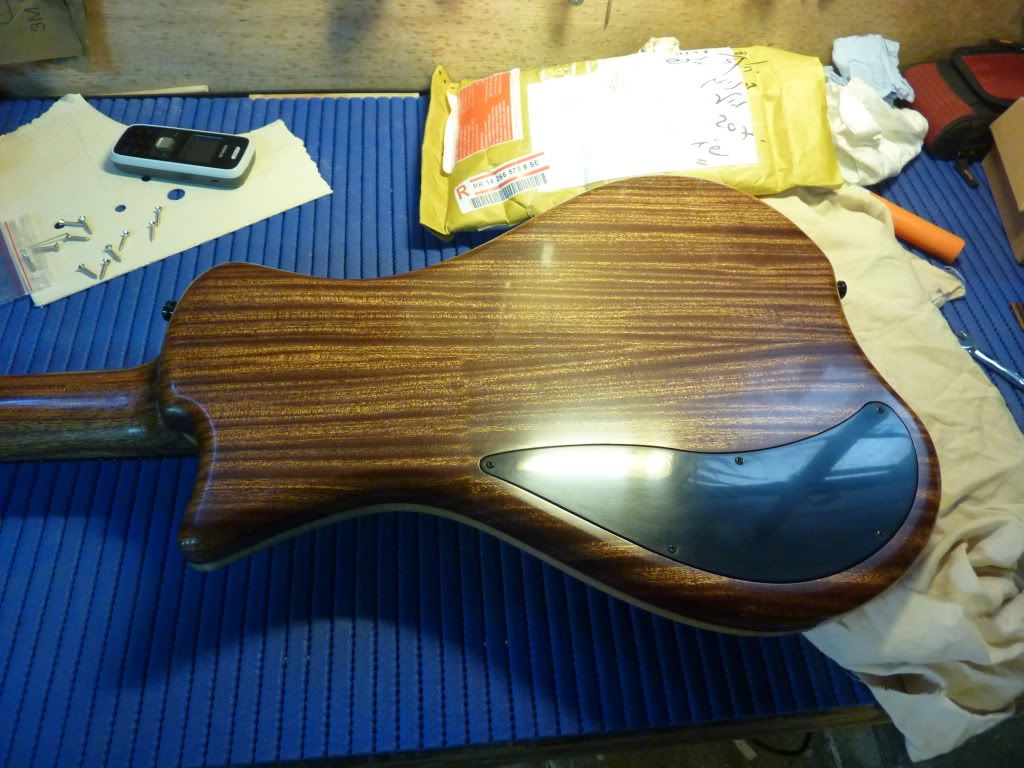
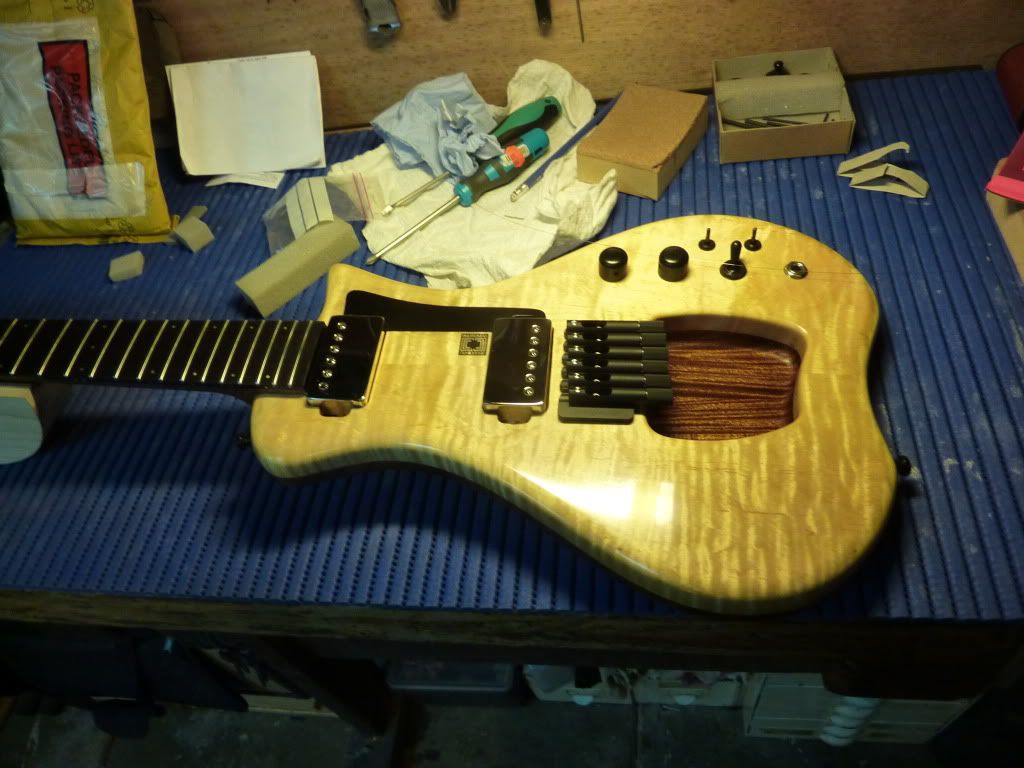
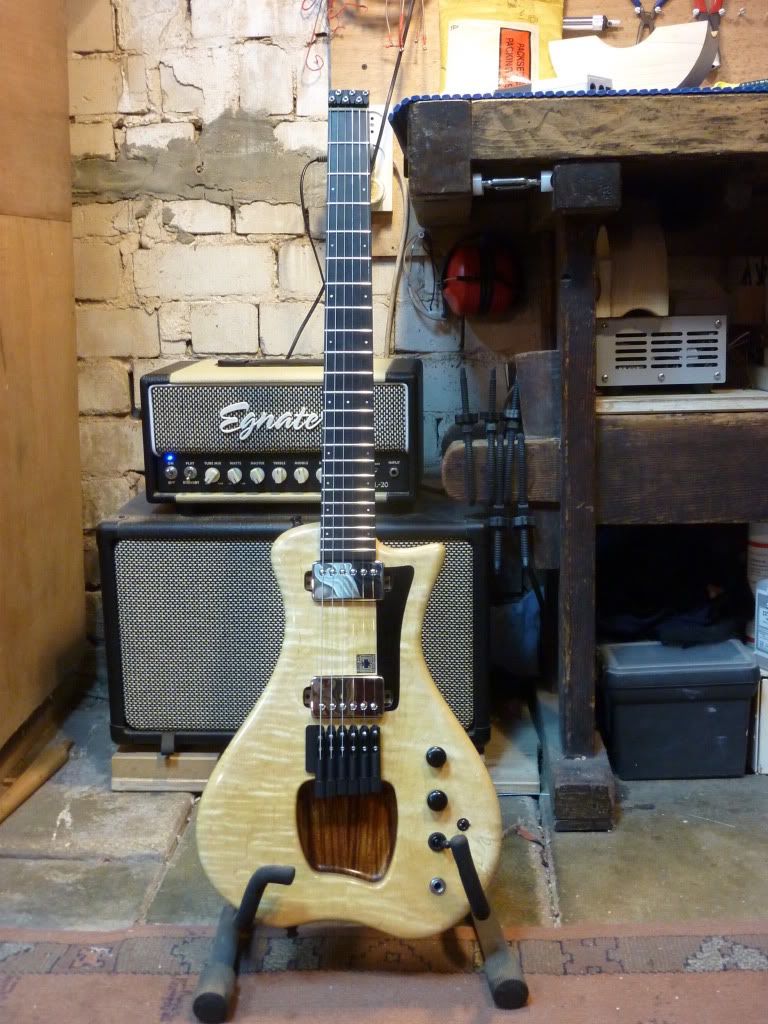
The (happy) client who just picked up this guitar couldn't think of a proper name for it (her!!), so I will temporarily name it "the 5 Pounder" - after its weight.
Sapele / figured Maple body.
Sapele neck.
Ebony fretboard, electronics cavity cover, recessed scratch-plate and knobs.
Strandberg headless system: bridge and string locks.
Gold MOP face and side dots.
Bone nut.
Schaller strap locks.
BKP custom made alnico III humbuckers.
Volume / Tone / 3 way pickup selector / Series-split-parallel mini switch for each pickup.
Double action truss rod.
More pics of the Finished guitar can be viewed here:
http://www.facebook.com/B.M.handmade.guita...135576636474094
And the Building process photos are here:
http://www.facebook.com/B.M.handmade.guita...135576636474094

Cheers.
-
I like the display in the body. serves several functions, which is great.
Ashtray
Dip holder... put in more than one like me and its a chip AND dip holder !

I'll take a picture of the guitar served with guacamole (the 2k finish is Glasurit so it should handle it)
You could also make millions by taking this idea a step further, selling microwave dinners in totally playable guitars. I don't do it only because I'm too lazy.
-
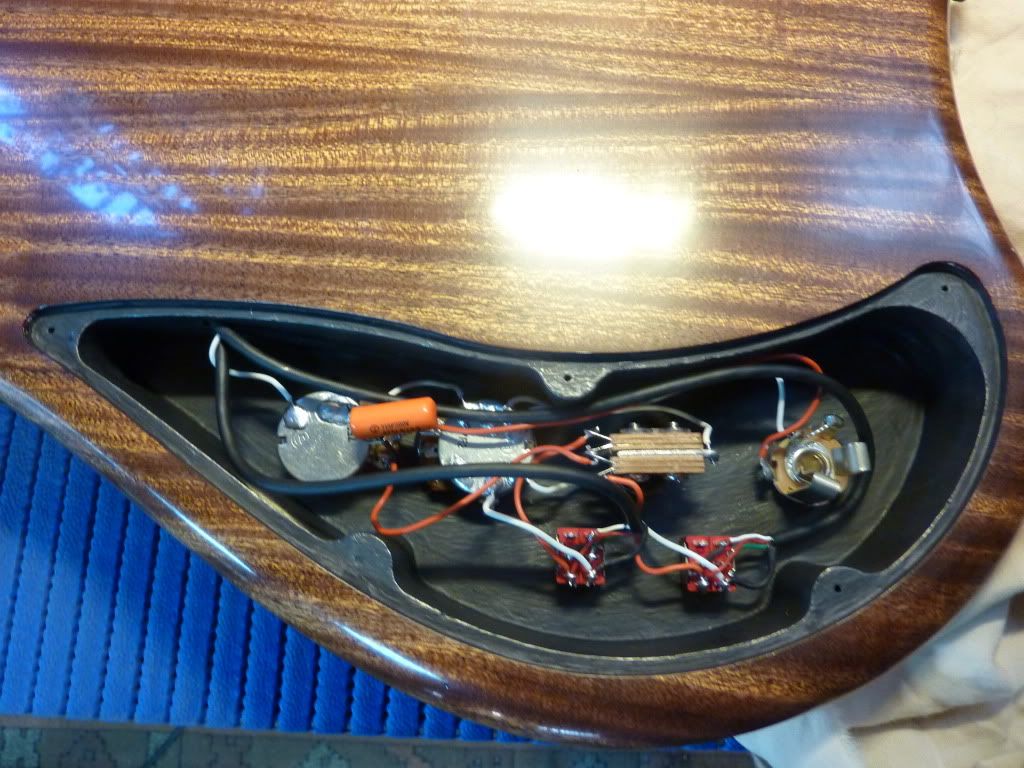
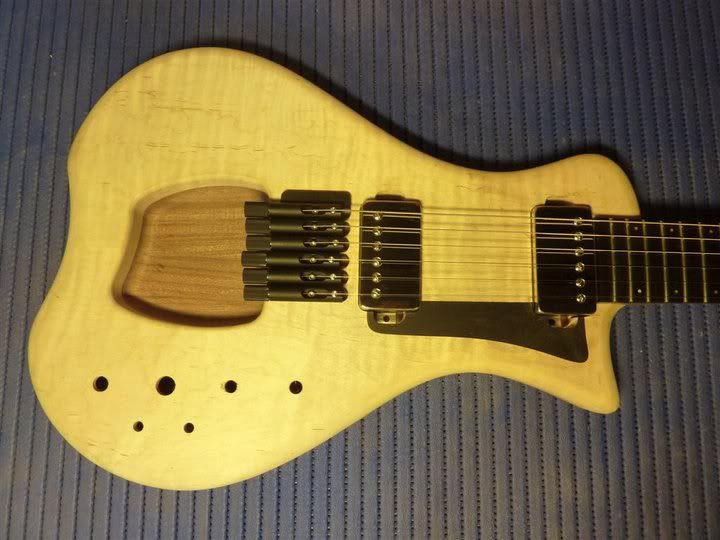
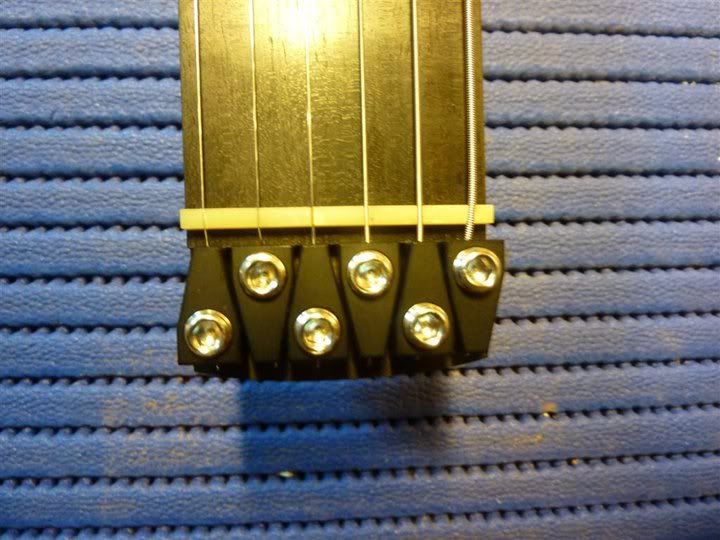
I assembled the guitar and the grounding wire thread I drew beneath the string locks works perfectly fine.
I still need to do the final setup, But even as it is, after playing and hearing it a bit, I am very pleased with the result.
Words of praise are due to Ola Strandberg for his cleverly designed bridge and the quality of it's fabrication, and to Tim Mills from Bare Knuckle Pickups for yet another amazing pickup (custom made alnico III set).
The entire build process can be viewed here:
http://www.facebook.com/B.M.handmade.guita...135576636474094
-
They're small. Tuning pins take up less room, so it's possible to fit alot more into a small space. This interested me in a design aspect, where I would have a headless guitar and the pins in the body.
have you considered using banjo tuners or the Steinberger ones?
-
Looks good, fairly unique.
How have you grounded the strings? Ola grounds one bridge and uses a zero fret to ground the rest - looks like you're using a standard nut.
Buter
Haven't done it yet, but I was thinking of running a wire between the screws that attach the string clamps, which the strings rest against.
clarification: one thread of a braided wire under the string clamps.
-
Looks good, fairly unique.
How have you grounded the strings? Ola grounds one bridge and uses a zero fret to ground the rest - looks like you're using a standard nut.
Buter
Haven't done it yet, but I was thinking of running a wire between the screws that attach the string clamps, which the strings rest against.
-
It's doable, but involves a lot of hassle every time you tune (see reply above).
another point to consider is that every time you replace a string it requires you to screw the pin out, or else you will find yourself with the pin bored to the bottom of the hole and ruining the thread in the wood surrounding it.
turning the pin back and forth like that every string change will make it a little looser every time, until you will be forced to replace the pin with a thicker one, and at some point you will run out of sizes (that might take a long time, but still needs considering).
-
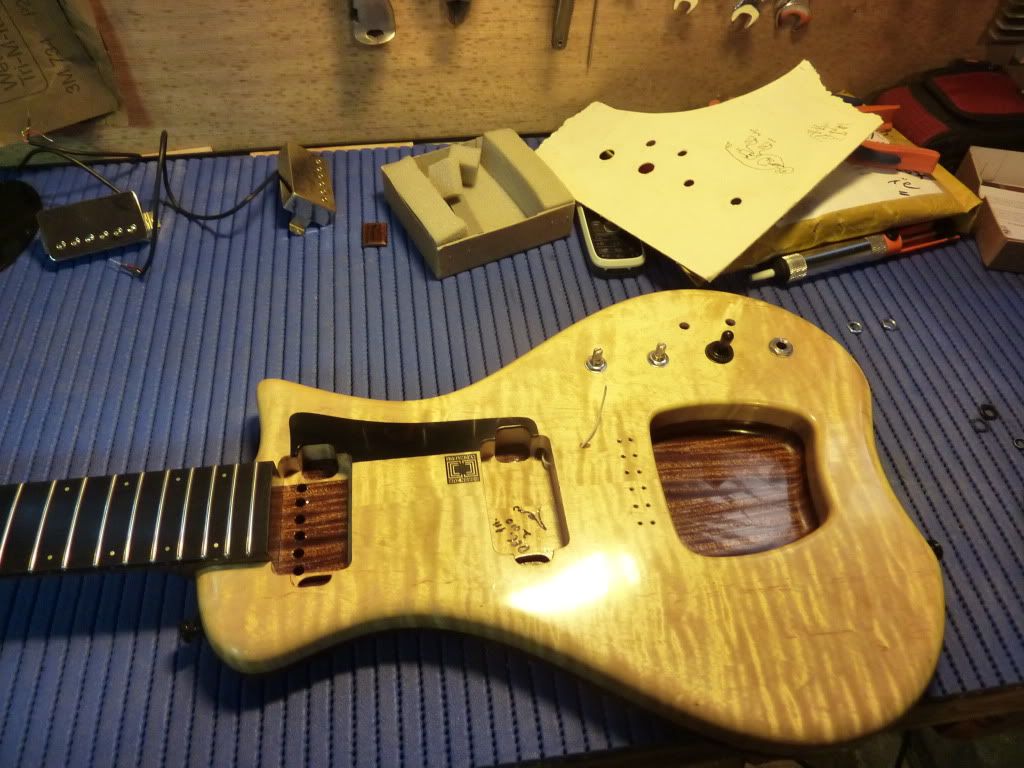
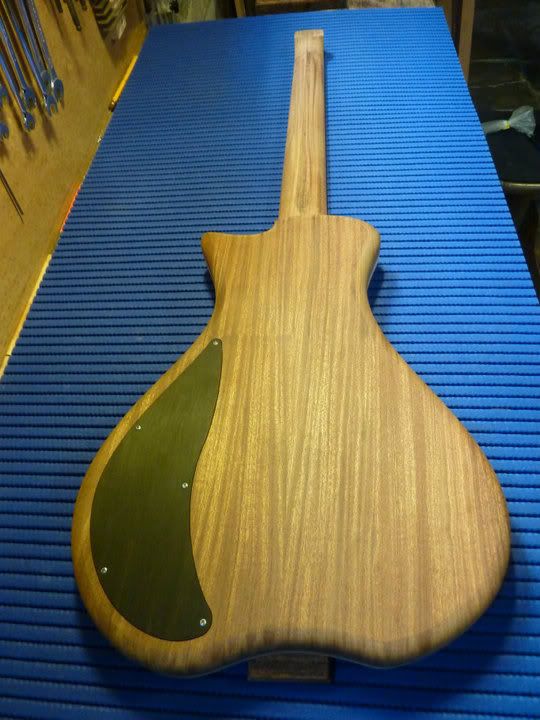
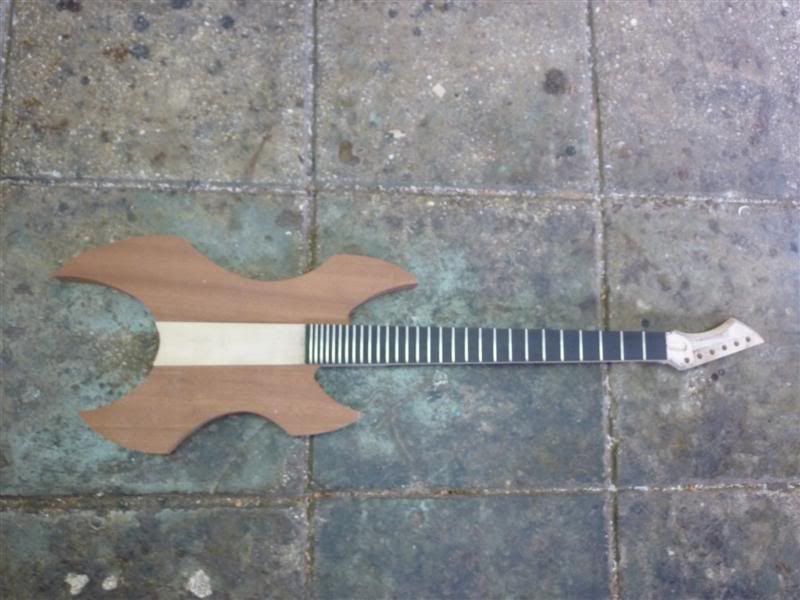
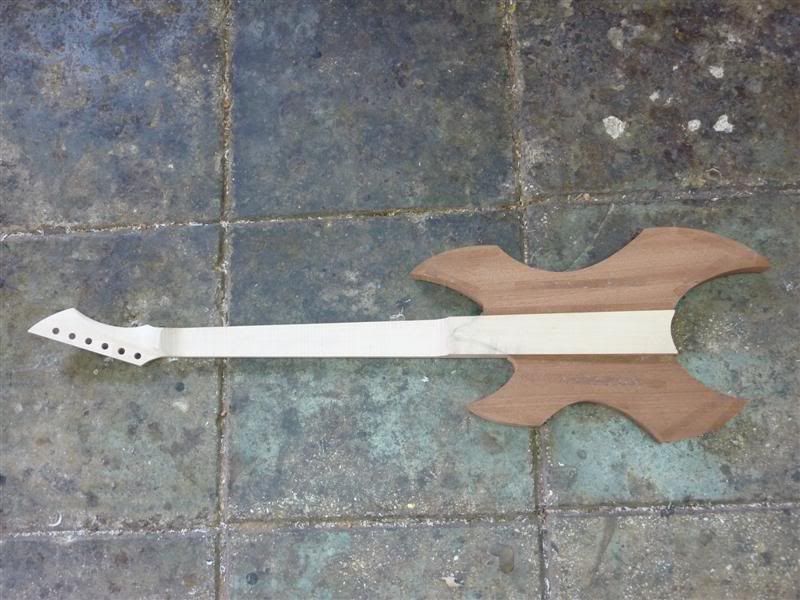
Hi
This is a commission done for an architect who got tiered of his 10 lb les paul and wanted something lighter.
The basic design was his, with me giving advice on aesthetics and altering it to make it playable. In the end we came up with a very compact, yet comfortable design.
At the moment I'm doing the final sanding before the sealing and finishing, which will be clear 2k.
In the pictures you can see the guitar with the strings on. I put them just to make sure that everything is well aligned and working properly before I do the finish.
Bridge is by Strandberg, Pickups are BKP custom made.
The entire process so far can be viewed at my facebook page:
http://www.facebook.com/B.M.handmade.guita...135576636474094

Cheers,
Benjamin
-
Cheers!
The reason for the conversion it that I have a client who ordered a warmoth tele, and he had a set of texas special to put in it. only problem is that he had the neck made with a compound radius, which makes the bridge radi very flat, and the middle strings with noticeably higher output then the outer strings.
will taking a rough diamond stone (manually) to the magnets while still on the pickup work?
thanks
-
Could you elaborate?
From What I know of telecaster bridge pickups, the plate is flat and the pole pieces vary in length. shortening the tall ones will remove some of the magnetic substance, but it will only make them similar to the outer magnets. am I missing something here?
-
Hi
Can I safely remove the two center magnets in a tele bridge pickup, cut/grind them a bit, and replace them back into the pickup without causing damage to the pickup?
Thanks.
-
Hi
I started working on a guitar that will be finished with clear poly.
the problem is that all the places near where I live that sell Glasurit ans Dupont (brands I know I can count on) are very happy to sell by the galon
.However, I found this store nearby that Imports De-Beer ans sells it relatively cheap, and more importantly, in 1 liter cans!
Has anyone had any experience with any of their finishes.
any input will be helpful. thanks.
-
[quote name='jaycee' post='428161' date='Jun 24 2009, 11:12 PM']Lemmy[/quote]
+100,000
-
i love the look personally would have gone with 3x3 tuners inteasted but 2 quick questions
whats the scale lengthof this? and is it a lefty?
scale length is 25.5"
and the guitar is not a lefty - the headstock is just reversed.
-
I'm coming back on a project that was on hold for a while now.
this is going to be a 29 fret 6 stringer neck through, with 2 Q-tuner humbuckers (super high & high z) right next to each other, in the bridge and "middle" position.
Since it's a metal axe, I'll put a 4 way (tele) lever pickup selector with a - both unbelievably hot pickups in series - position, which will probably suck but simply has to be done.
eventually there will also be a 15mm, 45 degrees beveled edge around the body so it will not look so bulky.
and it will probably be black (unless I go bananas and give it to a paintbrush (edited: airbrush!!!) guy who will make it look like a rusty old axe
.as I'm in the middle of an exam period, progress will be slow during the upcoming month or two. I hope to finish this one before the start of the next academic year.
B


Cool Fingerboard Gluing Technique...
in Solidbody Guitar and Bass Chat
Posted
I would just use more clamps.
Using too few clamps makes you use a lot of pressure in order to get a good squeeze-out of glue, whilst potentially starving the area under the clamps and is not good for the clamp itself in the long run.
I prefer using as many clamps as comfortably possible with moderate pressure. In the end its the power of numbers that does it.