


n8rofwyo
-
Posts
314 -
Joined
-
Last visited
Content Type
Profiles
News and Information
Tutorials
Product Reviews
Supplier Listings
Articles
Guitar Of The Month
Links and Resources
Forums
Gallery
Downloads
Posts posted by n8rofwyo
-
-
Ryobi is fine for light duty or intermitent use, no doubt about it. But for a router that can take a little punishment, is simple - and user friendly - to operate, and accurate with the factory settings.... Bosch. I'd put my money on them any day.
-
Great job Dave, I'd be lying if I said I didn't get any inspiration from this guitar. Absolutely beautiful work, and thank you for taking the time to document it all.
Nate Robinson
-
"bump"
I know this last question may be better suited to inlays and finishing, but I don't want to set any bad examples of multiple post considering that's been happening alot lately.

Nate Robinson
-
I second that, it's the same saw that is set up in my shop. Not the best saw available, but for that price I think it is unbeatable. I think mine came in pretty close to $365 after tax. I have also been very satisfied with their 6" jointer, easy to set up, good weight, and maintanence is quick and easy. Jointer cost close to the same as the bandsaw.
Nate Robinson
-
Hey your imagination, your guitar...know what I mean. I was just joking a little cause the desk does look like a possible reproduction piece to me, and I think there is a good possibility that he may be able to sell it for enough to cover the wood for at least one guitar. But if he isn't willing/able to wait to sell it to buy the wood he needs, then it's better he carve it up and try to make a guitar with it rather than send it to the dump.
Nate Robinson
-
As far as bending the frets goes, you may need to fiddle with the homemade bender to get the radius of bend you want, that is if you are using the homemade fret bender - if not disregard. I find it much easier to bend the entire fret and then cut it. I get a more consistent bend, and only have to bend once - all those 2" chunks of fret get to be a pain after awhile.
As far as glueing goes, I glued my first fretjob in and spent a hell of a lot of time cleaning up the mess. So I don't have any good advice there, except that a little ca goes a looooonnnngggg way.
Hope that helps, but I am not an expert either... just learned from alot of mistakes, good luck in your build!
Nate Robinson
-
That's about the best advice possible, imho.
Good luck!
Nate Robinson
-
That's where I would put my money as well. But it is really a 70/30 shot until its stripped. Definently not oak, though. Hey, are ya gonna make the headstock look like one of the legs, ya know, for heritage.

Good luck!
Nate Robinson
-
Ran across another pitfall today. I decided to have a look at the materials available already in the shop for the clear coat. What I found was a crap load of Imron by DuPont. After reading LGM's tut on painting, it sounds like this stuff is far more toxic than I care to deal with. I think that a composite polyurethane is probably what I would like to use. The big question I have is that I'm not sure of the total mix ratio. Most of them seem to be a 4:1 of paint to hardener, but I'm unsure of whether reducers, hardeners, or accelerators should be added to this ratio or within it. Beyond that my concerns are:
A) is a reducer advantageous in clear ( as I found it to be in the base coat)
) is anti fisheye necessaryC) Can the clear be thinned, if so what is the correct product to use.
On that note I'm using acrylic enamel for the base coat, is that just thinned with solvent or a special thinner.
My searches aren't producing much, since I don't think I know enough about the terminology is to be able to understand what can (or can't) be substituted for what. I bought a couple of books on automotive painting, but both authors seem to have the impression that I already know my ABC's, so not much help as of yet.
TIA
Nate Robinson
-
Well gave the paint another go today and had slightly better results. More wet coats fewer runs. Bought some retarder, that was a god send in and of itself. More practice tommorrow.
Nate
-
Well, the way I look at it is: I wouldn't expect to buy a hammer and just build a house, painting isn't any different. And if nothing else I should get pretty damn good at cleaning the gun!
-
I started a 40psi, then fluctuated from 20 to 60, but 35 seemed to work the best. Of course during this time I was also adjusting the fluid valve. So at this point I have a paint booth chock full of either dusty or runny scraps! If I had to bet on it I would bet my hand was just to unsteady.
-
Thanks for the tips, I'll regroup and see what happens tommorrow.
Nate Robinson
-
I tried to stay 8 inches away. Fluid valve is open 3/4 of the way and the fan is set at maybe 80%. High probability I'm moving too slowly. But then I didn't expect to get anything good out of the first practice section.
-
I can litterally count the leaves on your trees with that reflection! Beautiful job, man, just beautiful.
Nate Robinson
-
Right, It is a flat top. Sorry for using the wrong term. Since this was the first time I have done a cap, I decided not to go all the way down the rabbit hole, just keep it simple and not get in over my head.
On another note, today was my first practice run at spraying with a gun.
It was pretty well a distaster, but that was expected. The most difficulty I had was getting a wet coat without a running coat. Will be doing a lot of searching of the Inlay and Finishing Section tonight!
Anybody have any thoughts about glueing veneer on two intersecting planes? Still haven't tackled the veneer on the headstock.
Thanks fellas, Take it easy.
Nate Robinson
-
I guess if you used a binding or no cap, it could work really well. Hmmmm....
-
I think you're right balooka, you would need to put a plumb cut on the end of the neck for a perfect fit. Hadn't really considered that, never having put an angle on my necks, good point!! Of course Myka's jig covers that as ijc mentioned.
Nate Robinson
-
Moron Moment!!!!! I didn't think to save the image, just printed it out.
-
This is kinda what I have in mind for the paint.
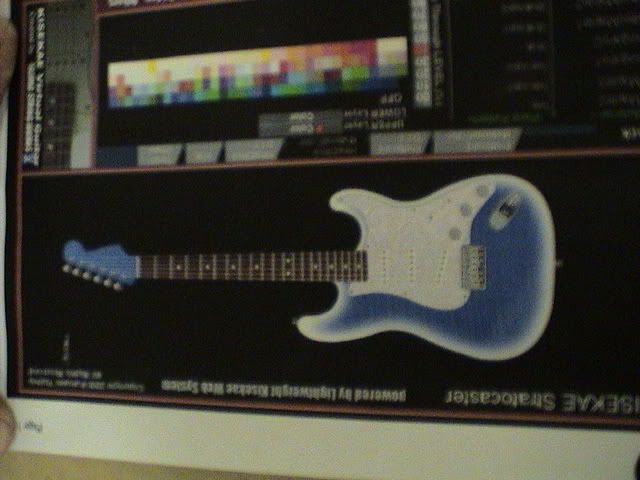
I guess It would be a white burst. I haven't seen anything like it before, but I really didn't get serious about looking either. Kinda reminds me of a bottle of Malibu rum for some reason. I'll be using acrylic automotive paint, as a bunch of it came with the shop.
The guy who had it before used it as a spray booth for semi trucks I guess. Thanks for the kind words and as always all opinions are welcome.
Nate Robinson
-
Jmrentis, you are absolutely right. They are oversized, the last time I did pup routes I cut em so tight it was damn hard to get the wiring through to the switch. And looking closer it does seem that the neck and middle routes are different, (though they were supposed to be the same.
Will have to check on that in the morning). And yes it will be the unwilling recipient of the hardware from my first burn, er... build. As such it will have a standard strat hardware setup including full on pickguard. On that note my wife asked my why I spent $20 on a top just to cover it with the same old hardware I already had! I replied, "yes dear, you are absolutely right, next time I will go full in and get the good stuff." At least I might get one righteous guitar built before she gets wind of the bill for hardware!
Nate Robinson
-
Actually I'm kind of ashamed of myself for that. I had a couple of hours of spare time at the shop waiting for some replacement window sashes to set up - so I decided to have a go at the guitar. But....I didn't use the time to make myself a nice set of pup templates, instead I just put down some masking tape and freehanded the routes. I should have just made those templates, but impatience got the best of me.
Nate Robinson
-
Thats Niiiice!
As far as the rings go - I had to recreate the carve on a mantel molding a few years ago and I ended up using a double cast of plaster to get the shape I needed.
First I cast a the contour of the mantel by simply putting cling wrap on it and setting it in the plaster. I then made a new cast from the exisiting one, getting the original shape of the mantel itself. Then I glued sand paper to the cast to get the new molding to take the shape of the mantel. Don't really know if that is usefull in your case or not, but it seemed to work ok. But, the cast was about 2" thick, so breaking it during sanding didn't seem to be a problem... just something to consider.
Hey, it looks great, though, and I think recessed rings would look stunning, even if it was a monster of a workload.
Nate Robinson
-
Wow! Take the ride and enjoy the madness! WHOOOOHOOO!
I agree that the notebook and camera are a must. Can't wait to see your stuff after this educational interlude.
Nate Robinson


Making A Template?
in Tools and Shop Chat
Posted
I'm not aware of any router that doesn't have a depth of cut adjustment. There are all different ways that different routers adjust depth, but it is usually a rotary knob or a lever or some combo of both. Have a closer look at the router, I bet it becomes apparent pretty quickly what I'm talking about.
Nate Robinson