


DivebombInc
-
Posts
23 -
Joined
-
Last visited
Content Type
Profiles
News and Information
Tutorials
Product Reviews
Supplier Listings
Articles
Guitar Of The Month
Links and Resources
Forums
Gallery
Downloads
Posts posted by DivebombInc
-
-
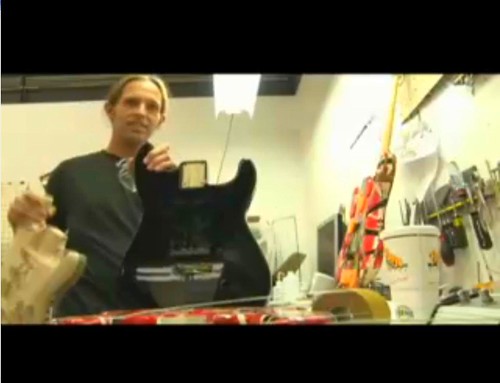
I built all of these bodies and necks except for the Danelectro neck.

-
I still can't get over the tone. It's a ROCKER for sure. Oh, and it's a 25" scale.
The Rockinger really set's it off I think. Future builds will have to have other tremolo's or fixed bridges; this is a one of a kinder.
-
I rarely use necks that I don't make, but this one has been sitting in my office for quite a while. I made this Basswood Star body a while back and the Rockinger tremolo I found on eBay a few years ago. The Seymour Duncan Super Distortion has been on a shelf for years too.
Specs:
Basswood Body
Danelectro Neck and Tuners
Rockinger Tremolo (no arm)
Super Distortion Humbucker
500k Volume
Fiesta Red Nitro Cellulose Finish
Played through my Metro Amps Marshall Plexi Clone and this thing is a beast. Sounds incredible. Wish I had a way to record.

-
I think the clear over the black it an important step to the look that Fender acheived. Once you spray the white and do the aging some of the areas where you go all the way to the wood have black around the edges and there are some areas where you just sand the white to expose a hint of black underneath too. If you spray the white directly on the black it's hard to do this and in some cases it all comes off together. The clear in between helps.
-
Someone just posted this pic on another site. Based on this I think Fender cleared over the black (it's pretty glossy), I would guess they did the same for the white. If they cleared over the red they steel wooled it and rubbed it out to take off the shine. That's what I'm thinking now. That would allow some aging of each color without the danger of going through the underlying color unless you wanted to. I'm trying it over the next week. I'm sure they used basecoat/clearcoat automotive paint for this project.
Not sure how interested anyone is in seeing the results, but I'll post them anyway.
-
I guess I'm looking at the details on the Fender. The paintjob just has an interesting look to the layers of paint and the seperation of each color. I know the steps to recreate the paintjob, it's just that look that Fender acheived that's escaping me. I use masking tape and liquid latex masking to make all those weird little shapes. Maybe the body prep is what I'm not doing right. Because I use automotive paint I used automotive clear and then wetsand smooth before spraying the first color. One of my issues is when I age the white/black stage as soon as I get through the white I go through the black too and expose wood. In some places I want to take off the white and still have some black.
Here's an example:

maybe I'm over thinking it. Would allowing each color to cure more before spraying the next maybe make a difference. I do know that Ed said in an interview that he did clear it after it was red because he saw some pictures of it and the grain was showing a lot.
-
Thanks for the response, but I can put my paintjobs up against any of those and probably do pretty well.
I'm looking for more technical info on the technique used to get this look like possibly doing a coat of clear in between colors and body prep.
Here's one of mine-

-
I know this really isn't what some would consider a beautiful finish on a guitar. I'm really looking for the technique more than how to do this particular guitar.
-
I have done this paintjob before, but I really want to get it to look like Fender did. I have a spray rig and I use PPG auto paints. My question is this...
How the heck did they accomplish this look? Can I seal the body with clear and wetsand it and then spray color over the clear? I guess I could spray a thin coat of clear over each color so that the colors don't "stick" to each other.
Does anyone know the answer? This pic is of the Fender.

-
Okay, I've been working on this deal with the manufacturer for 5-way switches that are accurate to the real Frankenstein and also can be used in restoration projects and/or aged new builds.
My costs are coming back making it cost prohibitive. I’ll have to sell them at $49 to make any kind of margin making it worth my time and investment. Considering the broad range of applications for this switch and the accurate vintage specs do you think this is something I should pursue?
It will look like this minus the solder of course.

-
that's a walnut inlay on the fingerboard
-
i was very careful to not stain up to the edges and once i sanded with a block it sharpened everything up. carve is more like scraping with this.
yes the bridge will cover the image slightly, but it was intentional.
-
i'm making this one for john evans; he's a big john wayne fan and his nickname is... well... you can see what his nickname is.

the image was sketched and then carved out of the alder carefully. i applied a little stain and then sanded to sharpen it up.
-
Chrome plating would flake off unless you pre-bend the binding material prior to chroming it, and even then I can't see it working. You'd be better off spraying Alsa Krome on a masked body, or using a different metal and lacquering it after polishing it to a shine. The Alsa option is more likely to give you a result.
Difficult task although there may be an easier answer to what popped into my head.
Thanks, I was just reading about Alsa; it might work.
-
I'm working on a guitar that would look great with chrome binding. Any idea how i can accomplish this? I've never heard of it, but was hoping someone has.
-
What you have drawn looks fine to me. The difference in adjustability that you are finding is due to the difference between the 2-way and vintage style truss rods. The 2-way has a rod threaded on both ends with the direction of the threads reversed. This makes one turn move the rod twice as much as the vintage style. Plus the vintage is a compression rod acting on the wood of the neck itself. The 2-way acts on the second rod.
~David
Thanks David! I understand the dynamics of the two different types of rods. The EBMM was so easy to turn and it had such immediate results it must be a 2-way.
Thanks again... I'll start carving now. I'm just trying to get to the point to where I don;t even use 2-ways and I just want to be sure I'm doing it right every time.
-
Got a great quartersawn maple blank this morning and I'm wanting to make sure I get this right before I start working on it.
Does anyone have any info for or against my method in the drawing I posted above?
-
Thanks for the reply!
The EBMM neck was super sensitive and literally 1/8 turn took 1/16" of relief out of that one. It just seems like I'm not getting much.
Do you see anything wrong with what I'm doing.
-
This is the drawing I did and this is what I do every time.

Any suggestions as to what my limited adjustability issue may be due to?
-
Is there any definitive information on neck construction available? I've been making necks now for almost 2 years and when I use a 2-way truss rod I get plenty of adjustability, but I don't like them for many reasons. I want to use single rod vintage type rods on both 1-piece and 2-piece necks. I recently made this neck and installed it on my Frankie and it's 1-piece with a vintage style rod. It doesn't have a lot of adjustablity it seems. Luckily it's perfectly straight and the action is sickly low and sweet so there are no issues.

I had an EVH EBMM guitar in for adjustments here a few weeks ago and noticed the truss adjustment was very sensitive.
I'm also making this neck for someone now and have noticed limited adjustability with it too. I prebend my truss rods about .200" with tapered shims and the skunk stripe is shaped to fit that bend as well.

What are the standards when making a 1-piece or 2-piece neck and using a single rod vintage truss rod?
-
Actually if you have a compound radius of 7.25" to 9.5" at the heal then your bridge is going to be even flatter then that. If your strings are following the radius of the neck as they should then the radius at your bridge is going to be more like 10.5" to 10.75". I'd have to CAD it to really see how it works out. Your strings continue on a flattening path past the heal so you have to calculate for that. I do a lot of 12" to 16" compounds and they work very well with Floyd Rose tremolos.
-
I was asked the other day to make a doubleneck body with a Curly Maple Cap. The best example I could find is one of Eddie Van Halen's Music Man guitars.
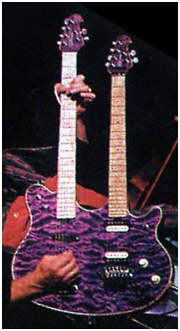
How was this cut to bookmatch all the way across the body? I was thinking kind of like an Accordian might do it. It's obviously 4 pieces for the cap.
Any suggestions?
Oh, and I'm new here so hey everyone. Someone over at the EBMM Discussion suggested I come over here for this one.
Srv #1 Build
in In Progress and Finished Work
Posted
This was a from scratch build including the body and neck.