


scottyd
-
Posts
390 -
Joined
-
Last visited
Content Type
Profiles
News and Information
Tutorials
Product Reviews
Supplier Listings
Articles
Guitar Of The Month
Links and Resources
Forums
Gallery
Downloads
Posts posted by scottyd
-
-
I havent been on the forum in a while, wow Tim this really turned out nice!
-
Actually the Grind is a neck through with the neck exposed. It would not be that hard (for the experienced builder
 ) to do this. Cut off the wings, thickness the wings for new top, shape top to fit wings, clamp and glue top to wings, plane edges of wings flat, re-glue wings to neck, touch up the pup routes, refinish bass. Of course there is more too it and it wouldn’t be a simple job but very do-able none the less.
 -
Beautiful job!
-

OOOhh I want one of those bad!
-
Hey Erik Im in the same boat with you, Ive wondered about what emg uses but havnt found any info. Ive found a butt load of schematics to build different buffers and pre's if your interested. Ive built a couple of jfet type buffers but they are lackluster to say the least. Opamps are the way to go and the circuits seem pretty simple. I just built a set of neo magnet passive single coils that worked out great, so Im really burning to build a set of actives. Let me know if you find any more info on the emgs.
-
SO BE IT!!! I can't argue with such a wise and sophisticated bunch. Perhaps I will save the purple heart for a future project.....Or perhaps i will use it for the back! GASP!
-
What the HECK? am I the only PurpleHeart lover here?.............
-
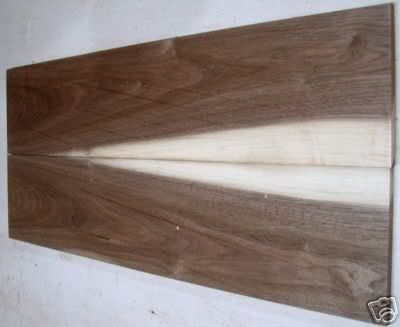
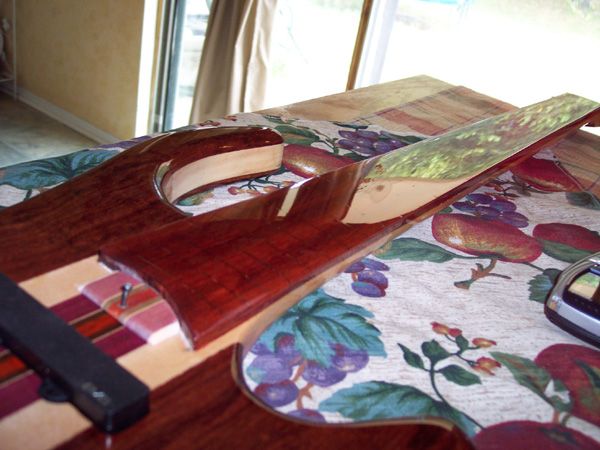
I just scored 2 tops off ebay for a very very low price. which one do you think I should use for this bass? The first one is crotch Walnut the second PurpleHeart. Im leaning towards the purpleheart, but I really like the walnut too.
-
I believe thats a Fodera Imperial.
-
Im considering it, but probably not.
-
Well being that the last project is just about wrapped up, its about time for a new one. I dont have all the details worked out yet, but here are some starting plans (subject to change of course)
Five string headless
neckthrough
Singlecut
35" or perhaps 34.5" scale
body wood will be wenge bottom, bubinga core, and a figured top of some sort (probably flamed spalted maple but Im still looking, I really want something with some nice sapwood showing) natural finish
bubinga/wenge/paduak/laminate neck some maple venners for good measure
Cant get enough of that cocobolo for a fingerboard!
I really really want to try binding the board with wenge
selfwound Neodymium pickups (maybe humbuckers)
Ive been tinkering with homebuilt preamps perhaps I will have one perfected this time around...
Status Hardware, (I really dont want to put the labor into another set of headless tuners this early)
Self-built truss rod ect.
Drawing so far (not finished by no means!)
another view
http://img.photobucket.com/albums/v626/sco...icture003-1.jpg
-
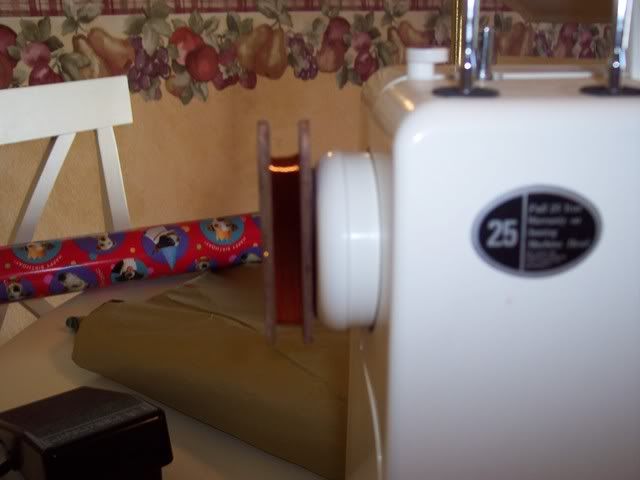
Very carefully. I plan on building a winder but this seriously works very well.
-
Its been awhile!!
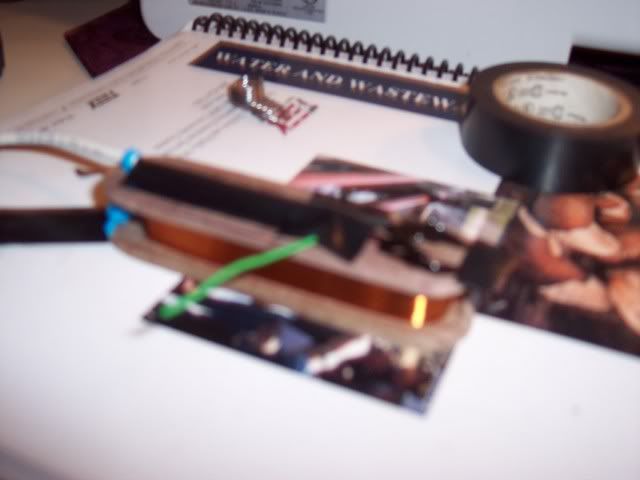
I built a pickup! The neo magnets are awesome, I love the way this pup sounds. I also wired up a alnico Jazz pickup for comparison and there isnt any! The homemade pickup is crisper, cleaner and all around sounds better. The pup is wound to 7.5k with 42 awg formvar wire. I wound it using the wifes sewing machine and some double sided tape which worked out pretty good. After I got the windings to the number I wanted I potted it in wax. Then I shielded it with aluminum foil and put it in the cover I previously built. Once in the cover I poured wax into the cavity to seal off the entire unit. I used a 2 pair wire which has a positive and negative for the pup and a ground for the shielding. This one will go in the bridge position. I will post some sound clips once I build the other one, very soon. Hopefully I will be able to get some better pictures too, dont konw why I cant get this camera to act right.
http://img.photobucket.com/albums/v626/sco.../Picture091.jpg
http://img.photobucket.com/albums/v626/sco.../Picture092.jpg
http://img.photobucket.com/albums/v626/sco.../Picture094.jpg
-
HI, I really, really like that body design.
-
Something to keep in mind, which has not been mentioned, Turtle wax and poly, dont mix. Just the dust from it can cause fisheyes. If you go that route be extremly carefull.
-
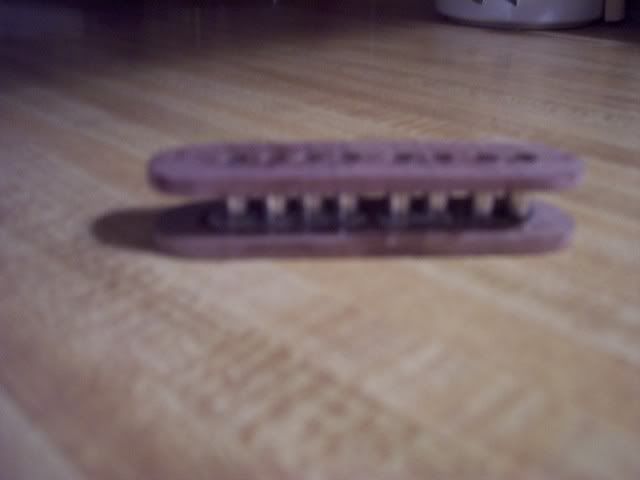
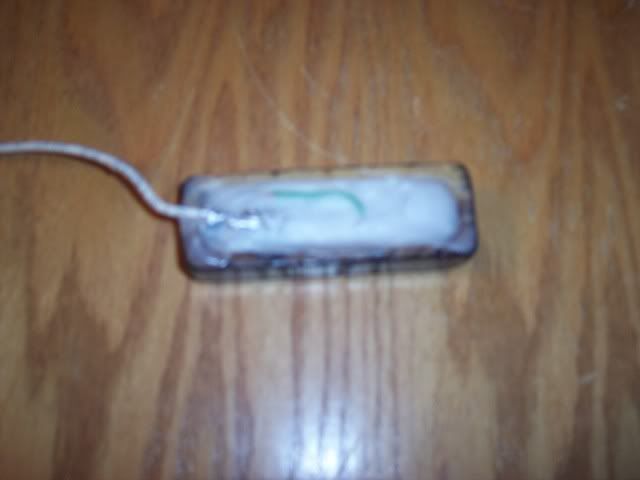
I got a little productive and made a bobbin for the neck pickup yesterday. The neo magnets are crazy strong making it hard to work with them but I think the end result will be worth it. Dont know why the friggin camera wont take a good picture of it....
-
Hey Jon, the bass is looking great! I recently fretted my bubinga fivestring. When I built it as a lined fretless I coated the board with poly to avoid the bloodwood from browning much like you want to do with your paduak. I have to warn you it makes for a very bright sounding bass, which I like, others dont. Hell, I had to cut the slots while coated and it was still pretty straight foward and easy, so I dont think it would be to hard to clean the poly out of the slots if you spray it before fretting. You just have to be carefull. As a matter of fact thats the only way I would do it, because if you got a run or any orangepeel you'd have to sand it out and it'd be kinda hard with the frets in the way. You'll want to bevel the slots across the top to avoid chipping and tearout not only for installing but also for if you goof up and have to remove one. When dressing the frets I put multiple layers of masking tape between each one to cover the finish so I could work the frets with files and the crowning tool. Whenever I was ready to polish the frets I just buffed them and the board at once, it turned out very nice. Its a little more work but well worth the effort and I really think you'll like the results. Also I would suggest a hard 2part poly like what's used for automotive work, I used House of Kolor for mine and played it over a year fretless before I decided to fret it and It still looks as good as when I first did it. NEways heres a pic to show you what I did, of course this thing gets played like crazy so there are plenty of fingerprints all over it
If you have any questions please feel free to ask.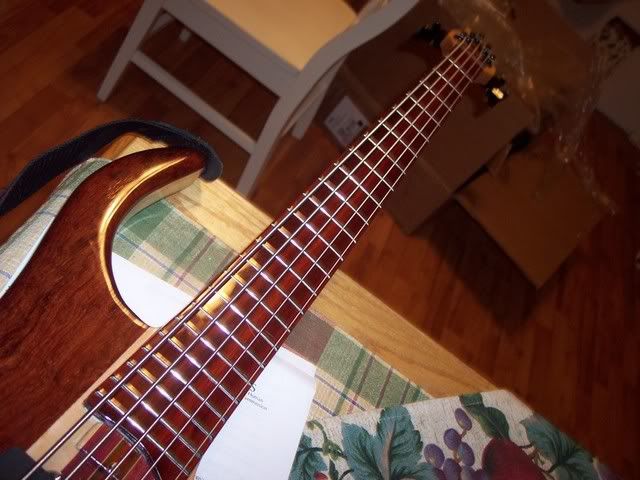
Before Fretted!
http://img.photobucket.com/albums/v626/sco...bassbuffed2.jpg
-
Looks great! Everything about it is nice....even the purple color. Could you please explain how you made knobs using a drill press? They look cool, especially with that wood.
Sorry I missed this question, I have not worked on the bass for a little while. I still have to buy some wire for pickups. This will be a little later because I want to buy alot of wire to have on hand. I was planning on buying it this week but my bass head petered out and I had to buy a new one (friggin Ampeg set me back a good chunk)
NE WAYs on to the knobs! I started with a square piece 2cm x 2cm x 2cm. I drilled a small pilot hole in the center,screwed in a #8x 3/4" screw about half way in hole, cut the head off said screw then chucked remaining screw in drillpress. After putting on SAFETY GLASSEs, I turned on the drill and shaped knobs with coarse rasp until round, then I smoothed and shaped the sides and tops with a fine file, then finish sanded with 220 grit. Then the pilot holes were drilled bigger to fit the pot post. (These pots have the knurled posts so a firm push seats the knob on the post, solid none the less) Then they were coated in satin poly, not bad wish I would have started doing these sooner......

-
Some where a guitarless orphan is shedding tears, tears of lost hope in all that is pure There there little orphan there there. Seriously I understand why this must be done. Ive got a couple past projects I'd like to WOD.. I think I would get more enjoyment out of it with a sledge though.
-
I built the bridge pup cover today. It has a mean radius on the top of it. The quilt on it looks darker than on the body, best I can figure is it will change a little when the poly fully cures/ambers. So besides that what do you guys think? does it go with the bass better than the cocobolo ones? Once the poly is good and dry it will get wetsanded, then a few more coats then buffed out. In the mean time Im gonna start on the bobbins for this one. FUN!

-
Im getting all my supplies together to build my own pickups. I decided to build a set of single coils. Ive purchased some neodymium magnets which should be make for an interesting sound. There arent very many builders out there breaking the mold of using Alnico, and Ceramic to me doesnt really suite the sound Im after. Its gonna be alot of trial and error to see what kind of windings are required to get the desired tone with such a strong magnet. Im still researching to see if I want to use the standard 42awg wire or larger. Ive also ordered a ton of supplies to start buiding my own onboard preamps. They will be based off a J201 jfet. The preamps will have bass/treble boost via pots and a mid cut via switch. Ive already started on making new covers from quilted maple and poplar for this particular bass. These covers unlike the cocobolo ones will not have exposed pole pieces. Once I have the covers done I will make bobbins for the pups out of maple. Also Ill post pictures of what Ive gotten done soon.
-
That bottom one is crazy!
-
Dang, that's beautiful! I wanna know the final budjet! Can't be under 200$! well lets just say its still under the $300 mark......so far.
-
Your welcome Jon I hope that the picturial can help you build some tuners, Ive had alot of requests for some, but I just don't have the time to build them. I also have another picturial I did explaining how I build my trussrods if your interested.
 ) to do this. Cut off the wings, thickness the wings for new top, shape top to fit wings, clamp and glue top to wings, plane edges of wings flat, re-glue wings to neck, touch up the pup routes, refinish bass. Of course there is more too it and it wouldn’t be a simple job but very do-able none the less.
Retopping.
in In Progress and Finished Work
Posted
I agree 100%, me personally I wouldn’t mess with it. Not that the Grinds are priceless or anything but they are far from "high end" it would be a lot of work just for it to still have Peaveys name on it. I would just build a different one and leave that one alone. In the long run you will be much prouder of what you have accomplished by building a complete bass.