


Ledzendrix1128
-
Posts
389 -
Joined
-
Last visited
Content Type
Profiles
News and Information
Tutorials
Product Reviews
Supplier Listings
Articles
Guitar Of The Month
Links and Resources
Forums
Gallery
Downloads
Posts posted by Ledzendrix1128
-
-
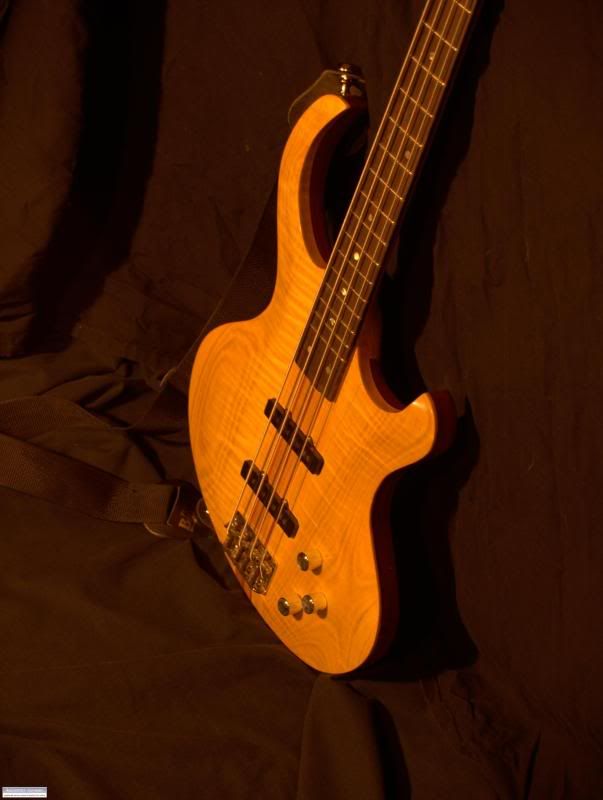
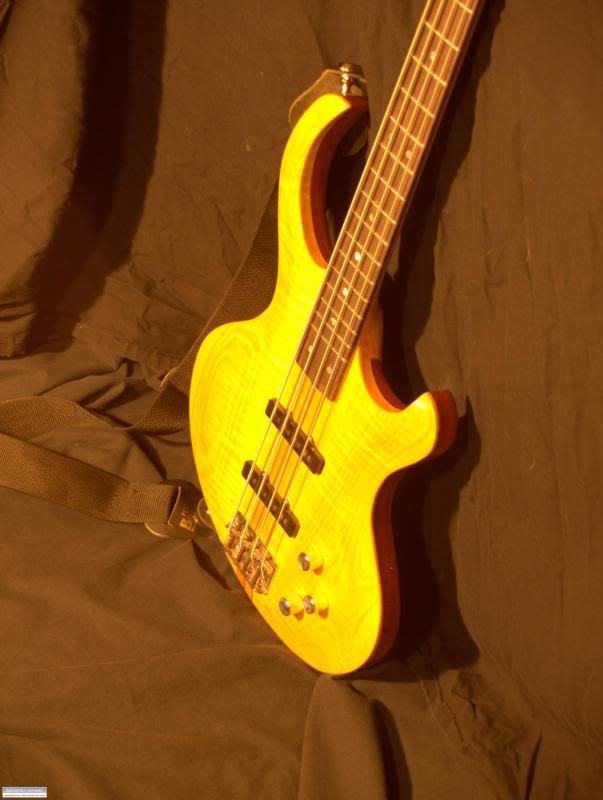
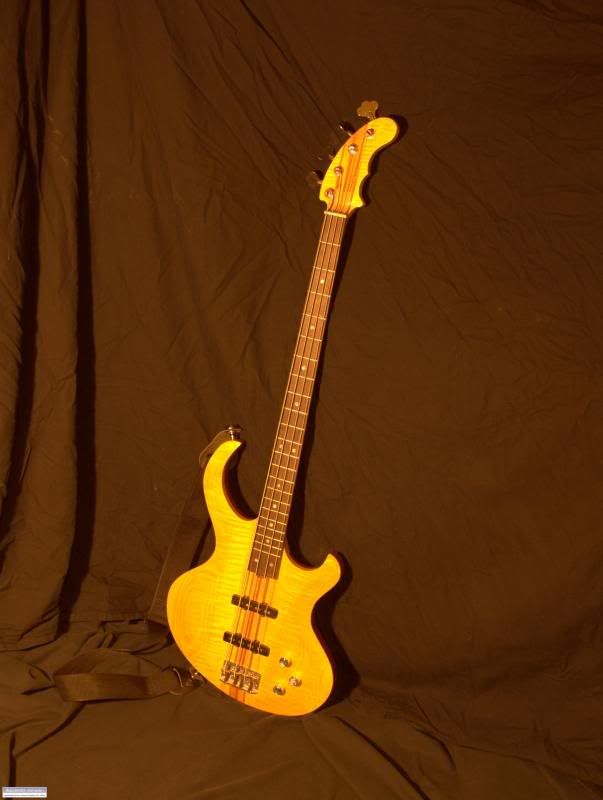
pretty darn close to finished... just gotta put 2 more frets in when i get the order from stew mac since I didn't order enough the first time

http://i68.photobucket.com/albums/i10/ledz...28/P3186305.jpg
http://i68.photobucket.com/albums/i10/ledz...28/P3186312.jpg
http://i68.photobucket.com/albums/i10/ledz...28/P3186317.jpg
http://i68.photobucket.com/albums/i10/ledz...28/P3186319.jpg
http://i68.photobucket.com/albums/i10/ledz...28/P3186321.jpg
http://i68.photobucket.com/albums/i10/ledz...28/P3186325.jpg
http://i68.photobucket.com/albums/i10/ledz...28/P3186330.jpg
http://i68.photobucket.com/albums/i10/ledz...28/P3186338.jpg
http://i68.photobucket.com/albums/i10/ledz...28/P3186340.jpg
http://i68.photobucket.com/albums/i10/ledz...28/P3186343.jpg
http://i68.photobucket.com/albums/i10/ledz...28/P3186346.jpg
http://i68.photobucket.com/albums/i10/ledz...28/P3186349.jpg
http://i68.photobucket.com/albums/i10/ledz...28/P3186358.jpg
http://i68.photobucket.com/albums/i10/ledz...28/P3186360.jpg
http://i68.photobucket.com/albums/i10/ledz...28/P3186367.jpg
-
-
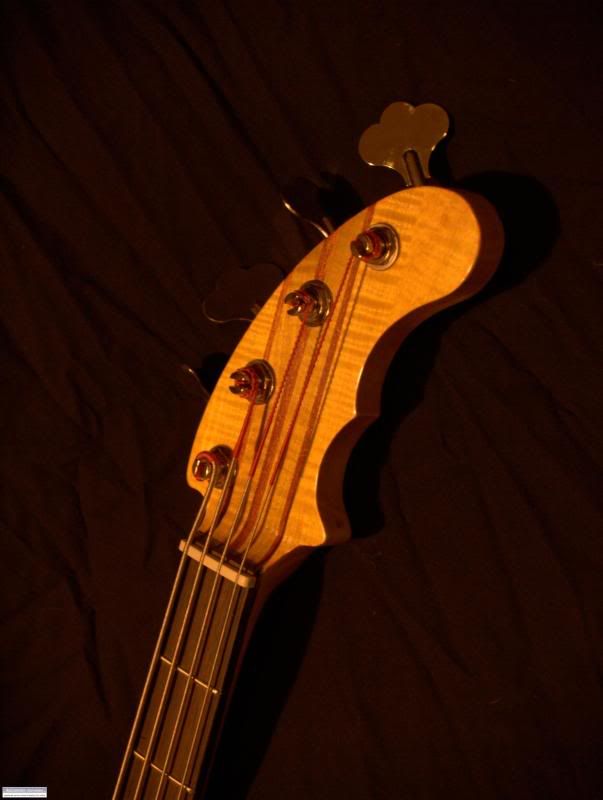
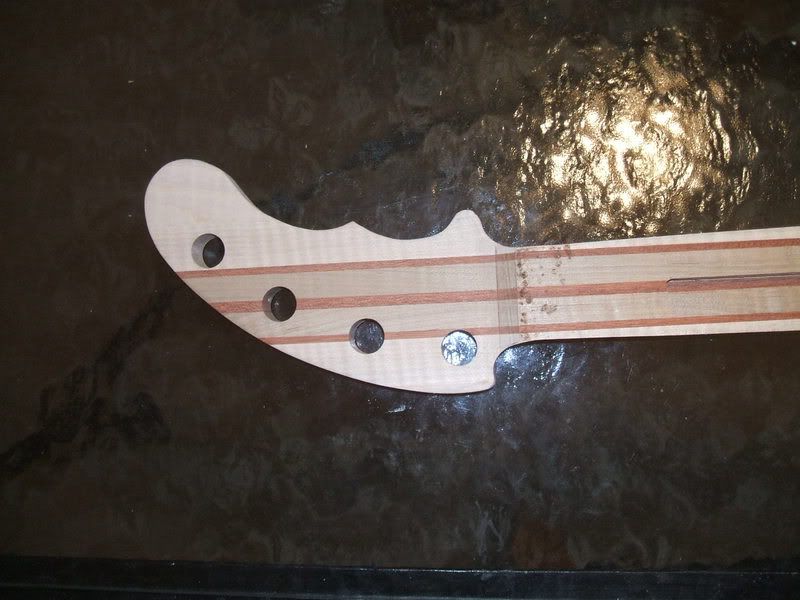
Looks awesome, love the body and carve, not digging the headstock though
Yeah I think the headstock needs somethin too, im thinkin about choppin off the ear on the right. I wouldn't be able to hang it from a wall hanger, but i think it might look nicer aesthetically, and I use floor racks anyway... haha
thoughts??
-
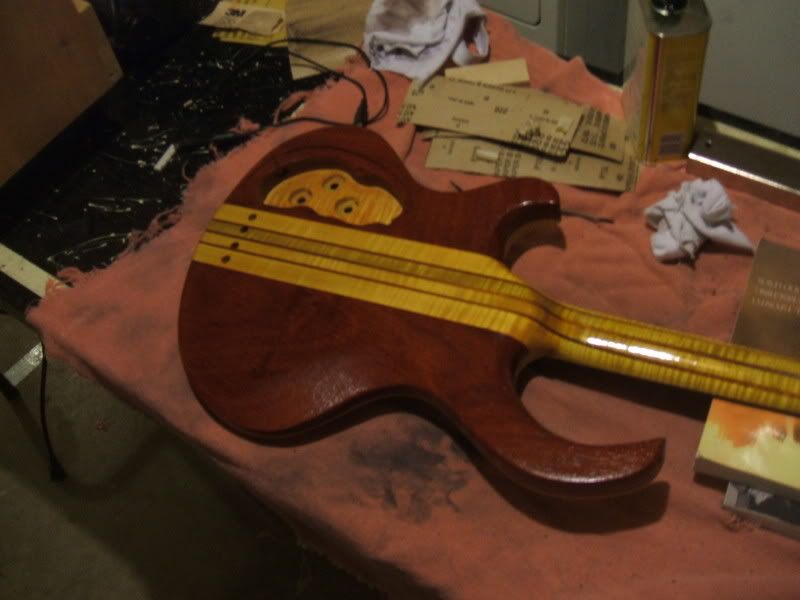
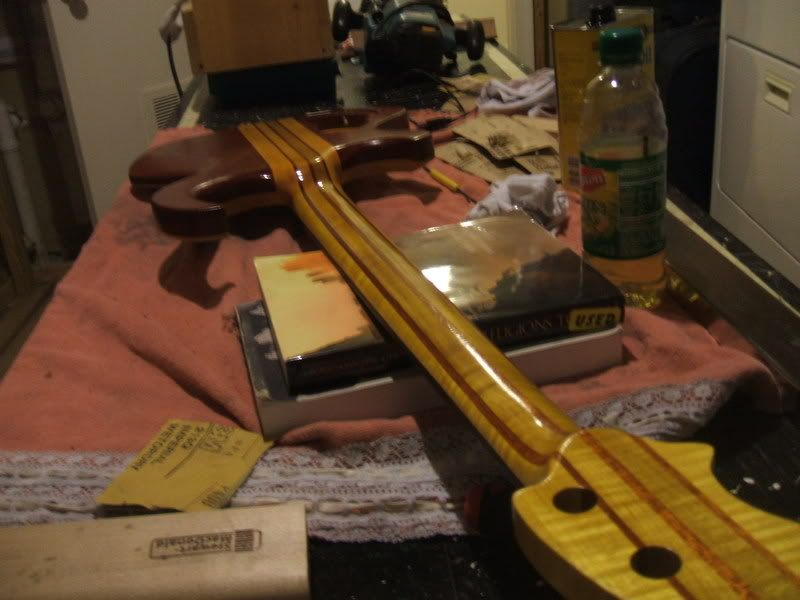
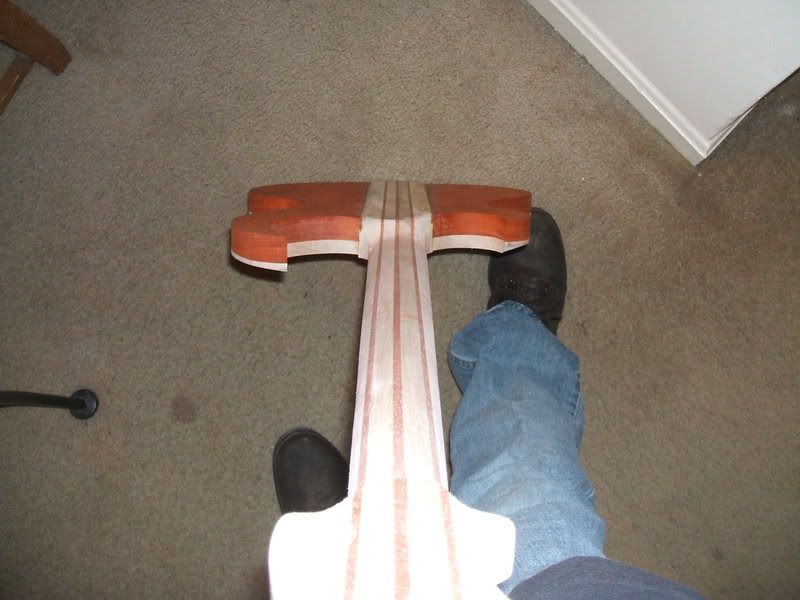
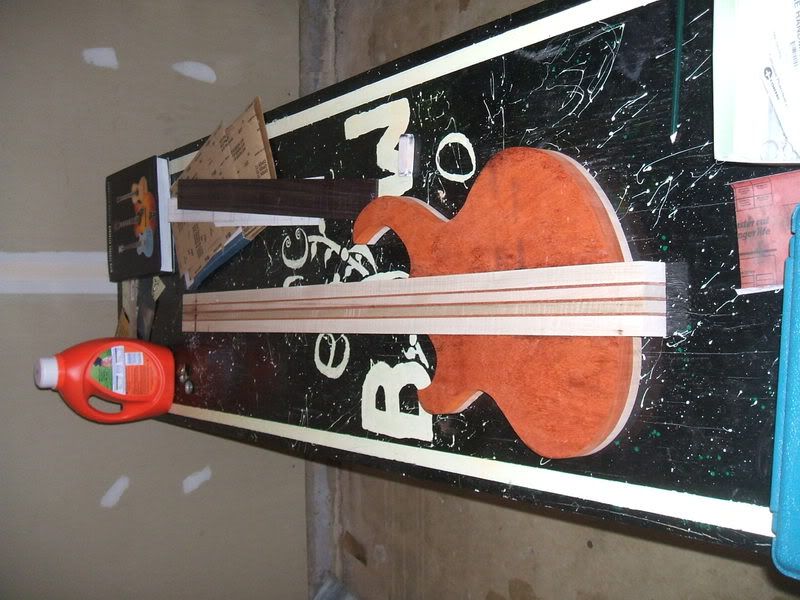
more progress...
...so kenny doesn't have to buy a plane ticket haha
http://i68.photobucket.com/albums/i10/ledz...28/DSCF1312.jpg
http://i68.photobucket.com/albums/i10/ledz...28/DSCF1313.jpg
http://i68.photobucket.com/albums/i10/ledz...28/DSCF1314.jpg
-
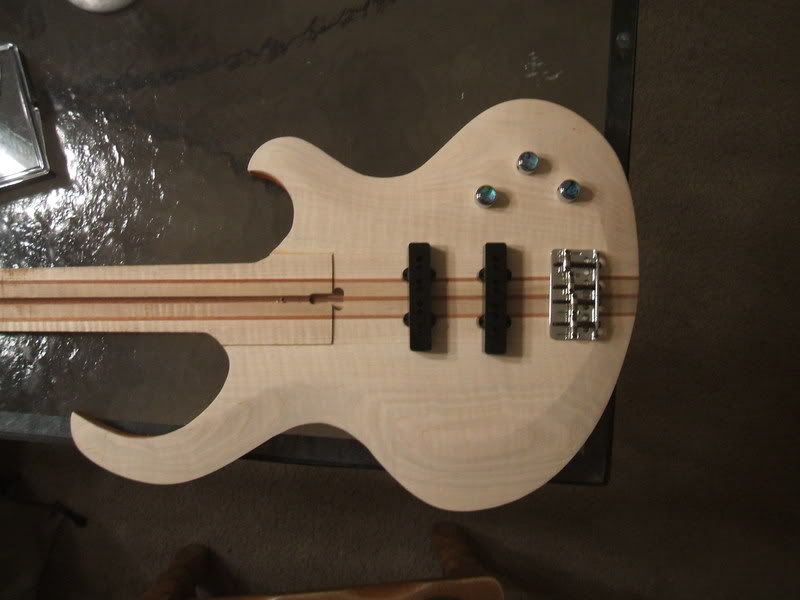
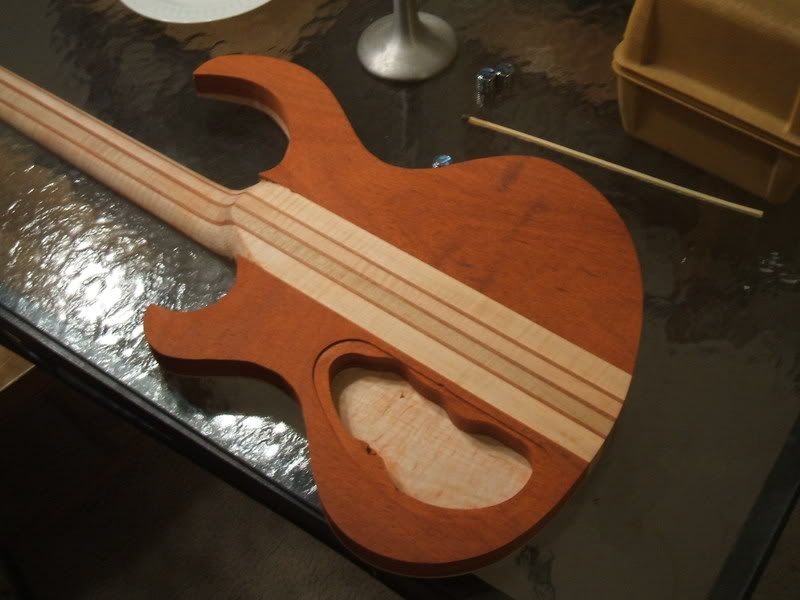
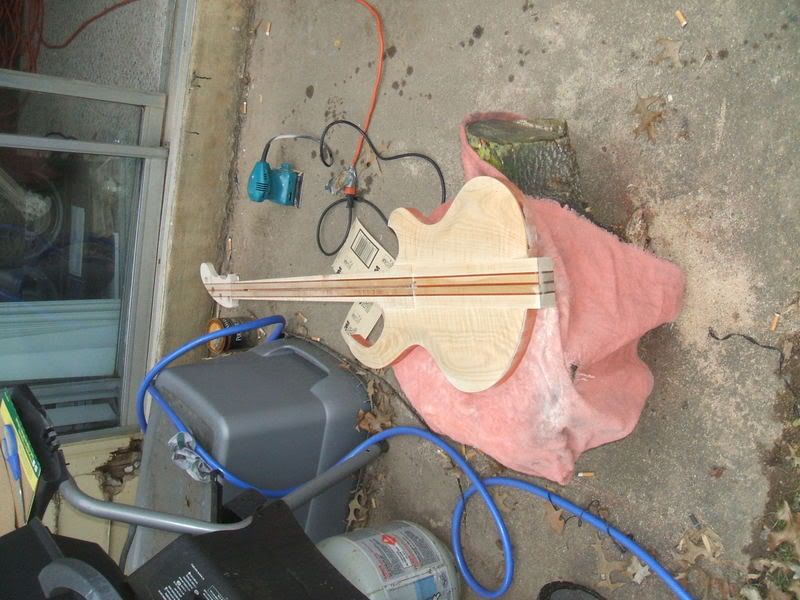
more work from today, pup cavities and control cavity routed
http://i68.photobucket.com/albums/i10/ledz...28/DSCF1310.jpg
-
like this? haha
-
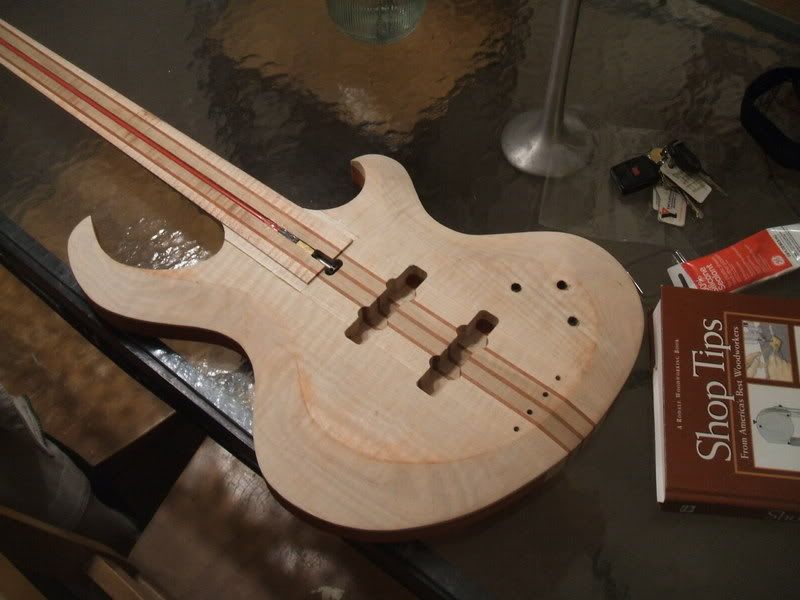
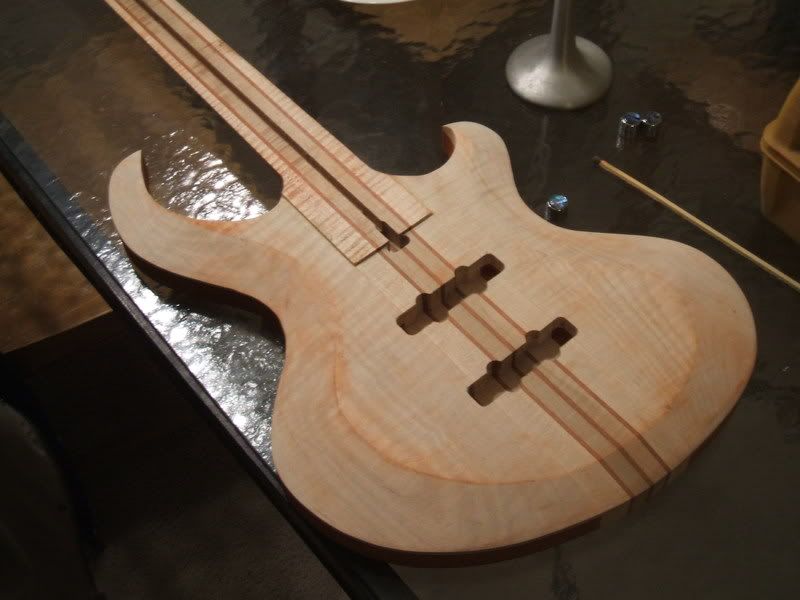
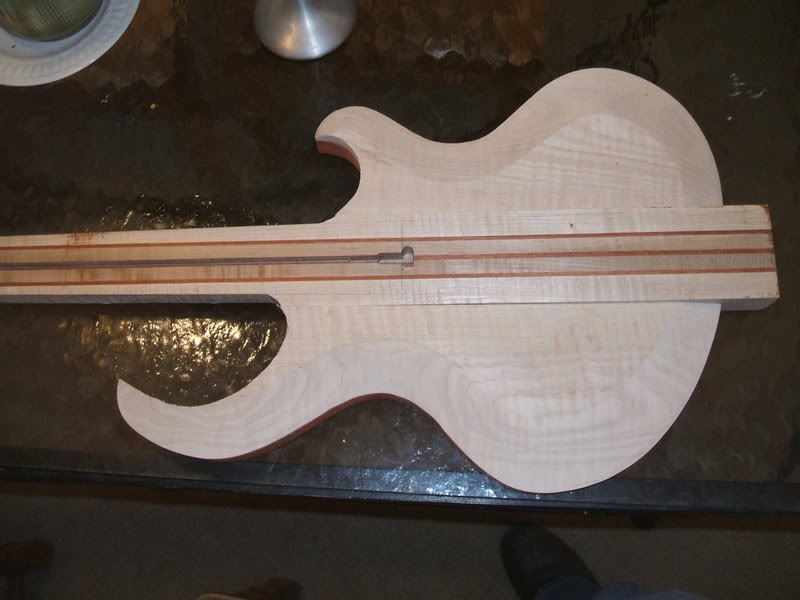
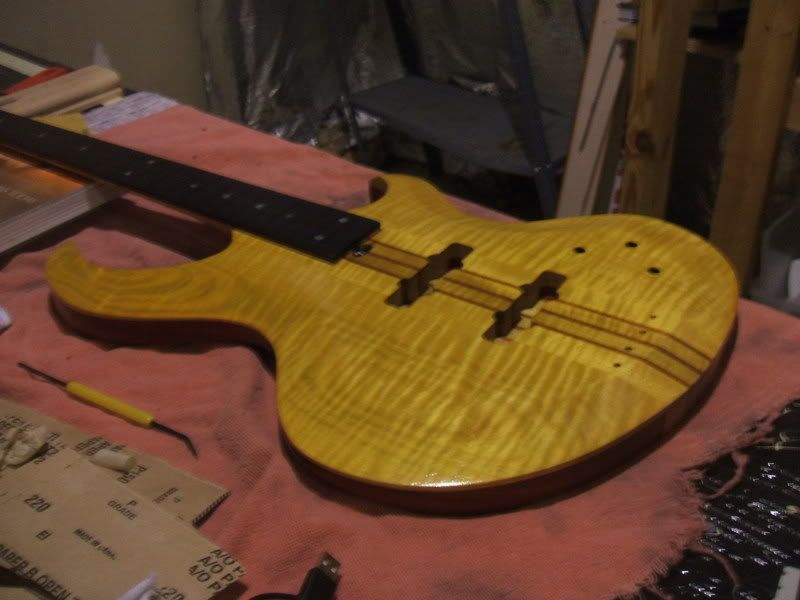
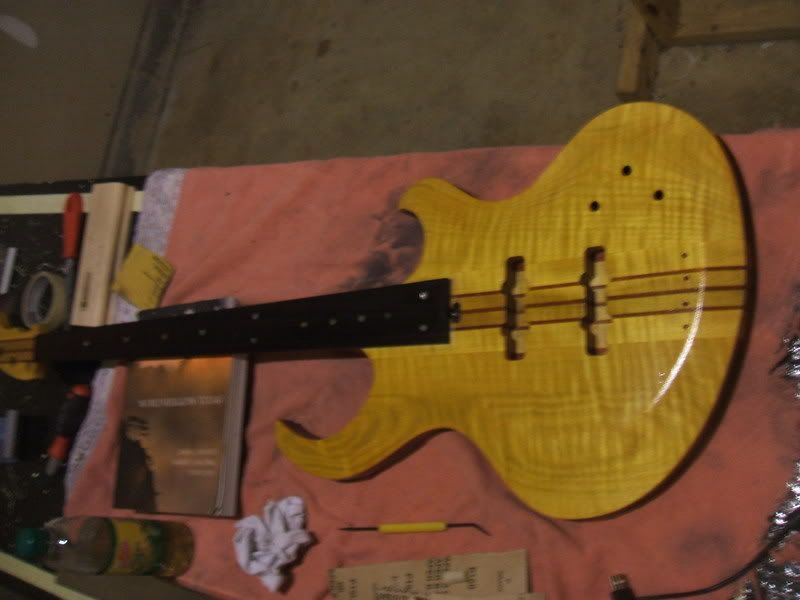
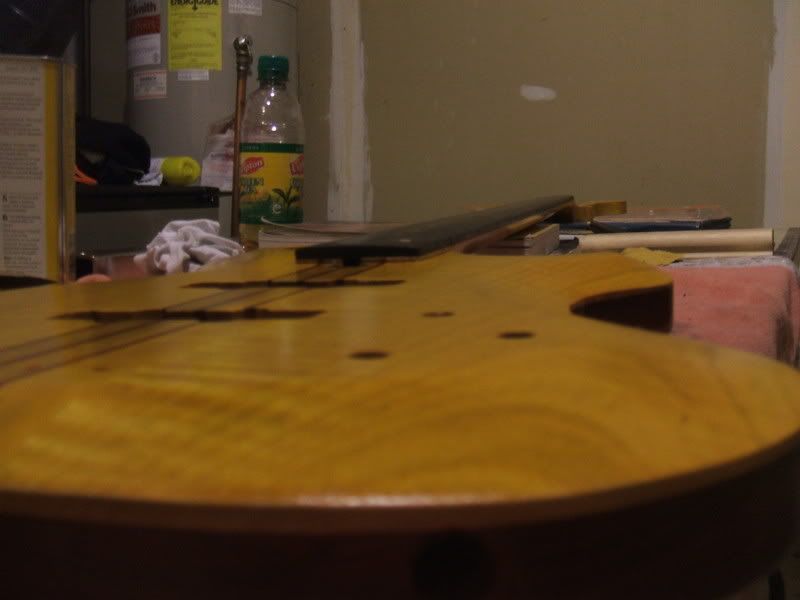
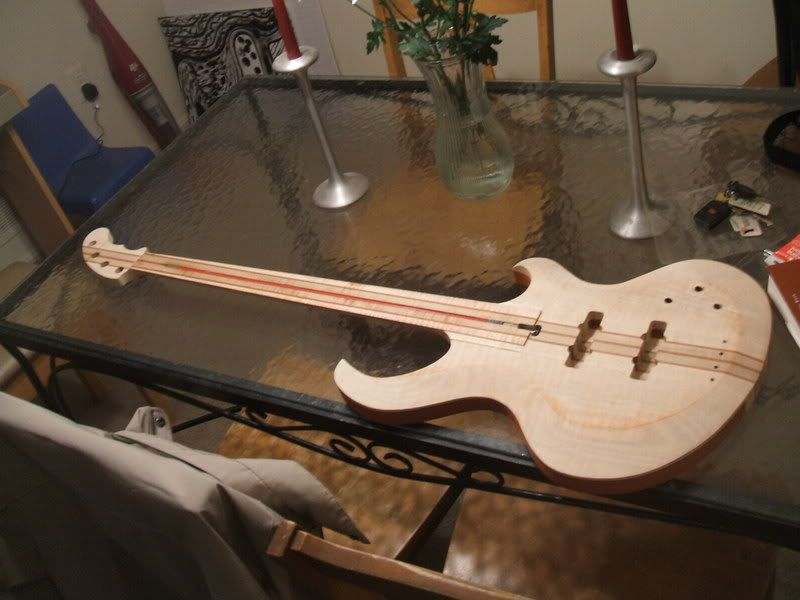
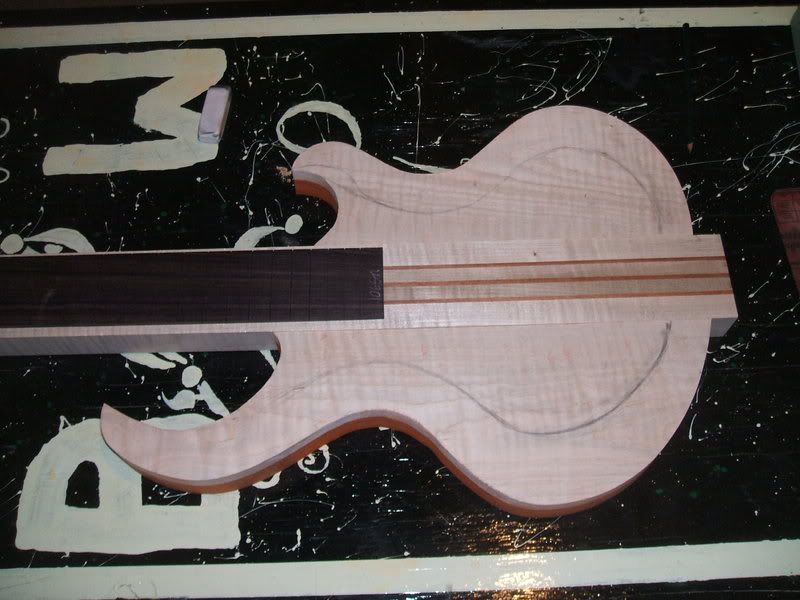
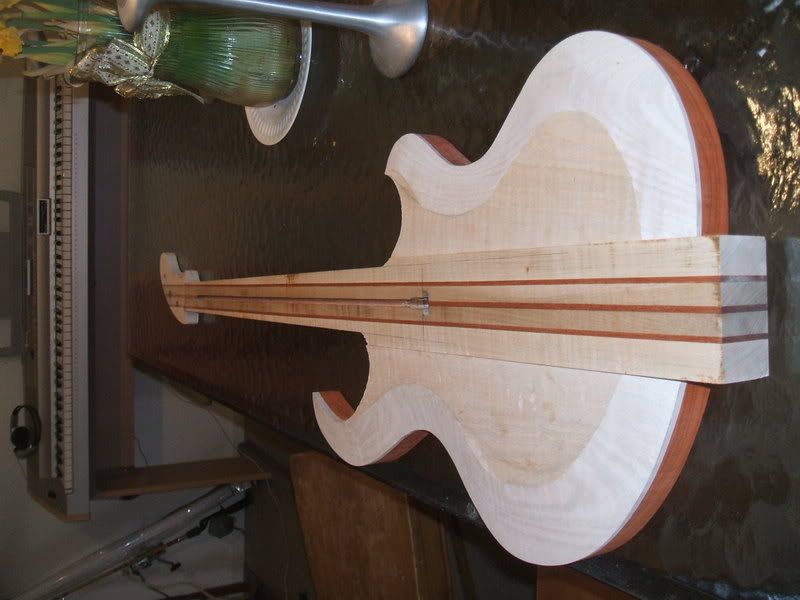
a little more progress, top has been sanded close to final, neck has a rough profile
top with a little water...
http://i68.photobucket.com/albums/i10/ledz...28/DSCF1302.jpg
http://i68.photobucket.com/albums/i10/ledz...28/DSCF1303.jpg
http://i68.photobucket.com/albums/i10/ledz...28/DSCF1304.jpg
http://i68.photobucket.com/albums/i10/ledz...28/DSCF1305.jpg
http://i68.photobucket.com/albums/i10/ledz...28/DSCF1306.jpg
-
Anyone got any ideas for finishes?...
White exterior latex house paint.
haha, funny you should say that. Before I started this bass I restored a 58' TV yellow Gibson double cut. The headstock was broken, and the original owner repainted it with white latex house paint back when it wasn't lead free! haha... no thanks...
But seriously, if anyone has any pictures of color-dyed thru-necks I would love to see them to get some ideas
thanks
-
I cut the body wings with a bandsaw, then sanded it to final shape with a belt sander and a drill-mounted sanding drum, the headstock was done in the same way. For the carve I used an angle grinder, marked off pencil lines where i wanted to put the carve, and then just tried to make long, even passes around the edge of the guitar.
Anyone got any ideas for finishes?... I know I'm most likely going to just clearcoat it and leave it natural, but I really like the look of color-stained maple. I have a blue/black sandback I did on a guitar that really popped the grain out nicely. I dont think any kind of burst would go well with the thru-neck laminate strips, for some reason something about the straight geometric lines framed with an organic sunburst doesnt seem right. So im toying with the idea of dying it black, sanding back, and then dye it again with some sort of subtle earthy tone like a forest green (over the body and neck). This is all theoretical at this point though, to tell you the truth I'm leaning towards a good ole' high gloss clear coat. I'm worried about what colored dyes will do to the bloodwood strips in the neck.
Thanks for the comments!
-
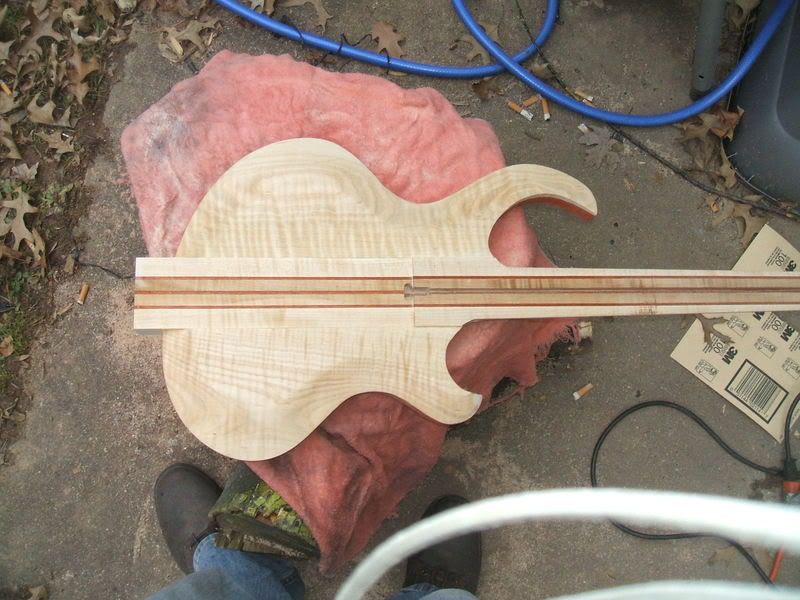
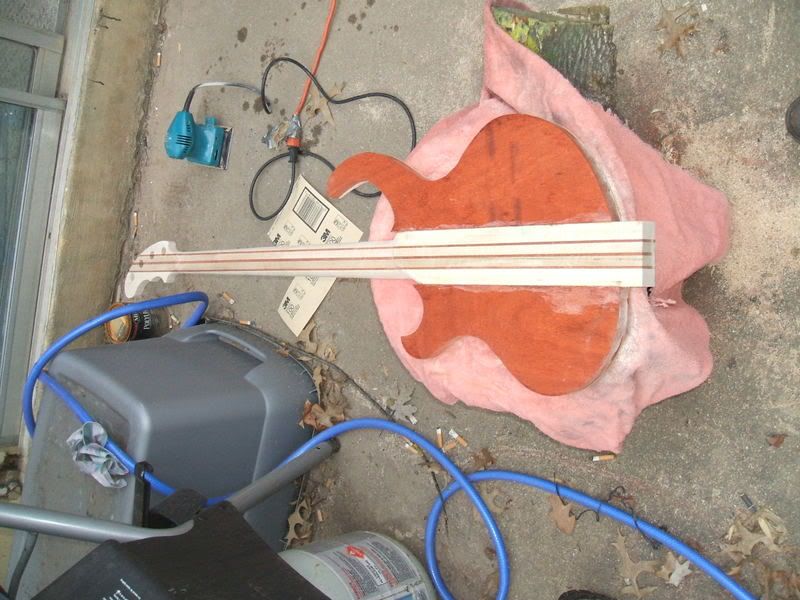
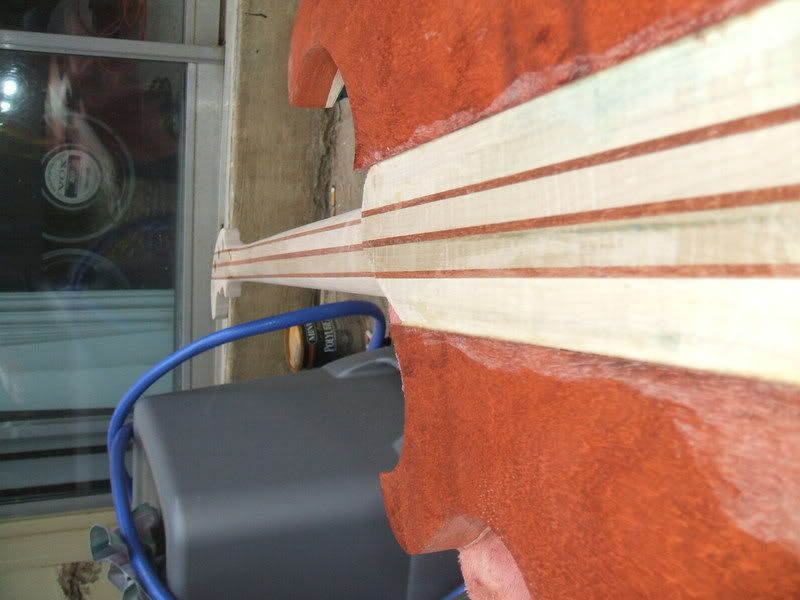
Hello everyone! been a while since i've posted... heres what i'm currently workin on.
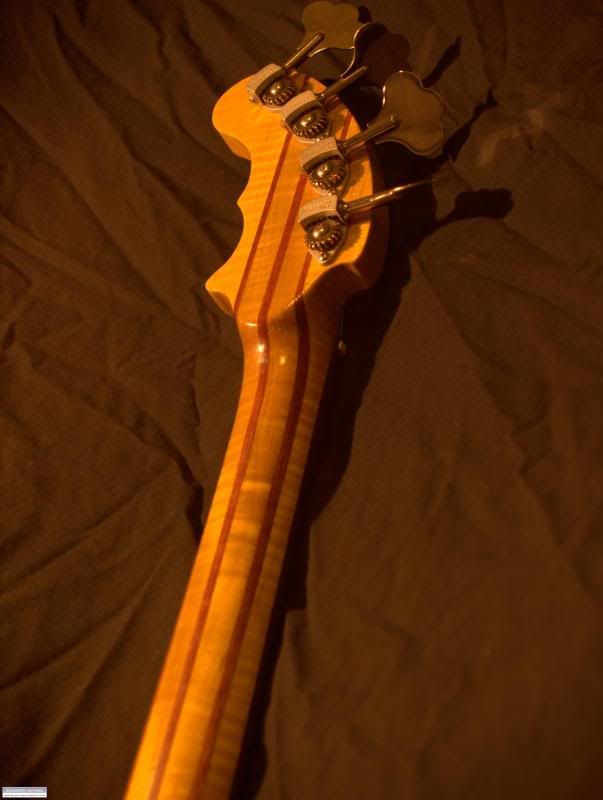
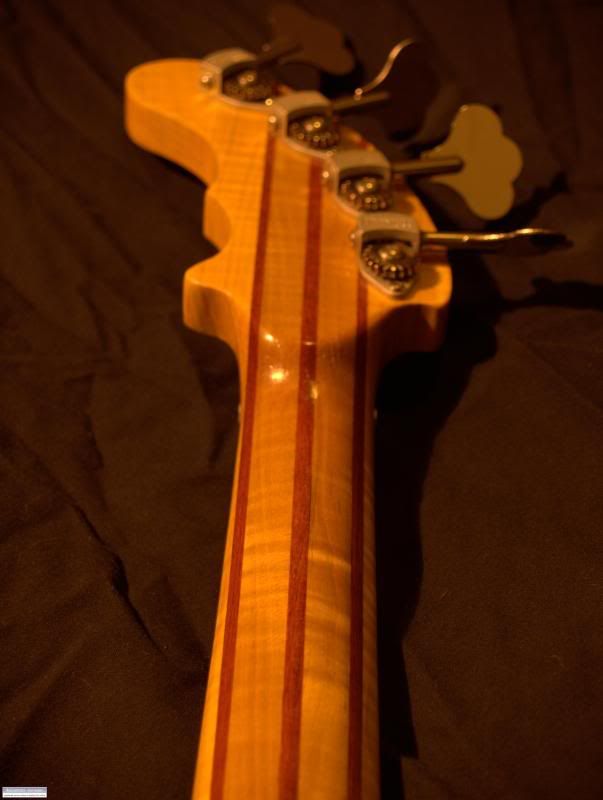
Thru-neck (curly maply/ bloodwood)
body - paduak back and curly maple top (solid, no chambers)
hardware is all off of a friend of mines jazz bass, except for the tuners which are hipshots
Body design was something i developed from a bunch of sketches
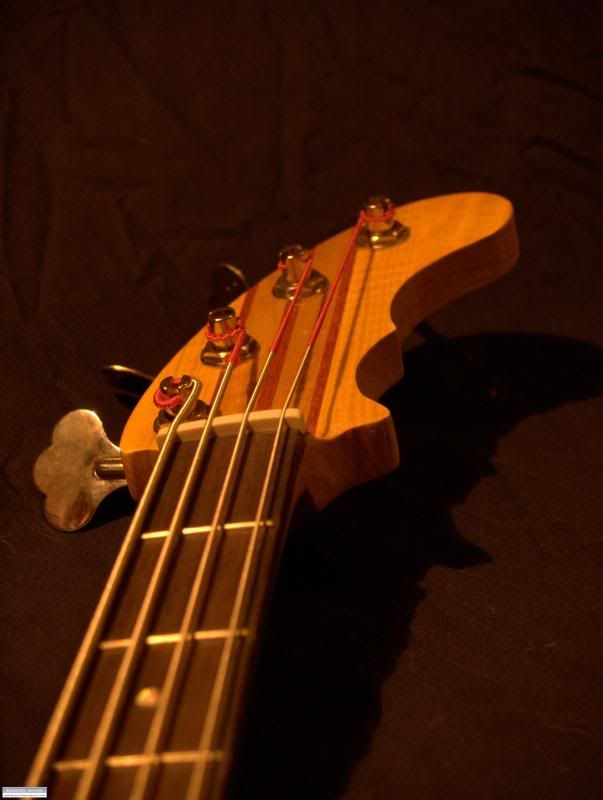
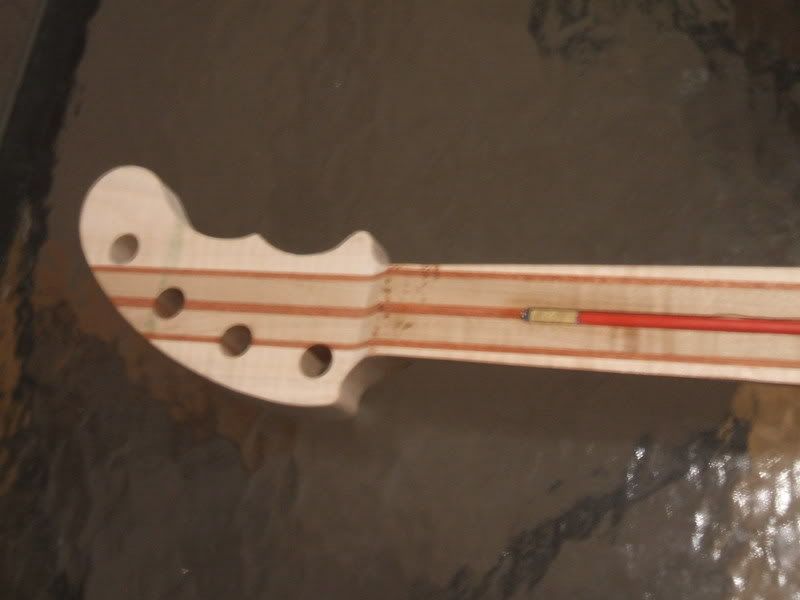
headstock design is meant mostly to achieve the straightest line from the nut to the peg-head. I'm hoping this will make tuning easier.
fretboard is indian rosewood
At this point all the shaping is rough and the wings are not yet glued on.
Let me know what you think!
http://i68.photobucket.com/albums/i10/ledz...28/DSCF1293.jpg
http://i68.photobucket.com/albums/i10/ledz...28/DSCF1294.jpg
http://i68.photobucket.com/albums/i10/ledz...28/DSCF1295.jpg
http://i68.photobucket.com/albums/i10/ledz...28/DSCF1296.jpg
http://i68.photobucket.com/albums/i10/ledz...28/DSCF1297.jpg
http://i68.photobucket.com/albums/i10/ledz...28/DSCF1298.jpg
http://i68.photobucket.com/albums/i10/ledz...28/DSCF1299.jpg
-
The same thing happened to me... quilt maple top, mahogany back... I was able to sand almost all of the color out of the maple (due to the fact that it is not a porous wood) and any color tint that was left was not noticable after my first coat of stain when I went for round two! but like quarter said.... dont be too aggressive with the sanding because you don't want to change the shape of your guitar too drastically. Goodluck!
-
I'm gonna go out on a limb by saying this... as it is NOT the correct way to do it... but if you sanded the primer off already it might have filled your grain... theoretically you could just keep priming and sanding it off until the grain is no longer visible... But getting grainfiller is probably the safest, least time-consuming way to do it
-
shove some toothpicks in there! it'll make it a little tighter fit and they shouldn't be visible once you put the tuners on
-
I think this would ultimately end up being a bad idea, for me at least i would have to have a smooth surface for my fingers to bend notes on, ESPECIALLY on the 12th fret.... but if you wanna carve it, AND still have a smooth surface AND make the carve visible, you could always do the carve you want to do, spread some white, blue, green, pink or W/E kind of paint you want to use in the bottom of the carve, and then fill it with layers of epoxy until its flush with the curve of the fretboard. With this method, the shape you carve in the wood will still be conveyed, and its not quite a typical 'inlay'.
-
I thought about doing this as well a while back... I think its a good idea and if it doesnt work out theres always the 'at least i learned something factor'
One problem that I dont think has been addressed yet is the grounding issues. With an electric guitar pickup (from the diagram that looks like what you will be using) you will need to have an electrical ground for the strings, otherwise you run the risk of shock/or the guitar will sound bad (a LOT of humming). I'm sure there is an easy solution to this problem, I just never delved into it that much.
Also as with all hollowbody electrics there is a lot of feedback from the amp... and converting an acoustic guitar into an electric guitar will make it feedback even more than that.
For a cigar box mandolin I made a while back I used a Piezo mic I bought from radio shack for like 5 bucks, it doesnt sound great, but sound comes through at least. The Piezo would eliminate the need to ground the strings, and you can mount it right inside the soundhole as its about the size of a quarter.
Hope this information helps/ is valid... im sure someone will correct me if im wrong
Cheers!
-
This looks really nice! good job on the finish!
I actually was fooled by the first two pictures as well... the masking tape looks really neat you shoulda just cleared over that!
-
Nice work with the rasp, just curious, do you have a router? or are you planning on chiseling out the pup cavities?
EDIT - nevermind stupid post, i just realized you used one for the truss rod channel
-
I'm thinkin about starting to use some black limba. I would probably want the same kind of gloss finish you have on this one. I plan on using nitrocellulose/compressor set-up, but what I was wondering was if you had grain-fill that limba before you shot the clear on? Ive never worked with limba before so I'm not sure if its ok to just laquer over the wood and build up a thick coat, or if an epoxy grainfil would make for a nicer finish.
-
Good to see you're at least making a guitar, instead of doing as many do and just talk about 'one day
getting around to it'. Thumbs up for that. Well done.
This looks like your headstock and neck you bought. Not that it matters greatly anymore,
I just appreciate honesty as most of us do.
Guitaraust.com.au (pre-made necks)
Don't stop with the building, Zeb. You're doing allright.
cheers, Stu
hmm, those necks look the exact same, I think you just got owned.
How many times are you guys going to beat this horse? Its dead... bury it
-
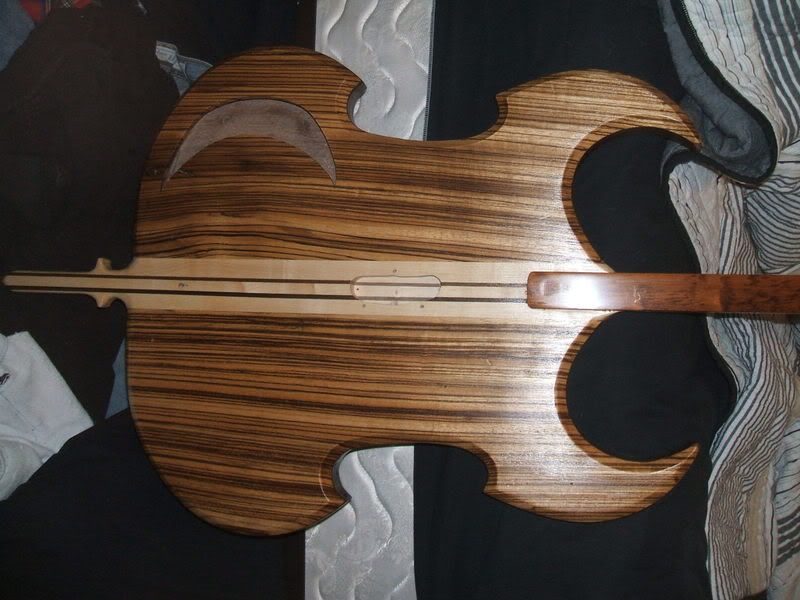
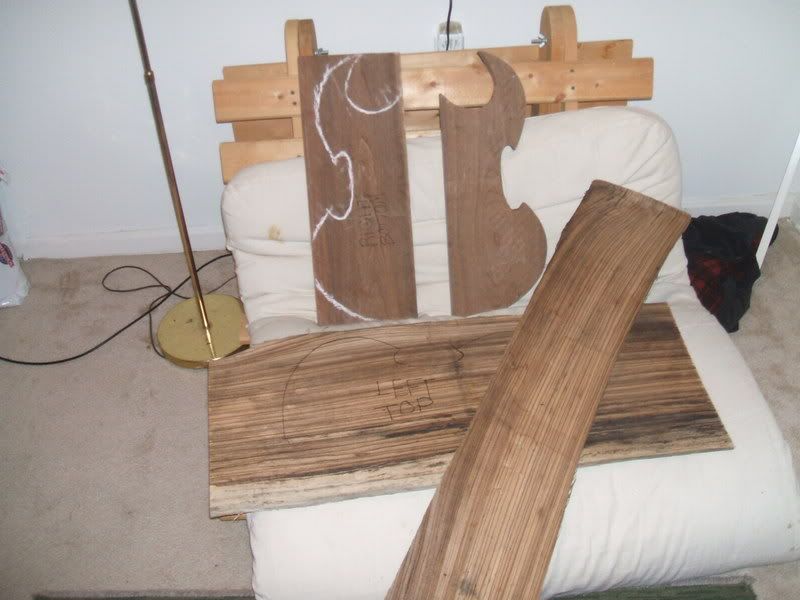
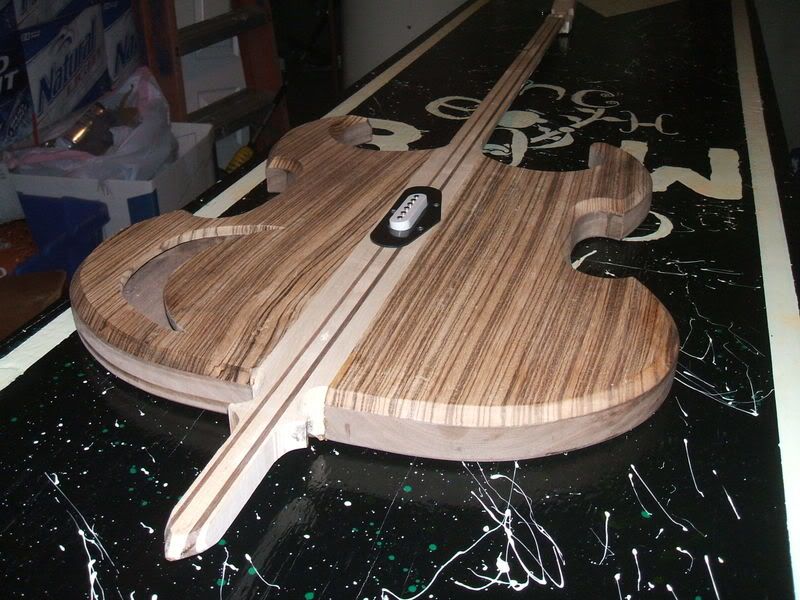
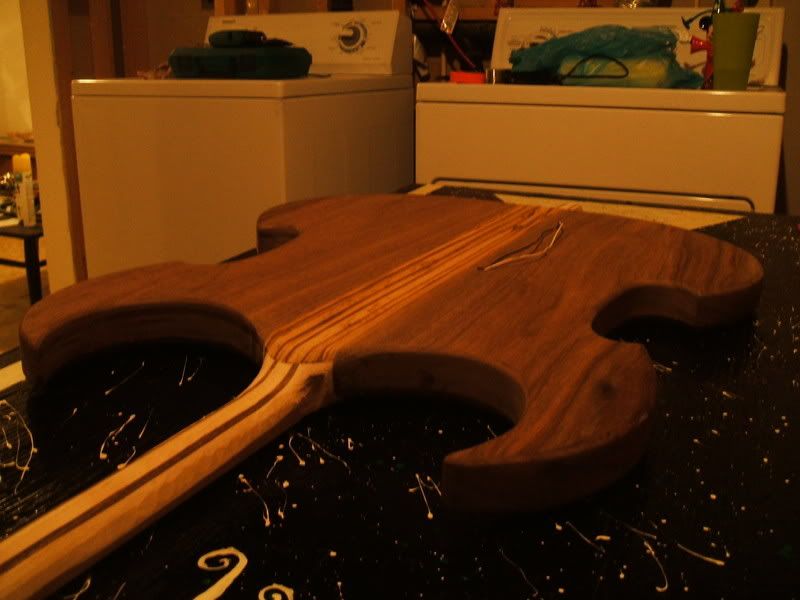
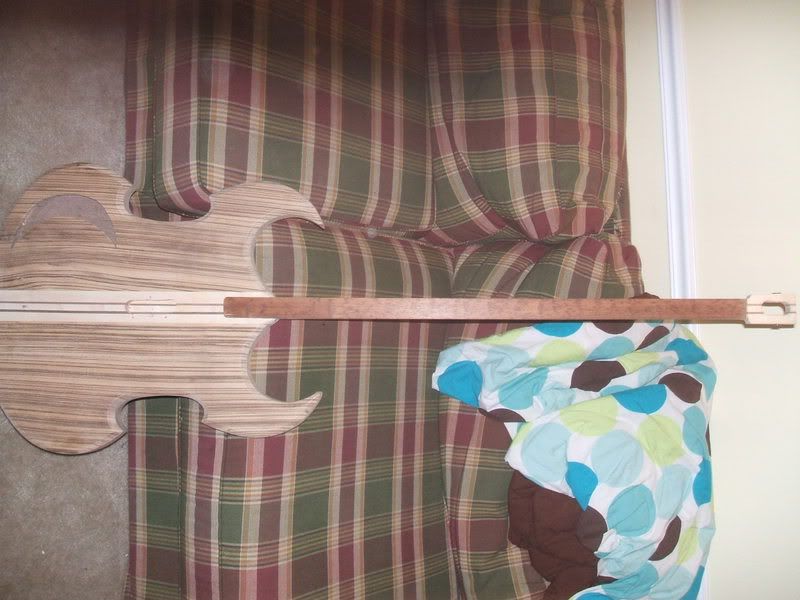
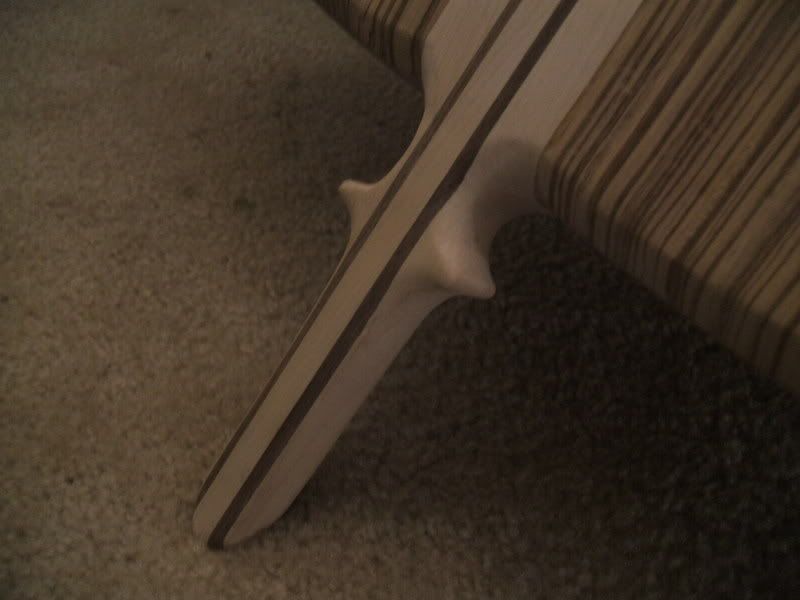
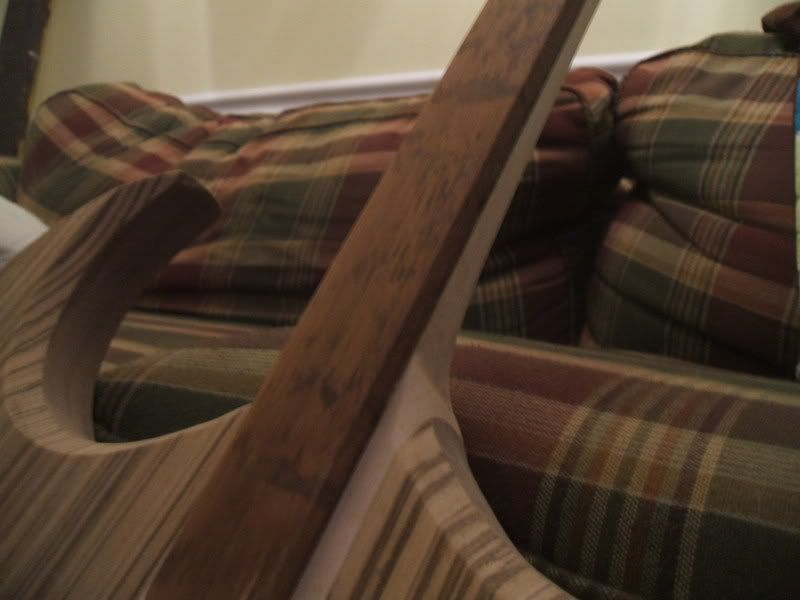
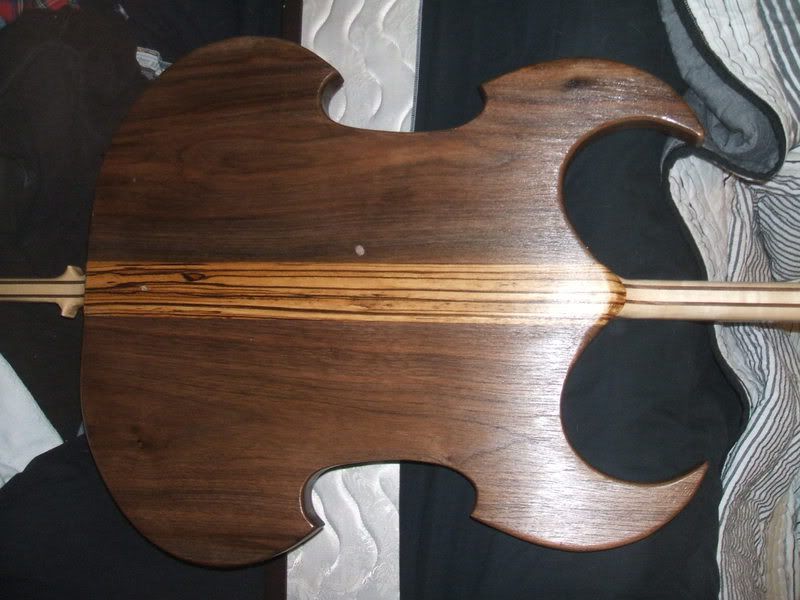
This is a project I recently built in my Sculpture I class last semester. Its been a while since ive logged in to the forums, so i don't know if anyone here remembers me, but Ive been lurkin!
Heres the specs
chambered Walnut body w/ zebrawood top
maple/walnut thru-neck (42" from nut to bridge)
snakewood fretboard
steel nut
part I found lying on my floor (possibly from a lamp?) I used for the bridge
single coil squier strat pickup
3/4 scale contrabass D-string
No Sound clips as of yet, but when the whether gets nicer I'm gonna record some stuff at my buddy's house
http://i68.photobucket.com/albums/i10/ledz...28/DSCF1014.jpg
http://i68.photobucket.com/albums/i10/ledz...28/DSCF1050.jpg
http://i68.photobucket.com/albums/i10/ledz...28/DSCF1058.jpg
http://i68.photobucket.com/albums/i10/ledz...28/DSCF1080.jpg
http://i68.photobucket.com/albums/i10/ledz...28/DSCF1088.jpg
http://i68.photobucket.com/albums/i10/ledz...28/DSCF1089.jpg
http://i68.photobucket.com/albums/i10/ledz...28/DSCF1097.jpg
http://i68.photobucket.com/albums/i10/ledz...28/DSCF1098.jpg
I'll post some finished pics strung up sometime soon
-
I voted for the Lahav, I think the blend of traditional woods with a contemporary style worked really well.
-
Its got all gold hardware with a black pickguard. The paint stick is just the easiest way for me to do it I guess, just two small wood screws that dont go all the way through the neck pocket, everything is assembled now so i'll try to get some pictures up tomorow sometime.
-
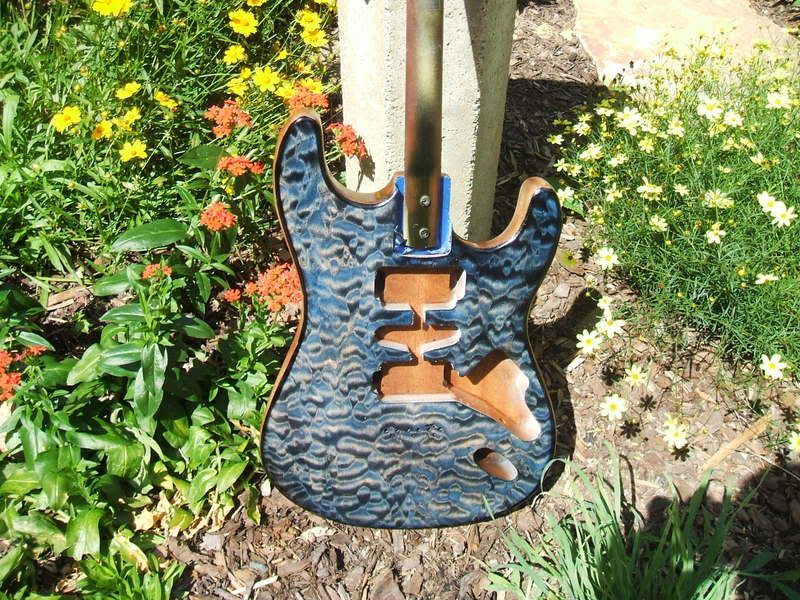
Some of you might remember this guitar.
http://s68.photobucket.com/albums/i10/ledz...nt=DSCF0451.jpg
Its a warmoth chambered stratocaster copy I did maybe a year ago?
Well, I recently purchased a spray gun set to use with my compressor, and the rattlecan finish just wasn't holding up. I used stew-mac rattlecan nitrocellulose to finish it originally, and it didnt hold up at all. It was most likely the way I sprayed the finish, but it was extremely easy to scratch and the finish was chipping off in spots. So I sanded it all off back down to bare wood. The method I used for re-staining the top is as follows:
1) sand off the thin crappy finish I put on originally
2) The back is mahogany, grainfiller was still intact, so I decided not to do it again.
3) taped off the entire quilt maple top
4) sprayed about 4 thick coats of nitro on the back and sides.
5) removed tape
6) wiped black colortone wood dye on the quilt maple
7) SANDBACK
8) wiped blue dye on
9) SANDBACK
This is where I made a descision that I think turned out nice, I was going to wipe on another coat of blue dye, however, with the maple exposed (and un-dyed) at the high spots, it gave it a nice denim kind of color. I also only sanded the top of the guitar, didnt do anything with the edges, this gave a fairly uniform black line of dye around the edge that I suppose would be another way to do a faux-binding.
10) clear coat the top and back.
which brings me to where I am now...
http://s68.photobucket.com/albums/i10/ledz...nt=DSCF0976.jpg
http://s68.photobucket.com/albums/i10/ledz...nt=DSCF0980.jpg
http://s68.photobucket.com/albums/i10/ledz...nt=DSCF0979.jpg
http://s68.photobucket.com/albums/i10/ledz...nt=DSCF0983.jpg
http://s68.photobucket.com/albums/i10/ledz...nt=DSCF0984.jpg
-
hahaha, so your hatin on ford, i kinda forgot that was still my signature, but I still have a ford, so it holds true!
Yeah, I think I'm gonna make a trip to woodcraft and see if they have clear i can buy there, hopefully I can make some nice shiny cardboard boxes too. thanks
- Louis

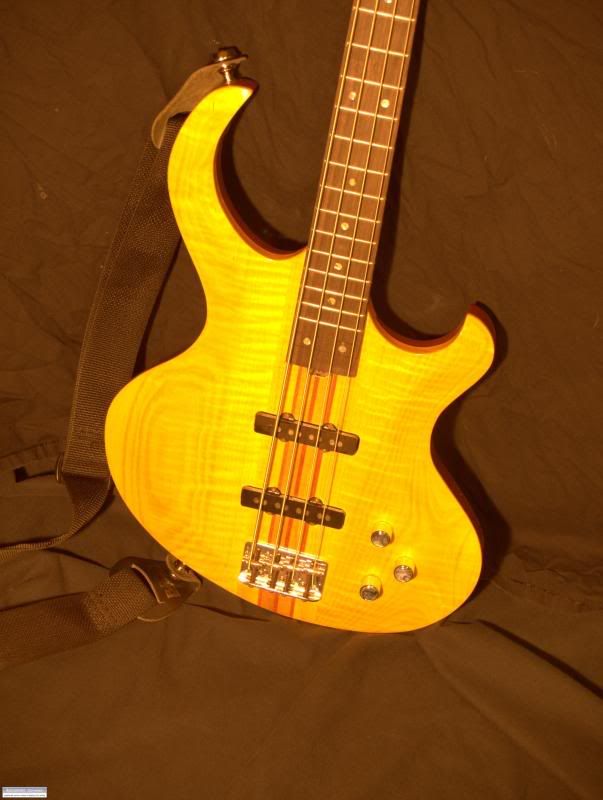
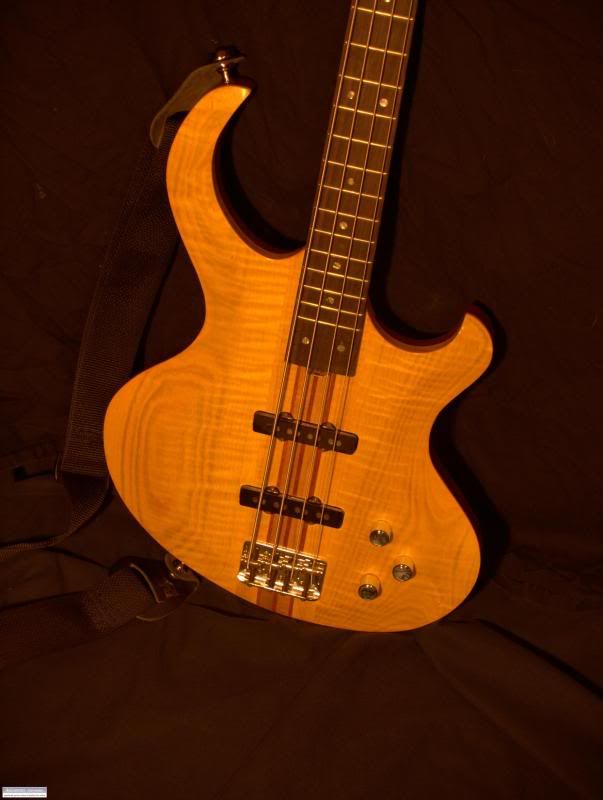
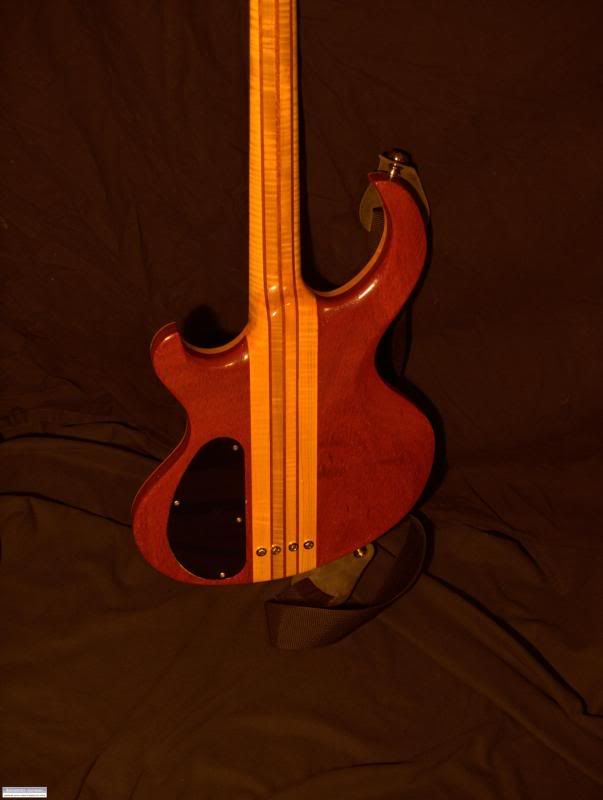
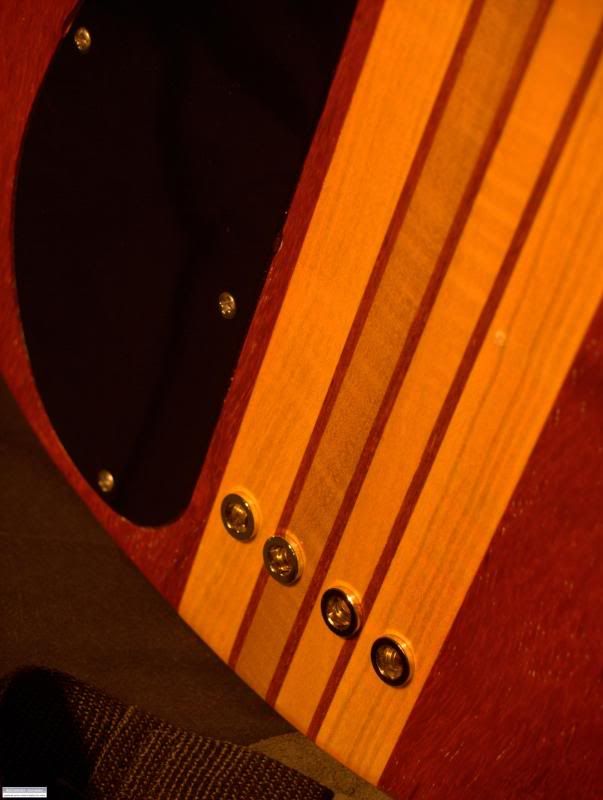
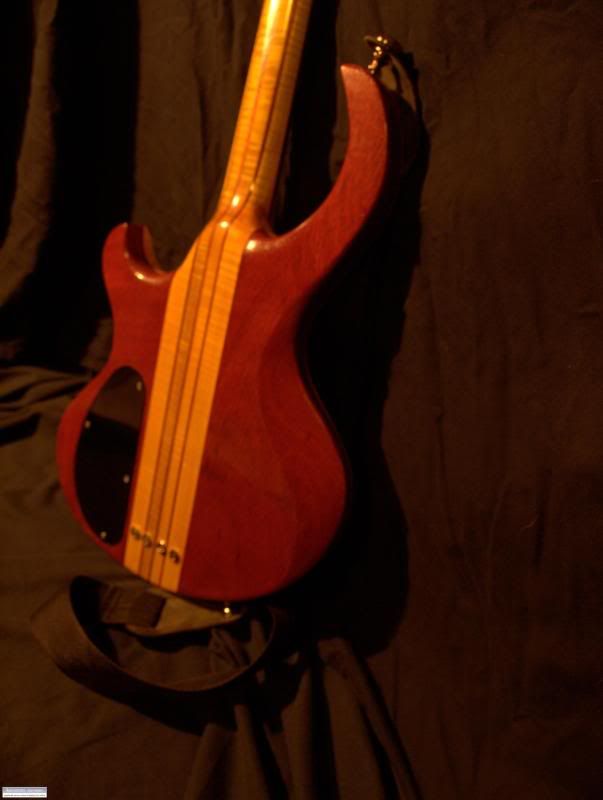
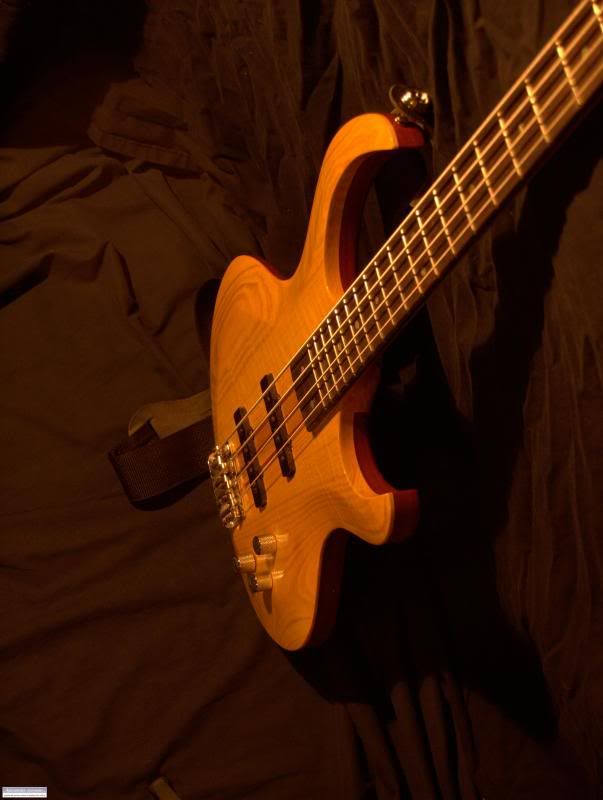
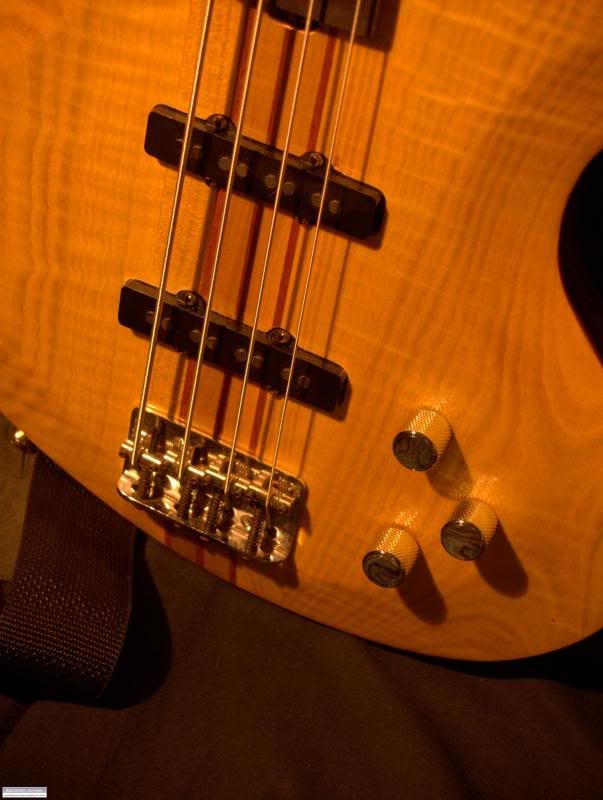
Curly Maple 4 String
in In Progress and Finished Work
Posted
thanks for the comments!
haha wes your eye is insane.. yes the headstock is thicker than 1/2"... its 5/8ths I agree with you though... it does look thick to me
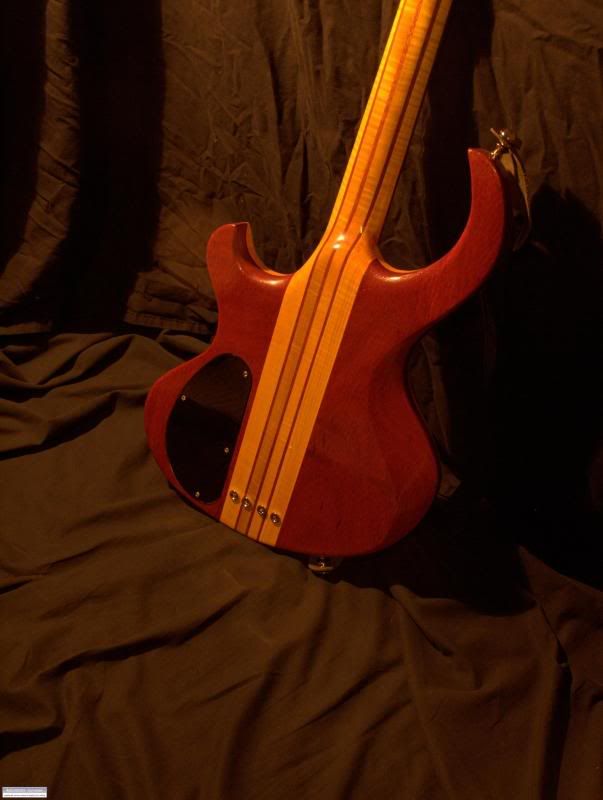
and I also think the back is a little more interesting to look at than the front is... maybe for the next one i'll go with solid padauk... the only problem is I kept breaking out in itchy bumps everytime I worked with that wood... but the grain looks so nice up close its definately worth it.
anyone got any ideas how I should go about putting a headstock logo on this thing? I was originally thinking I would be able to just print a waterslide decal of my logo and put it under the strings, but the wood laminates would make the logo read kinda confusing... veneer is kind of out of the question since I have a fender style headstock (not a 13 degree angle, but a round-over at the nut)... so im thinking about maybe a black oval with the logo in the center? could I paint that on, or is there a better/easier way to do this that im not aware of?