


orgmorg
-
Posts
800 -
Joined
-
Last visited
-
Days Won
5
Content Type
Profiles
News and Information
Tutorials
Product Reviews
Supplier Listings
Articles
Guitar Of The Month
Links and Resources
Forums
Gallery
Downloads
Posts posted by orgmorg
-
-
Drill a hole thru the bobbin, between the middle two pole pieces, and stick a red LED under it.
Awesome guitar!
-
Ash is a very strong wood, and is easy to find with straight grain. Only real problem is the open grain, and that can be filled or ignored.
-
The pics of the Wizard neck suggests a double action rod!
Not necessarily. Many single action rods have two rods.
Warmoth bass necks are made with a forward bow.
-
Just to be "clear", the green in poplar is not mineral streak, it is the natural color of the heartwood. The guitar in the pic is all sapwood.
-
Barnwood is fun stuff, and I am always pleased to see other people getting into it.
Look for barns that are falling down, especially in areas that are being developed for subdivisions, etc. Usually they end up getting bulldozed and burned.
Sometimes you will find one that you can pick what you want off of. Not always, but it never hurts to ask.
Don't worry about the bugs. If there are any living in it, they will leave when that cycle of their life is done ( less than a year )
Used to be a big worry for me, but I have had hardly any real problems with them over the years.
On the barnwood acoustic- the problem is that barnwood is full of surface cracks that go much deeper than 1/8", so if you resawed it that thin, it would be a mess.
-
Getting it sawn up and stacked and stickered right away is definitely the right thing to do.
Blue staining is indeed a problem on many white woods.
Make sure your stickers ( the sticks that separate the layers of the drying stack ) are dry, as well. Otherwise you will get staining where they contact the wood.
Sealing the ends with a wax solution like Anchorseal, or latex paint will help keep the ends from checking/splitting.
Best thing is to let it air dry for a while, outside, top covered, sides open, ends shaded.
Keep it up off the ground 8" or so, in a place with good airflow.
I use a couple methods for the secondary drying process, after it has shed the bulk of it's moisture. ( down to 18% moisture content )
One is to stack and sticker it inside, with a dehumidifier blowing through the stack. This works good for a small batch, in a room where you would be using a dehumidifier anyway.
The other is basically the same, except it happens in a 4'x8'x3' tall box which is also the outfeed table for my tablesaw, and a work surface. The sides have removable panels, so I can enclose it fully when the wood gets down to 12% moisture content.
I'm sure I have left some details out, but that's the basics of how I do it.
-
-
Just wanted to say that I bought a set of the CKO files, and sent them directly back.
Really poorly made.
The teeth were badly cut, uneven, and not very round on the bottom.
The files themselves were not even straight, and would not cut right.
Woodenspoke- how were the ones you got from them?
-
Don't know how close stewmac's necks are to the original, but here's their specs:
-
The smell is sweet, the way rosewood is, but different flavor, if that makes any sense.
-
Osage Orange is very stable IF you find a good piece of it. The nature of the tree is pretty gnarly, it has multiple trunks, low crown, leans and curves in what trunk you do have, which means alot of reaction wood.
Yep, that's osage, all right! One of the more crazy-growing trees I have encountered.
Yet, I have found that even with all the wacky grain, knots and fissures, it stays remarkably straight while drying. Especially considering how dense it is. Absurdly strong, as well.
-
Well I managed to get in touch with my friend, and he said that he was never able to get the mercury switch deal to work smoothly enough, and that the ultimate configuration involved a pendulum, like mentioned earlier, and some sort of optical device. That's about all he would divulge, which is just as well, since it's probably all I could comprehend, anyway.
-
Unbelievable tap tone, very stable, very heavy (52 lbs/cu ft.)
-
If I remember correctly, this one had 2 mercury switches, and relied on some funky circuitry to pan smoothly. My electronics comprehension is very limited, so I couldn't even guess what that circuitry was.
-
I mentioned the patent only because it made me think that there was considerably more than just a couple mercury switches. As I remember, he tinkered with it a great deal until he got it to pan smoothly from right to left.
-
Hi, sorry I didn't see this sooner.
Here's a pic of the guitar-
I built this about 20 years ago, for a friend of mine. He's the one who did the electronics.
All I know is that it is controlled by mercury switches like psw said. there's more to it than that, but I have no idea what.
I think he managed to get a patent on it.
-
My personal fave is the knotty pine like on the roundup series, but that might be a bit difficult in this case.
Other than that- the orange Gretches are just so hideously wonderful.
-
Yes- the function/form thing:
This guitar, and the others I do with the really weathered tops lurk somewhere in the middle there, more toward the form end of the spectrum. Though they are fully playable, and set up as well as any professional instrument, they are definitely not intended as everyday gigging axes.
They are really more of an art piece that can be played if so desired, and the ones I have done previously, with the antiquey hardware and such, are currently in an art gallery in Nashville.
This one is a bit different, and I'm not sure really where it's place is- the high end hardware is really kind of inappropriate in this regard, but I felt compelled to do it.
There is no finish at all on the weathered surfaces, so yes, it is a bit delicate, but not as much as you might think.
Beech is a hard, fine grained wood much like hard maple, and the weathering it takes on sitting out in the elements for decades is a fairly tough patina. It will flake off if treated roughly, but there is little danger of splinters, unless you are really getting amorous with the guitar, in which case, though I would not presume to dictate moral standards, I cannot accept responsibility for personal injury.
I have experimented with different ways of protecting the weathered surface, but any sort of finish really kills the look.
Best I have come up with is clear matte acrylic spray, like for charcoal or pastel drawings, but even that doesn't look quite right.
I have thought about the epoxy/bar top stuff like Wes mentioned, and I may try that, just to see what it ends up like, but it will be a completely different animal at that point.
I also do a different approach, on other guitars, with salvaged wood that is not really weathered per se, but has still developed a nice patina over the years. This looks really cool when sanded lightly to highlight the original saw marks, and then finished normally- well as normally as I ever do anything.

This method produces a much more practical instrument, though not the same as the old barnwood.
Thanks for prompting me to explain this- I have been meaning to come up with a good way of describing the various degrees of utility of the guitars I have been making. This is a good start, I think.
-
It's pretty simple, really.
I usually do it on a really soft wood, like poplar or butternut.
Basically, after sanding it to 240 grit, I take a polished stone ball, about 2.5" diameter and start banging away at it until it is more or less uniformly dimpled.
Then, I do a wash coat of thinned shellac, wiped on with a rag.
Regular old shellac in a can works fine for my purposes, since I don't use any other type of finish over it, but if you wanted to do a top coat of lacquer or such, a dewaxed shellac, like seal-coat would be better.
Then, I use a less thinned mix of shellac, tinted with Trans-Tint dyes, and wipe it on and off, alternating with black and brown, until I am satisfied with it.
After that dries and hardens, I usually sand it very lighty with 400 grit, and apply a couple coats of untinted clear or amber shellac.
It's a really easy, low-tech finish, and there are probably many ways it can be modified.
Varying the diameter of the hammering tool will give different textures, as well.
-
Thanks All!
I'm really digging it too, now I just have to get someone to play it who can really play.
I'm OK on guitar ( I primarily play bass ) but I'm pretty useless with a whammy bar.
MATT- The EMG P series actives run about $105 each.
I love the way they look, nice and simple, mount right in the hole with no other hardware.
I forgot to mention the woods-
The neck is cherry, with a osage orange fretboard, and the body is cucumbertree, with a weathered beech barnwood top.
Cucumbertree is part of the magnolia family, like yellow poplar, which it is very similar to, but even lighter and softer.
-
An EMG p60 is essentially an EMG 60 in a P-90 size housing. They offer the 81 and 85 this way as well.
-
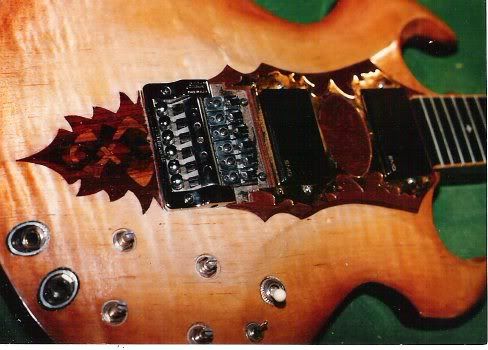
This guitar is basically the same as the last one I entered in GOTM, but with a different twist in regard to the hardware.
It occured to me that the weathered barnwood and distressed finish would look really cool with modern black hardware.
Pickups are EMG P-60 wired for 18 volts
Kahler 7300 trem with Floyd style locking nut
Hipshot classic open back tuners
24.625" scale, 24 frets


-
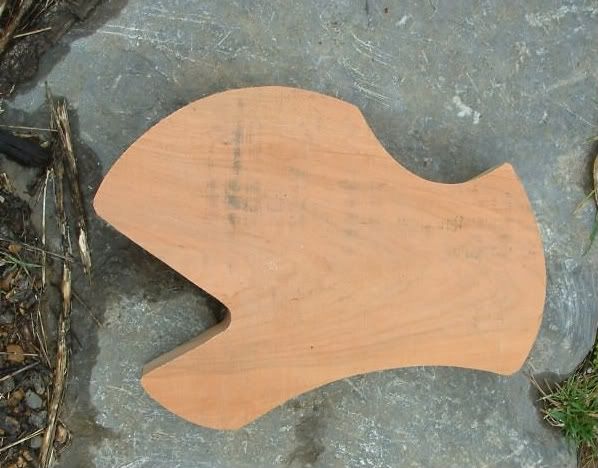
I think mine looks more like a goldfish cracker than a crow.
-
Haha, Thanks!
I drew the outline on the back, so it would be easier to cut on the bandsaw, with the cupping and all.
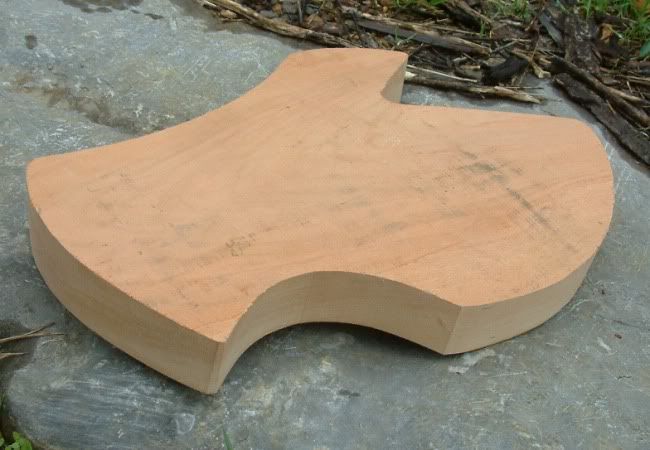
So, as you can see from the front, I have decided to reverse the body shape:
I feel this is well within the parameters, since it the sort of thing Gibson would be likely to do.
Also, this will be a set neck, since the shape is much more suited to that than the bolt on that it actually was.
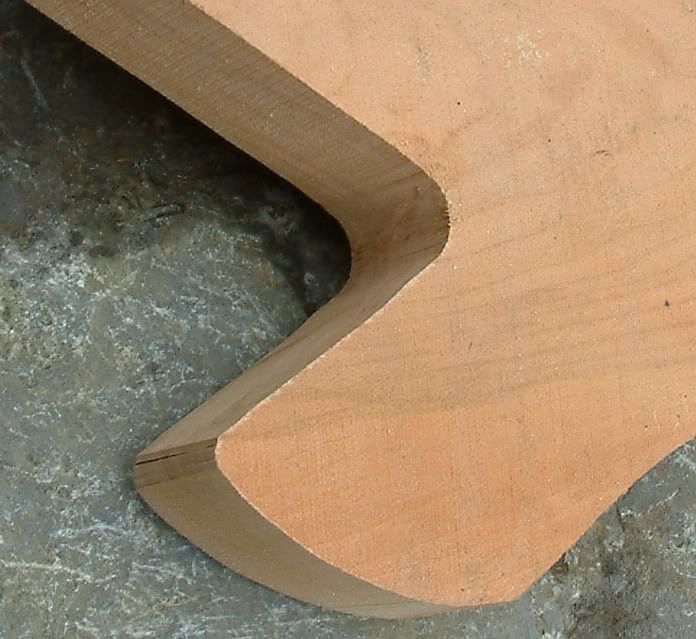
So, I have changed that area of the shape accordingly:
Cuts like buttah:
Edit @ Wez- No, but I like that, too. "Corvax" was a character in a language instruction cartoon thingy called "Muzzy" that was rather trippy.

Bearcaster
in In Progress and Finished Work
Posted
Hi all, wanted to share this one I just finished up for my friend, Al "Bear" Rozelle, who has the only music store out in this part of the boondocks.
The top of this one is yellow pine bead board, salvaged from a door of a railroad freight house, with the original green paint.
The back is eastern red cedar, and the neck is beech, with a black locust fretboard.
Al was born in Pennsylvania in 1945, so there's the story behind the pickguard, and the knobs have caps from local breweries of that era.
The tailpiece is made from an old iron strap hinge.
Pickups are from Allparts, made in Japan.
Bridge is from Tonepros, with graph-tech saddles. I got it for a guitar I built with a Bigsby vibrato, but the stupid saddles flex and don't return to the same position; so Al gets a fancy, overpriced bridge gratis, and the Bigsby guitar gets a cheap Wilkinson roller bridge that works perfectly.
Tuners are Grover Deluxe.