


Stew
-
Posts
146 -
Joined
-
Last visited
Content Type
Profiles
News and Information
Tutorials
Product Reviews
Supplier Listings
Articles
Guitar Of The Month
Links and Resources
Forums
Gallery
Downloads
Posts posted by Stew
-
-
I have a .010 gap at the 8th fret using the capo and depressing the last fret. The truss rod is just about loose and there is a slight bow at the nut. Strings are .100 - .045. Also strings have been on for about 3 days.
-
Ok here's the deal. I'm building a Jazz bass using parts from Warmoth and Gregg Rogers (I know, but don't go there).
I started assembling everything and noticed right off the bat the strings were on top of the frets. No problem, just raise the bridge saddles. Well I did the 6/64" bass and 5/64" treble side string height at the 17th fret. Still fretting out. Oh and by the way, there is no tension on the truss rod.
So my 4th string buzzes behind the nut but goes away when I place pressure on the string behind the nut (I'm sure the string tree installation will take care of that).
Now my bridge saddles are raised to the point of almost coming off the adjustment screws, just to get the fretting out eliminated.
Can someone provide a check list of what to problem solve in case there's something I've forgotten to check? I feel straightening out the neck will just bring the strings closer to the neck. Frets are perfectly level so that's not the problem. I'm wondering if maybe the neck pocket is too shallow. There is no paint build up in the pocket. It's a vintage version so I'm using the bridge and neck chrome pickup covers and the strings are too close to the covers. I need to do something to drop my bridge saddles down so that the strings don't buzz, string won't hit the chrome covers, and the saddles are at a more medium height without being in either extreme.
Also, the nut is not cut too low. When pressing the string at the first fret, the strings just clear the 2nd fret fine. Help please.
- Stew
-
I think I will fill it first. He sprays very thin and I'm sure it would shrink over time. I guess polyurethane can shrink? But not like lacquer, right?
-
Cool. So I can apply epoxy just like a grain filler? (spread with a plastic card to fill the wood pores?)
-
I'm going to start subbing out some paint work. My artist is used to painting flames and whatnot all over custom cars and hot rods. So he's delt with metal more than wood. I will be present to do some of the prep and in between coats/masking off work. So what could be used for a clear body (clear showing wood)? In other words, some wood grain will be showing in addition to some color coats. Can I just use any of the House of Kolor base paints? Or would I have to shellac first in order to keep the wood showing. Can I use whatever their clear coat product as a base coat, then shoot various layers over that clear coat without a funky finish reaction? Or is all that based on what % of hardener, retard, etc is used for other coats?
-
Stew,
Could you post the contact info for " Scary Productions ".
Thanks
Mike
Scary Productions
Business Services
7955 Haskell Ave Ste. 4
Van Nuys, CA 91406-1911
(818) 782-8204
Ask for Mark or John. They don't have a website, mostly do things word of mouth since they get plenty of business.
- Stew
-
Do you mean something like this?
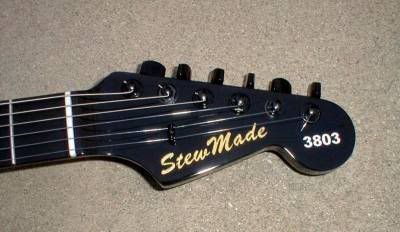
This is still waterslide inkjet decal paper (www.supercaldecals.com), but you have to use white embossing powder to get the white color to show up. So on the paper, you will barely be able to see the white until you place the decal on the black headstock. You will want to get clear waterslide decal paper, not white.
BTW, the gold is done by embossing powder too.
-
Hey that's pretty cool, I like it. It's very proffessional looking
It should be, they are the same company that makes Fender's decals. Actually they also make headstock decals for Ibanez, ESP, and many other guitar companies. They are called Scary Productions out of Van Nuys, CA.
How large (or small) of an order can you place with them? Although, I'm going to assume it's kind of pricey...
Like most custom made things, the sky is the limit (or your wallet). It would have been cheaper if I had made my original logos on Acrobat Distiller in the form of a TIFF file. But since that was not what I used, they had to re illustrate my design and made the rub down transfer from their work.
Yes, very pricey, especially since I requested Fender metallic gold for my lettering body. Minimum order is one sheet. Depending on how small your logo is, you can get quite a bit on one sheet. I got 39 decals on one 8 1/2" X 11" sheet. Reorders will be much cheaper since they keep the negatives and artwork filed. My order was well over $100. I think the quality of the decals were worth it. I was tired of using cheap inkjet, waterslide decals. These decals are very sharp and clear.
-
Hey that's pretty cool, I like it. It's very proffessional looking
It should be, they are the same company that makes Fender's decals. Actually they also make headstock decals for Ibanez, ESP, and many other guitar companies. They are called Scary Productions out of Van Nuys, CA.
-

Lightly sanded polyurethane and cheese cloth to remove any dust.

No need to find an outline, just cut the size area you need to work with.

Align where desired.....

..rub the transfer using your fingernail or blunt, rounded object that won't leave depression marks.....

..slowly lift the paper...

..and there you go. A perfect logo without any decal outlines.

Final clear coat cover.
-
Ok, I used Deft lacquer over the decal. No problems. I rough sanded the existing urethane with 800 wetsand, then applied the rubdown transfer, shot a light coat of lacquer, let dry for about 30 minutes, then shot 3 more coats (1 slightly wetter coat, once after every 3 hours). I'll provide pics later.
- Stew
-
-
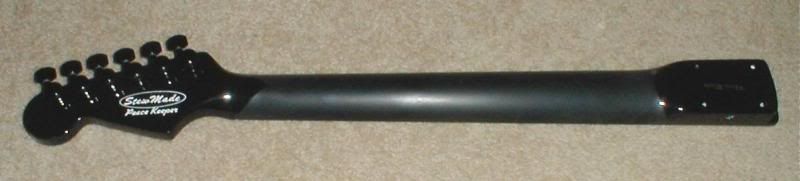
I'm getting my own headstock decals. It's the rubdown transfer or known to you guys as "Chromatecs" or "INTs". Lacquer is out and will ruin the decal.
I outsourced my finish work on some of my guitars for time reasons. But I now want to place my decals on the headstock. In the future, if I outsource, I'll just have them apply at the time of finishing.
Anyway, anyone got any ideas?
-
Two questions:
1. How big of a surface area do you need?
2. Why vinyl? Why not waterslide acrylic?
-
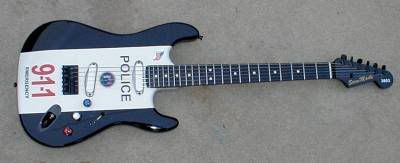
I think yes because it stays true to the whole title of this website, "PROJECT GUITAR".
It takes enthusiasm to get through a build. That's the best thing about this website is to log on when you run into a snag and hopefully you avoided some major mistakes in the process.
I've stayed away from this website for months now because I've found that a few "experienced" builders love to come down hard on the so inferior builders. That killed my encouragement and enthusiasm.
I don't know if it's ego or jealousy but it sure doesn't help those who are just starting out with wanting to build more guitars in the future. We all have to start somewhere.
Here's what a newbie can do with positive feedback...
From this....
..to this.
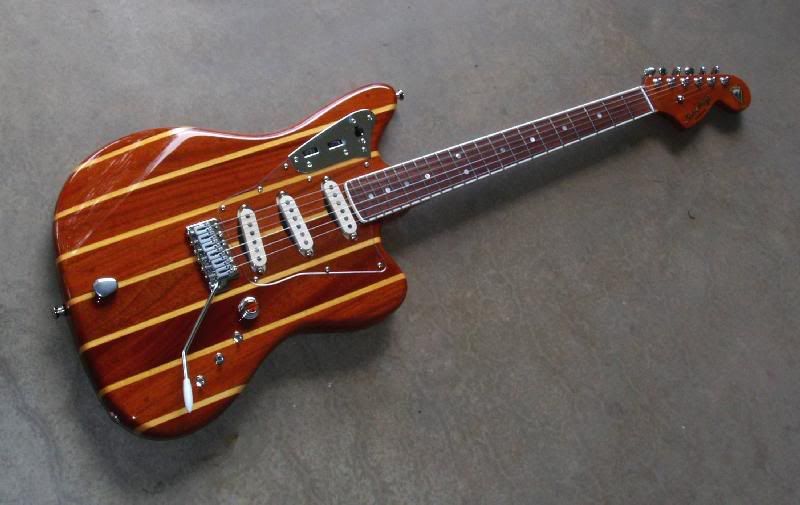 Guitar of the month, August 2005
 -
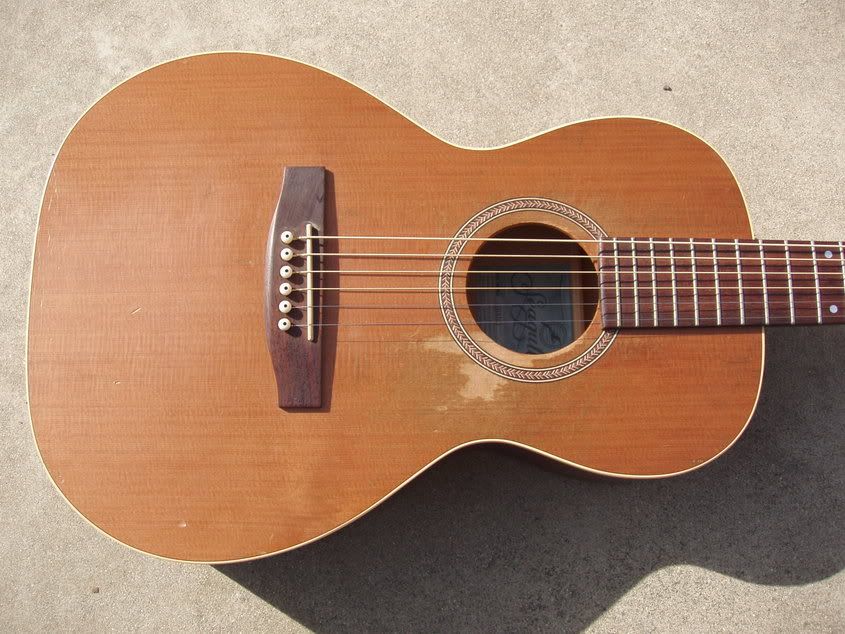
Well someone gave this to me to experiment with repairs. He found this in a rummage sale, sitting in it's case in direct sunlight for hours. He opened the case and found the wooden bridge mount coming unglued and starting to lift off the soundboard by the string tension.
The bridge has individual flat head screws to mount (not glued) and I found underneath the pearloid inlay, is two hidden phillips head screws. But the screws are larger in diameter than the inlays. I thought maybe the inlays were to cover up the screws. The screws don't seem to have any connection with the bridge at all. The screws are flush under the raising bridge. Here are some pics to better describe what's going on.


The glue has hardened. So what can I do to remove the bridge and reglue? Of course I will remove the strings and pins first.
-
Um, having trouble cleaning the finger grime off of the soundboard. Any suggestions? I tried mineral spirits but nothing.
How different is naptha as far as a cleaning agent versus mineral spirits?
-
"What would you use to fill and build up with?"
Lacquer. I plan on lightly sanding the entire sound board first then spot fill the dings and wear area, level sand then top coat the entire sound board. It won't be perfect but it will be a great improvement. Luckily Seagull guitars uses lacquer for their guitars so the finishes should be compatible.
-
I'm about to repair a friends Seagull parlor guitar. I'm going to place a pickguard in the area of wear which has worn through the thin lacquer and into the bare wood. The pickguard will be just outside of the rosette circle.
It's a little dirty from finger oils around the wear area and there are a few dings to the sound board.
I'd like some advice to see if I'm on the right road to repairing this damage. I was considering Murphy's wood soap for cleaning up the dirty surface but I'm wondering if that product would leave a residue that could interfere with the nitro lacquer.
These are my ideas:
1. Clean the entire soundboard of all dirt and grime.
2. Fill any small dings
3. Build up the worn through area to the level of the surrounding sound board
4. Flat sand entire surface to ensure completely level.
5. Spray a few light coats of lacquer over the entire sound board.
Oh, and by the way, I do plan on masking off at the binding as well as fingerboard and bridge.
I don't plan on wet sanding since the whole guitar is a satin finish and the lacquer I'm using is also a satin version. I may wet sand the edges where there might be masking lines to blend in at the binding.
Please let me know if there's anything else that I'm forgetting or may need to add to my check list.
-
Thanks, I'll ditch the Dremel idea. Plus I think you saved me from having to buy another Dremel tool due to burn up.
- Stew
-
I'm about to take on my first binding project. I've been eyeballin' those Dremel attachments for routing out the canal to place binding. I'm very handy and comfortable with the Multi power Dremel tool and was wondering if anyone has had success with this attachment?
BTW, anyone have some great tutorals on applying binding?
- Stew
-
Ok, lets get back to values. So a .10 will have a huge effect over a .010, .022, .033, .047? I think I better double check the value of the .10 mfd cap, unless it the material that's making the difference. I'll swap out for the mylar .10 cap. Who knows that might sound way too dark.
-
Ok, I have a set of vintage designed pickups. Alright, Fender LTD Masterwound pickups. Fender says it does not matter what cap you use. If you have a .022 cap then that's fine. I say not true. I had a set of Custom 54's a few years back that replaced my American Standard Delta pickups. OMG, it was horrible how brittle and bright these pickups were. I almost returned them until I read a review on Harmony Central about using a .1 cap (.1 is the same as .10?). I got some pancake ceramic .1 mfd capacitor and it really helped. Now it sounded like a nice 60's set of pickups.
Now I've heard the argument over and over as to the .1 cap should have made things brighter, not the reverse. But it did. I even did a comparision with some Custom Shop '56 Time machine pickups. The .045 cap with those pickups sounded bright. Looked like a mylar foil cap. I swapped out with the .10 ceramic cap and everything was perfect.
So now, I've installed my Masterwounds which have about a 6.5K resistance, alder body, maple w/rosewood neck (Custom Shop Relic neck), and the .10 mfd ceramic cap. It sounds way too thin. Has the spank of a Tele bridge pickup. Theh only normal sounding pickup is the neck which sounds woody but with some Hendrix high end sparkle to it. Well, to me the .10 mfd cap is not working. I have some .10 mfd mylar foil caps as well as a .010 mfd mylar foil cap.
Confirm for me if you can: .022, .033, ......= brighter? .10 and less is darker until you hit .022 mfd? I'm sure all I need is just one step value in the appropriate direction to trim some of this high end off. I'm turning my amp treble down to 4 and bass to 10 on my Fender Princeton Reverb. I'm getting a nice strong volume too so it's not the pickup height which are at 8/64" bass side, and 6/64" on treble.
What's the electronics theory on caps and tone? I understand the theory about the cap affecting how much high frequency is bled off on the pot. I'm just mentally stuck on values and how they affect tone and how some materials can have an effect also (i.e, paper/foil, ceramic, electrolytic, mylar/foil, etc)?
-
I voted for dougs because there's some incredible work involved (not to say anyone elses was any less). The only thing I didn't like was the top. Reminds me of Exorcist Vomit.
You guys here really have a thing for clear figured wood finishes. I'm glad Odd Boy was submitted with a metallic finish. It's just I could not get past that headstock shape. Sorry.
Need Jazz Bass Trouble Shooting Help
in Solidbody Guitar and Bass Chat
Posted
Pickups are far away from the strings, it's those chrome pickup covers (ash tray) that hitting the strings because the strings are so high yet they have to be that high just to eliminate fret buzz. But the action is too high.
I think I'll try to remove some pocket material. Possibly some shimming is needed?