


Bizzar_Guitars
-
Posts
80 -
Joined
-
Last visited
Content Type
Profiles
News and Information
Tutorials
Product Reviews
Supplier Listings
Articles
Guitar Of The Month
Links and Resources
Forums
Gallery
Downloads
Posts posted by Bizzar_Guitars
-
-
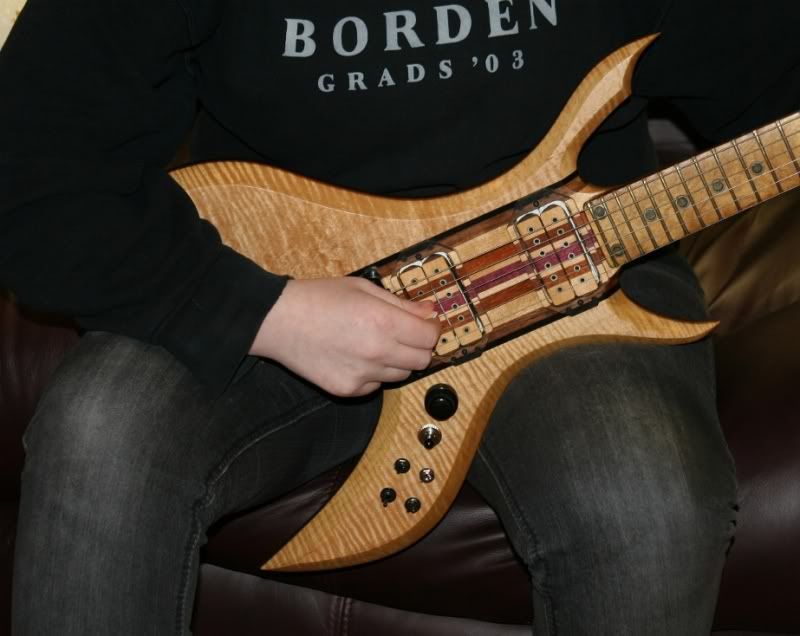
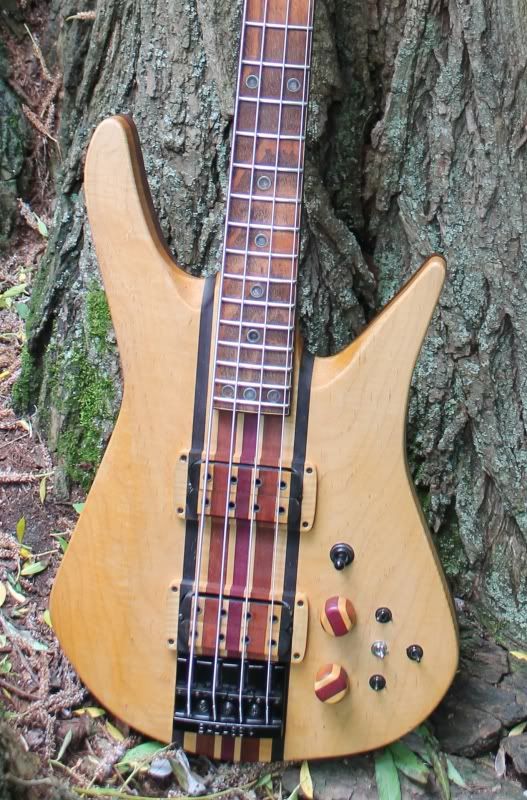
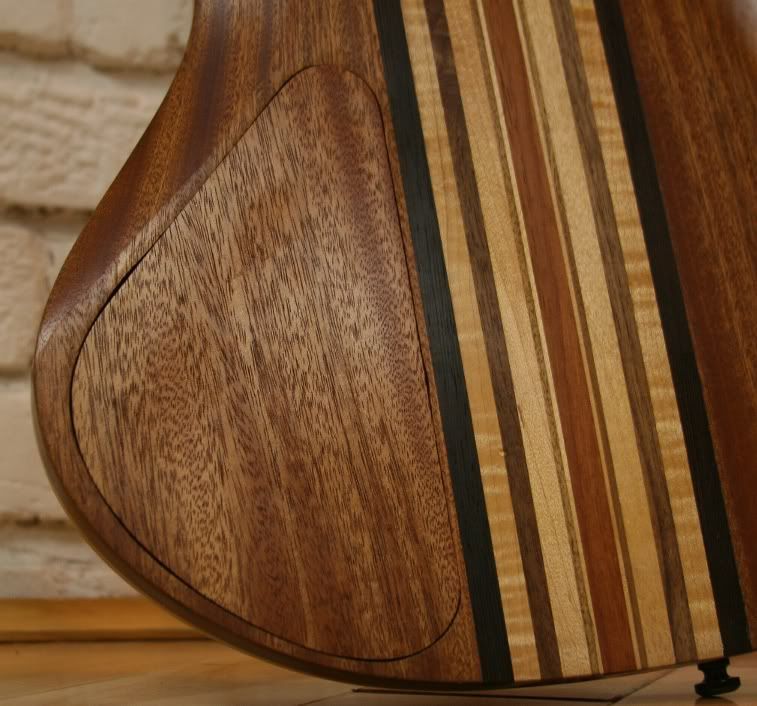
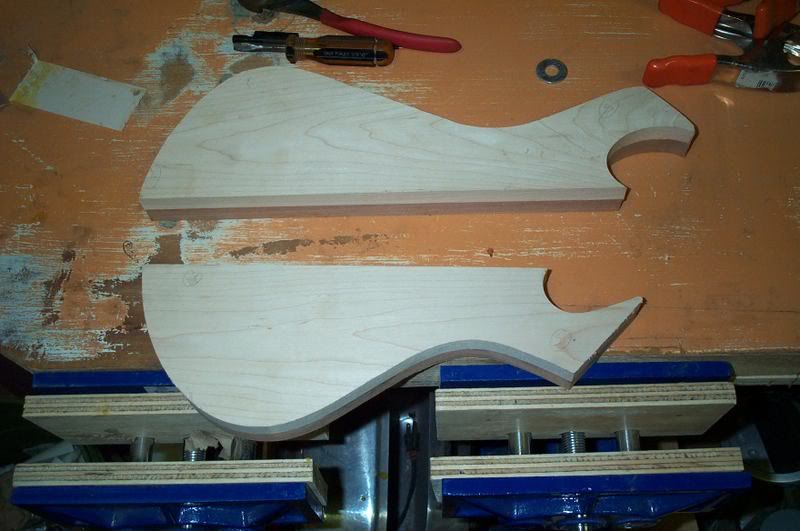
Here’s one of my latest works in progress, Hades.Hades, the Greek King of the Underworld, the god of death and the dead.Hades Specs24.75" scale, 5 Piece Laminated Neck Through (Purpleheart, Maple and Mahogany) all reclaimed woods
 Off set ‘D’ profile with a Figured Bird’s eye Maple fretboard (Compound Radii - 12" @ Nut - 18" @ Body)Mahogany, Maple and Purpleheart binding24 wide/high frets (+ Zero fret)44 mm wide black Corian nut3 mm LED (aligned between top two strings) with Fibre Optics in silver tubing side dots (lit from fretboard LEDs)12̊ headstock angle, 3̊ body angleSingle action truss rod with a Spoke Wheel adjustment nut @ HeadstockChambered Mahogany and Roasted Maple body with figured Maple core and Wenge & Figured Maple stringersBlack Tune-O-Matic bridge, Tuners, String Ferrules and Strap buttonsBizzar Humbuckers with matching pickup bobbin tops with ICS (Individual Coil Selection) switches3 way pickup switch & Switchcraft stereo jack mounted in custom jack plate in the back of the top wing2 - 500K Audio taper Volume pots, 1 - 500k Master tone pot with 0.23 Tone Capacitor and treble bleed circuitKnobs made from neck through off cutsMahogany Control Cavity cover, matching back wood grain attached with embedded rare earth magnets2 AAA rechargeable batteries inside control cavity1 on/on/on mini toggle switch (for LED colours)Stereo jack in custom jack plate turns LEDs on when 1/4" jack insertedHand rubbed Tung Oil finishHere’s some pics of the build process:Rough pencil sketch originally based on a bastardized B.C. Rich Beast
 CorelDraw plan with specs (it was originally going to be have three humbuckers)
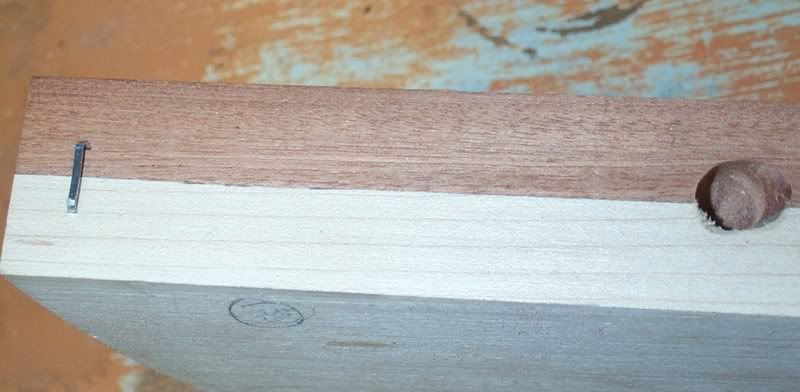
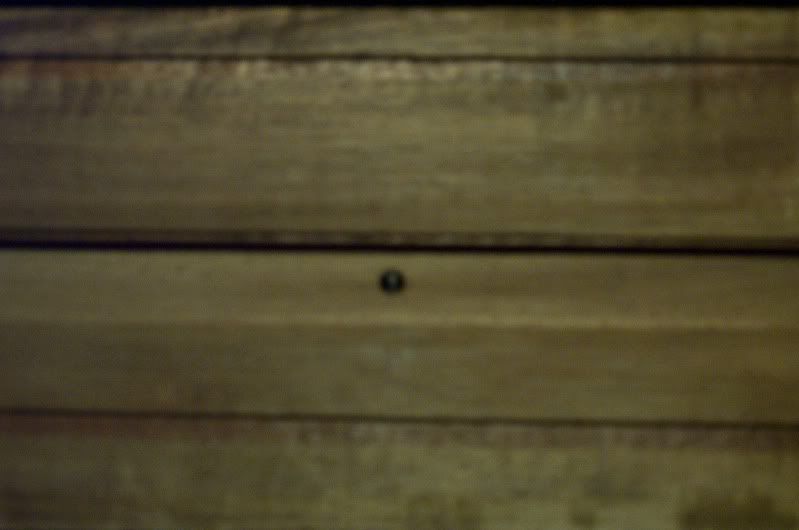
 Start date in truss rod channel @ the 12th fret (notice the nail hole in the top piece of Mahogany)
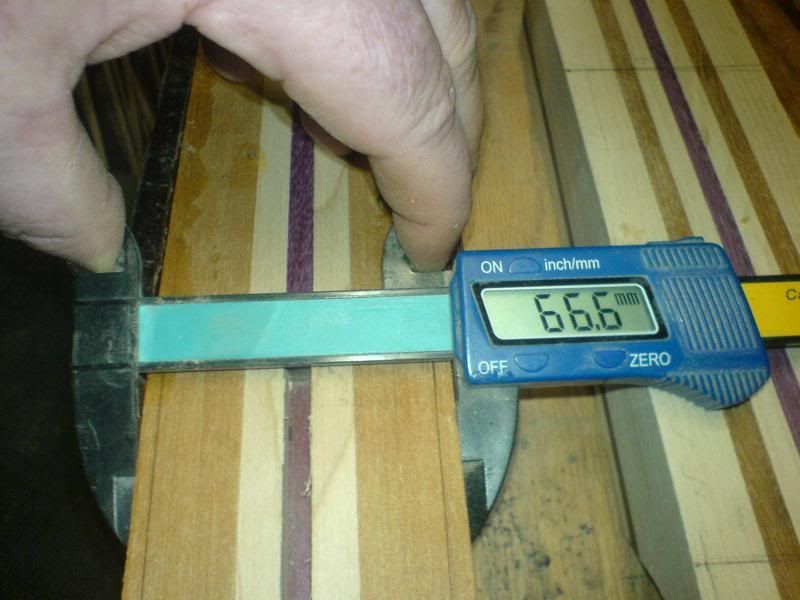
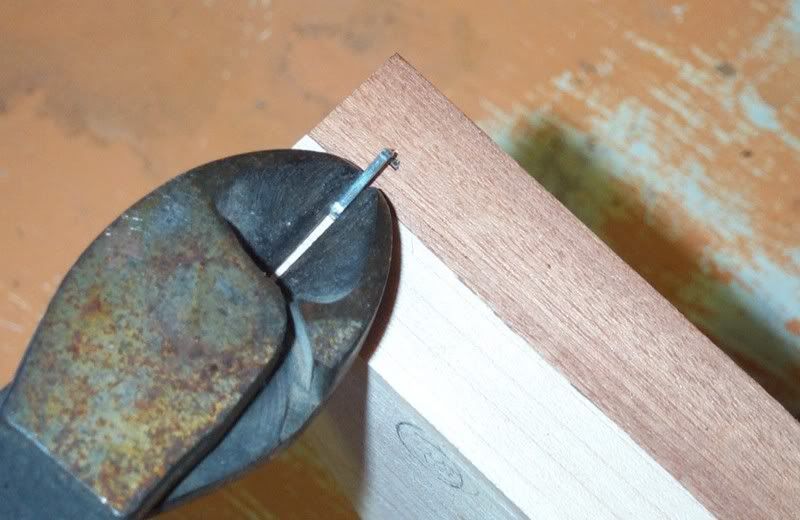
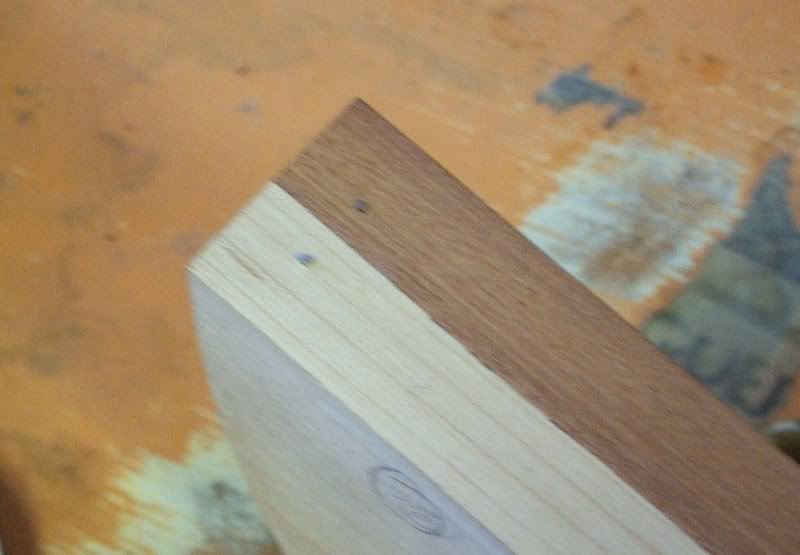
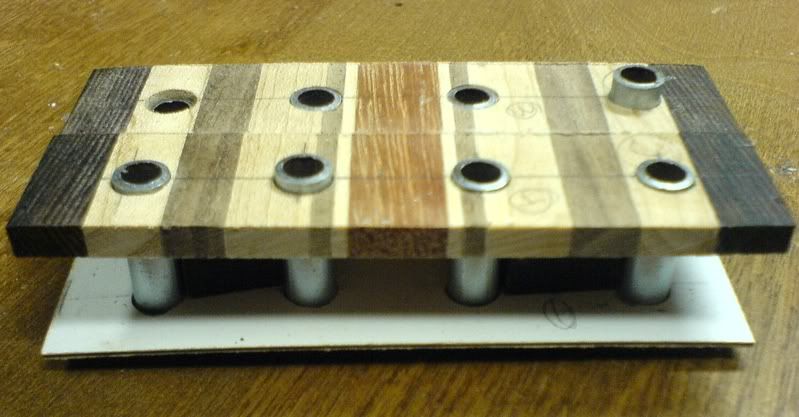
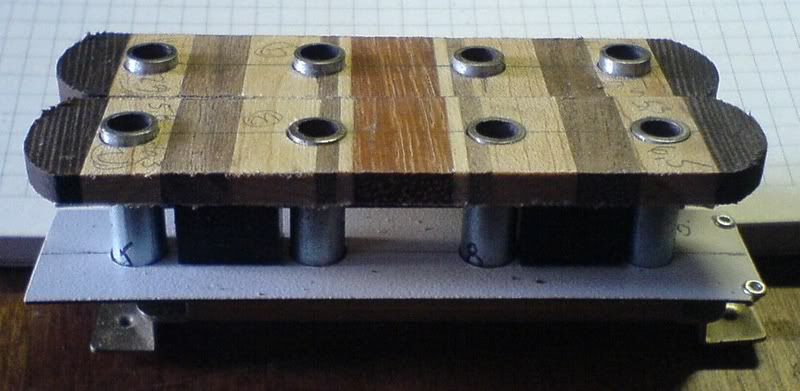
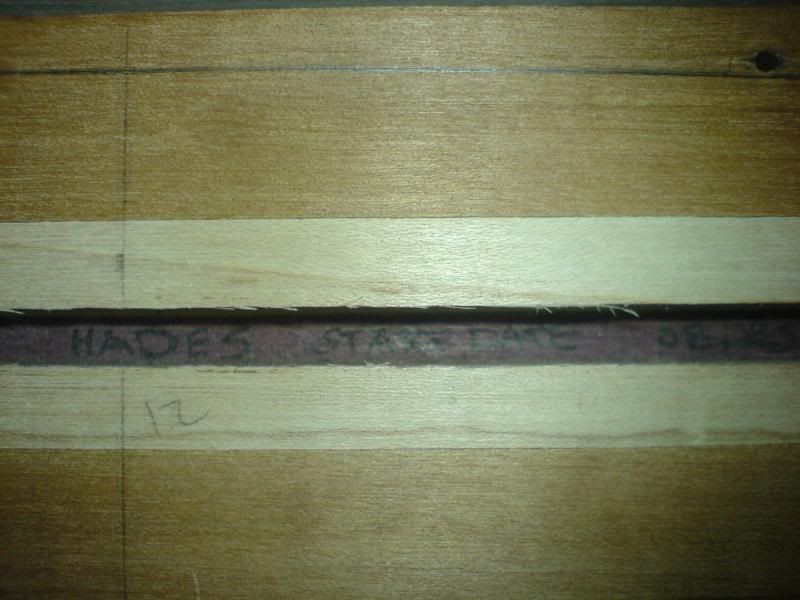 Width of neck laminates 66.6 mm (so appropriate for something called Hades eh?)
 Roasted Maple top wood for wings from KJP Hardwoods
 2 wings from 6" Mahogany also from KJP Hardwoods, the bottom wing pieces was flipped once cut
 Pickup wiring channels pre-cut in Maple core, eliminates having to drill those angled holes
 Wing laminates before glue up with Maple and Wenge stringers, pickup cavities rough cut with Radial Arm Saw
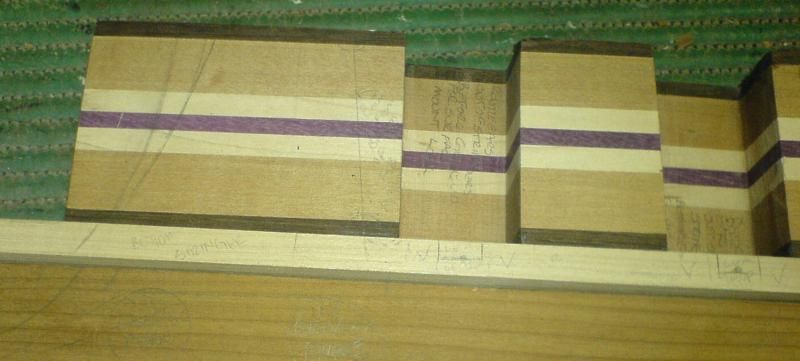 Headstock with ears on and B.C. Rich Widow shape drawn on for size comparison
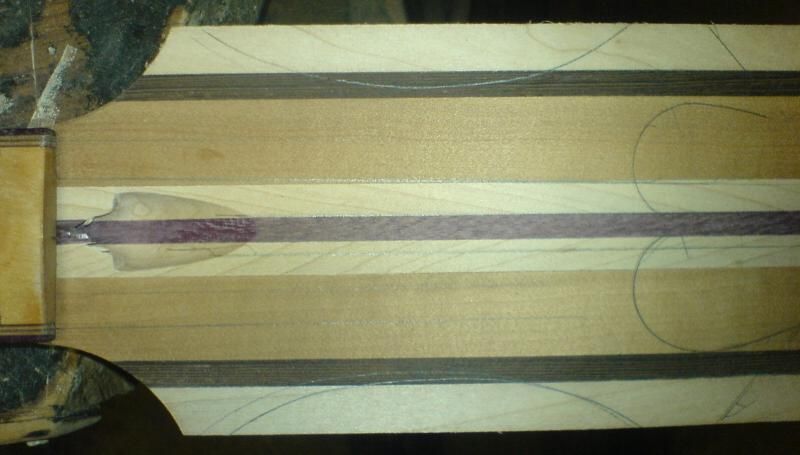 New headstock design with tuners mounted
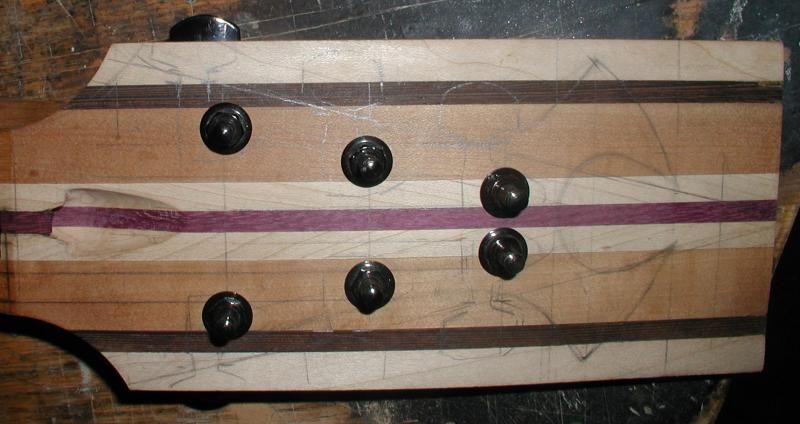 Headstock rough cut
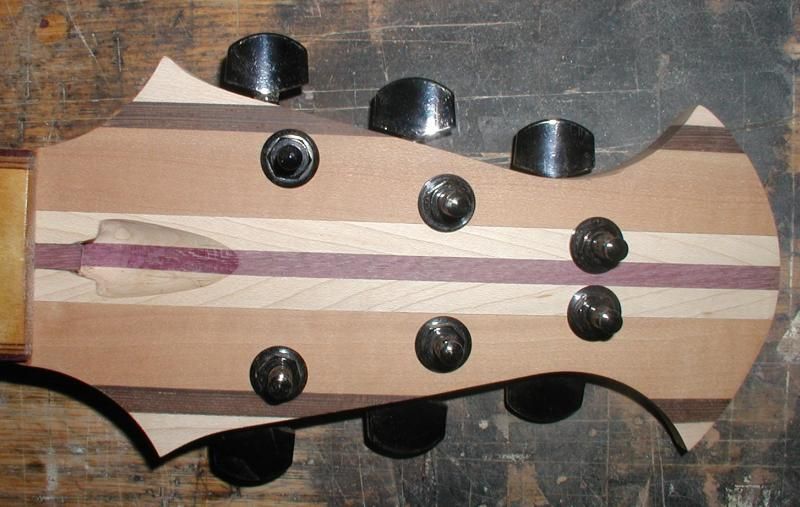 Headstock horns and tail (it IS called Hades after all) rough cut
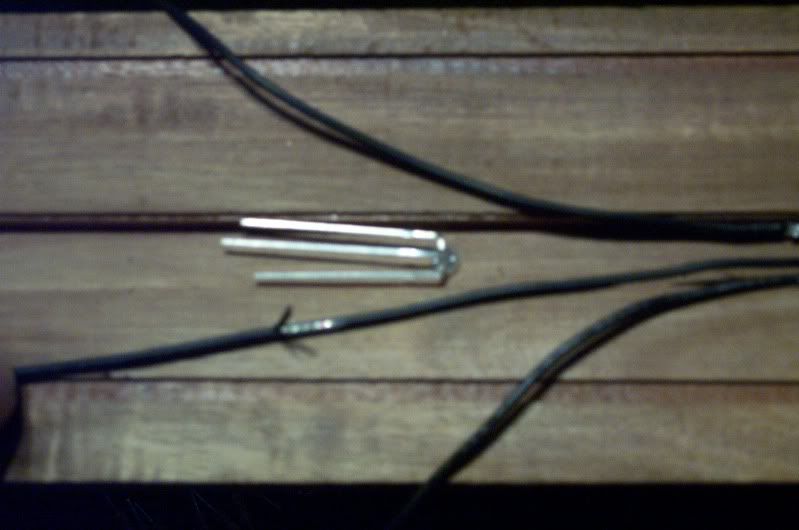
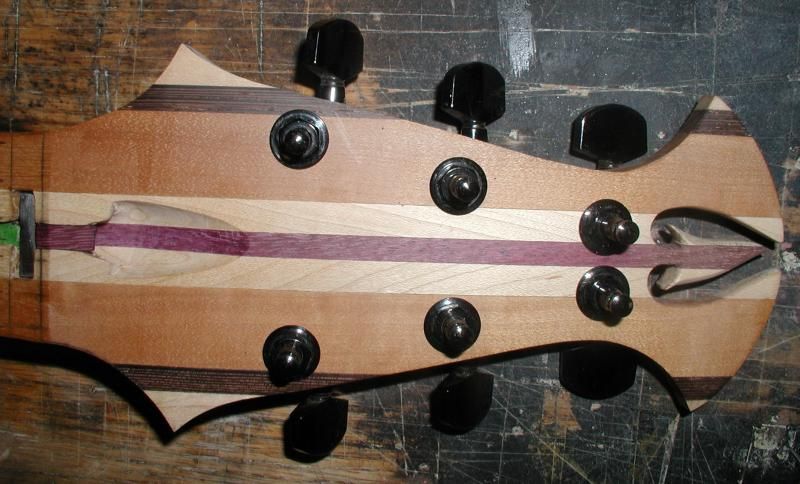 LEDs laid out, a Forstner bit makes a neat cavity for the resistors. The side dot holes were drill before the binding went on.
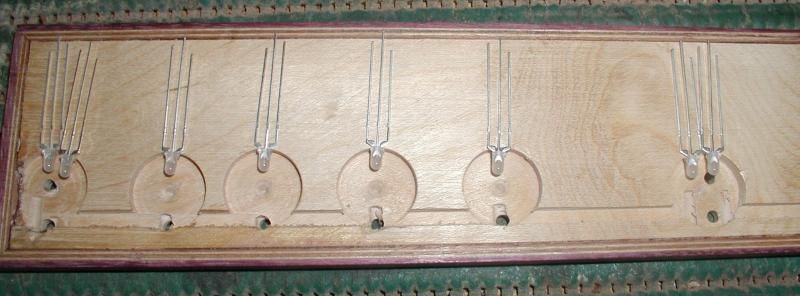 LEDs with resistors
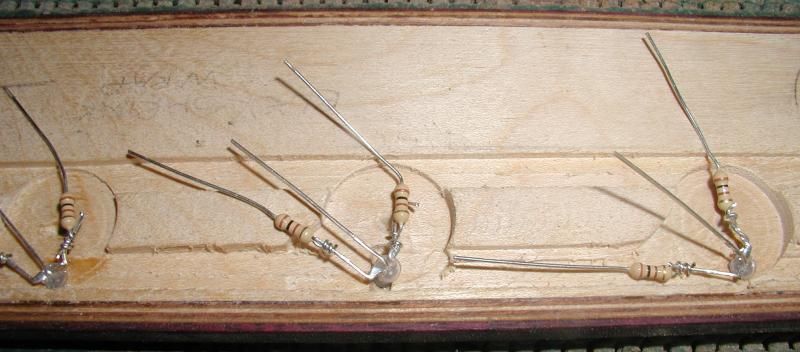 LED array lit up red. This isn’t the fretboard that will make it to the final product.
 Jack plate block made from neck through off cut.
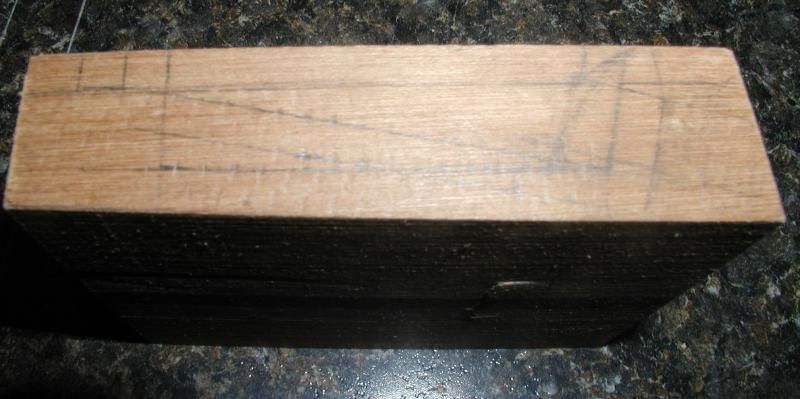 Jack plate block first cuts done on the table saw to define the lip depth and cavity width
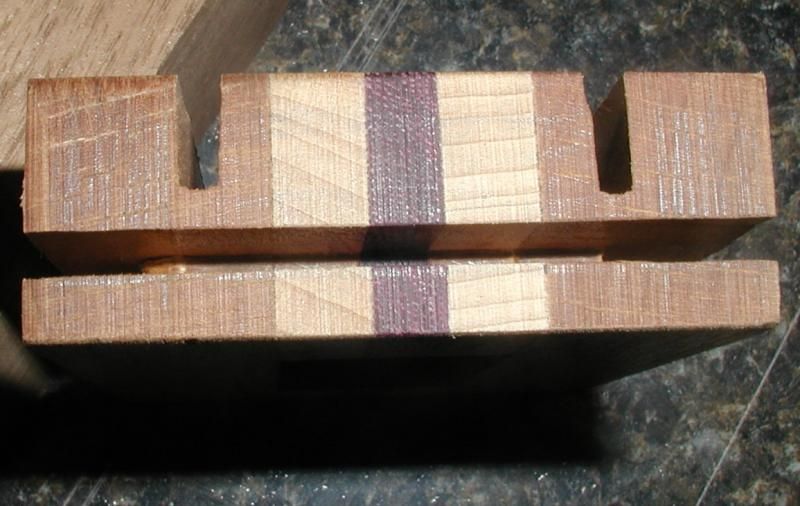 Bottom view of Jack plate with jack
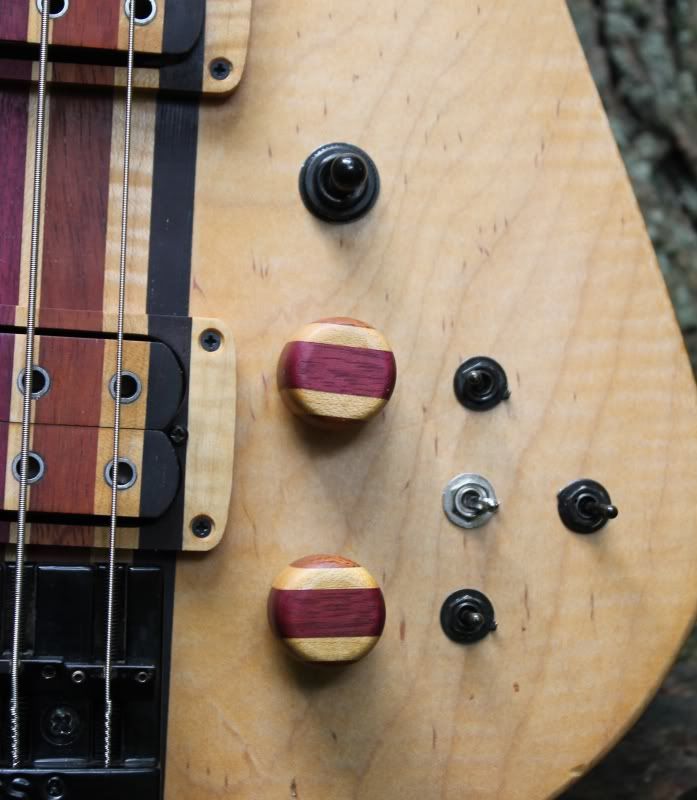
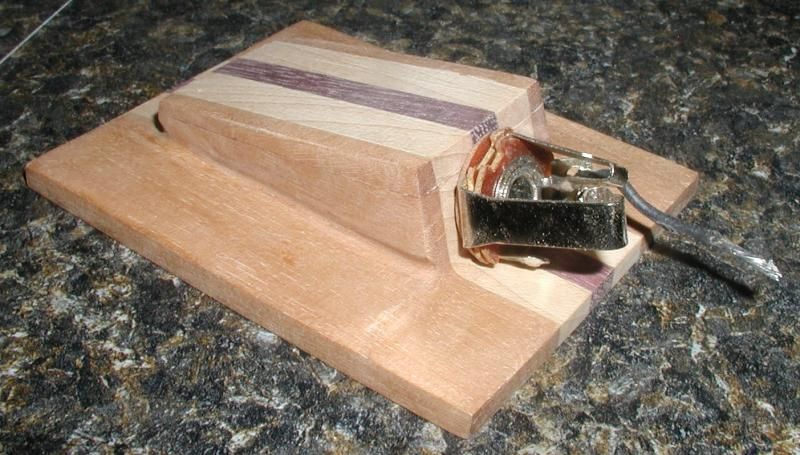 Top of Jack plate with jack and rough cut 1st generation knob. This knob will not make it to the final product.
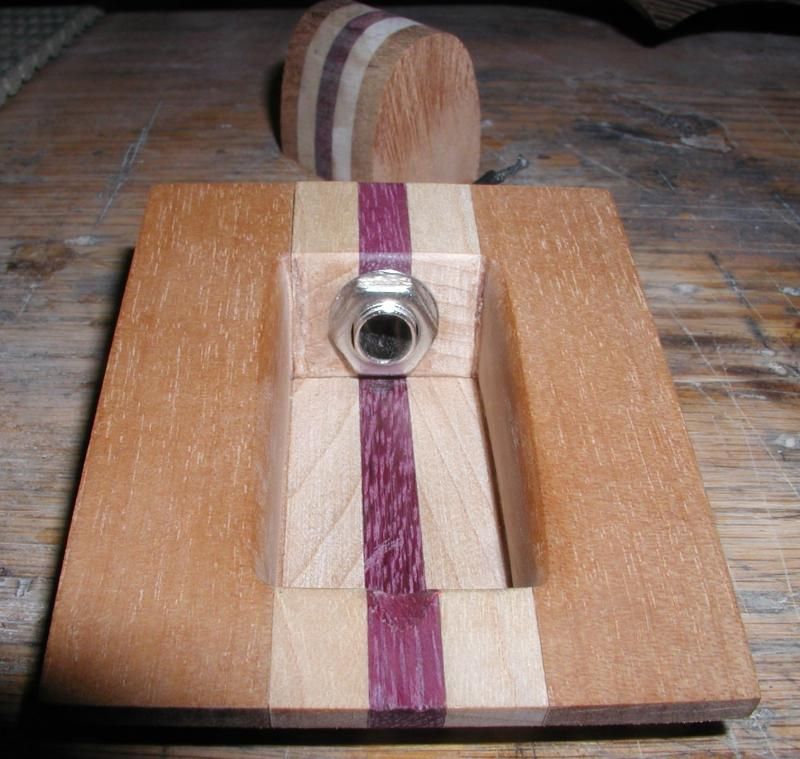 Jack plate test fit in back of top wing
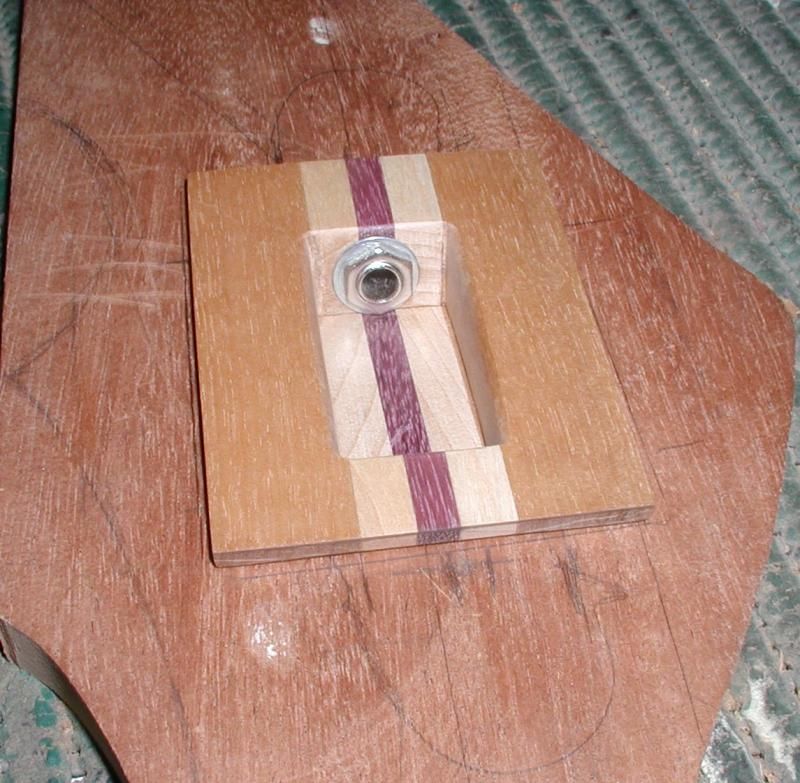 Bobbin tops and bottoms clamped together with bolts and nuts for consistent shaping of all pieces
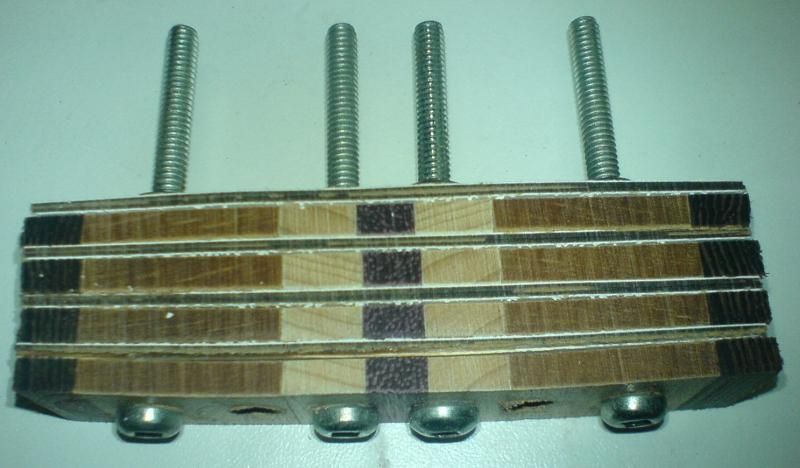 Baseplate ear rough cut away. No mounting rings, the screws will pass through the maple stringer for height adjustment.
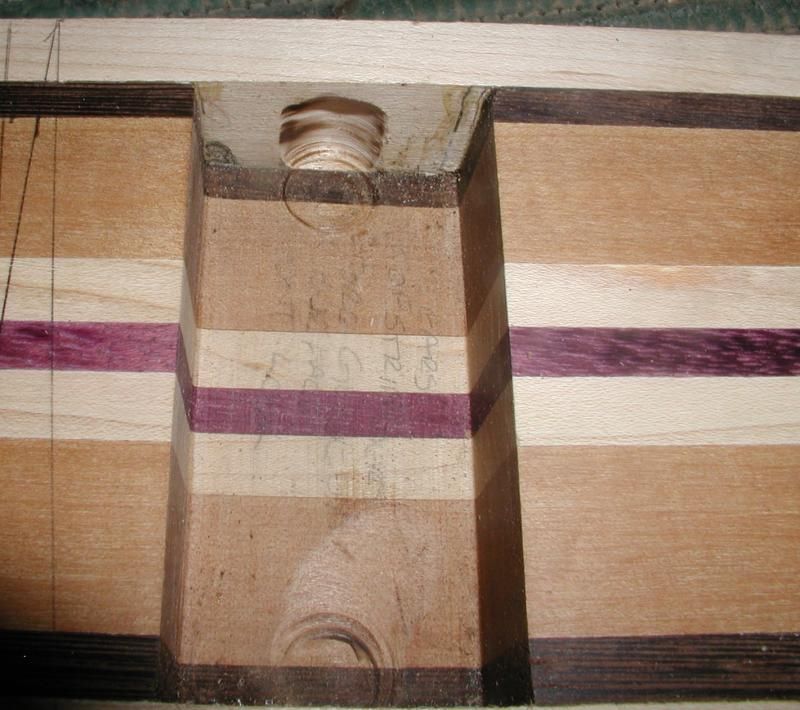 2nd generation knobs test fit
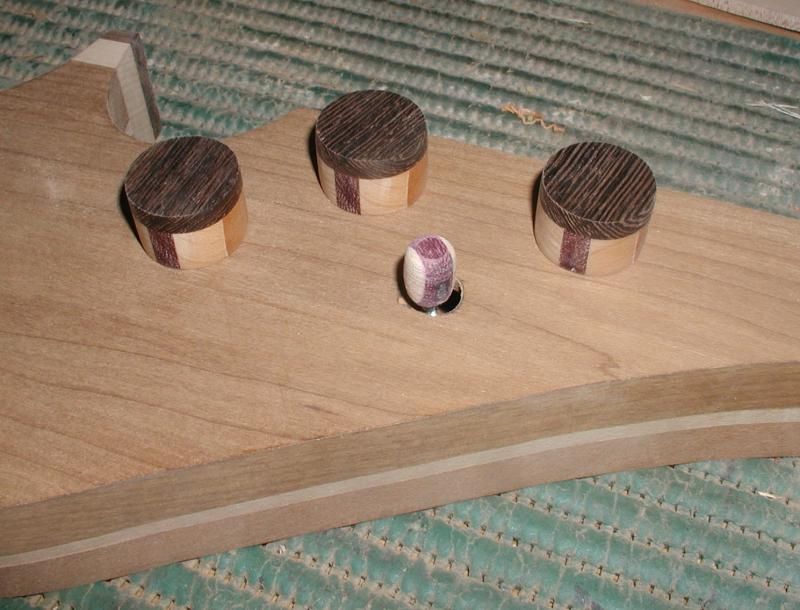 The neck through thickened with a piece of Wenge at the body end, due to limitations in the size of reclaimed wood used.
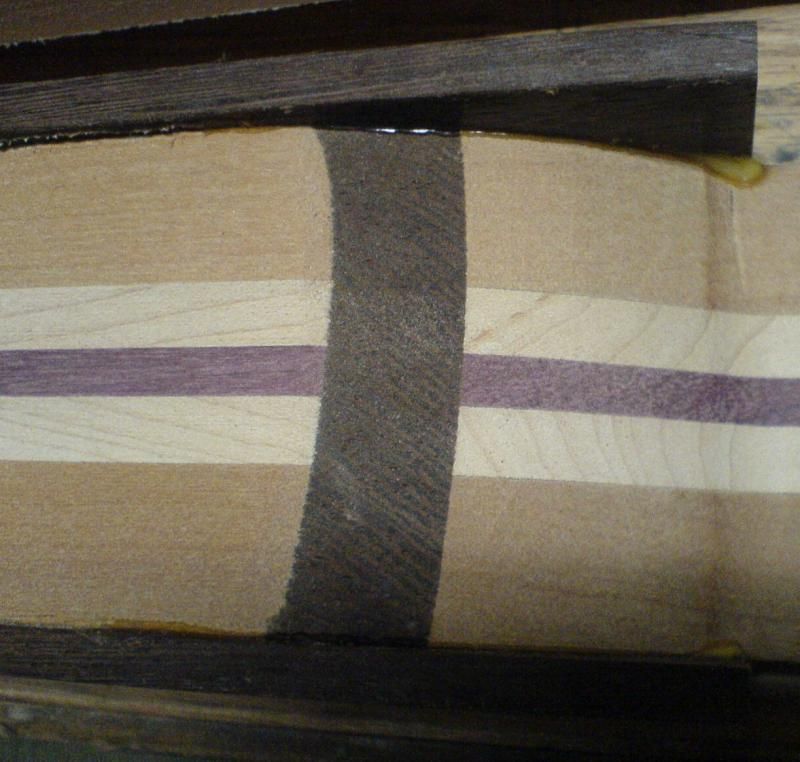 Neck profile 1st “cut” done with 40 grit sand paper in a Random Orbital Sander produced a trapezoidal contour.
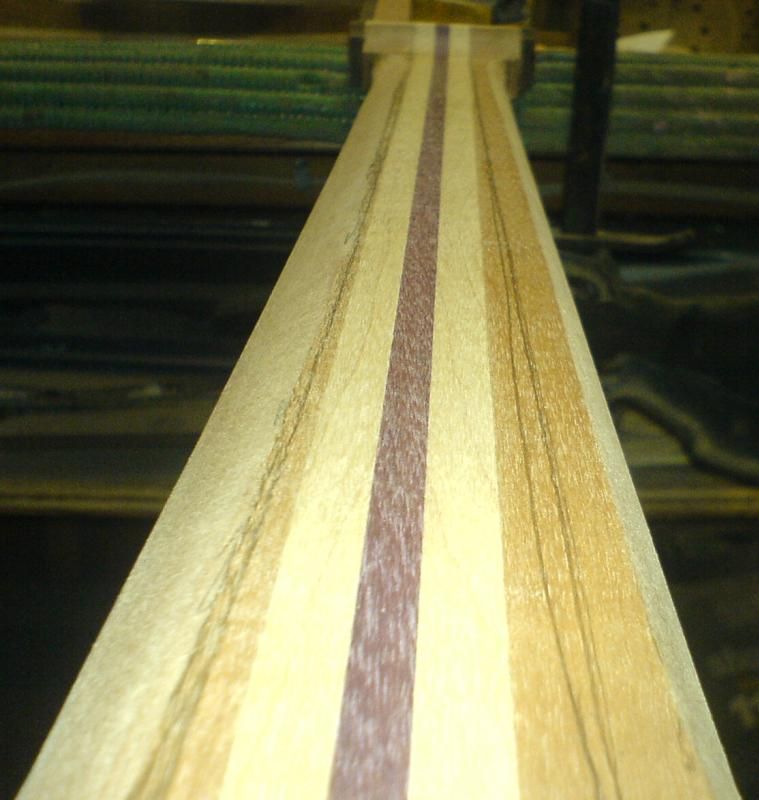 Rough shaped volute, I like the way the Maple looks book matched, notice another nail hole in the Mahogany.
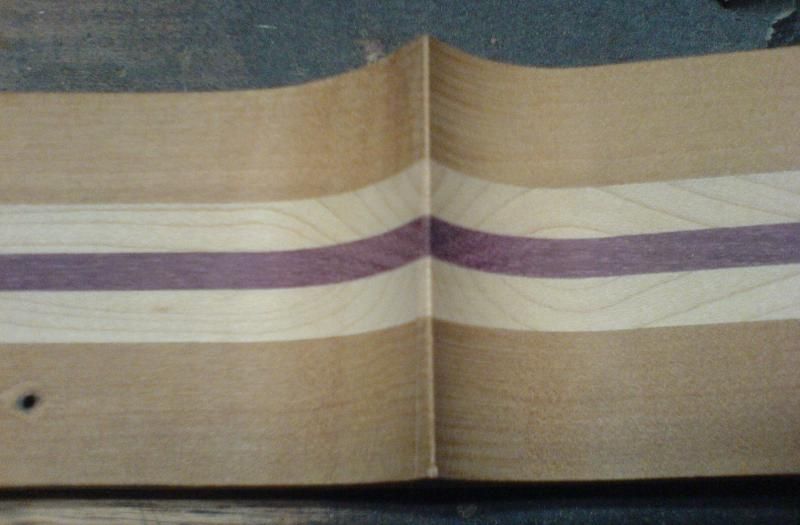 Left eye with Fibre Optic “pupil” lit by LED in behind jack plate
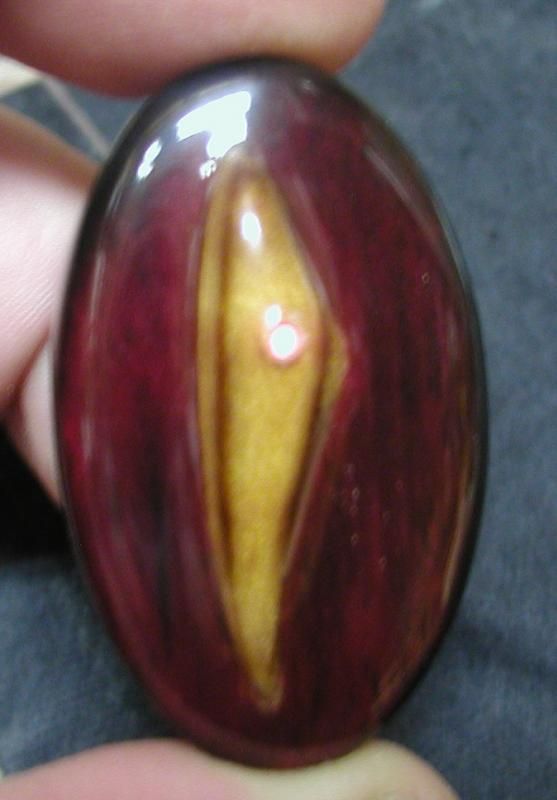 Eyes backlit with LED mounted under each eye, and Fibre Optics for the pupils lit LED behind jack plate
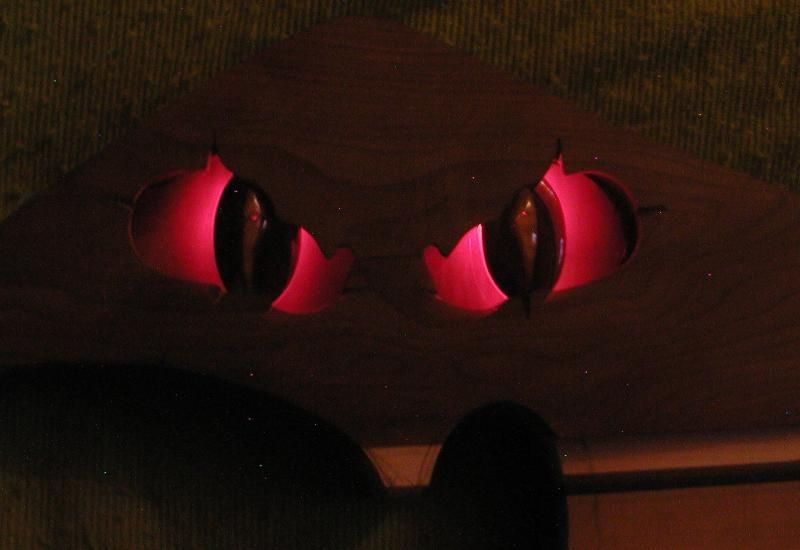 Bridge, knobs and pickups test fit. The pickups have a piece of tape over them just for the picture.
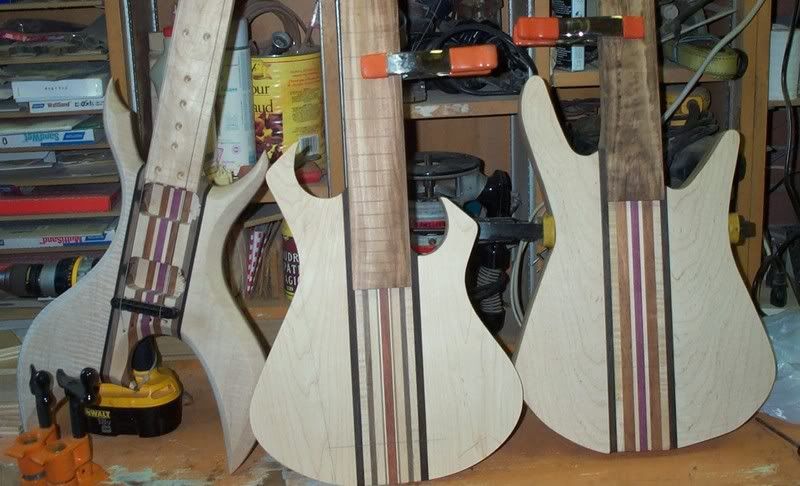
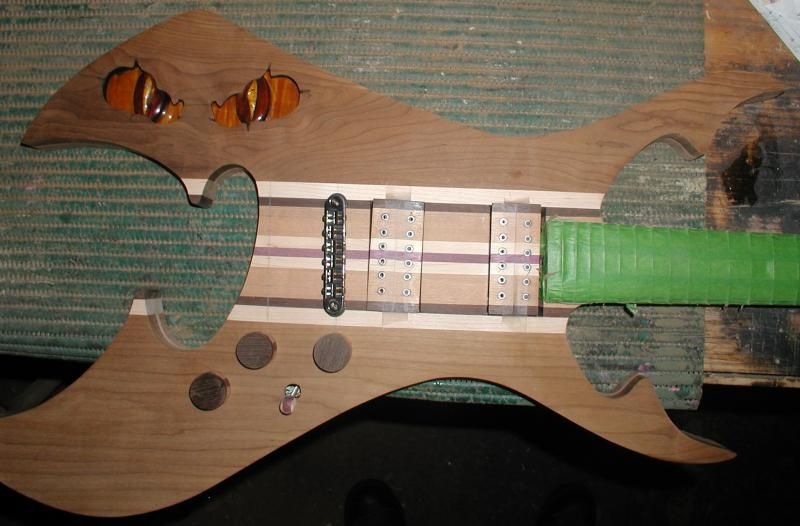 I will post more pictures as the build progresses.Thanks for looking.Ciao,Garth
-
 1
1
-
-
Absolutely WOW!
Completely stunning!
All the added details are just spectacular.
Very inspiring!
Thanks for sharing.
Ciao,
Garth
-
Awesome job! Very neat work.
I really like your binding and carve combination, and how the headstock binding and fretboard binding lineup, sweet!
The headstock inlay looks great off set to one side.
Great work!
-
Just a thought, but if you use a 'zero' fret, then you'd only have to ground one string.
-
Fantastic!
Really like the headstock binding, and the bevel on the back.
-
Nice!
Congrats on such a high profile customer.
-
Absolutely Stunning!
I especially like the F hole and the back carve, among everything else.
The tuner 'feature' was an impressive work around.
Ciao,
Garth
-
I'm totally stoked!
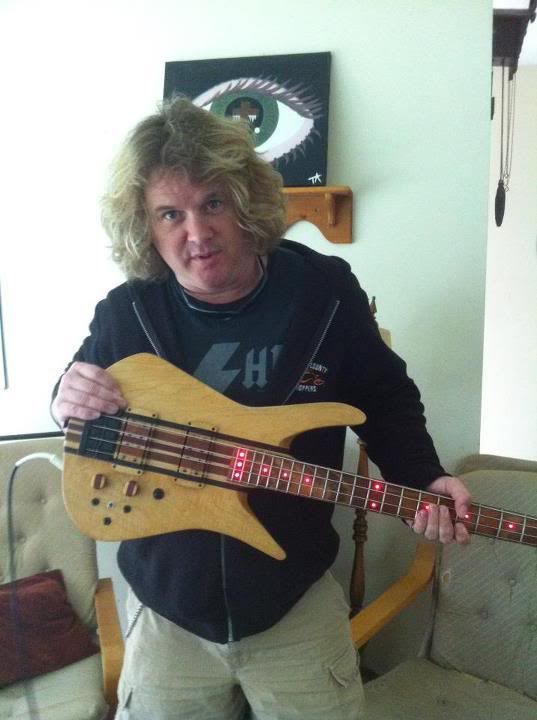
Here's a review of Luna from its new owner John Hughes of Daisy Train.
"My very own line of Bass Guitar! I've been playing this all week! I have to say I am quite impressed.
The neck is perfect with a bit of a groove in the back for comfort, and seriously, for a guy like me with tendonitis, it was so much more comfortable.
The sound is alive and present with punch and articulation.
The wide frequency response of the pickups allows you to shape your tone from punchy and aggressive to soft and mellow.
Every note is balanced and smooth. The different sounds I get from the pickups... I've never had a bass that can do that.
The woodwork is incredible and it shows and adds to the clarity and tone of this bass. My dad is a carpenter... he was amazed too.
Along with it's stamped "Handcrafted for John Hughes" and numbered 001 on the back of the headstock it comes with a custom case!
Thinking of getting a guitar or bass?
Get exactly what you want!
You'd be crazy not to go to Bizzar Guitars!'
-
1
-
-
Thanks for the compliments!
-
Thanks for the compliment.
Here's a couple of pics with the LEDs on:
-
Way back in the fall of 2007, I was approached by John Hughes of Daisy Train about making him a custom neck-through bass, based on Hamer Impact.
At that point, I had only ever made neck-through guitars, and wasn’t sure if the laminating method I was using would withstand the tension of bass strings.
Also, at this point, my youngest daughter was about to start taking music in school, and wanted to play guitar. \m/ \m/
She liked my Poseidon design, but the 27" Baritone scale and “Fat Finger”™ string spacing was too big for her hands, so a 25.5" scale version (Poseidon II) was made.
My daughter took Poseidon II to school for her first music class, only to have the teacher tell her that they didn’t teach guitar, only bass.

So I made her a bass, Jove.
Jove was a test, to see if the neck laminates would stand up to the tension of bass
strings. Apparently, it passed the test.

So, on to John’s bass.
Because I like to think I’m unique, just like everybody else, I prefer not to make copies of other designs, but John was set on this design. I told John I’d make him a ‘Bizzar’ version, it looks enough like one to see the resemblance, and he went for it.
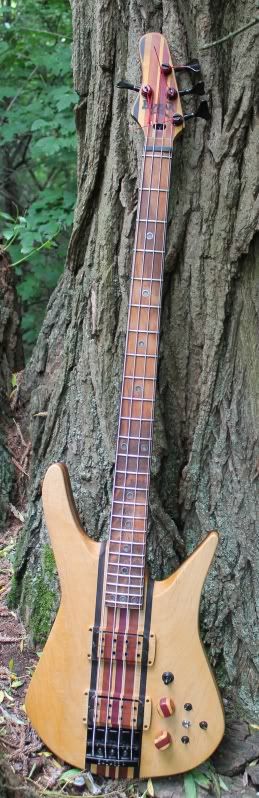
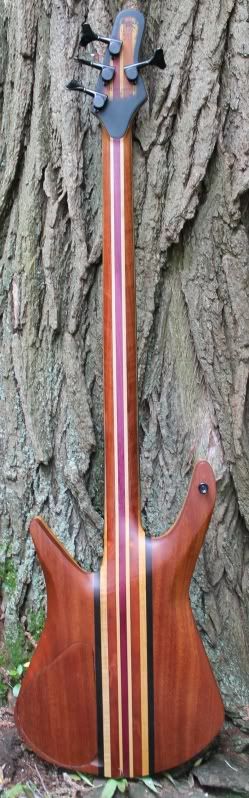
Specs
Based on a Hamer Impact bass
* 34" scale
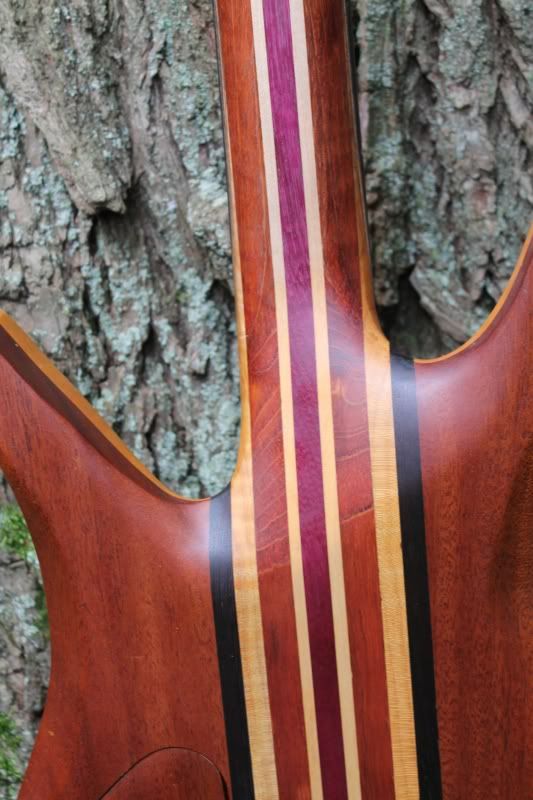
* 7 Piece laminated neck-through (Figured Maple, Jatoba, Maple & Purpleheart)
* Mahogany Back
* Figured maple front
* Wenge Stringers
* Tigerwood (Gonalco Alves) Fretboard
* 24 frets
* Acryllic-in-steel inlay
* BadAss bridge
* 2 over-wound Bizzar Humbuckers
* 2 Individual Coil Select (North/Humbucker/South) mini toggle switches
* 1 phase (In/Out) mini toggle switch
* 3-way toggle
* 2 individual volume
* Corian Nut
* Gotoh Tuners
* Tung oil finish
Wiring Diagram:
http://guitarmodder.com/beta/diagrams/test-2
Ciao,
Garth
-
I used staples, with the tops cut off.
From my Jove build : http://projectguitar.ibforums.com/index.php?showtopic=44402&st=0&p=478638&hl=daughter&fromsearch=1&#entry478638
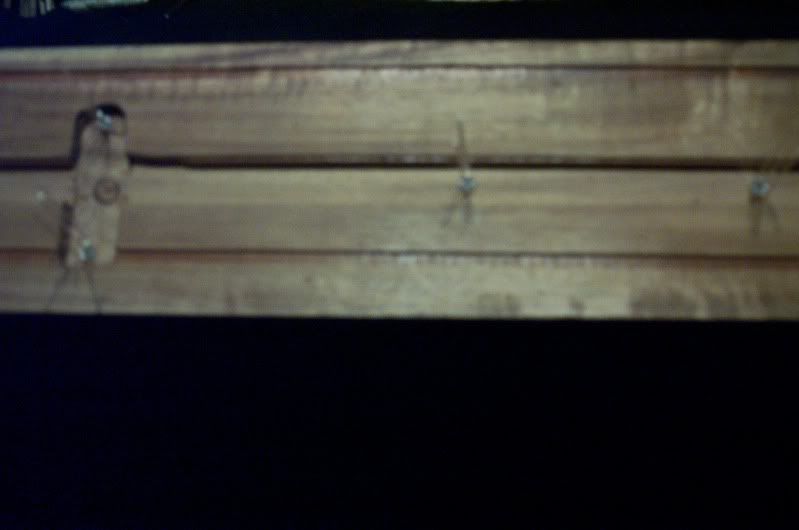
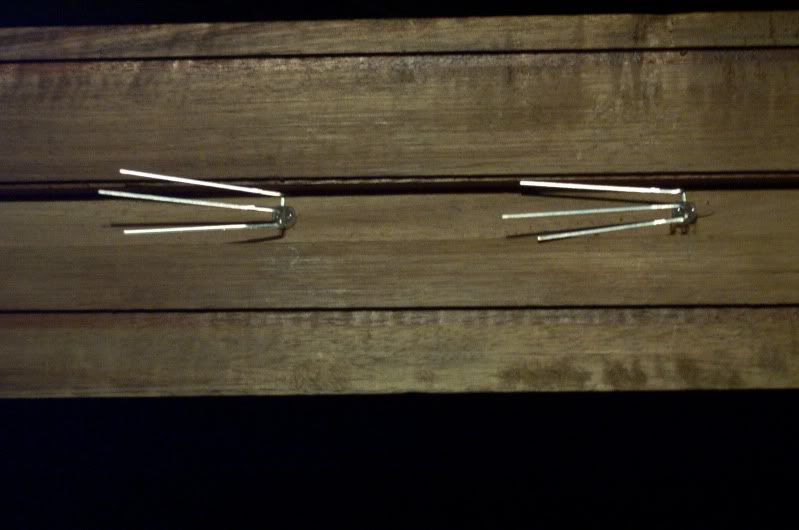
To prevent the wings from slipping during clamping, staples are inserted:
The head of the staples are cut off:
After cutting the tops of the staples off leaves two little nibs:
The wings are aligned and dry clamped to the neck blank.
During dry clamping, these nibs, leave impressions in the neck blank, making register marks to align and keep the wings from slipping during glue up.
The same process was used to glue the top and bottom of the wings, the pencil marks indicate where the staples are:

Ciao,
Garth
-
1
-
-
Oops
 Link fixed.
 Thanks Dave_B.
-
I haven't been able to build anything recently, but I put together my version of "How to build a laminated neck-through electric guitar" on my web page.
WARNING: Picture Heavy
Check it out: http://www.bizzarguitars.ca/index.php?option=com_content&view=section&layout=blog&id=13&Itemid=64
Ciao,
Garth
-
Hey Manny,
Great job on using reclaimed wood! I've got some Merenti that's going to make it into a guitar too. Here's what I did with some reclaimed wood: http://projectguitar.ibforums.com/index.ph...amp;hl=Poseidon
Your build looks great. I think I missed it, what kind of wood are you using for your fretboard?
For what its worth, I agree that you should allow more wood grain to show through. Brian Calvert (who runs this board) has a cool way of doing a burst. Check it out.
Ciao,
Garth
-
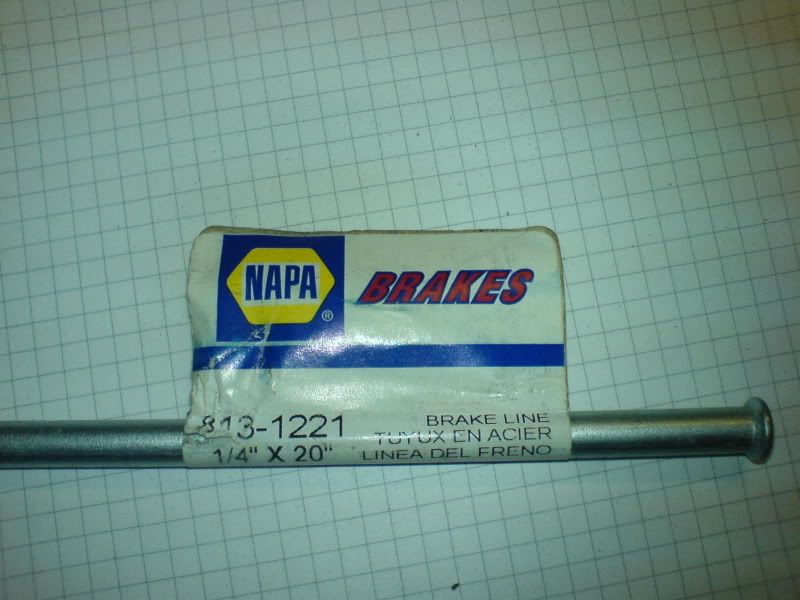
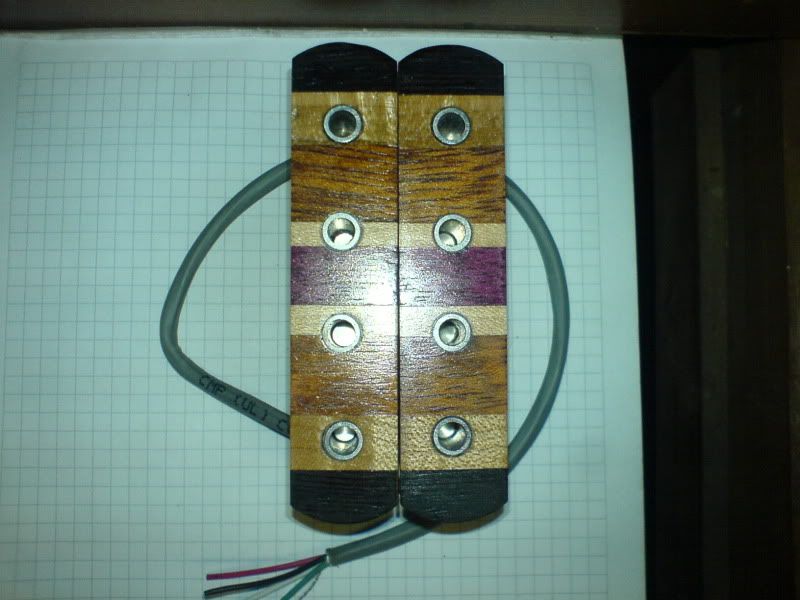
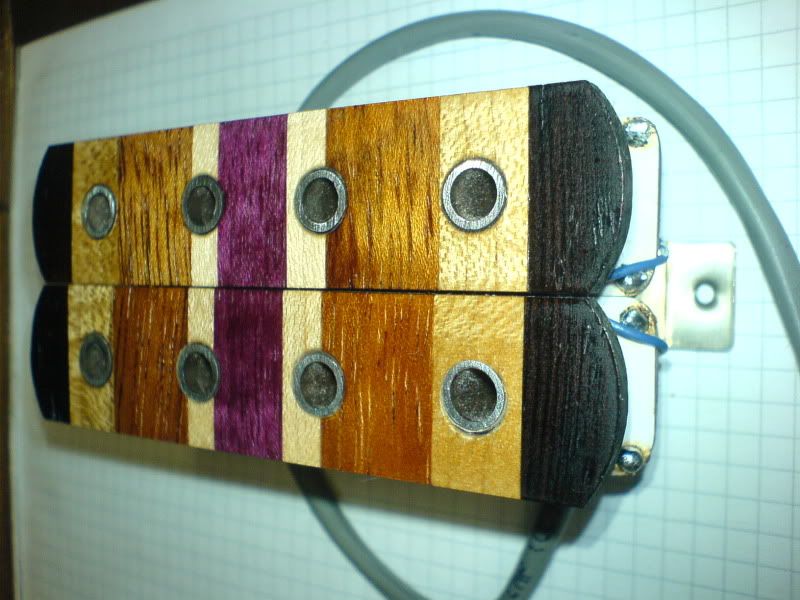
RestorationAD - Thanks, the pole pieces are made from automotive brakeline:
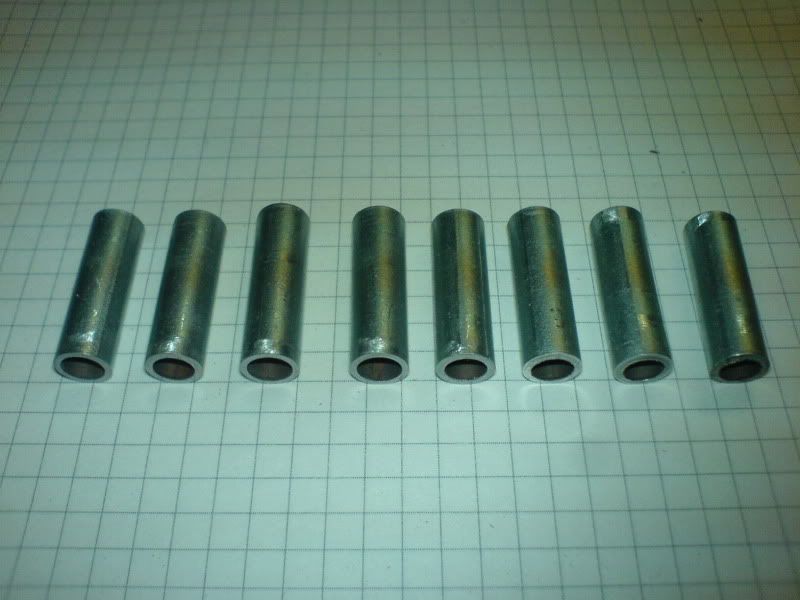
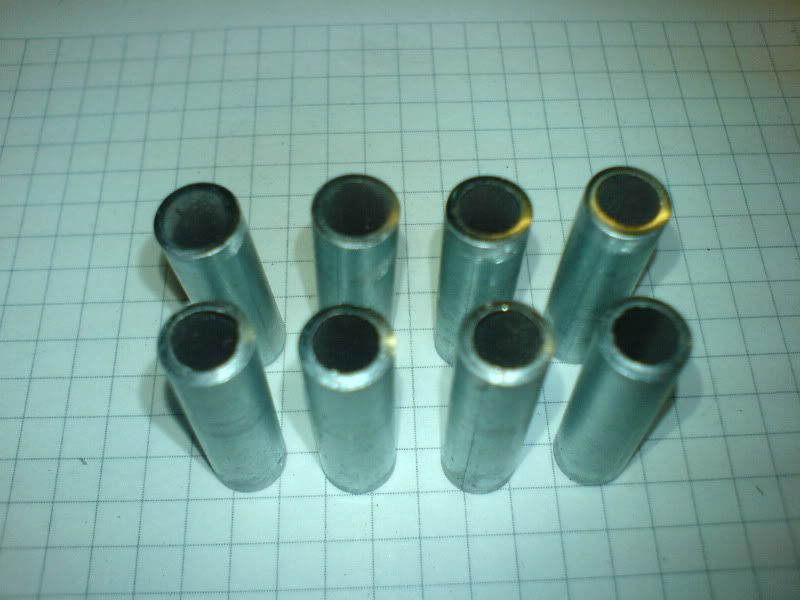
They are basic humbuckers, using an alnico V magnet.
Here's some pick of another set I made, using the same concept. The four coils (from right to left) freshly wound, wrapped in teflon tape, wound in copper tape and grounded, wrapped in black pickup tape. Wrapping the coils in copper tape and grounding them acts as a Faraday cage, eliminating RF interference.
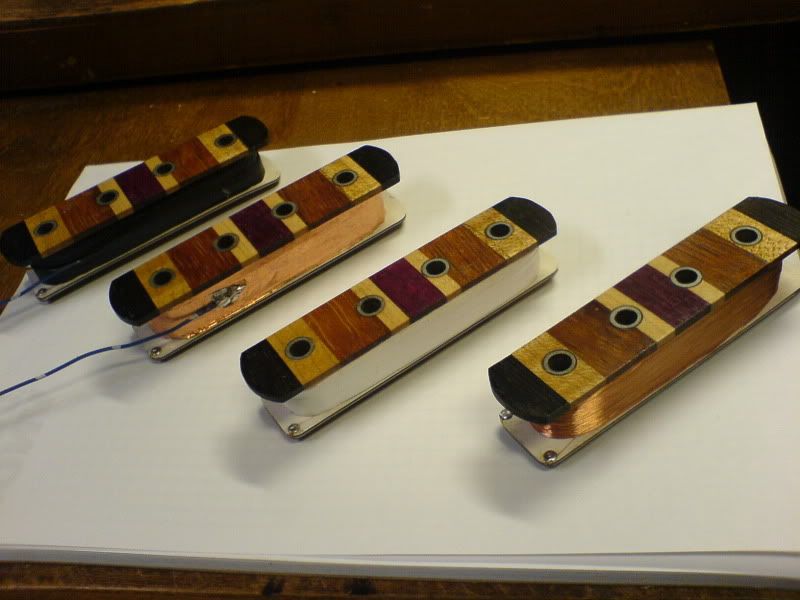
The assembled pickup:
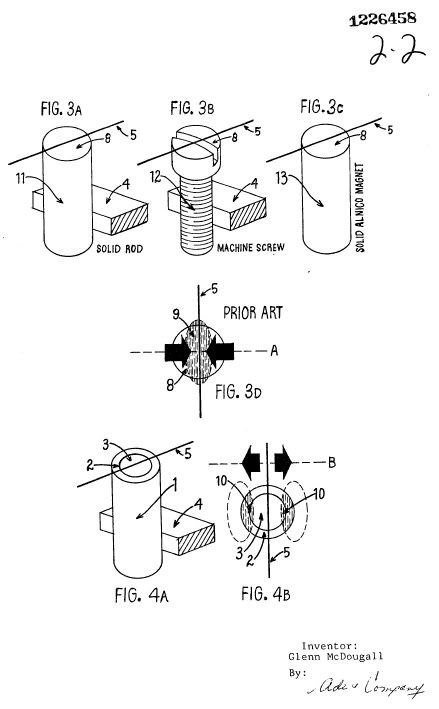
I got the idea of using hollow slugs from Glenn McDougall,
I haven't had a chance to compare them to other pickups, but here are some sound samples of my daughter playing a school lesson, recorded by plugging the bass straight into my computer.
Here's both humbuckers in humbucking mode:
http://www.freefilehosting.net/jove-bothboth
Here's the bridge pickup north coil only:
http://www.freefilehosting.net/jove-bridgenorth
Here's the neck pick up north coil only:
http://www.freefilehosting.net/jove-necknorth
Here's the neck north coil and the bridge south coil out of phase:
http://www.freefilehosting.net/jove-...outhoutofphase
(Anyone have any suggestions on a better file hosting site?
I think they sound pretty good.
Ciao,
Garth
-
Plinky - Thanks.
jeremyp - Thanks, doing the truss rod channel like this eliminates the need for a curved routing jig, and the cut off piece becomes the fillet to cover the truss rod. The fretboard started as a piece of hard wood flooring. it is about 6 mm thick give or take a few mm. These pictures were taken before it was setup. The action is a little lower now. I've had a few friends who play bass check it out, and they seem to like it.
IPA or death -Thanks.
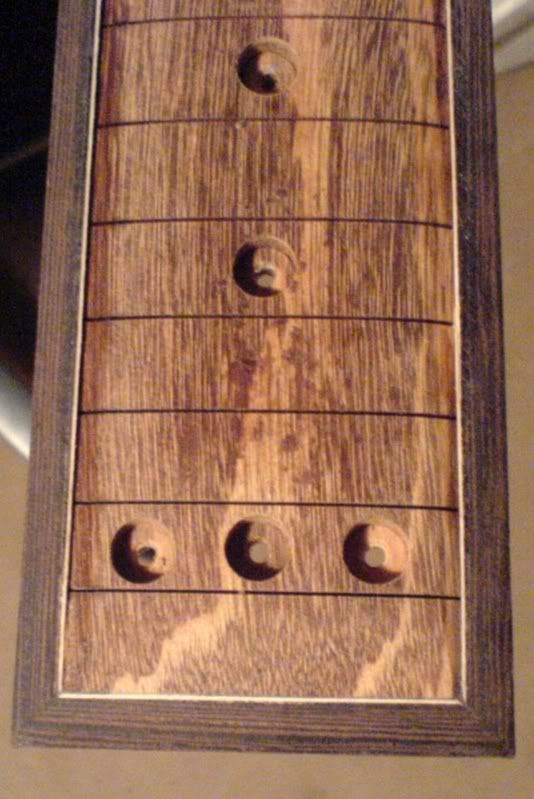
First the holes for the LEDs are drilled and then a channel is made down the centre.
The LEDs are placed in the holes.
The LED 'legs' are bent at a 90 degree angle.
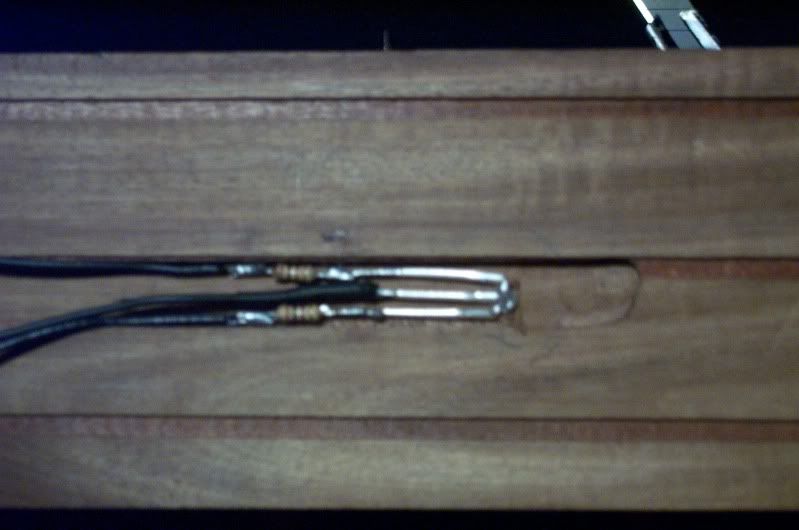
The ground wire is connected to all of the LEDs first by peeling away some of the insulation and soldering.
A resistor is soldered to each of the positive connections and the wire is soldered.
Here's a pic of the process on the first LED fretboard (minus the shrink tubing).
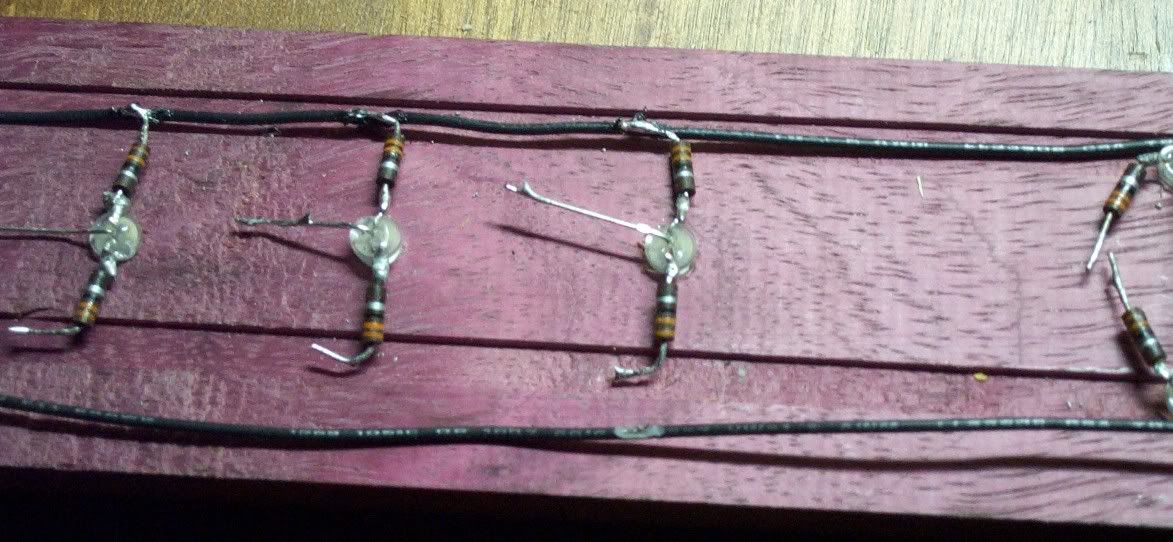
Once the resistors are attached, a piece of shrink tubing goes over them to prevent the possibility of shorting out. This process is continued to the end.
The inlay dots are pieces of steel tubing with thin slices of acrylic rod inside.
-
Cavity cover:
Body back:
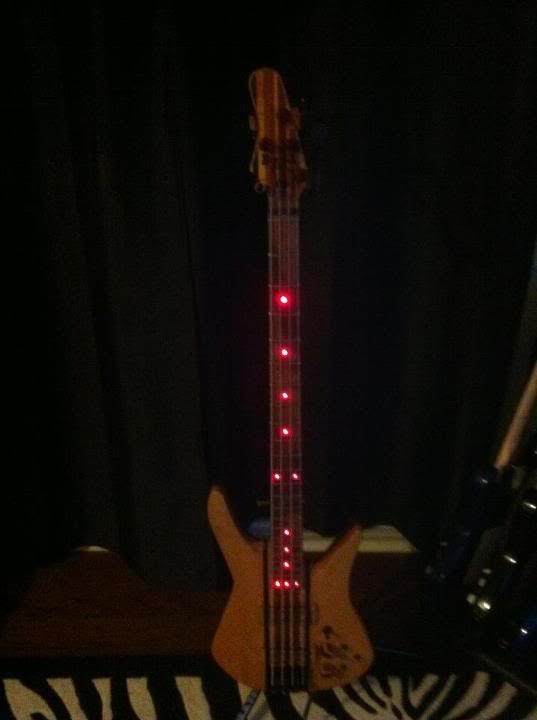
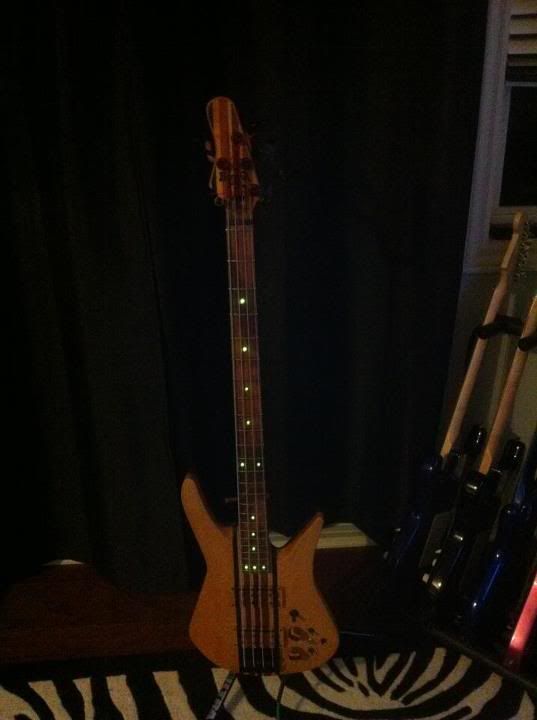
Body front with LEDs in ‘green’ mode:
LEDs in ‘red’ mode:
LEDs in ‘orange’ mode:
-
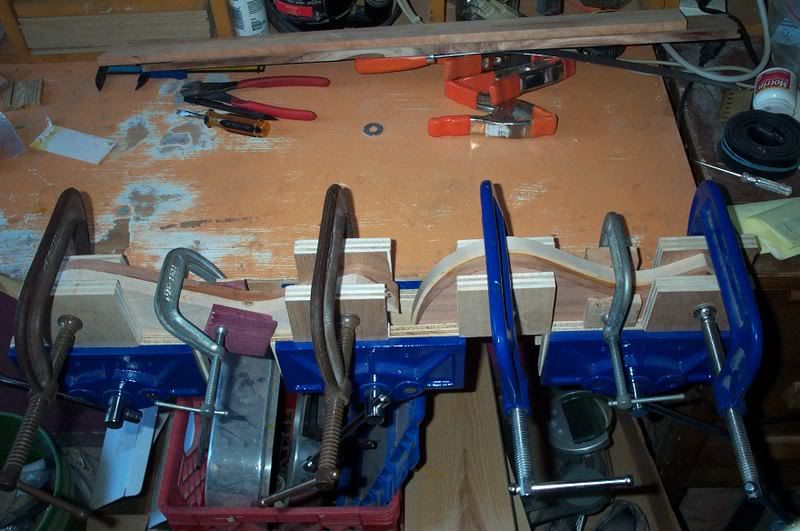
To prevent the wings from slipping during glueing, staples are inserted:
The head of the staples are cut off:
After cutting the tops of the staples off leaves two little nibs:
The wings are aligned and dry clamped to the neck blank. During dry clamping, these nibs, leave impressions in the neck blank, making register marks to align and keep the wings from slipping during glue up. The same process was used to glue the top and bottom of the wings, the pencil marks indicate where the staples are:
Clamps are removed:
Bobbin test assembly:
Bobbin top shaped:
What was on the bench in progress:
Fretboard binding:
-
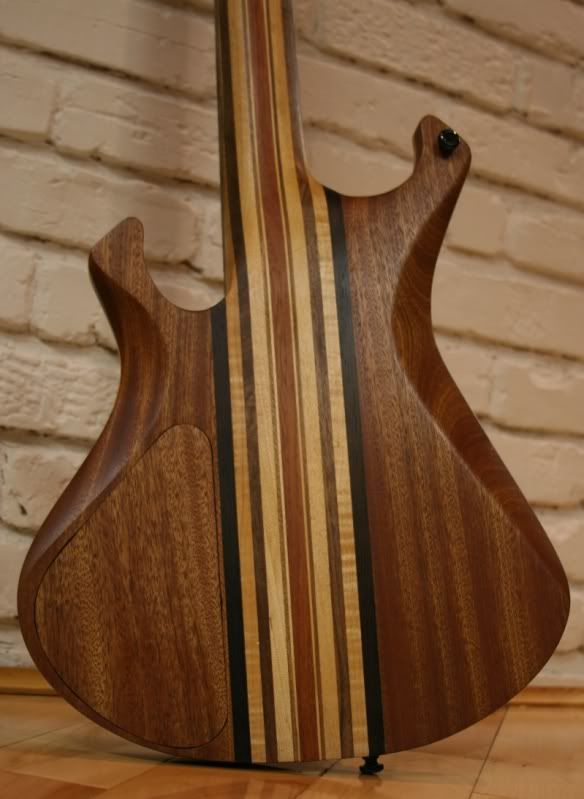
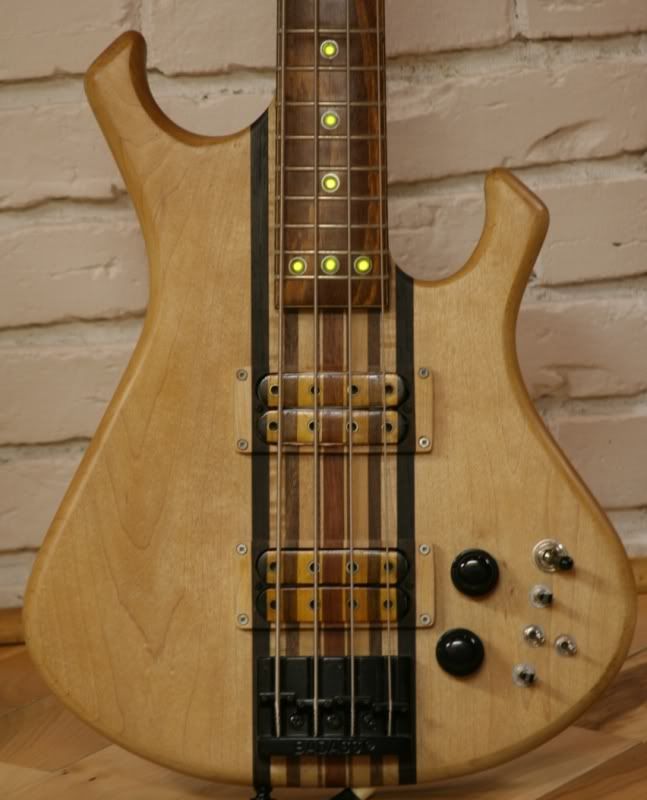
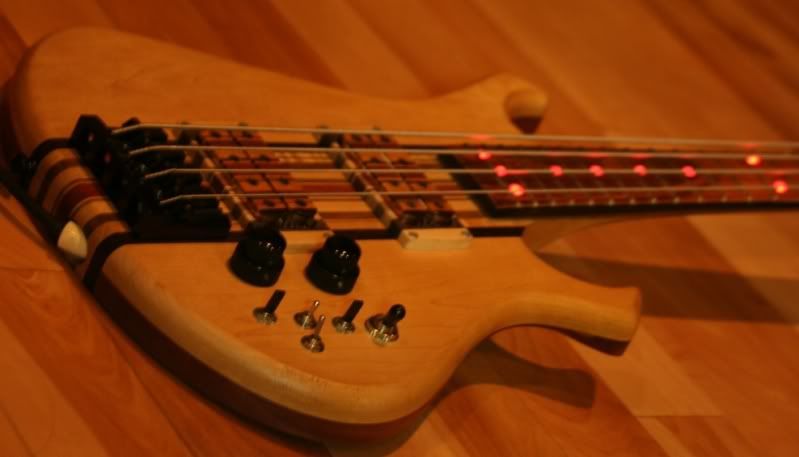
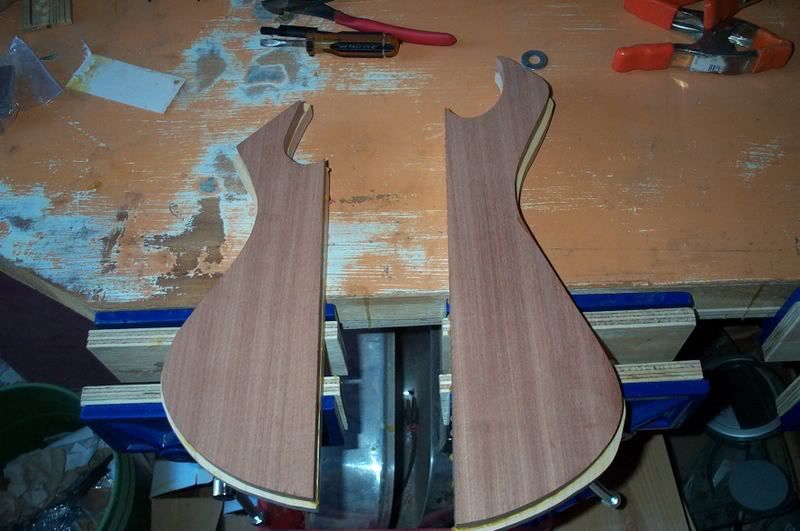
Here’s a bass I built for my daughter:
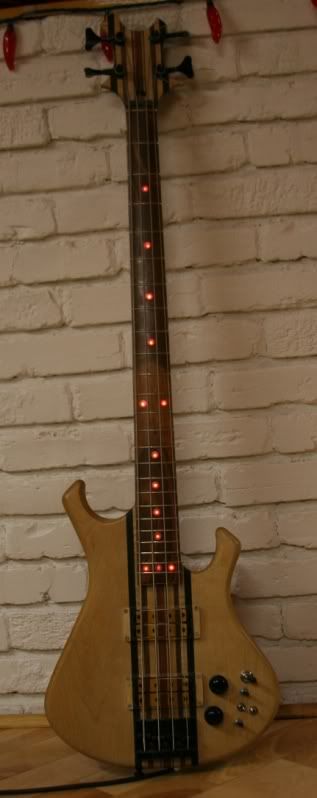
It is called Jove (Roman God - Lord of the Skies, Gods and Thunder)
It is a 34" laminated neck-through 4 string bass.
Here’s the original plan:
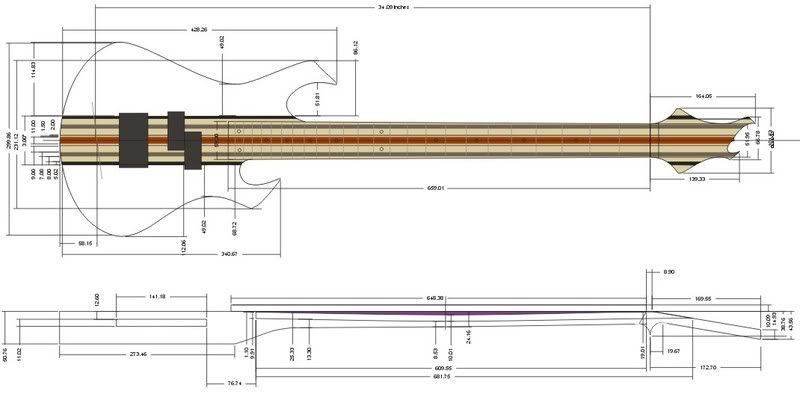
Specs:
11 piece neck-through (maple, walnut, maple, walnut, maple, mahogany, maple, walnut, maple, walnut, maple)
34" scale length
Mahogany back and Maple front
24 medium jumbo frets (well, actually 25, if you count the ‘zero fret’)
Single action truss rod (adjustable at head stock)
Tigerwood (Goncalo alves) fretboard
Maple compound radius fret board (12" at the nut, ~18" at the 24th fret)
Clear acrylic inlays in a steel rings
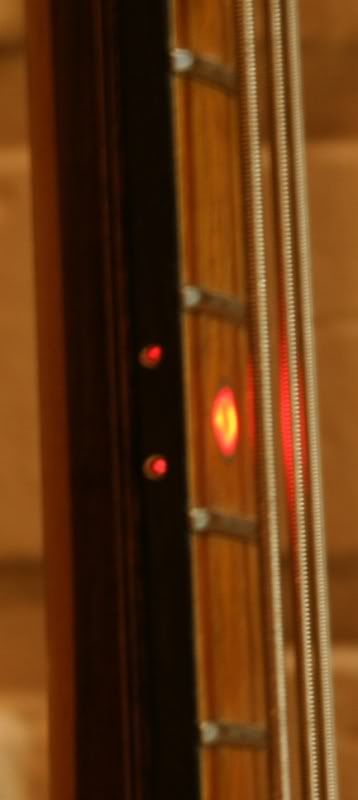
Bi-coloured LEDs under inlay
Fibre Optic side markers in aluminum rings
Wenge stringers
10 degree head stock angle
Gotoh Compact Bass Tuners
1 degree body angle
Black Corian nut
2 over-wound Bizzar Humbuckers with tops and mounting rings that match the neck laminates
2 Dual coil split switches (North/Both/South)
1 Phase switch
2 500K concentric Volume/Tone pots
Three-way Treble/Rhythm switch
Stereo 1/4" output jack (activates LEDs when mono jack inserted)
Leo Quan Badass bridge
Hand rubbed Oil finish
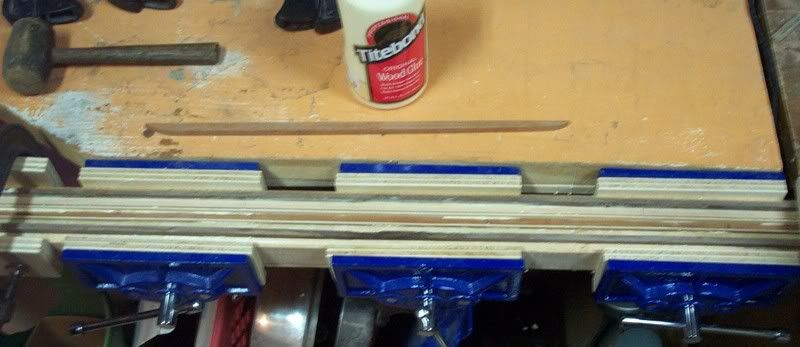
The centre laminate with truss rod channel cut:

A test clamping of the neck laminates:

Neck laminates glued with truss rod fillet:
The wings, rough shaped and clamped:
The wings, before final shaping:
The wings shaped:
-
Thanks Drak.
-
-
-
You're welcome DJ.
I did mine with bi-coloured LEDs (red and green), and put a resistor on each of the positive leads. With a resistor on each lead, the power being supplied to each of the LEDs is the same.
I chose to go this route instead of using one resistor, so that, if one LED should fail, they all don't go out (remember the old Christmas lights where if one bulb failed the whole string went out?)
I haven't found any difference in brightness between each of them.
You do have to make sure that all of the LEDs are the exactly same. Once, I substituted a couple from a different batch, and you could really see the differences in colour densities when used in "orange" mode. "Orange" mode is created by lighting up both the red and the green at the same time.
Here's a link to a page where I documented my trials and errors:
http://ca.geocities.com/bizzarguitars@roge...n/02d_leds.html
As far as fibre optics for the side dots, I use plastic fibres out of an old Halloween decoration, running from each LED:
http://i44.photobucket.com/albums/f21/Bizz...e-05pumpkin.jpg
The advantage to using plastic fibres is that you can bend them (they won't break) and a little heat will melt the ends into nice little "mushrooms" acting as lenses, magnifying the light.
Hope this helps.
Ciao,
Garth


 Link fixed.

\m/ Hades \m/ my latest
in In Progress and Finished Work
Posted
Thanks for the compliments guys.
Scott, the 'eyes' are made from a piece if 1/2" plexiglas with a prupleheart 'iris' and a figured maple 'pupil' with a thcik coat of spray poly over the top of them.
The single LED that provides light to the fibre optics in the 'pupils' is located in the jack plate cavity on the back of the top wing. This LED is always on, and light shines out through the jack, and makes 'finding the hole in the dark' much easier.
Prostheta, I agree about the string pull, I didn't like the way the 'Widow' string pull looked, or functioned.