


chops1983
-
Posts
432 -
Joined
-
Last visited
Content Type
Profiles
News and Information
Tutorials
Product Reviews
Supplier Listings
Articles
Guitar Of The Month
Links and Resources
Forums
Gallery
Downloads
Posts posted by chops1983
-
-
Hey,
Hope the first build goes well for you, my advice is to take your time and enjoy the building experience. It's easy to get excited once the construction phase is complete and the finishing starts and then do a rushed finishing job that your not happy with.
To help with your questions. Being humbucking(noise cancelling) pickups there is technically no need to shield your cavities in this build, however, it will help in making the guitar whisper quiet if thats what your after.
In all electric builds its paramount to ground your bridge. In most troubleshooting questions regarding buzzing from an electric, the first question that gets asked is "is the bridge ground?" As far as the piezo ground being enough, i'm not sure as i haven't used a piezo system. One of the other experienced guys i'm sure will chime in. I would say run a ground to the bridge anyway so when the passive side only is on it has a good ground. This will also ground the bigsby as the strings are in contact with it.
Chad.

-
Scott,
In the words of Inspector Gadget "wowzers!!!"
I love everything about it mate, and i reckon the black hardware looks really good. Your sig is a really good little addition aswell. So, If i see it in the GOTM thread it will be getting a vote from me!
Chad.
P.S give ol' bear a tummy rub for me
-
Looks heaps better Chris, still might need some tweaking but it definately looks better.
-
Hahahaha, it is just a Marlin with a pickguard and sized a bit differently to accommodate the 25.5" scale
But yes, the Marlin definitely was originally designed to be more Gibson-like than Fender-like... so that definitely shows through. I'm convinced it has a lot to do with the ratio of upper bout width to lower bout width. The tele upper bout is almost as wide as the lower whereas this has essentially the same proportions as an LP does.I hadn't thought of the offset body=offset headstock idea... but I like it! Perhaps I could use my 7-string headstock (see below) and just not have the 7th tuner present?
Chris
Can we see that headstock on your overall plan?
-
I really like the Jaguar-esque, but since it´s offset I feel as though the headstock should reflect that.
I agree with Mex, i think the design is a very nice spin on classic meets modern look and if i saw this guitar in a shop i would pick it up for a play and a better look. That being said though, i think the headstock could have an offset look thrown in to really bring the design and marry the headstock and body together.
The Tele esque design looks more like a LP variation to me. The headstock fits more with this design but still could be tweaked a little.
They look good Chris, you can see where you got your inspiration but tweaked enough to class as original IMO.
-
Im definately interested Duff beer man... but ill be travelling until October, ill keep an eye on this post and if i see movement and an order mounting ill let you know if im in.
Cheers Chad.
-
If I can stand it.
SR
Haha i know that feeling all to well!...hurry up and finish it allready, 3 weeks is enough! My semi Tele has been hanging in the shed waiting for buffing for a while now, been way too busy to even look at it. The motivation is almost non existent cause i can't spend money on parts until november when we get back from Europe!
That little guitar is shining like glass Scott...looks sick!
Chad.
-
I could be interested. I need 2 sets of tele pickups, so theres 4 p/up's. I'm impressed with the sound bites on seymore duncans website of the alnico 2's and the vintage broadcaster bridge p/up. What can u do those for?
-
Looks great Scott, a nice touch adding your initials. Inlaying with hand tools wouldn't be the easiest but it looks good. The chips have made all the difference, saw dust on large gaps just doesn't cut it, even with a grain blending method like you have done. Can't wait to see this all done!
Chad.
-
That's rocking SR! Loving your carving, i bet it feels all nice and cuddly in a playing position.
BTW i want your hat!
Chad.
-
Hey CD,
The builds looking great mate, just remember to be patient. Now that your getting close to the construction side of the build ending, it's real easy to get excited and make a silly mistake. I know from experience.
Double sided tape is great for holding templates for routing, but for something like a neck pocket, I personally make the template big enough so it can be clamped to the body, that way you can feel confident that the rout will turn out perfect and the pocket and neck will have a snug fit. I find even with a lot of double sided tape the template still can move, only slightly but enough to make a gap.
Looking forward to seeing this one at the finishing line!
Chad.
-
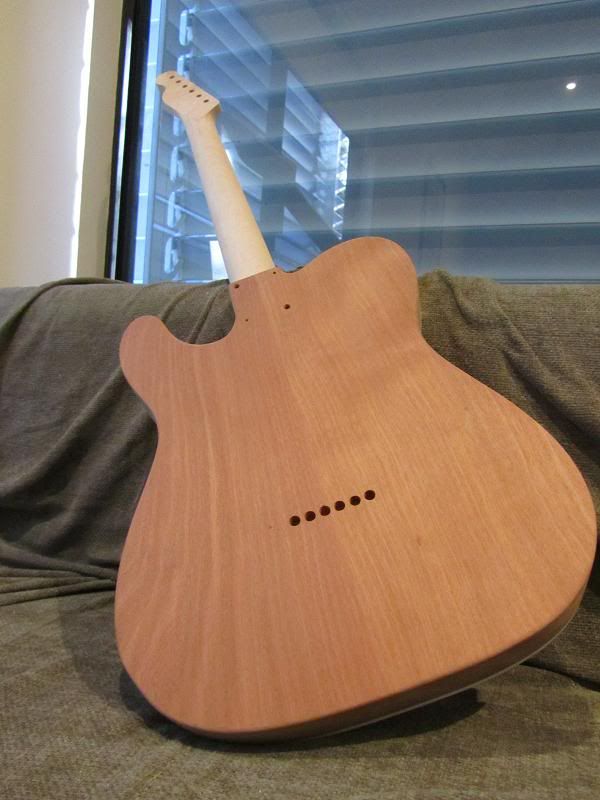
These 2 are ready for finish sanding and finishing. On the couch.
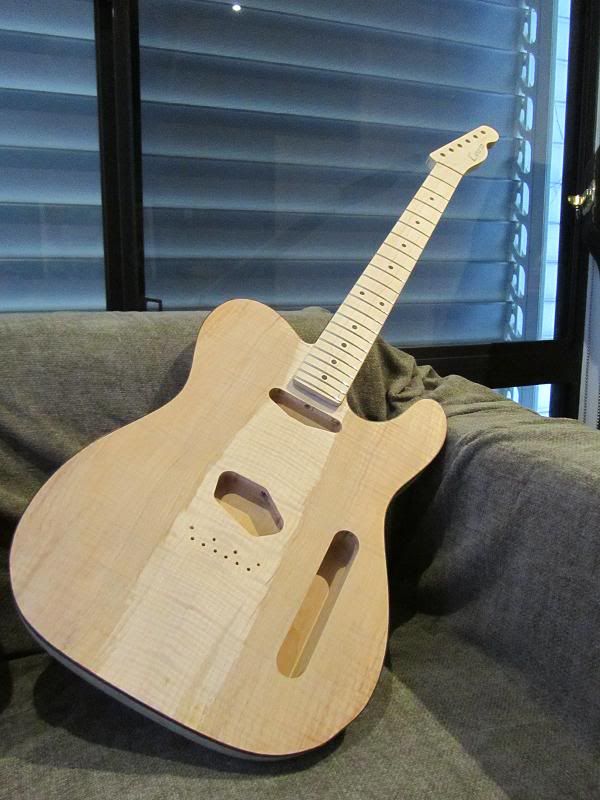
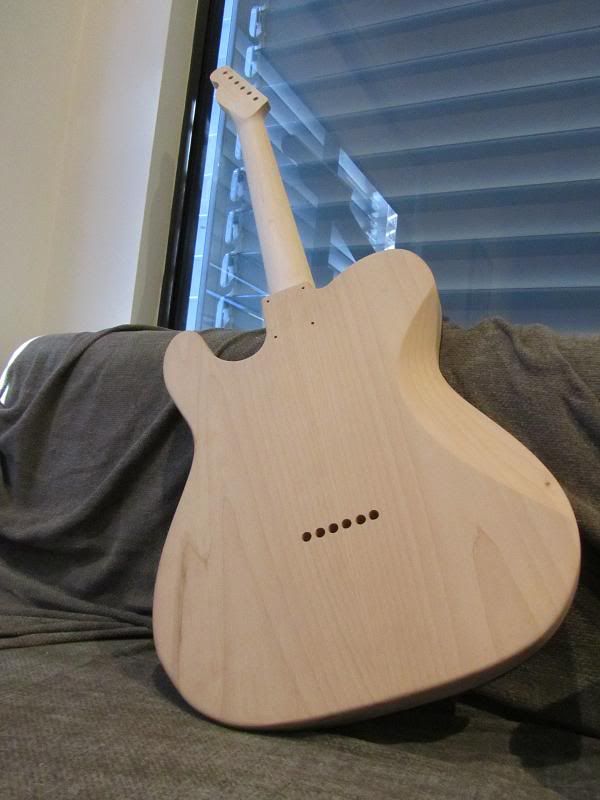
All for now, probably won't be any photo's till they're all buffed out!
Chad.
-
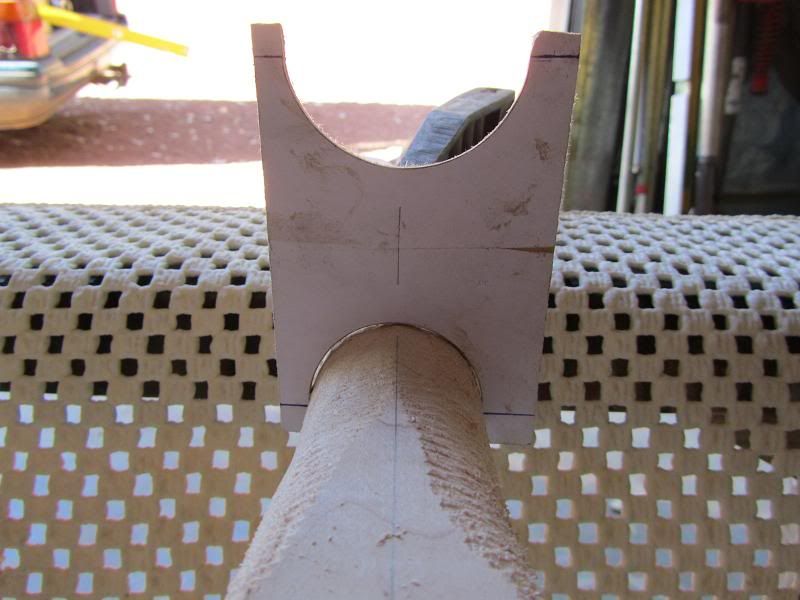
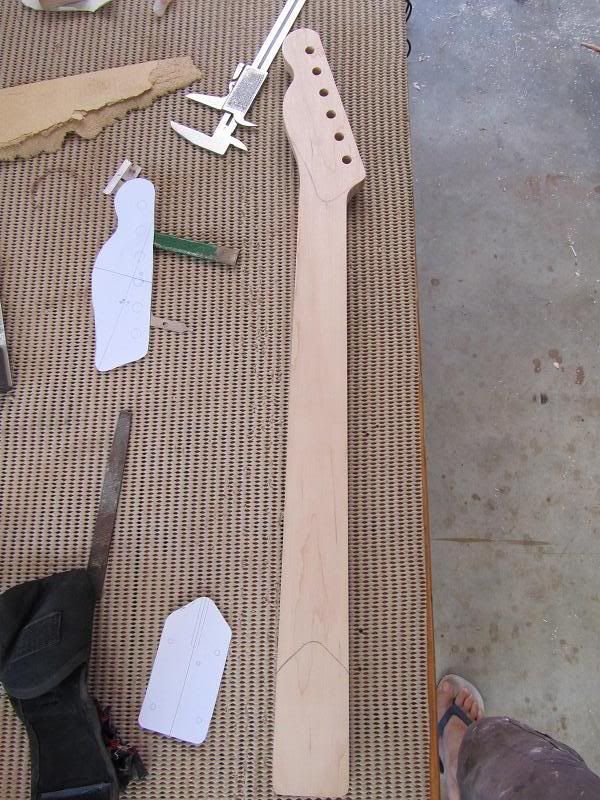
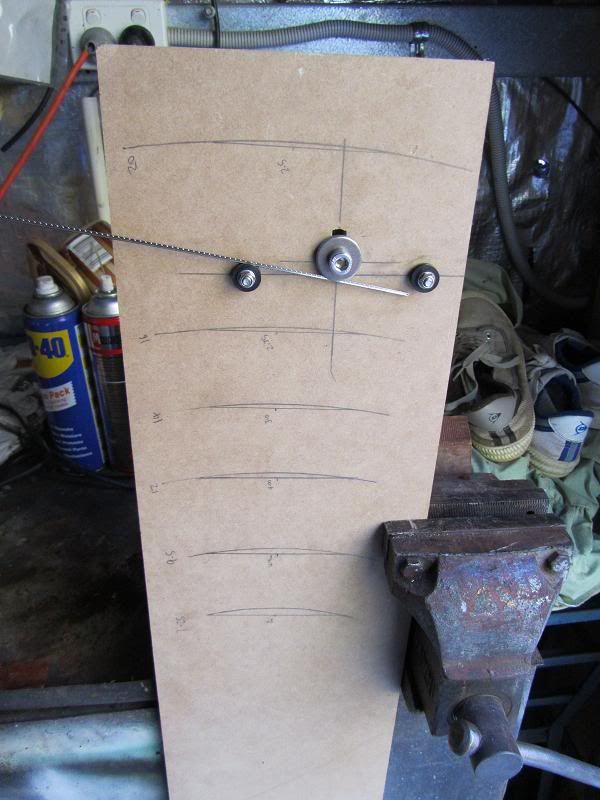
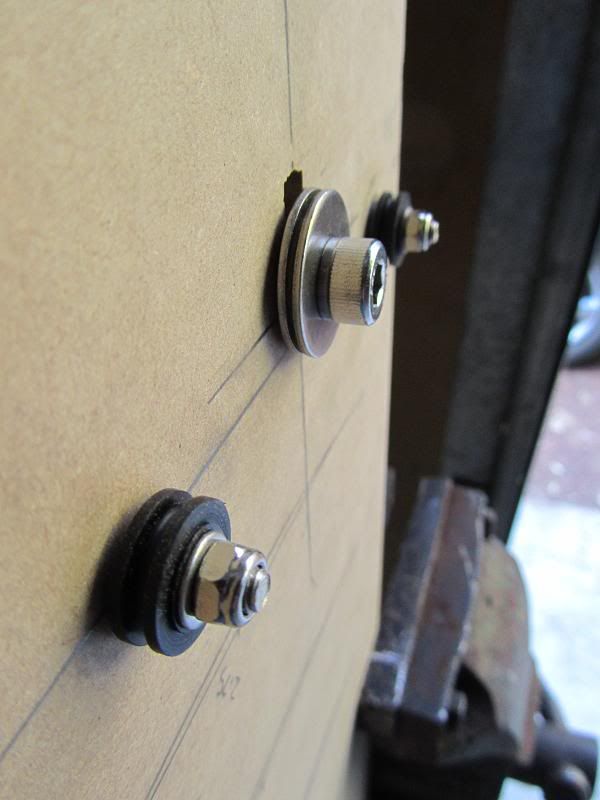
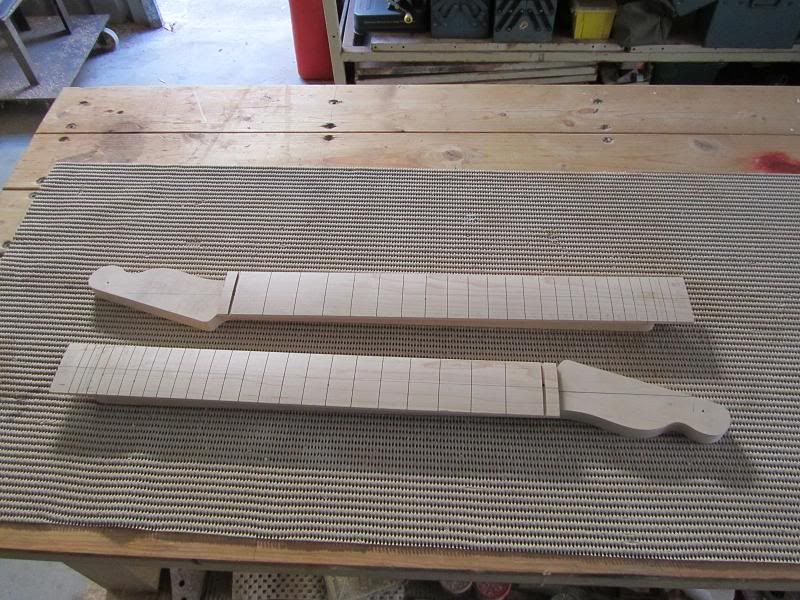
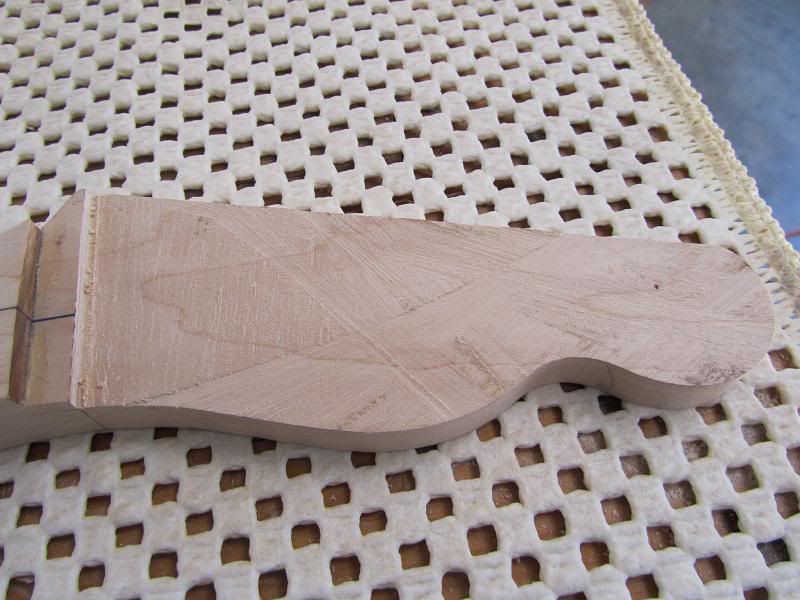
I made this neck profile gauge off the plans using some 3mm mdf. The lines are the edge of the fretboard to help rough in the thickness of the neck at both points. I start to rough in the headstock end of the neck with a rasp, followed with a half round file and then sandpaper to smooth it all out checking with the gauge along the way. Final thickness's are checked with the calipers.
Once both end's are shaped to the correct thickness, i blend in the neck shape between the headstock and heal with a spokeshave and i use a straight edge to make sure the neck is flat.
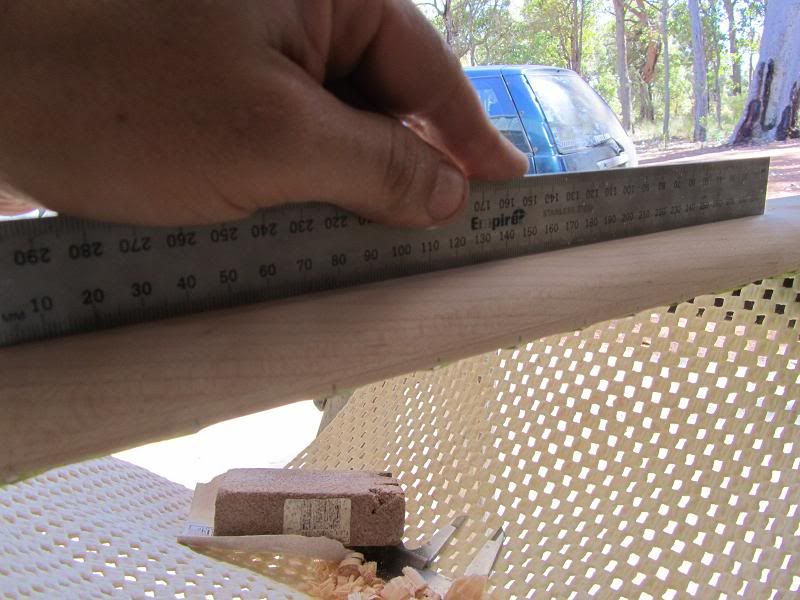
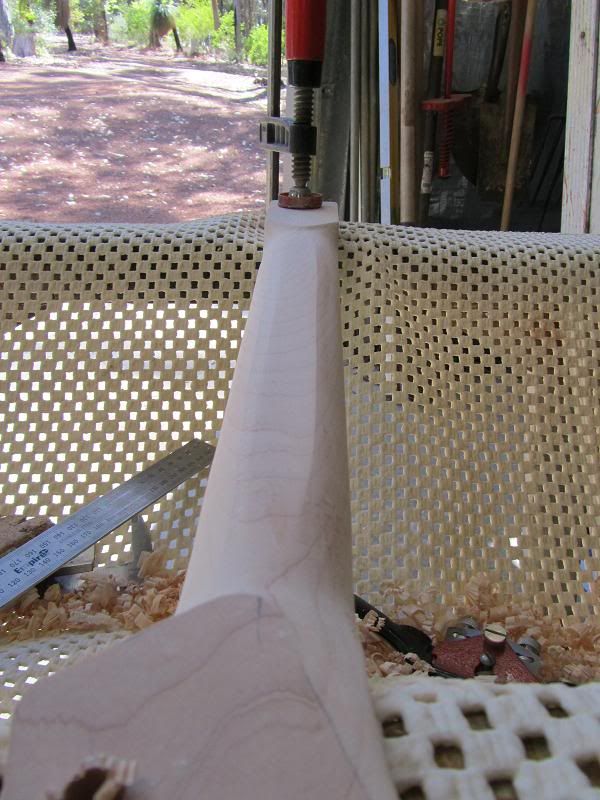
Once the neck is flat and straight like the above pic, i start to shave my way from the centre out to the edge of the fretboard using the straight edge to check for lumps. It doesn't take long with a sharp spokeshave and is quite fun. After its all shaped i hit it with some sandpaper. I wanted to try a neck that is a little asymmetrical in shape. Basically i left a little more bulk on the bass side of centre so it moulds into the base of your thumb a little more. It's not much, but enough that if you grab the neck normally and then flip it the other way you can feel a difference. It feels comfy to hold, but ill make more assumptions whether its good or bad once ive spent time playing it and get some opinions from fellow guitarists. Necks all done.
.....
-
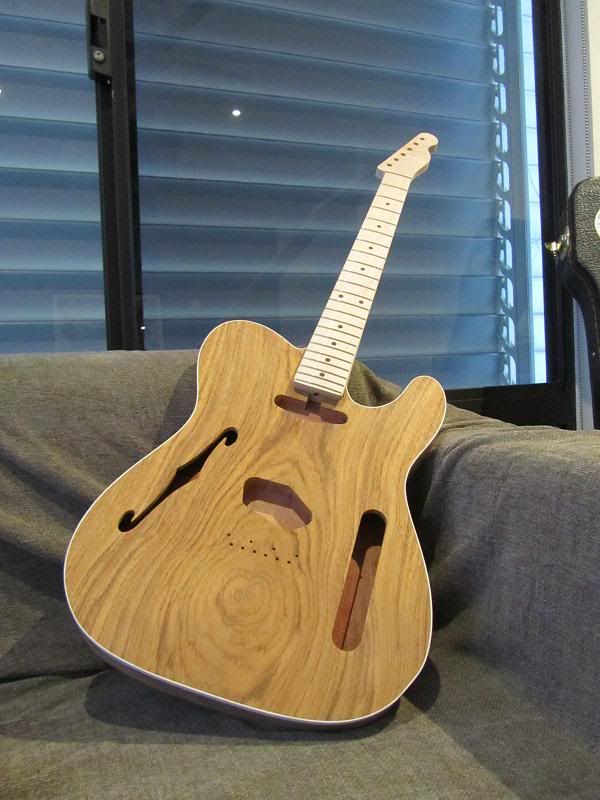
im about to start building a thinline tele with my father, this has been a great build to follow so far! How deep do you route the hollow?... or i guess a better question to ask, how much material is left on the back?
Hey pariah,
I left around the 7-8mm mark. The top is 6.5-7mm thick for memory. You can leave more if you so wish but i wouldn't go much less than 6mm(1/4 inch). It all depends on the weight your after, i probably took a little too much on this body and as Drak stated earlier in this thread, it may not balance well and the tone may not be there. Time will tell.
So starting where i left off.... the woodwork on both these guitars has been finished since last Friday. I've been to busy to start the finish sanding and finishing, im also waiting on some nitro sealer to arrive.
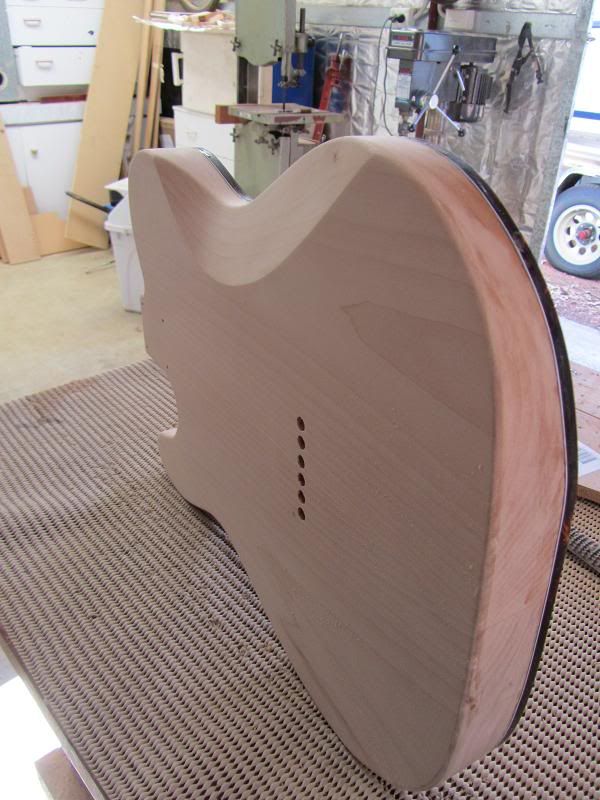
I decided to carve a ribcage(belly?) carve, i thought if i took the time to bend the top for comfort i should carve the back as well. Its much comfier to hold in playing position now when sitting down and i think it really suits the look of this build.
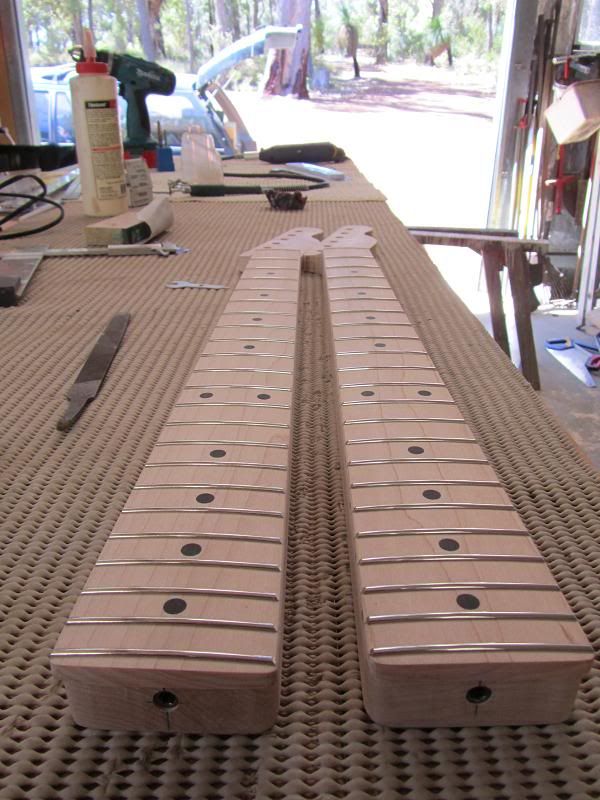
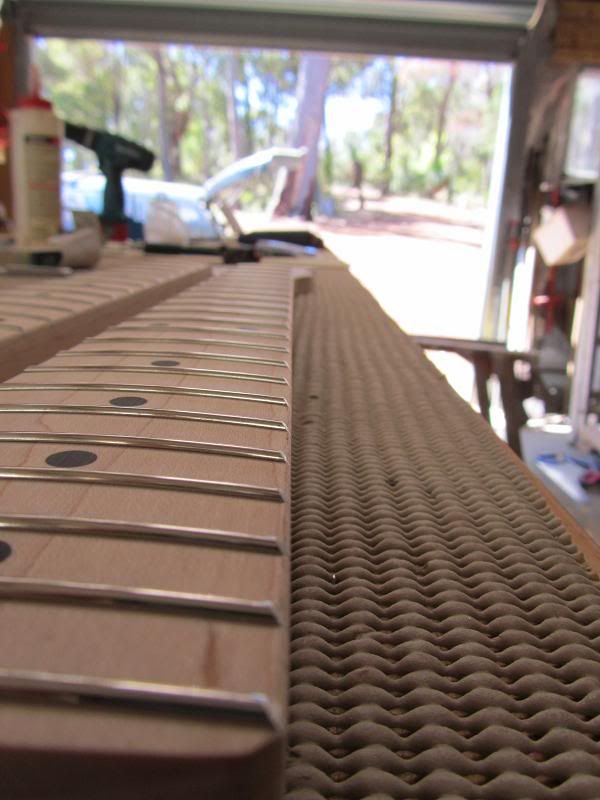
The necks all fretted and edges beveled . I will dress the frets after the necks are sprayed. Using the fretbender the fret are seated really well, im super happy with the fretting results, my best yet.
I marked the heal and headstock carve details using a paper template photocopied from the plan.
........
-
Hey Scott,
This guitar is looking fantastic mate! As far as the black edging goes, is the mahog getting any colour or is it all natural? I know what you mean about softening the line between top and bottom, they're quite different colours. If it was me and i think this is what you mean, i would think about a very subtle black burst on the top only, leaving a faux binding of the natural top colour around the edge. I think this would give attention to the centre of the top and soften the edge.
Oh and it was your fretbender i saw that made me build one.
Chad.
You've got it exactly! Everything will remain natural except and unless I do a subtle fade/burst as you described it. The trick will be to see if it even would show up, because this top changes color drastically with the addition of a finish. And actually it was your last build that is making me even consider this. What you did with that teak top blew me away.
And that fretbender was amazingly easy wasn't it?
SR
Mate it was too easy. $10 and 15mins is all it took. I've just finished fretting the necks and it is the best job ive ever done.
The finish sounds great, the subtle burst on that last guitar was deceiving. It didn't look like any burst and then a coat with the shellac to seal it and there it was. It will soften the edge because the top's edge will look darker than the faux binding and then lighter again when the mahog starts. It will look great!
Chad.
-
Hey Scott,
This guitar is looking fantastic mate! As far as the black edging goes, is the mahog getting any colour or is it all natural? I know what you mean about softening the line between top and bottom, they're quite different colours. If it was me and i think this is what you mean, i would think about a very subtle black burst on the top only, leaving a faux binding of the natural top colour around the edge. I think this would give attention to the centre of the top and soften the edge.
Oh and it was your fretbender i saw that made me build one.
Chad.
-
I also made a fretbender this afternoon over a beer. Took me 15mins and cost me 10bucks! I still can't believe how ridiculously easy it was to make and the perfect results it produces. A couple of pics, if anyone's interested i can give more details into how to build one. I'm pretty sure there is already a tut for it though.
-
Looks like a great build Fookgub!
I have the exact same router bit from MLCS and had a tearout on some endgrain the other day
All fixed now but is there any special method you use to rout when routing full depth? Chad.
-
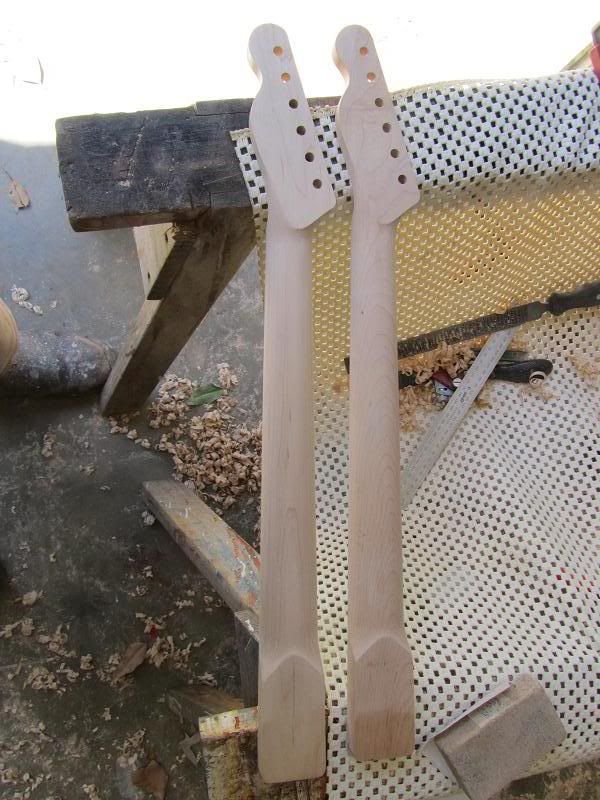
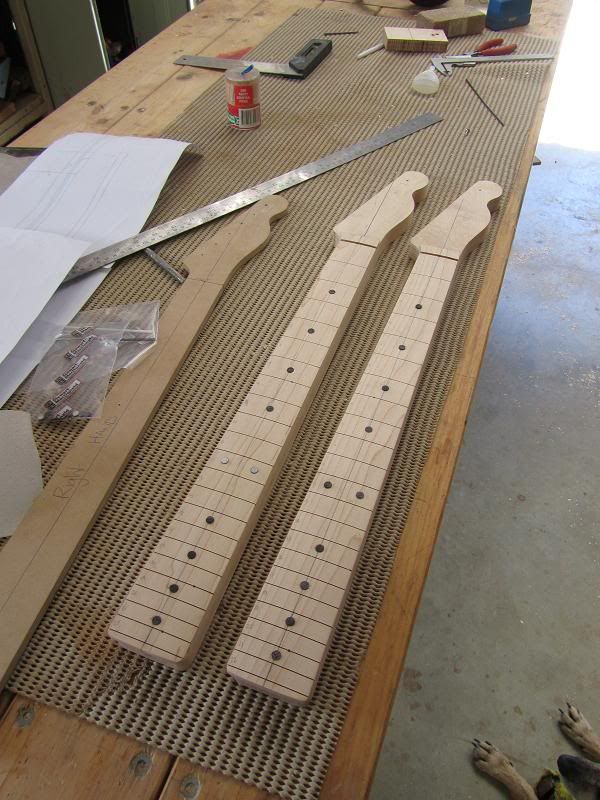
Both necks then had the tuner holes drilled and fretboards finished radius sanded to knock down the dot inlays. These two are ready for frets and shaping tomorrow.
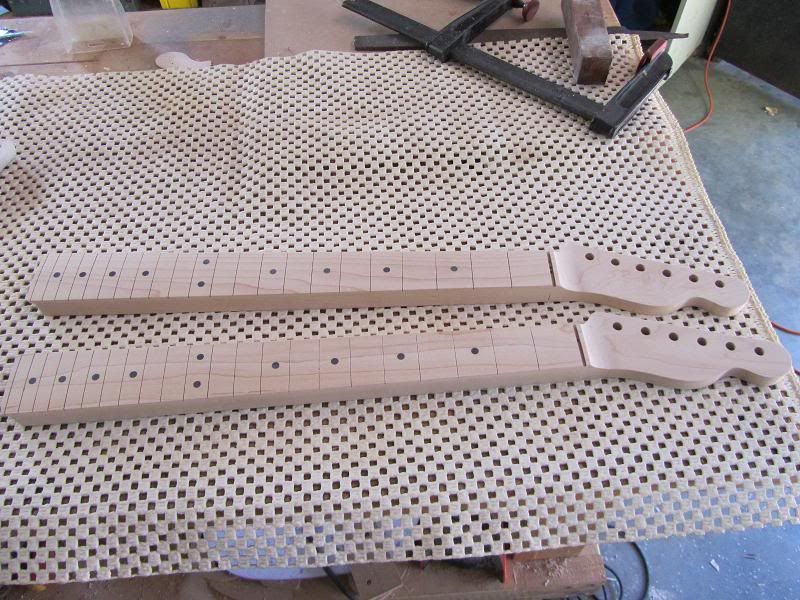
with their bodies,

........
-
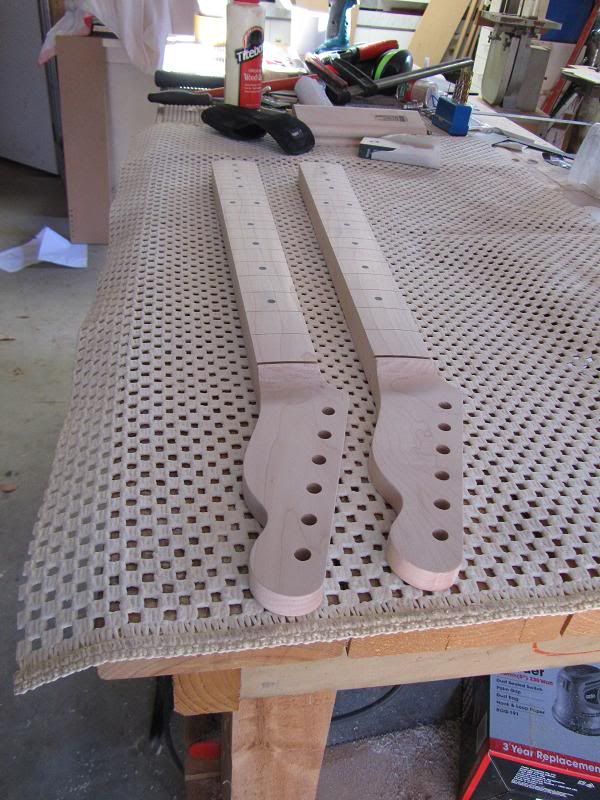
Got some more work done on the necks today. It started with both fretboards glued to the necks.
Next I routed them flush to the neck and shaped the heel. Because these f/b's are pre-slotted and radiused from Stewmac they come with 24 slots which caused a little problem. If i had of cut the fretboards off at the 22nd fret slot for a 21 fret neck the f/b would have been to short for the neck, so the easiest fix was to have 22 frets and leave a 3mm overhang off the back of the neck. Then I marked out for fretmarkers and sidedots, drilled and glued them in.
While they were drying i had to finish thickness the headstock and blend the f/b to the neck. I tried 2 techniques for this, first i rough cut on the bandsaw and then cut depth cuts to the line and then cleaned up with a chisel. I saw someone using this technique on PG and thought i would see how it went. If i had a guide for my bandsaw i would have just gone for a finished cut on the line and I tried clamping a straight edge to the bandsaw table but just didn't like the setup. The method worked fine and the results were good but i felt it took too long and there is too much room for error if your not good with your hand tools. Here's a shot to explain the technique.
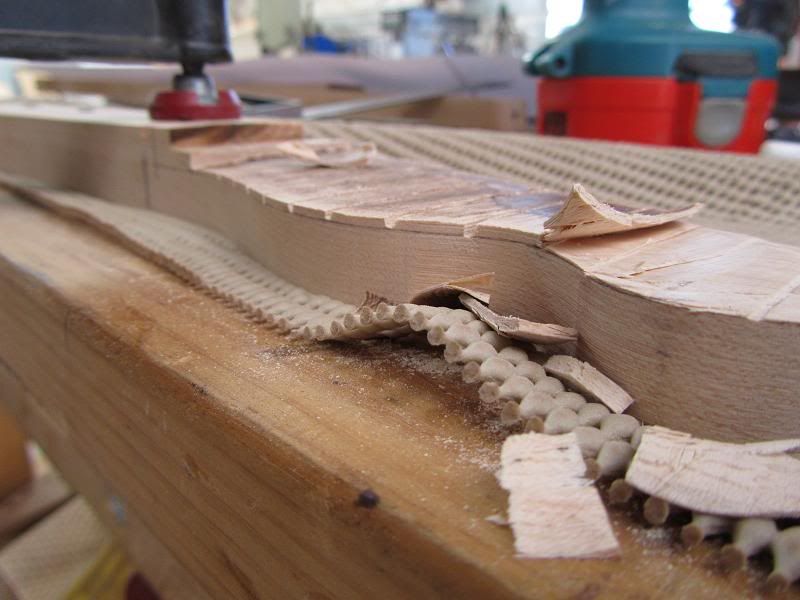
The second technique is just a trusty tenon saw. This is how i was always gonna get the job done but thought i would roadtest the other technique. Took 10mins from start of cut to totally finishing the headstock shaping. I would recommend this way every time.
Just needed a little blocking to flatten her out and then i used the rasp to shape the f/b curve/blend.
......
-
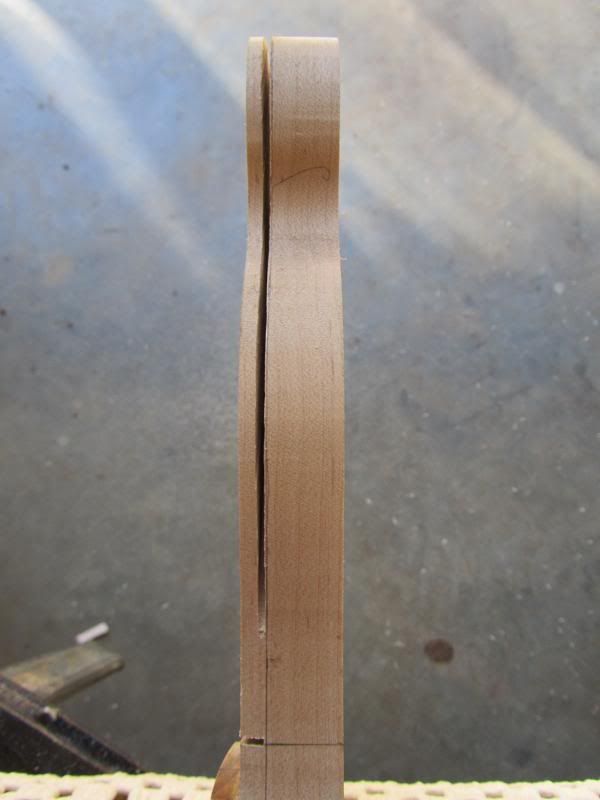
You need to find a way to sand the glue faces parallel especially if you're planning to layer like the neck in the picture.
Dougs spot on but in other words, joint one face of the pieces and then run them through a thicknesser. Once all your lams have parallel faces glue them up making a rough neck blank and then joint one edge of that and thickness the other.
We are all thinking the same thing the way you have explained it, so if this isn't your answer then we are interpreting it wrong.
Anyway hope that helps.
Chad.
-
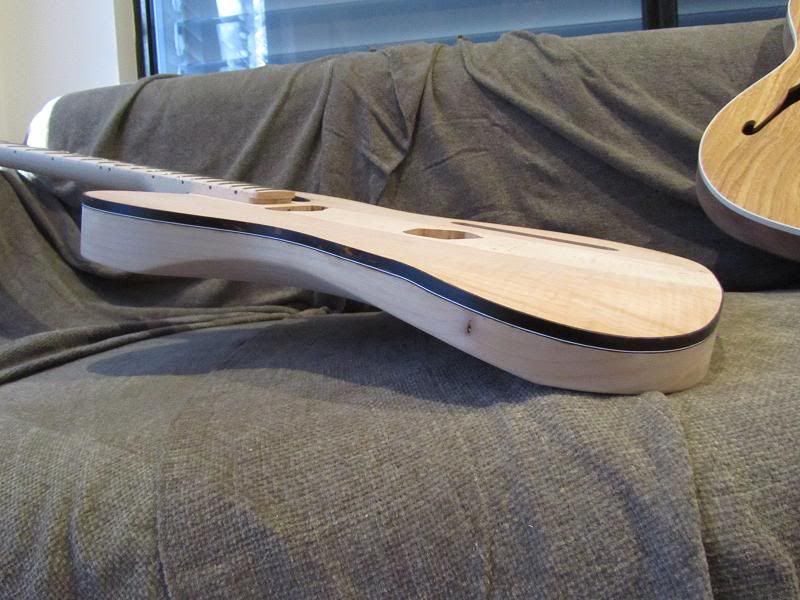
Hey Chad, that's very cool binding. Is that some sort of tortoise shell? It's dancing in the light. Keep 'em coming, these are looking great.
SR
Yeah it is tortoise shell plastic binding with B/W/B purfling to make up the height. The tortoise only comes 6.35mm deep and the top was around 8mm so instead of plain black binding i thought this would be much cooler. I really like the look im just trying to figure out if i should bind the neck aswell.... I'm not sure if a tele should have a bound neck but its basically gonna be a clear finish and i reckon those little touches will jazz it up!
More work will get done on the necks tomorrow as i have a day off from work
Chad.
-
Blackdog! As usual..... a beautiful, professional job
Im sure the customer will be stoked! Chad.
-
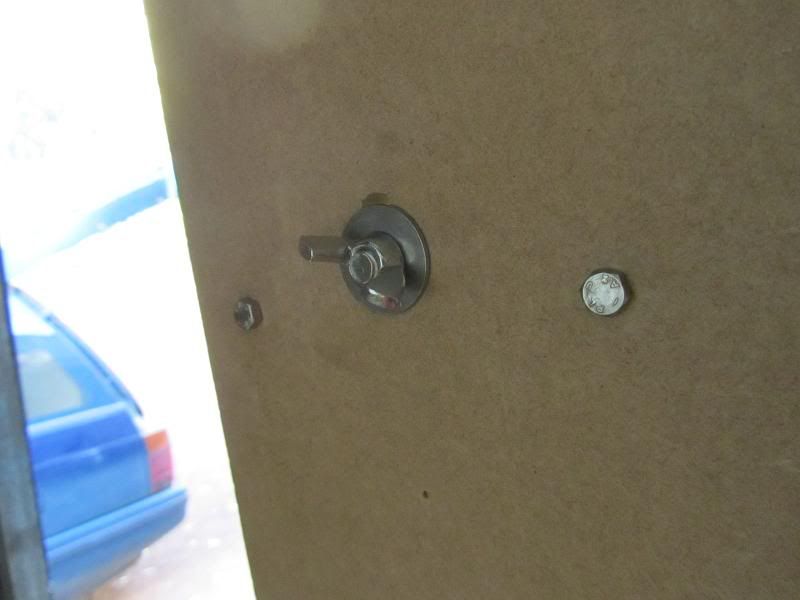
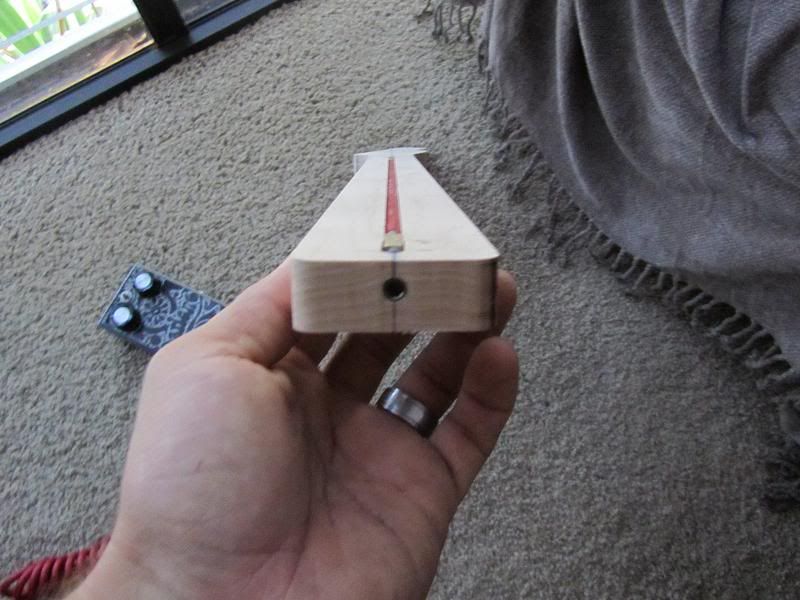
The hex head nut on these trussrods are slightly bigger than the rest of the rod, so it calls for a wider slot right near the butt end of the neck so the rod will be able to drop in. Once the hole is drilled from the end of the neck the rod can then be slid up into position.
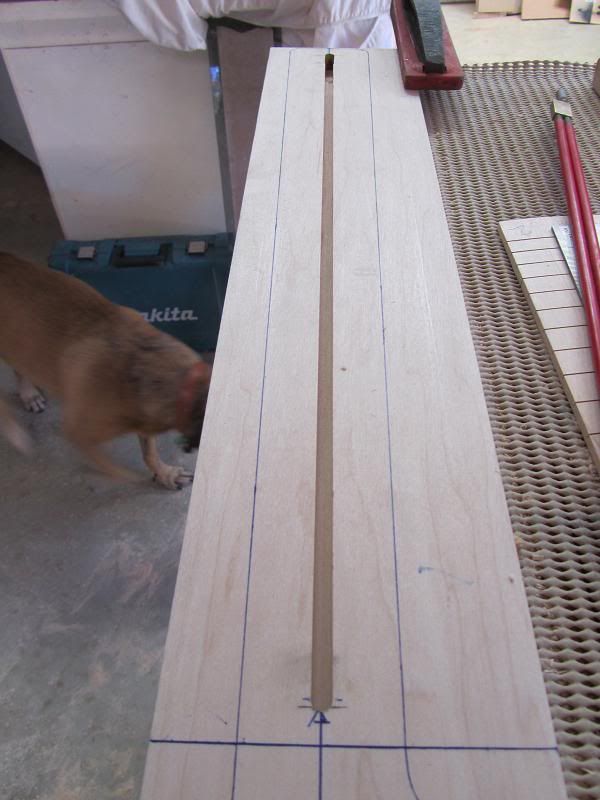

The end result....
Both necks are at this stage,... well sort of, the neck for the semi is getting the fretboard glued on at the moment.
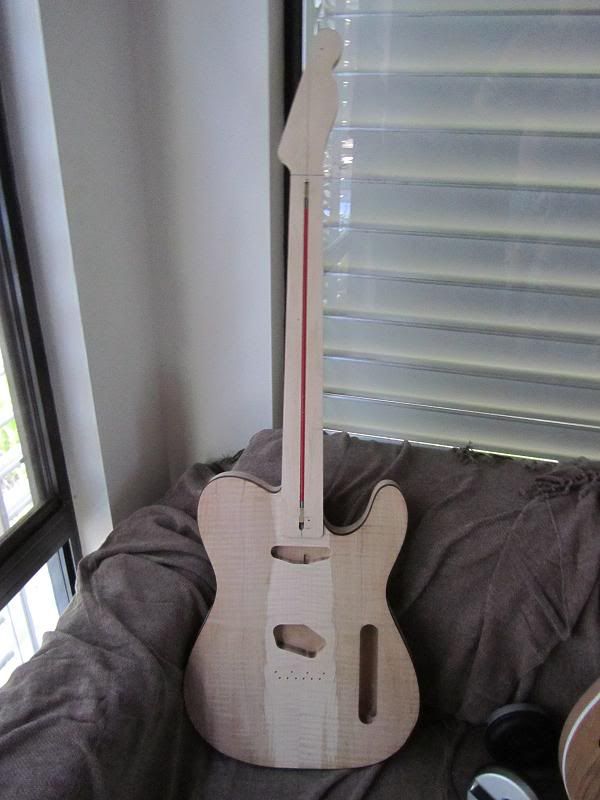
Thats it for now!

A Pair Of Gibby Tribute Builds.
in In Progress and Finished Work
Posted
Hey Blackdog,
Ive been travelling for the last 4 and a bit months with my wife through Europe so i havent been on PG much, but, I do stop by regularly to just watch this thread unfold. By far, my most favourite thread on PG, maybe ever.... Your work is simply stunning and you have done a tutorial on my favourite guitar of all time (ES335 ). Its looking amazing mate, can't wait to see both of these finished!
Chad.