


necroscience13
-
Posts
21 -
Joined
-
Last visited
Content Type
Profiles
News and Information
Tutorials
Product Reviews
Supplier Listings
Articles
Guitar Of The Month
Links and Resources
Forums
Gallery
Downloads
Posts posted by necroscience13
-
-
i like #1 and #3 the best. good luck on the build
-
very unique build. i like it, nice work
-
Cutting out the body was a success. The next step will be getting the neck cut out. I'm not exactly sure when I'll be able to do that. Maybe this week or the next. That's where I stand though.
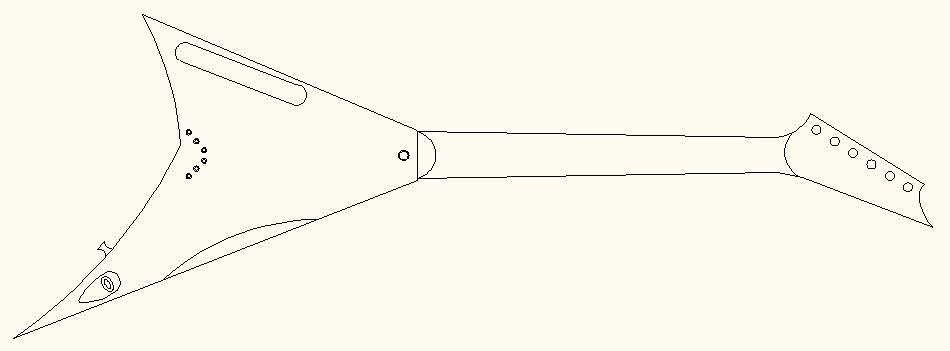
Here is the body:

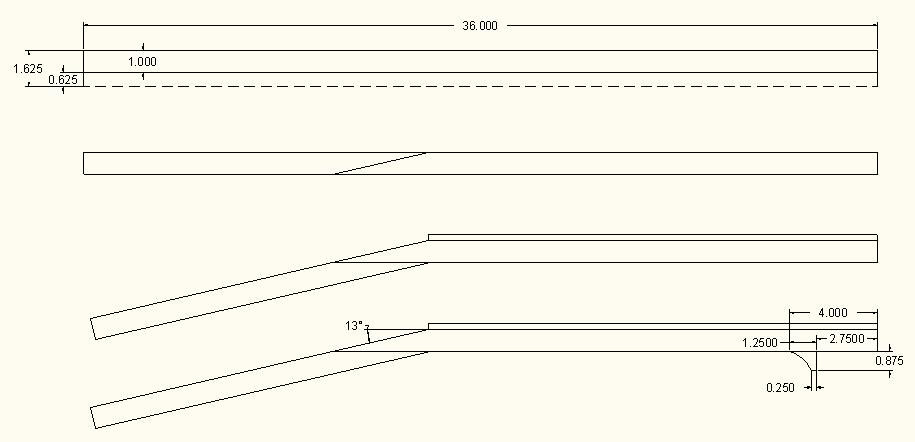
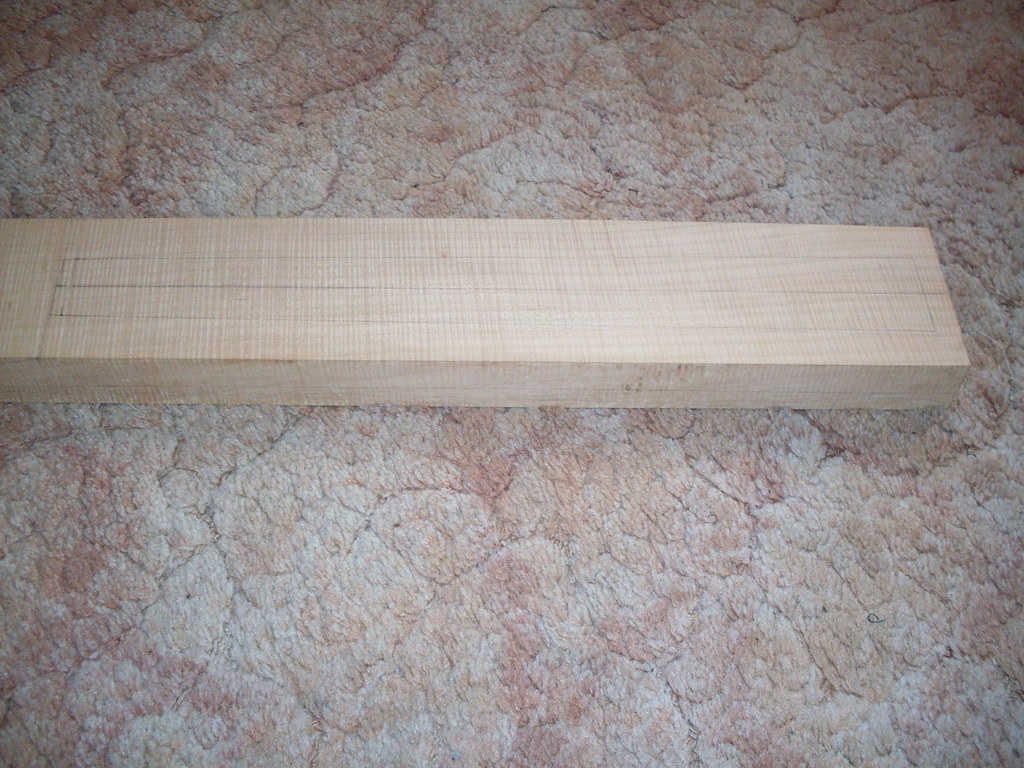
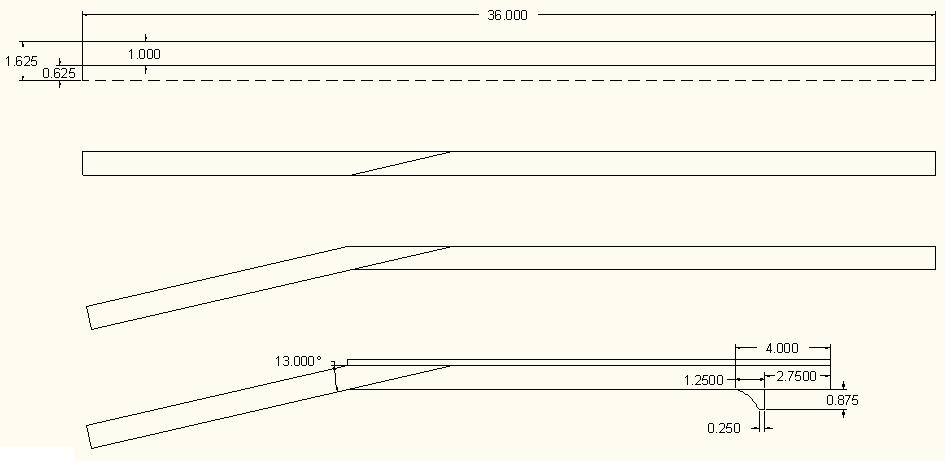
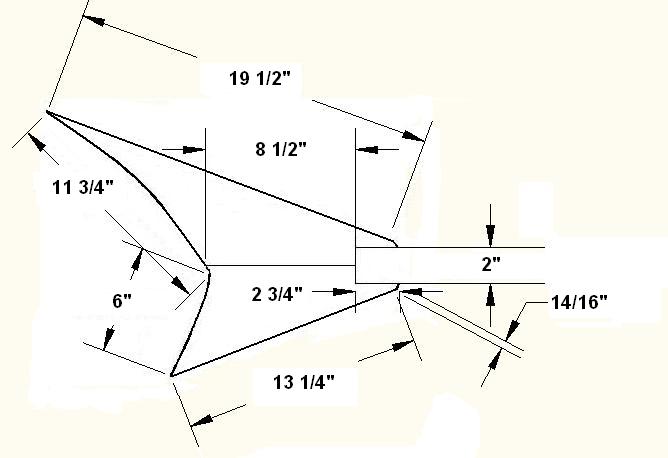
My final neck dimensions:
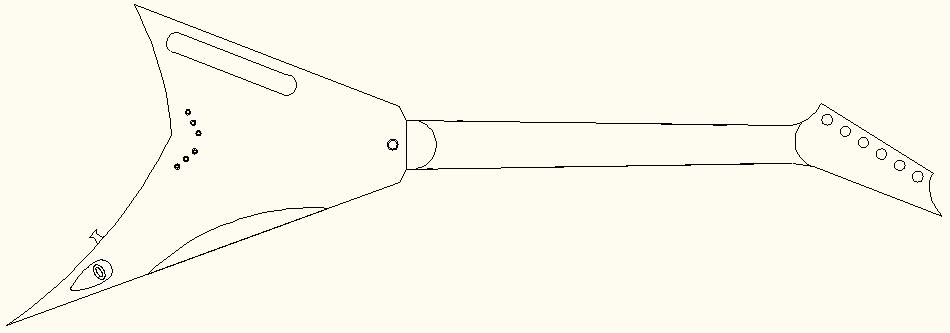
My final headstock design:

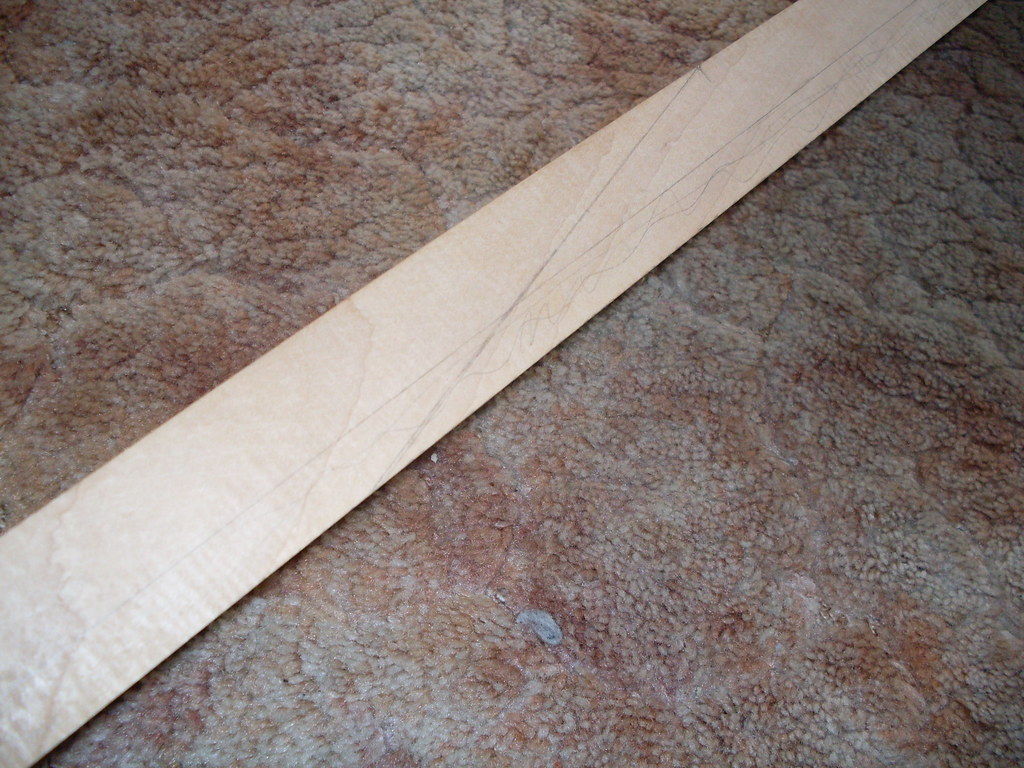
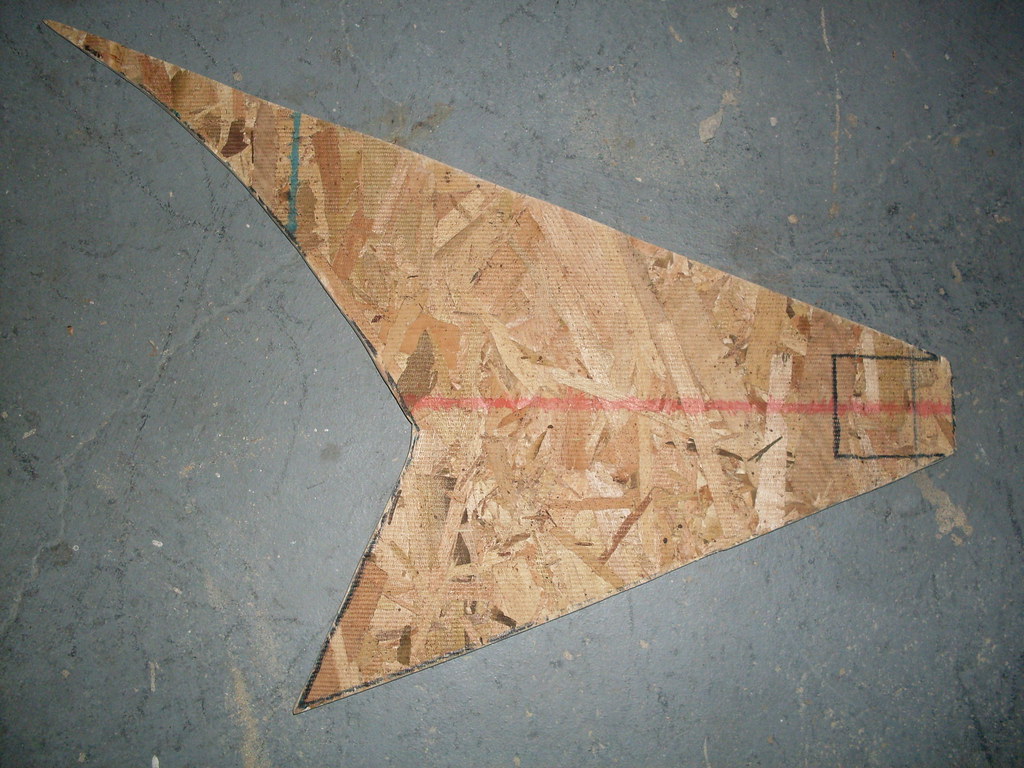
Scarf joint tracing:
Neck tracing:
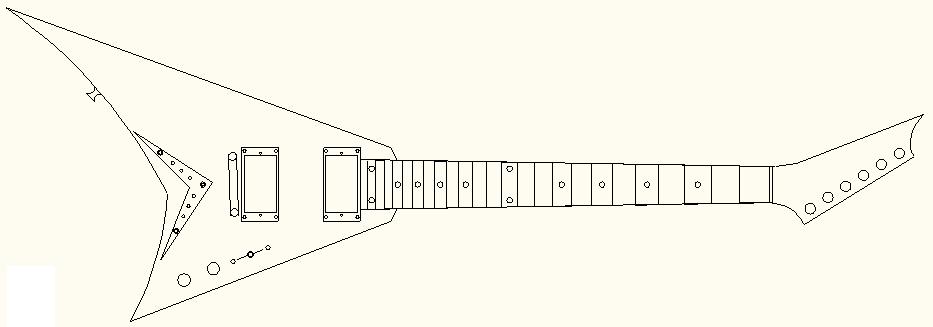
Here's a draft of what the final product should look like:

Oh, and I'm not going to use the v plate, I will use ferrules.
-
Very cool idea but I'd also change the headstock.
-
alright cool thank you
-
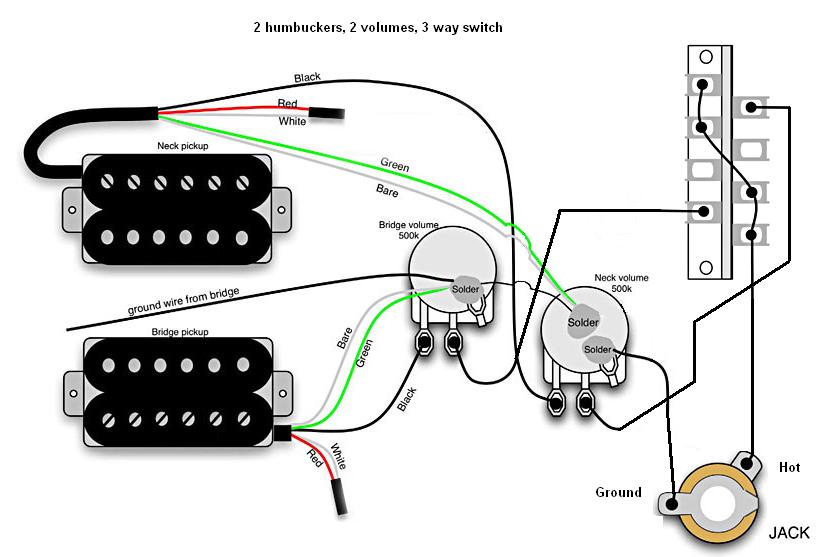
its 2 humbuckers, 2 volumes, and a 3 way blade switch
thanks for the help
-
Update:
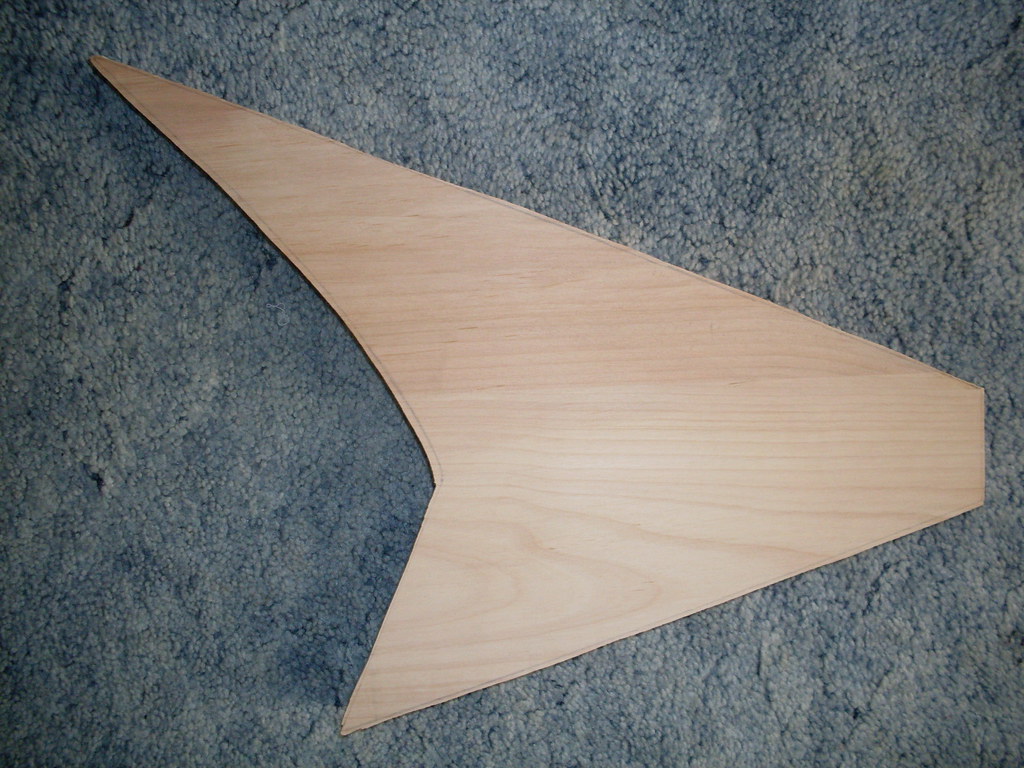
I was able to cut out the body today. Here it is:
Body blank:
Body thickness:

-
the black and creme is ftw
-
awesome job, i looked at some of your other work, its very good.
-
-
I forgot to mention that earlier. I am going to recess the TOM bridge.Hopefully it's not too late, but did you take into account the string height of a TOM bridge? You said you want a 0 degree neck angle. With a TOM being so tall, you either have to make sure the nack is raised high enough like on an SG, have a neck angle, or use a recess to seat the TOM lower into the body. -
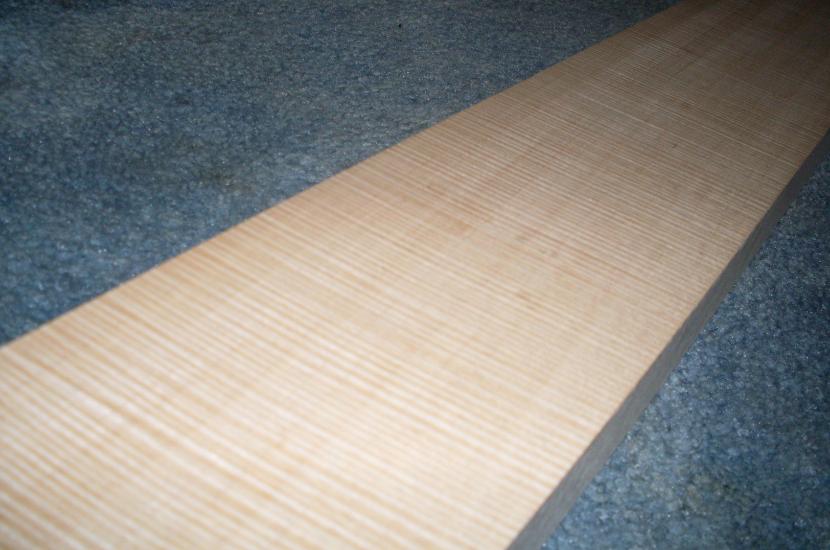
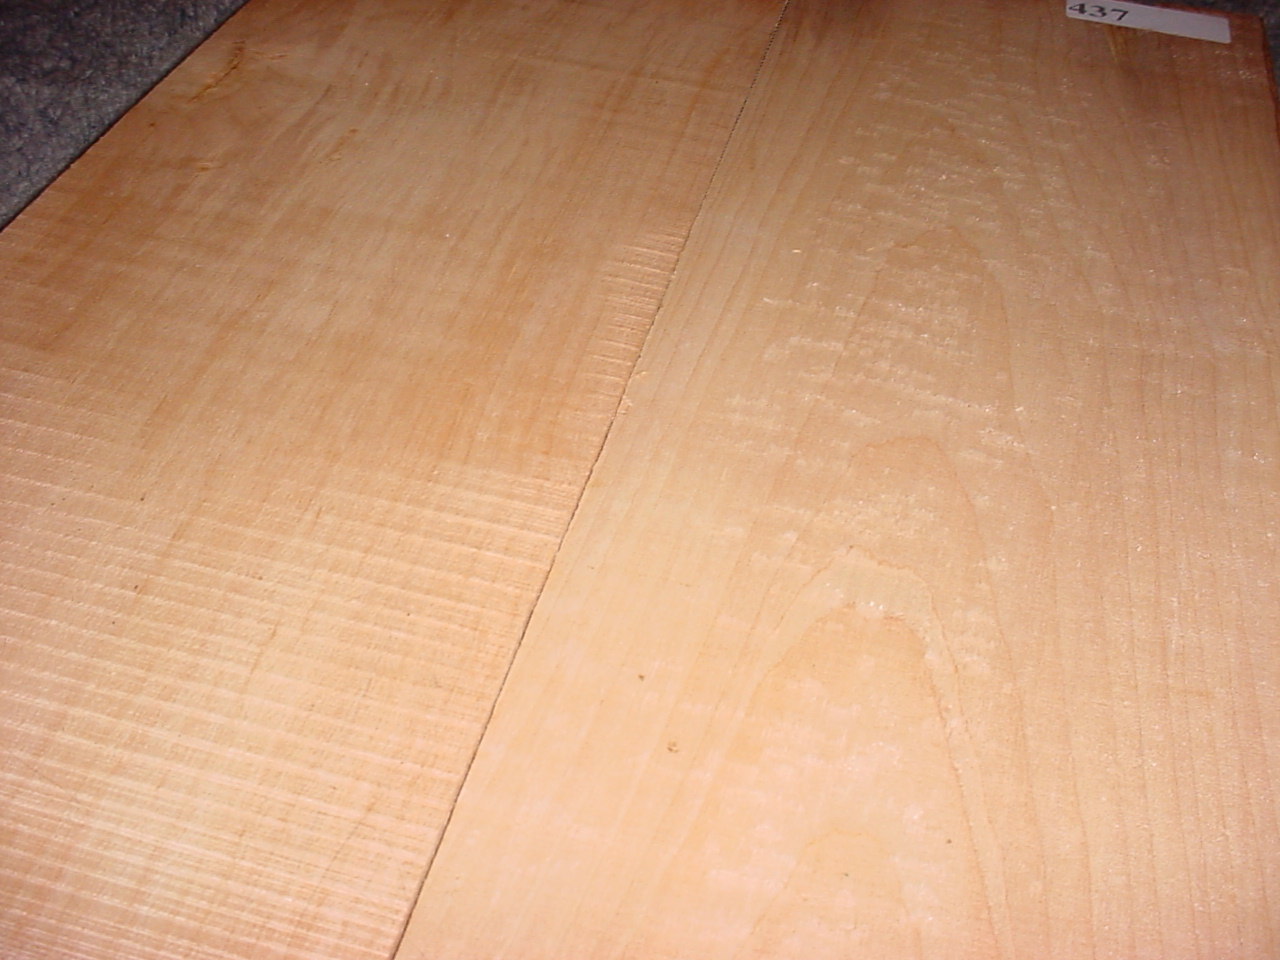
I think it looks cool with the streaks but I am going to dye it black. In future builds I may leave the streaks.Nice work! those plans are so detailed, and good plans make a great build.That's some tasty curly maple you've got there, but are you going to dye the ebony board? Or do you like the streaks? You can buy fret board dye from Stew-Mac, in case you didn't know.
Good luck on your first.
-
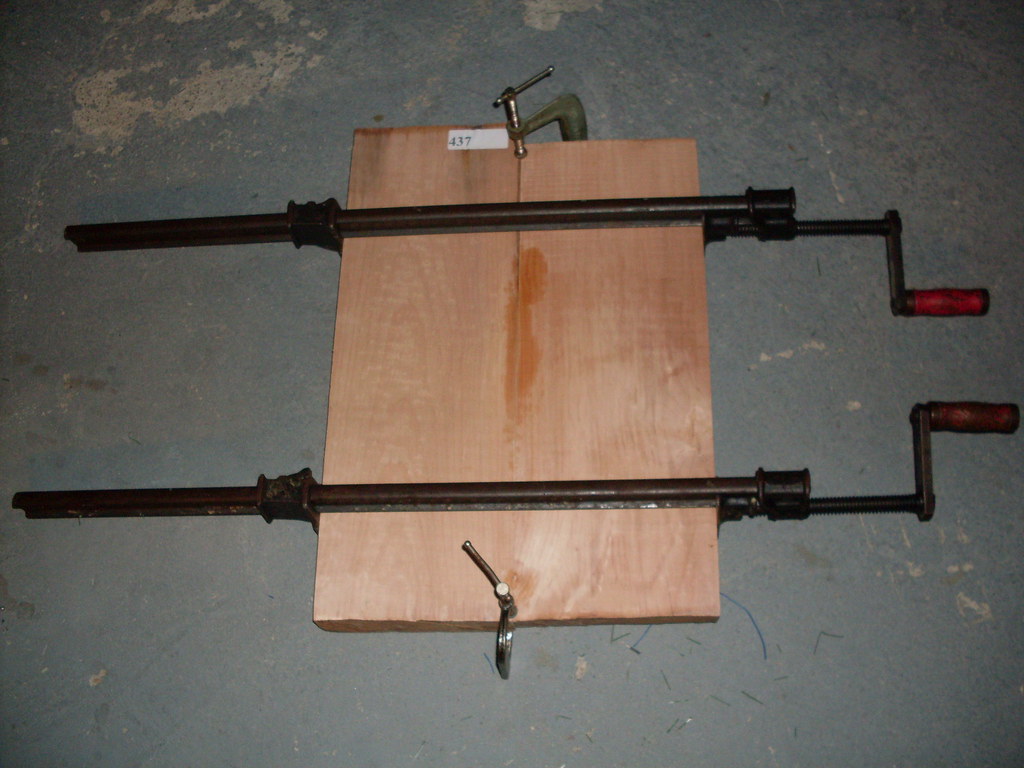
The idea about extra credit isn't a bad idea. As for the wood, it's a two piece body blank but when I bought it the seller failed to mention that one of the pieces is about 2mm higher then the other one. I'm not mad or anything though, it's no big deal.Damn, If i ever wanted to know how to build a rhoads, here's the schematics!As far as the joint you have going on there, did you plane it and make sure it was completely flat with complete contact before you glued it together? It looks a little uneven on one end. I'm sure running it through the plainer will fix that, but I noticed, so i have to point it out.
For the use of the band saw, I would see if you can squeek in some extra credit on a woodworking side project. My robotics teacher let me do that when I was in highschool. He added a point to my final grade for wiring up my pickups in my bass.
-
Revised neck dimensions:
-
I've run into a problem, the wood is too thick to cut with a jigsaw and is slightly uneven. I didn't know what to do at that point but a friend of mine suggested that I use the bandsaw at school which was a great idea. As for the planing I was going to hand plane the wood but I'm pretty sure the school has a thickness planer also. I am on good terms with the shop teacher because he also teaches Autocad and I had him last year. I'm hoping he'll let me do it. Anyways, here is what I've been up to in the meantime:
My alder wood blank all glued together:

The wiring diagram I am going to be using (tell me if there are any mistakes):
Wood rasps for shaping the neck:
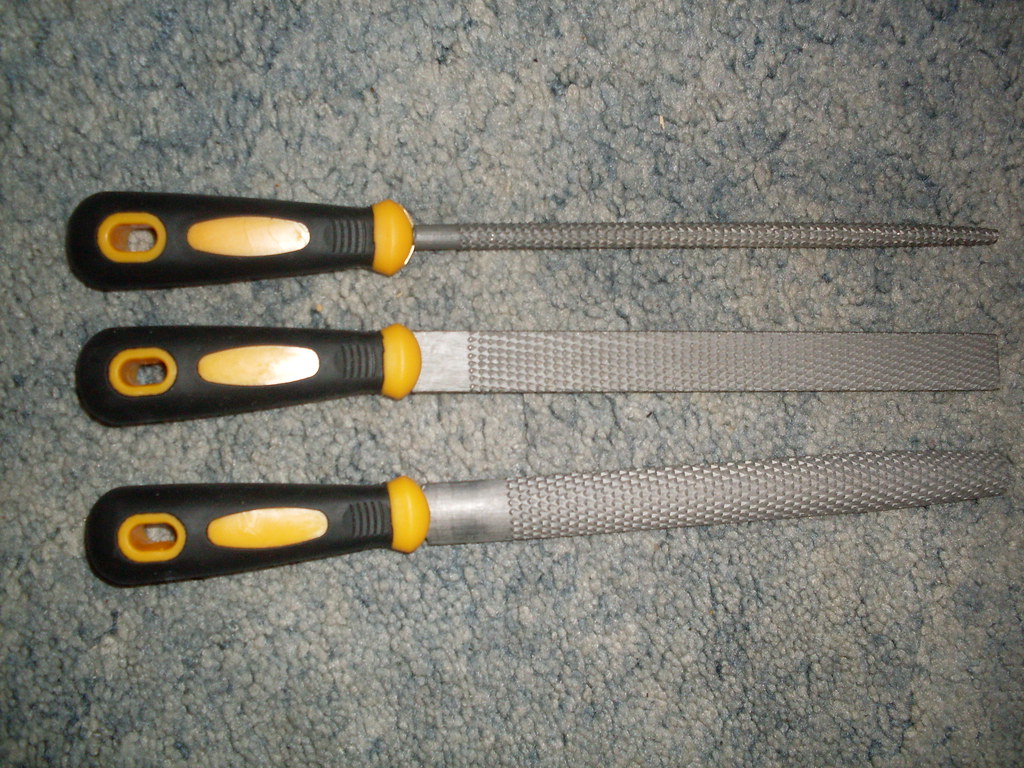
The wood rasps were a great investment, they're really sharp and should have no problem shaping the neck. I only wish I had gotten them sooner when I was scalloping the neck on my other guitar. In addition to the rasps, I recently purchased a fret file which should be coming in the mail soon.
My birthday is coming up in February and I'm sure I'll get some money so that I can get the rest of the materials. Here is a list of what I still need:
Jack and jack cover
Knobs
Tune o matic bridge with either a flying V tail piece or top ferrules
Pickups
Pickup rings
Pickguard Material for the control plate
Tuners
Nut
Paint supplies
Screws
Side Dots
3 way switch
An oil stone for leveling the frets
-
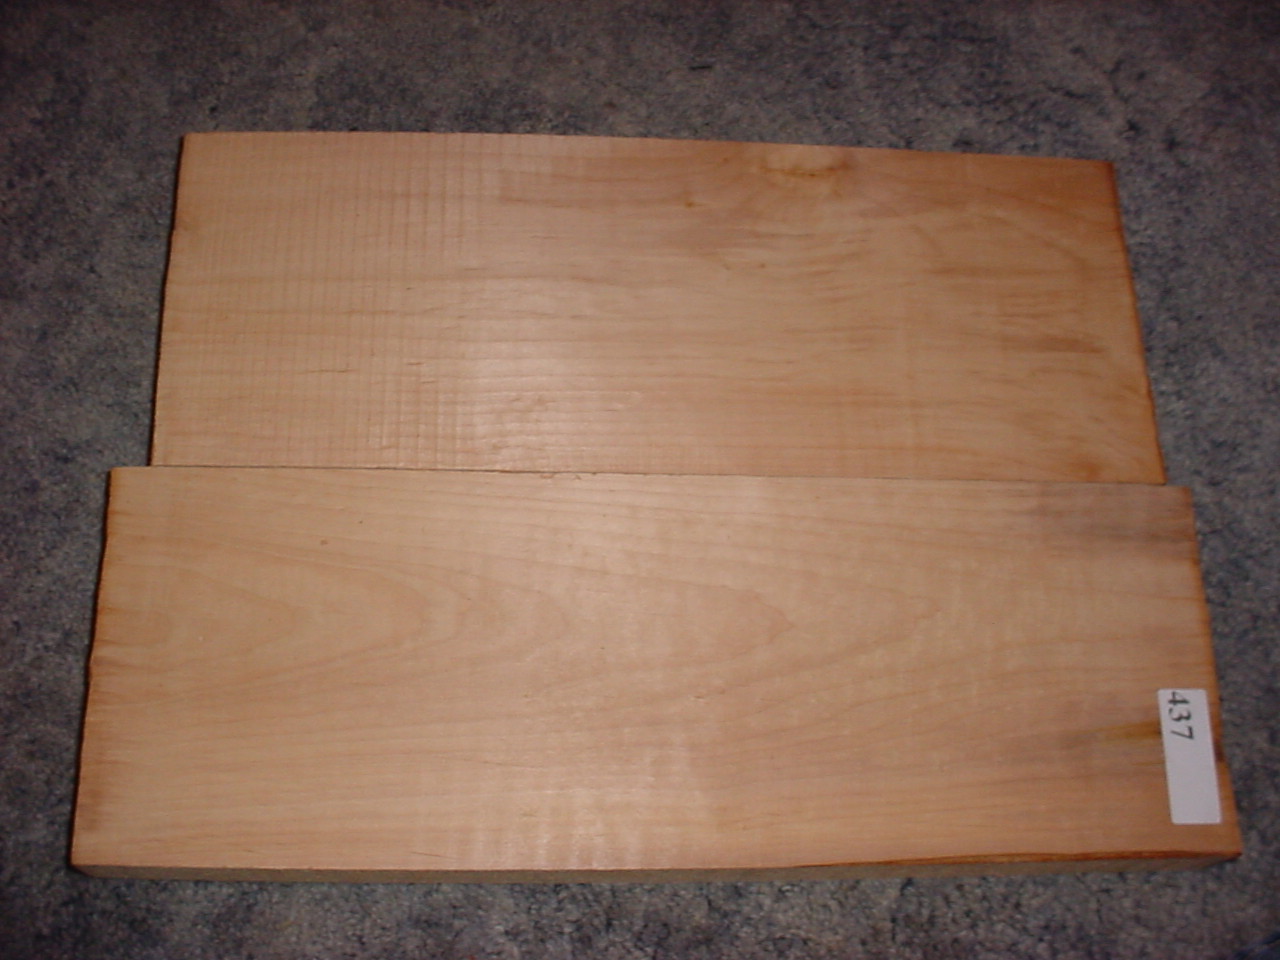
Nice looking curly maple neck blank:
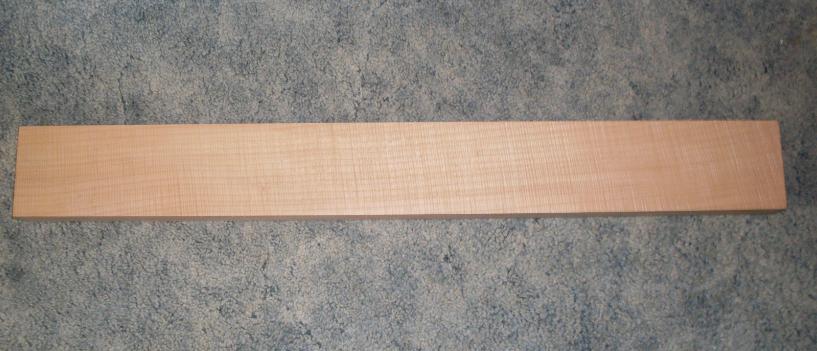
Curly maple grain shot:
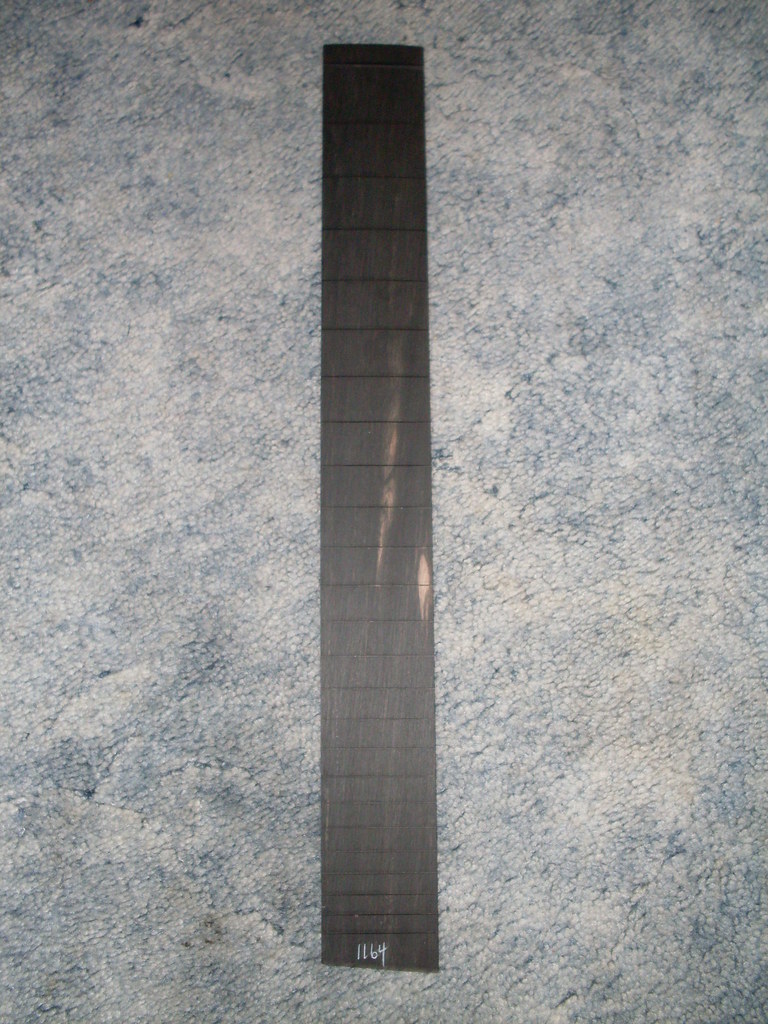
Ebony fretboard:
Group shot of supplies:

Body glued together:
-
First concept:
Revised concept:
-
Alder body blank:
Alder grain:
Dimensions:
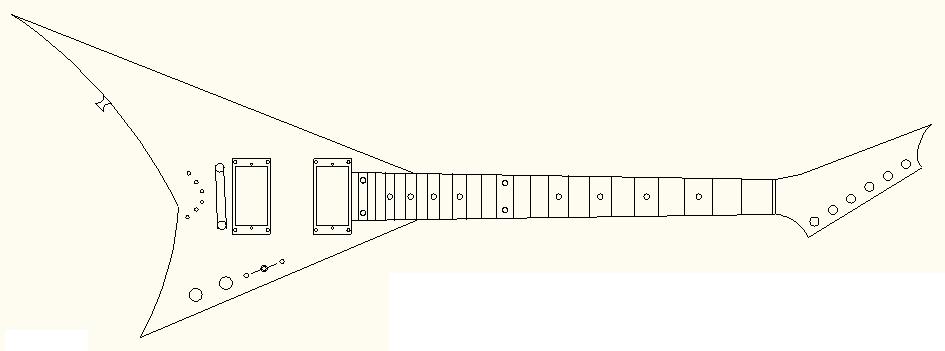
Template:
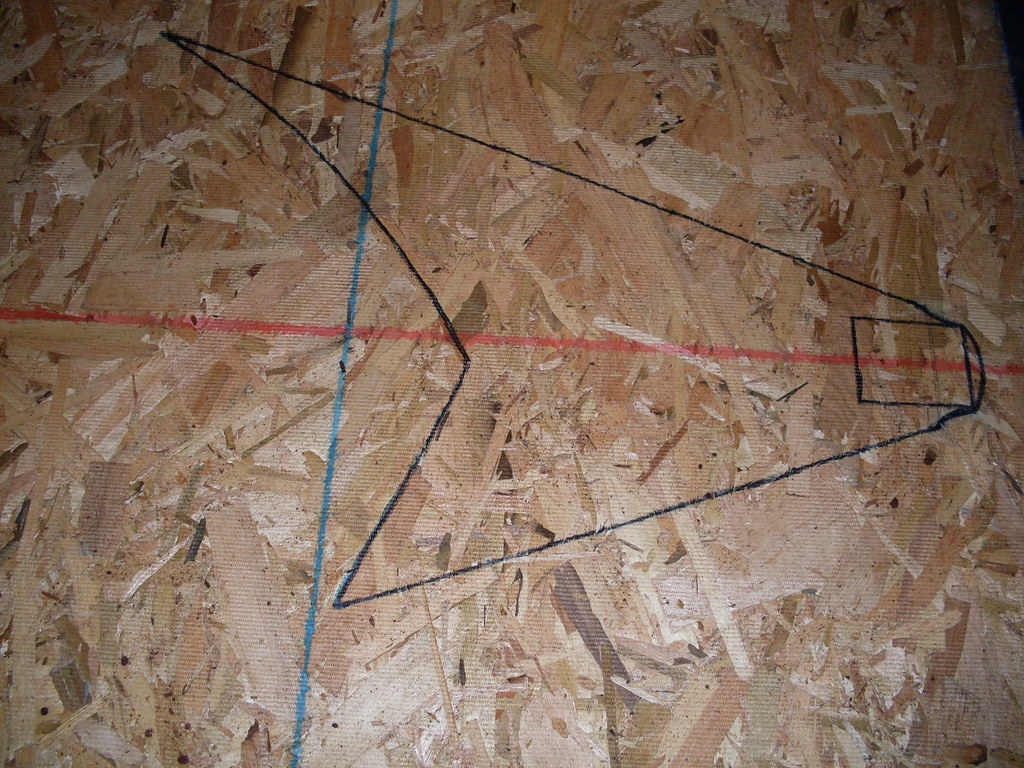
Template cutout:
Neck dimensions:
Custom headstock:
-
I have been checking out this forum for awhile now and checking out some awesome builds. Here is my first.
Here is what I'm going for:
RR24 Style Guitar
2 piece alder body
One piece set curly maple neck
24 fret ebony fretboard
Non-beveled top
25.5" Scale
Tune o matic bridge with either a flying V tail piece or ferrules (string through body)
13 degree headstock angle with scarf joint
Custom headstock shape
Body, neck and headstock painted solid black
2 Humbuckers
2 Volumes
3 way blade selector
Zero degree neck angle
Dot inlays
Jumbo fretwire
-
really nice job on the guitar, looks great, but the fret dots are in the wrong places
I Am Curious Blue
in In Progress and Finished Work
Posted
i like it but loose the washer on the pickup selector