


NotYou
-
Posts
573 -
Joined
-
Last visited
-
Days Won
4
Content Type
Profiles
News and Information
Tutorials
Product Reviews
Supplier Listings
Articles
Guitar Of The Month
Links and Resources
Forums
Gallery
Downloads
Posts posted by NotYou
-
-
This is my first in progress thread. As some of you know, I started my own business recently. I'm doing my first run of multiple guitars. It was going to be three, then four, and now I'm thinking five.

I'll post some progress photos later. For right now, I have outlines that I'm using for templates. I've already started planing and gluing wood.
I'll be doing three of these. One is a Jatoba top(carved) and back with maple sandwiched veneer, one is a goncalo alves top(flat) with a walnut back, and the last is a combination of African mahogany and red goncalo alves all dyed black (and selectively sanded... you'll see):

One of these (walnut back with a bubinga top):

And one of these. This one is special. The shape is unusual for a solidbody, but I really love it. I'm going to use homeade chemical stains to "age" the wood on the top (wormy maple) and blacken the wood on the back (walnut). I hope to make the knobs from bone, but I have to find it first:

I'll most more info and pictures later. This going to keep me very, very busy. (there's a fine line between brlliant and crazy
) -
I really like them. I think they give more character to what would other wise be a very plain back. Personally, I like to make the middle piece the same wood as the top, as long as it looks good (it doesn't always work). I think it adds some continuity to the overall design.
There have been times where I really want to use a piece of wood that is an inch or two too narrow. Making a three piece back is great way to work around it.
I don't think it should be frowned on at all, especially since it involves more work. It'd be much easier to just buy a wider piece. The same goes for laminate necks.
-
birch as been called "poor man's maple" i think is alot like maple its not quite so hard its good for necks ,acoustic bodies whatever....give er
That's funny. Where I come from, in Ohio, maple is called "firewood."
When I started building I was telling my dad about how much maple costs and he wouldn't believe me. If I tell anyone from there that I built a guitar from maple they usually look confused and respond with "really?"
-
If you press down on the pickguard with your fingers, does it still do it?
Try it on the bridge too. Also, check the springs on the pickups.
I've honestly never heard of this problem, so I'm sure someone else might know the answer. I would assume it's one of those three things, though.
What does the echo sound like?
-
It does look like a good jig, and I looked at this thread in case there was actually a machine method that would convince me to change from my hand plane. Nope, I'm sticking with my method. The easiest, and I'm certain the most accurate, method of making a compound radius FB is with a hand plane. I wouldn't even think of using a radiused sanding block, as a matter of fact, I avoid sanding in general on guitars. Even on a block, sandpaper is vastly inaccurate compared to a scraper blade or plane when it comes to leveling surfaces. In fact, it really surprises me that a reputable supply house like Stewmac sells so many of them. Not only is shaping a compound radius with a handplane easy and almost mistake proof, it's fast too. William Cumpiano outlines the method in his exellent book. No, for me to change to a machine method, it would have to make a more level, smooth FB than my handplane, and I just can't see (or feel) that happening soon.
I like scrapers too. They're also good for shaping when you only need to take off a little bit.
Radius sanding blocks are a nightmare to use, IMO. I never tried using a plane for radiusing. I just figured it wouldn't work. I'll give it a try on a scrap piece. I think a spokeshave would good too.
When you use a plane to radius, do you slot after you do it?
I'm still working on my jig that I mentioned before. I haven't touched it since that last post, but I'll be on it again soon.
-
According to wikipedia brazilian cherry isn't acctually cherry. What I would be using would be european wild cherry. I thought they might be similar as the cherry i'm using is of similar hardness as mahogany (little bit harder than mahogany i would say). Somewhere imbetween mahogany and maple?
I see. I've only used cherry from the US or Brazilian cherry (it's called Brazilian cherry because the wood is similar... they claim it is at least).
It's likely to be very different if it's European cherry. It should be fine structurally. If you can get ahold of some you could just give it a good tap and compare the sound to mahogany. That should give you a real good idea how it will sound. I bet it'll be more like maple, though. Even though the hardness might be like mahogany, the structure of cherry is usually closer to maple, in my experience at least.
-
I've used Jatoba a lot before. It's considered Brazilian cherry. It's definitely not like mahogany.
As far as domestic cherry goes, I haven't heard it in a guitar, so i can't say, but like Wood said, it seems o be more like maple.
-
If I were you, I would just cut a rough shape with the jigsaw then route out a clean shape with a router and a template. That way you won't be digging through the wood and the router will work more like how it's supposed to.
-
If you don't want a full sized router, check this thread out. I use this thing way more than my router.
http://projectguitar.ibforums.com/index.php?showtopic=25245
Laminate trimmers in general are great for guitar building. That Rigid one is good kit, though.
-
I prefer no wall.
When you're building handmade guitars, it really makes things a lot easier. Also, I like to have as much of the neck into the body as possible.
Personally, I really don't see a reason to make a wall if you're doing a set neck. It all depends on what exactly you're building, though. The glue is plenty strong to hold it in place by three sides. Tonally, I don't see a difference. If anything, you might get just a hair more tone from having no wall and sending the neck through to the pup, but nothing noticeable.
But, like I said before, if you're building by hand, it really is easier to have no wall.
-
I'm not really sure how many. I'm a complete perfectionist, so I just tore apart my first ones and did something else with them. The only remaining evidence is a botched neck.
In retrospect, that was a bad idea. People keep asking for pictures of my work and I have nothing to show except my most recent work.
I got that fromart school I think. We made countless drawings, paintings, and whatever projects and I trashed most of them afterwards, considering them practice. I didn't think ahead to starting a business. Definitely one of more boneheaded moves.
-
Use the stripey side. It's a LOT more interesting.
I was thinking either that or the top picture. I think the top one would look good once it's shaped and everything.
-
I got this black and white ebony a while ago to make fretboards. I'm sure which side I want to use yet. Any opinions?


-
I vote for binding.
-
I was gonna hard maple cap a soft maple core with a mahogany neck. 4 string bass; any thoughts on the wood combination while we're at the discussion.
Any kind of maple with mahogany has been done countless times. It'll definitely work.
I haven't worked with soft maple much. Although, I recently bought a bunch of soft maple covered in work holes that I'm looking forward to using. A lot of people think that's junk, but I love how it looks.
-
I just looked it up and there's a place near me that sells it. I'll have to check it out. I love how it looks.
-
Make sure to show us pics when you build it.
Make a good one so I dont have to redesign another one,
LOLIt's not going to be pretty, that's for sure.
I have it about half finished now. This is pretty much a rough design to see how it works. I'm making sure everything is precise, but I'm just using scrap wood and table legs to construct it. When I know it works, I'll build a proper one.
-
That's a great idea. I was about to make a jig where the router moved over the fretboard, but I this makes much more sense. It'll be a smaller jig too and should be easier to set up. I'm not sure why it didn't occur to me when planning the other one.
Seems simple enough, you have to fiddle with the height if you are changing radius. The pendulum swings inside the box. A miter slot is best as it allows you to easy slide the box back and forth as well as swing. Wedging the box against the fence is less than ideal. I guess you can clamp two boards to the table as guides.
As long as you dont do really flat radius like 16" the box should only be about 14-15" tall.
I'm definitely going to be doing this. I'll post pictures when I'm done.
-
I made a quick and easy jig a while back which can be used to make a compound radius as well. Uses a router table. I scrapped it when I moved a year ago I may make another..
This is a very rough sketch.
I am not going to get into details as it would be a lenghty post, but it gives you something to think about. It did work.
The pendulum had a long slot not shown.
http://img.villagephotos.com/p/2006-11/122...adius%20JIG.jpg
That's a great idea. I was about to make a jig where the router moved over the fretboard, but I this makes much more sense. It'll be a smaller jig too and should be easier to set up. I'm not sure why it didn't occur to me when planning the other one.
-
You might get lucky with heat. Use a hairdryer and heat up the adhesive, then slowly peel it back.
Lighter fluid works really well with removing that sort of thing. Not BBQ lighter fluid, but the kind you put in Zippo lighters. It's dirt cheap and it evaporates completely. It might react with the finish, though.
I actually think Zippo fluid works better than Goo Gone. I had to use Goo Gone a lot at an old job of mine. It stained everything it touched and smelled like Hell.
-
If you call them, they tend to be @$$holes. I didn't know there were fret-snobs, but I guess there's a snob for everything.
-
Neodymium magnets. Thanks for noticing.
I was thinking about using magnets for that, but I was unsure how they'd react to the pickups.
I got thinking about it when I saw a guitar made for Ted Nugent that had a magnetic quick release cover with a pistol underneath. I don't want to do the pistol thing... I think... but I like the flush look.
-
Yep, just get the ferrules from Stew-Mac.
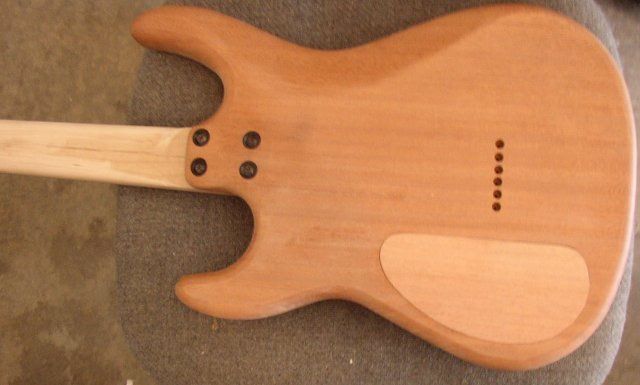
How is that cover plate held on?
-
I would make sure make those radiuses end pieces very wide. That way you don't risk cutting too deep on the sides.
If you make them 8" wide, it won't be too big and it'll make the whole process easier.
Personally, I working on plans for a swing arm jig right now. I think your method should work out great as long as you set it up right.
Make sure to upload some pictures.

My First "batch"
in In Progress and Finished Work
Posted
Sorry about that
I was gluing the first wing onto a three piece body of a double cutaway. I looked at it when it was drying and thought it looked really great with only one horn, so I got out some drawing paper and some french curves and came up with that. I think it has a nice bluesy look.