


Johnny Foreigner
-
Posts
476 -
Joined
-
Last visited
-
Days Won
1
Content Type
Profiles
News and Information
Tutorials
Product Reviews
Supplier Listings
Articles
Guitar Of The Month
Links and Resources
Forums
Gallery
Downloads
Posts posted by Johnny Foreigner
-
-
thanks. finally got the replacement spring for my drill press so hoping to get a bunch done this weekend.
Realized i also haven't posted any pics of the fretboard, which i sanded up through the grits and is now super super shiny.
-
never thought i'd vote against quilty maple, but number 1 looks a touch nicer.
-
here she is:
-
Does anyone know what they came from?
some sort of guitar, I'd say.
Sorry, been a long day.
-
FYI, I'm searching through the forum now for general stuff on band saws. just wondering if there was additional info that might be pertinent.
-
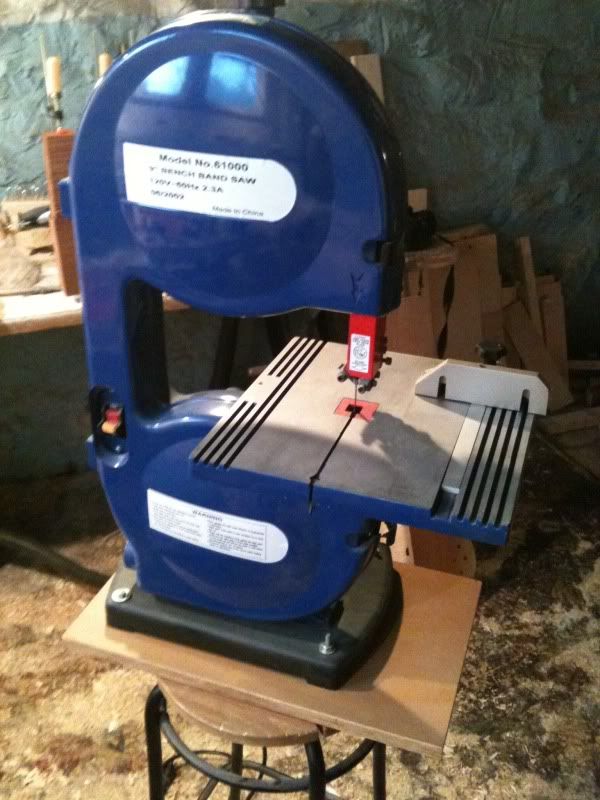
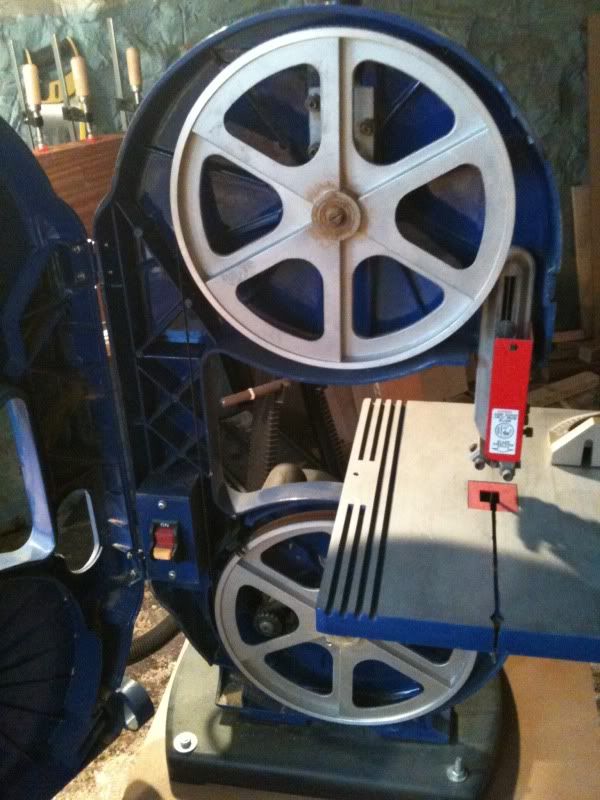
So tonight I'm going to go buy a second hand craigslist bandsaw for $35.
It's a little 9 incher and I'm pretty sure it's this one: http://www.vanlu.com/saws/3909.html
now, before the comments get started, let me say one thing. I am not going to spend a penny more than $35 on a band saw. The *only* alternative to buying this bandsaw that I would consider is not buying a bandsaw.
it's not that I don't think a better one would be great or worth the money, I just don't want to spend the money right now, and I'm not going to - I would rather live without a bandsaw at all.
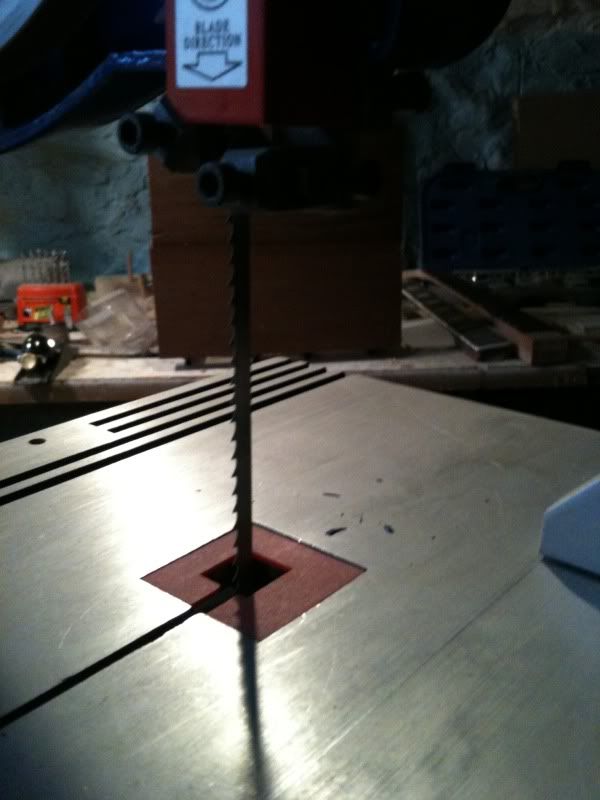
...that said.... is there anything I can do to make *this* bandsaw work as well as *this* bandsaw can possibly work? I'm not going to be resawing anything (naturally), I'm only going to use this for rough cutting out of blanks, which will be no more than 2" thick. So far I've done that with a jigsaw, but for one particular project I need to be able to slice off half inch strips and the jigsaw just isn't practical for getting a nice straight line - hopefully this bandsaw with a fence and some love will do that job *better* if not perfectly.
i'm assuming a new blade is probably in order - what should i be looking out for on that front?
-
You are going to do black and sand back anyway right? Dyeing the inside of the routes at that time seems like the natural way to go. Good call
 .
.SR
Yes, I am. as long as there's no obvious reason not to then I shall!
-
one more piece of advice needed - thinking ahead: i don't think I ever seen anyone dyeing the inside of humbucker routes when no pup ring is used. any practical reason for this? I don't really want to see naked wood around the pups, so I'm planning to dye the cavities black but would rather know now if that's a bad move.
-
They sell standoffs at radioshack. They might be a bit much for inside a guitar but go with what you want.
that could definitely work.
sadly the feed return spring on my drill press snapped last night, rendering the thing pretty useless. A quick look around t'internet hasn't thrown up any suitable replacements (It's a cheapo Skil 10" thing) so I'm waiting on a response from Skil customer service to see if it's salvageable. Only bought it at Christmas.
-
pot and toggle holes drilled:

and now need to figure out how to attached the piezo preamp pcb. i need to route a trench for it anyway, then I'm thinking of securing it to the wall of the cavity with a long screw and a piece of rubber tubing. any other inspired ideas??

-
ok, here's the completed 12th fret inlay:


-
How did the 12th fret inlay turn out?
Love the carve on this one too
pretty good. I actually got a teensy flake of maple dust in with the rosewood dust / epoxy mix, so after I'd sanded down the inlay I had to carve out that one little chunk and refill it. Should get it properly finished tonight.
it's reaaaaallly subtle, as you might expect, but I really like that about it. You can only see it when it catches the light the right way, but it's also obviously on purpose. I'll stick pics up once I've reflattened the patch.
I'm pretty happy with the carve - although a little worried that there are imperfections that are hard to see at the moment, but which will show up under the stain.
-
it will work, but i dont see the point. if you are mixing up some epoxy why not just glue it with that?
fair enough. I will do that. thanks for the advice, all.
-
that join is better than a lot of factory guitars.
now its nice to have it at the stage where you can pick it up without the body falling off... but all those photos on this forum started with perry showing off how good his joins were rather than being a required step. having it snug, but not tight is just as acceptable. also try and remember that being too tight is not good either, especially if using a water based glue that will swell the wood and could stop the neck going in
so yours is a little loose, but not massively so. If it was wider i would suggest a piece of veneer either side but as it is i would go with epoxy rather than titebond for the join
awesome, that's kinda what I figured. So if I maybe use titebond on the bottom of the tenon and then epoxy on the sides (where the gap is) that would work well??
-
ok, so as I posted on another thread, my neck join is NOT tight enough so I can lift the body up by the neck pre-gluing.
but the gap is teeeeeensy, so I wanted to get some advice.
this is with the neck in place and me pushing it as hard as I can away - to make the gap you're seeing as big as possible:

and here is the other side, me pulling the neck towards me, again to make the gap as big as possible:

and if I put the neck in, then slide it away from the body by less than half an inch, I can now pick up the body:

my feeling is that it will glue up just fine, but I really need some advice on this.
-
Thought i woudl have had a response on the lack of matching grain on the cavity cover
the color more than the grain shape/direction. but then i'm not a fan of wooden cav covs anyways.
-
Tom was asking how essential is it that you can lift the guitar up by the neck before gluing, it is absolutely essential, otherwise when you do this shot you will just have a neck sticking up in the air
arf arf! there's that famous Australian sense of humor http://www.youtube.com/watch?v=wZb4vwMV8lY
-
i can give a good reason, black will kill the 3D effect of the quilt. It can also look a bit grubby. Using a darker but still slightly translucent version of the same colour maintains the quilty goodness in real life as well as photo's.
You can get good results with black, especially for photo's, but you really need to remove almost every bit of it for it to work nicely and use a thinner trans black rather than solid black
so if metalhead had used something like the transtint black dye first, that would have been too dark? it would have killed the 3d?
how much difference does it make what the second (primary) color is? Is it about the luminence difference between them? so for a blue finish you maybe would go darker with the first dark dye, than you would with a yellow/orange as here?
with apologies for further hijacking this thread about this beautiful guitar.
-
'breaking even'... is not a negative thing
absolutely agree. to me, the dream of being able to sell one to finance one for myself and break even, is a dream in which i don't have to justify to the wife why i'm spending YET MORE money on wood and parts and supplies.
-
why do you want to know? thats the real question.
nothing more than idle curiosity, and a far off thought of being able to break even on my guitar building habit
-
I appreciate this can be a sensitive subject - for both personal and commercial reasons, so feel free to tell me absolutely nothing.
But I was interested in what sort of ballpark number GOTM standard, handmade guitars go for - if anyone wants to share.
-
had 30 mins to spare this evening, so did this. and it was one of the things i was most nervous about, so glad it seems to have gone well...
first cut out my "logo" with the dremel and tidied up with a razor blade:

then mixed up some rosewood dust with epoxy to fill it in again.

hoping it will look good, but reasonably subtle when sanded back. less obvious than mop and not requiring any skill with a jeweler's saw!
-
No sense in changing your plan. To reiterate what you said, to fix a sloppy neck route just get some scrap body wood, about 1/8" thick and just slightly wider and longer than the route (one for each side) and glue them in, then reroute the pocket.
*It will be virtually invisible, since there will only be a sliver left of the plug/shim after rerouting.* I admit that I'd done this more than once before upgrading my neck pocket routing technique & jig. I have some pics if you'd like to see.
with apologies for thread hijacking, how essential is it that you be able to lift the entire guitar by the neck before gluing? mine isn't there by the tiniest fraction (barely barely visible to the human eye) and I was hoping some glue expansion would somewhat fill the gap.
-
But yeah... I'm stupid, I can't believe I didn't think of that... it's like one of those "duh" things lol. And I've seen it all the time like with Scott French:
http://www.scottfrench.com/i/Finished%20Cu...0Guitar/98_back
Chris
that's what my second picture was kindof getting at.
 .
.
Making The Most Of A Super Cheap Band Saw
in Tools and Shop Chat
Posted
see, spoke, I have a lot of time and respect for you and many of the things you say. But it's comments like this that put people off this forum. I made it abundantly clear in the OP that *I KNOW* you get what you pay for. I KNOW that this isn't going to be anywhere near as good as more expensive, better spec'd bandsaw.
I KNOW!
your comment adds nothing but snide to this thread. If you didn't have anything constructive to add then i'd have much prefered that you said nothing.