


Juntunen Guitars
-
Posts
569 -
Joined
-
Last visited
-
Days Won
8
Content Type
Profiles
News and Information
Tutorials
Product Reviews
Supplier Listings
Articles
Guitar Of The Month
Links and Resources
Forums
Gallery
Downloads
Posts posted by Juntunen Guitars
-
-
I think my tops end up thinner than an 1/8th usually but I don't thickness them to a set thickness. I thickness them until the flex with and across the grain feels right. I'm curious to see how the inlay goes as well with the radius in the top. Are you going to inlay it before or after glueing on the top?
If I can ever get pictures to post to this site again I will post a picture of a baroque I saw once that the entire back and sides were inlayed in a chevron pattern on every square inch of it... Impressive stuff. -
I'm curious how a hard wood will work for bracing. Larson Brothers used laminated braces with a thin hardwood center and spruce on the outside but I've never heard of full on hardwood braces with a full hardwood box. I did get a chance to play an early 1900's Martin parlor guitar that was all koa except for the spruce braces. That was probably the best sounding guitar I've ever played.
-
Not epoxy! I wish you luck when it comes time to do a reglue on that bridge. Titebond is a big enough pain to deal with on a reglue.
Looks like it's coming together pretty nicely so far. I may have missed it but what neck joint are you using, dove tail or bolt on? -
Another book to look into if you want wiring diagrams is "The New Book of Standard Wiring Diagrams" by "Les Schatten". For some reason I can no longer post links or anything otherwise I'd link it to you but it's a good book.
-
Any more progress on the build? How are you going to do a bolt on from the outside, is there a reason for not doing a regular bolt on where you reach through the soundhole? If you want hardware ideas for the bolt on part you can look through my 8 string acoustic build, I did a bolt on with that one but I set it up so the bolts were inside the body.
-
Try to route with the grain instead of into it. If you keep going in one direction with the router it will always tear out. Fine Woo Working has a video on what I'm talking about but I can't post links anymore for some reason and if I try the forum freezes the link adding thing onto my screen... Google how to route end grain and the video title is "How to avoid router tearout" it's on the Fine Wood Working website.
-
Just watch how much the top flexes in that area. I think it'll be fine but it's something to keep an eye on. Like I said though, there's a number of builders who have brace patterns like that. What is the x-brace angle?
-
Great build so far. Couple questions though, why are you running the finger braces off the upper half on the x brace instead of the lower? I've seen builders doing that more now but haven't had the chance to ask them about it. How are you bending your sides? I'm assuming a heating blanket from the water marks on the inside of the bends.
On your next acoustic you should try making a rosette like on a baroque guitar in you decide to do another one like the crane one you did here. I'd post a picture of them but I can't post links or pictures right now for some reason, it just freezes my screen if I try but I'm talking about the stacked parchment ones they put inside the soundhole, not the rosette on the top like a steel string.
-
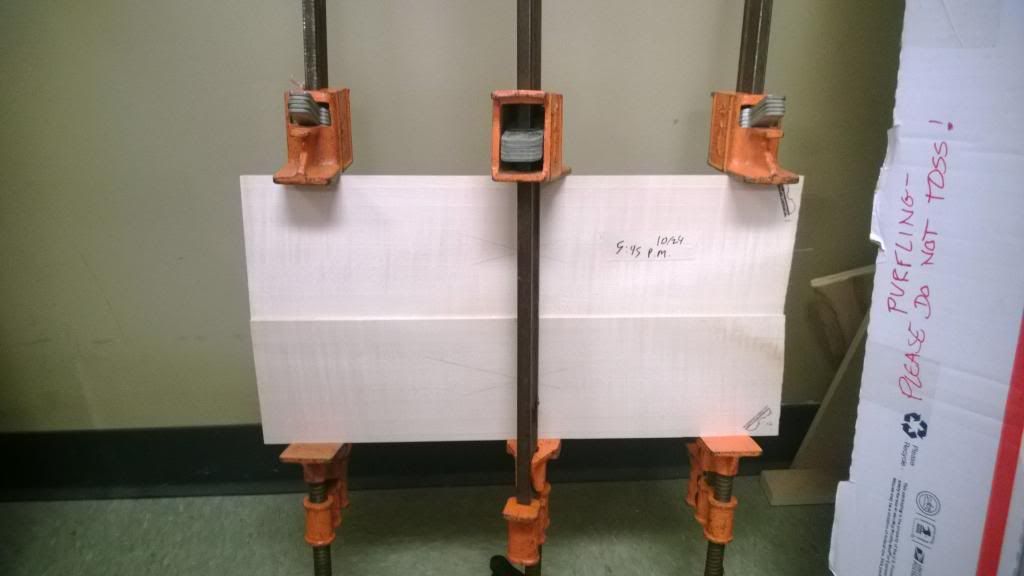
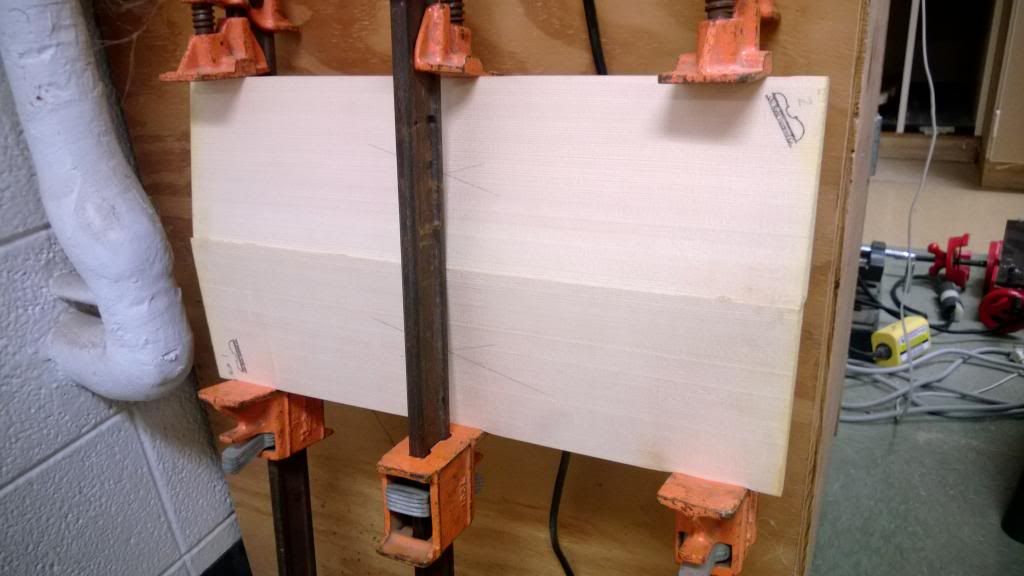
The only "glue-up" pic I feel is mandatory is the "every clamp you can fit on" when the f/b is being glued on.
Oh come on you can get that gluing tops on too, have you seen the top gluing pictures from my builds?
Thought I might chime in on the bracing question on the first page. The top braces don't have to be the same wood, it doesn't hurt to have it be the same wood but it doesn't have to be. A friend of mine uses spruce as the x brace and the upper of the two lower transverse braces and cedar for the fingers and lower transverse. When it comes to voicing the top you can get a lot better vibrating top that way it seems. I really like how his guitars sound compared to guitars with all spruce braces. The other thing he does is laminate braces with cedar cores on the bass side and spruce cores on the treble because cedar vibrates more freely it makes for better bass tones. That's part of why I don't scallop the lower part of the x brace on the treble side of my acoustics much.
A general rule to go by is the floppier the top the lower sounding it will be and the stiffer a top is the more treble you'll hear (at least those are the terms I use when describing sound) That's why planning your tops/sides/back to a set thickness isn't the better option. Since each piece of wood is different and more or less dense thicknessing it to where it "feels" right is where you stop (obviously don't go until you can see your fingers through it!) I thickness my tops until I can freely twist and flex them pretty loosely across the grain but it is still good and strong with the grain. You can always brace heavier above the soundhole near the neck block if you feel it's to thin since most of the vibrations there are killed off by your upper transverse brace anyways.
As to the woods moving separately. This can happen but more so if the wood isn't truly dry or acclimated to your shop and the glue you use will affect this too. With titebond 2 chances are you'll see the braces through the top throughout the year no matter what wood you use since it doesn't let water move as much as titebond 1, avoid titebond 3. Epoxy ... please go jump in a well with cement shoes if you use epoxy for acoustic guitars ... that is all. I like hot hide glue but you have to work fast with it and it will release with heat much faster than titebond. I use titebond on everything in an acoustic except for the neck joint if it's a dovetail, then I use hide glue because it makes neck resets easier (another reason to never use epoxy) the idea of "if you build it right the first time you won't have to worry about it" does NOT work on acoustics.
-
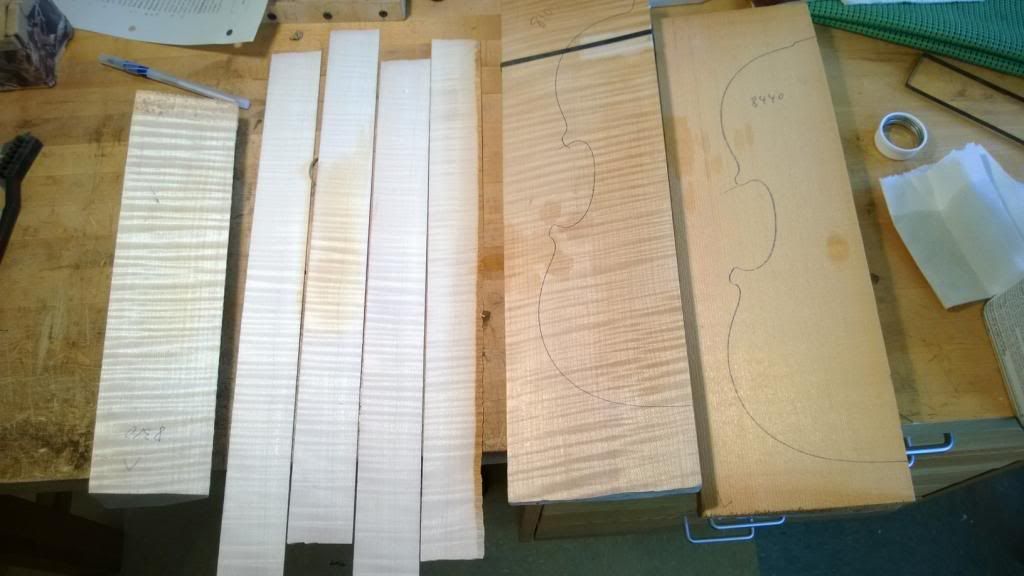
Don't have any plans. I don't know where to buy them. The Strad magazine often has full size posters of old violins that have archings on the back that you can make copies of. What I have is stuff based off the Betts Strad from a poster from the Strad. Other than that measurements for the neck and everything is pretty standard from violin to violin.
I'll post more pictures tomorrow when I work on it next. I didn't do anything for over a month but I'm getting back at it tomorrow.
-
Since this is your first build I'd suggest doing something like a strat or tele just to get an idea of what to do but if you're up to the challenge go for the Les Paul. I'd do a lot of reading on this site for info on building.
The old way of doing burst was hand rubbing them with dyes and blending the colors. Do a google search on hand rubbed bursts and you will find articles. I'd like some but you always find more info when you look it up yourself or at least that's how it works for me. The burst you asked for colors is just an amber and brown more than likely.
Some sites to look at for some ideas are Stewmac, LMII, Allied Lutherie and of course eBay. Stewmac has a lot of good articles on their website. What are you planning on doing for a top coat over the burst? Just dyes won't protect the wood, spraying is the easiest way to do a burst IMO but more expensive. Some companies sell aerosol cans that work. I wouldn't use paints because they are opaque. Try and use a colored lacquer and clear or hand rubbed and clear and like mentioned test on scrap wood.
What do you have available for tools?
I'd do a lot of reading and have a good idea of what to do before starting though. It's always better to go into a project with more info than needed rather than less and just go with it, been there done that with my first build, it plays but the action is high enough to be a slide guitar.
-
I started a side project this last week and got some more wood for another violin build that I'll start in the spring or summer. The build I started this thread with will have the back arching just about done after Thanksgiving week.
-
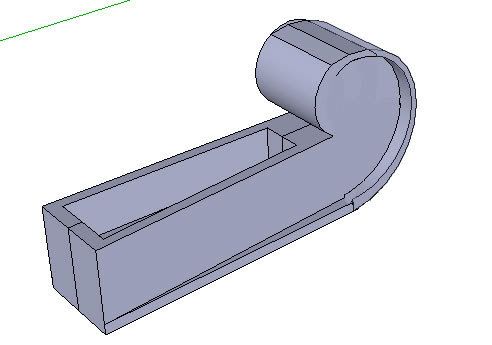
I'm doing a VERY untraditional scroll design in case you're wondering what I'm up to there and why it isn't carved. This is a REALLY rough sketch of what I'm up to. There will be no "carve" of a scroll. Instead, the headstock will be backstrapped. The backstrap won't taper, but the headstock does. Leaving an almost scroll appearance:
Chris
That'll be interesting, why not carve the scroll traditionally?
-
Those Veritas marking gauges are fantastic for making nice tight cut lines that you can drop your chisel straight into and cut fibres across endgrain perfectly. They have some fantastic toys that I would love to bring in for contextual reviews sometime.
I like Veritas a lot but I don't really like their prices that much.
-
always thought they were a cool instrument so I figured I'd take on the challenge.
Pictures? We didn't have cameras back then... I can draw you a map to the cave painting.It was a fun project but just like my super custom inlayed banjo project I never took any pictures. I couldn't even afford a camera back then.
You never know. There's a luthier in my area who has a huge brick of pictures of his builds from the early 90's so I figured I'd ask.
-
Veritas sells this neat marking tool, it's in metric and all you do is adjust to the thickness you want then spin it around your piece to get a scribed line that won't run off like pencil.

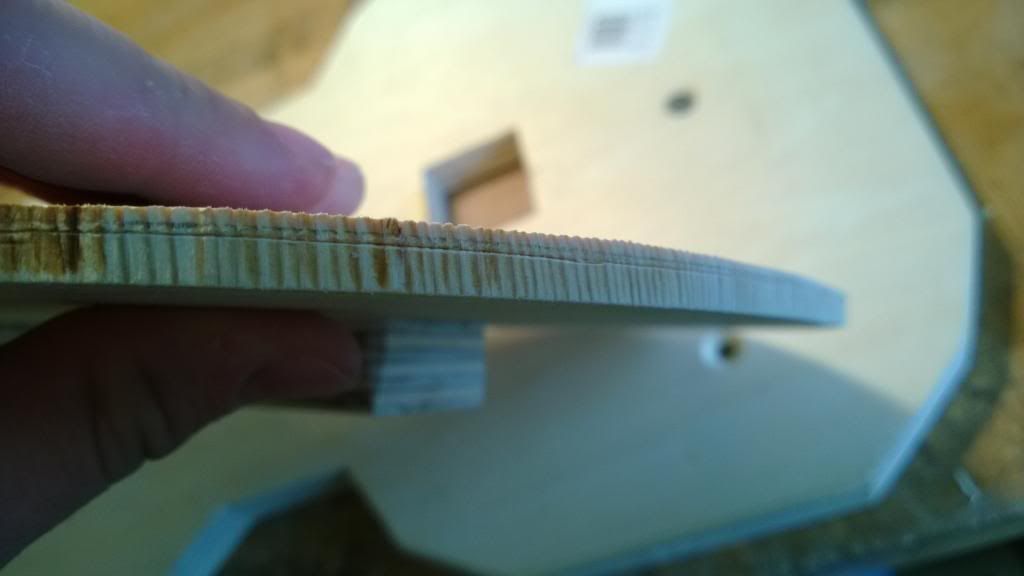
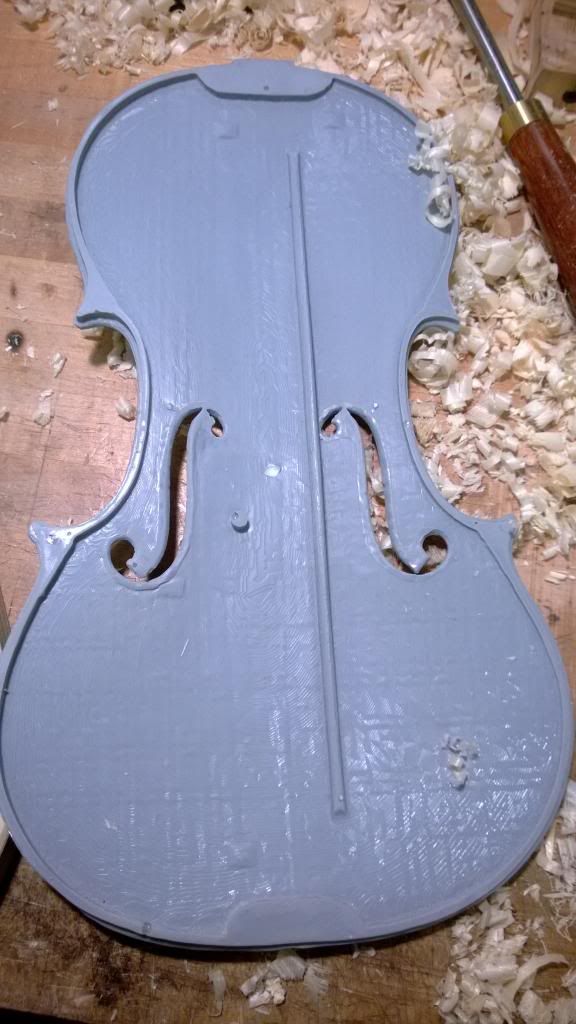
The plastic top is a 3d printed copy of the Betts Strad. On the inside you can see where there have been cleats added to reinforce cracks and where a soundpost patch has been added at some point in the instruments life. Last year when I was going through my CAD classes at the tech my instructor Steve Rossow has a CT scanned image of the Betts on his computer, he had done a project with John Waddle and Steve Sirr to recreate the Betts using a CNC to make an exact copy. The file he had on the computer was the actual CT scan so when you watched it you could see everything from voids in the purfling to gaps in miters and you could even count the grains per inch and see imperfections in the wood like sap pockets that didn't show up in the carving. Here's a link to his site with the Betts project if anyone is interested.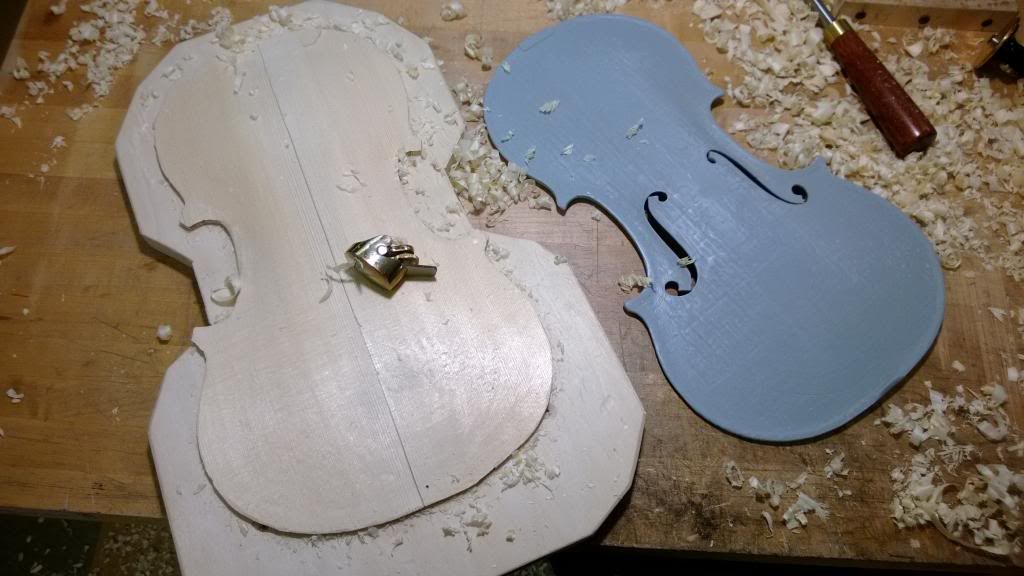
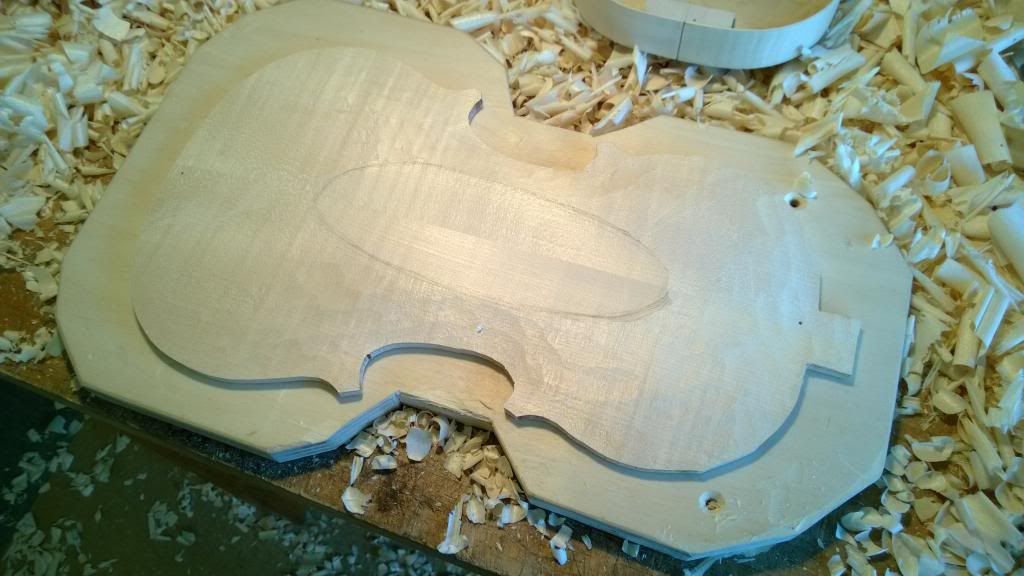
Here's where the top is now.
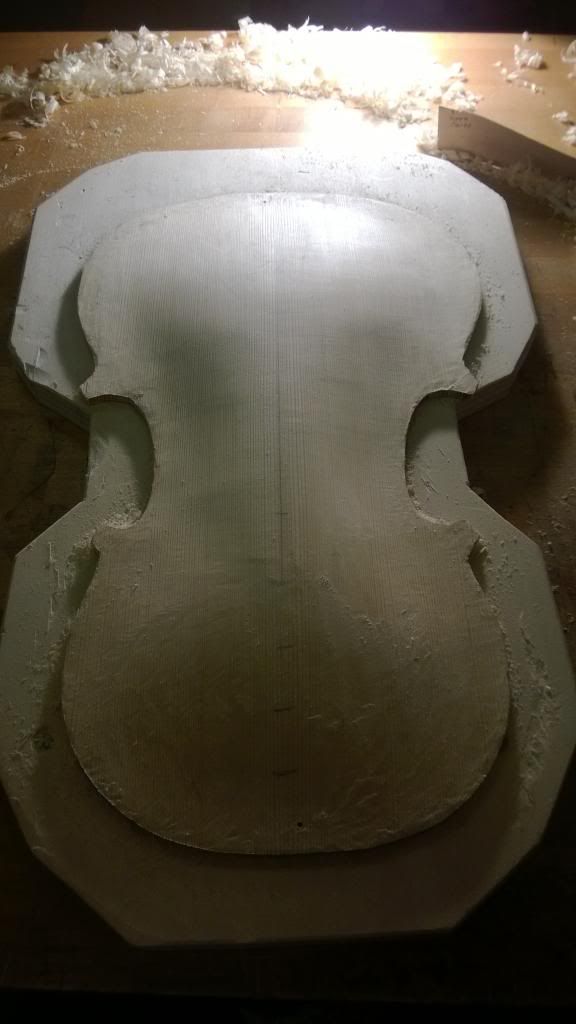
-
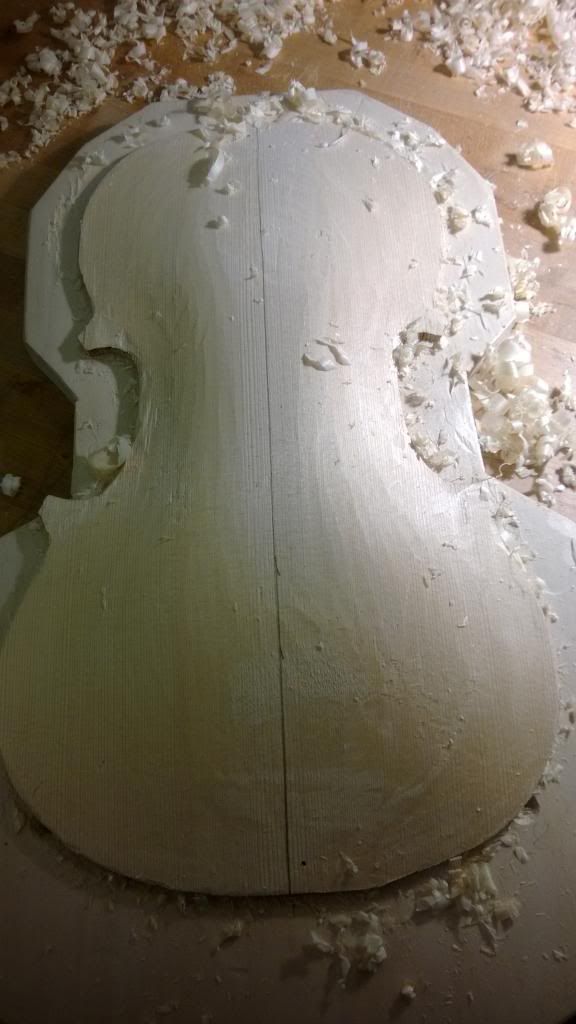
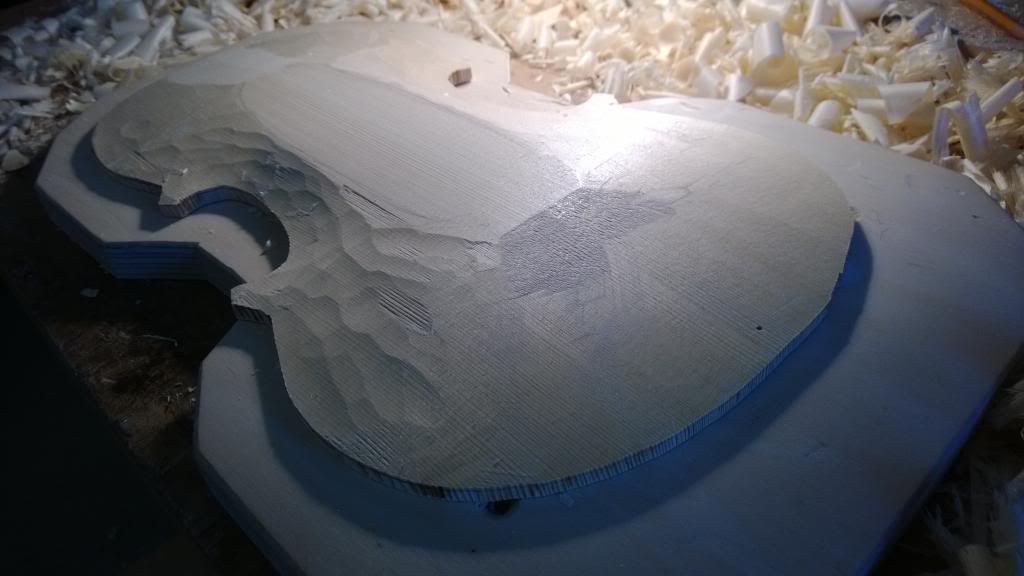
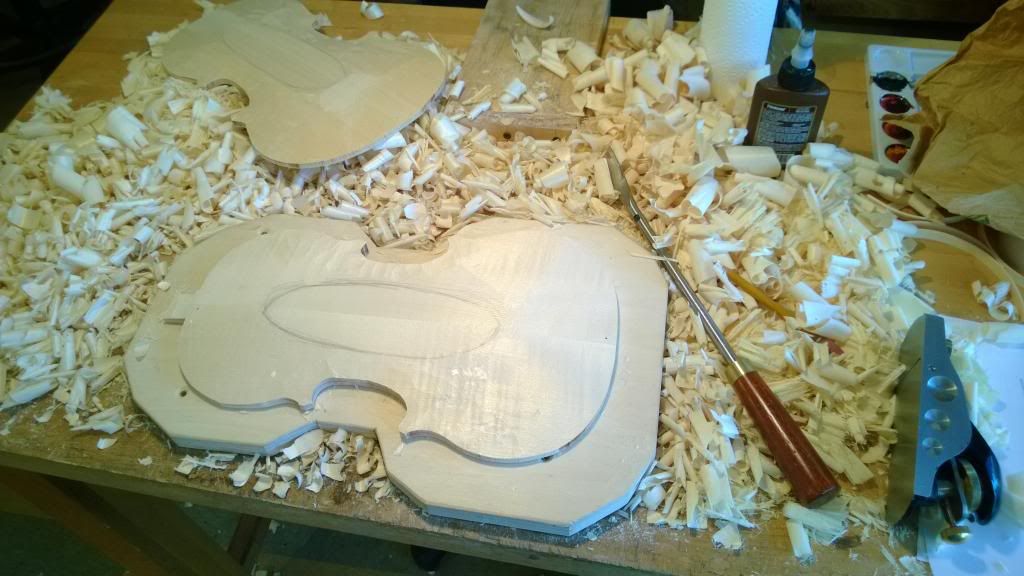
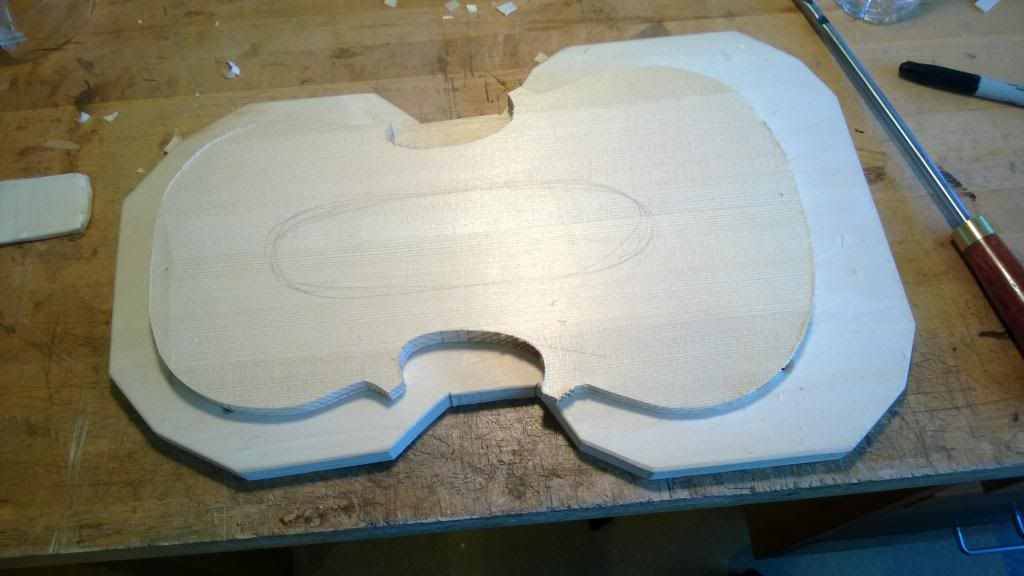
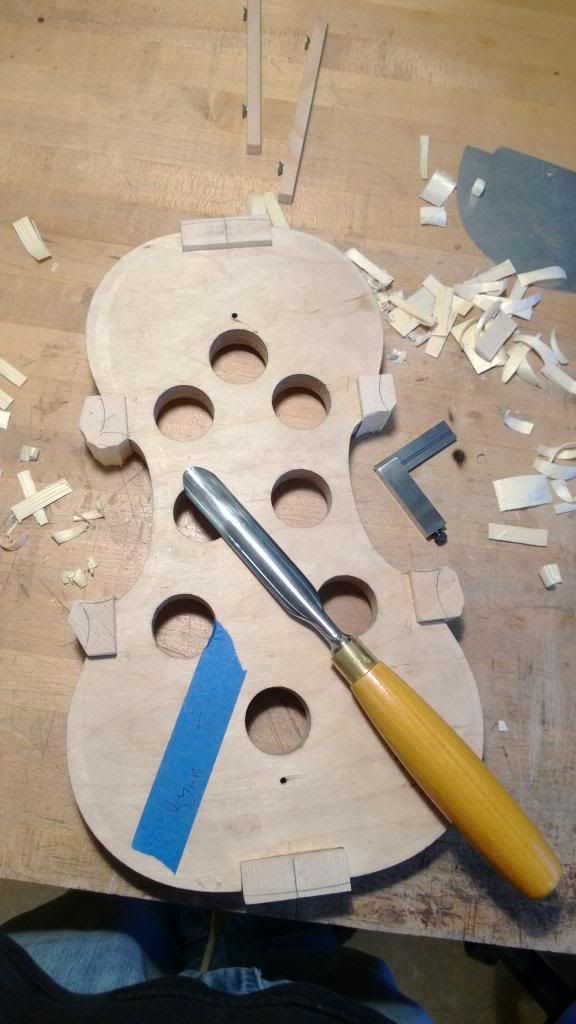
And on with the carving, not much to say here since it's just carving the arch. I just roughed it in with a block plane then switched to a gouge then switched to finger planes and scrapers.
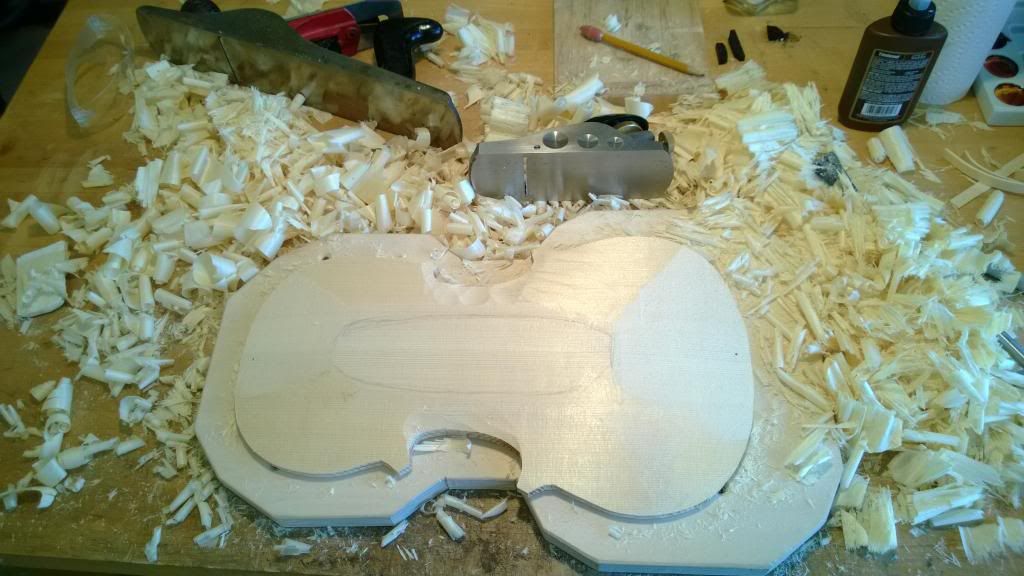
You have to love getting nice shavings with a freshly sharpened plane.
-
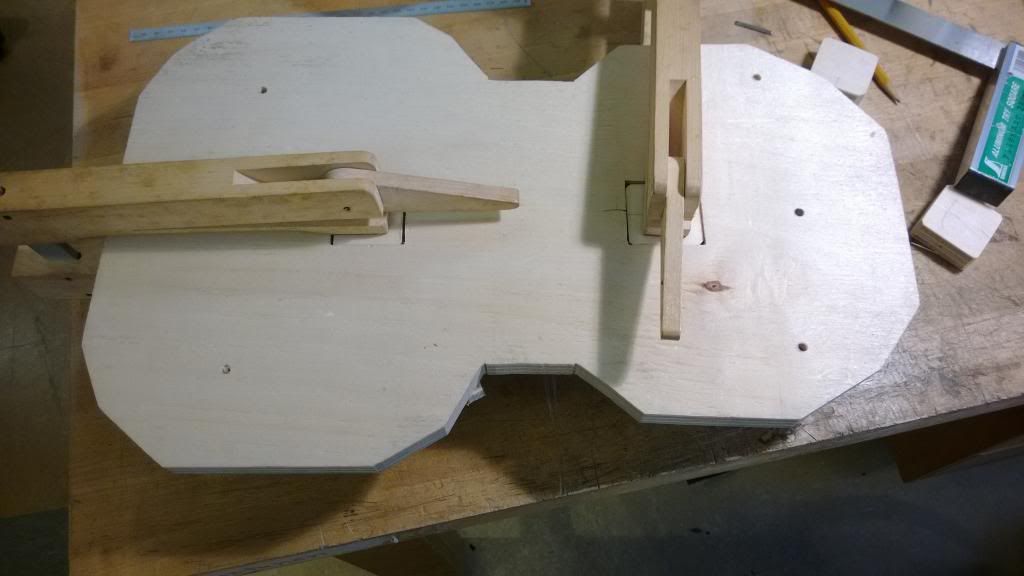
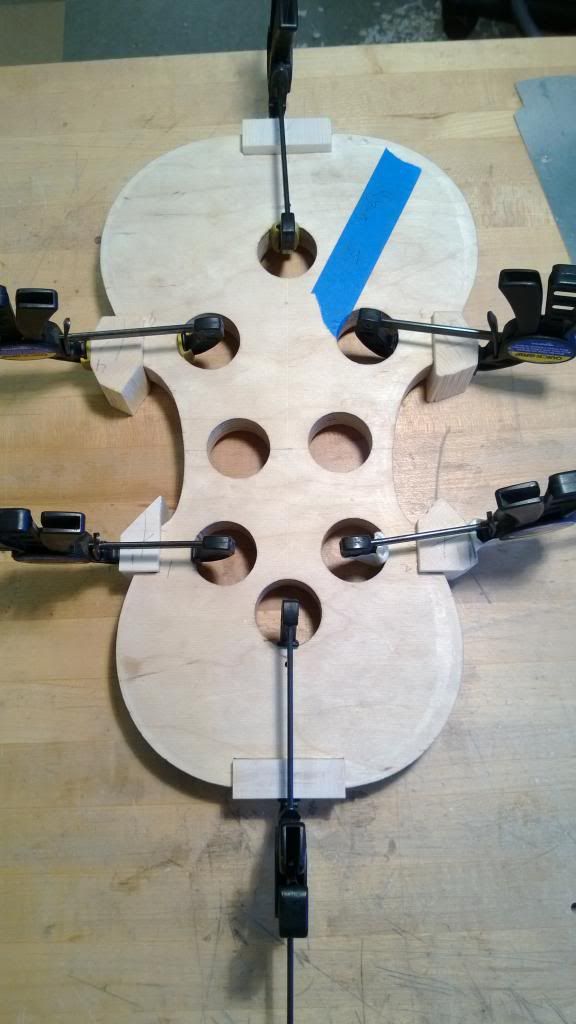
Got a lot of carving done this week. I started by drilling the pin holes for glueing the top on, seems weird to be drilling holes straight through the top. After that I make a couple blocks to fit in the carving holder. The holder is held into the bench by a couple nails that fit in predrilled holes. The blocks are glued to the top with hide glue so they are easy to pop off.
-
Really cool stuff. Please keep the updates coming!
Man, you always have the coolest projects.
SR
Thanks, I'll keep it updated as fast as I can.
Nothing will expand your luthier skills more than a Violin build. I haven't done one since 1990 but it was the biggest growth I saw in my knowledge of building.
Your recent projects should help you really expand as a luthier!
Excellent work as always.
Cheers!
Do you have any pictures of your build? I've been told that violin builds really test your patience and skills, that's partly why I chose to do the class but I also have always thought they were a cool instrument so I figured I'd take on the challenge.
Fun! I have a curly redwood/curly claro walnut violin project I should really finish!
I love working on other stuff for a bit... however, I never seem to want to work on non-guitar projects long enough to finish most of them hahaha. I always want a temporary distraction and then back at it.
I shall be watching with great interest here!
Chris
I'd like to see some pictures of that. I was thinking about using redwood the other day and I definitely have plans to use walnut sometime. The instructor of this violin repair program is a traditionalist though and just about everything has to be done by hand the way Stradivari and the other Cremonese makers did it 300+ years ago which can make things difficult sometimes, I've asked about walnut and other woods and the response is always "Does it matter? Stradivari and the Amati's didn't use it so why should I?"...
It must be welcome relief to be working on something that doesn't tire your arms out through being heavy and needing constant manipulation! Good seeing you back Ryan - seems you've been adequately busy.
What was I working on that fits that description? I must be drawing a blank here... I have been busy though, I spent a lot of time this last summer working on converting an old barn into a shop and had no time to build, I've got a few builds planed though and hopefully a bass commission coming up that should be fun, I'll be sure to post it here. It's good to be back building something.
-
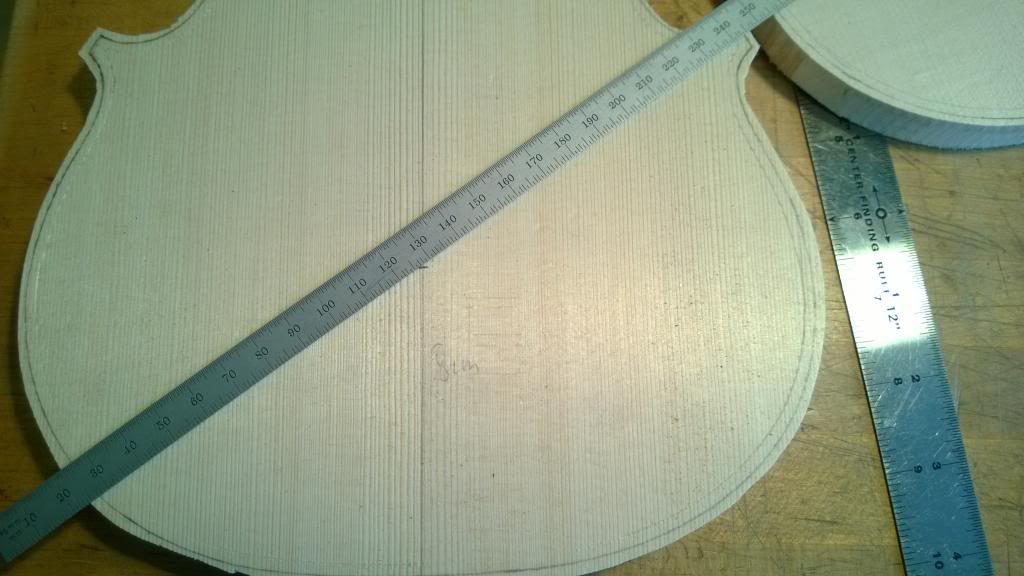
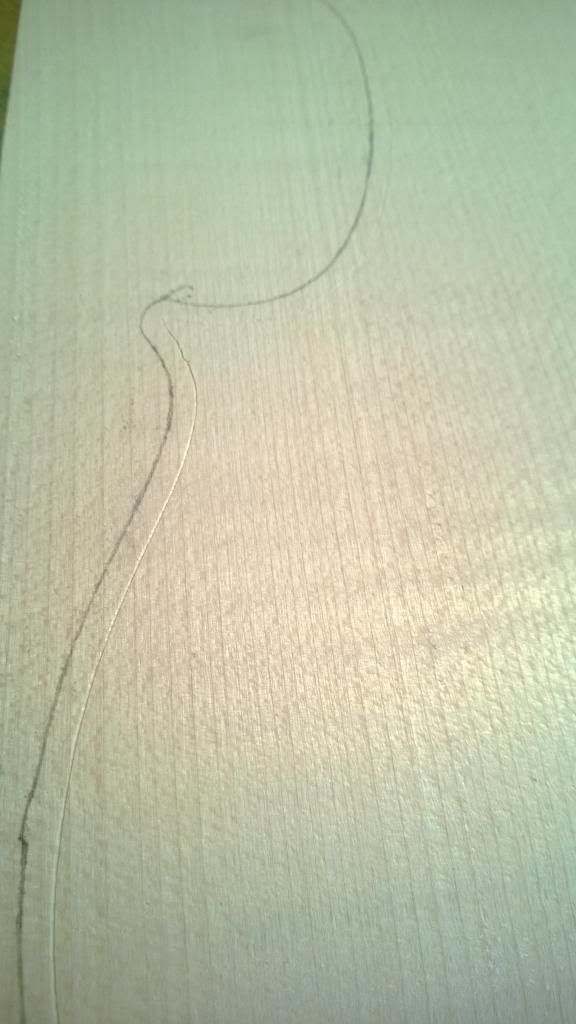
Corners... Each builder has their own corner style and they all are marked out differently. I chose to do mine similar to the Strad pattern just for simplicity. They are all drawn on by hand. I started by marking down a little ways from the ends then used a ruler to mark about 3-3.5mm away from the corner and traced a line about 7mm long at the 3mm point then it just become a matter of blending the lines of the overhang into the 7mm line until they are symmetrical on each side, easier said than done.
-
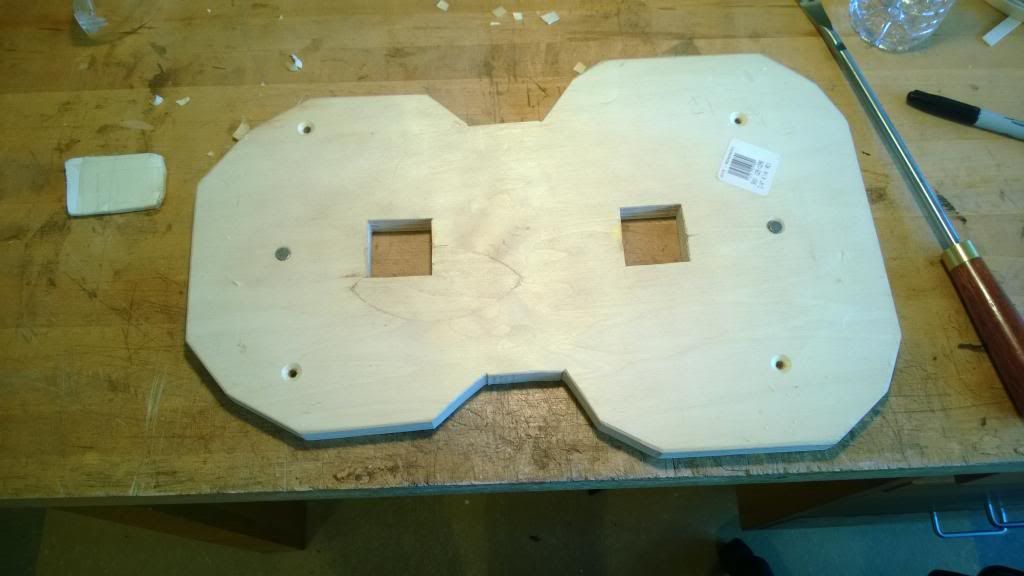
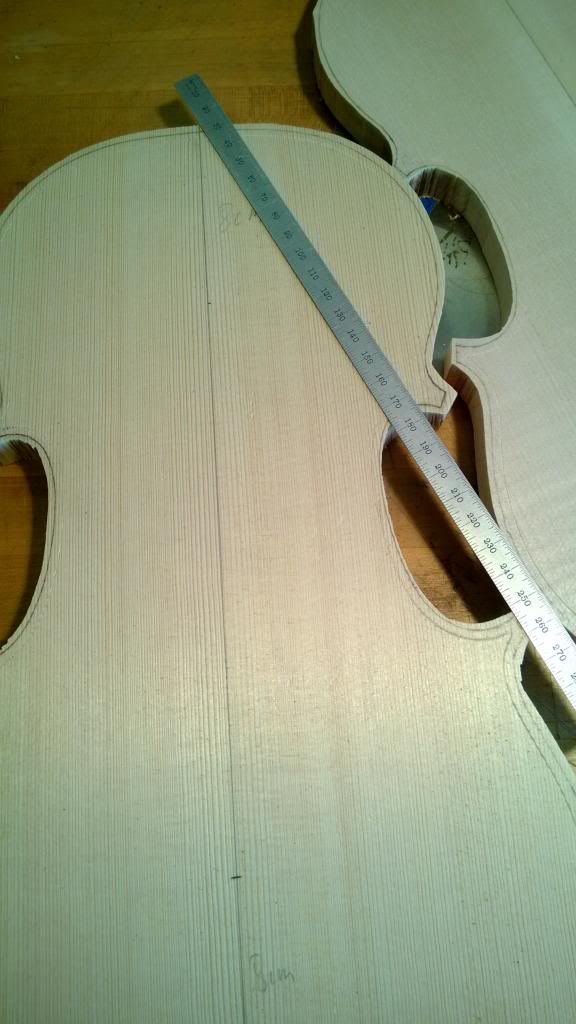
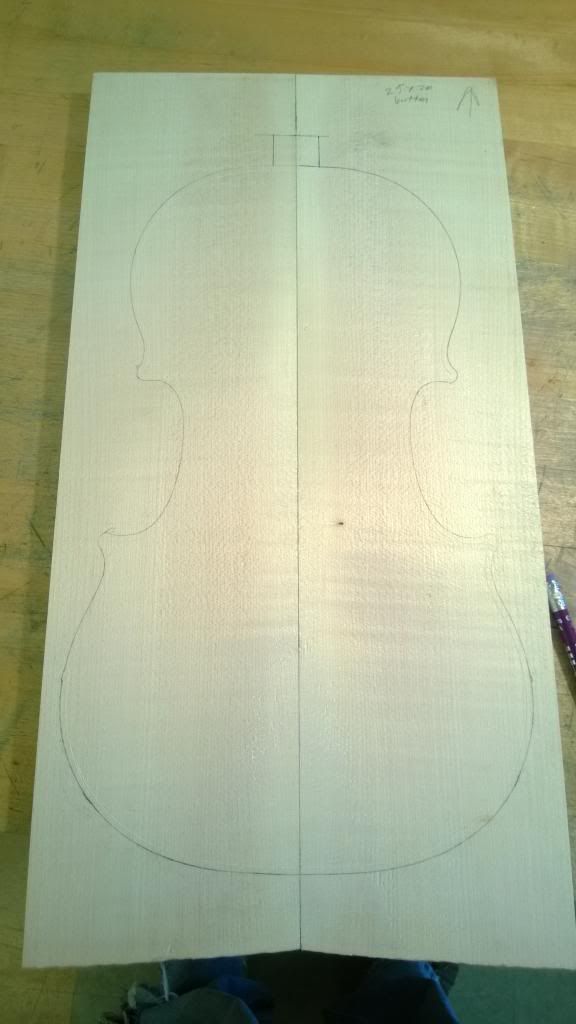
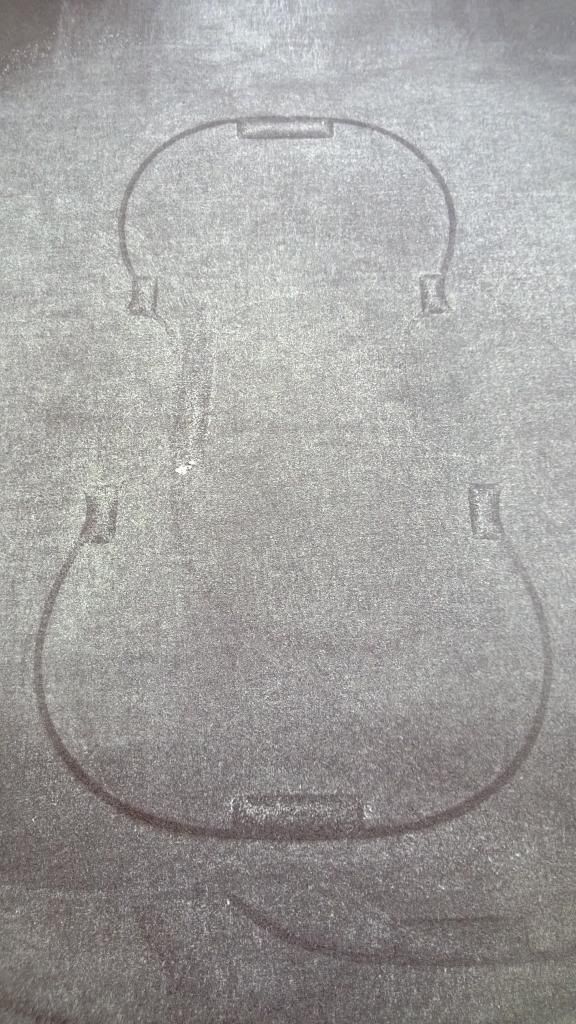
To get the outline on the plates I just centered the rib structure on the center line then scribed a line around the outline, the scribed line is used throughout the violins life for glueing the top on when it's removed for repairs. Each plate's outline will vary slightly so be sure to flip over the rib structure each time you work on the top or the back so you don't get screwed up.
-
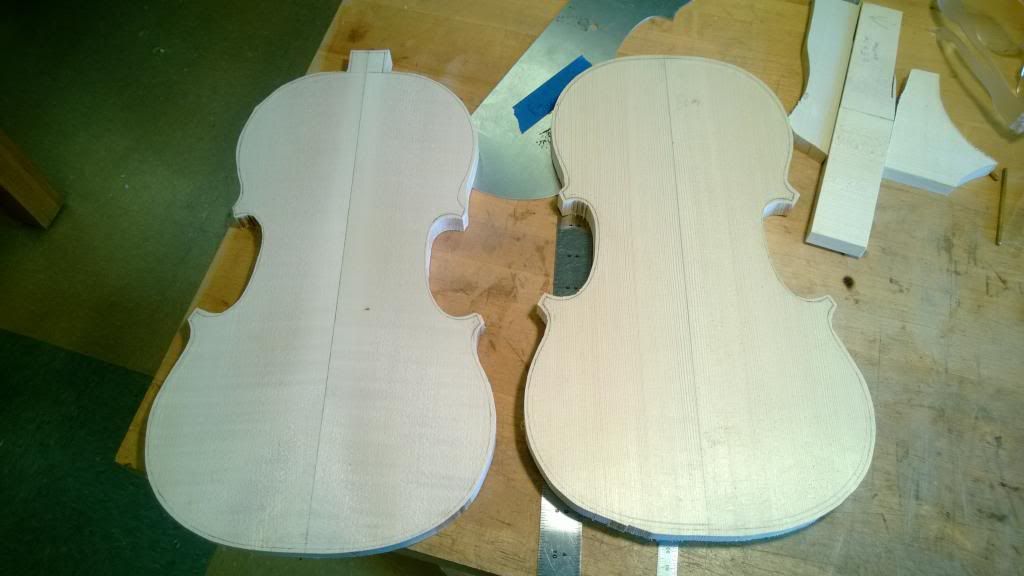
Plates glued up. I just used a jointer and then a block plane to clean up any marks.
This was new to me. Usually I just join everything at a 90 degree angle. The instructor of my building class joins his plates at a 1 degree angle so when he clamps it everything gets pulled together better and it seemed to work well.
-
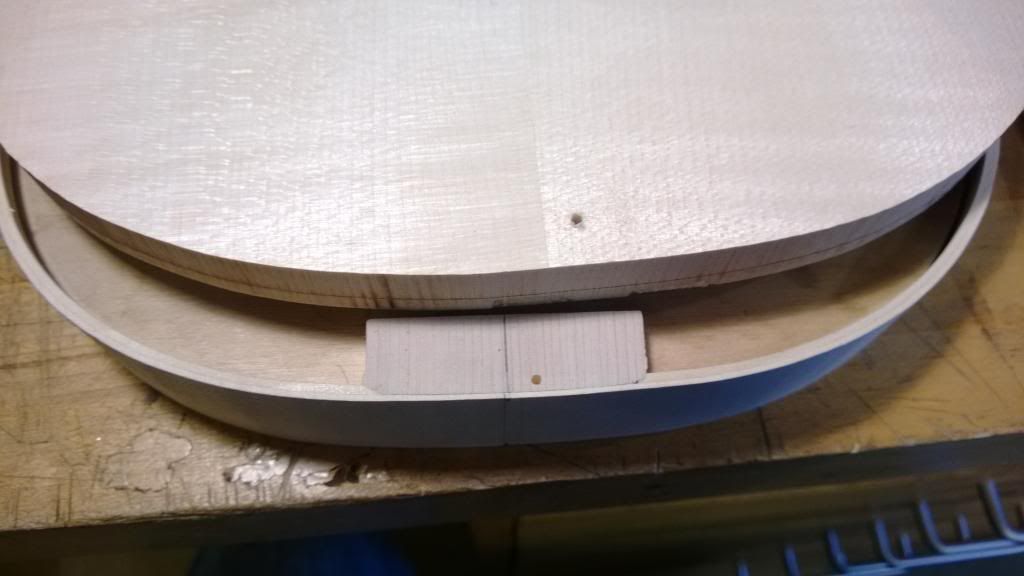
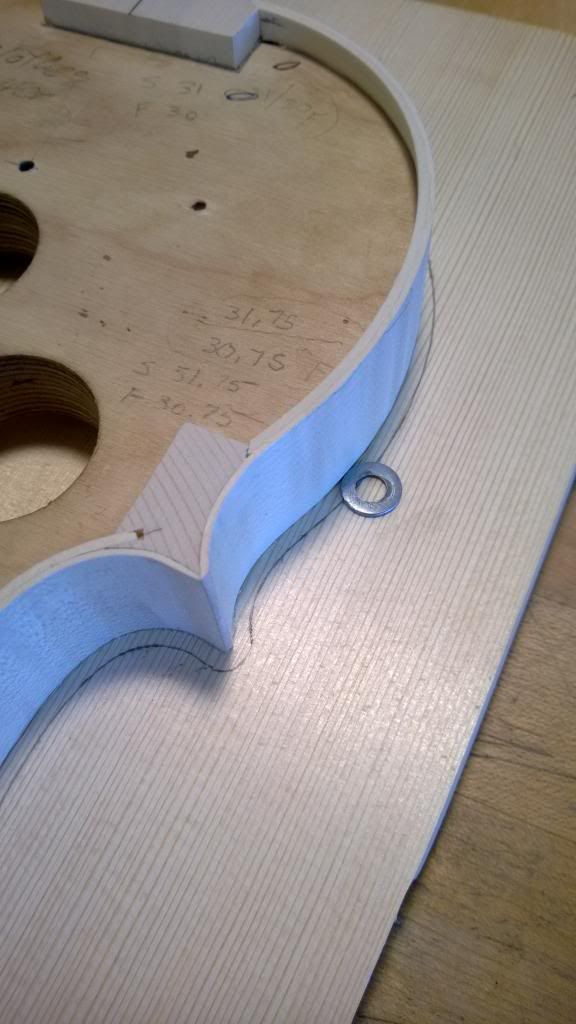
Moving to the outside corners.
After they were shaped I bent the bouts.
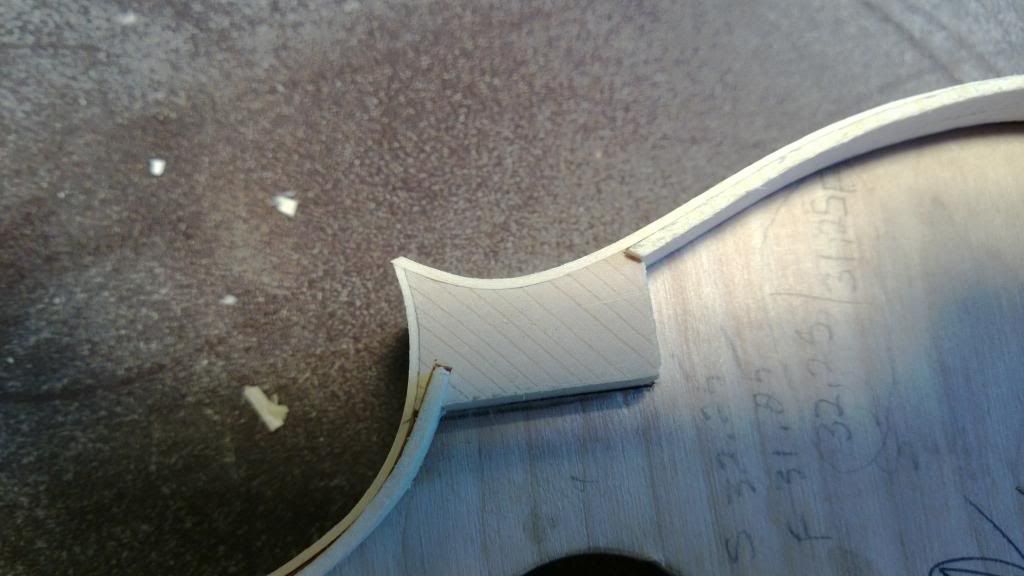
Linings were interesting. Unlike kerfing in a guitar linings in violins are solid and bent but they are also mitered into the blocks a bit. I thicknessed the linings down then marked 6 mm down into the blocks and cut the slots with an old straight razor (which cuts spruce literally like butter) The neck and tail linings aren't mitered like the C-bout, they are just notched in.

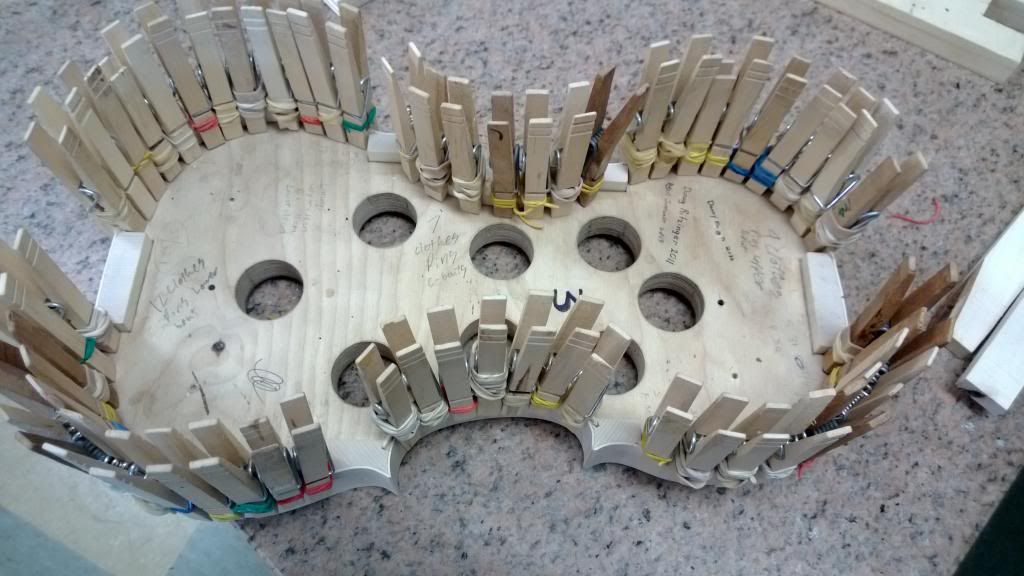
Glueing in the linings is similar to kerfing though. Once they are glued you just flatten everything on a sanding plate.
-
I figured I'd post my most recent project on here, I'm not sure if many people will be interested but here it is. In the summer I decided to go back to tech school for violin building and repair and am building a copy of the 1704 Stradivari "Betts" violin (Since it was that or some copy of an Amati) personally I'd have preferred to build a rosewood violin and play with the arching a little but everyone knows if Strad didn't use it 300 years ago it isn't good enough
 So far my biggest issue has been relearning how to guess sizes in metric. I'm used to American inches but everything violin related is in metric, other than that it's about the same as an archtop guitar so far.
Here's glueing the block material into the mold. I'm using spruce blocks, Strad used willow. With Spruce you need to point the grain towards the corners because it moves more than willow and pointing the grain towards the corner helps limit seasonal changes.
Cutting down the shape of the blocks with a gouge, I just roughed it in with the gouge then took a crossing file to make it flat and square constantly checking it with a granite plate and my little starret squares.

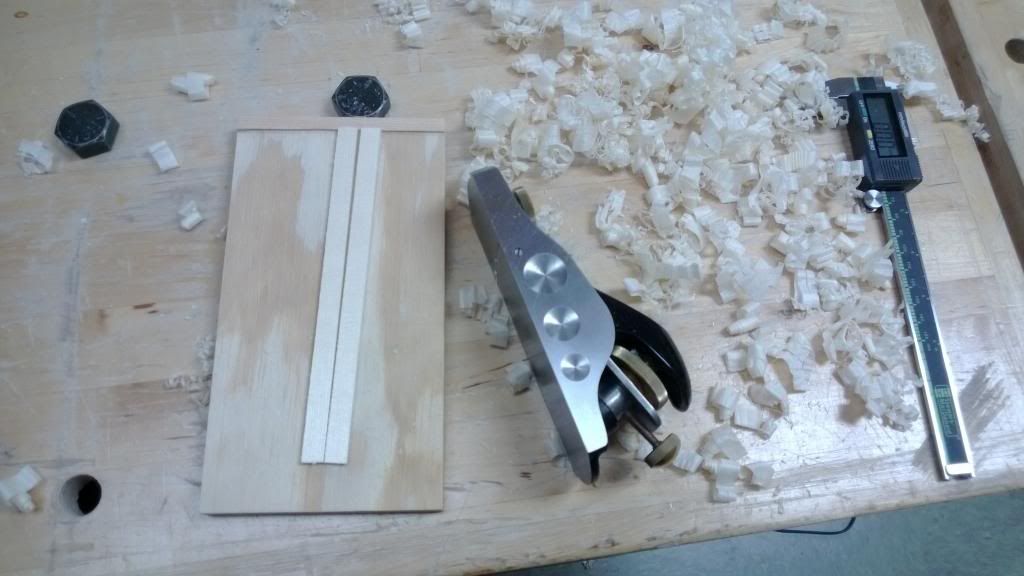
Thicknessing down the sides to 1.1 mm. I just roughed it with a block plane and finished with a cabinet scraper.
Bending the C-bouts.
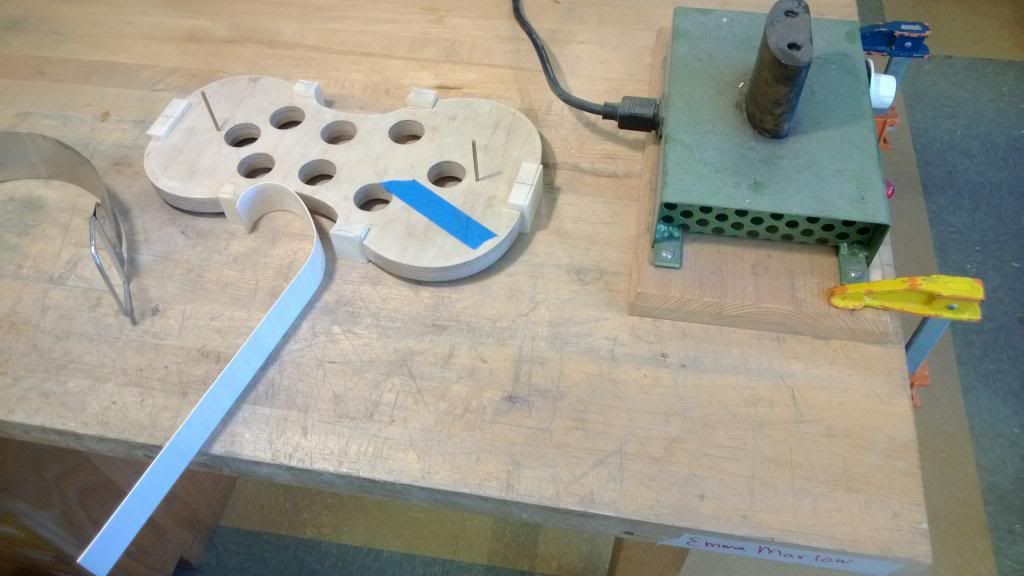
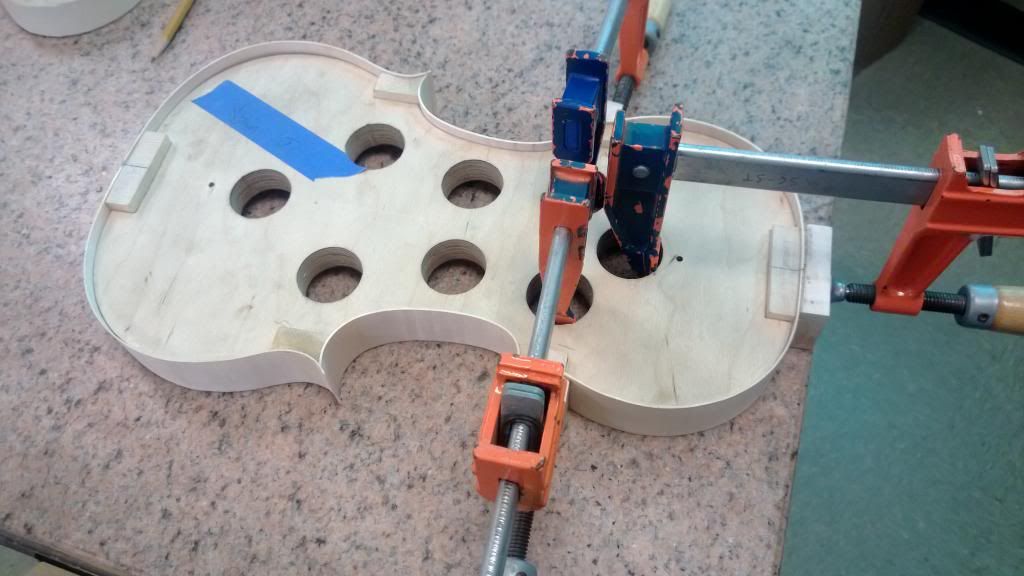
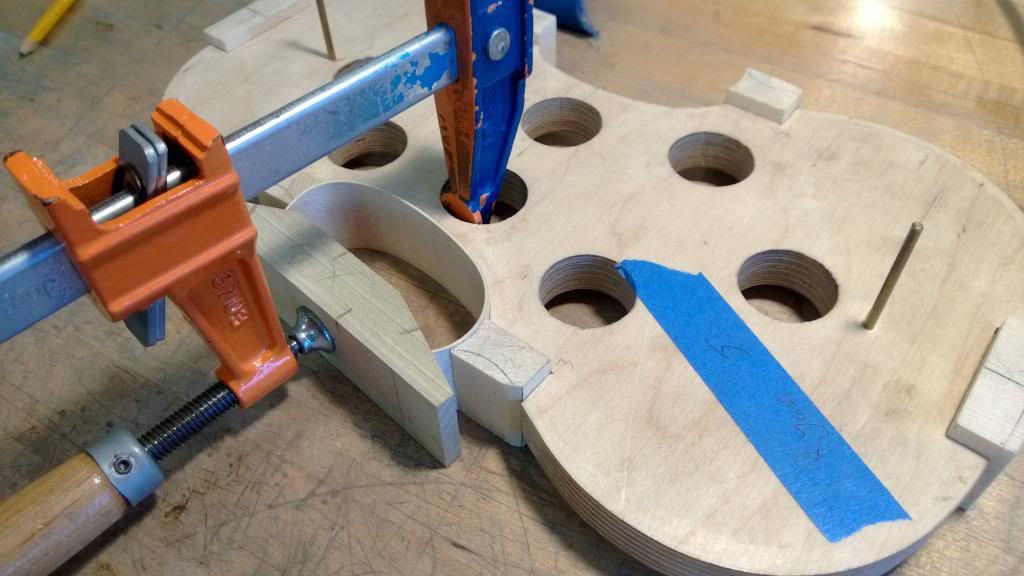
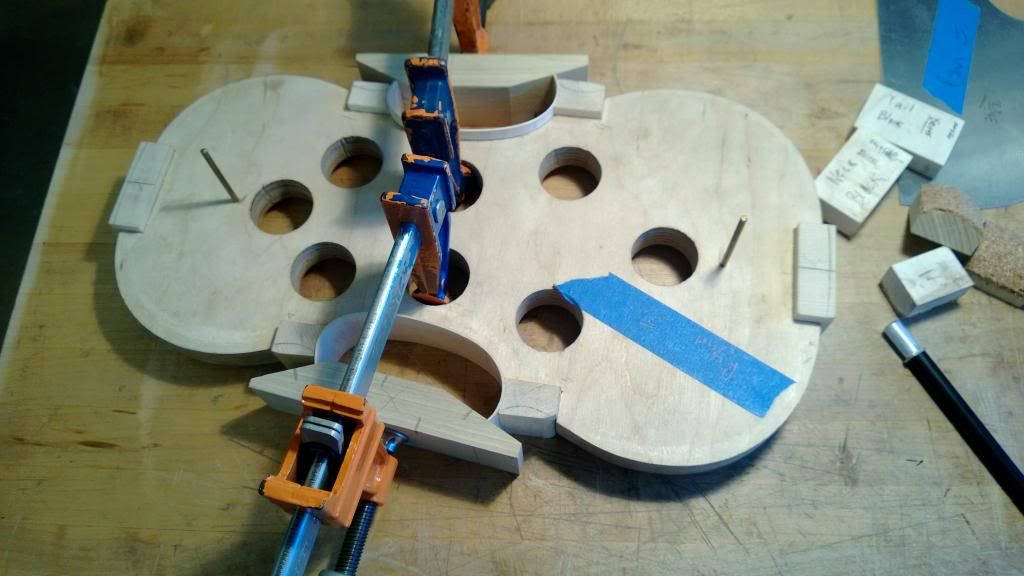
Glueing in the C-bout ribs. Always start with the C-bouts. I made the clamping caul to have each angle on the block being 90 degrees to the direction the corner points out of the body so it puts pressure straight into the ribs.


Juntunen Guitars Build Thread.
in In Progress and Finished Work
Posted
Looks like I can finally post pictures to this site again so I figured I'd start a build thread. I haven't had much time to work on guitar stuff or my violin builds over the last year and a half and I just took as job as the head repair tech at a shop in Vegas so I'll be moving across the country soon so I'll have to leave some of my projects behind in Minnesota.
So in October of 2013 I sketched out a bass guitar and through it in CAD to blueprint it a little. In November or December of that year I started building it. Later tonight I will continue this thread with more pictures.
Here's a screenshot of CAD while I was blueprinting.