


Juntunen Guitars
-
Posts
569 -
Joined
-
Last visited
-
Days Won
8
Content Type
Profiles
News and Information
Tutorials
Product Reviews
Supplier Listings
Articles
Guitar Of The Month
Links and Resources
Forums
Gallery
Downloads
Posts posted by Juntunen Guitars
-
-
This thread is amazing work. It makes me want to build another Archtop. Very nice attention to detail and quality work. I can't wait to see the finished project.
John
Thanks, I'm getting excited to see it too, it's getting close to being ready to put on the finish.
Here's a quick update. I got the back glued on and I got the backs binding installed, I forgot to get a picture of routing the dovetail though.

-
What did you do for plate thickness on the top and back?
-
I couldn't tell you the exact mill thickness. The finishing of the interior is as recommended and directed by Benedetto. Since the three coats were sprayed onto unsealed wood, it didn't build very much at all. In fact, even though it was a gloss product it didn't get to anything beyond perhaps semi-gloss.
Pros, I've certainly learned the downfall of impatience. Taking twice as long to setup properly undoubtedly saves time over rushing in the long run. Fixing mistakes or redoing work takes up a ton of time.
I didn't realize Benedetto finished the interior of his guitars. Even more reason for me to go buy his book I think.
-
That looks great. I think I like the second test piece best.
-
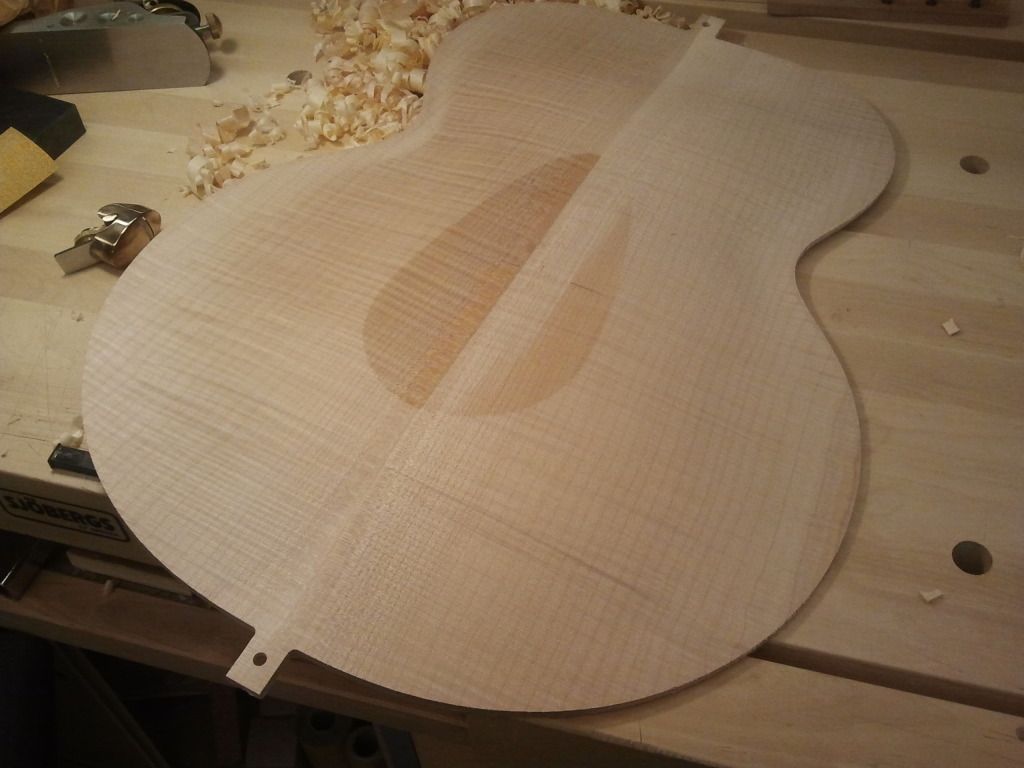
After lots of sanding and scraping.
Working out the recurve which is the same as the tops, 3mm at the shallowest point. and 4 on the outer rim.
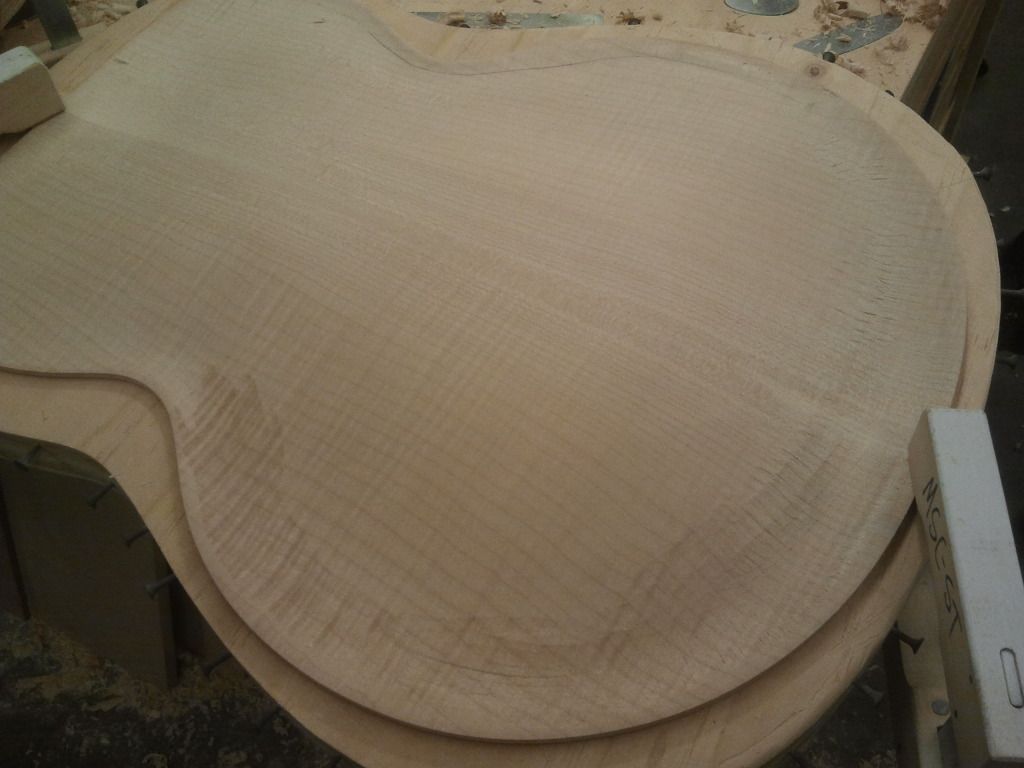
Then carving the last bit by hand.
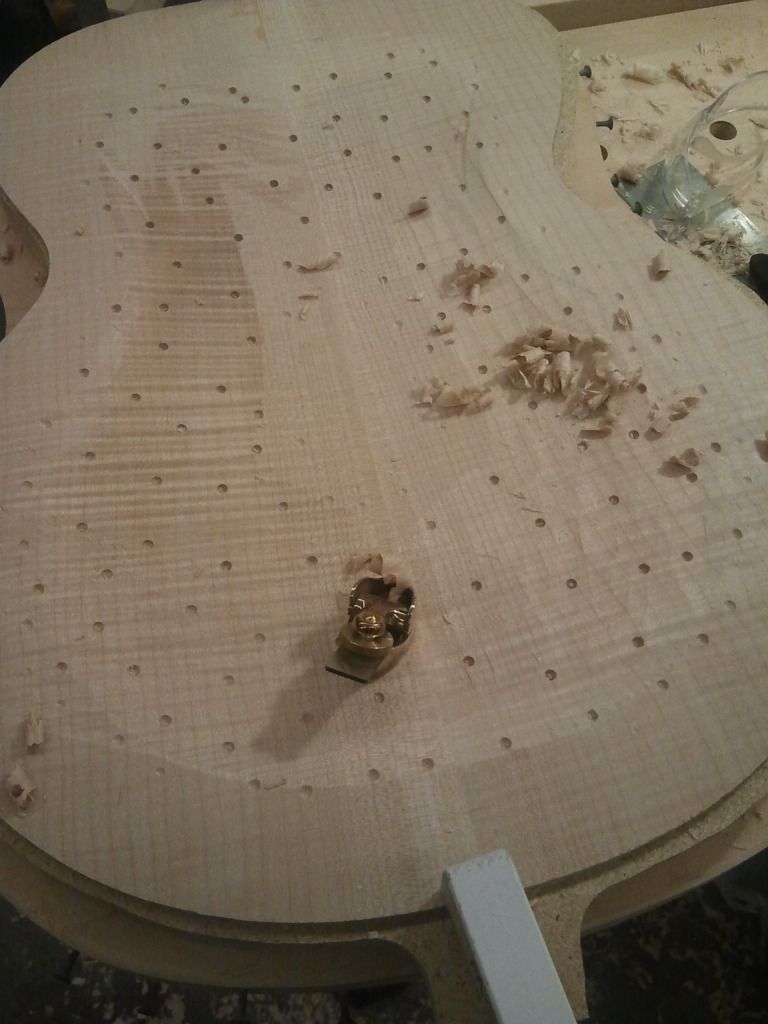
And then finally I got the side dots in. I found a good deal from a company called rescue pearl. They sell a lot of inlay material and you can buy a package of 100 abalone side dots, or a choice from several other sizes for fret markers for only $18 and they do deals like that for pearl, reconstituted stone, even mamoth tusk aparently.
-
 1
1
-
-
Yeah, every way of doing something has it's downside to account for.
Definatelly and this build has been a big learning curve so far.
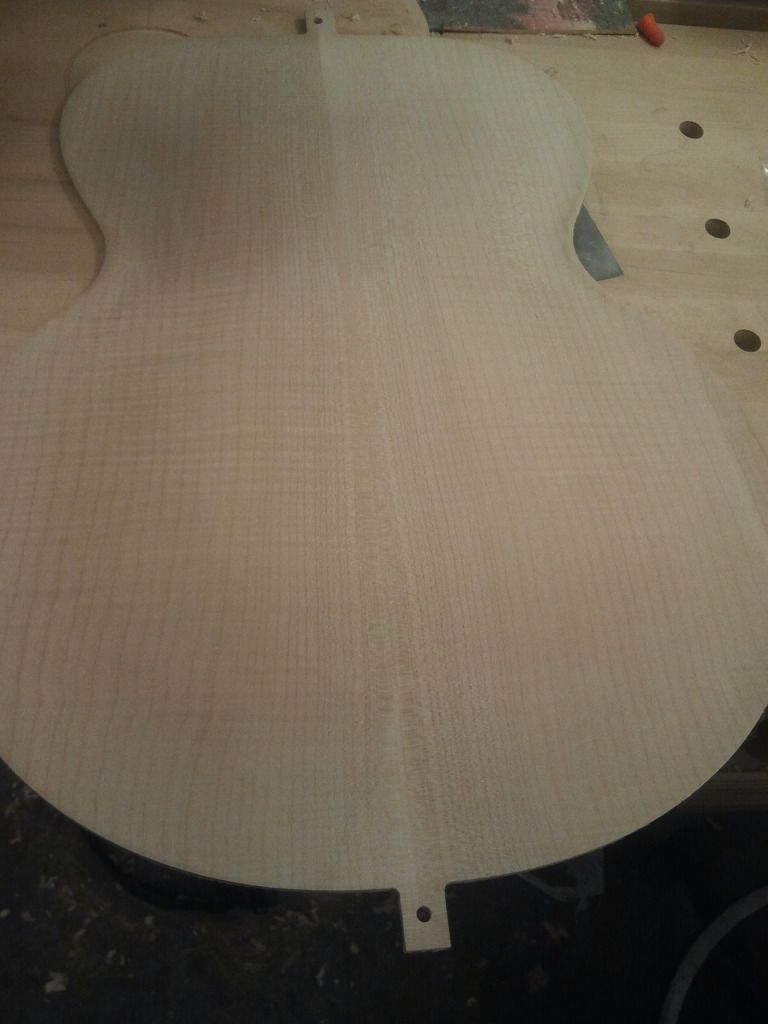
Back to the build. The back on this thing was just causing issues left and right but I finally got it figured out. So at first I had to carve out the back a bit by hand. It wasn't holding down still so I took some thicker self adhesive foam to the vaccum press hoping it would be just soft enough that it would pull everything down, it was a little to sketchy so I decided to just carve the inside a little thicker and try my luck

It ended up working just fine.
During this whole back problem I've been getting more and more mad at this so when I was cleaning up at the end of the day I found this fortune cookie paper from earlier in the week when some friends and I went out to the chinese buffet.

-
damn man this is just awesome!
Thanks man, I'm enjoying this build a lot.
-
Finding out string gauges and settle in. So with a flat top guitar you need to figure out the expected settle in that the guitar will adjust to as the wood is first getting compressed and moved by the string tension, to figure that out you need to know string tension. In standard tuning with the strings I use on my 6 string (D'addario .013's) there is about 180 pounds roughly put on the top. I ofen to to an open tuning so I'm guessing it's more around 150-160 with the tuning I use but I haven't figured it out exactly. With the 8 string having an extra low and high string and being tuned from a low F# to a normal standard high e I want the string tension to be about 180-165/170ish to try and reduce a ton of pull on the cedar top but still have good tension and since it's a fan fret guitar there is technically 8 scale lengths.
The equation for string tension is T=(UW(2SF)²)/386.4 where UW is unit weight (found on the D'addario string chart, S is the scale length and F is the notes frequency in hz. The string guages end up being about .012-.080 and about 175 pounds on the top.
I think I'm going to leave it this way for now and see how it feels but it should be about right. Here's how my math was done.
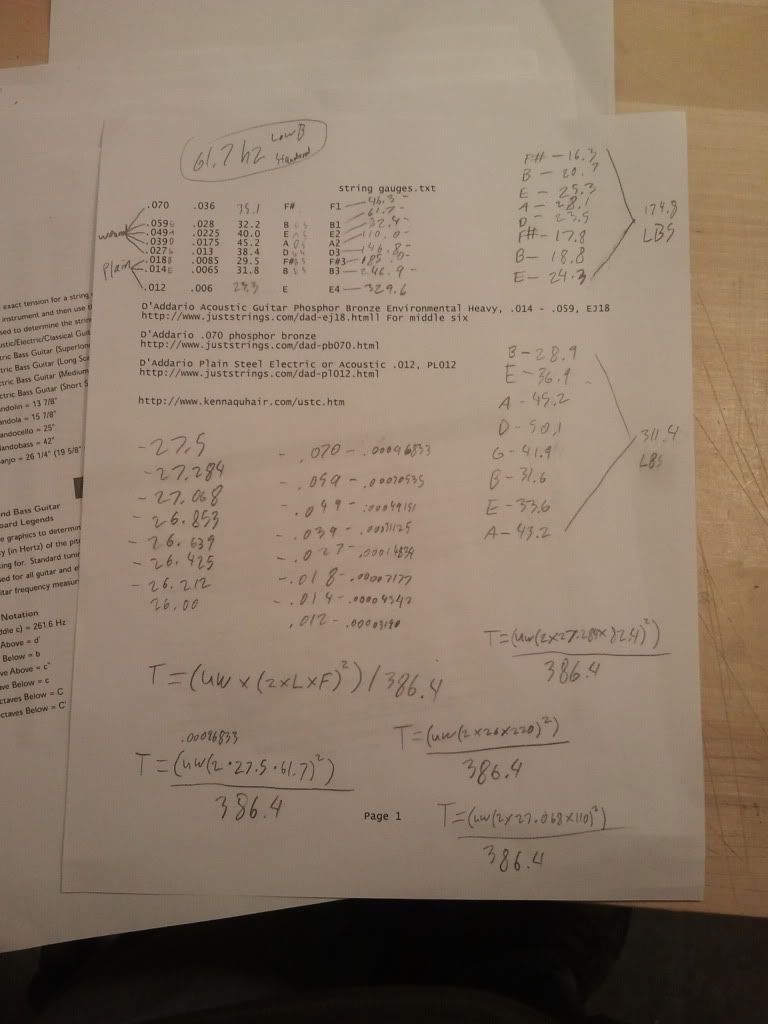
The downside to this is I will never be able to tune up to standard without destroying the guitar. When tuned to standard it would be about 311 pounds, if the guitar were to survive it my fingers wouldn't

-
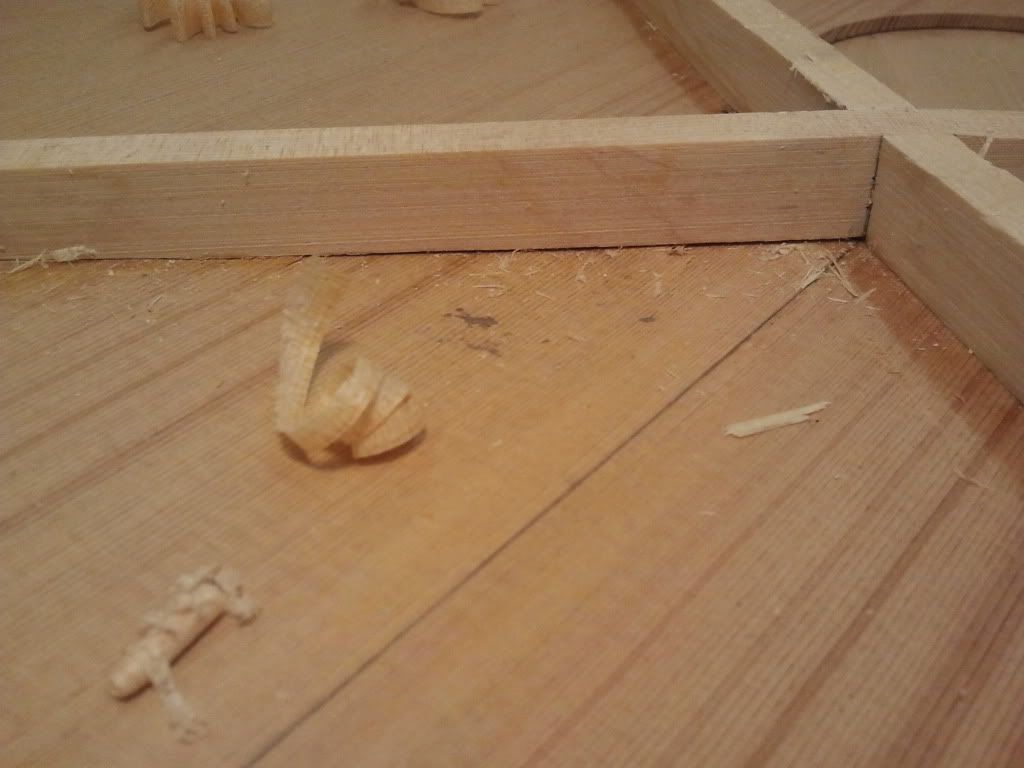
I got the back glue joint strips glued in as well. This was a pain, I had about two hours into cutting these out and shaping them with a chisel then hand sanding them to be scratch free. They are just cut off of the cedar top so they also liked to break off their tips so a lot of time was spent super glueing things back together.
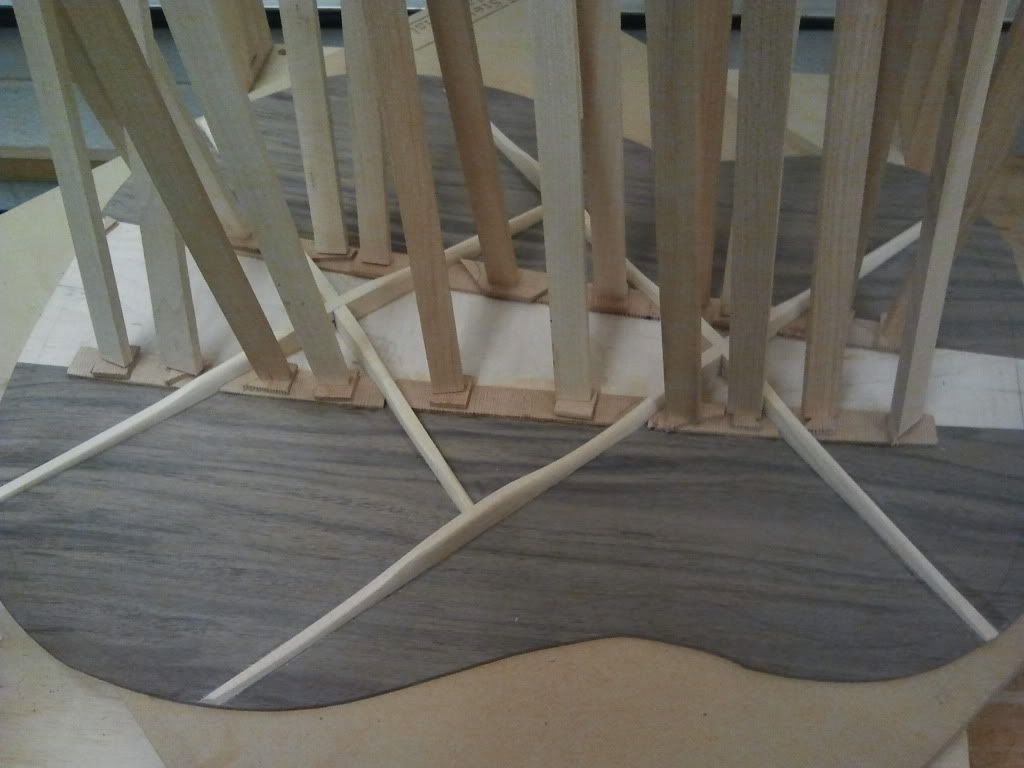
I also got the kerfing in.
-
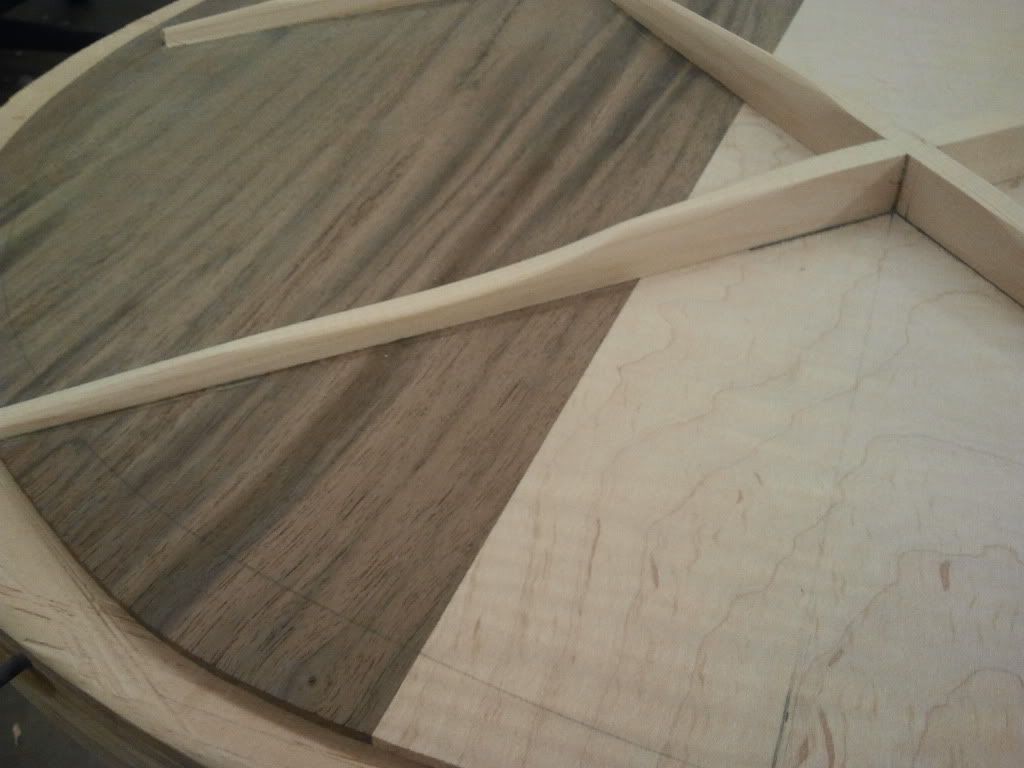
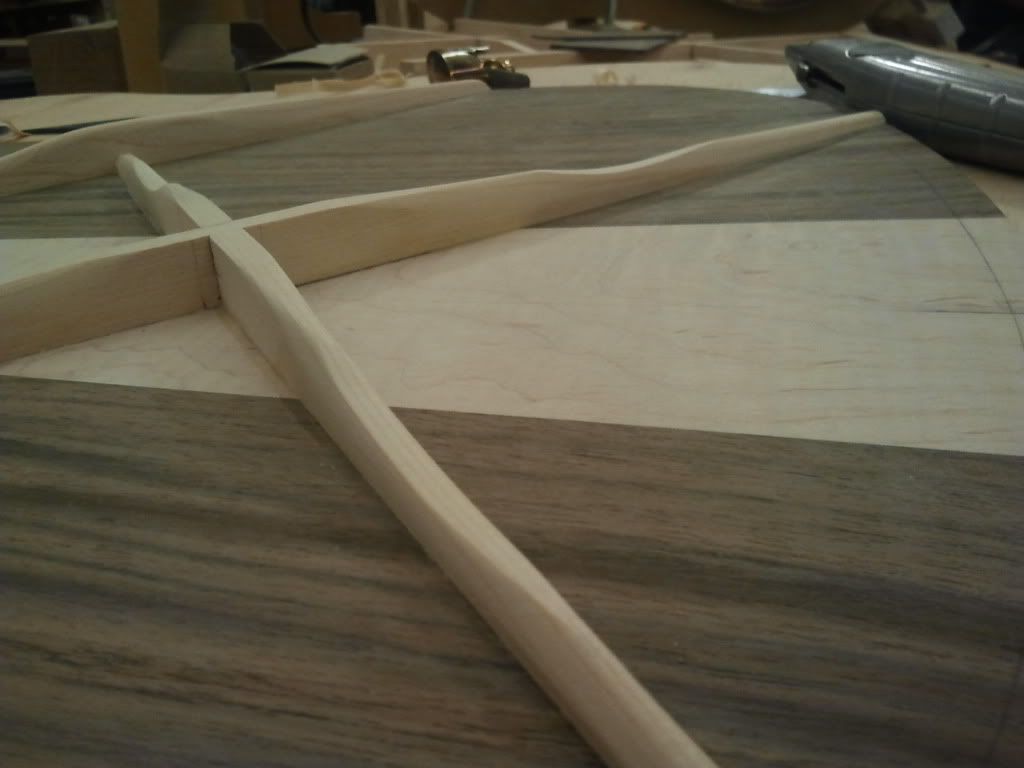
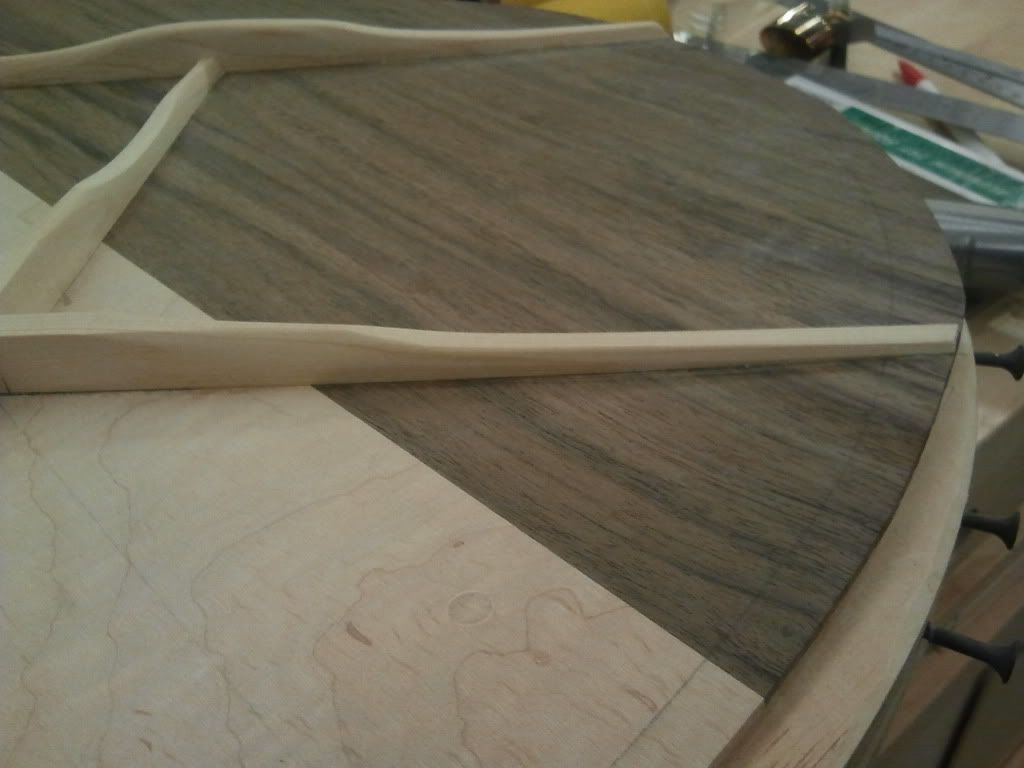
Shaping the back braces. I use two finger planes and a ruler with self adhesive sandpaper on it.
When I got the rough shape done I started to voice it. I have no idea what to look for with a back compared to a top so I just started shaving away areas and scalloping different spots to see how it would affect the tone. I finished when it still had some stiffness to it but I was also able to get either a nice rumbly tone or bright crisp "ping" sound everytime I'd tap it while holding it in different places. This is all part of me experimenting to see how back braces affect the tone. By the way, violin knives make great tools for scalloping smaller areas.
-
1
-
-
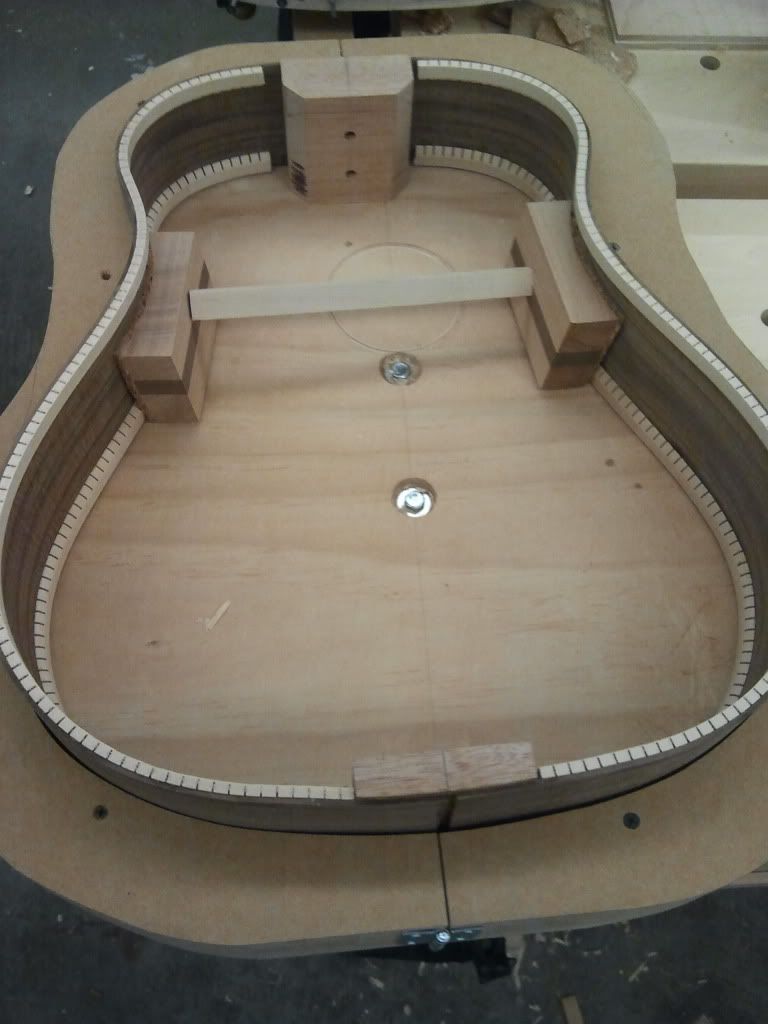
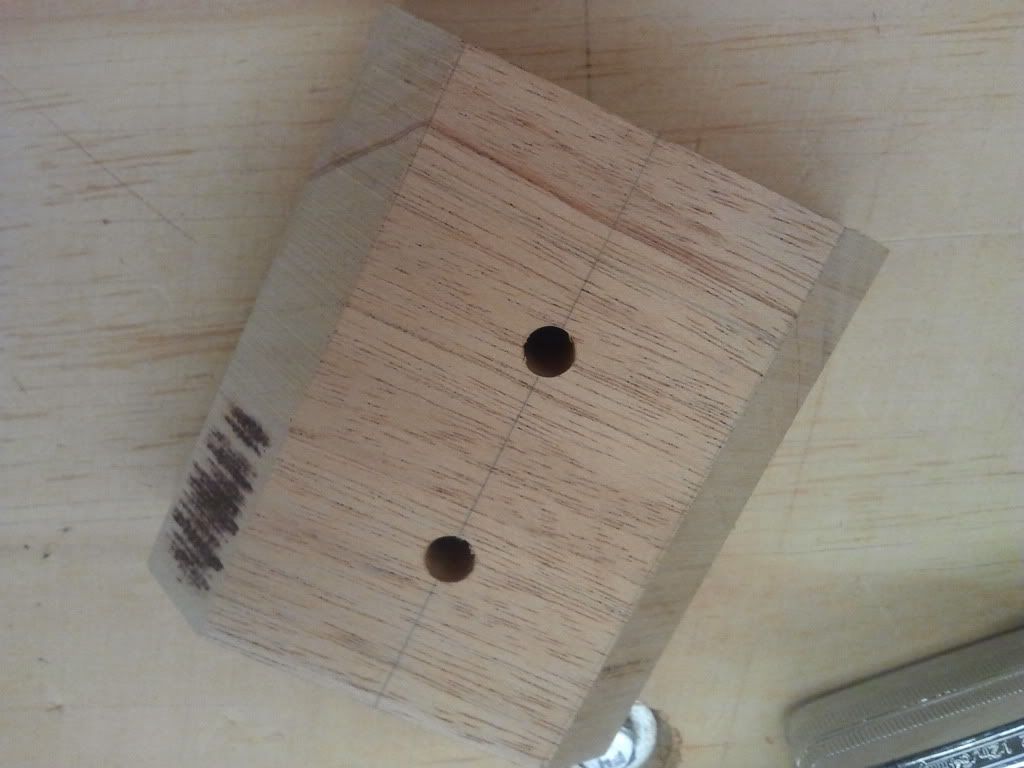
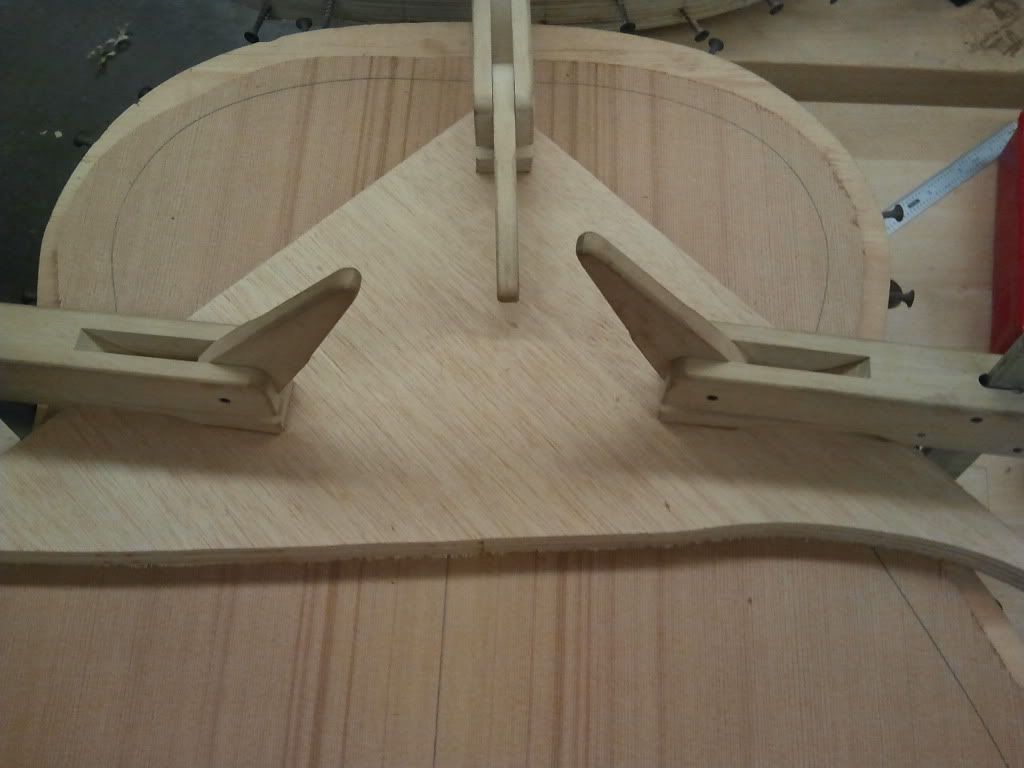
Here's making the blocks. I keep the grain going horizontally, the idea is so when the sides move with humidity changes it won't have to fight the blocks grain direction.
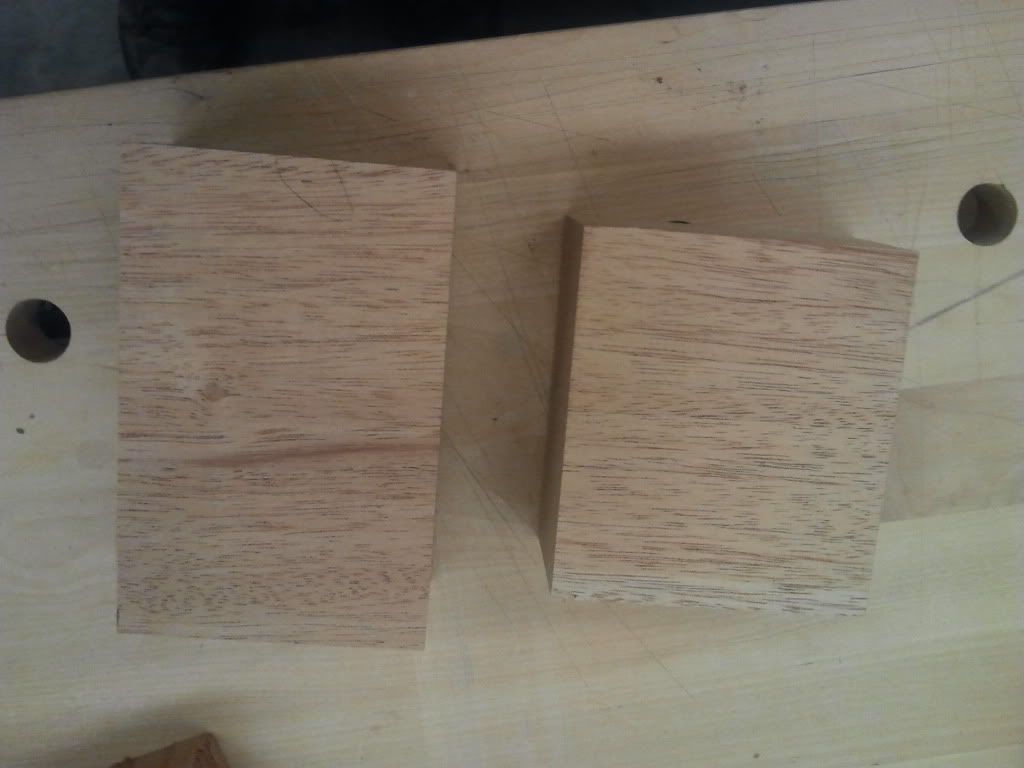
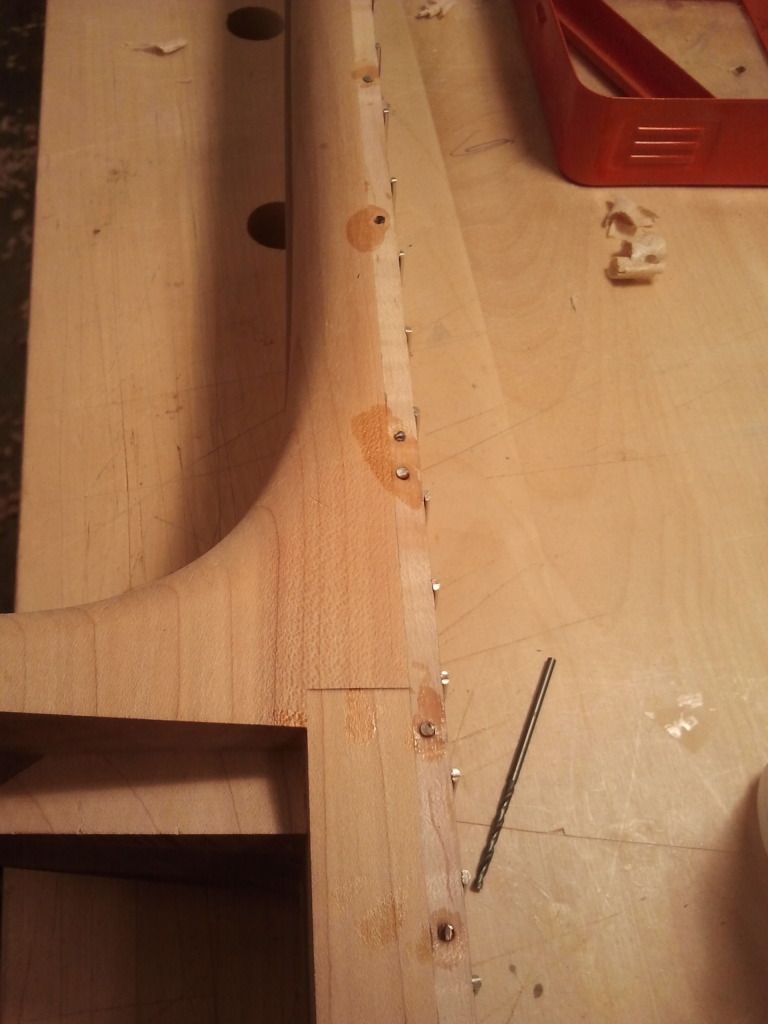
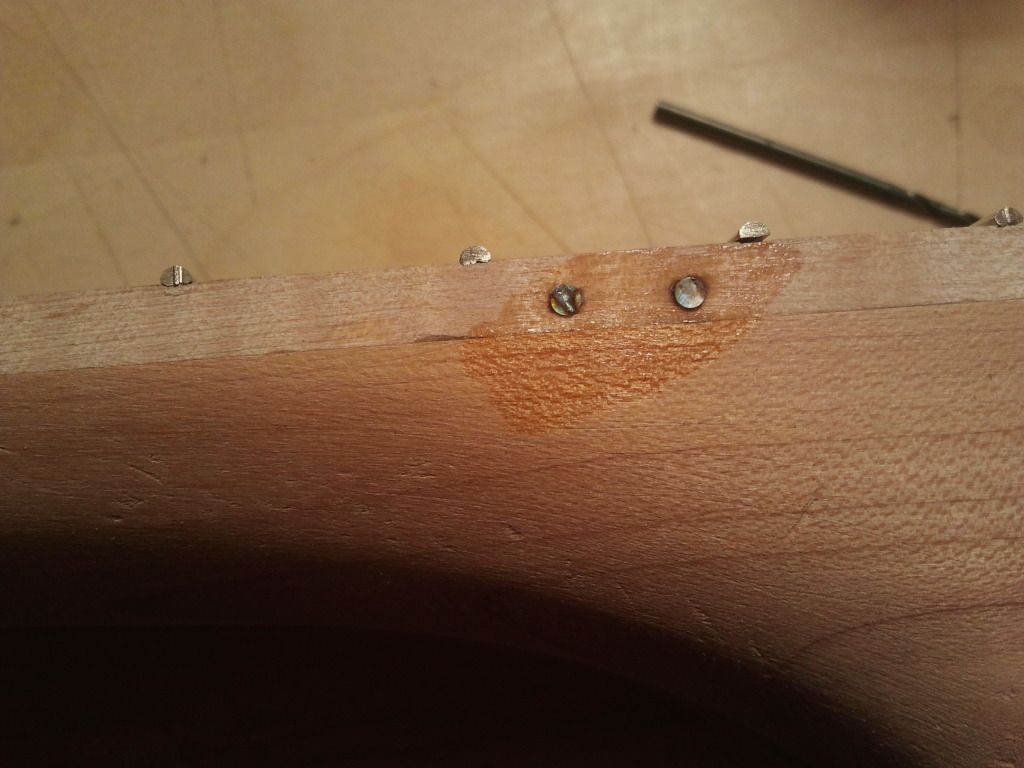
Since I'm doing a bolt on neck I decided I'd show you guys the neck joint I'm using. I originally drew one up as a mix of this one and the Taylor neck joint which is basically inlayed into the body but that would have taken more time than I want to spend on it so I figured I would just go with a normal mortise and tenon and then do a mock up of my joint later. The metal pins in the mortise are used as a punch to mark holes for where I drill the tenon mounting holes.
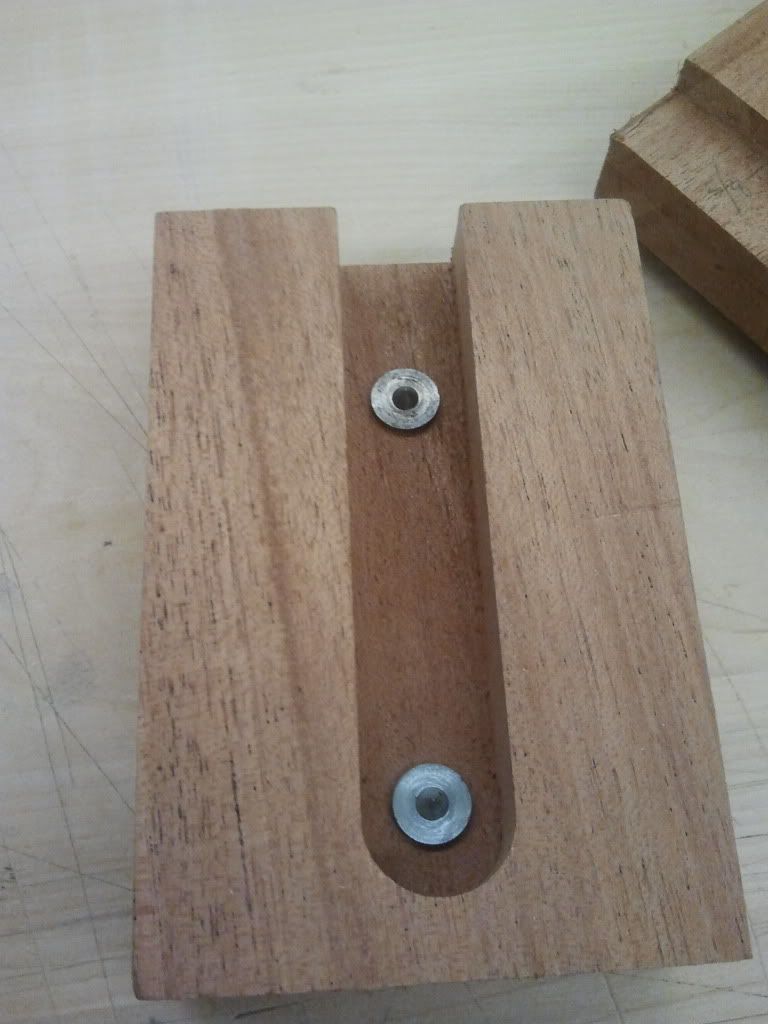
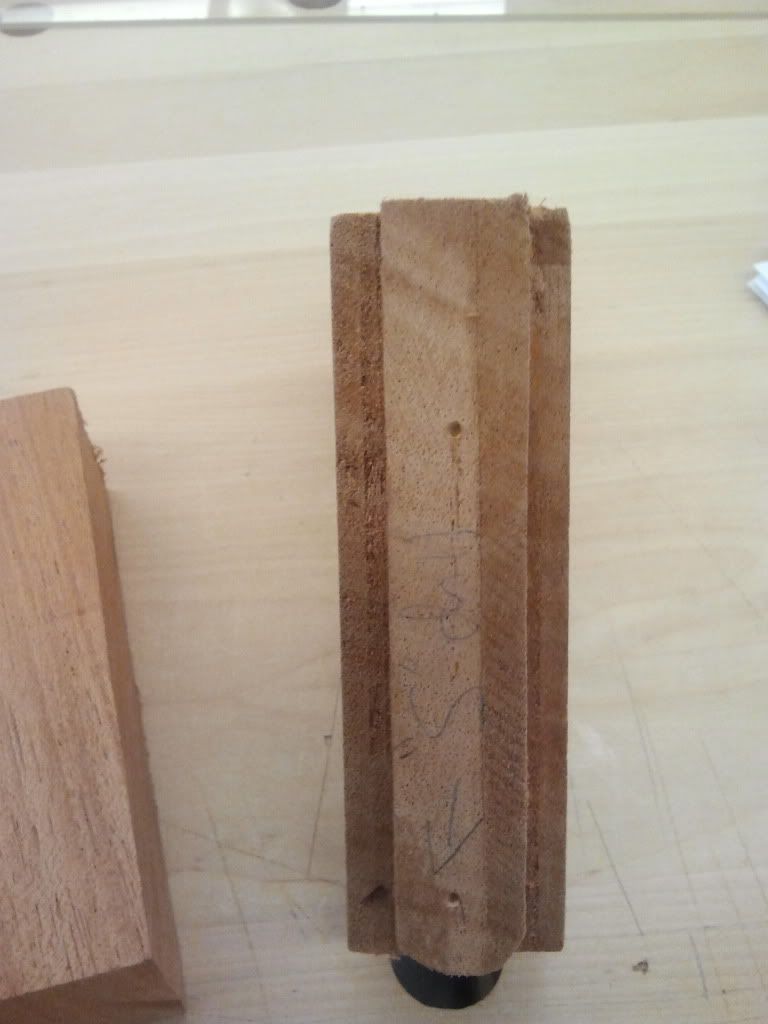
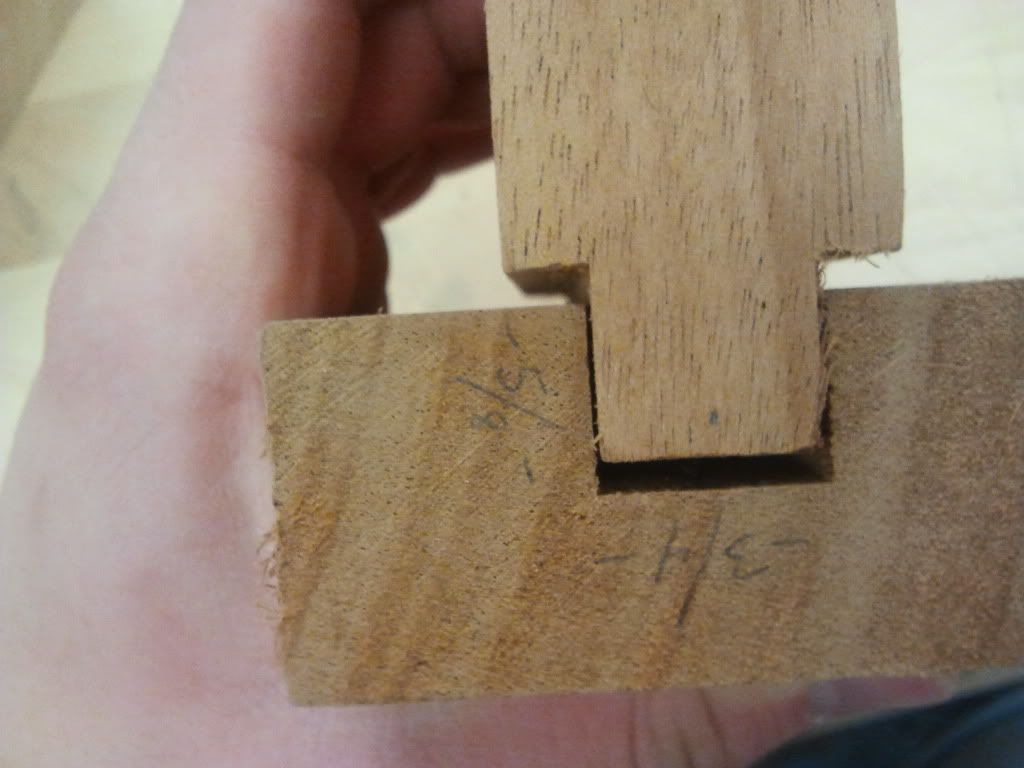
You want to leave a gap on all three sides of the tenon.
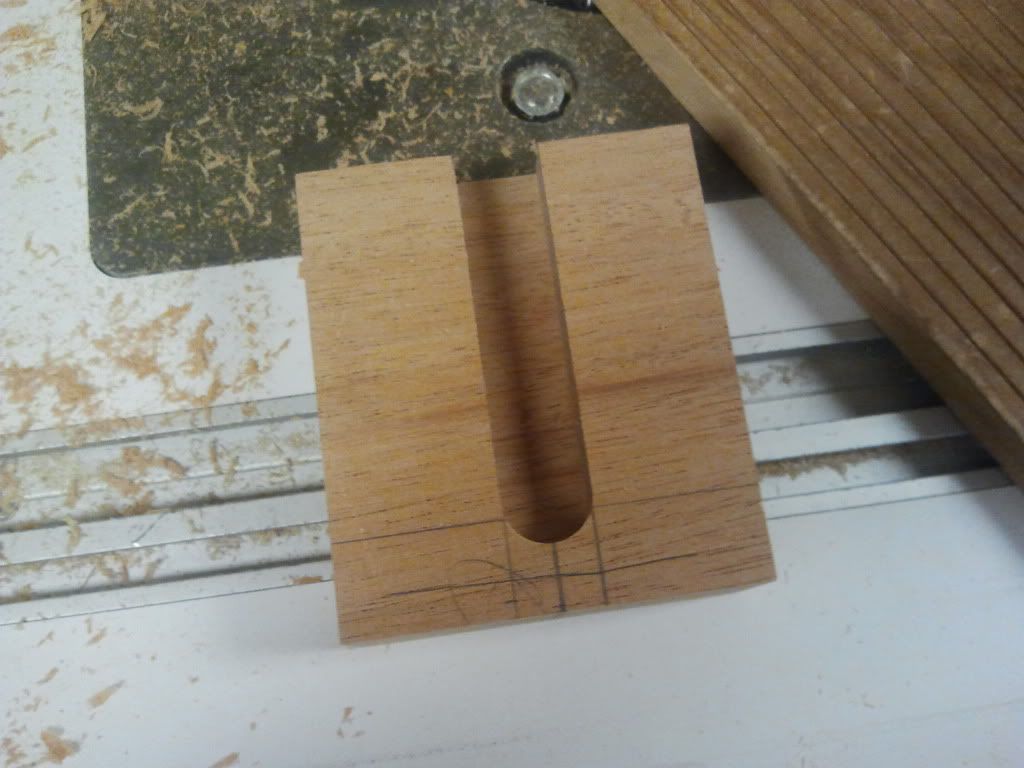
Routed slot in the actual head block. I used a forster bit to make positioning the bit easier.

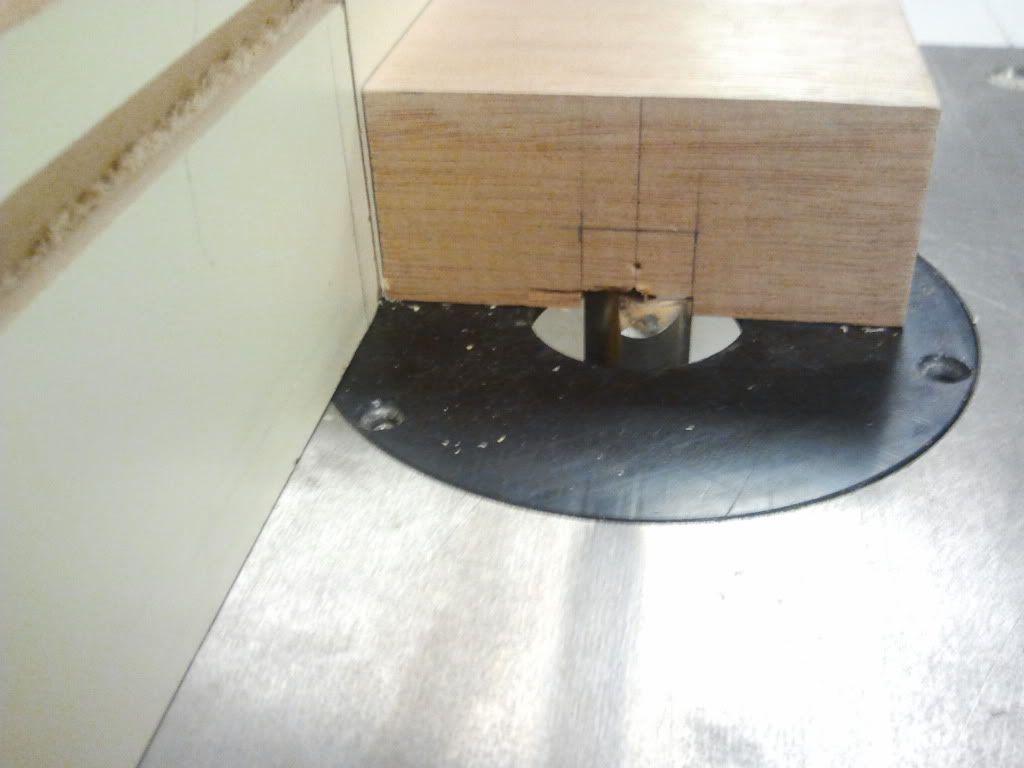
Then I drilled the bolt holes.
-
I've got a lot to update on here.
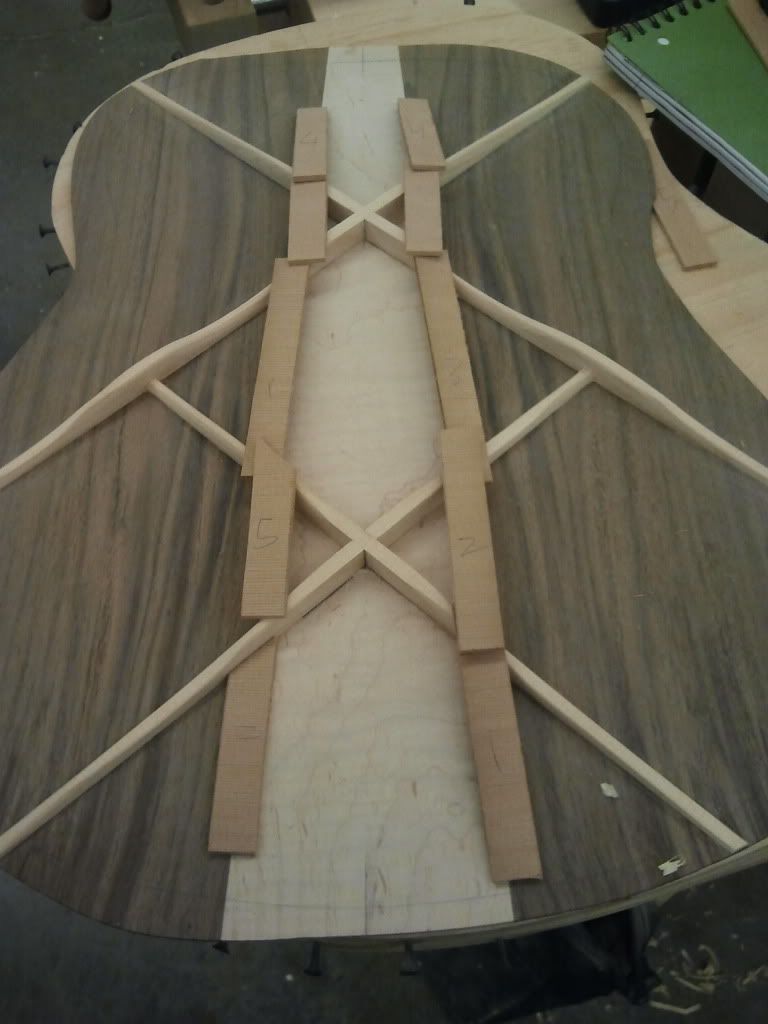
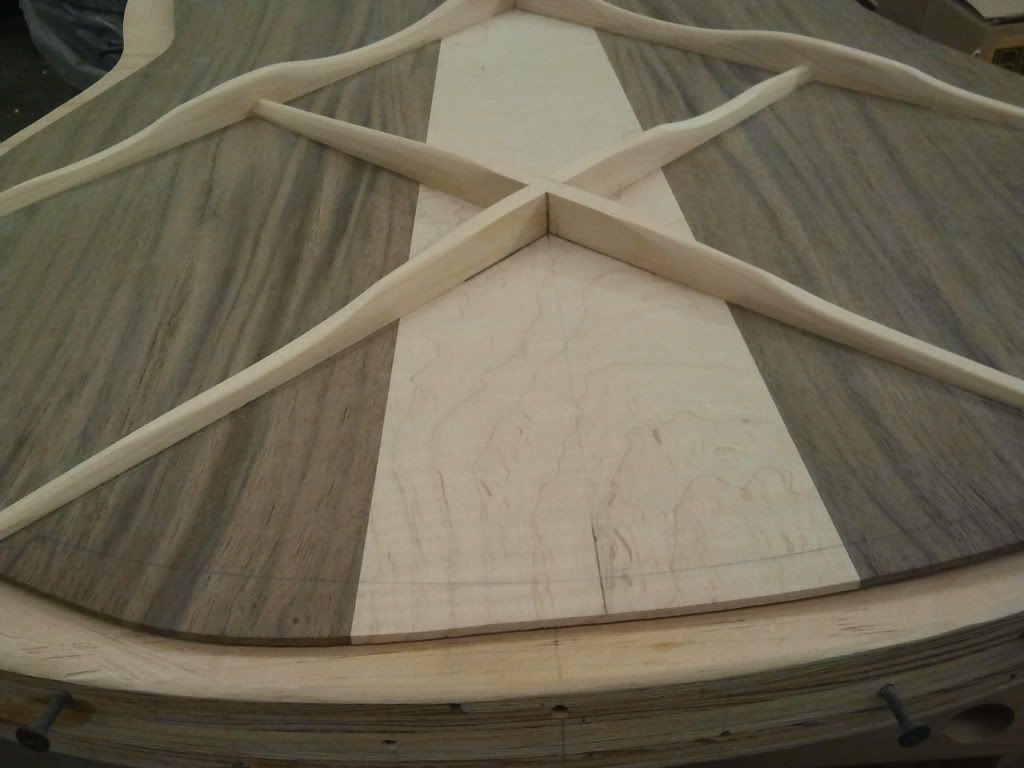
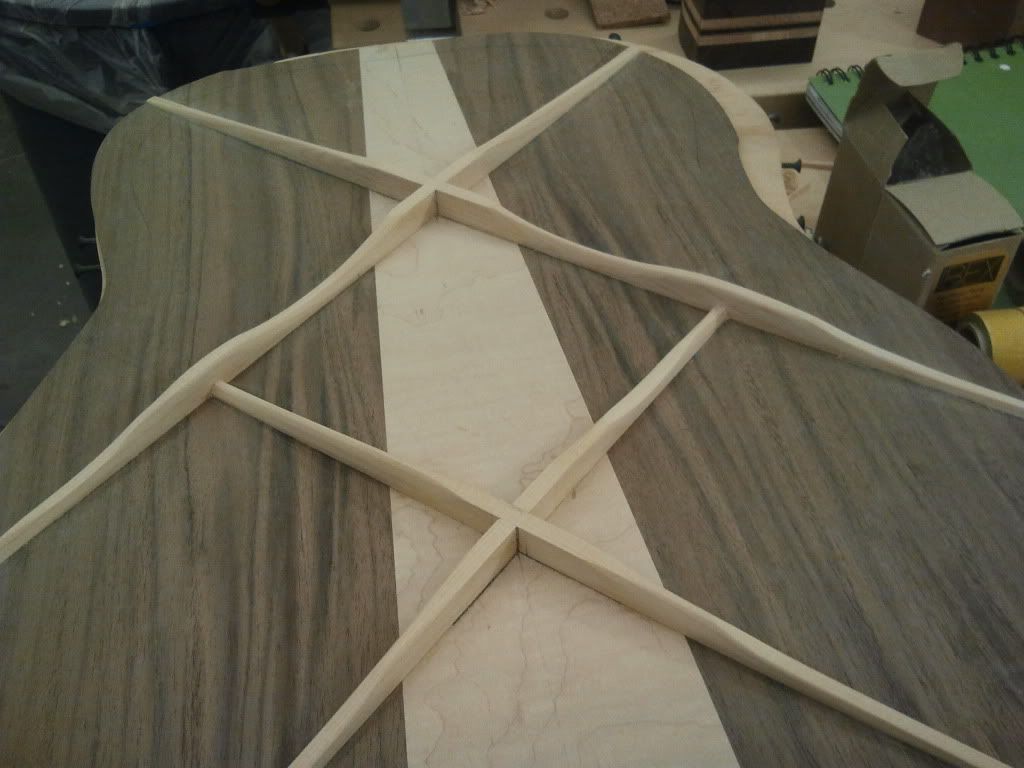
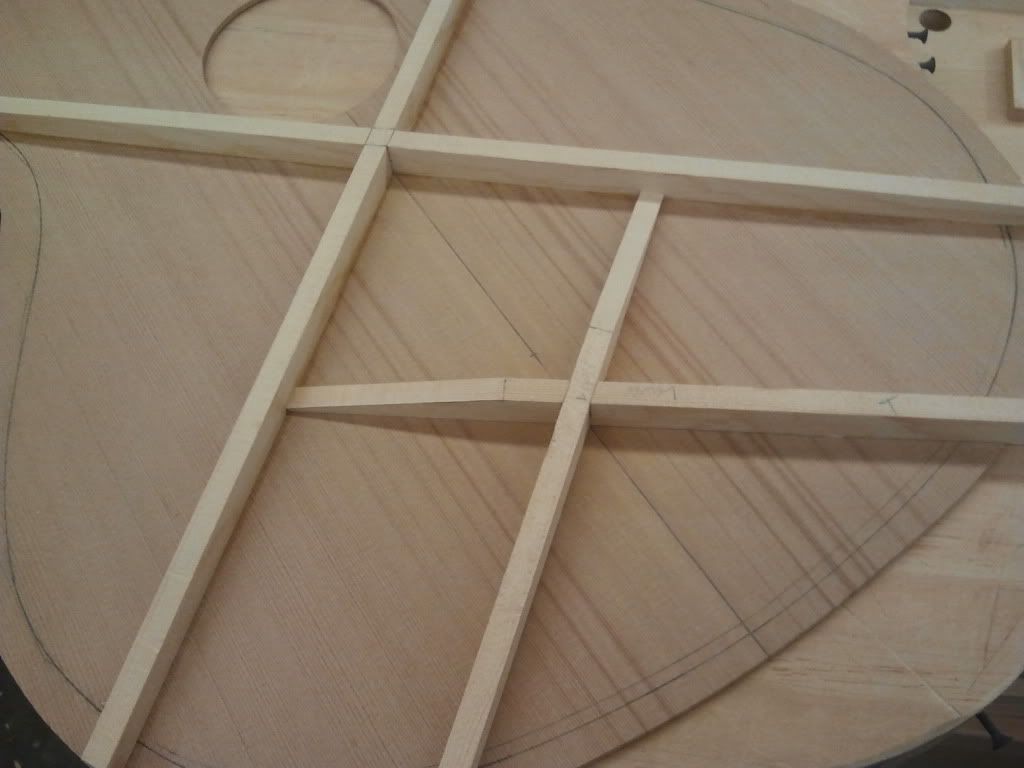
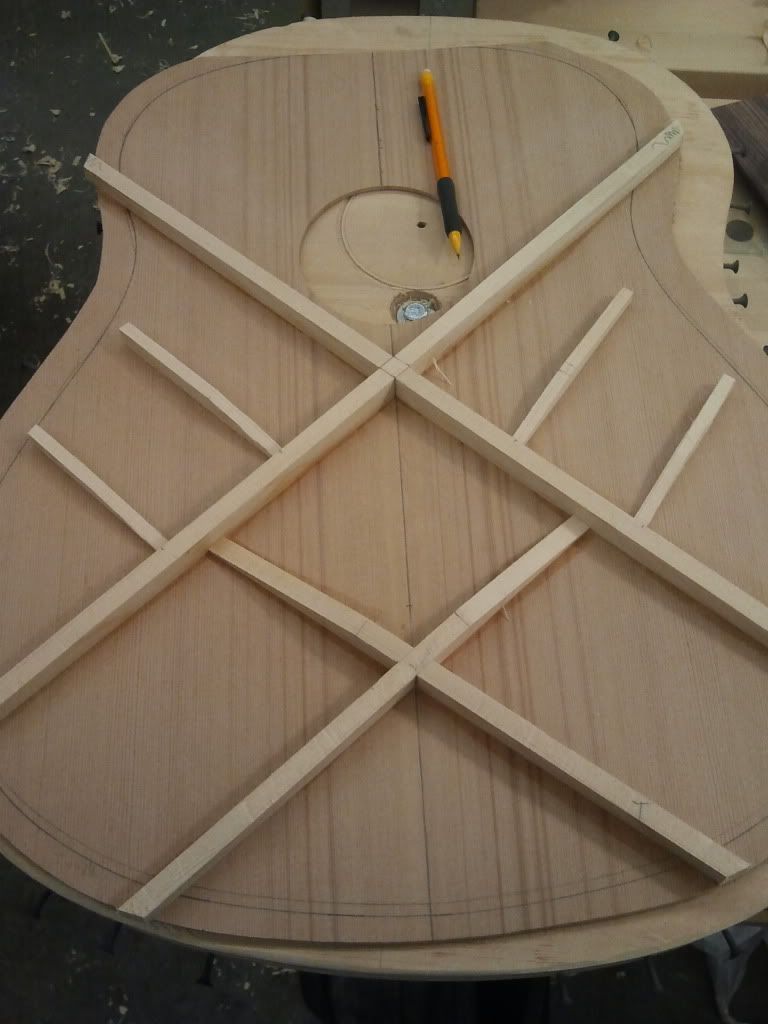
I had an issue with the x-brace, it didn't seat right so I had a nice gap on it. This day was starting to get me pretty mad because I was struggling with my archtop already so to top it off was this...
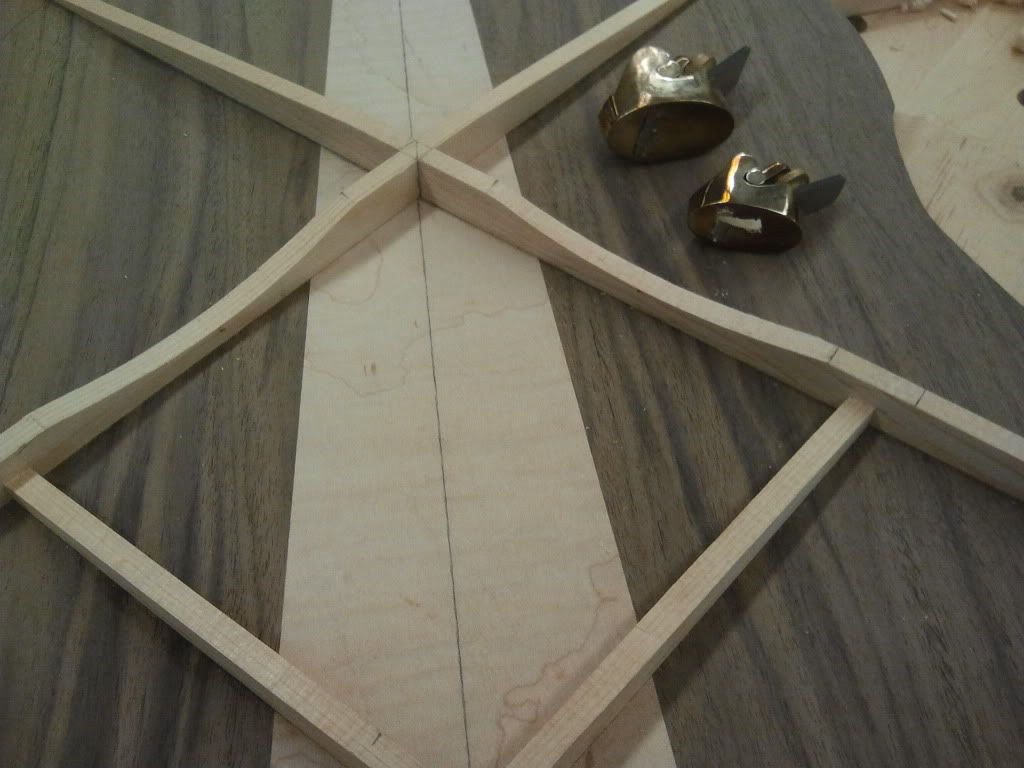
I shaved the bad x-brace off and made a new one. Here's glueing it in.
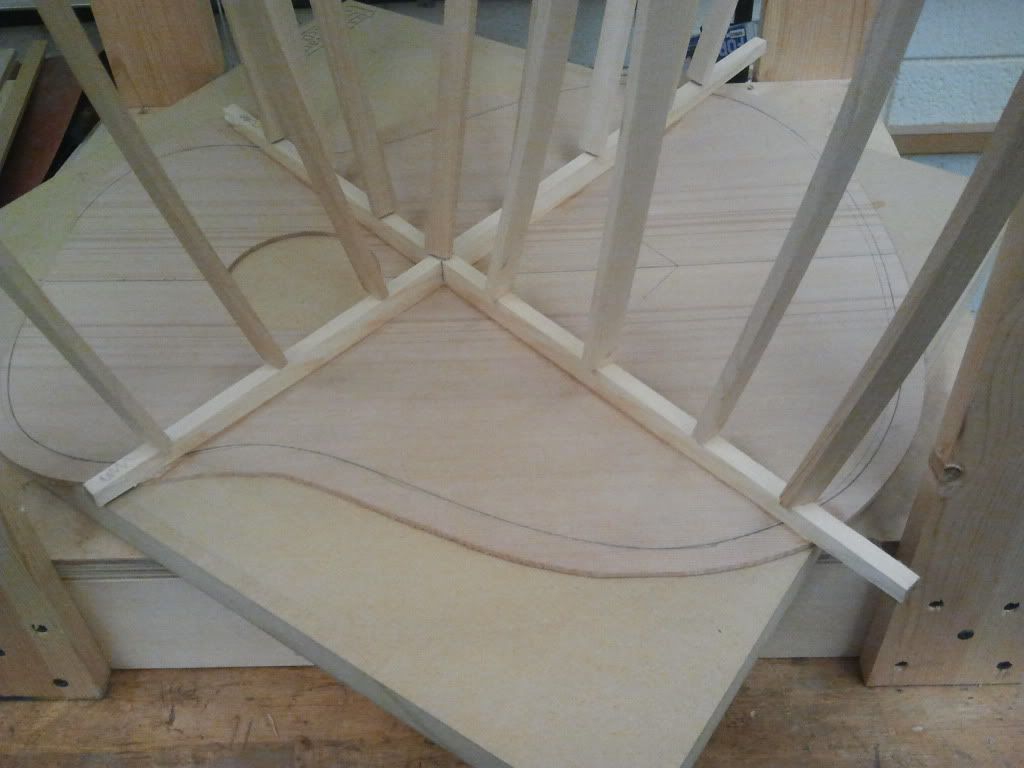
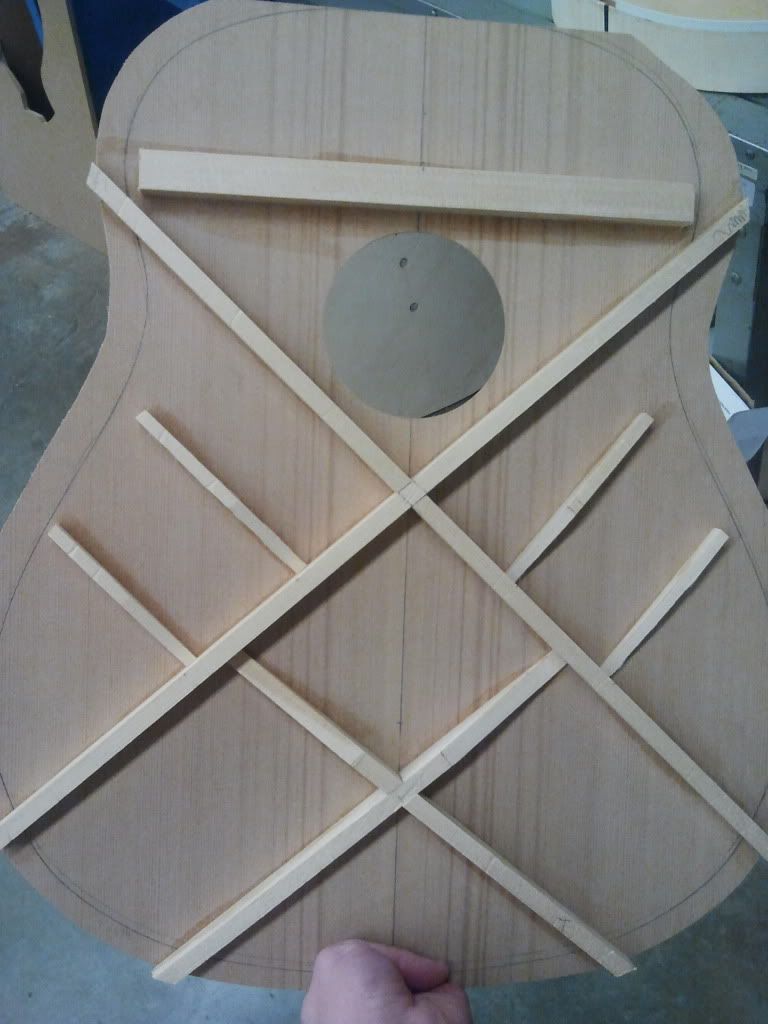
And the rest of the braces. I'm playing around with finger brace placement. The bass side finger braces I put at a sharper angle and a little closer to the upper x-brace to try and get a little more high end out of it. I tuned my 6 string down to what the tuning of this guitar will be and it was super bassy so I figure a tighter angle will bring out more high end, it works with x-braces so in theory this should work as well.
-
Look around for lumber yards in your area. Many places sell woods like maple and mahogany for a lot less than what guitar companies call "guitar wood" where I live it costs me about $25 for an 8 foot board of mahogany that 8/4 lumber and I can get either 4 acoustic necks out of it or two electric bodies.
-
Just to fill in the gaps on some of the advice here, "scrap wood" could be Poplar bought from Home Depot. It's relatively inexpensive, and it gets you familiar with working with hardwood. Alternatively, you can buy relatively cheap maple of eBay or at a local lumber mill. Good luck, and read, read, read! Read these In Progress builds from start to finish and understand every step.
You beat me too it. I was going to suggest getting some 2x4's from Home Depot to practice glueing and shaping bodies with or get some basswood or birch.
System51 you do have a lot more reading too do and you never can say you did the research since there's always something you will learn with guitar building (just a heads up
 ), even our most experienced luthiers on this board still are coming up with new ways of doing things. I'd suggest doing some searches on this forum in the solid body section and in the in progress section. Look at builds from RestorationAD, Our Souls, and SwedishLuthier. If you are interested in acoustic building I have a couple going (links in my signature) and there are some archtop threads going on currently as well.
If you look on the main PG website there are tutorials for basic building there, they helped me out a bit before I started but in reality you should practice on scrap before building. It's nice to think that you are good to go because you read a few threads online but then when you start you learn it's not quite like that so practice making a few bodies and necks on 2x4's or something and then spend some good money on some good wood.
Sorry if I come across as a bit blunt but as SwedishLuthier said you will not make many friends on any forum asking questions without much research. Come up with ideas or questions about building and if you can't find them post them here and we will be more than happy to help.
Welcome to the forum by the way.
-
The answer to how it looks is "amazing". Snakewood is gorgeous.
Yes it is, I can't wait to get the fingerboard made. I plan to have it made either this coming week or the week after. It all depends on how much time I have to play with my CAD program and making tool paths.
I'll have more picture of this build coming up soon once I get them off my phone.
-
I'll have to do some reading on this one. Do you have any specific links saved to spare me the Google trawling?
Links for the violin stuff? http://waddleviolins.com/index.php?contentID=86 I was wrong on the scan, it was a CT scan, not MRI.
I was talking with Steve Rossow on tuesday about carving the outside first and he said for structural purposes the reason he carves the outside first is because when you put a top that's had the inside carved first into a vacuum press it will pull the top down more since the top flexes more so it will warp the top. So if you carve the outside first you can flip it over into a perfectly formed cradle and it won't deform.
-
I'm curious about spraying the inside and how that will turn out. I just got done reading online about it a little and it seems to be hit and miss on it working or making things worse. I've always thought that the finished interiors didn't sound that great but my experience is only one of the Alverez guitars that had a finished inside so I wonder how it affects the sound of the instrument over time. I don't really see a need for it because as long as you keep the instrument properly humidified it will be just fine. Acoustically though it would be fun to play around with, I'd like to try spraying just the back and sides and not the inside of the top becase spraying the back and sides would either dampen the sound or send the sound waves bouncing back and forth more depending on the finish used. Three coats seems like a lot though, what's the mill thickness?
This archtop is looking good by the way.
-
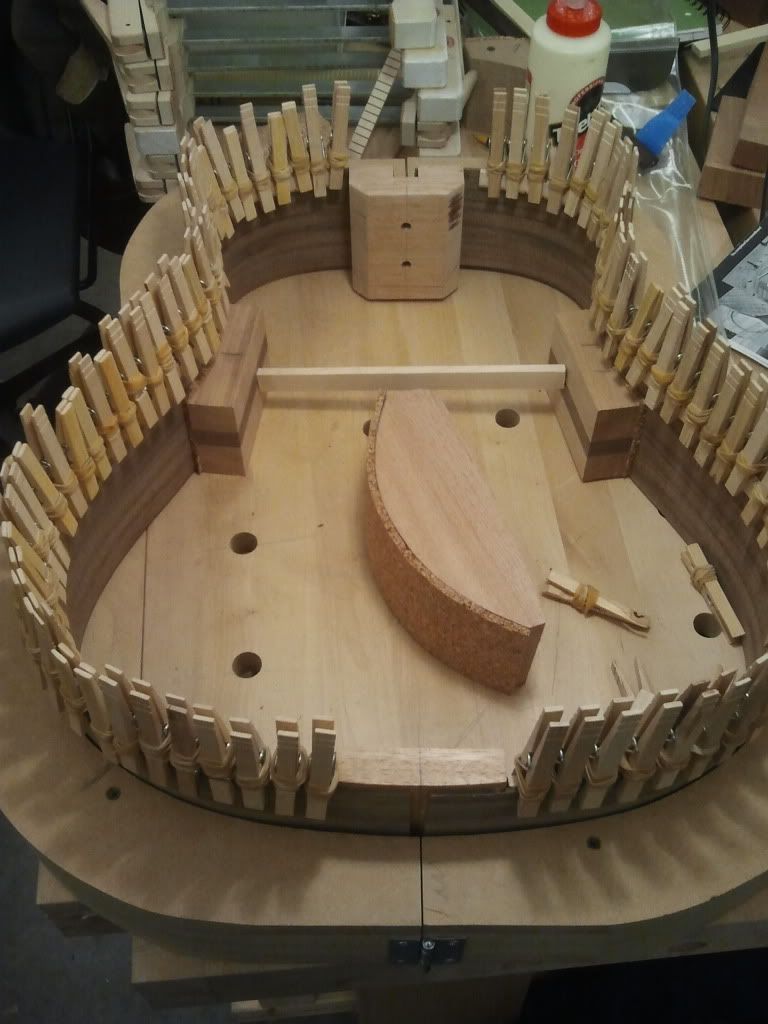
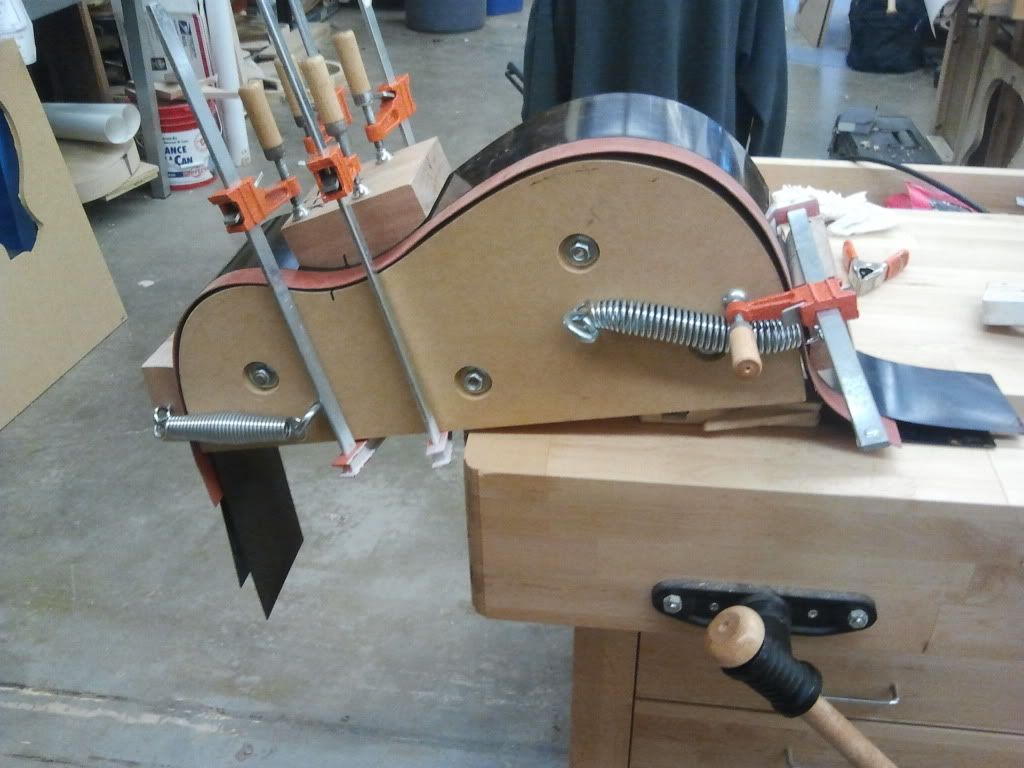
Got the sides bent today. I need to work on the spring placement on my bending mold a little.

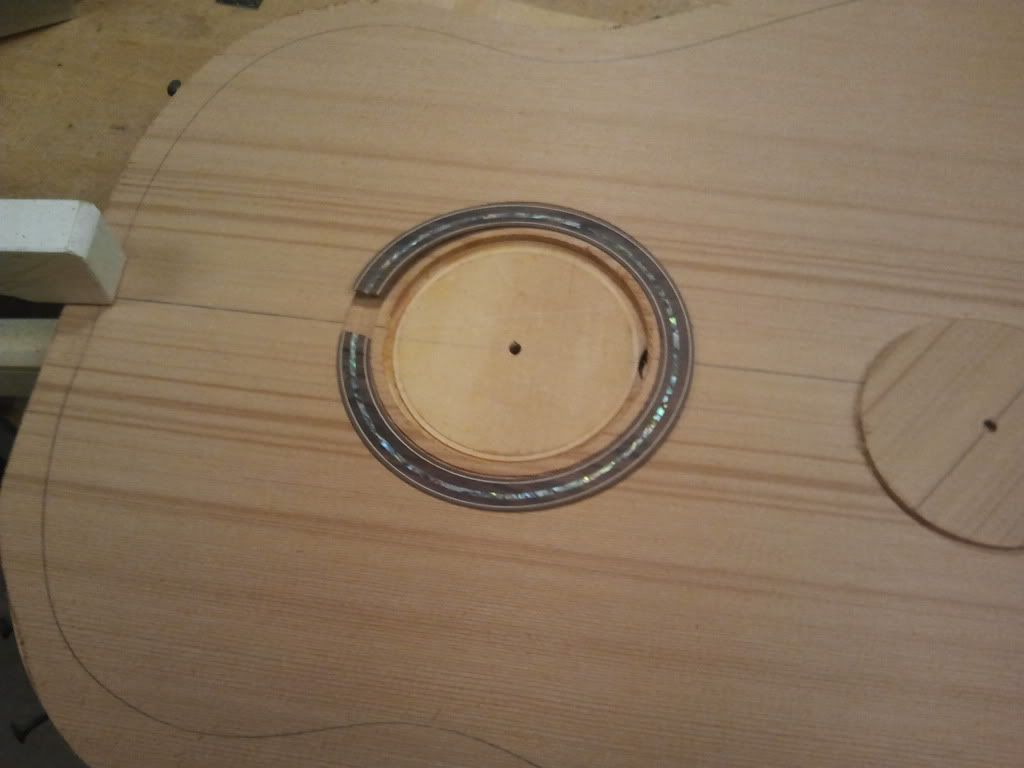
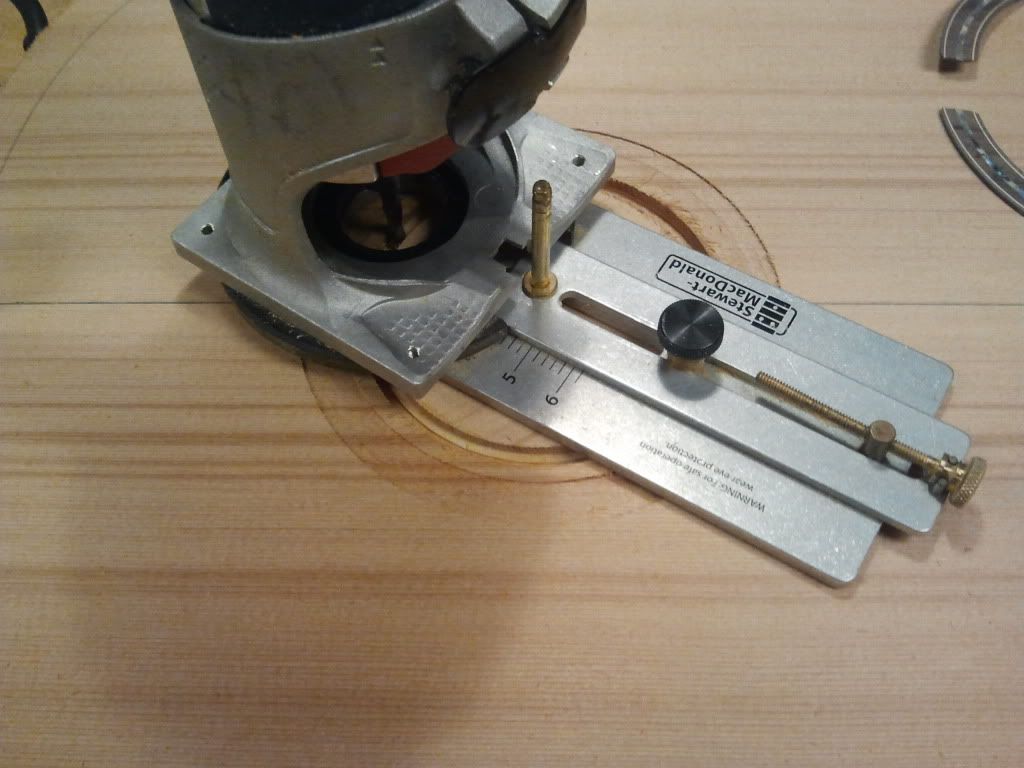
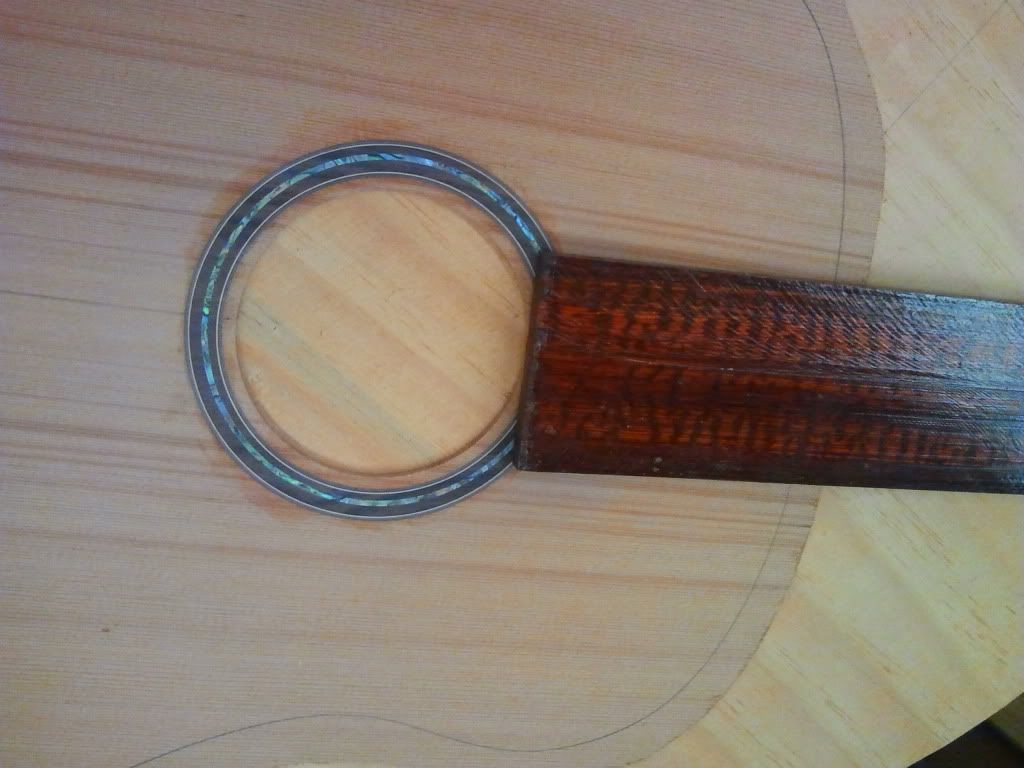
I also got the soundhole cut out and the rosette glued in.
Stewmac circle cutting jig.
Glueing in the rosette.
I had to do a quick little mock up to see what it would look like.
I also got the X-braces for the top radiused and the upper X-brace is notched but I ran out of time to glue it in so that will get done on wednesday along with the rest of the top braces.
-
1
-
-
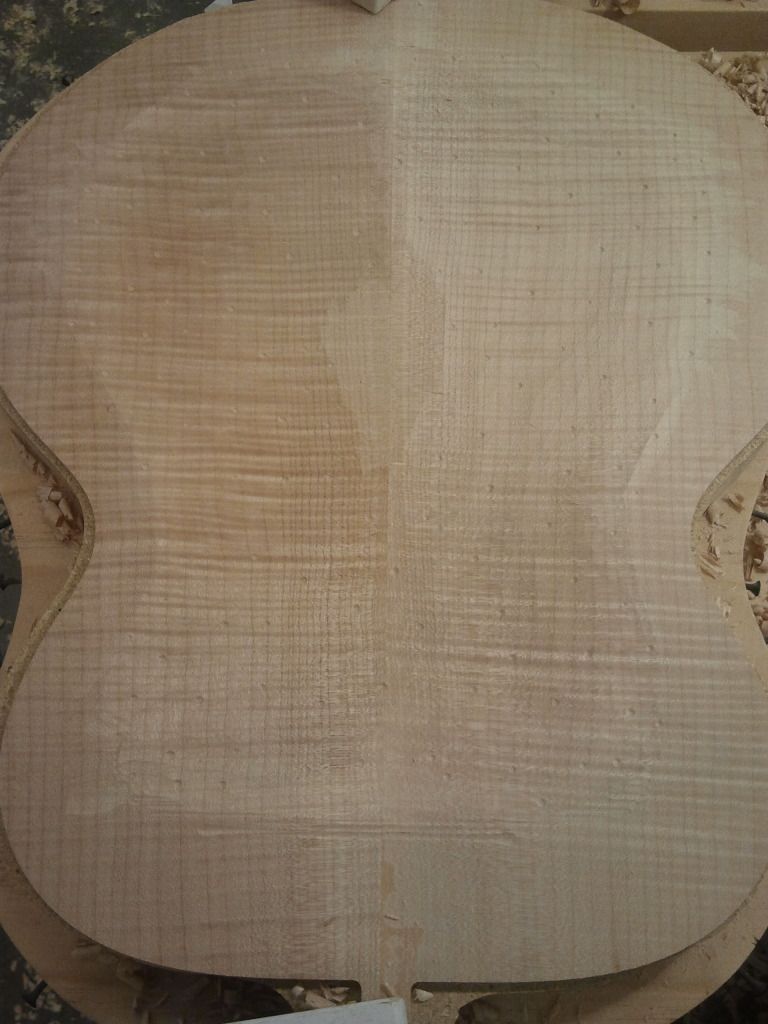
Juntunen, that back plate looks phenomenal. It would have been a shame to have lost it. I'm looking forward to getting my two "master grade" flamed maple backs started, because the figure is so intense.
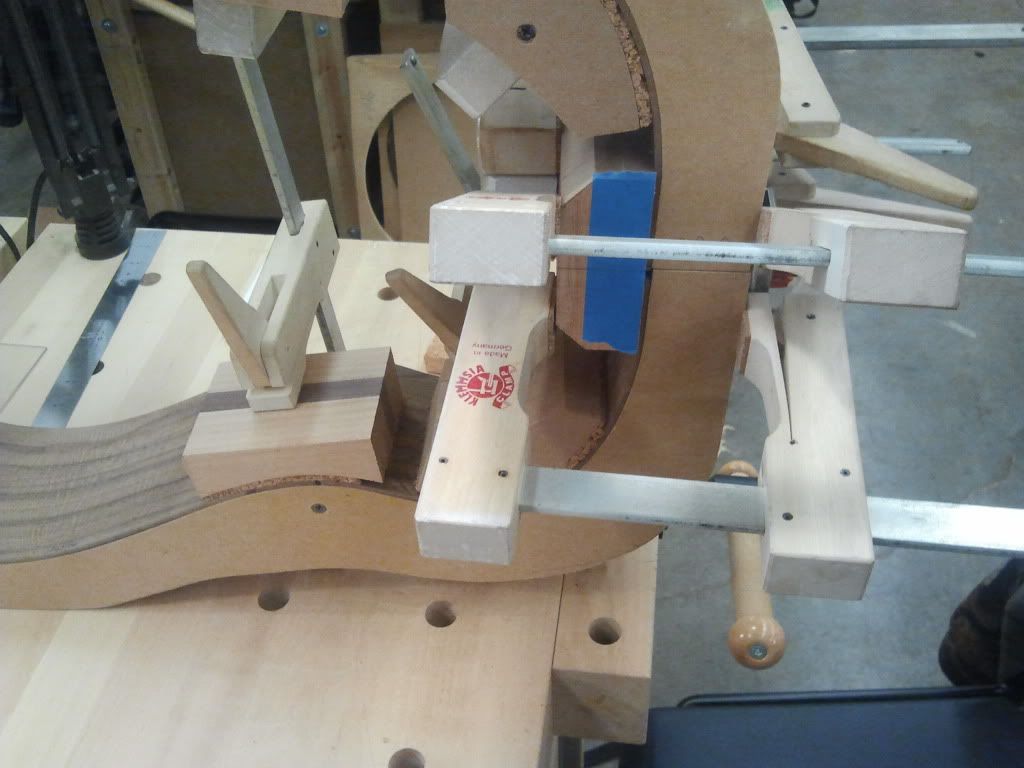
Great work! I have a question about your neck jig. Does the jig have your neck angle built into it? I'm currently planning out the jig I'm going to build for doing the neck side of the joint and while the Benedetto jig seems nice, it's rather large. While I'm sure it would be great if I was doing a ton of necks, for only doing 3 and maybe a few more after, something simpler that came at the expense of more setup time would be fine for my use.
I'd have been pretty mad if I lost that back as well and no the jig doesn't have the angle built in. The jig is actually made for flat top acoustics instead of archtops but the way it works is by screwing the neck in so you have to have the angle already cut which isn't difficult if you have the plans laid out and then any changes that need to be made are taken care of when setting the neck. I don't actually know what the Benedetto jig looks like, I haven't read any of his books or really looked into his guitars much other than buying the plans for one but from what I've heard his books are filled with a lot of good info.
As for the cupping I think it has something to do with the fact that a large majority of the carved top is open end grain and since end grain sucks up and loses moisture faster than the rest of the wood it will warp mostly but this is countered when you open up all the end grain on the inside when you carve it. My top cupped too, it wasn't a big deal but since I was doing it by hand I just used some cam clamps and clamped it down until I finished the outside and then it flattened out again as I carved the inside of it. I haven't really thought about it though I just know it will happen.
Prostheta, as far as I know it will cup regardless of what side you carve first, I just did the outside first since that's how I did the top and because I have a concave cradle made that I can set the back upside down in to carve the inside of it. I will have to look into what happens when you carve the inside first. I know a violin maker who also does cellos and mandolins who carves the outside of a top or back first always, I'm not sure why but it's just what he does, his name is Steve Rossow, I'm not sure if you have heard of the CNC made copy of the "Betts" stradivarious violin that was made from an MRI or CAT scan of the violin but that's who I'm talking about. Look it up, there's a few articles online about it. I was actually just looking at the scan of the strad violin today, it's pretty cool seeing literally EVERYTHING done to that violin, you could even count the grains per inch in the top but this is a whole other topic and I'm rambling now.

-
1
-
-
Yes. Revised looks nicer. Best use of space without cramping or leaving big open areas for no reason.
Yeah. I'm a little nervous about neck dive though. I will get a feel for it this week once I get the headstock cut out and everything but with the truss rod and neck reinforcments it's going to be iffy. Not to mention the snakewood fingerboard isn't really the lightest wood I've worked with either.
-
I doubt you will need that much space between the tuners. It makes the headstock feel a little ungainly. Realistically you only need to add on perhaps 10-15mm on the length, and most of that can be caught from bunching up tuners a little. It looks a little too paddle-ish if you see what I mean.
The original or the revision? The original I could have probably paddled a canoe with. The revision has the tuners spaced like the Taylor 8 string does. The thing with this build though is that no matter what I do the headstock will be wide and look wide because it isn't an 8 string with the center two strings as courses, it's 8 individual strings, the nut is 55mm if I remember right and the last fret is somewhere around 80mm. I'd rather have a more normal but slightly wide headstock vs a proportionate to a 6 string one that I could paddle a canoe with... on the bright side if I went that route I wouldn't need to pack paddles on a canoe trip, dual purpose instrument

-
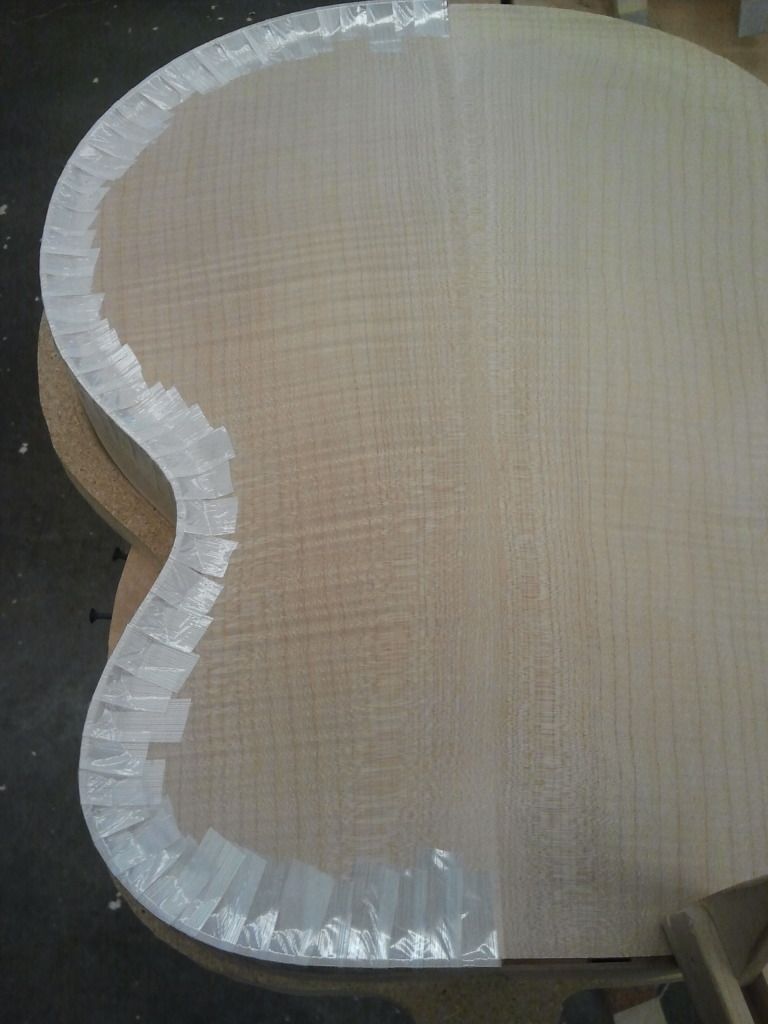
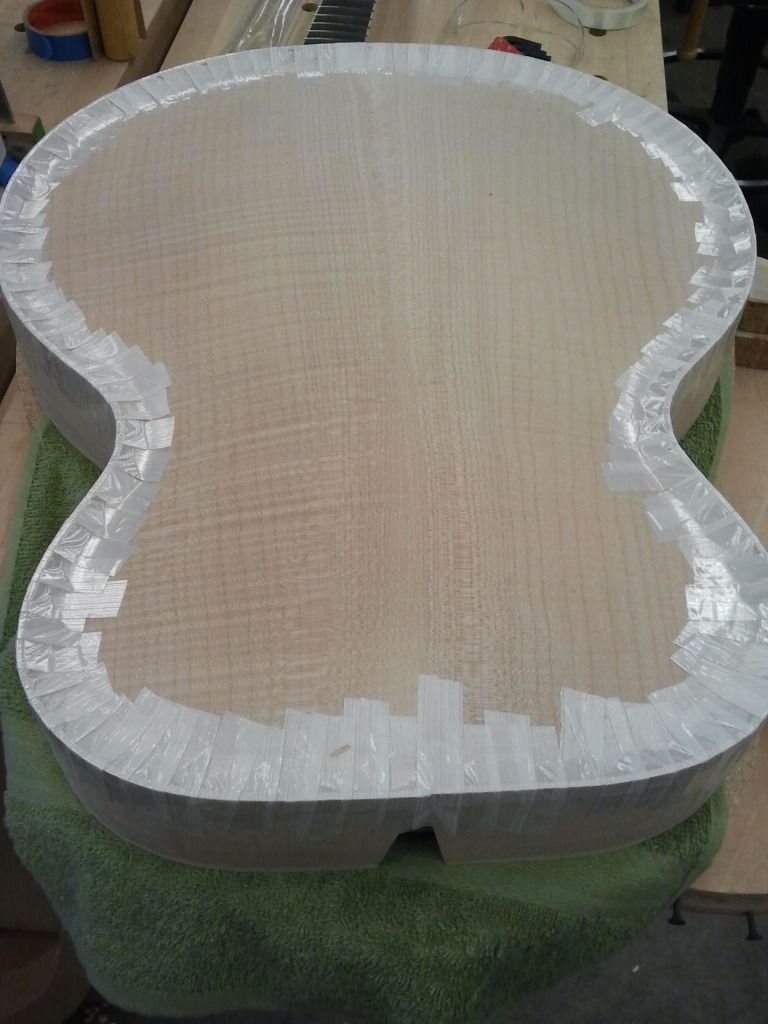
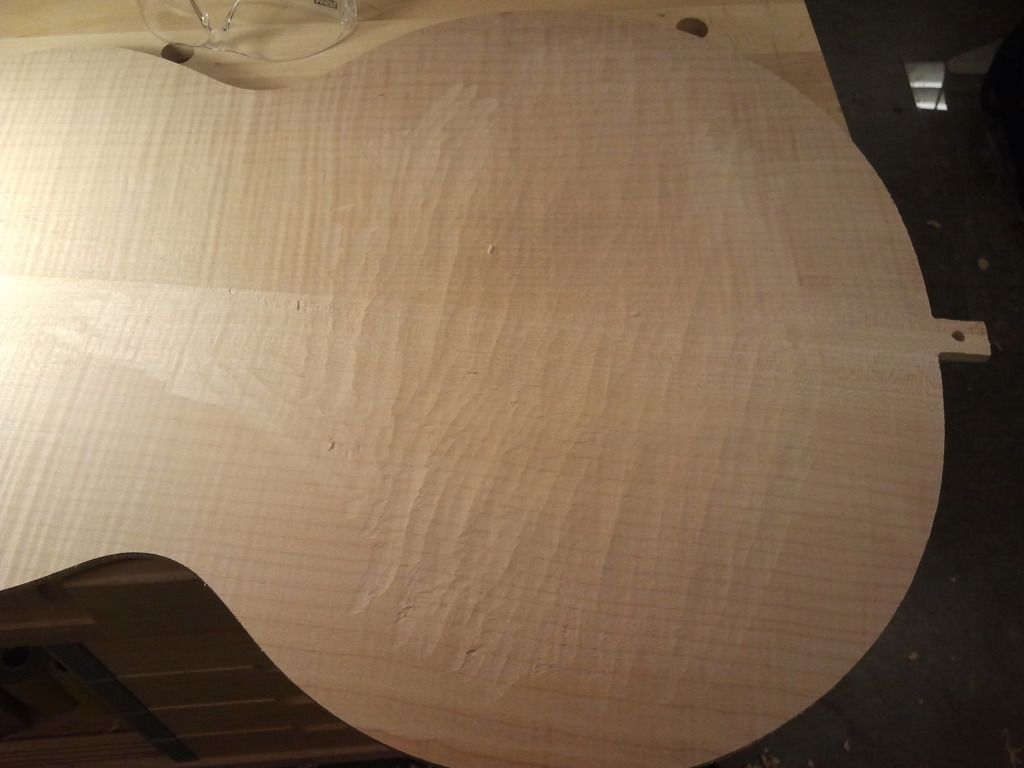
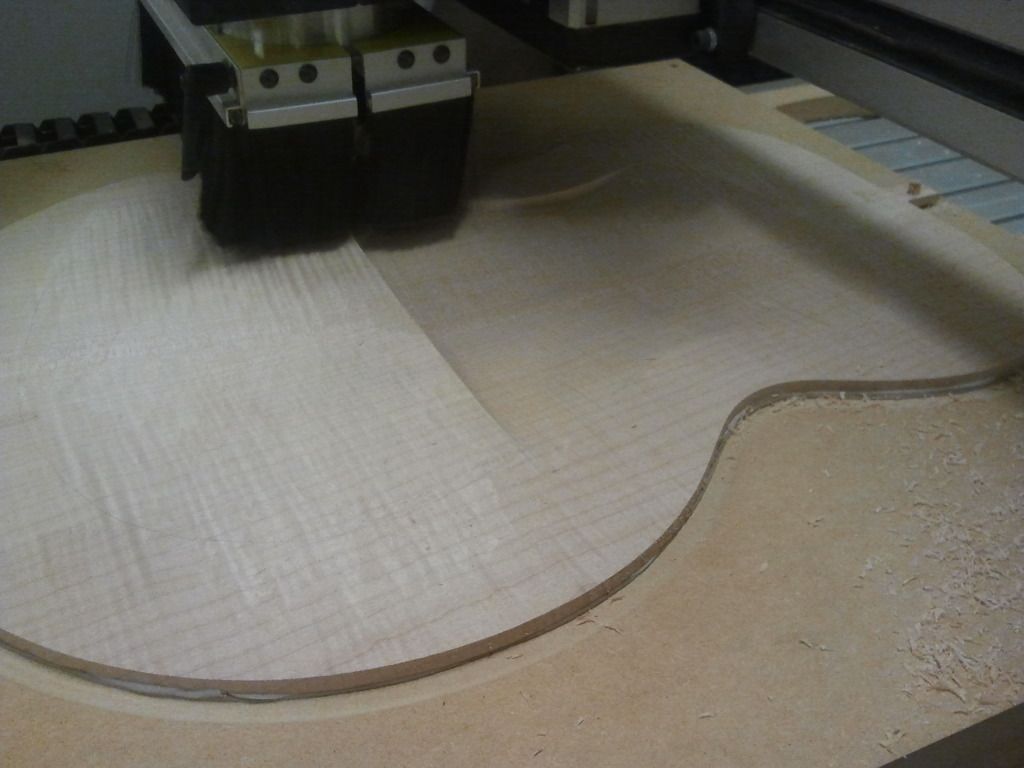
I was using a CNC to cut out the back and had a bit of a scare. When you carve wood into an archtop back or top it naturally wants to cup up, well I didn't think of that and was using a vaccum press to hold down the top which works great as long as your work doesn't cup and pull off the vaccum. Luckily I saw it when it happened so I was able to finish off the last 20 minutes holding the edges down so it didn't cut too much off and I left the file oversized so I will just scope out some wood from the back by hand and then once it flattens out I will run it through the CNC again closer to its final thickness.
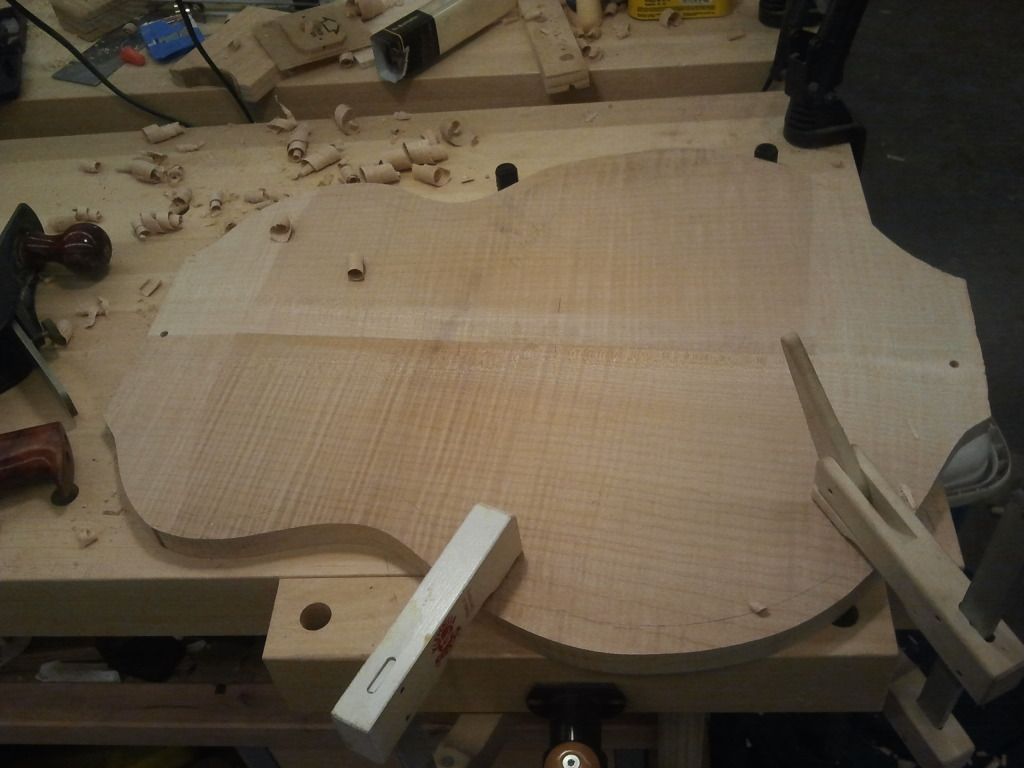
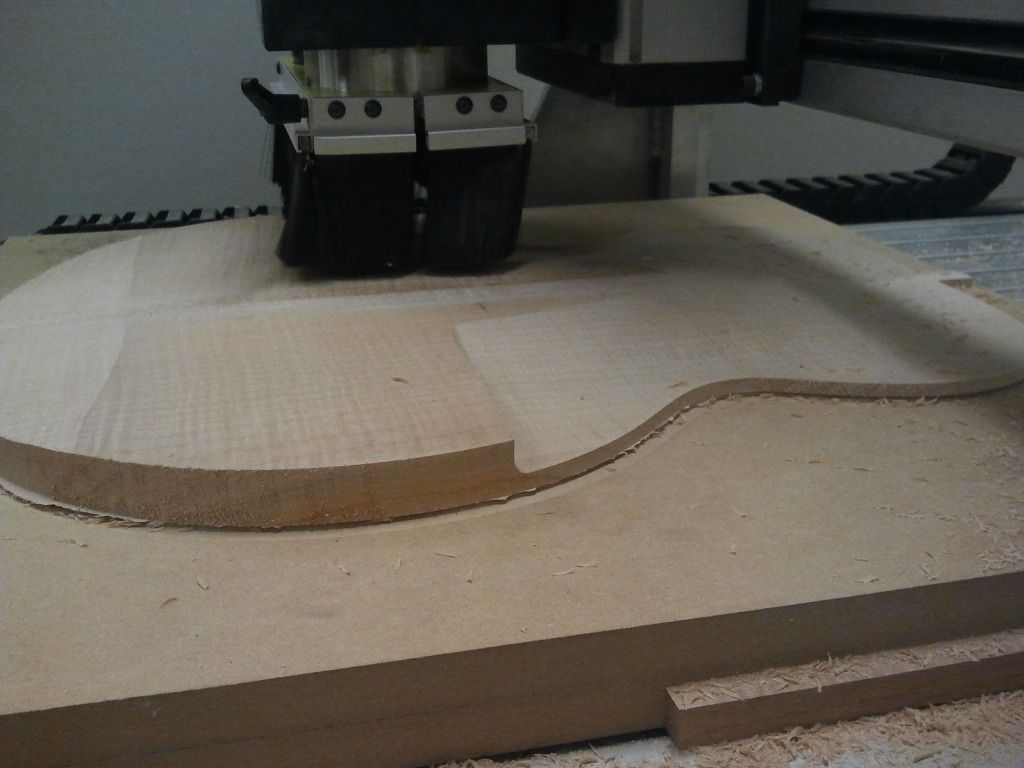
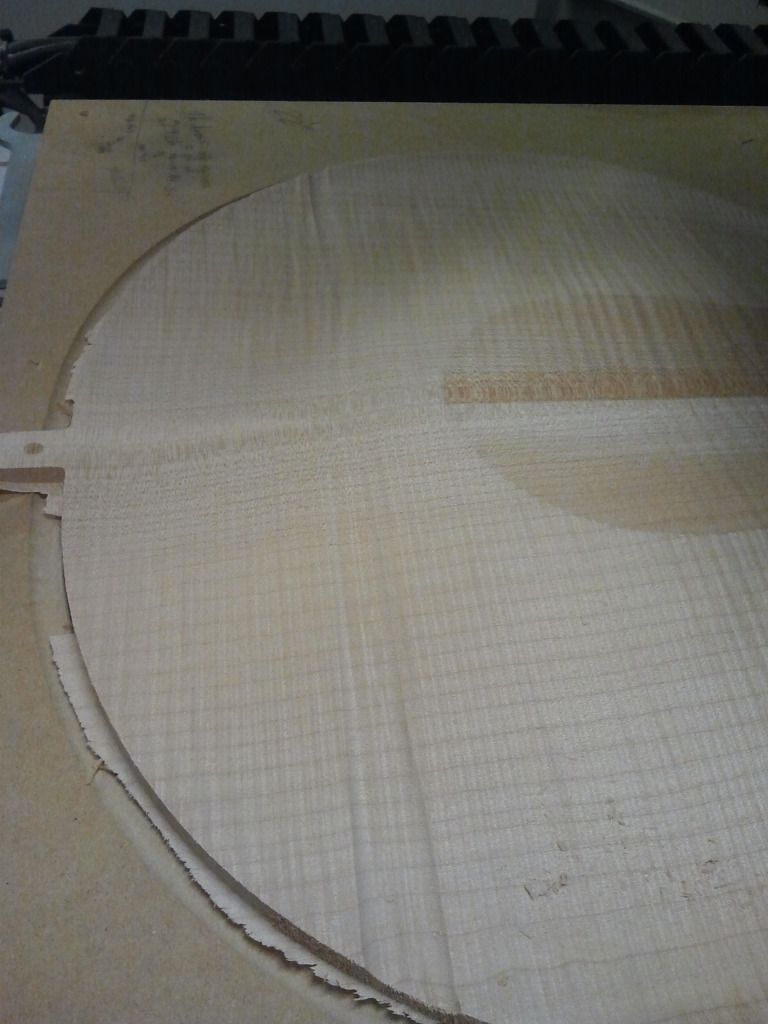
Here's the nice gouge it left, if I hadn't have caught that it could have been a ruined back.
-
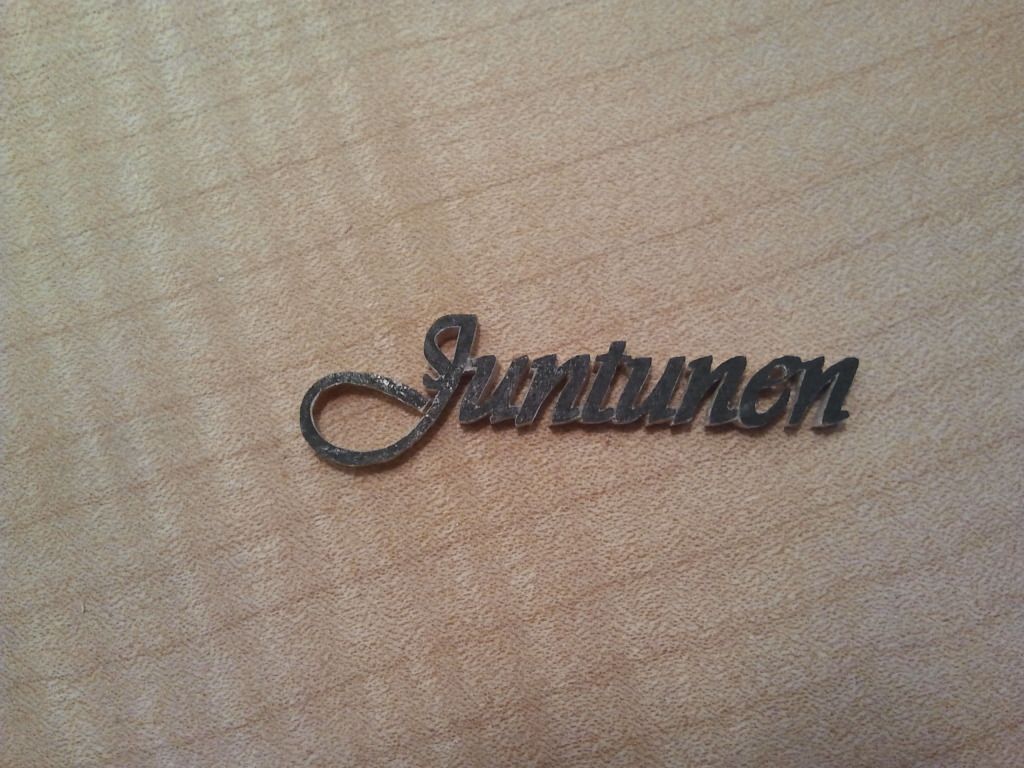
Inlay time
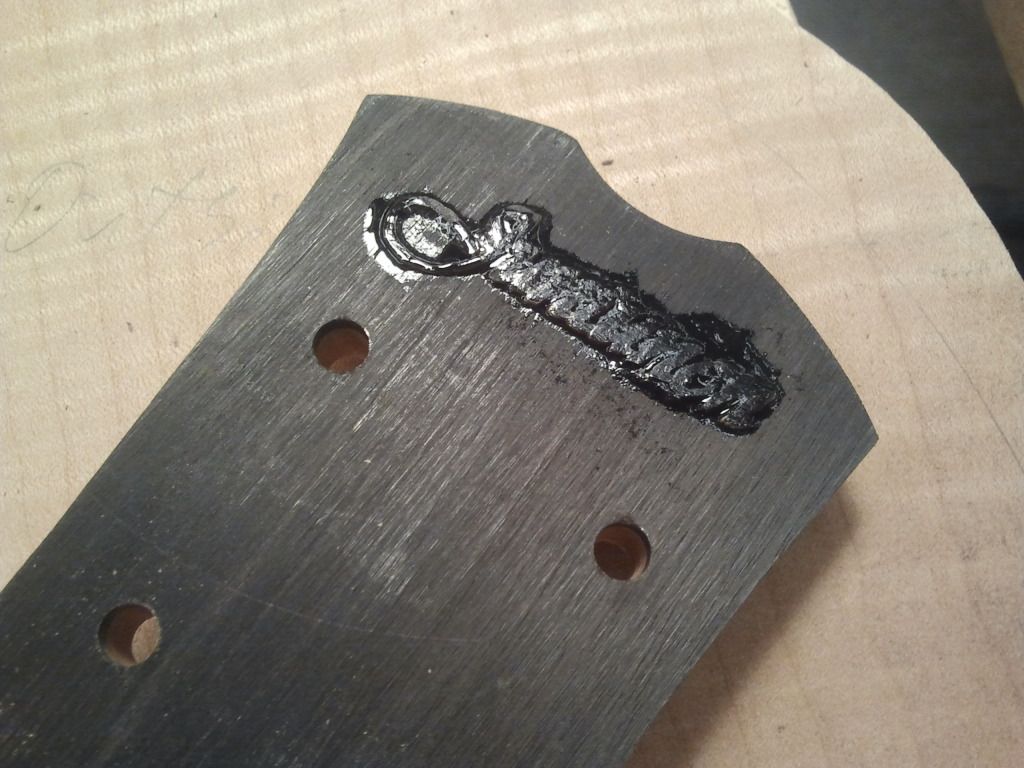
 I don't know why I find this fun since it's just a simple inlay but It's one of my favorite parts of a build. The inlay is flame maple. This first picture is paper superglued onto the wood to use as a guide.
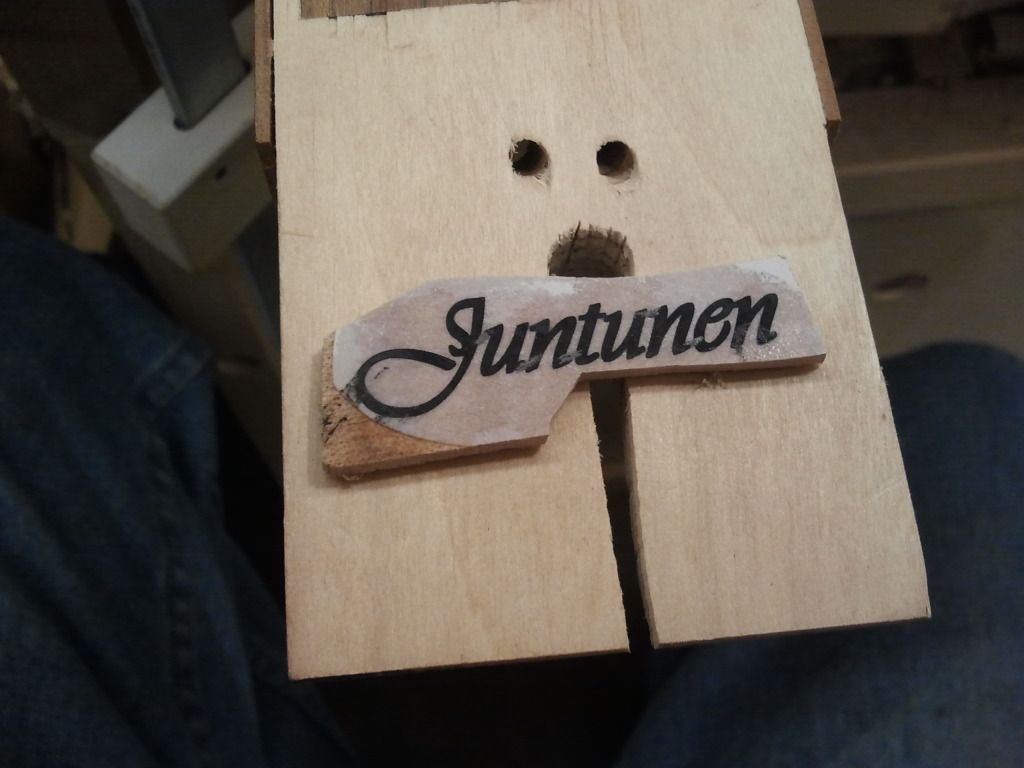
Got it all out of one piece of wood without breaking it.

I mixed some ebony dust in with the superglue here.
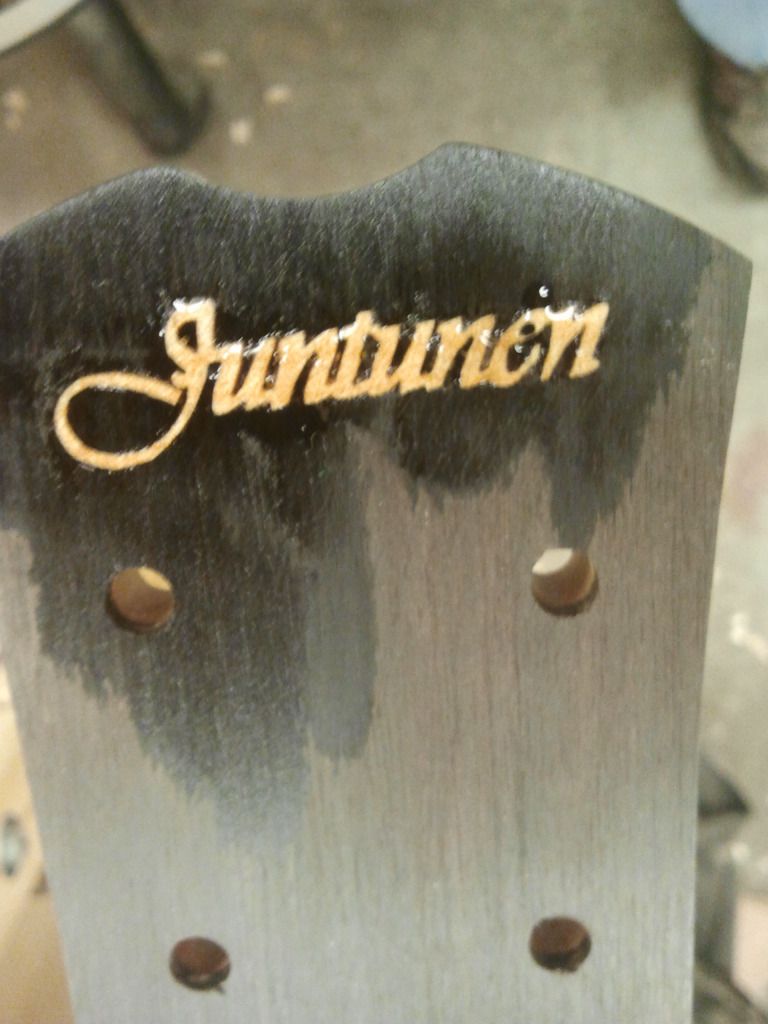
Now I just need to finish sanding back the glue and it's done.
-
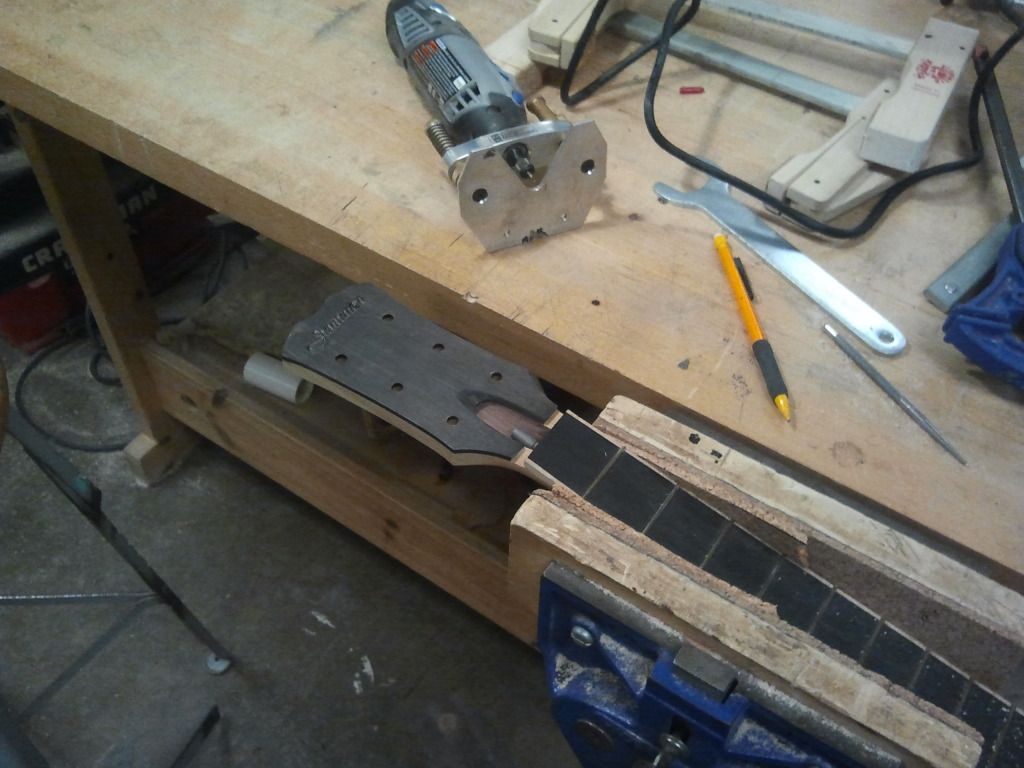
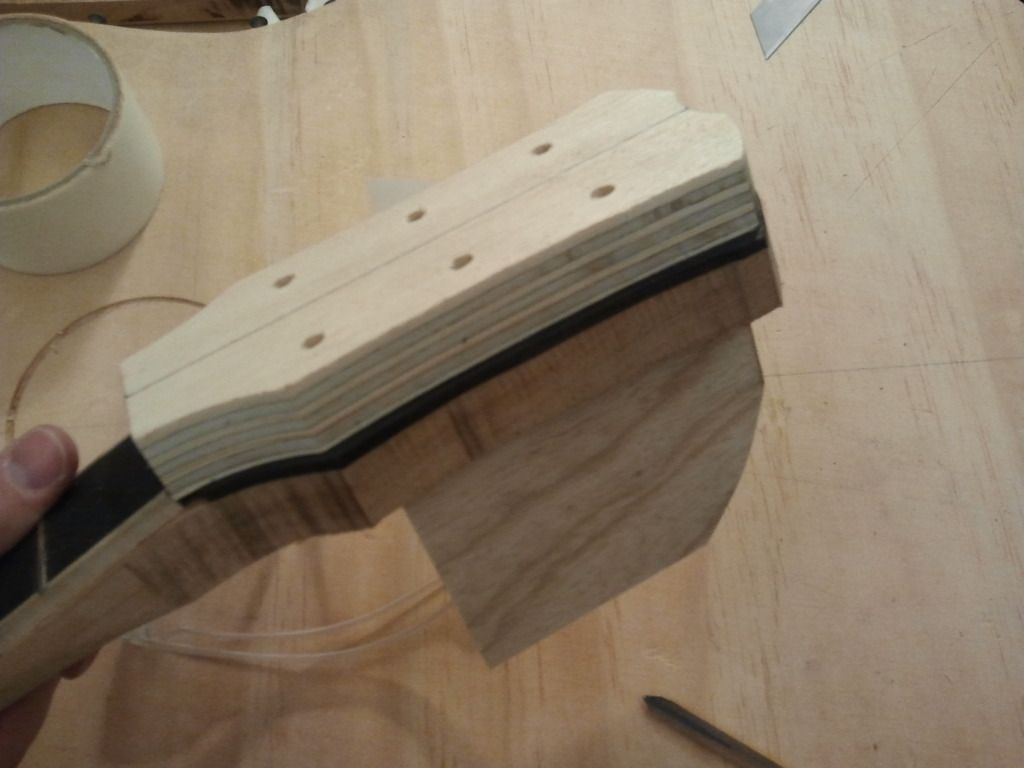
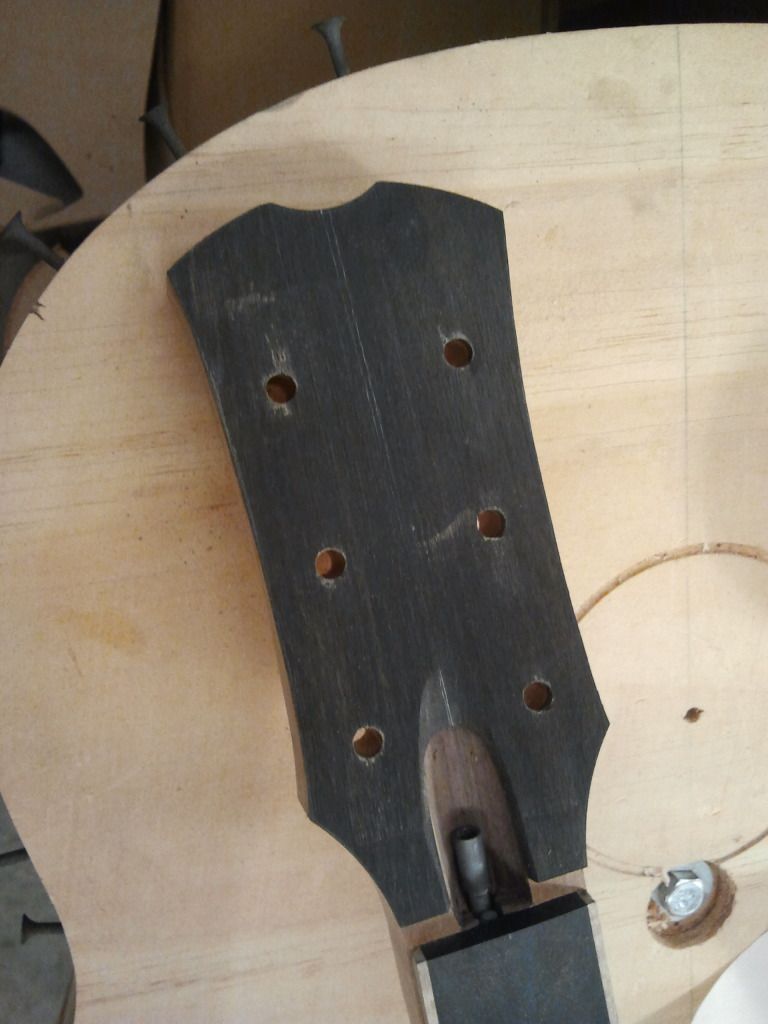
Time for some updates on this build. I got the neck mostly done now so now I'm working on the back, hopefully I can get that glued soon and get to finishing up this build.
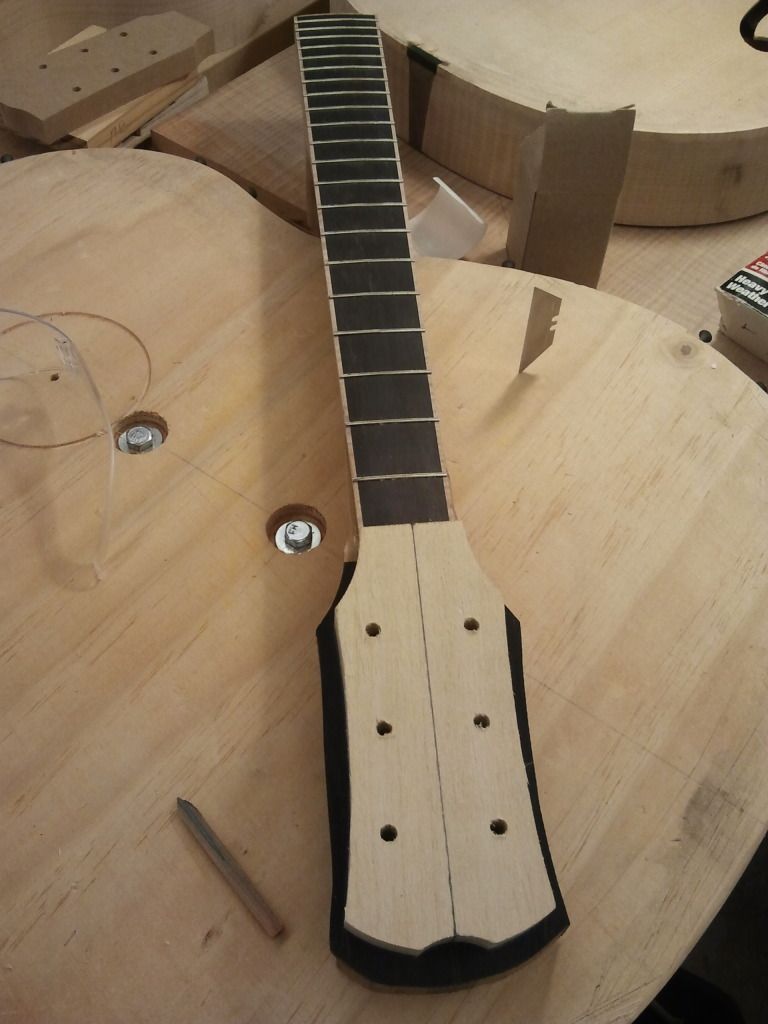
I put a block on the back of the headstock when shaping it so I can hold the headstock level on a spindle and edge sander. The block also helps for reducing blowout when drilling the tuning holes.


 ), even our most experienced luthiers on this board still are coming up with new ways of doing things. I'd suggest doing some searches on this forum in the solid body section and in the in progress section. Look at builds from RestorationAD, Our Souls, and SwedishLuthier. If you are interested in acoustic building I have a couple going (links in my signature) and there are some archtop threads going on currently as well.

 I don't know why I find this fun since it's just a simple inlay but It's one of my favorite parts of a build. The inlay is flame maple. This first picture is paper superglued onto the wood to use as a guide.
Baritone Acoustic On Steroids
in In Progress and Finished Work
Posted
Notching the kerfing for side braces to help prevent cracks.