


The Fool Guy
-
Posts
100 -
Joined
-
Last visited
-
Days Won
2
Content Type
Profiles
News and Information
Tutorials
Product Reviews
Supplier Listings
Articles
Guitar Of The Month
Links and Resources
Forums
Gallery
Downloads
Posts posted by The Fool Guy
-
-
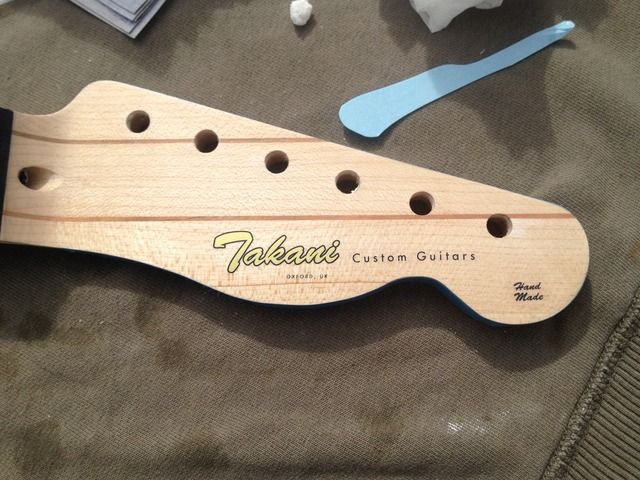
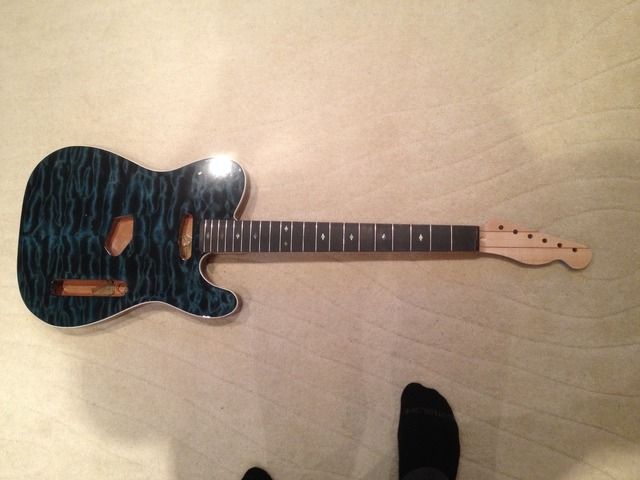
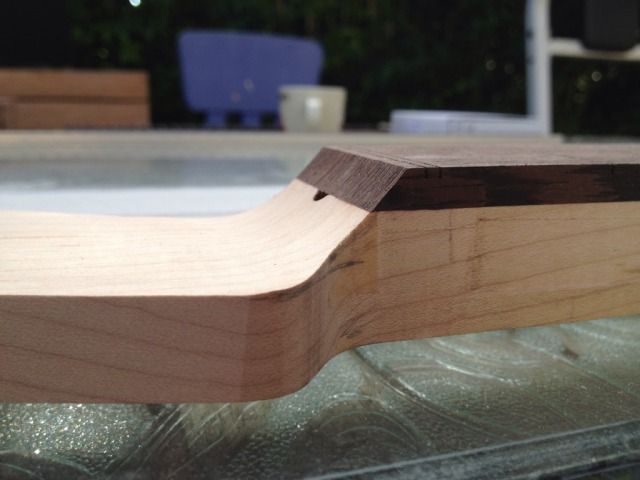
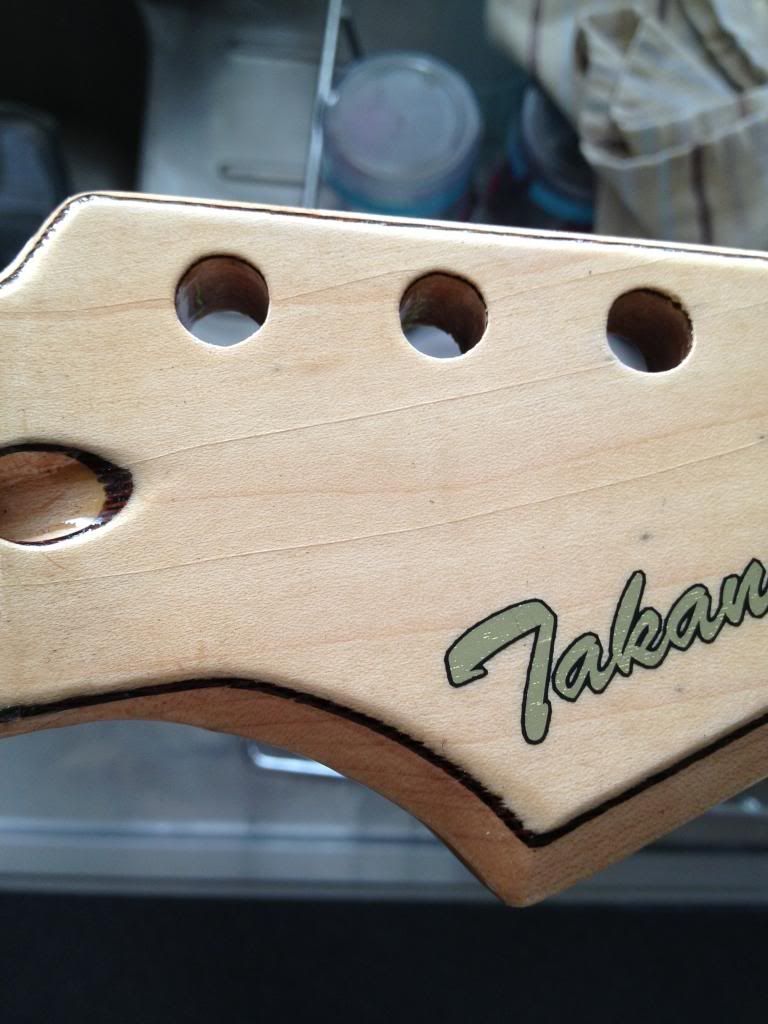
Logo for the headstock
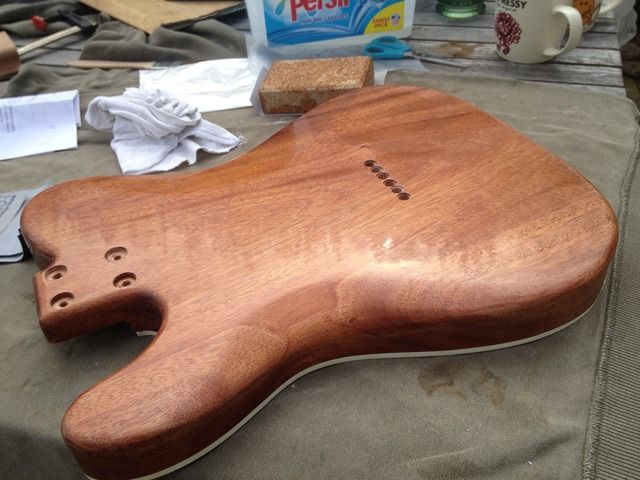
Had to leave that for 24hrs before lacquer, so back to work on the body.
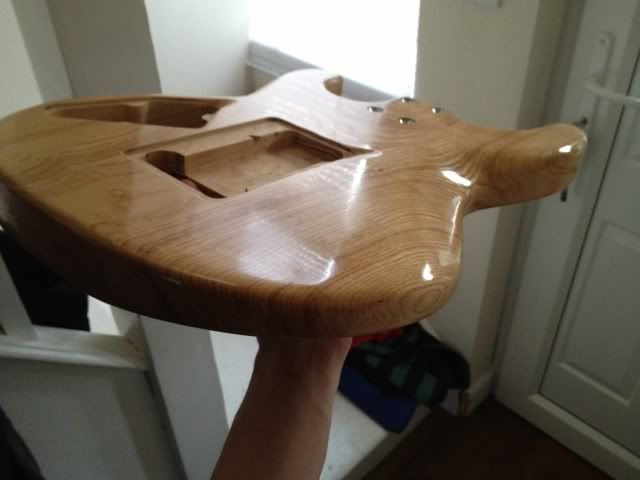
Flattened and now going through the grits
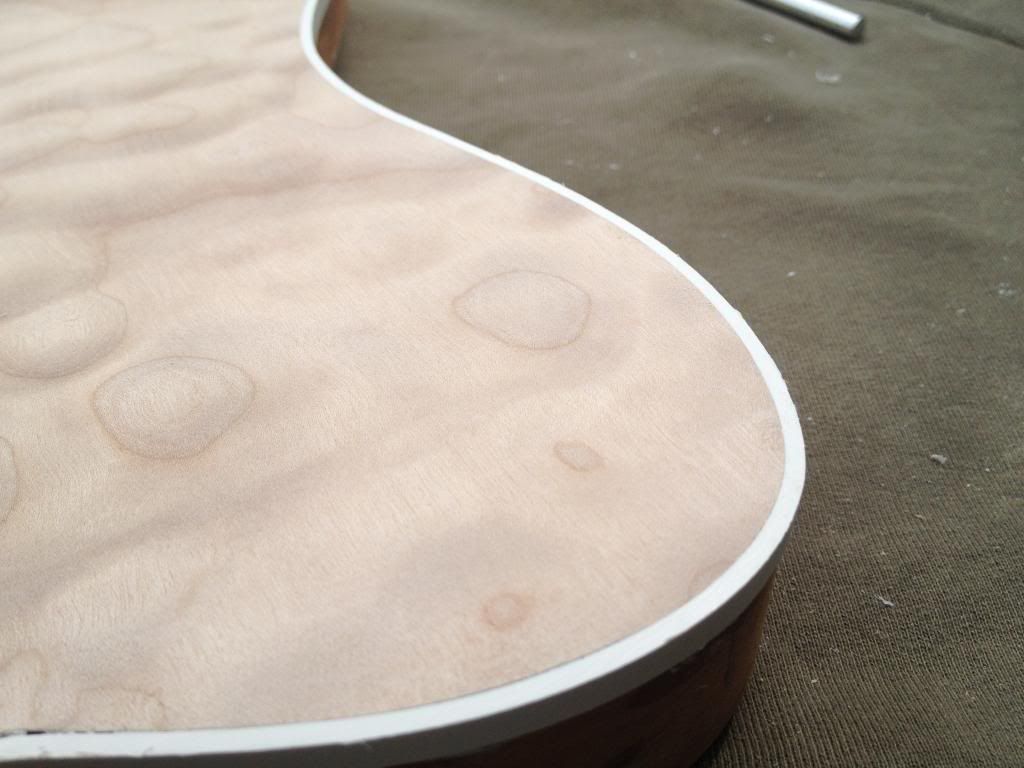
Polished it with meguire's scratch-x.
It's pretty good. My first attempt at finishing and I'd give it 7 maybe 8 out of 10. I think it was the sanding through the grits that I could have done a better job at. It's smooth like glass but if you tilt it in the light you can still see tiny scratches. It's hardly noticeable and I'm happy with it as it is.
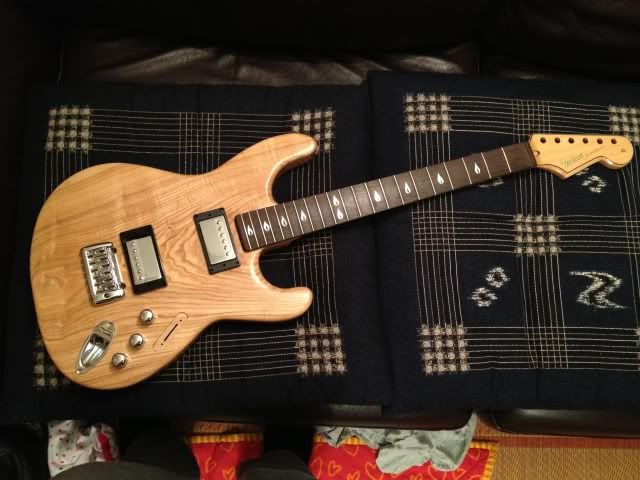
Quick mock-up
-
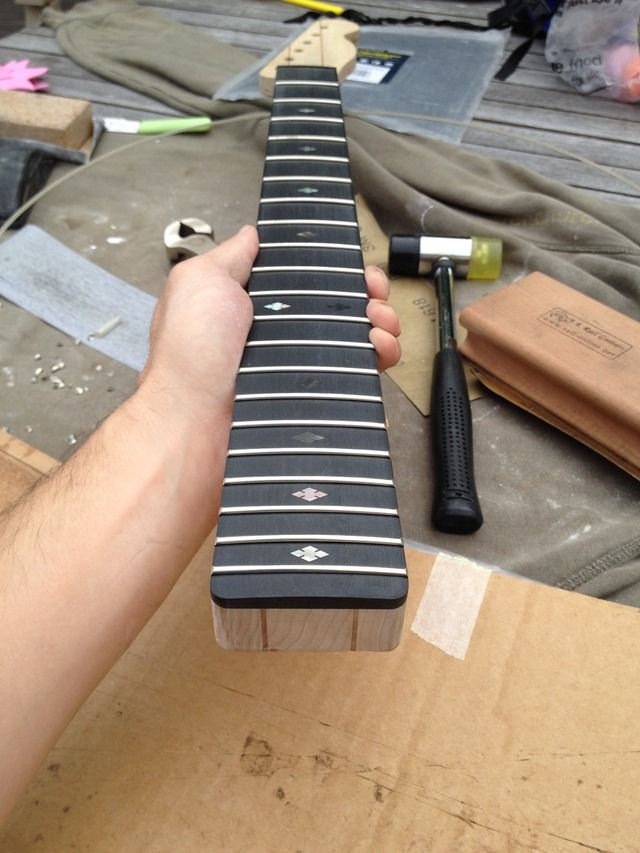
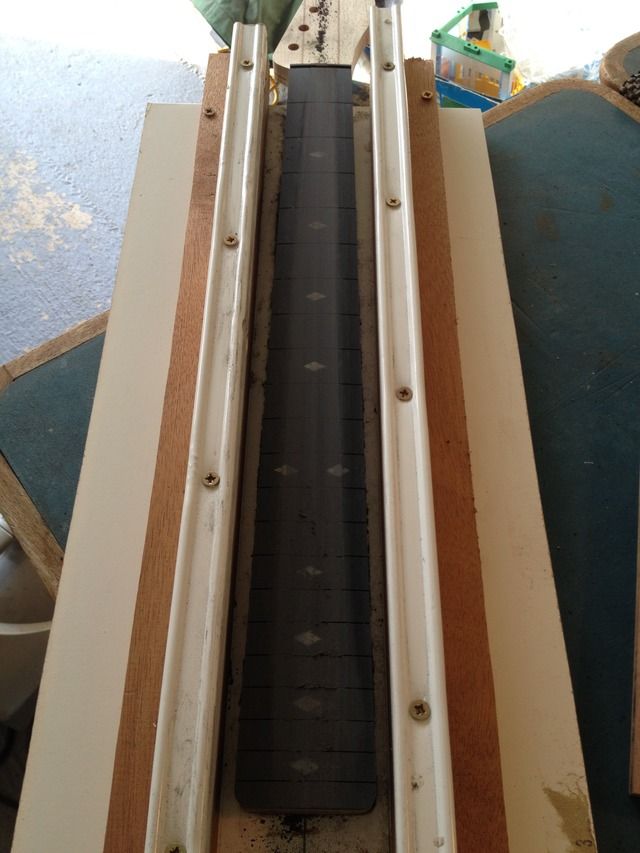
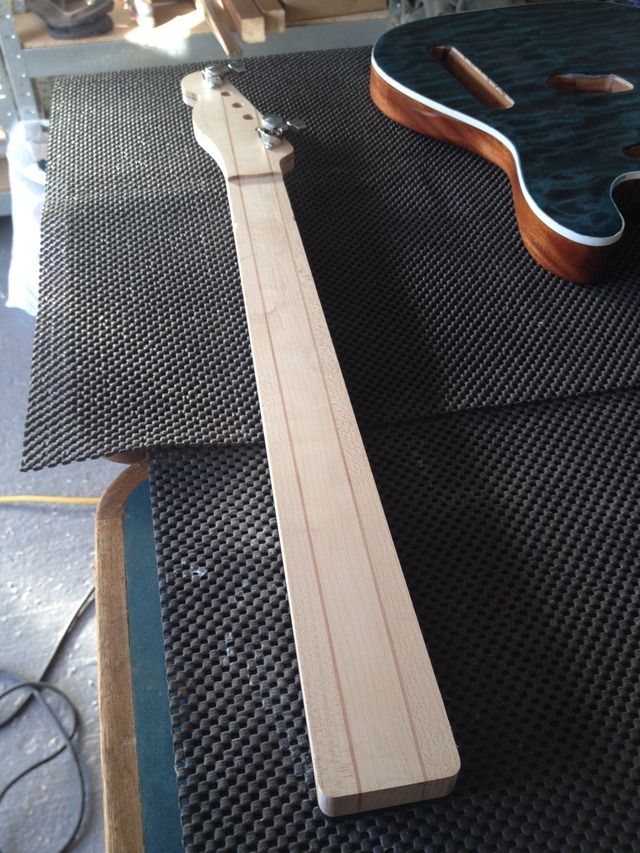
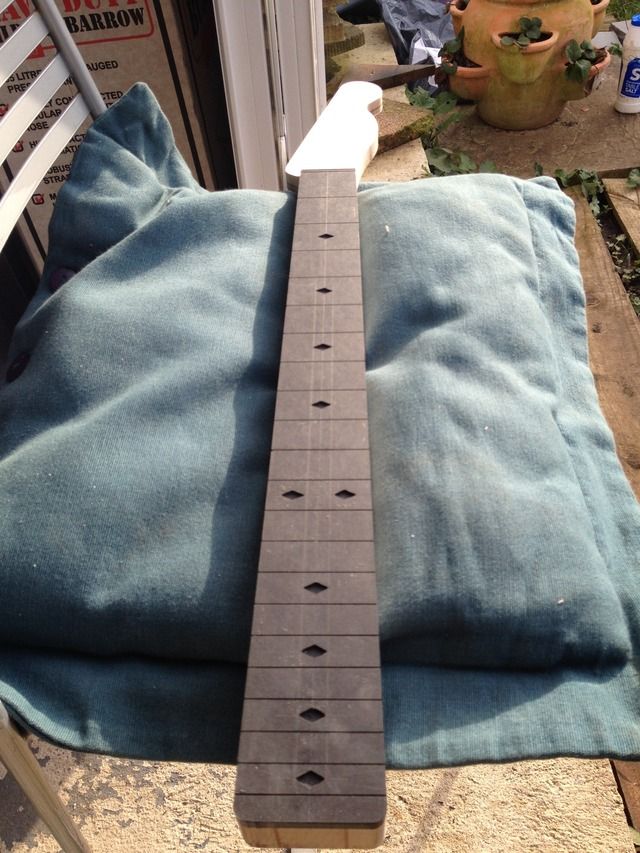
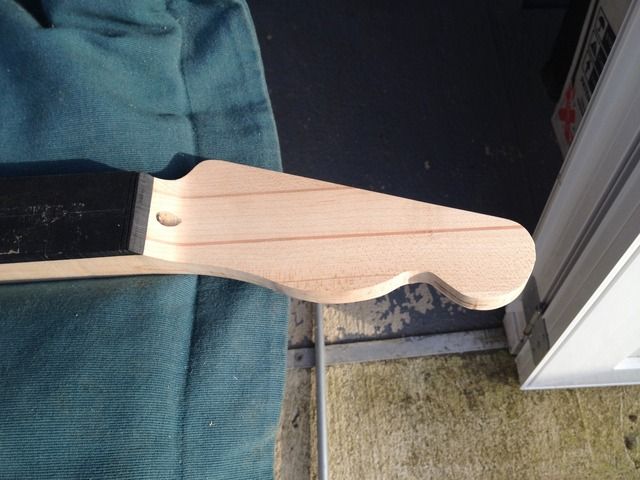
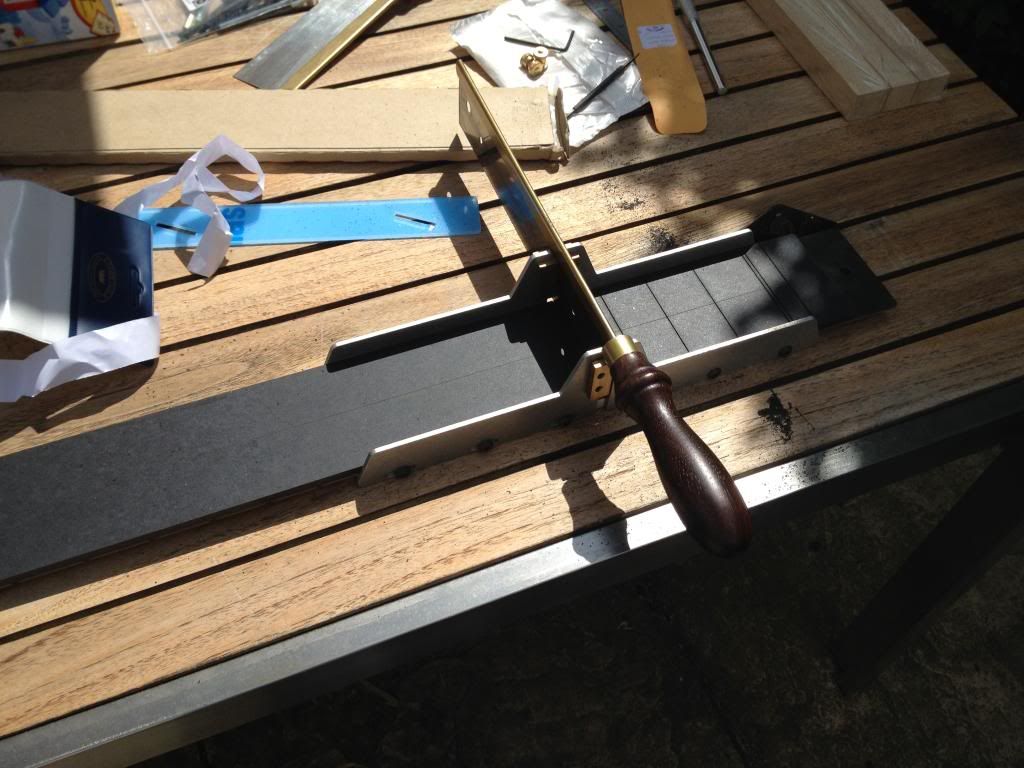
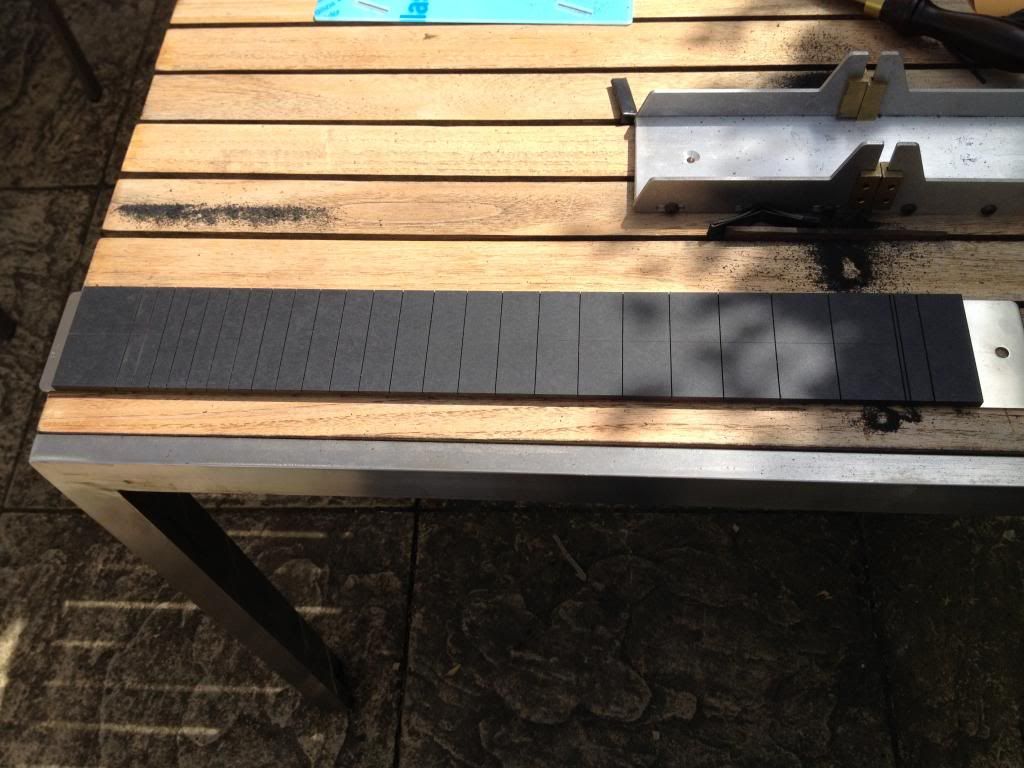
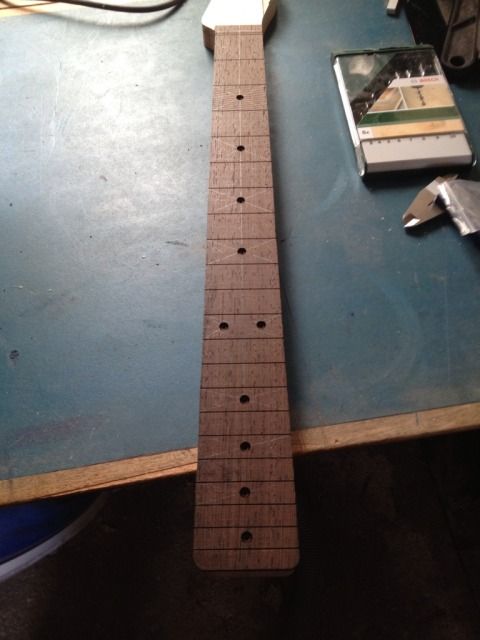
While waiting for the body to cure again I got back to work on the neck. Recut the fret slots, bodging up the 21st so I had to glue that fret. Don't really like the richlite, it was horrible to cut, sanding the radius almost killed me. If you look closely you can see lines from the layers which kind of look like grain but not quite. I'll put something on it when it's finished maybe wax.

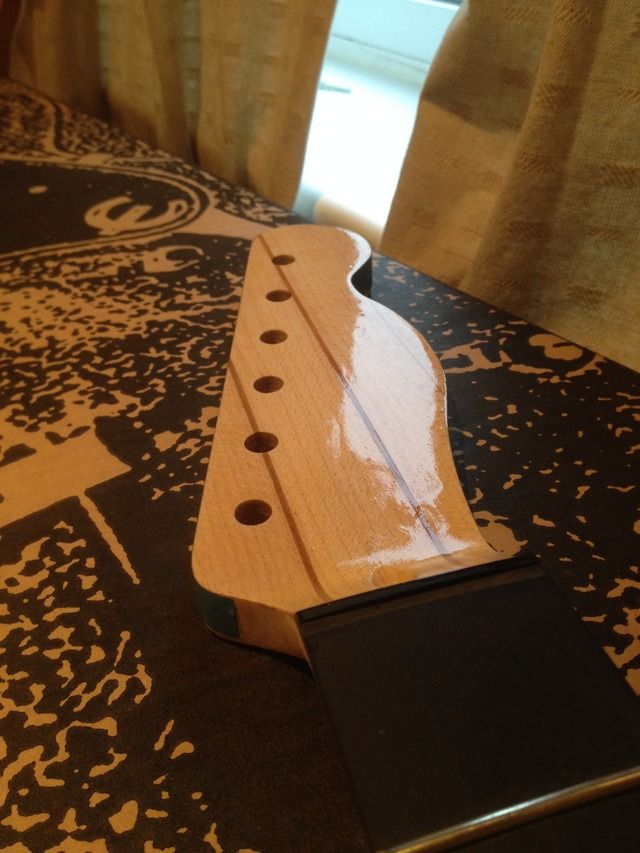
I then started lacquering the headstock.
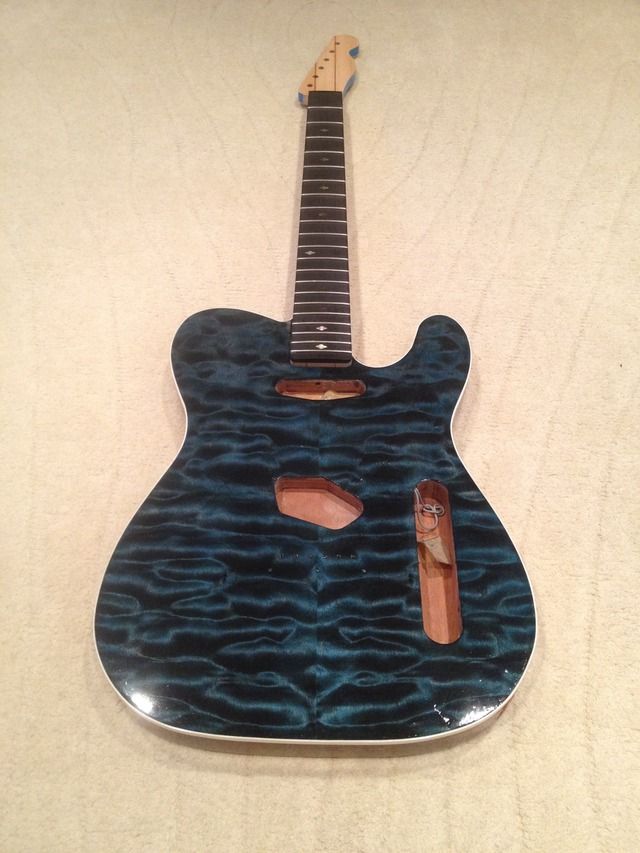
Body's cured
We're getting there
-
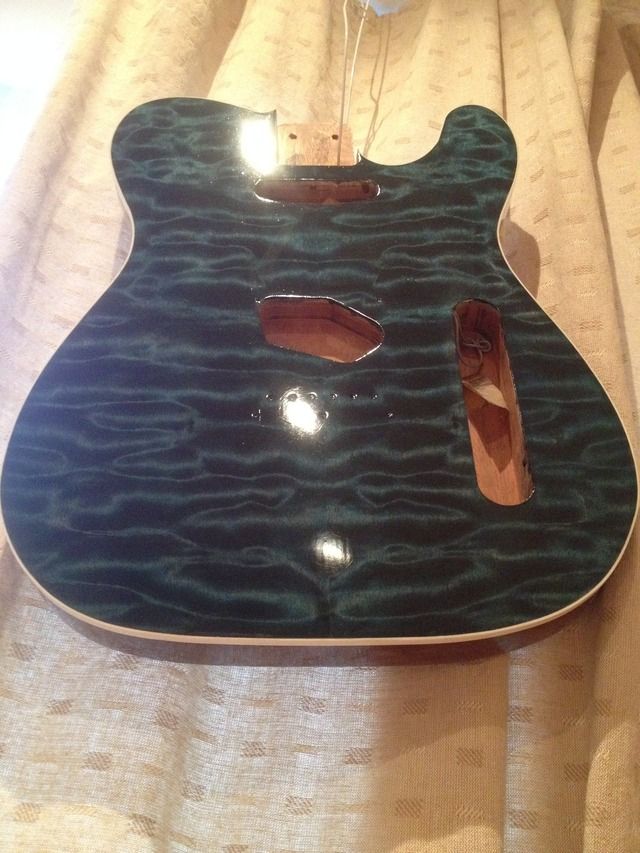
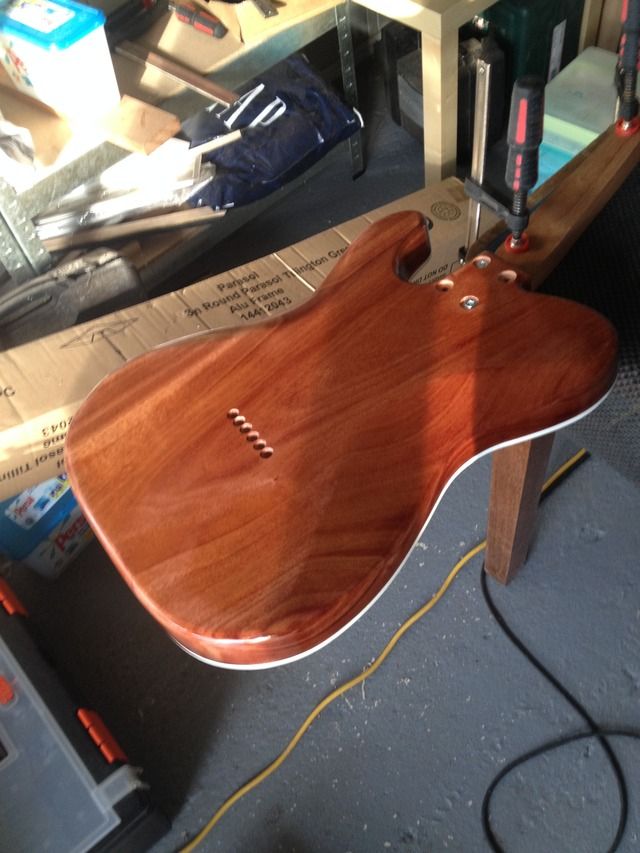
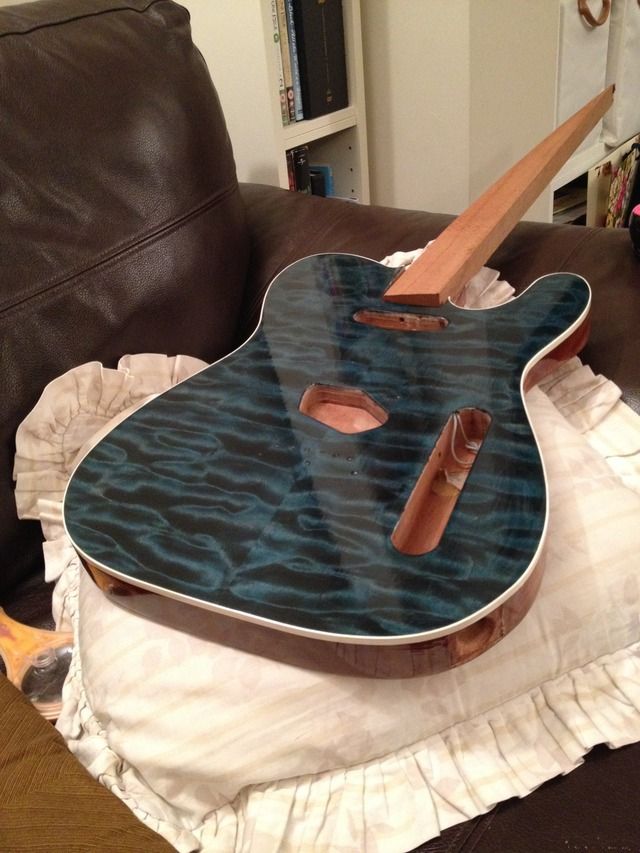
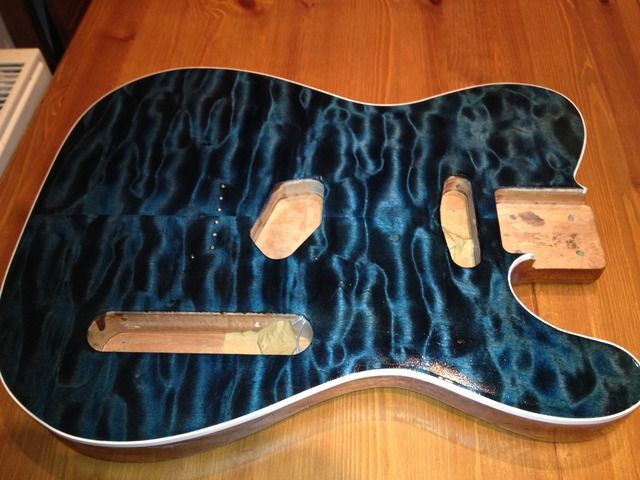
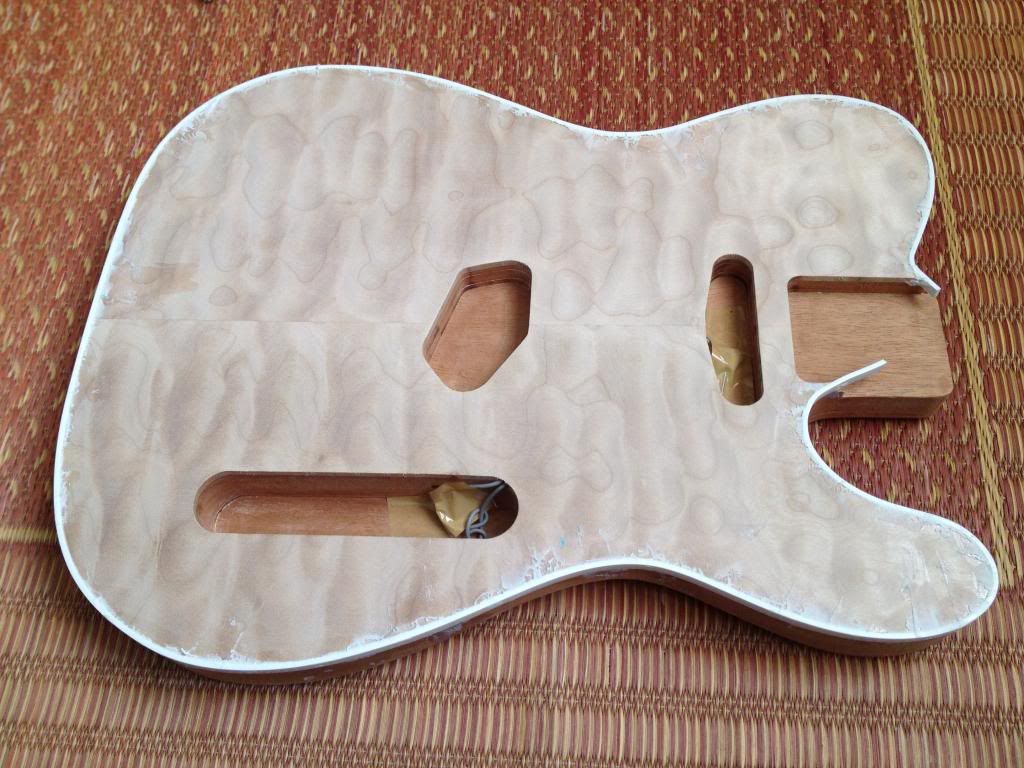
I finished the body with KTM-9. I wasn't sure about using it as it's been sat around for a couple of years, but did it anyway.
I brushed it on with a liberon lacquer brush, loosely following a guide I found on the website. It seemed to be quite forgiving. After the first coat I remembered about sitting it in warm water for a while before applying so did that and it flowed out much nicer. I think I did six coats over 2 days, didn't bother to sand out runs or brushmarks. I then hung it up for a week to cure.
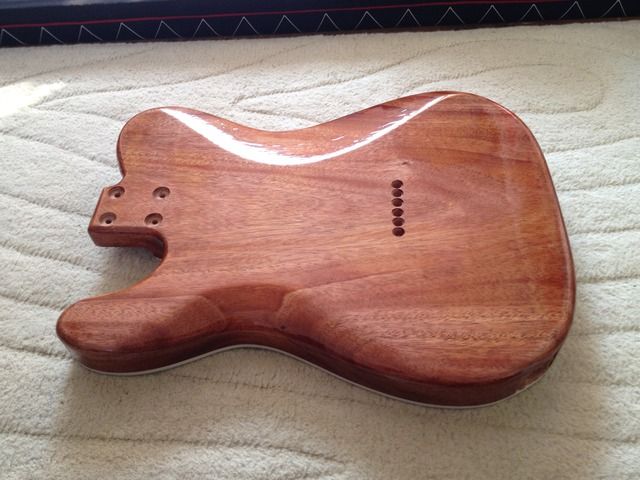
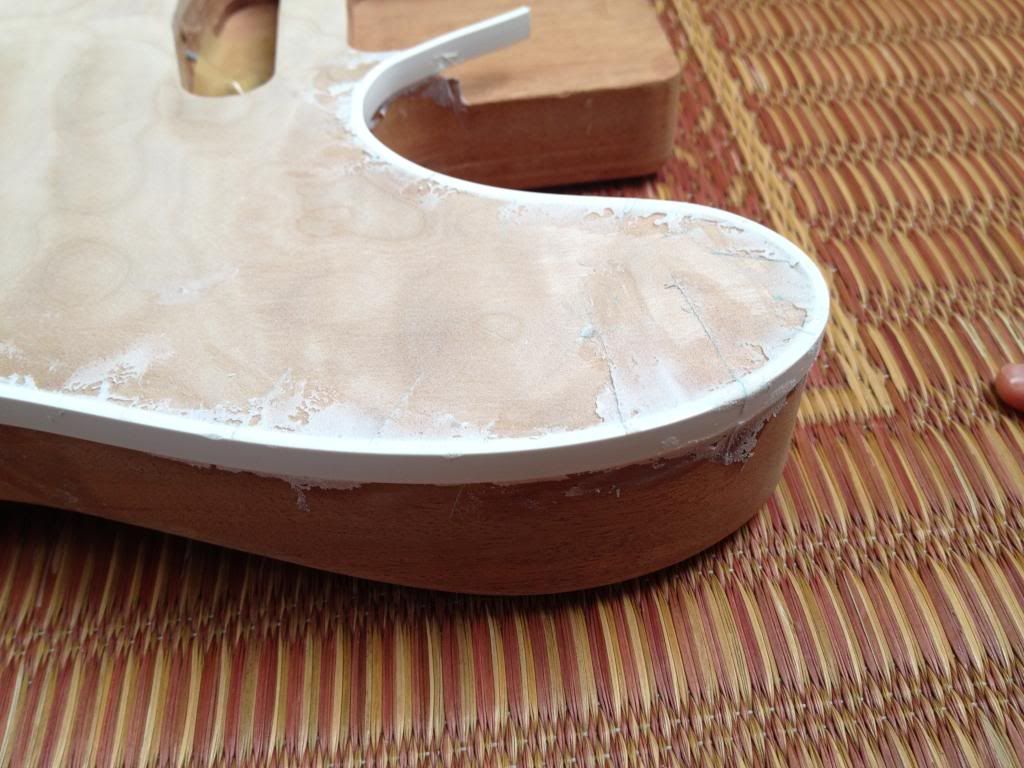
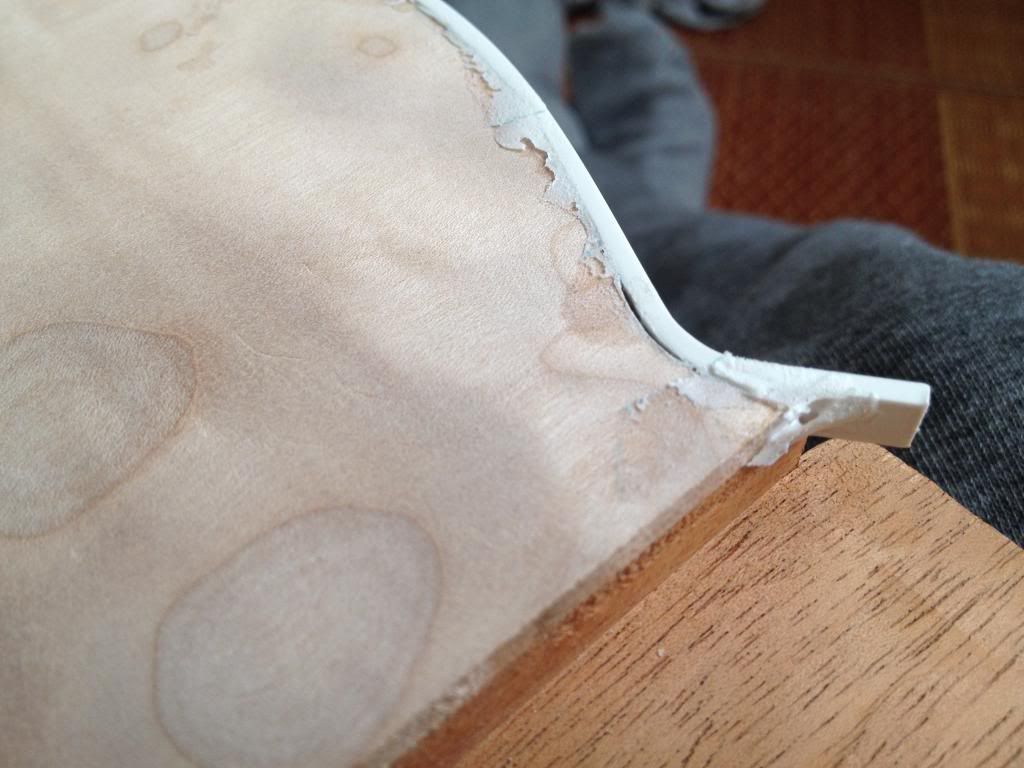
Then bit I wasn't looking forward to... (gently) sanding the lacquer, paranoid about sanding through again.
I sanded through again, on the edge on the back by the jack. KTM-9 claims to be easy to repair, so I fixed it then gave the whole guitar another coat, maybe two.
-
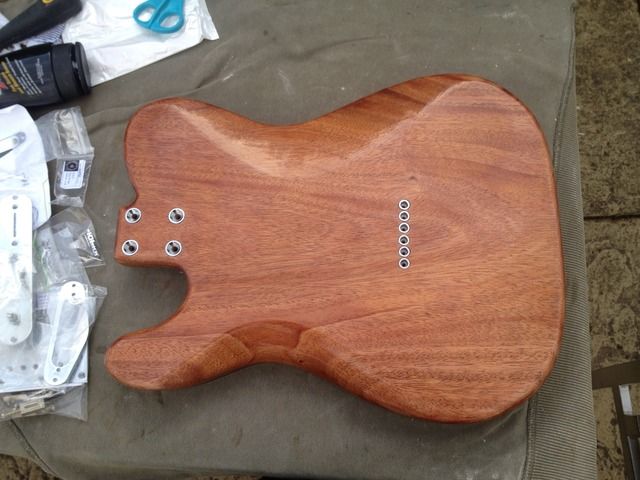
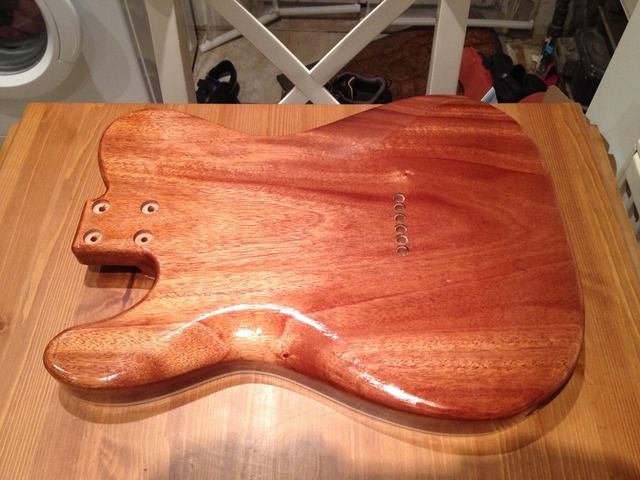
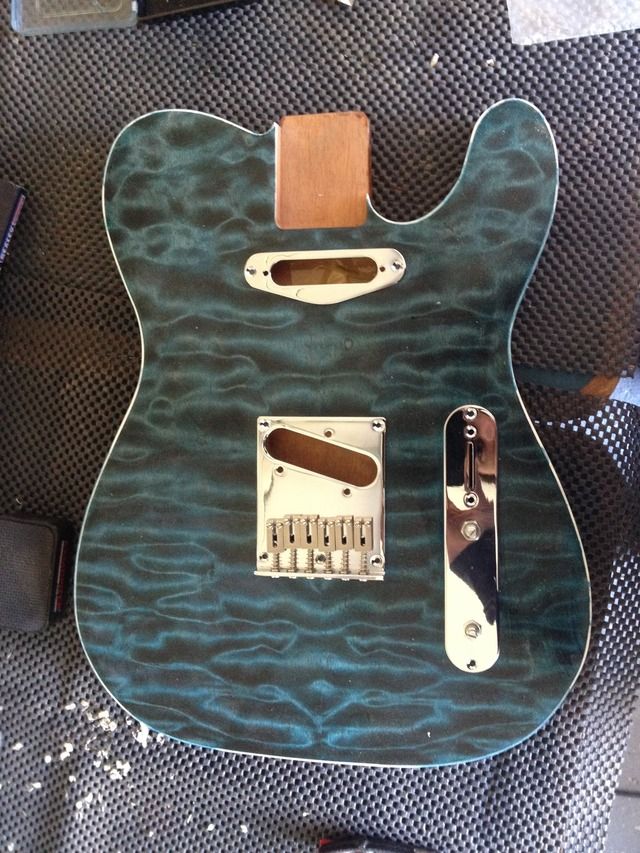
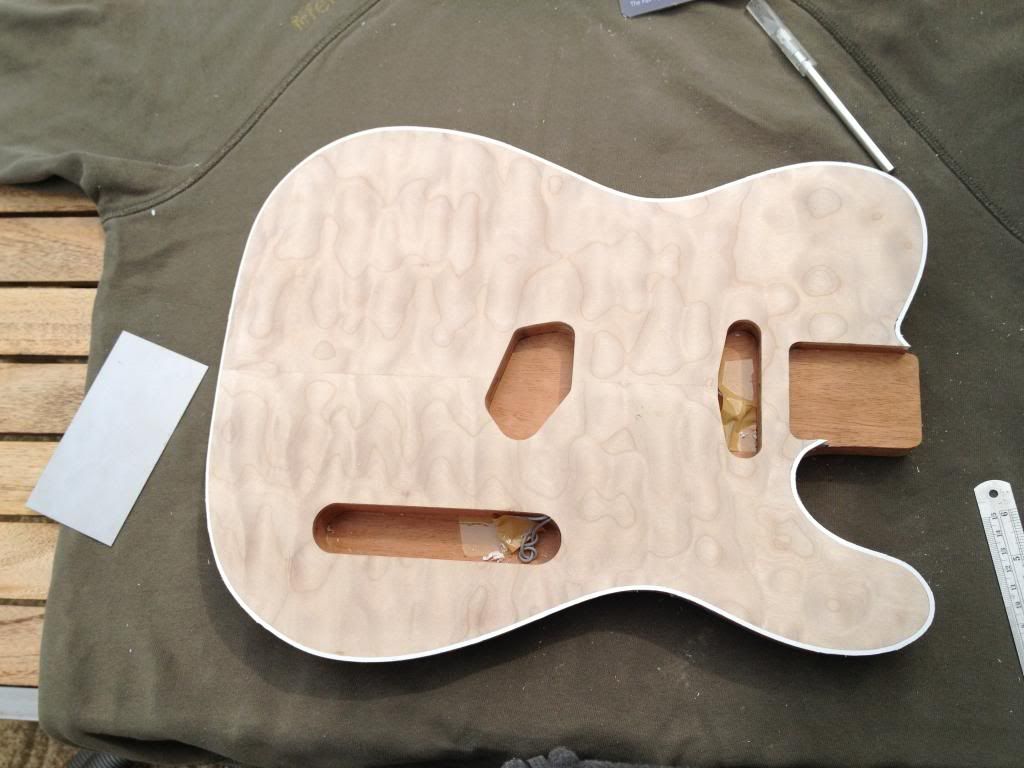
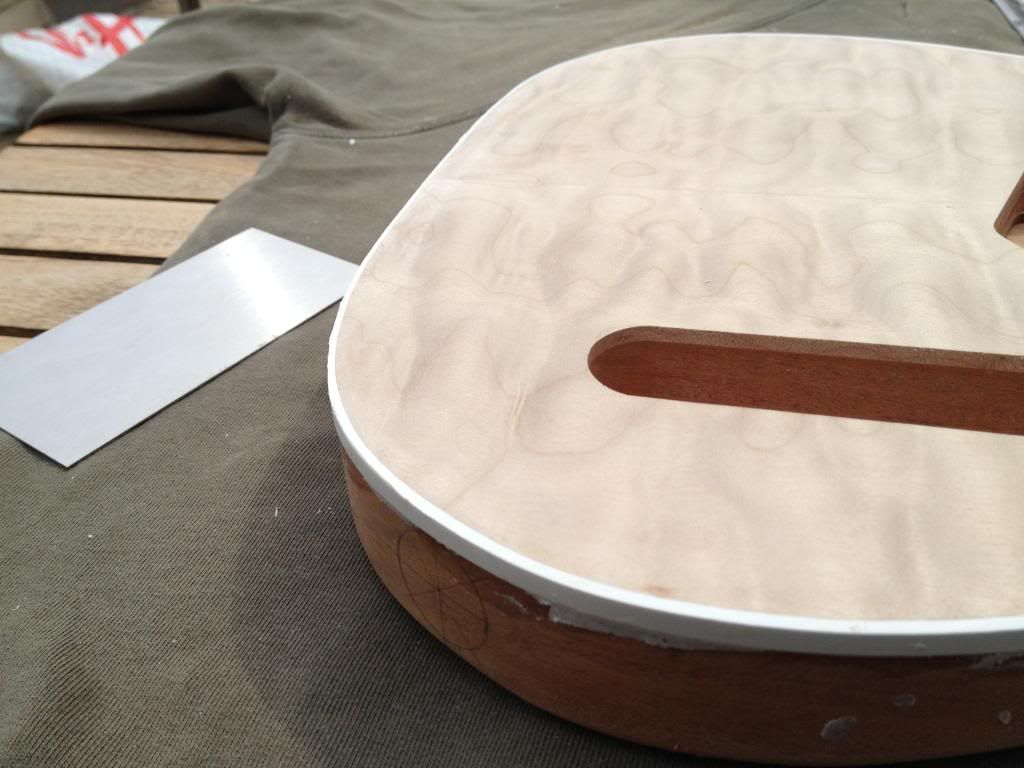
Positioned the bridge and drilled the holes.

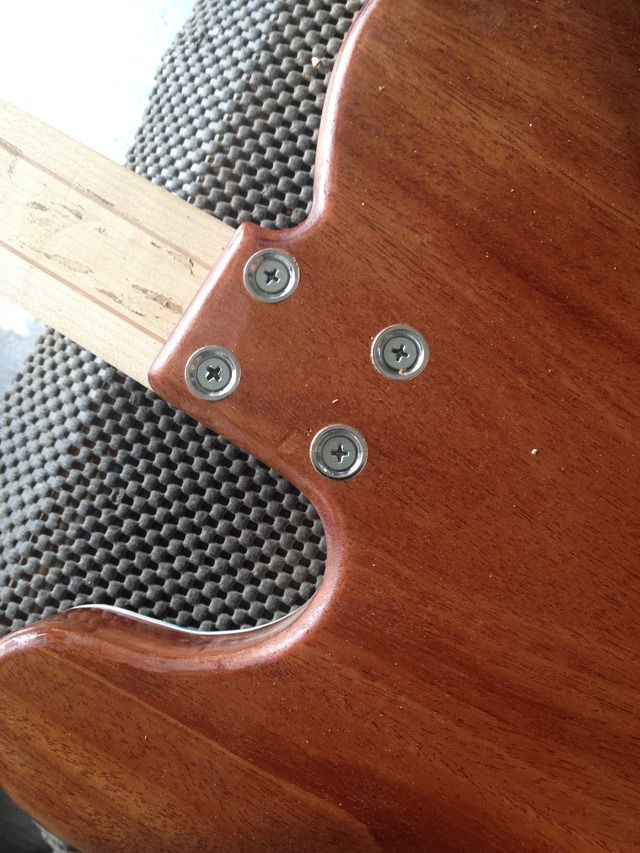
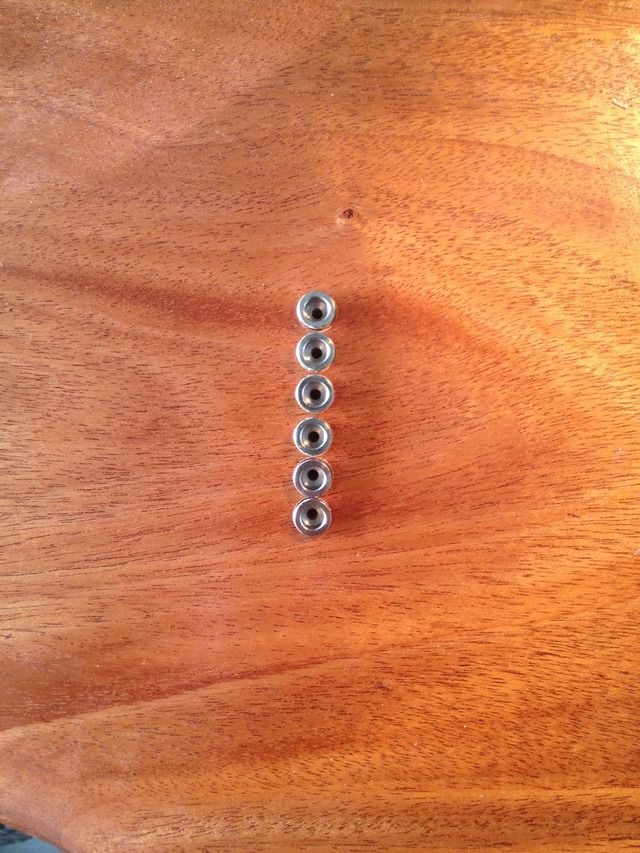
Got the neck attached. Bought some steel inserts from a company someone mentioned here, can't remember the name now. Really like them, much easier to install than the last ones I tried. Forgot to take a picture though. The neck's attached with screws I got from Screwfix or Toolstation, but I've got some better bolts with hex head as I think they look nicer.
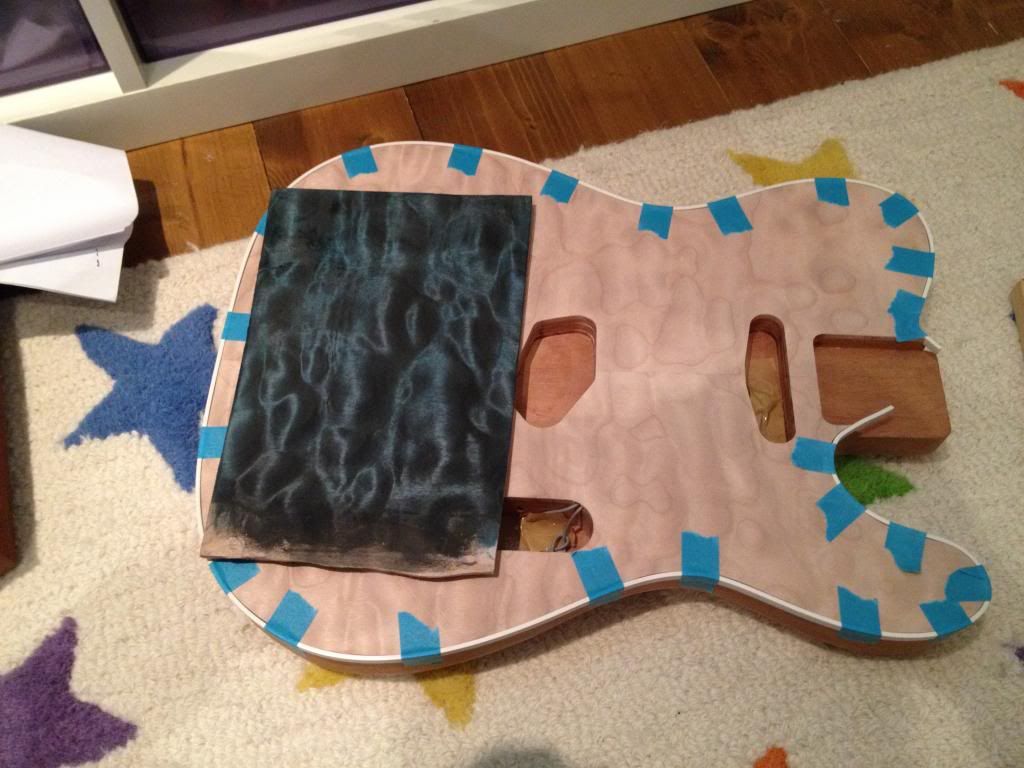
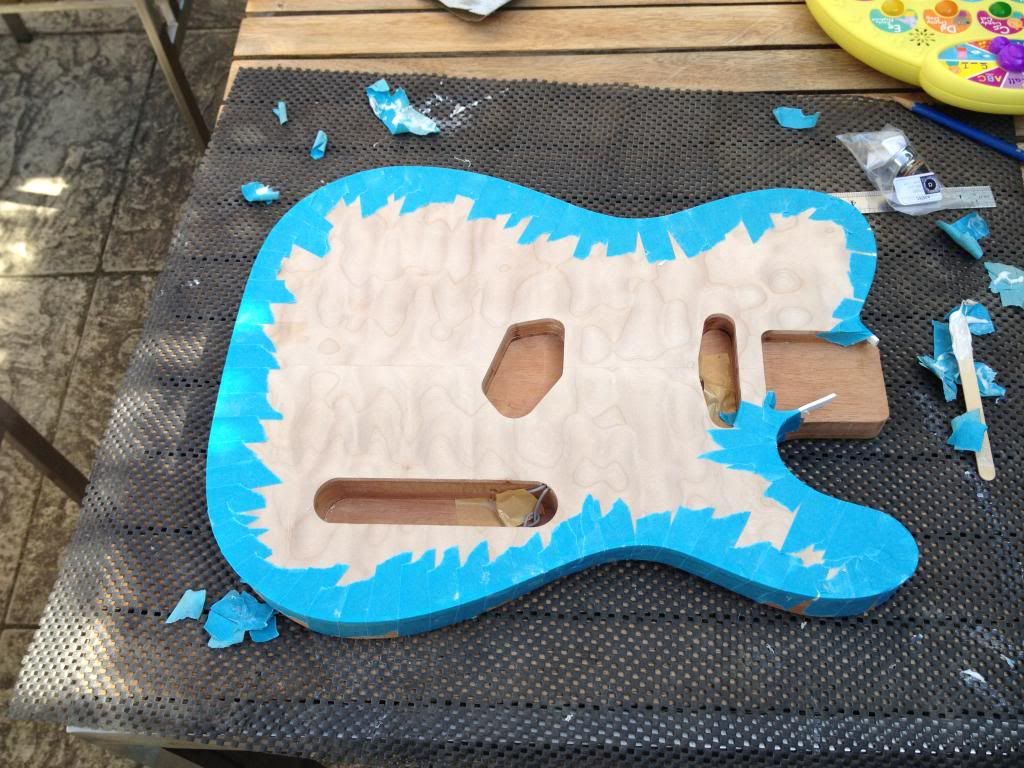
I started prepping the body for finishing and instantly sanded through the stain, so off it came again and it got it's 3rd staining.
Sanded back
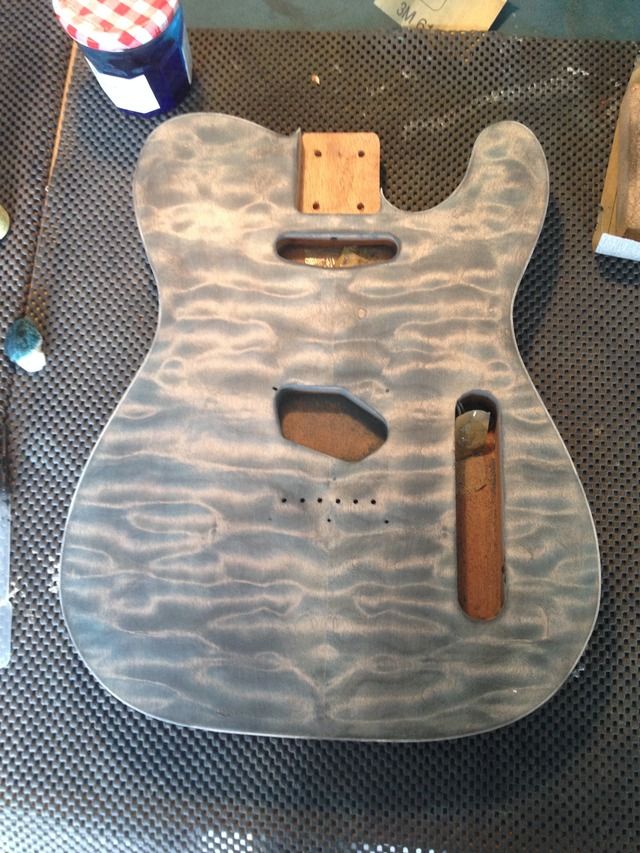
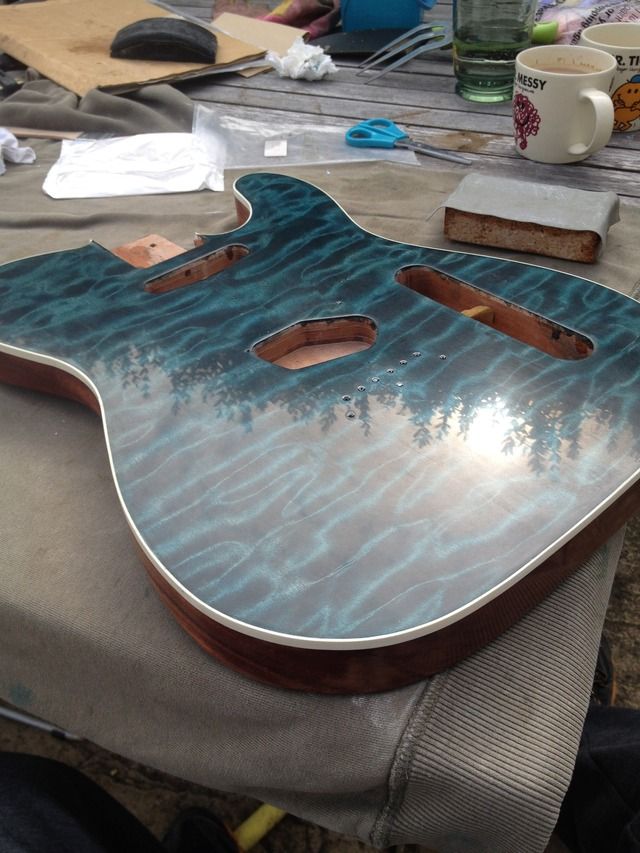
Blue again
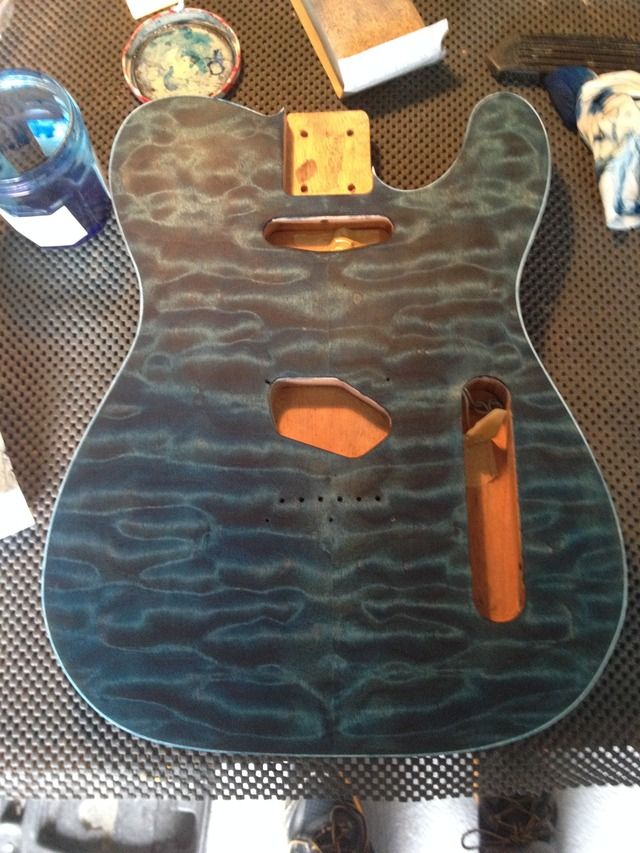
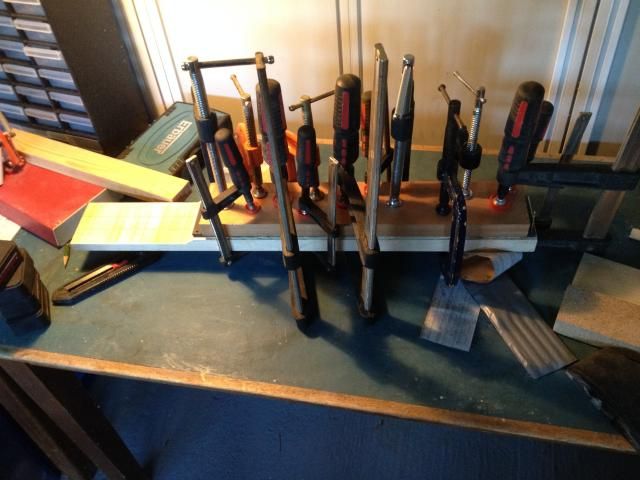
Got some z-poxy on it as soon as I could.
Back to work on the neck...
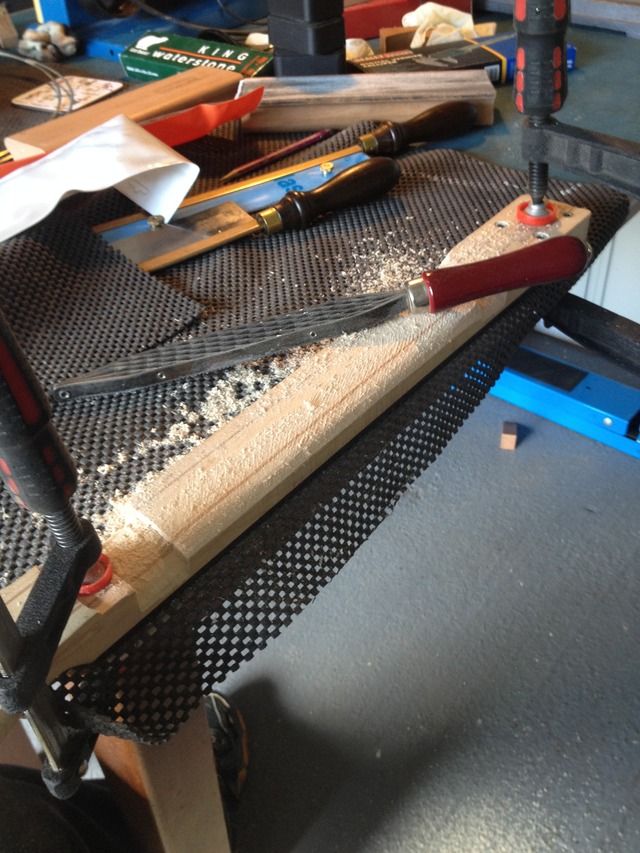
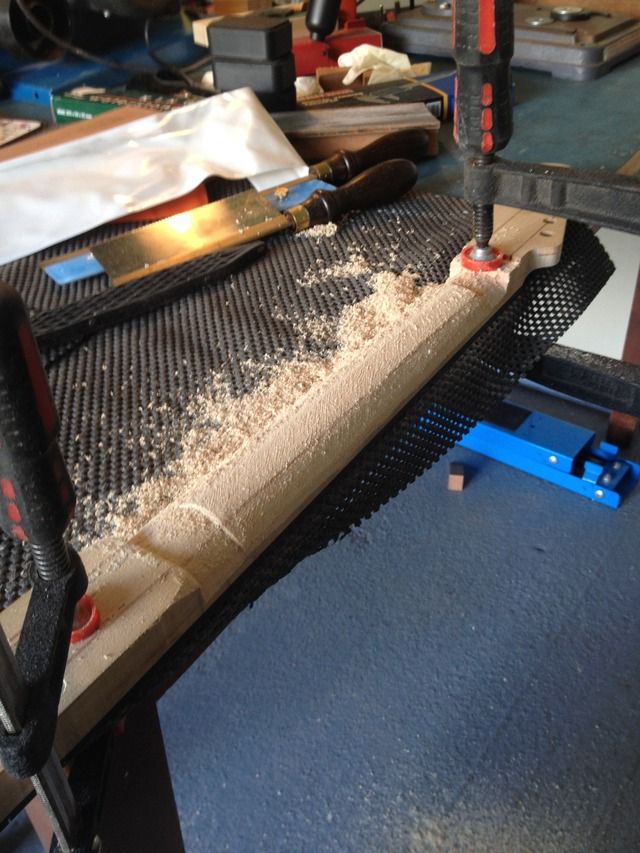
Started with the Shinto rasp, then switched to spokeshave and scrapers. I think this is one of the most enjoyable jobs, although I've not carved a top yet...
Taking shape...
-
Hi Guys,
Sorry, been away from the site for a while but have made some more progress on this one. Not far off from completion, maybe two weeks or so. Masses of updates to follow...
Got the inlays in...
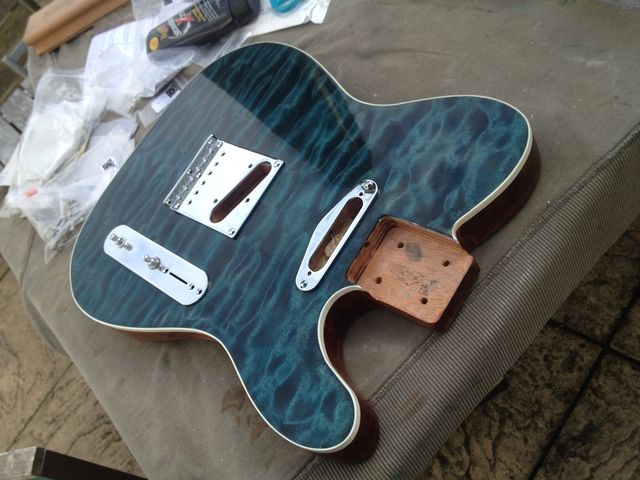
I fixed up the bodged jack socket with a different style jack plate

Drilled the ferrule holes. The ferrules aren't pushed in but the lines not too bad for a first attempt.
-
 1
1
-
-
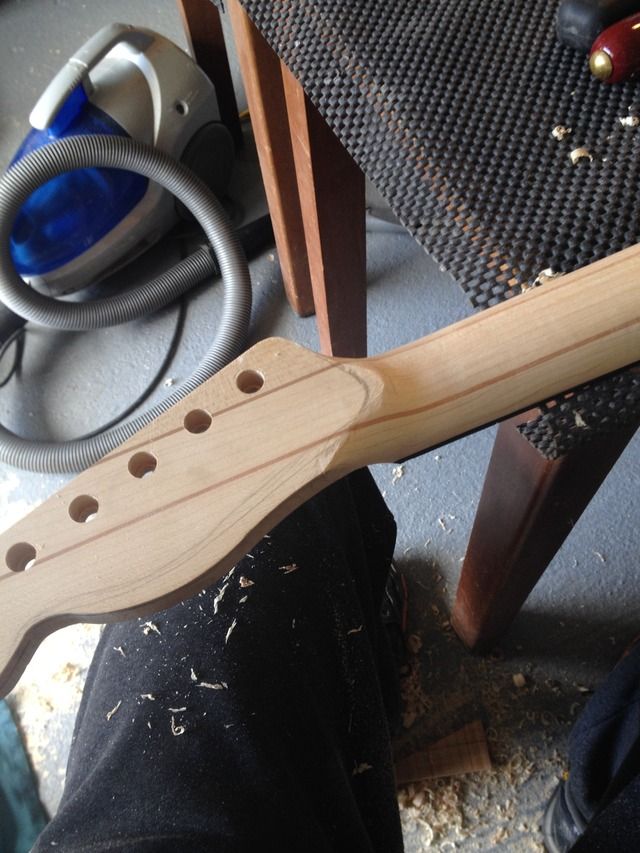
Thicknessed the back of the neck/heel a little
Tuner holes drilled...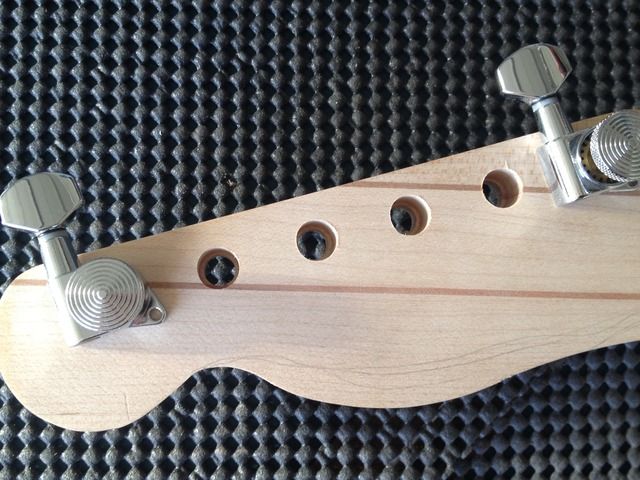
Nice and straight, unlike last time...
That's it for now...-
1
-
-
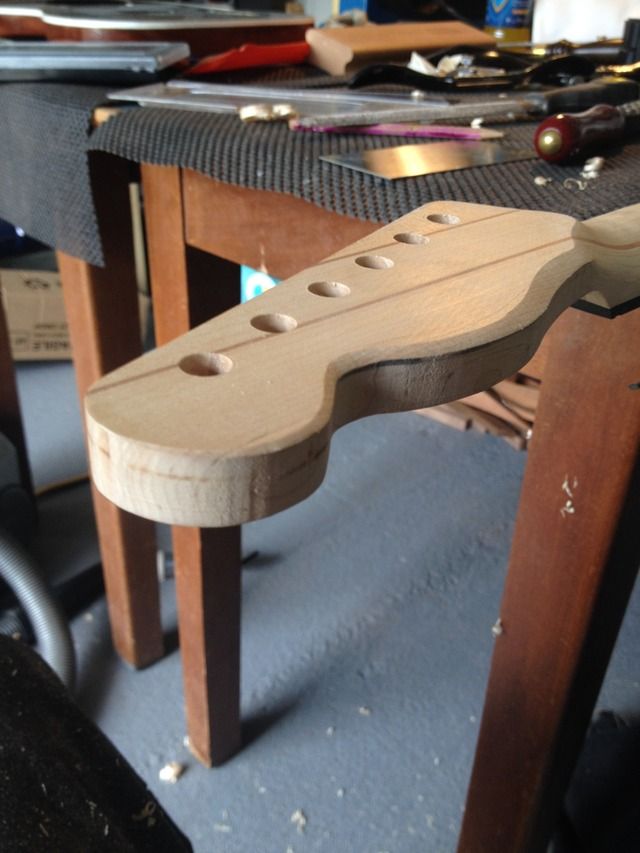
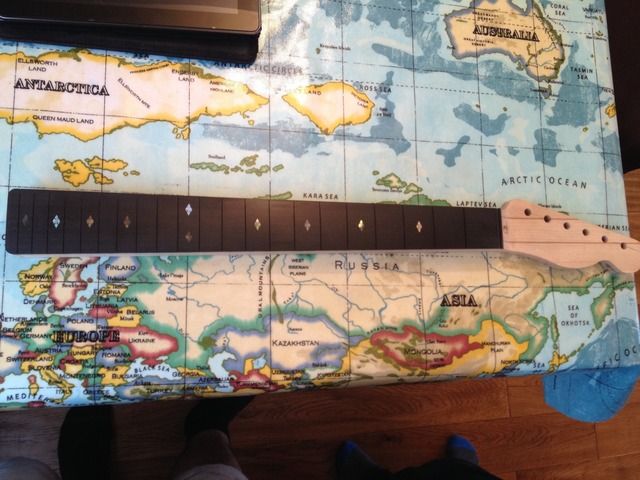
Roughly routed fretboard markers and an small headstock wing added...
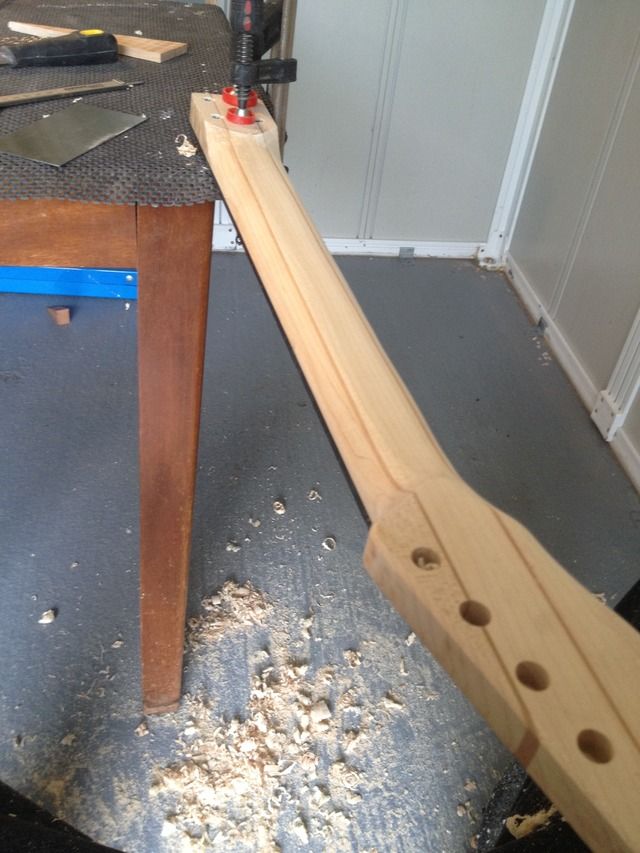
Starting the drop-off...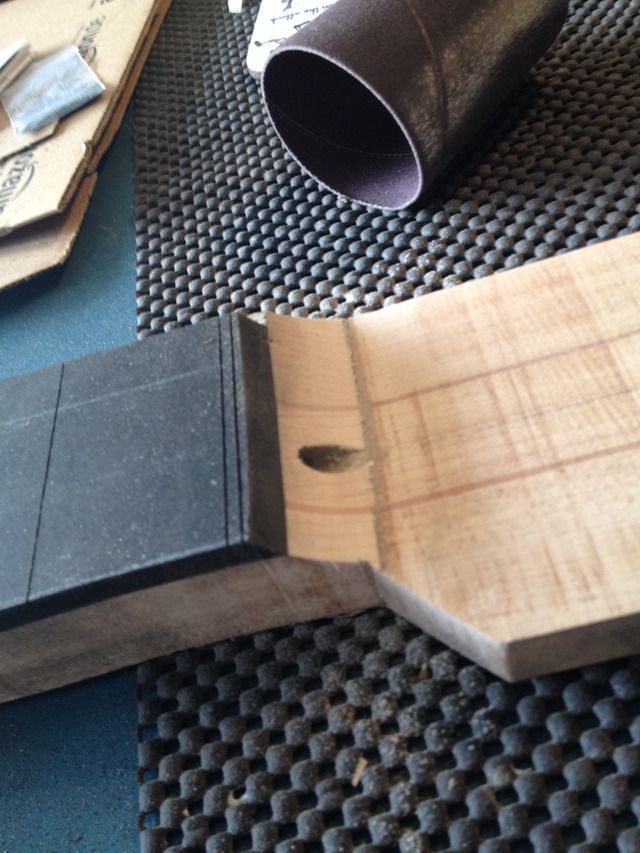
Neck rough cut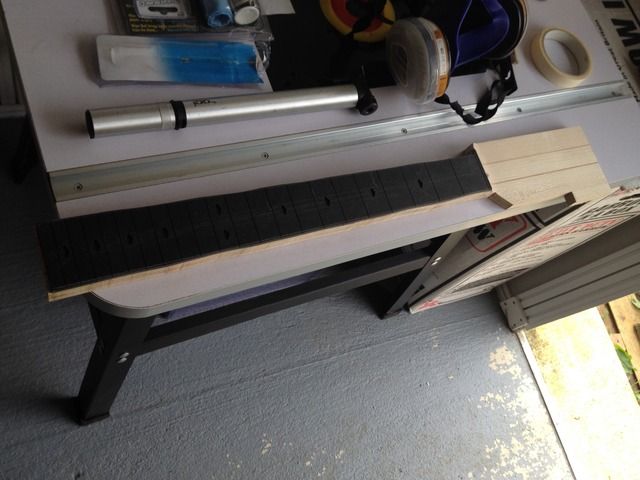
And routed...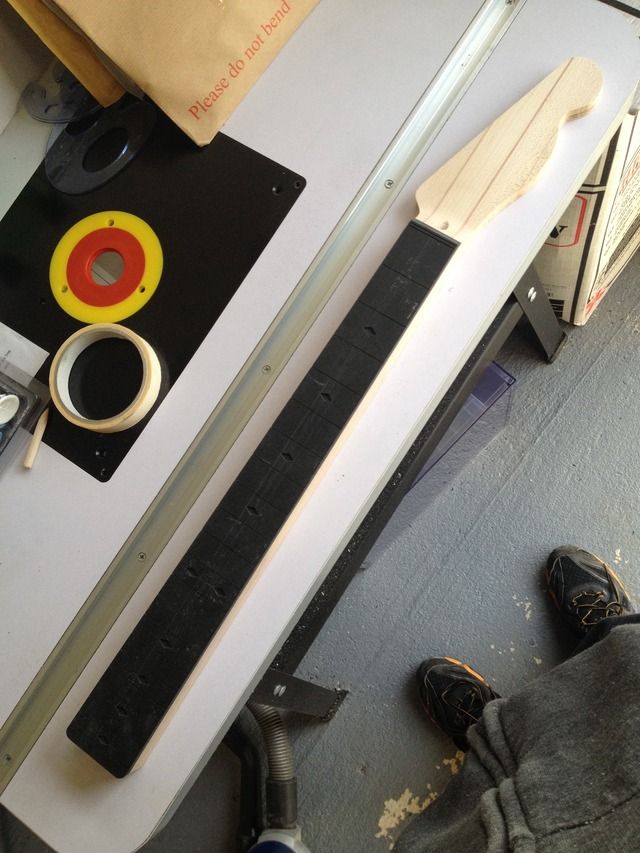
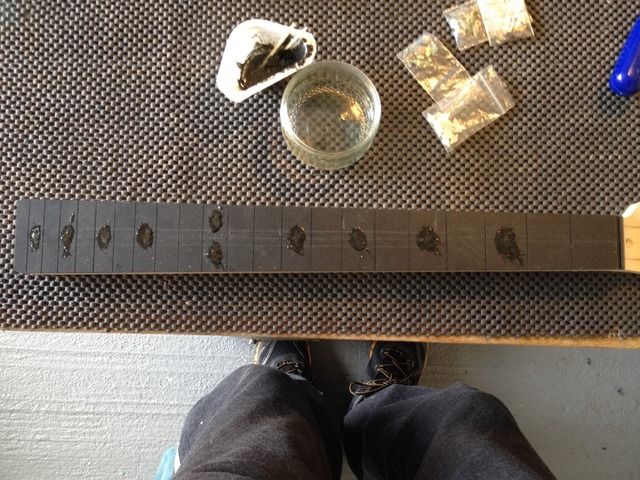
Testing fretboard markers, will probably go with these black MOP markers...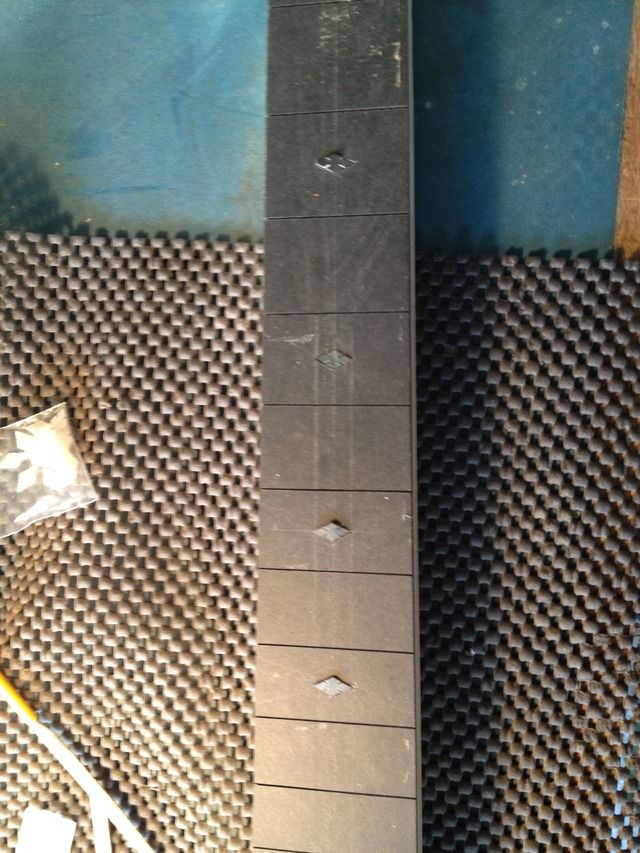
...and the story so far...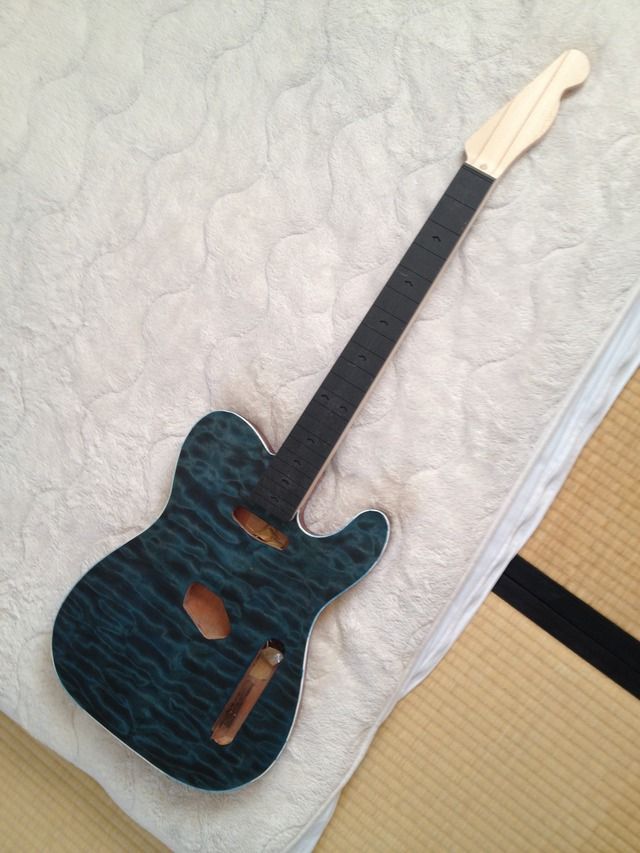
-
It's been a while since I last updated this, but I have made some progress...
Neck blank (purchased from Simo a couple of years ago) with rout for truss rod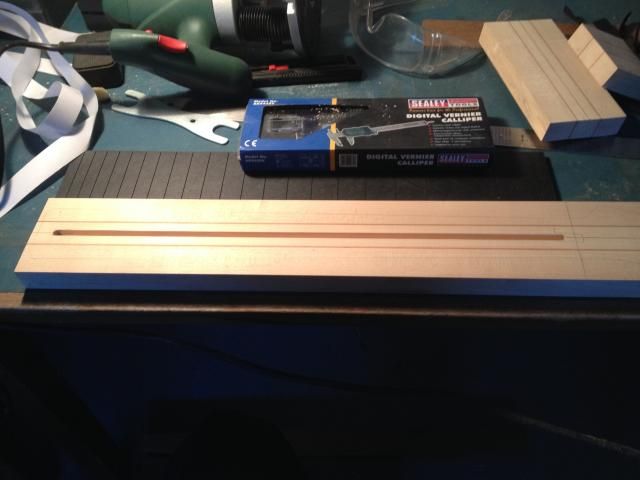
With truss rod fitted...
Fretboard glue-up...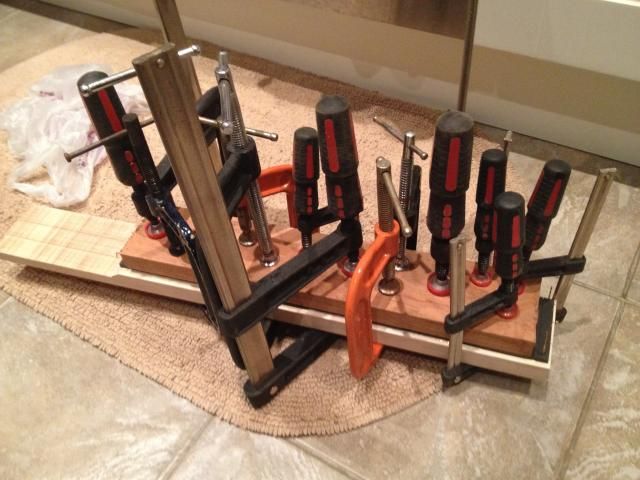
I didn't quite get the locating pins in properly resulting in some fretboard slippage...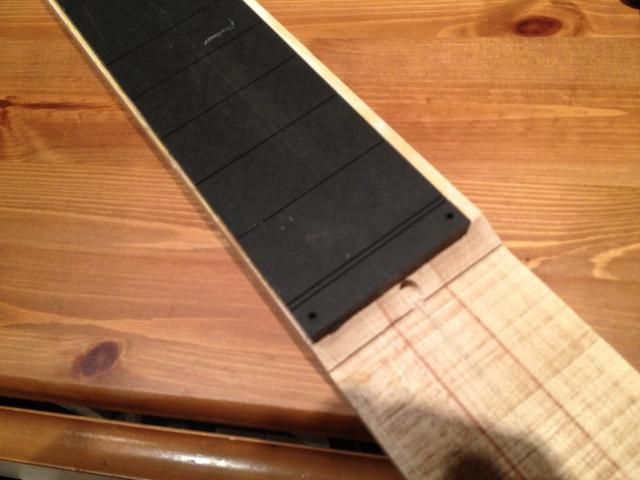
Fortunately I caught it after a couple of hours, and I managed to get it off with a spatula and a couple of hefty whacks with a hammer, phew!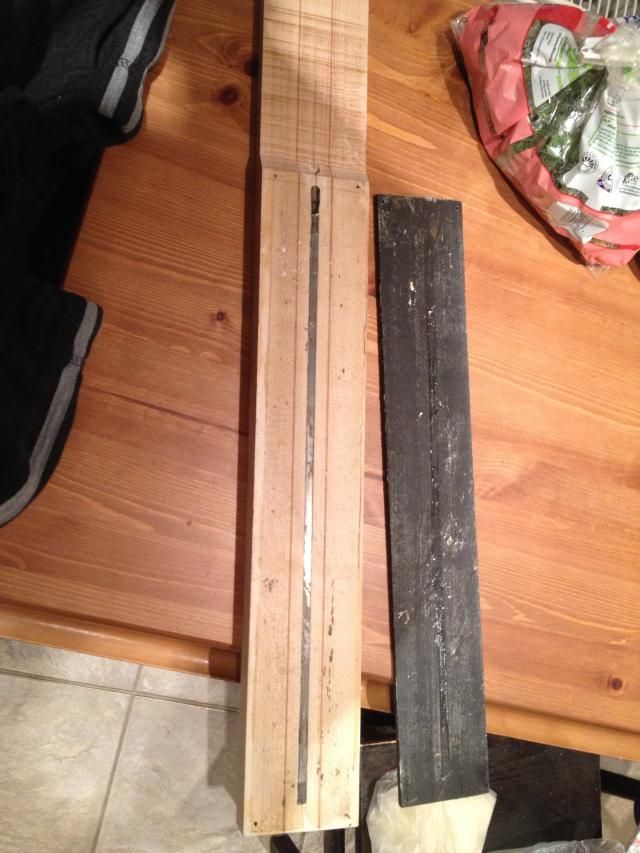
Cleaned up the surfaces and had another go...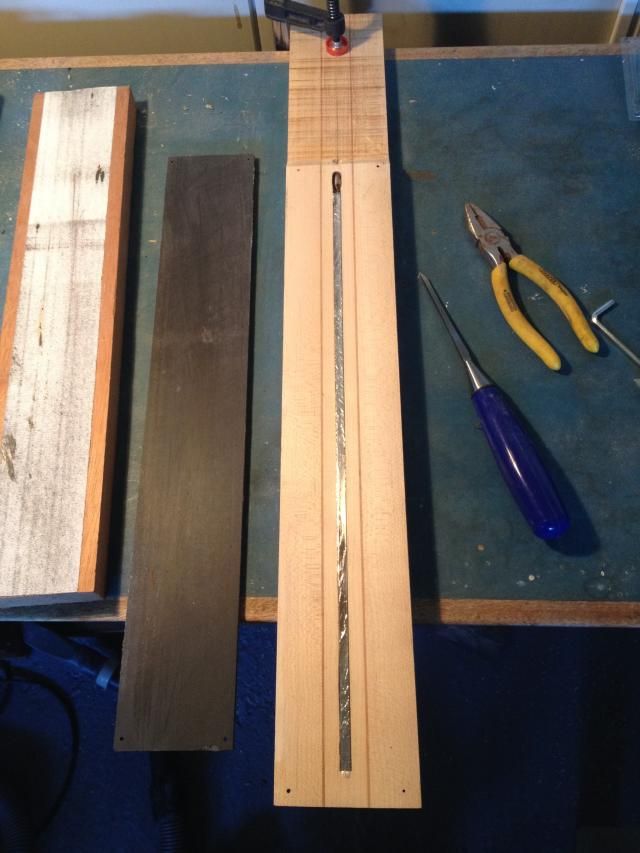
That's better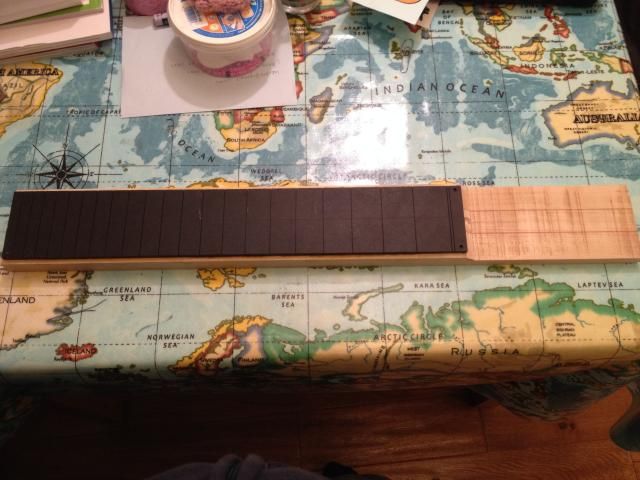
-
The way the body grain matched up in the center is beautiful.
I should hope so... it's a one piece body

Thanks for the kind words guys, just wish i had more time to work on it!
-
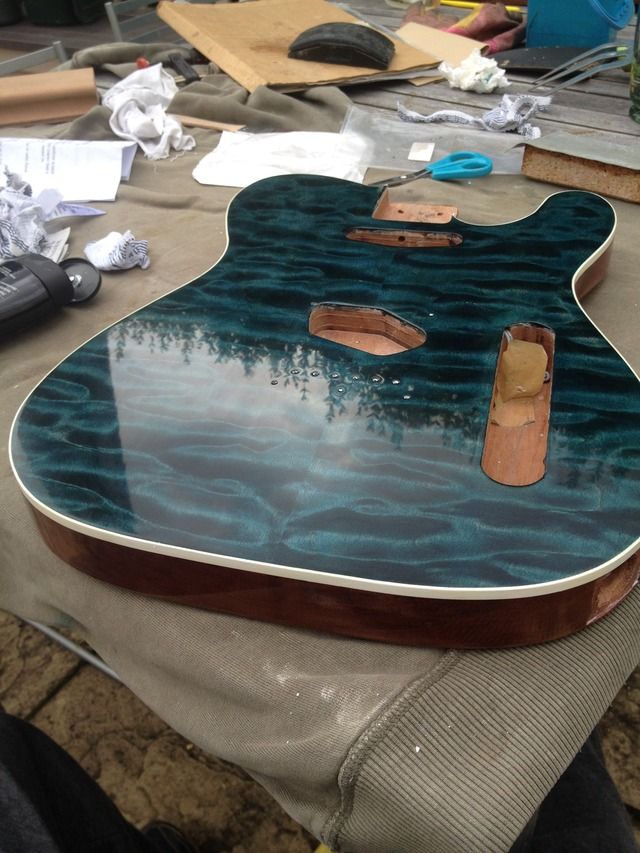
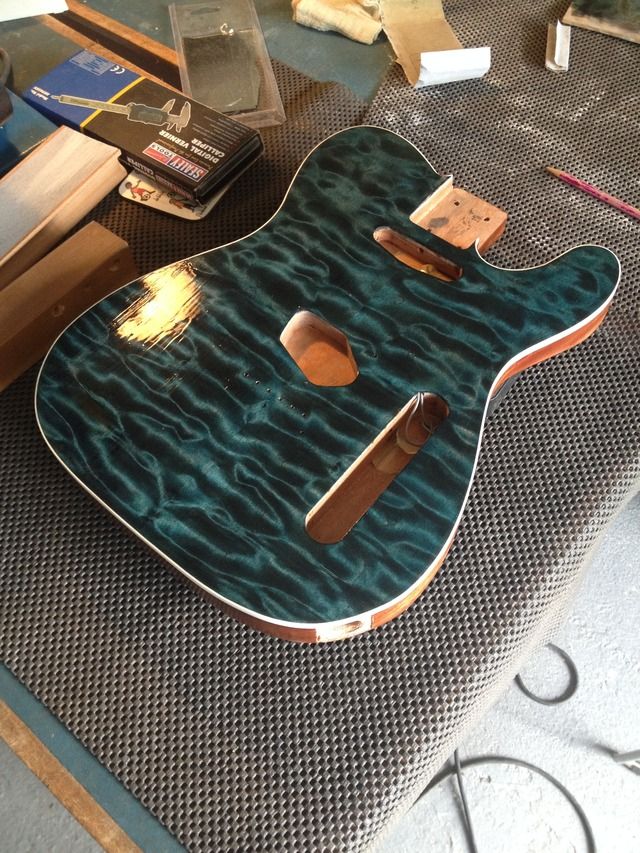
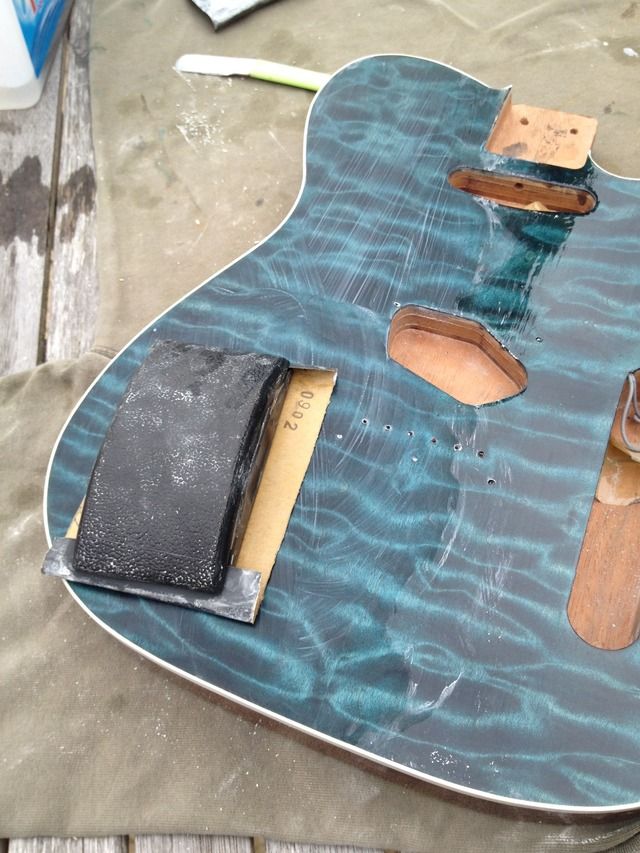
Ok, so this is what it looked like before sanding it back. It was actually much darker than it seems in this picture, almost black with green highlights. It had kind of grown on me while I stared at it for a week and I almost left it as it was but no, back to the original plan (maybe next time).
In daylight...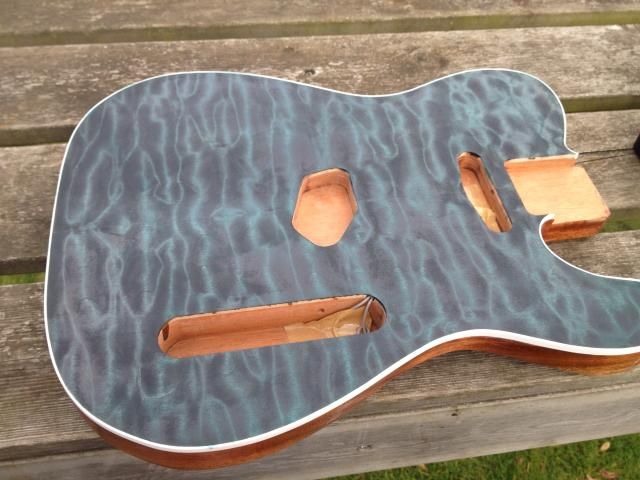
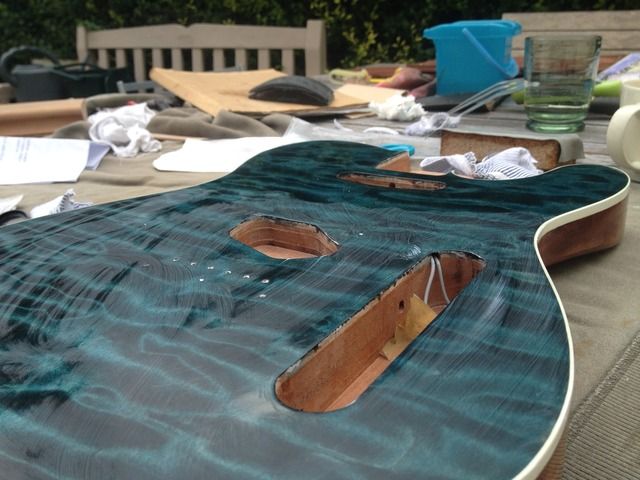
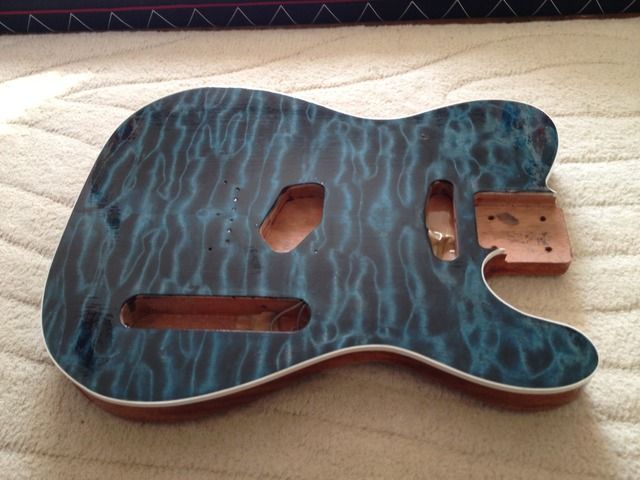
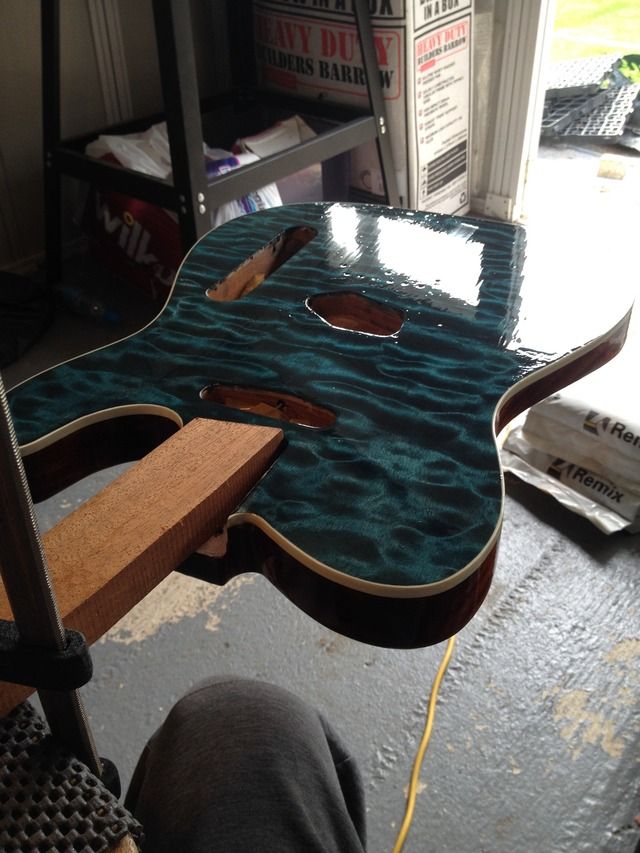
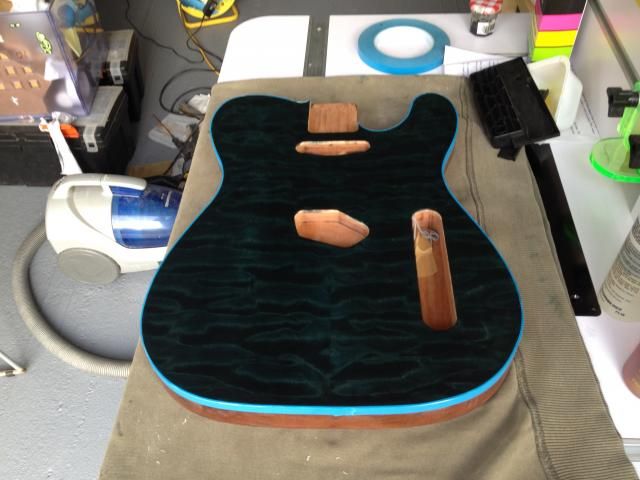
Didn't take any more pictures until after the grain fill. I went with just blue this time (I added a bit of green before, but when it came to grain fill it made it look even more green), and am pretty pleased with the result. Was hoping for a slightly more turquoisey colour but this will do just fine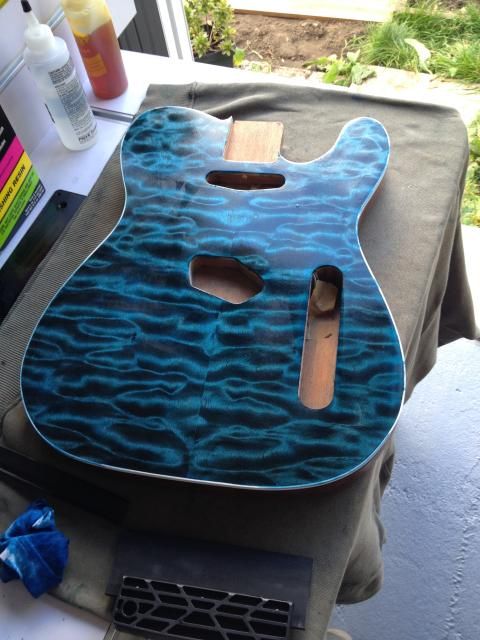
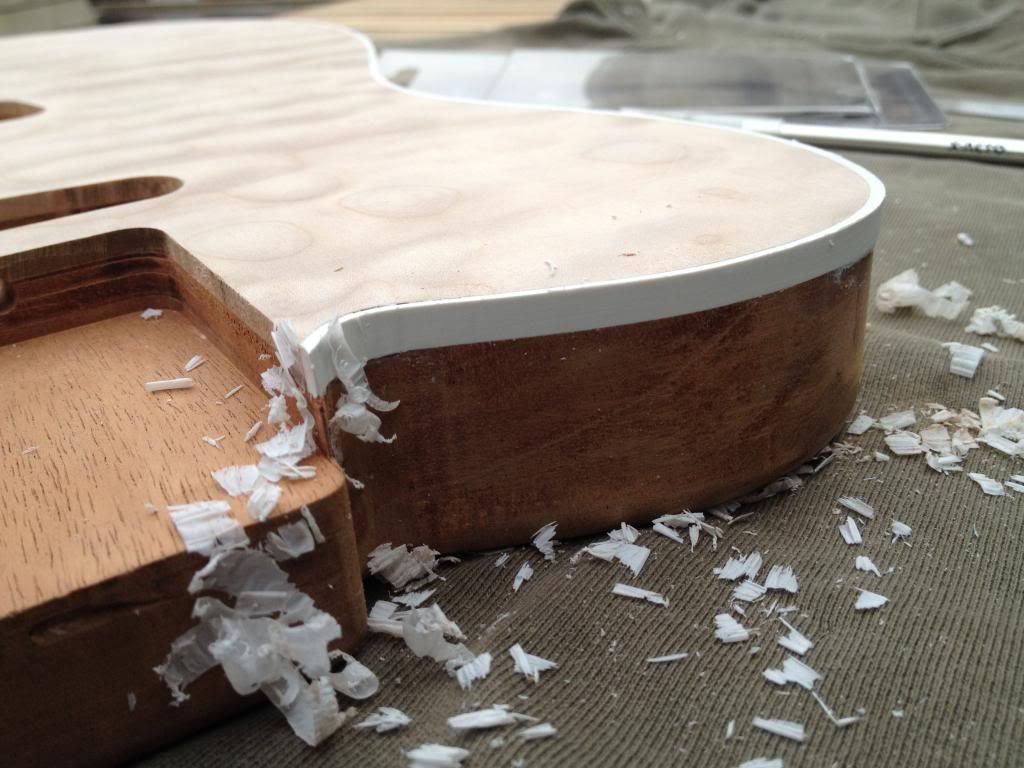
Need to clean the binding up a bit now, then work starts on the neck. -
After ANOTHER long break, I finally got back to working on this.
Sanded the back and did a quick grain fill...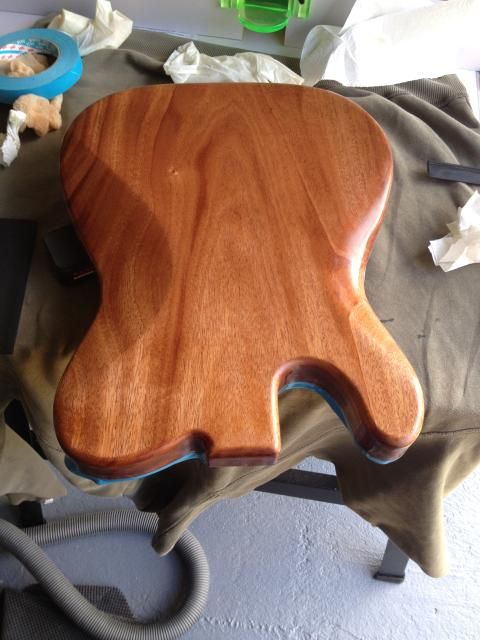
Sanded the front ready for stain...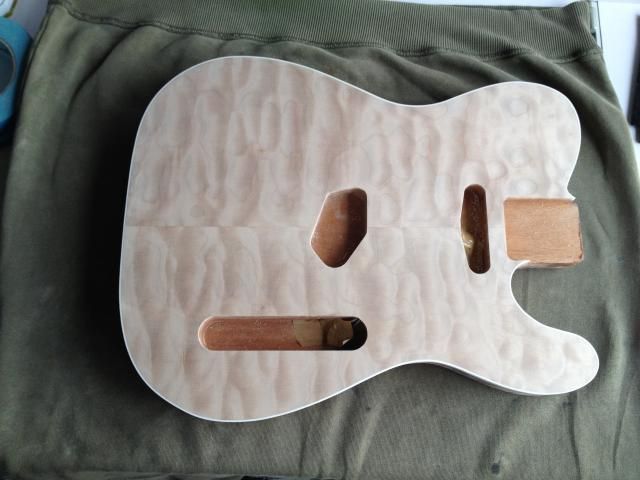
Black...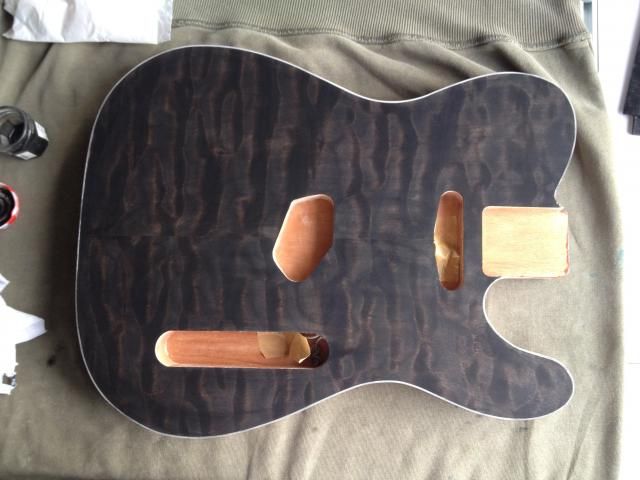
Sand back...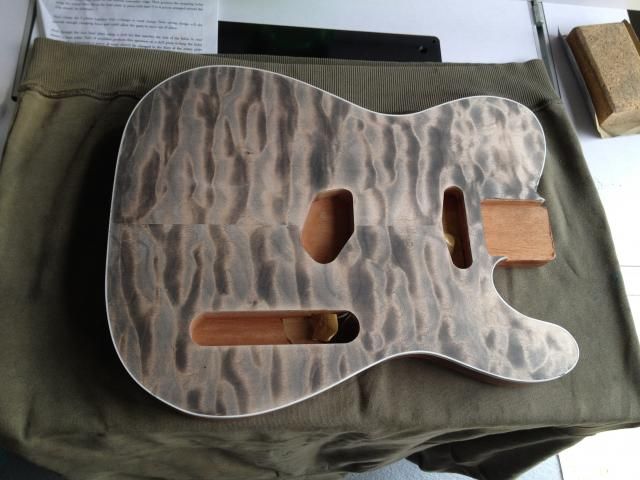
And colour...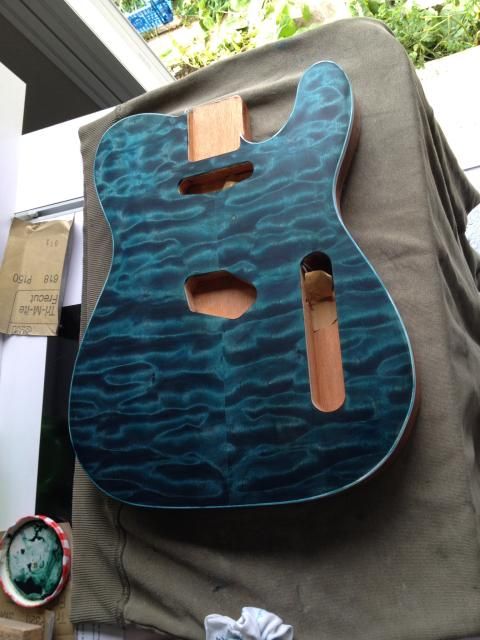
Perfect!
Now I knew the colour would lighten and the figure disappear as it dries, but for some unknown reason I added some more colour (probably just to remind me what it looked like), and when I came to grain fill it was way too dark :'(.
I'm now going to sand it all off and start again...
-
1
-
-
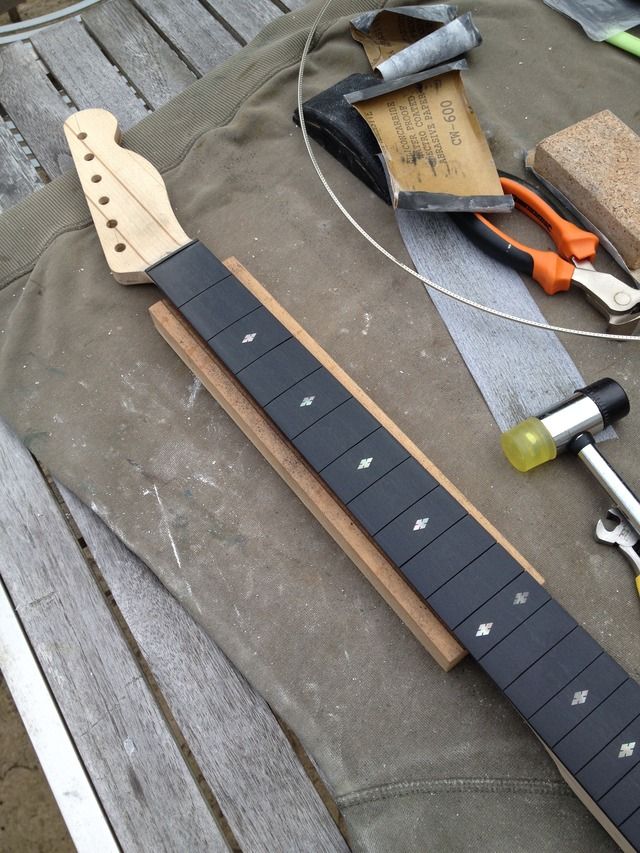
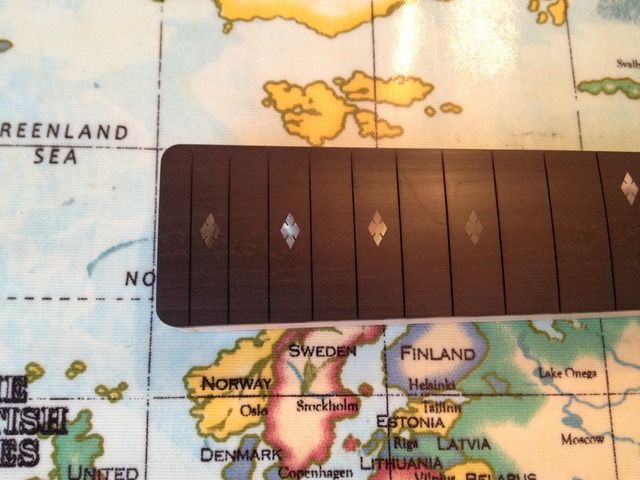
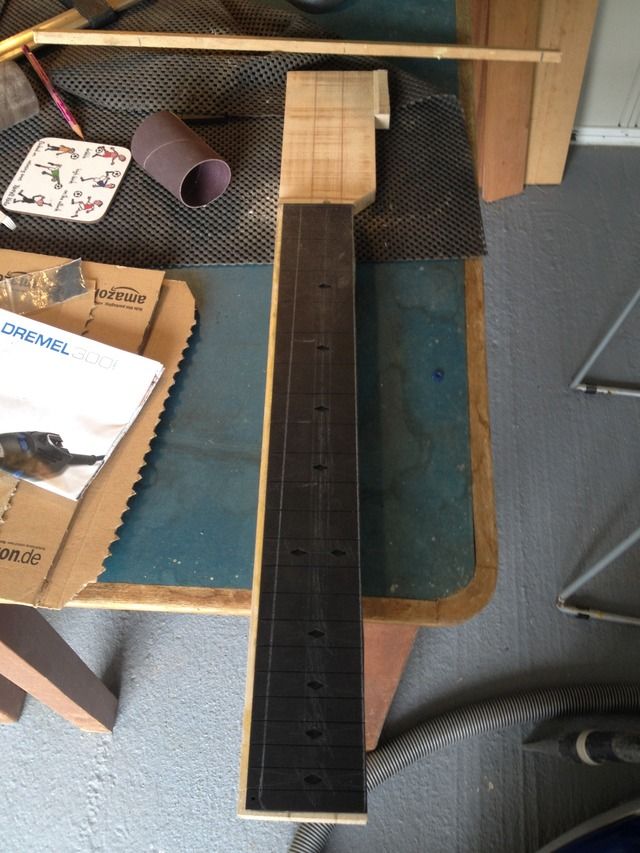
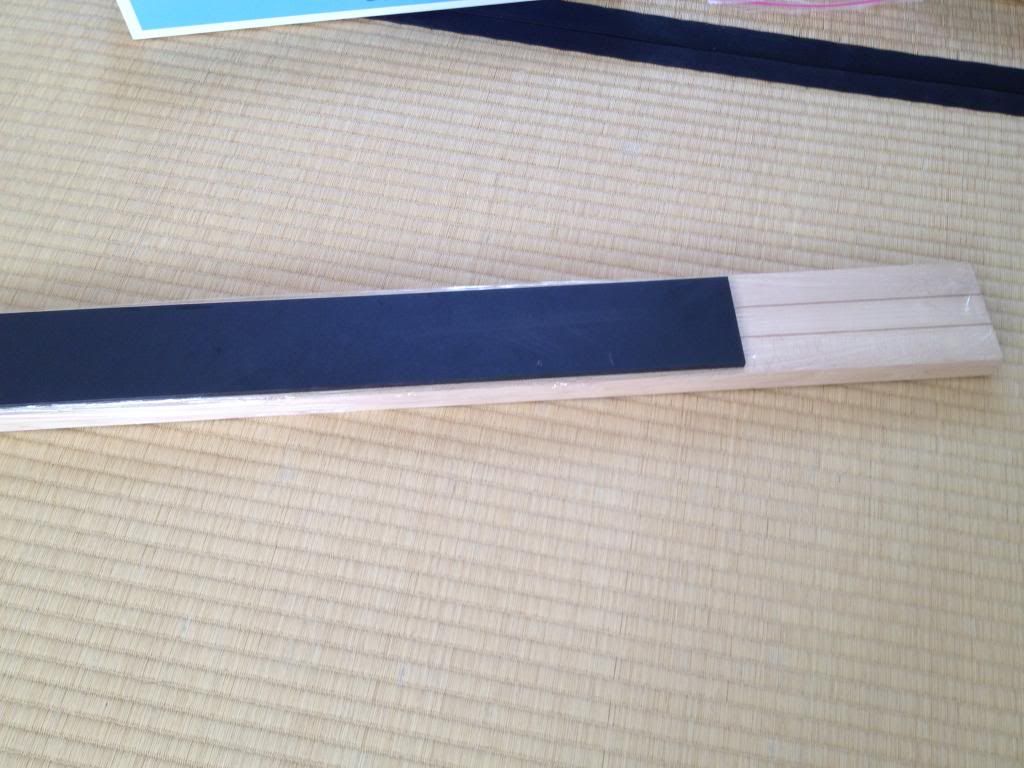
The fretboard is richlite. It cuts ok (although the 'sawdust' is a little weird), we'll see how it sands later...
-
Now I can't modify posts, oh well.
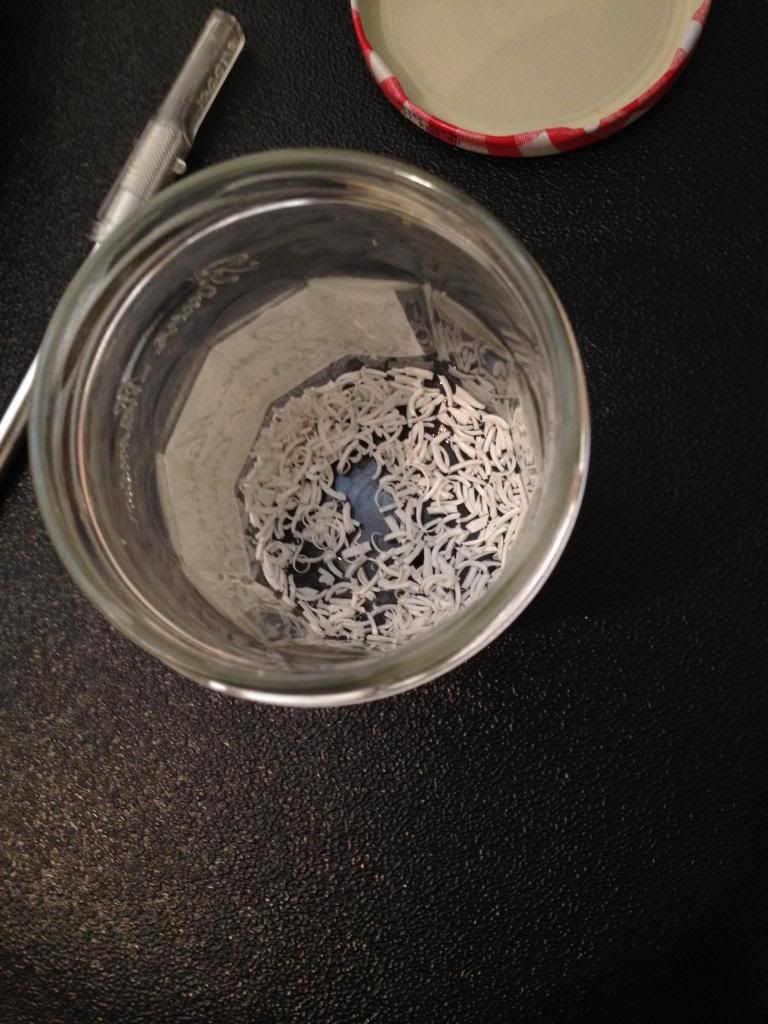
Pics fairly self explanatory, made a binding glue from binding and acetone. Got pretty messy but no major problams, a couple of gaps which should fill easily enough. Still need to scrape the sides, looks pretty thick at the moment. Will get the rest of the scraping done, then fill in the gaps.
-
Uploaded this in a rush, will comment on pics later

-
1
-
-
Tons of updates but don't seem to be able to paste pics at the moment?
Tried from PC, mobile and iPad...

Will try again from my work PC tomorrow...

-
As you can see here, I didn't have much room left for sanding before I started to expose the (badly drilled) wiring channel...
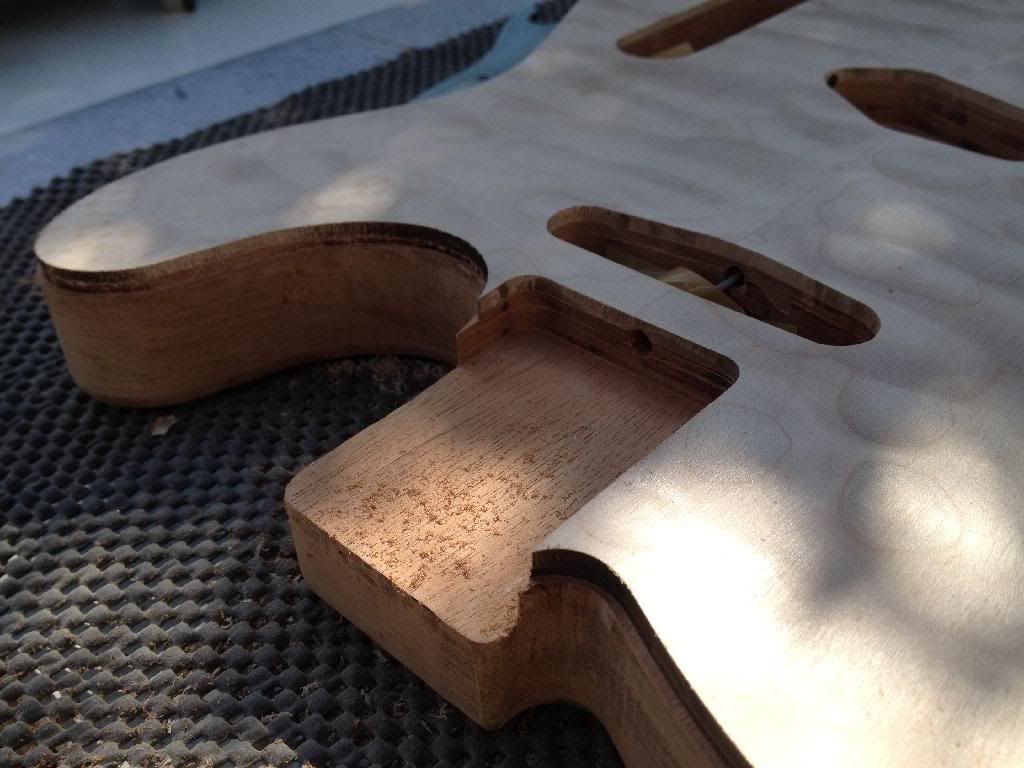
As long as you are gluing a top on anyway, why not route wiring channels into the body before gluing the top on? You never have to worry about getting the right drilling angle or boogering up your top. That's what I do anyway.
SR
Believe it or not I did do this, BUT I routed the channel using the template I had bought and it wasn't long enough to reach the control cavity or neck pickup rout, so I had to drill to it from either side. A beginners error that I won't make again (I hope)!
-
Just realised that some old progress pics on the neck are missing from this thread. I have this build documented in two places and must have missed posting in this one.
So, from September 2012...
The drop off...
Think I made this a bit too deep
and the markers...
despite taking great care with this, the 19th and 21st dots are slightly out. This combined with the fact that I re-routed the neck (don't ask why, I can't even remember now) which has made it ever so slightly thinner and so no longer a tight fit, hence the thoughts of making a new one...
-
And here's the binding channel routed...
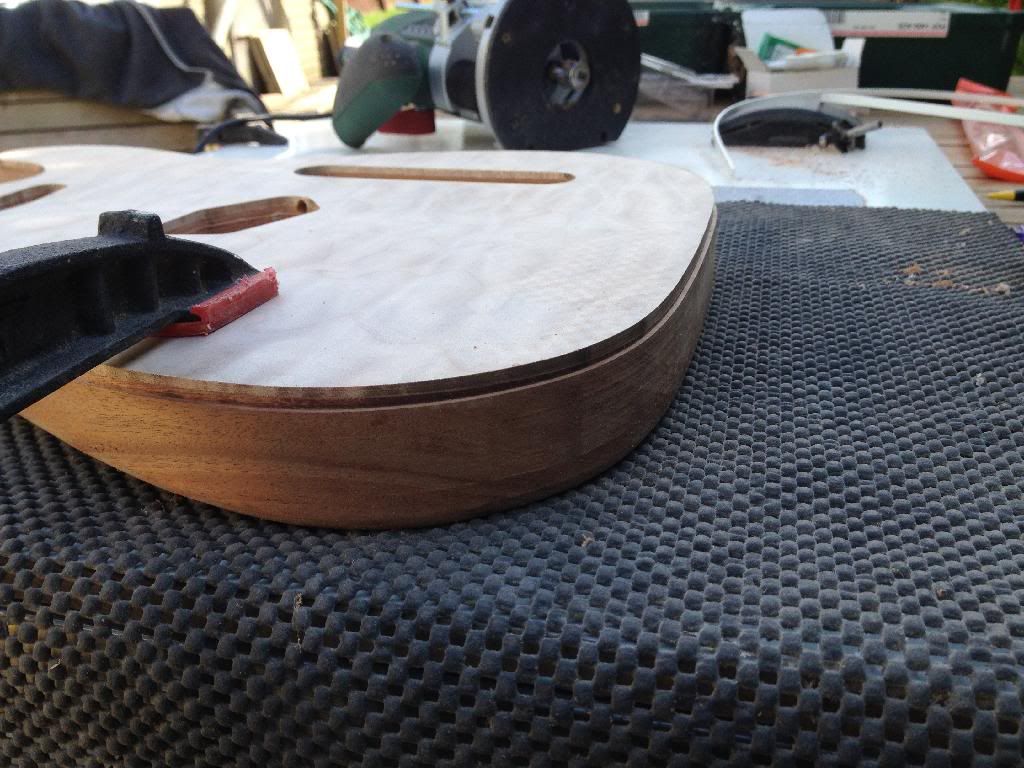
As you can see here, I didn't have much room left for sanding before I started to expose the (badly drilled) wiring channel...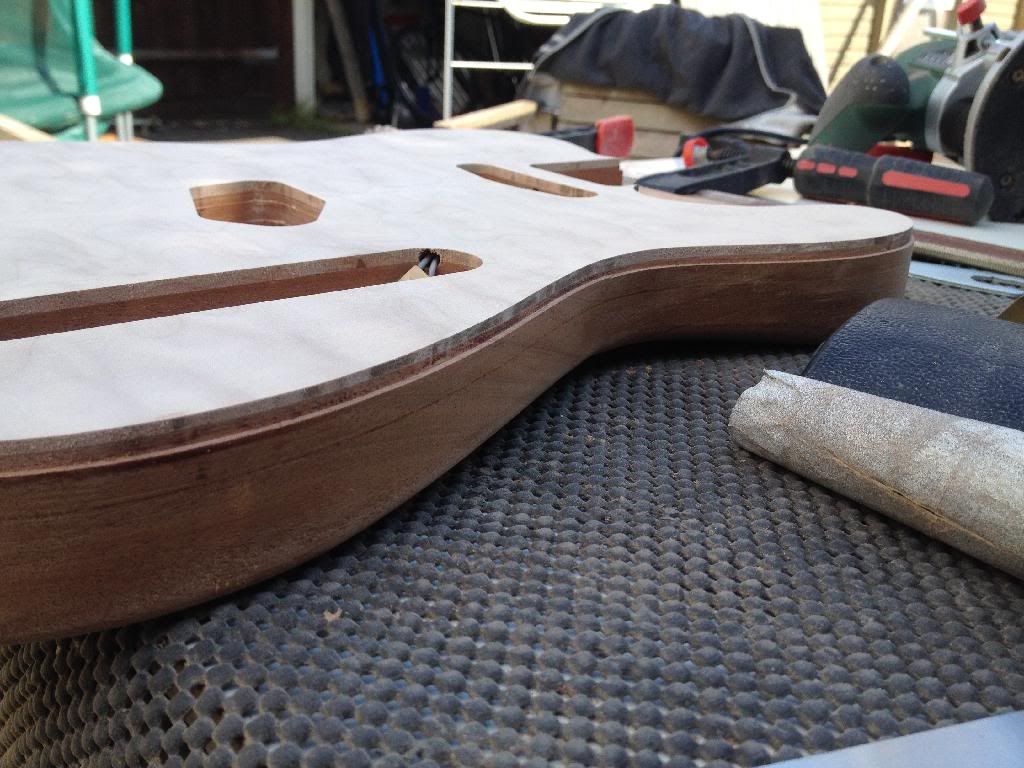
Should fit nicely...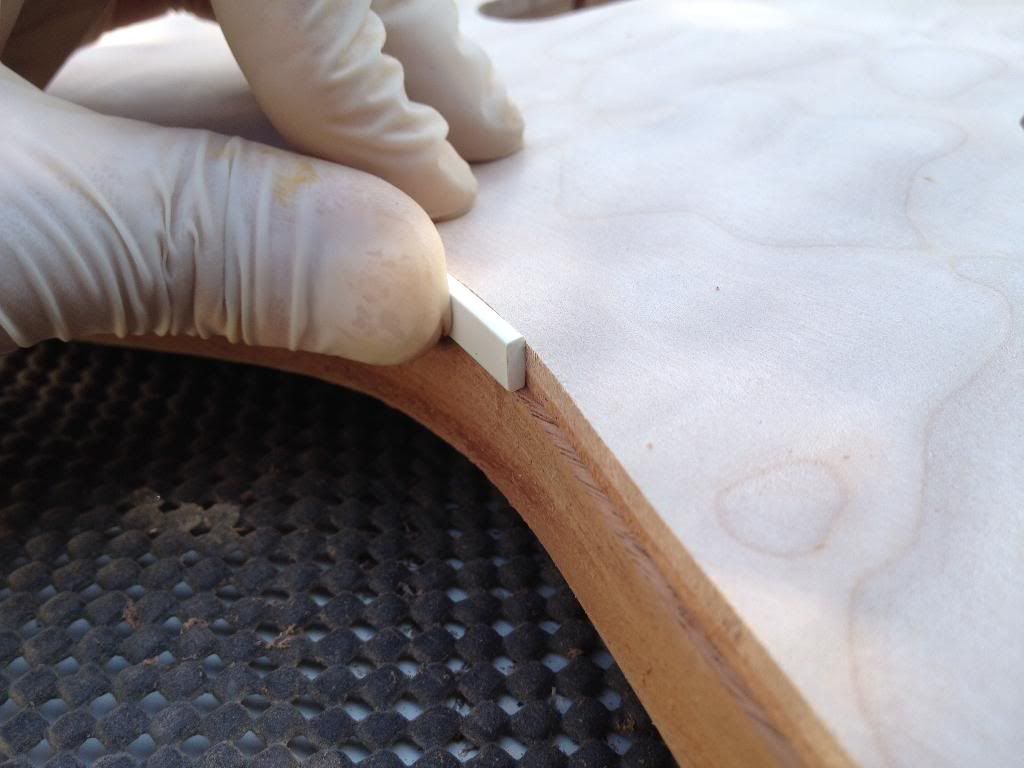
I'm thinking that this is starting to come together nicely. The body feels great, nice and light, and I'm starting to think that the neck I have for this (or what I have so far) isn't good enough. Might make a new one and use this current neck on another build. -
...And so, 2 and a half years after the warping body incident :o, I thought it was about time to fix it, and get on with this build (seriously, I have been a bit busy with other things and haven't really done anything guitar-build related in a while).
Went with the tried and trusted 'Bits-of-sandpaper-glued-to-flat-surface' method of body flattening...
Scribbled all over it with pencil...
Then sand...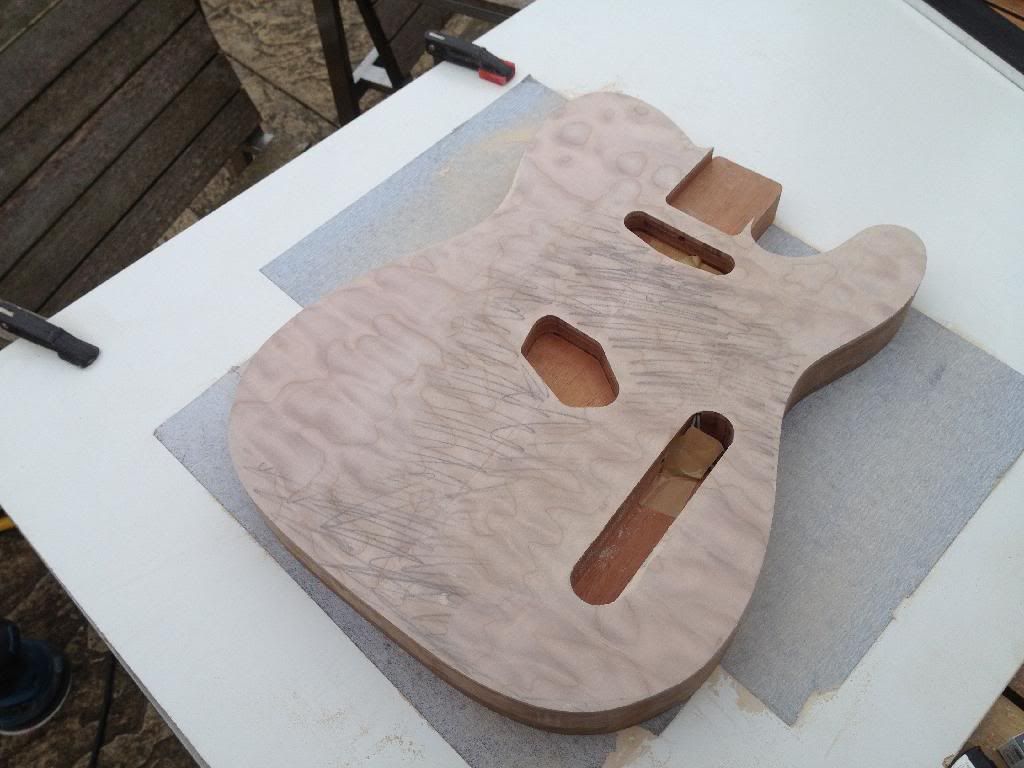
...sand...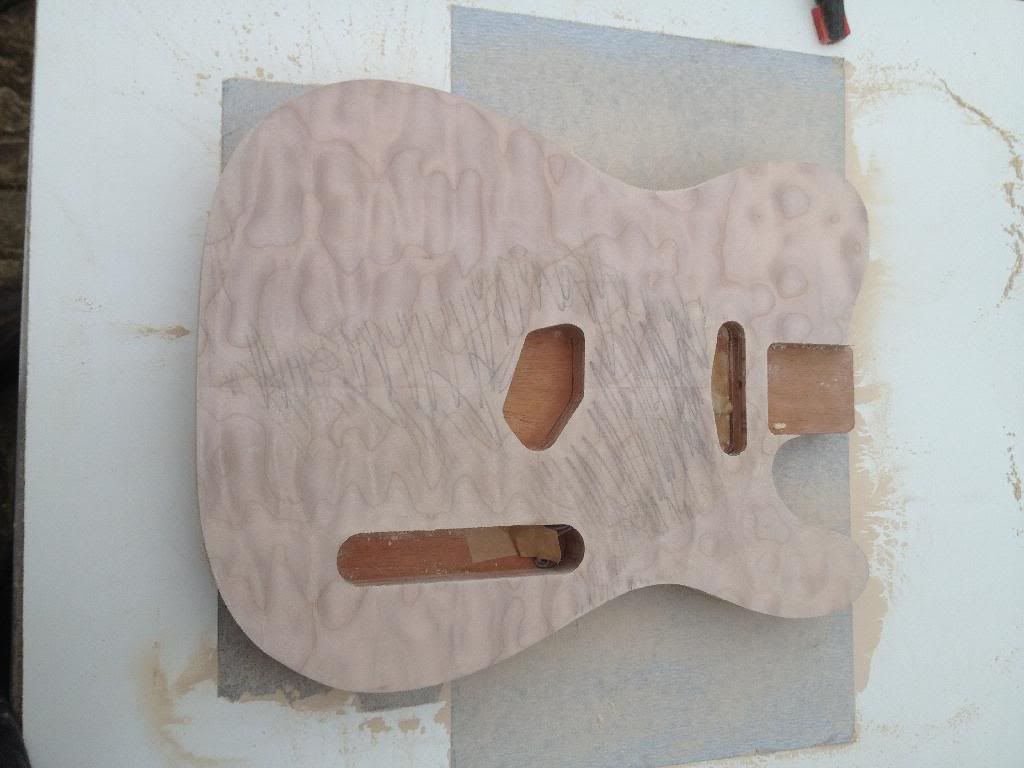
and sand some more... Holy Cow! That took a long, long time, about 5 hours to do both sides >
But, it is finally flat (or at least good enough for me )
)
Next we need a belly carve...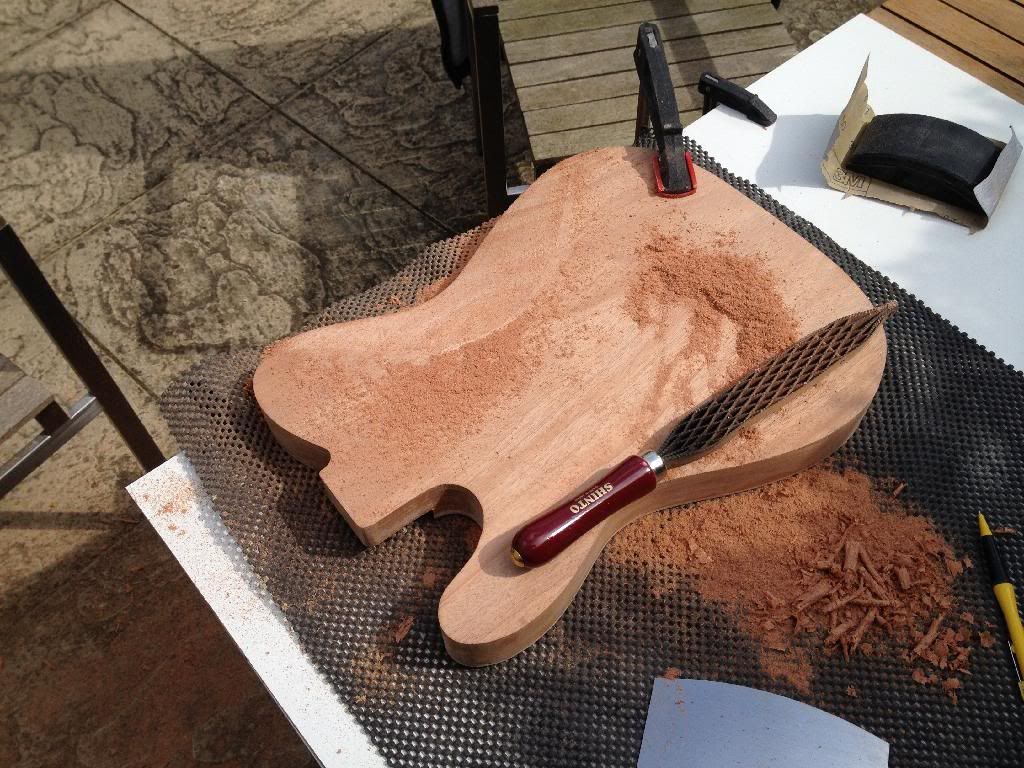
And a leg carve as I most practice sat down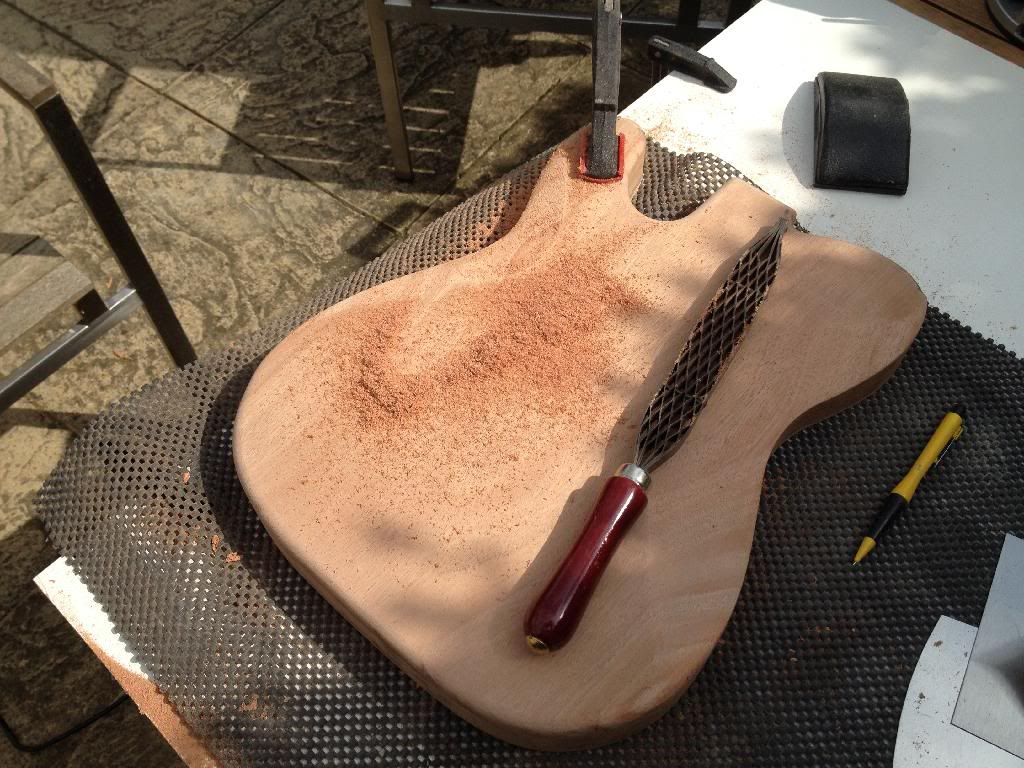
Did these with a combination of Shinto rasp, sandpaper, and scrapers. Still need to do a bit more on the leg carve, as I want to take it under the side of the body more (being very careful to avoid the control cavity).Did the roundover on the back of the body but forgot to take pics, not that exciting really...
I also routed the binding channel but haven'y uploaded the pics yet so will add them later. Just ordered some acetone, for a binding glue, and some of that blue masking tape. Colour tests were done some years ago and appear earlier in the thread. Going with blue quilt, which looks much better in reality than the crappy pictures I posted previously.
Will also be building a new garage at some point this year, then the guitar building can get going properly again, as the current one is old and damp and everything it there rusts.
Will be seeking advice on cleaning up rusty tools (bandsaw, drillpress) etc nearer the time. -
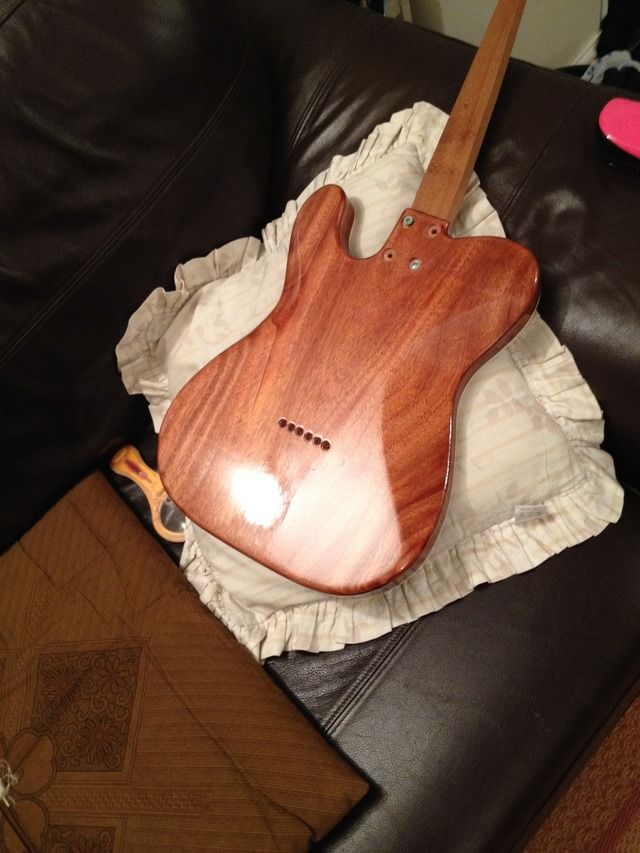
Finally got around to polishing up the body...
Went through the grits with micromesh (lightly) from about 4000-12000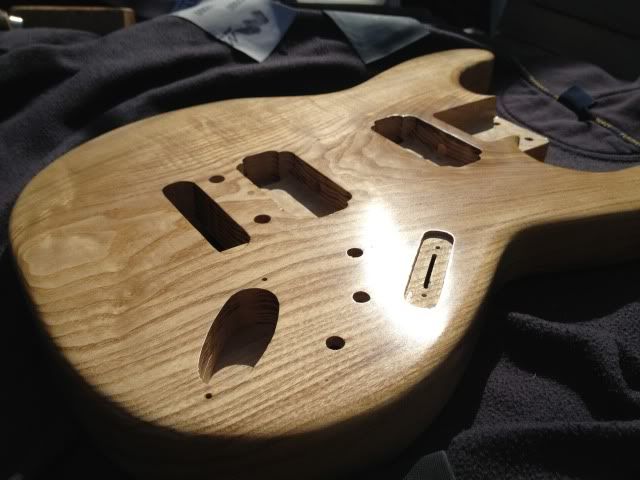
Followed that up with Meguiers ScratchX, then some carnauba wax. Not bad... It isn't like glass but it looks pretty good (it is tru-oil after all)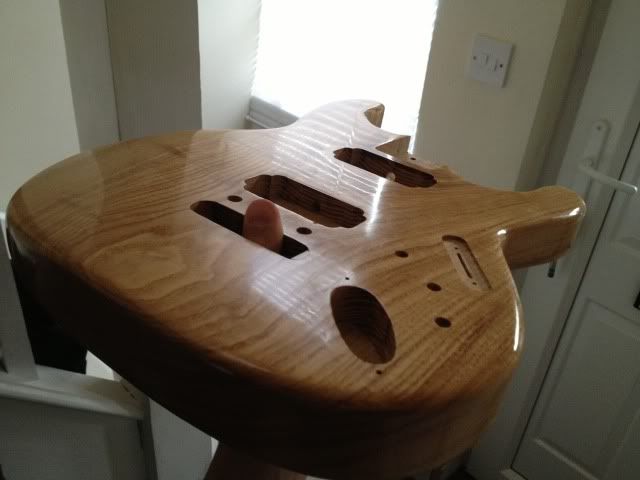
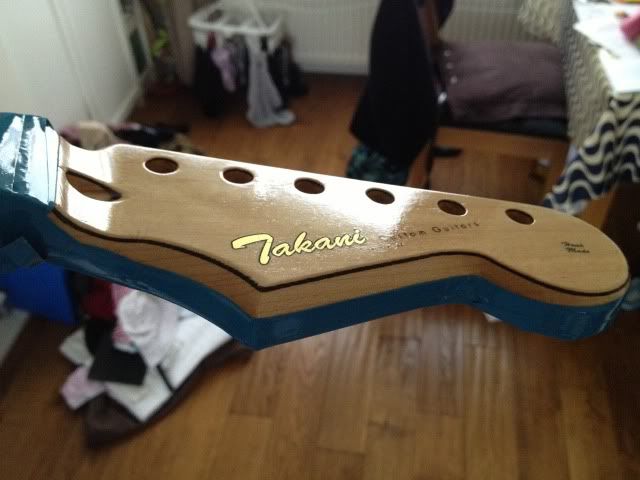
Then on to the headstock...
Flatted...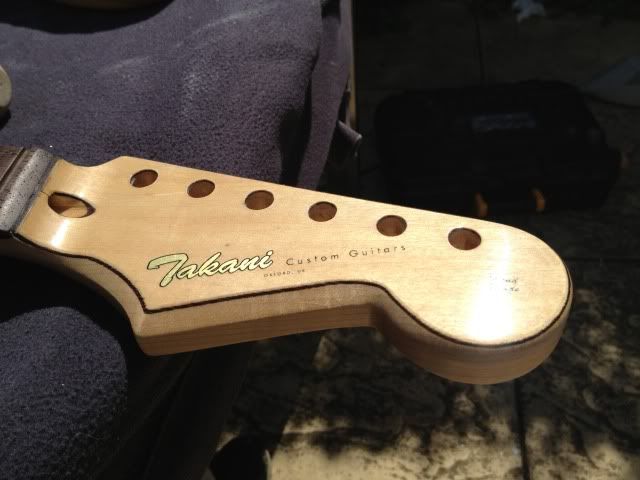
and polished (the same way as the body)...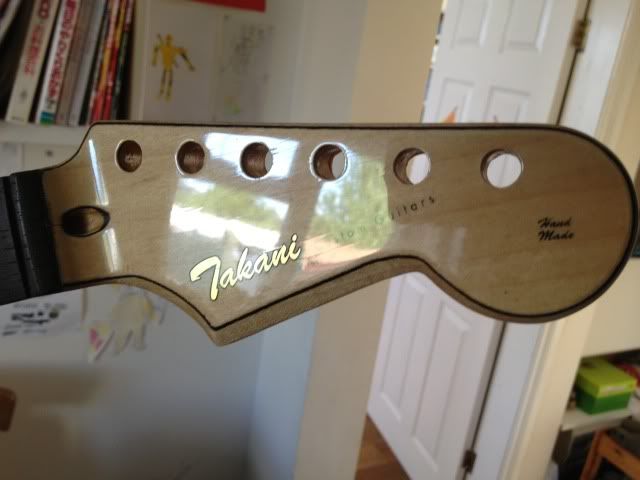
The cracking of the nitro has continued, I'll try and get a shot of it later. I'm going to leave it for now as it looks ok, but if it gets lots worse or starts lifting I'll probably rip it all off and start againAnd time for another mock-up...
Ignore the black rings. progress on the wenge ones has been a little slow

-
That is beautiful!

Now I want a solid body nylon string

-
Problems...

I know nitro cracks as it ages... but after a week?
I haven't even flatted it yet!
Anyone know why this might be? I'm guessing it has to do with the thickness of coats or drying time between coats? This is my first time finishing so I haven't really got a clue what I'm doing...
If I spray more nitro will it melt the finish enough the cover the cracks?
I'm not going to rip it all off and start again, so if it can't be fixed so be it...
... I'll just say it's vintage
-
7 coats on...
...and it would have to be the final coat that gets some dust in it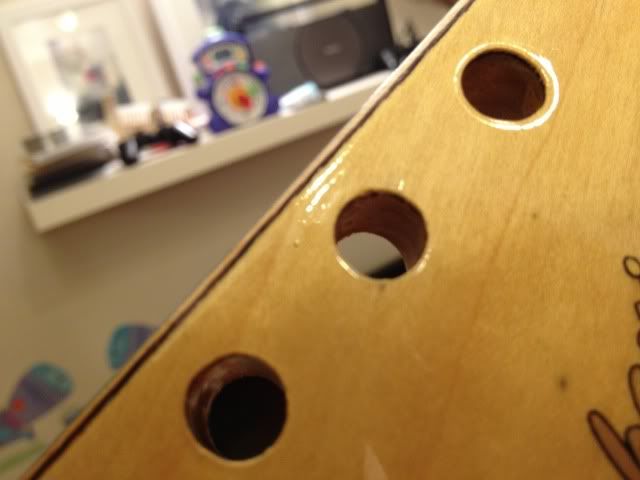
I'm hoping that it will sand out when I flatten the nitro..., if not I'll have to shoot some more. Still have quite a bit left... -
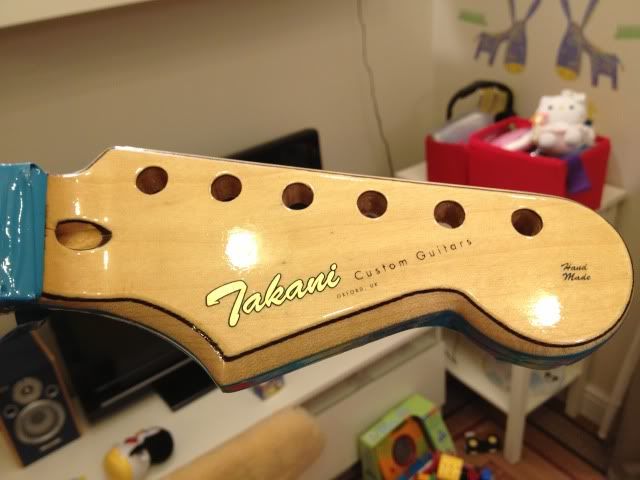
Here's the headstock so far. It's had 4 or 5 wet coats since the decal went on (the decal edges actually disappeared after about 2 wet coats). It's starting to build nicely.
Will probably do 2 more then call it a day. Then I'll have a few weeks to finish the covers and switch while I wait for it to cure


 )
)


The Fool Guys Second - Yep, A Tele
in In Progress and Finished Work
Posted
Shielded the cavities with copper tape and did a little soldering. I was originally going with a four-way switch the both pickups in series in the fourth position, but then found the switch was too tall for the cavity and I couldn't be arsed to re-rout that at this stage so bought another switch which I'll have to wait for.
Still a bit of shaping to do on the back of the headstock then I'll sand it and start the tru-oil. Also need to flatten the headstock lacquer and polish that up.
Apologies for masses of posts in one go. I'll try and keep more up to date