The Fool Guy
-
Posts
100 -
Joined
-
Last visited
-
Days Won
2
Content Type
Profiles
News and Information
Tutorials
Product Reviews
Supplier Listings
Articles
Guitar Of The Month
Links and Resources
Forums
Gallery
Downloads
Posts posted by The Fool Guy
-
-
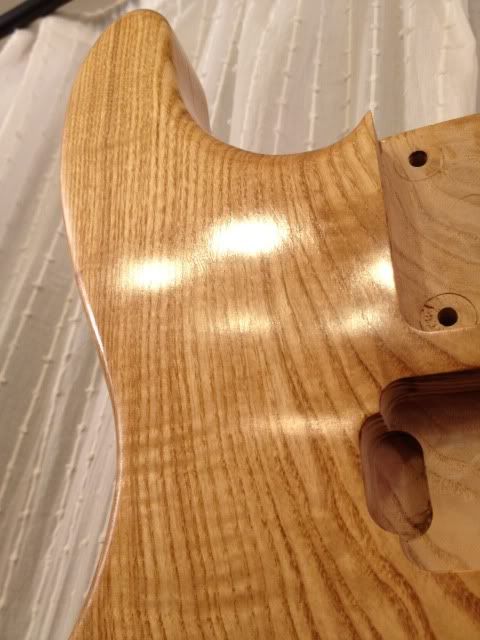
Got my shine on going through the grits with my micromesh sheets...
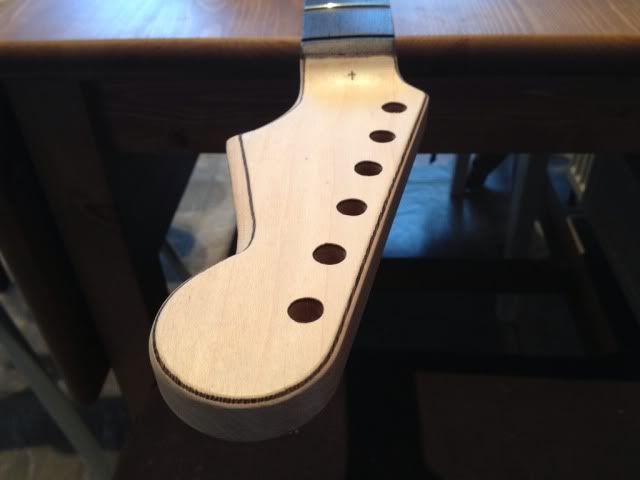
...and logo now attached
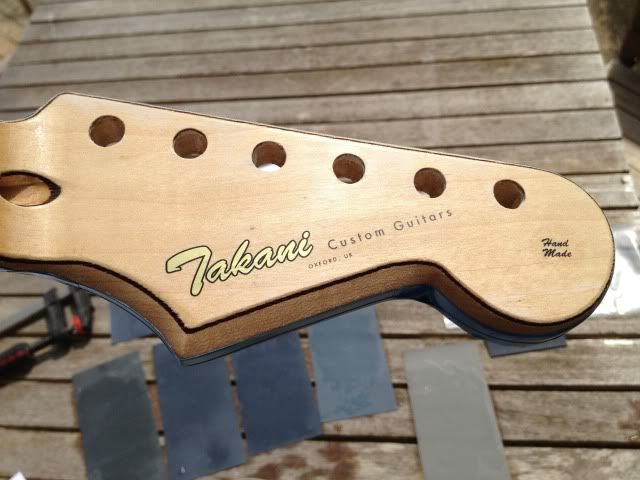
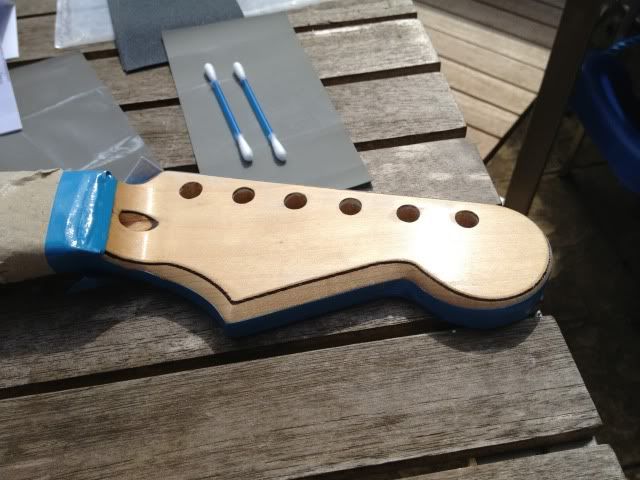
Did get some sand through around the tuner holes and the bottom edge, went ahead and did the decal anyway. Next time I'll do more than one wet coat before the decal ...
...
The end is nigh (finally)... -
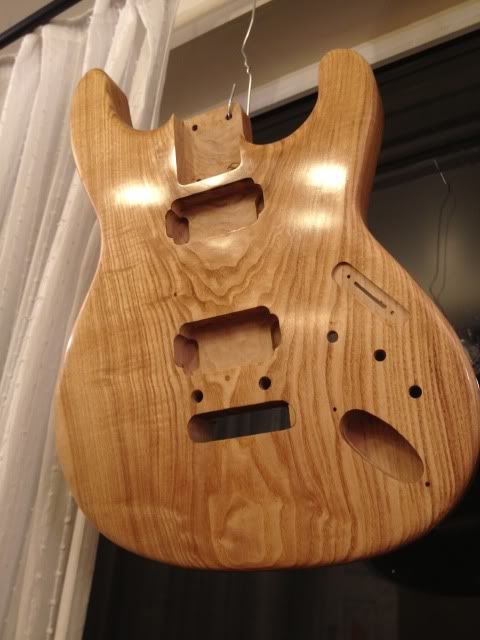
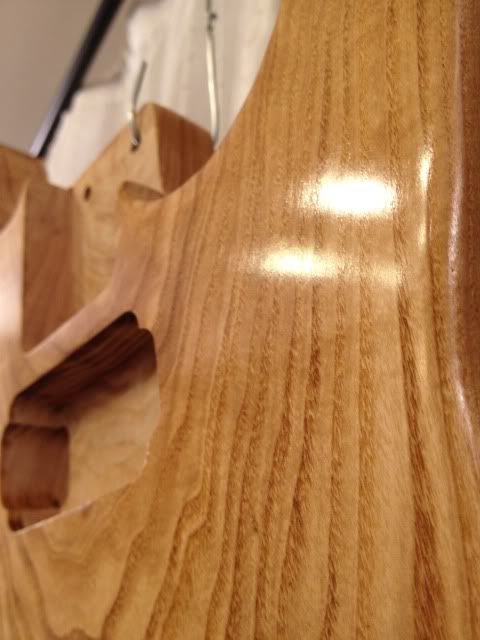
Right, here we are at 5 coats of tru-oil...
Looking good
It's had another 2 coats since this picture and I don't think it will need much more. i may even stop here and start polishing...
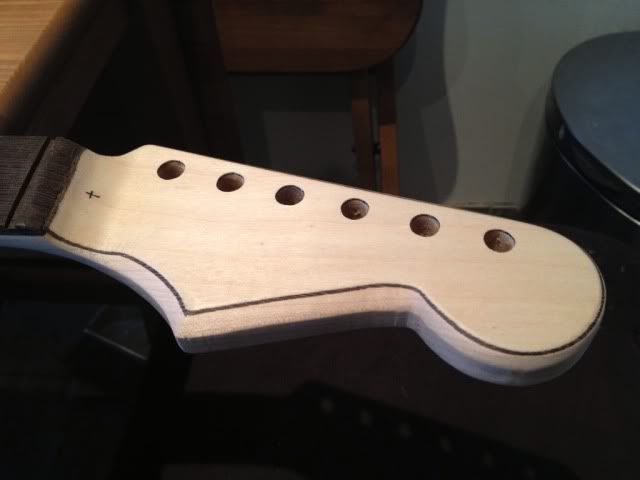
Made a start on nitroing the headstock. Did 2 very light coats followed by one wet coat. Had a panic moment when doing the wet coat that I'd put too much on, but it leveled out ok. Never used nitro before (or any finish for that matter) but it seems to be quite forgiving for an amateur like myself. Will leave this for a while (probably won't get back to this until the weekend) then flatten and apply my decal before the rest of the nitro goes on.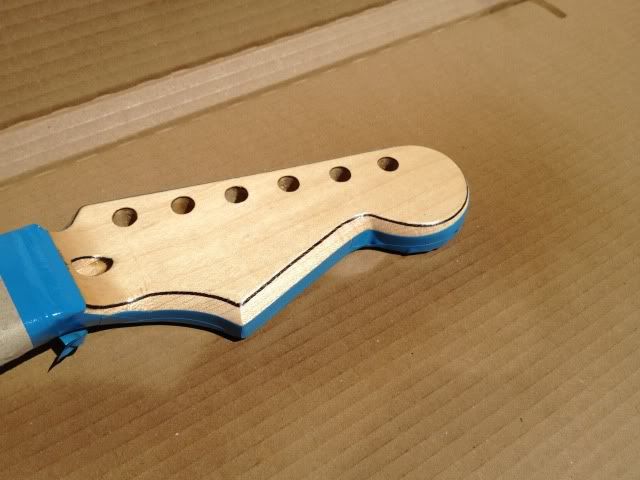
Yes, the nitro has revealed a nice big scratch across the headstock which I couldn't see before . It can only be seen from a certain angle so I'm going to leave it, as the veneer is so thin I don't want to sand it any more 
-
Sanded back the first coat of epoxy and did a second. This has worked really well so don't think I'll do any more coats.
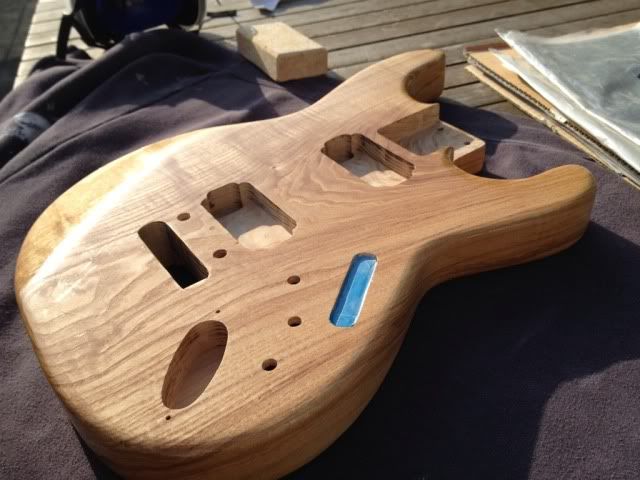
This has now been sanded back again and I've applied the first coat of tru-oil. Forgot to take pics, will take some later. It's not as shiny now as it was with the z-poxy on it, but hopefully the tru-oil will build nicely and I'll get a good shine out of it in the end. The satin sheen it has now is also pretty nice...
Am I right in thinking it will need about 15-20 thin coats if I'm going for a gloss finish? -
Yeah, I was really disappointed with the body blank when I got it (see first post), but I guess it turned out alright in the end.

-
Some more progress
Neck after 5 coats of tru-oil. It's been curing for a week but I'll leave it for another week as it still smells of the oil...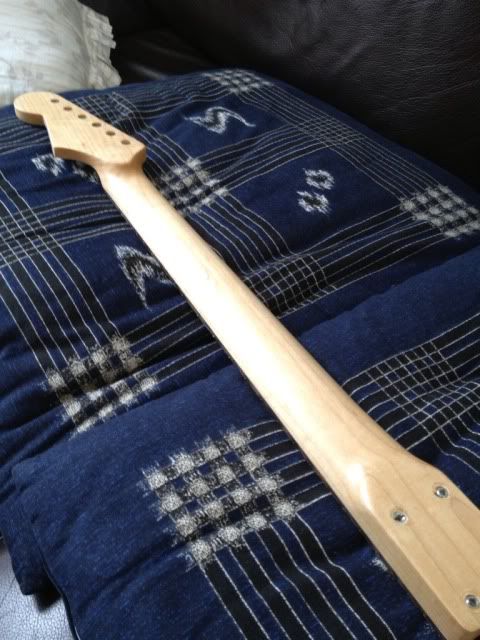
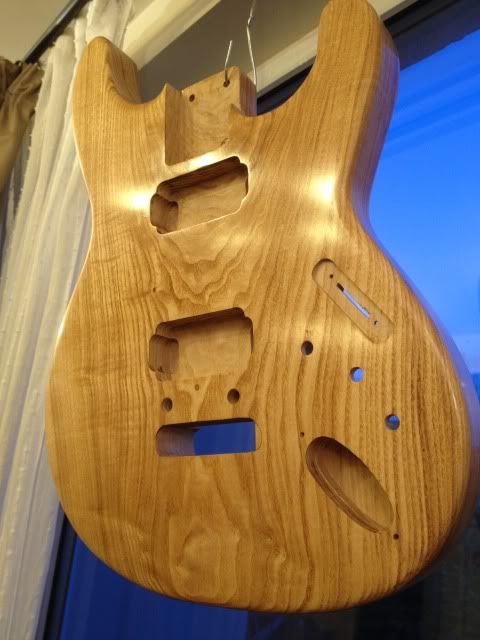
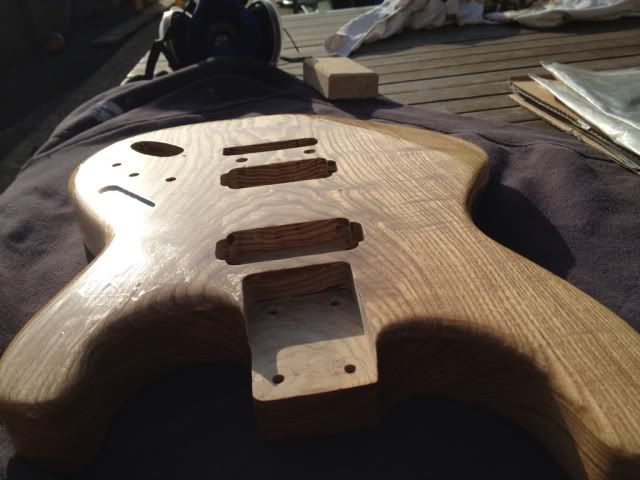
Did a final sanding of the body (sorry, no pics) and started on the Z-Poxy grain fill...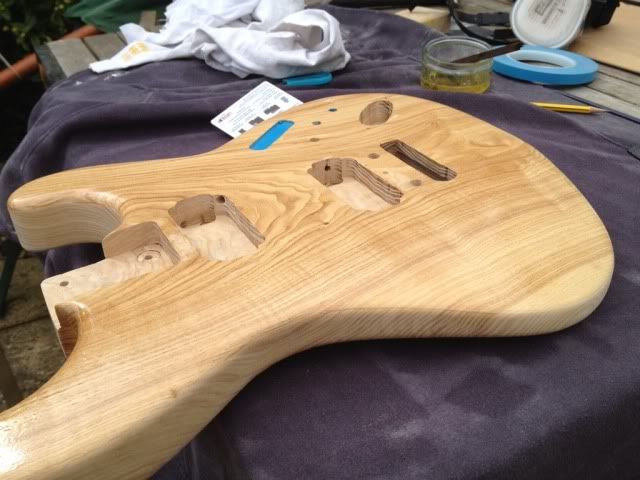
Really glad I didn't stain this now... -
Yeah, the grain on the switch cover matching the body is just luck. I angled it that way to match with the grain of the pickup rings and fretboard, although the fretboard is quartersawn so looks a bit different anyway. The cavity covers will also have the same grain orientation.
Once I get the pickup rings sorted it should look good (*crosses fingers and prays*)
-
After another long break the weather finally perks up enough for me to get back to work on this one, nearly three years in the making!!
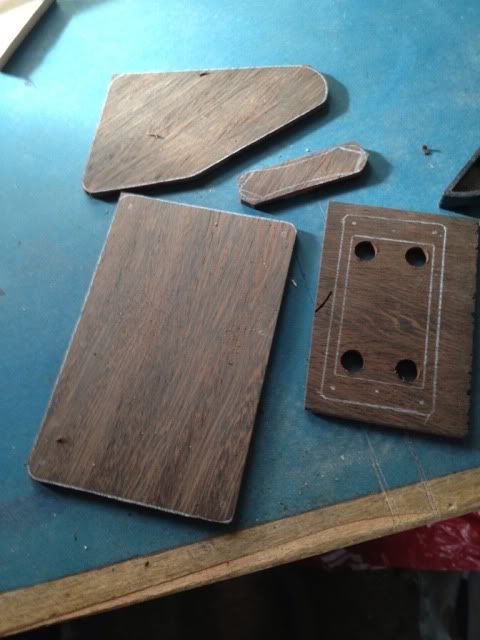
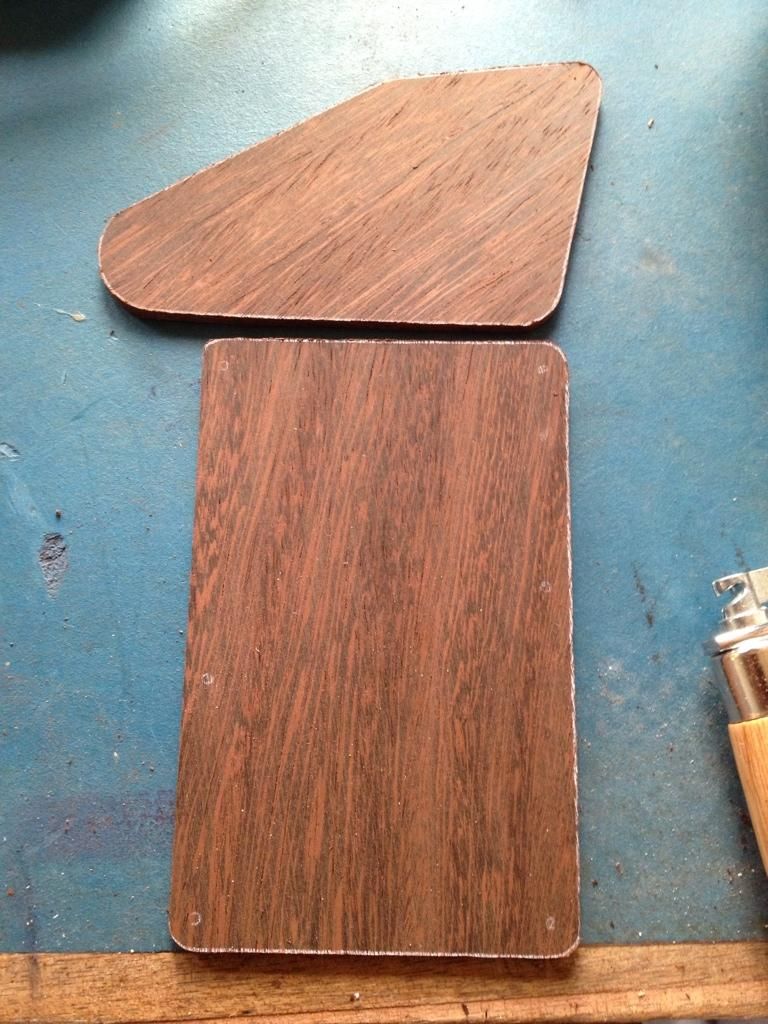
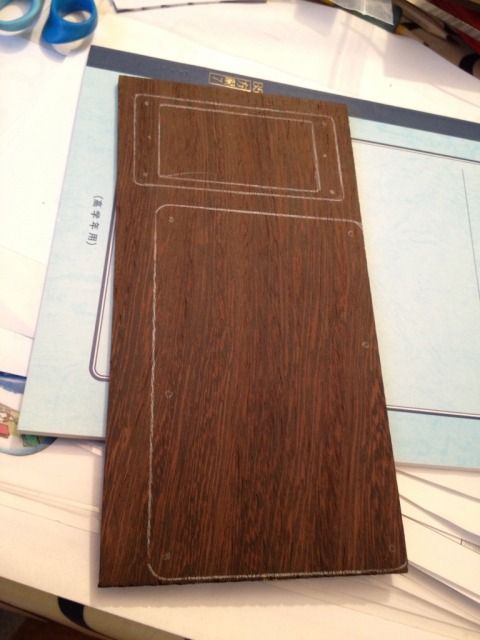
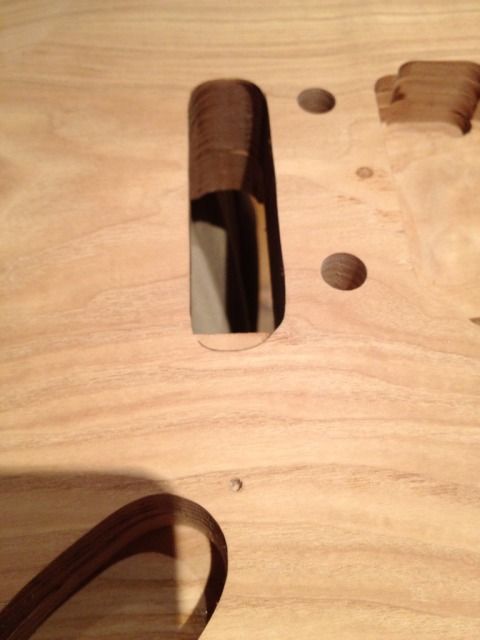
Finally got a cover made for the bodged switch channel...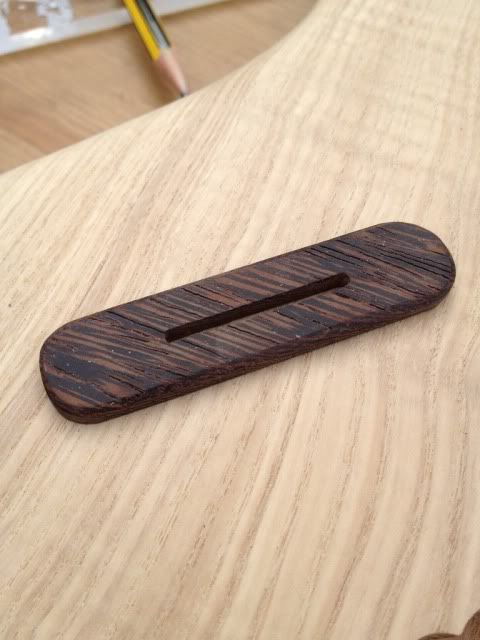
Still need to drill for the screws.
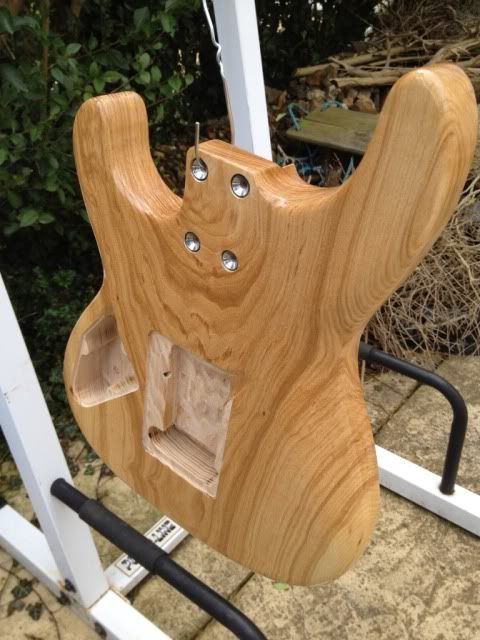
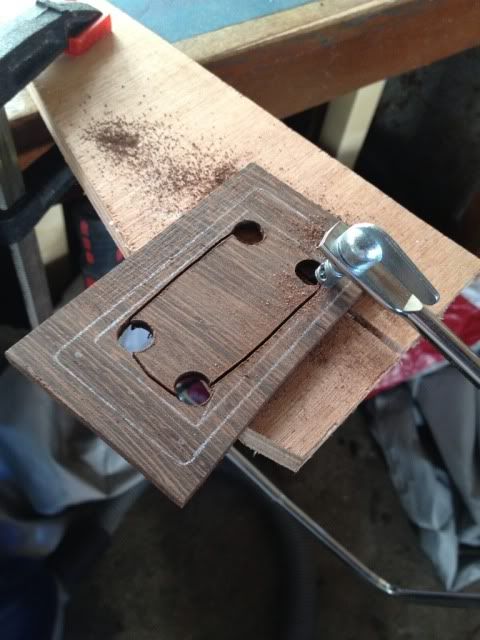
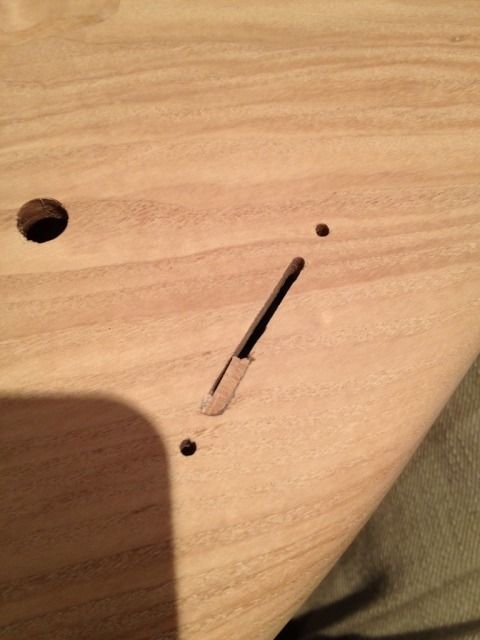
Routed the body for the switch. Had to do this freehand so it was a bit scary...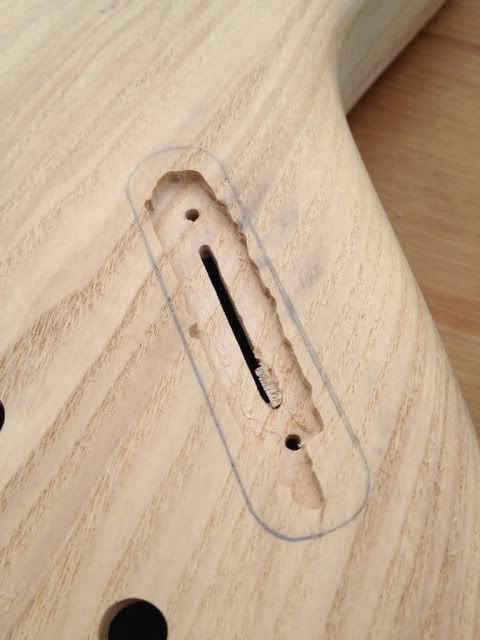
Tidied up...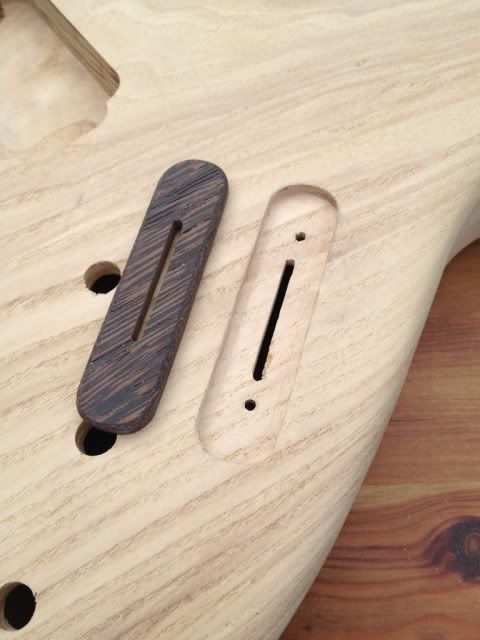
It's not quite perfect, there was a slight overcut on one of the corners. I'll probably fill this with wenge dust when I glue the switch cover in...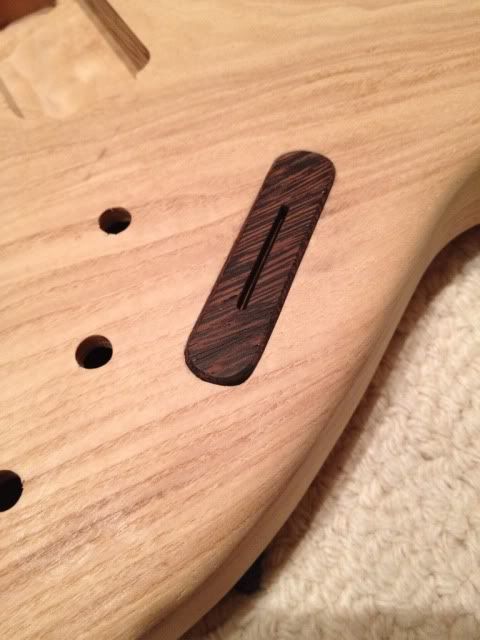
It's currently slightly proud of the front ofd the guitar. I haven't decided yet whether I'll leave it like that or sand it flush to the top...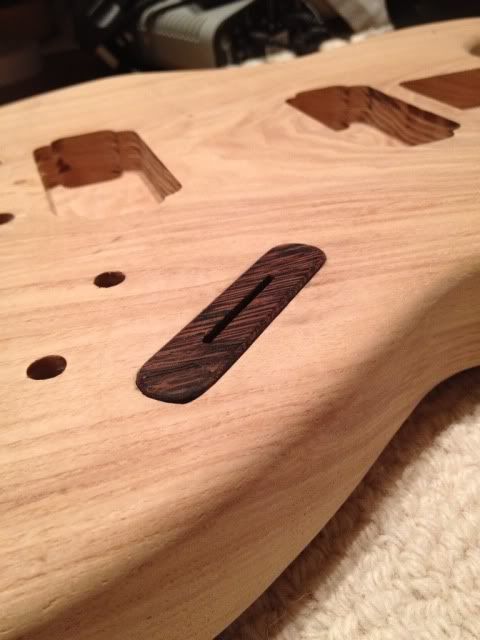
Quick mock-up. The pickup rings still need lots of work and are way to big at the moment...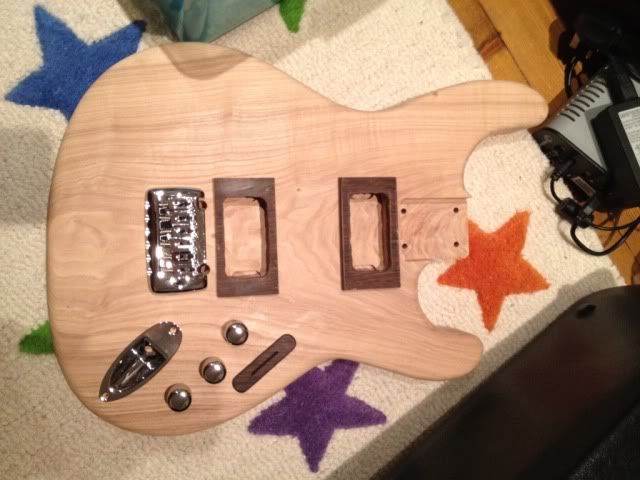
Not really liking the bridge anymore, too big. May change it, but as this is only supposed to be a practice build (albeit a very long one ) I may not bother...
Finish sanded the neck and got to work with the tru-oil. 1st coat...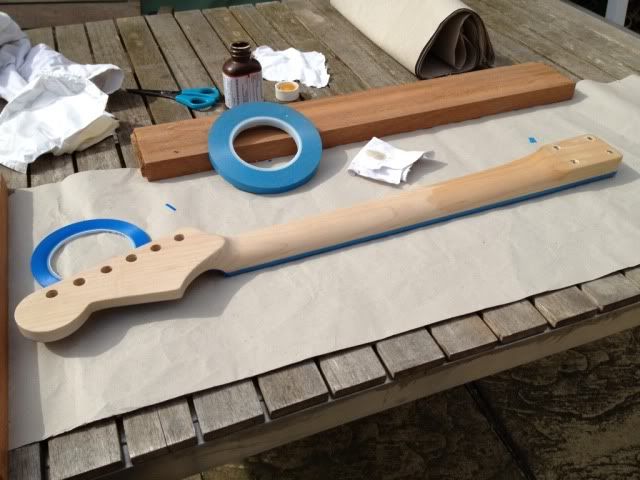
It's had five coats now, which should be enough, lightly rubbed down with 0000 wire wool between coats... It looks great. Will leave it for a couple of weeks to cure then will make a start with the nitro and waterslide decal for the headstock face. -
I like the pinstripe on the headstock. Happy accidents, according to the late Bob Roth.
What's the "x" mark on the HS for? do you still need to cut the truss nut access?
Yes, the access is there, just covered by the veneers.
-
More slow progress...
Had a bit of time finally, so got a few minor jobs done.
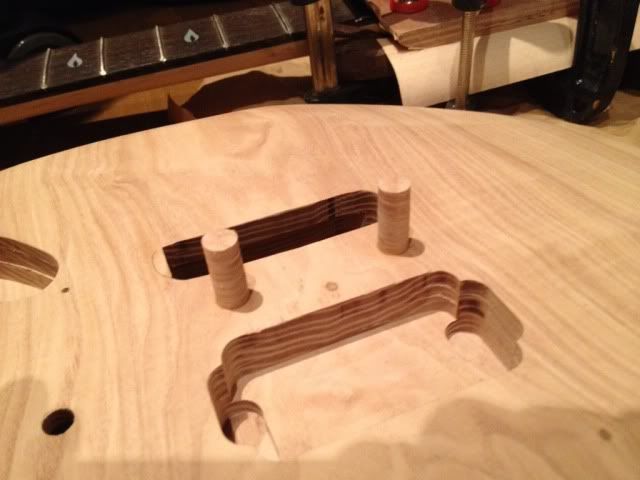
Redrilled the bridge post holes
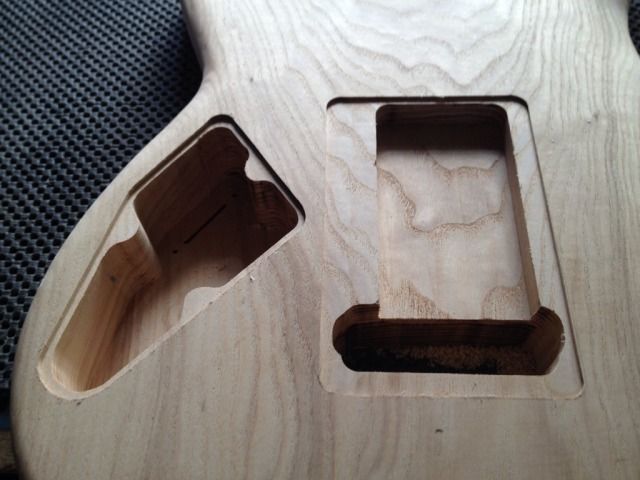
Deepened the tremolo rout, and cavity to accommodate the 4mm thick covers.
Just the switch cover left to go, then it's on to finish sanding.
Did a bit more shaping of the neck, then made a start on the headstock shape. I'm pleased with how this turned out, especially as it arose from a mistake.
Still a bit of tidying up to do, but happy with where this is going. Might even make this a signature thing...
-
A little bit more on No 1.
Got some veneers glued on to the headstock. Actually went better than expected (they'll probably fall off after I've got some finish on...
Plugged the bridge holes as I'd gone and used a 10mm bit and the bridge posts dropped in too easily, will get hold of a 9.5mm bit for this.
And had another go at the pickup rings. Laminating two pieces together with the grain going in opposite directions has made all the difference here. Only roughed out so far...
-
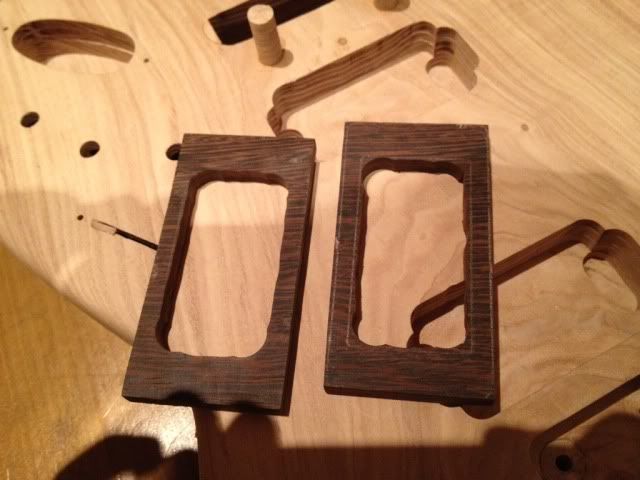
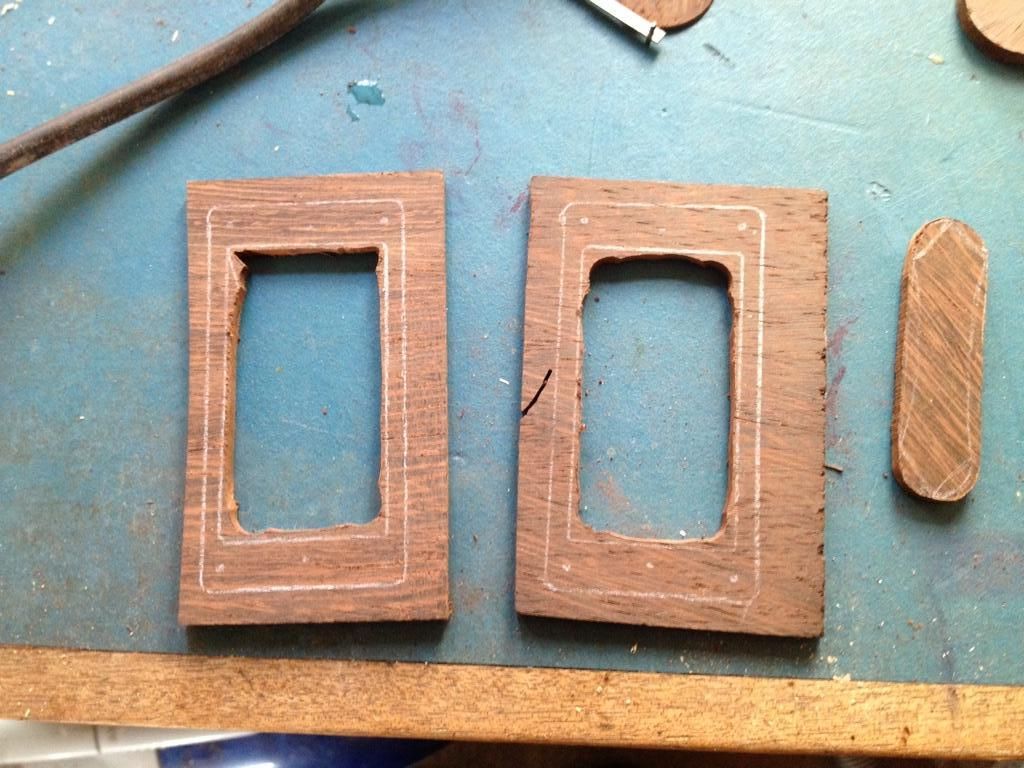
Actually managed to find an hour or so to get a the covers and pickup rings sorted.
Covers in place...
These are just put in place. They're still a little bit oversized and need to be sanded down to fit.
Pickup rings didn't go so well...
Unfortunately, they both broke when I was sawing out the middle. The wenge is only 3 or 4mm thick so I kind of expected this would happen. Luckily I have one more piece of wenge, so cut it in half and laminated it with the grain going in opposite directions. Should just about be big enough for two rings if I'm carefull.
Will have to wait until next weekend to get them cut out.
-
That is awesome. Really enjoyed watching this come together.
Top work!

-
Haven't had time to get much done on this lately, and now the weather's taking a turn for the worse

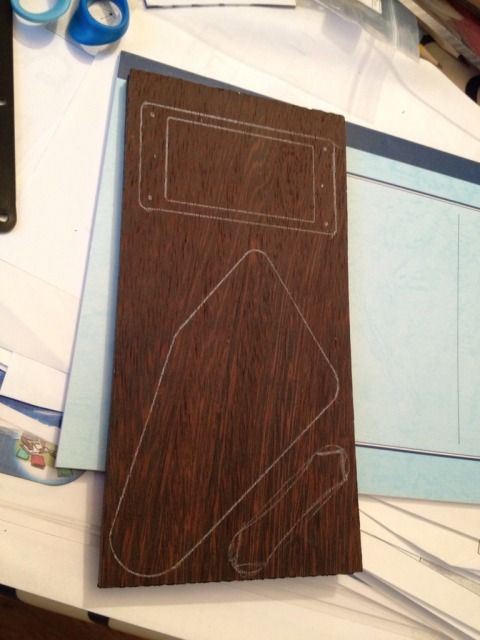
Bought some wenge headstock veneers which I will use to make cavity covers, pickup rings and a cover for the switch. No actual progress yet but have marked them out ready to butcher with saws.
-
Truefire have loads of great blues instruction courses ranging from beginner to advanced. You can watch samples of every course on the website.
Very good value for money IMHO
-
Liked. Maybe I'll se one of my guitars on there one day? OK, maybe not...
-
The site could use a pic of the previous months 'Guitar of the Month' as the background...
-
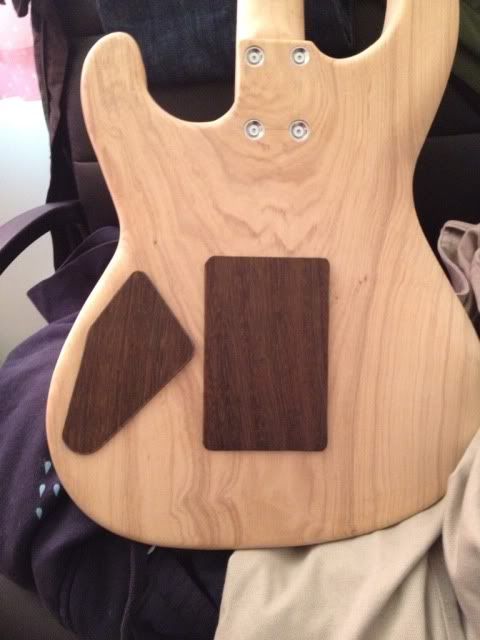
No more work done on this yet, but I did put it together for a quick mock-up.
Too much chrome?
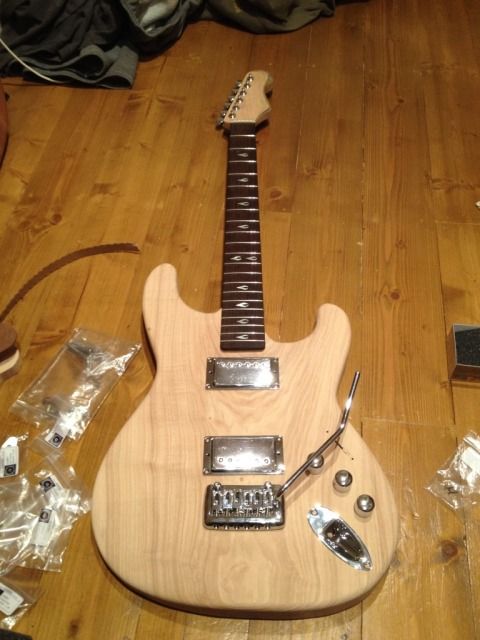

Also tried it with black pickup mounts...

...which I think looks better...
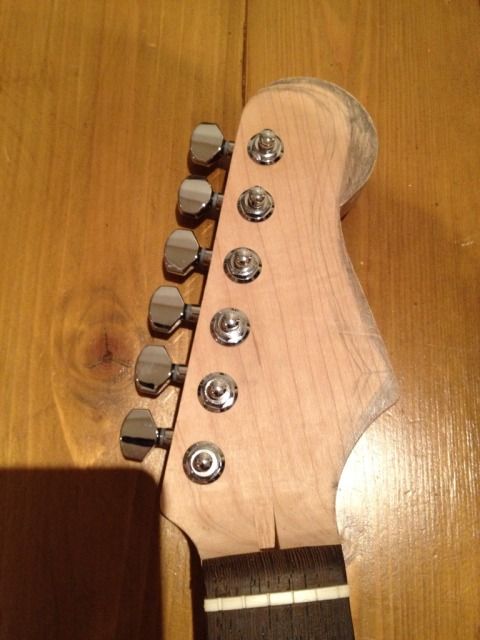
Machine heads still not perfect but much better than it was...
Decided on a different option. Have just ordered a 5mm wenge headstock veneer, which should be big enough to make two pickup mounts and a cover for the f**ked switch channel. Just have to try not to break it cutting the pickup mounts
Also have a couple of waterslide decals on their way.
Was originally going to call them Firewood Guitars, even had a cool(ish) logo but have since discovered that there is already a Firewood Guitars so I guess I was a bit late on that one...
-
worse comes to worse... http://i280.photobucket.com/albums/kk166/Slav123/1992%20S540%20LTD%20Sabre%20Custom/DSC01063.jpg you can do it like that!
Link doesn't work for me
-
Yeah, so basically they stick out like a sore thumb :-[...
Still need to re-cut the switch channel...
Not sure if a stain will hide these or not :-\
-
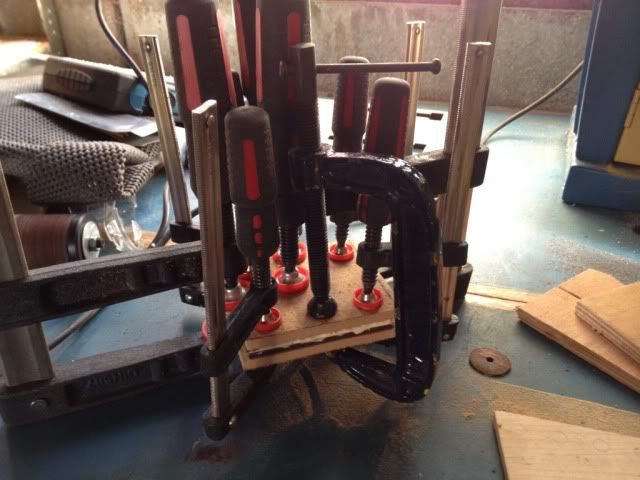
Got a little bit more done this weekend.
Routed the recesses for the control and tremeloo cavity covers. Made templates out of plastic for the control recess so had to prop them up so as not to cut too deep, worked fine though...

Did the tremelo rout with a straight edge rather than a template, again worked fine.
That's the good bit out of the way.
Made an attempt at repairing the bodges on the switch channel and tremelo rout...
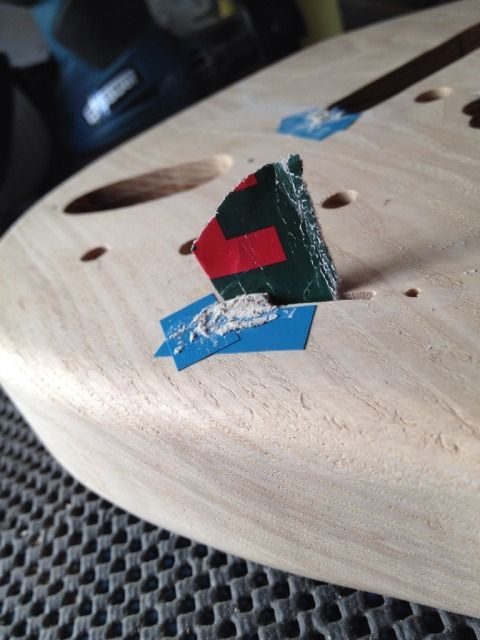
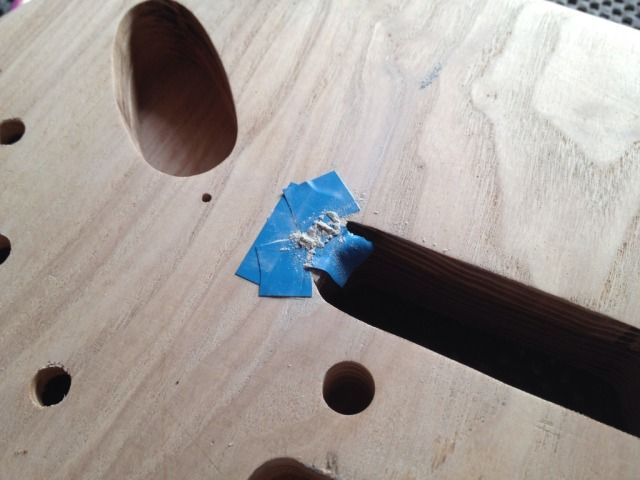
Well, it worked but it looks **** basically (no photos yet, will take some tonight). There's a very clear dark line at the glue join for the tremelo rout, which may or may not look worse than having the hole there. The bit I glued in for the switch channel looked ok when I stuck it in but after bringing it down flush the grain was in the other direction
-
My 8 year old son has started taking guitar lessons at school, and he needs to have his own guitar, so I'm gonna build him one. Anyone here built a 3/4 sized guitar?
From looking on the web it seems that 22.75" scale length is the norm, but what about body size, and neck width?
Would I reduce the neck width at the nut to accommodate small hands?
I might just buy him a cheap one to be getting on with, in which case I can take measurements from that.
Mind you, at the speed I build, he'll be on full sized guitars by the time it's finished anyway
-
I still REALLY want to do a black burst but I only have a spray paint can of Stew-macs gloss black clear. I wish I had a airbrush... GAH haha Does anyone know of any tutorials of how to burst with a spray can?
-
Yeah, you're right. Just getting impatient with this build as I started it back in 2010.
-
Another new build for 2012 ???
PRS Custom 24 copy
Body: Sapele (this things gonna be heavy!)
Neck: Brazilian mahogany, scarf joint (not done this before so hope I don't f**k it up...)
Fingerboard: Richlite (gonna give this stuff a try)
Inlays: Black MOP notched diamonds or birds possibly (if I can be bothered to cut them)
Bridge: Gotoh 510 Wraparound
Pickups: ?
Tuners: ?
Finish: Shiny

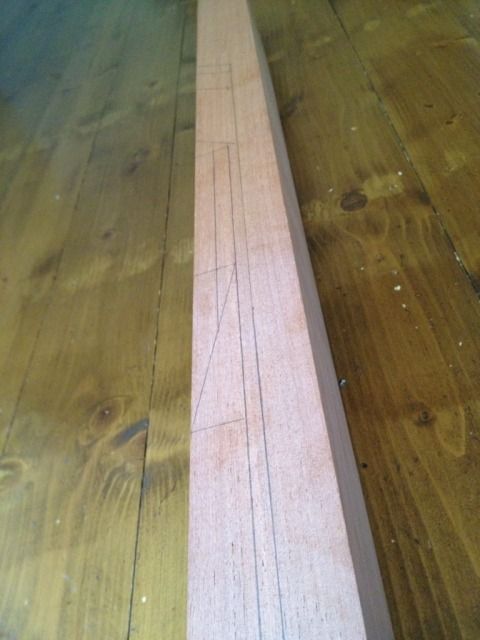
I though I might only get one neck out of this blank due to the fault, but as long as it doesn't run too deep, it falls outside of the blanks I've marked out
Have to do scarf joints though, something I've never done before. Saw a pretty cool (and simple) sanding jig on youtube for the joins, so will probably copy that.
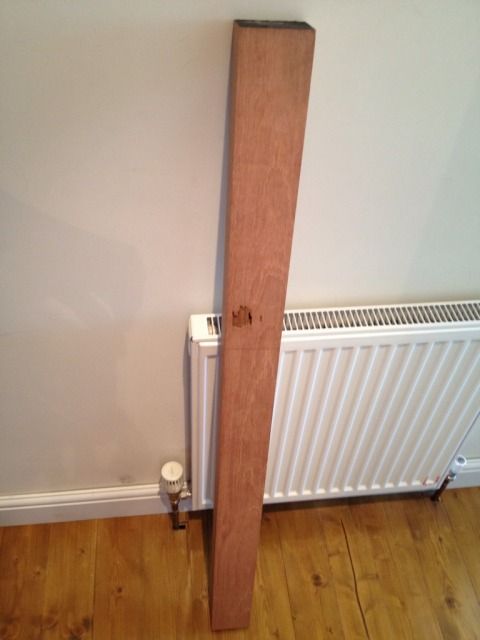
Finally going to use the huge sapele body blank i got a year or so ago. Thing weighs a ton!
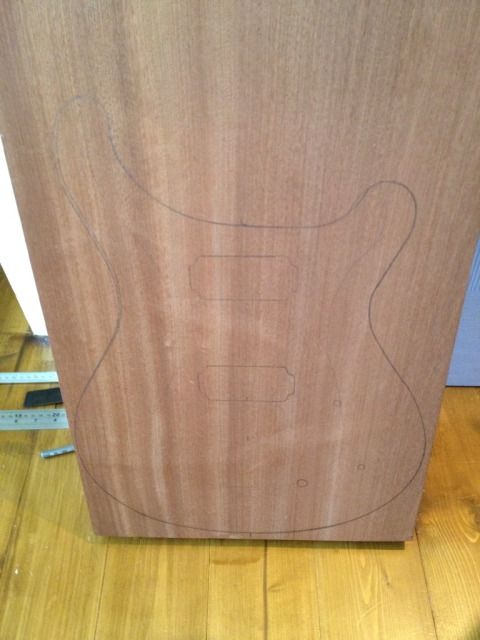
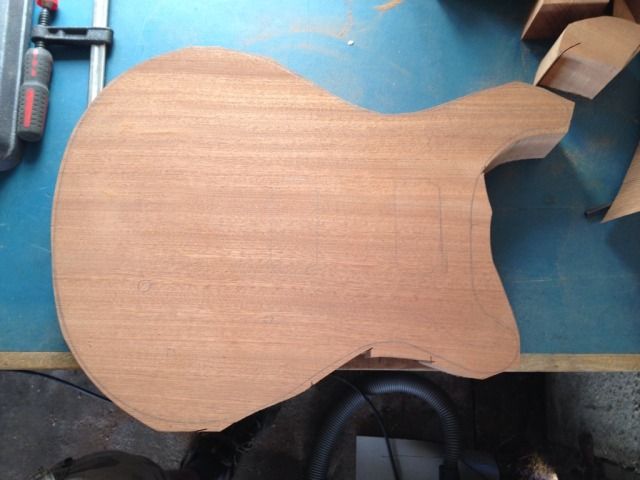
Got the body rough cut. My little bandsaw really struggled with this, not looking forward to cutting the neck out
That's it for now. My main focus is on getting my first build finished, so progress will be as slow as ever on this one...


 ...
...


The Fool Guy's First
in In Progress and Finished Work
Posted
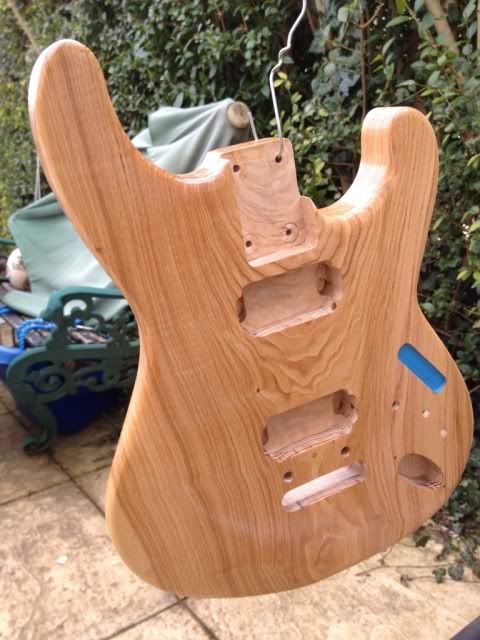
Almost forgot, body after 7 coats of Tru-Oil...