


plinky
-
Posts
102 -
Joined
-
Last visited
Content Type
Profiles
News and Information
Tutorials
Product Reviews
Supplier Listings
Articles
Guitar Of The Month
Links and Resources
Forums
Gallery
Downloads
Posts posted by plinky
-
-
-
I may get an eq, but first I'll need an amp. The peavey was never ment to be.
I wouldn't give up on the Peavey just yet. Grant it they're not a Bogner or Boogie,
but they're usually good bang for your buck gear. You said your going for metal?
What are your settings on the crunch or Ultra channel?
FYI, I still have my old ss Stereo Chorus 212. I use it every day for practice, and I've
auditioned for bands with it (just amp, no effects). 100 watts, and it's just as brutal as
an Uberschall.
-
Can't really see any imperfections from these pictures, but I can understand being your own worst critic. Still, nice job. Hopefully my first true build (whenever I get to it) looks this good.
-
Nice job man. I only hope mine turns out half as good, lol.
Do all your woodstaining at the same time and you'll top me.

-
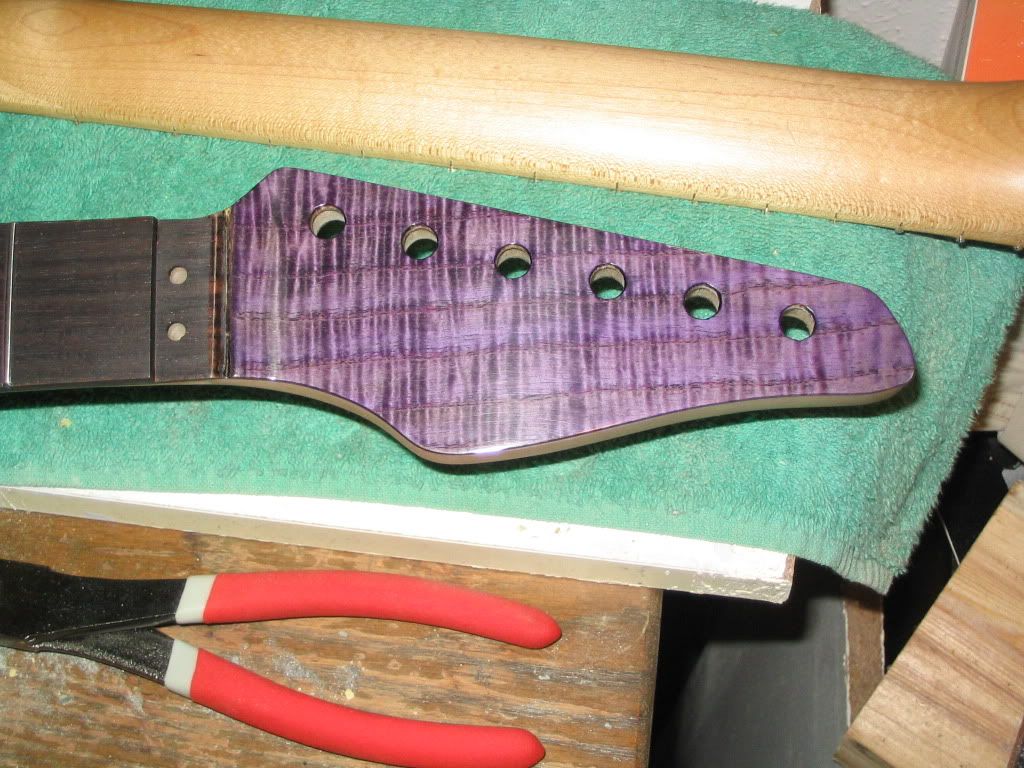
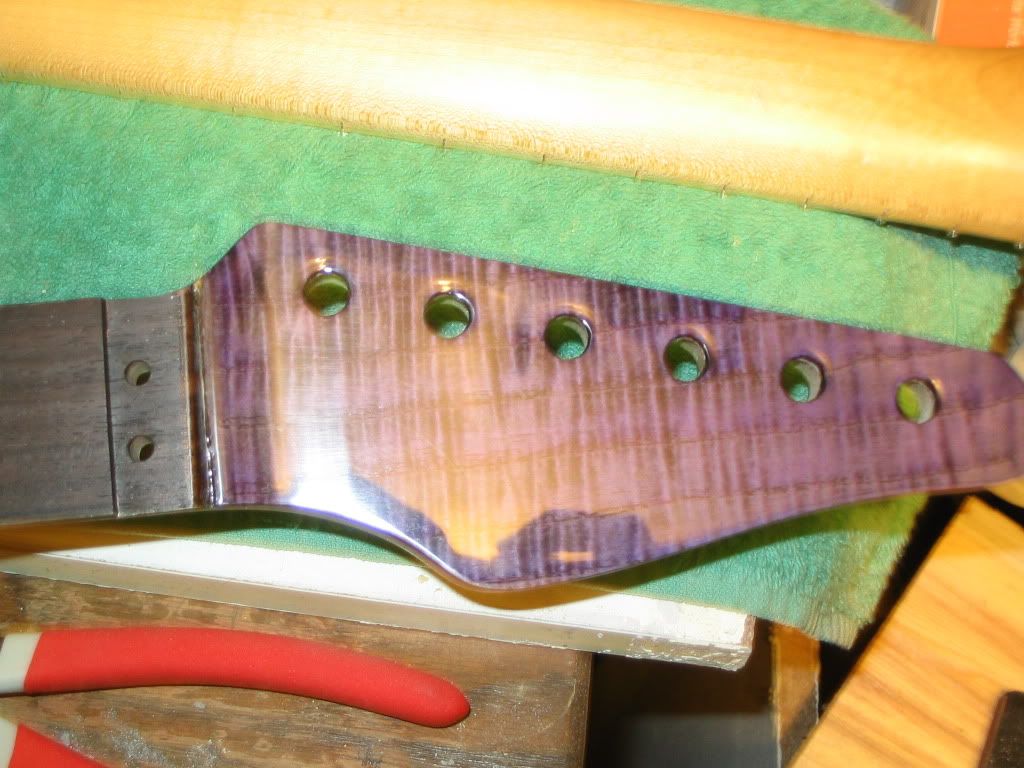
that looks like curly ash? no?
Flame maple veneer, bought from Brian.
-
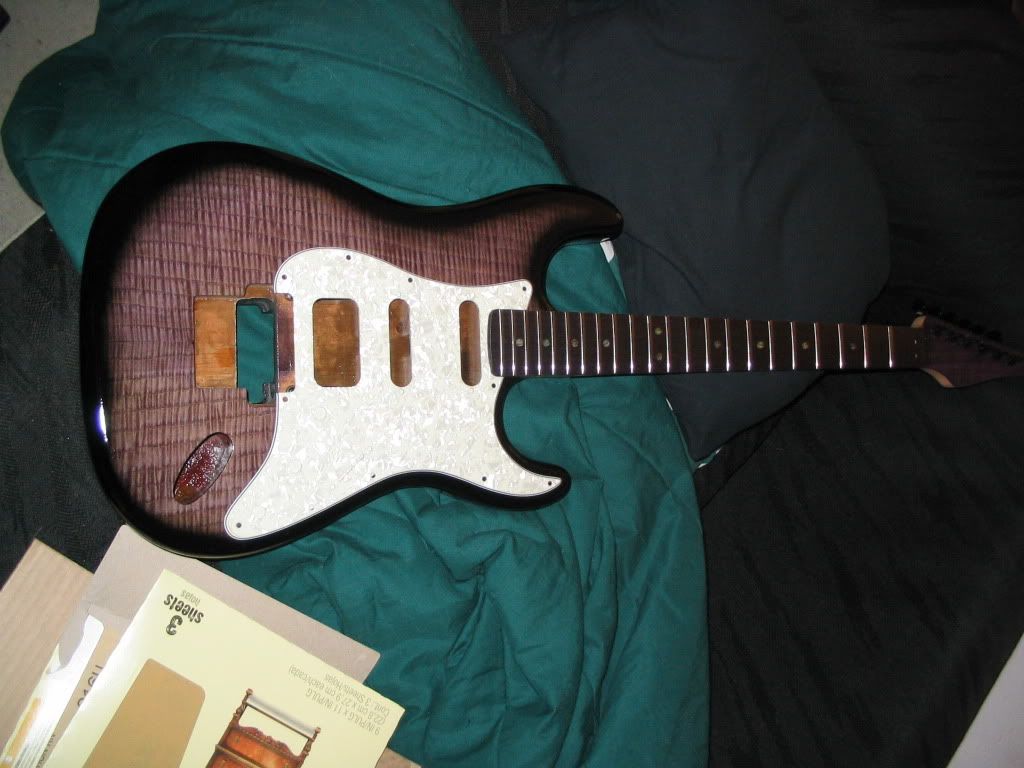
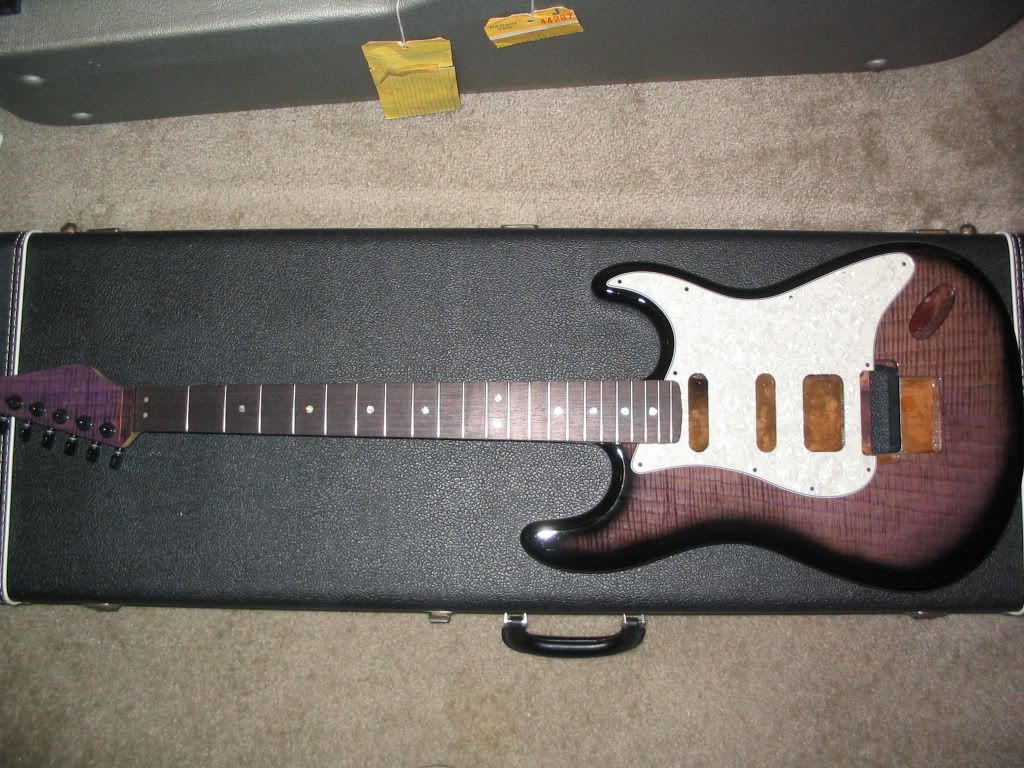
Into the tweaking stages, but this project is, for the most part, done. Definitely learned a lot from this project (and this forum - thanks a bunch).
The bridge & neck need some shimming for lower action, but it plays pretty good out of the gate. The pickups sound great so far (Breed bridge,
Virtual Vintage solos). Should have it gig ready by next week.
-
If you live in the San Antonio, TX area and want to try #3, give me a shout! I am there between today (10/10/10) and (10/13/10).
Darn it. I have to work! Take a quick trip up to Dallas this week so I can check it out. ;D
-
I recently added a Dimarzio "Chopper" to the neck position of a couple of guitars that also have a Tone Zone in the bridge and I'm very happy with the tone of the "Chopper"... articulate and smooth.
The Chopper isn't far off from the Cruiser in that they are scooped tonally. I want to try something that's more mid range, and the Virtual Solo is just that. I'm still not totally sure about the Tone
Zone either. It's kind of a toss up between that and a Breed. I had one of those in a Strat I built and I really liked it too. So many pickups, so little money. ;D
-
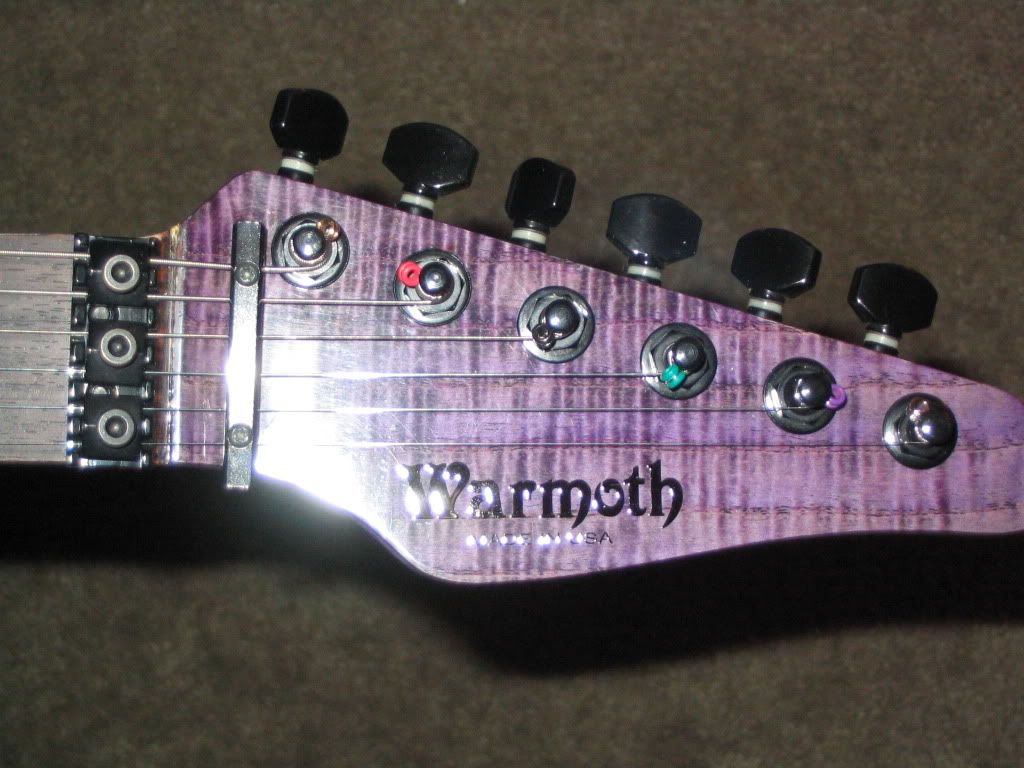
I can't be the only one wondering... what does the 'F Spaced' sticker on the pup case mean?
The pole pieces are spaced for a Floyd Rose tremolo.
-
Great to see so much use of hand tools, craftsmanship.
Absolutely.
-
Build an AT100 clone? ;D
-
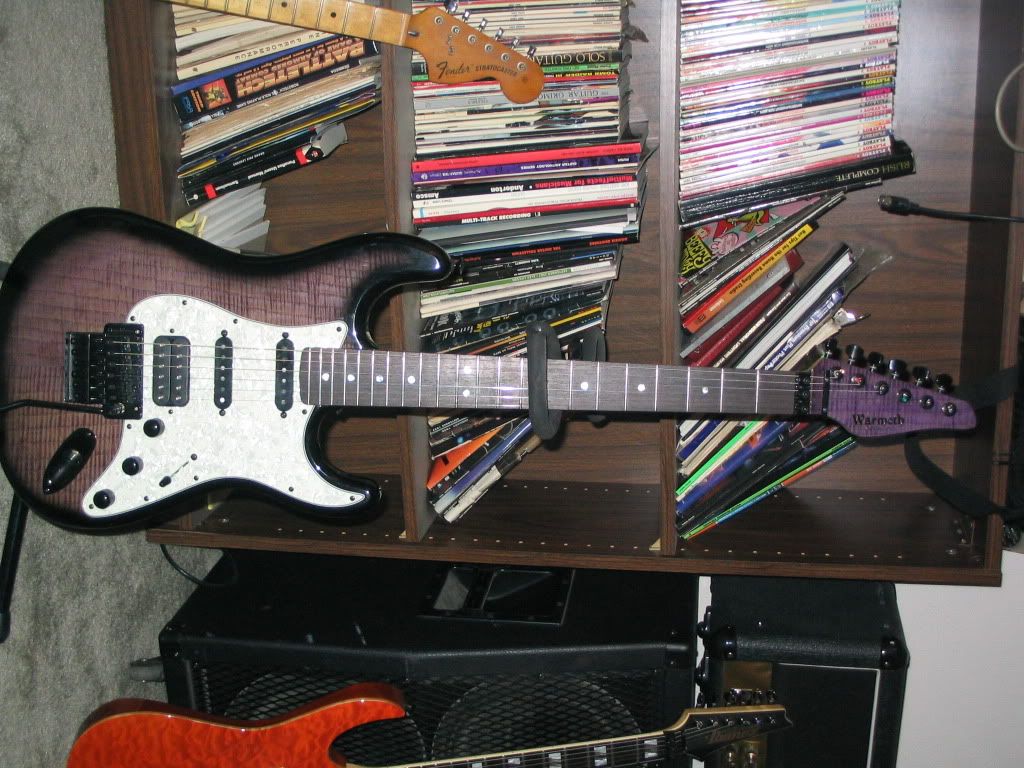
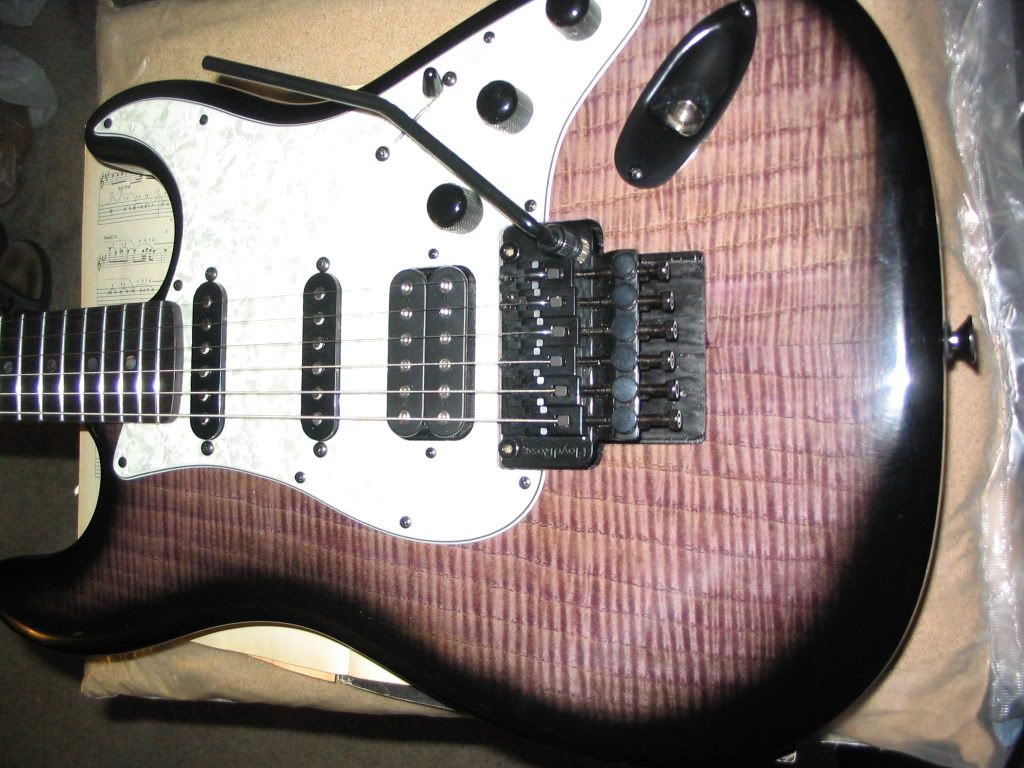
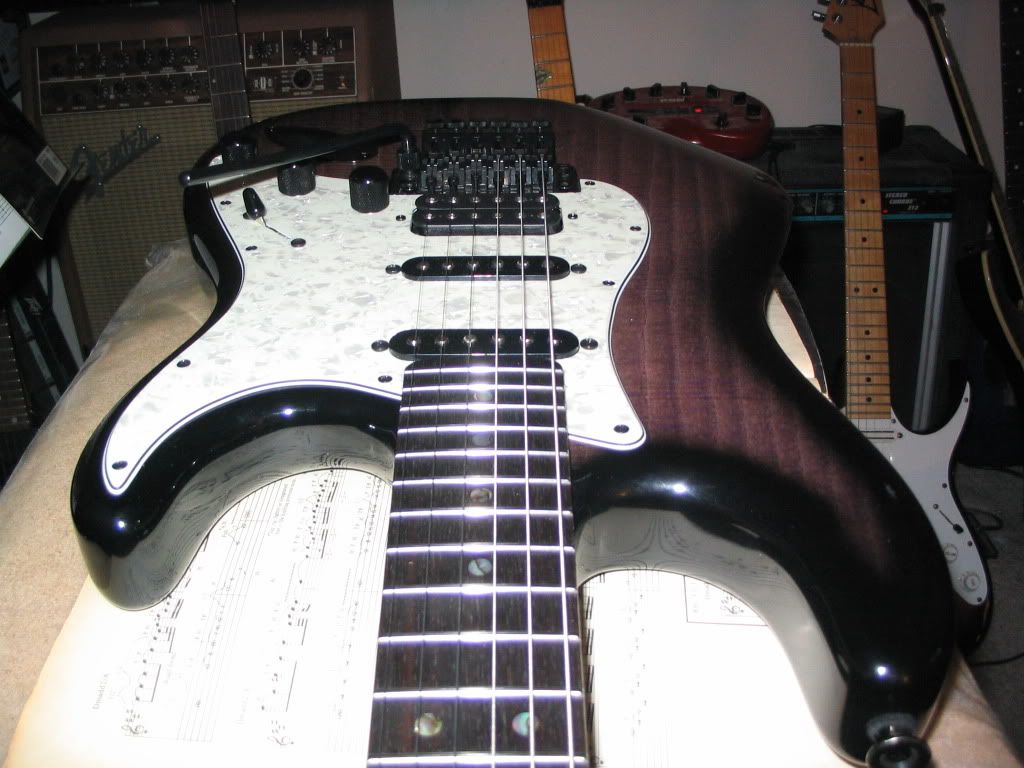
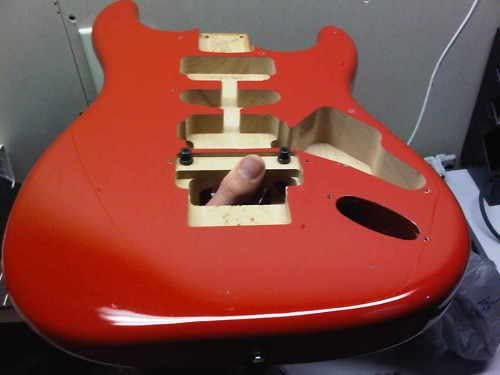
A quick mock up to check progress. Screwed up the burst and had to sand and start all over.
Managed to get some clear on the body finally.
Should get the rest of the hardware ordered this weekend. Gonna try a DiMarzio Tone Zone in the
bridge and a Virtual Vintage solo in the neck & mid positions. I want to try something a little less
bright than the Cruisers and Jeff Beck I normally use.
-
All digits present & accounted for.
I robbed that before pic from the auction on Ebay.
-
On the homestretch now. The neck is done, only waiting for hardware installation. The body is awaiting the final clear coats before polishing.
It will still be around December until I get all my parts in for it (pickups, pots, etc.).
A quick reminder of what this guitar started as. Follow the Facebook link to watch the progress.
-
Before
After
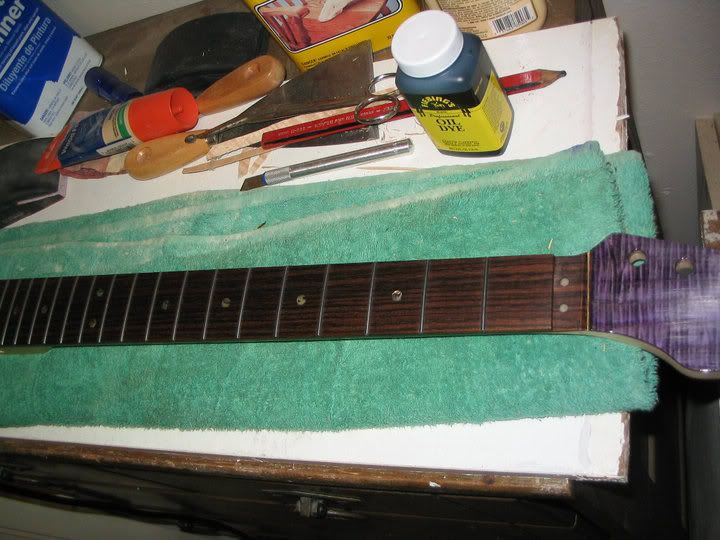
Can't remember, but I think this was just one coat. I'm sure it would get plenty darker with more. Since your neck is bound
you probably won't have the same problem as I did. I sanded the finish off the side of the rosewood fretboard to dye it.
I let it sit for a little to set in. I had no problems with the inlays on the face of the board, but the side dots started to soak in
the dye. I was able to sand it out luckily.
Definitely wear some gloves. This stuff is nasty and will stain anything it touches. Don't use a rag like I did. Get a dauber or a
small brush like Stew Mac recommends.
-
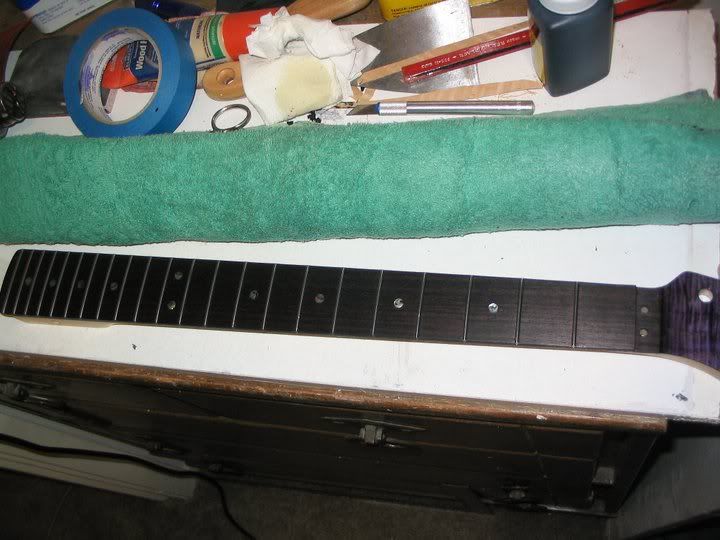
Watch that leather dye. It stains ANYTHING!
I just dyed a rosewood fretboard with it a few weeks ago and it started to discolor the side dot inlays. Test a little bit
out on an inconspicuous spot first. It says it doesn't stain the inlays, but better safe than sorry.
-
I talked with a dude at a local guitar shop. He's their in-house tech and also works in a car finishing place. As he does the setups of the guitars that come in from the various factories, I talked with him about how finished necks usually come in from the factory. Unless it's a REALLY high-end ax, they all have the finish applied right over the frets. He's hound that the finish will eventually come off of the fret on it's own without chipping away from the fretboard.
With this knowledge in hand, I'm just going to brush on more shellac and let the frets take care of themselves. The finishing pads I use are pretty spongy, so I don't figure I'll have too hard of a time buffing it all out.
Worst case scenario: it looks like crap and I have to pull the frets and start over.
I read somewhere (in an Erlewine book I think) that Fender used to take a nail with a groove filed in it to remove the finish from the frets.
I don't think they do that anymore because I did a fret level on a Strat Plus that had tons of leftover finish on the frets. I just gently scribed
and scraped it off with an Exacto knife blade.
Nice work BTW.
-
The Wilkinson VSVG is the best 6 screw Strat replacement bridge around. I have 3 of them and they are awesome.
Will it stay in tune like a Floyd? Not totally, but when set right you can slam the bar to the pickguard and bring
it back with all strings in or almost in tune. I'll use anywhere from 3-5 springs depending on the guitar.
-
Harbor Freight tools also sells a 1-ton arbor press for under $50. Looks just like the StewMac one less the hole drilled in the ram for the fret press caul.
-
That top wood is awesome. It looks like there's a million faces in it.
-
Wanted to start learning how to refret a neck properly, so I started on the neck.
While waiting on fretwire and a few tools, I started stripping the old sealer and burnt gunk off the neck.
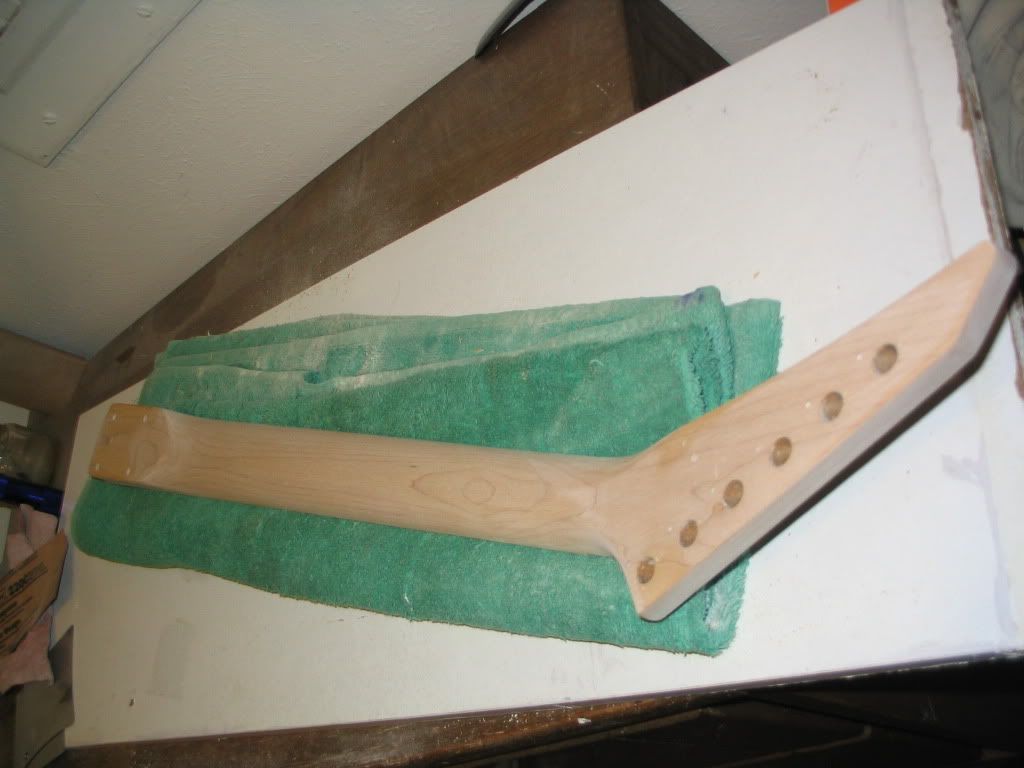
Some light level sanding, and a little spot sanding to get most of the burnt wood off the headstock.
Filled in the voids with some wood filler.
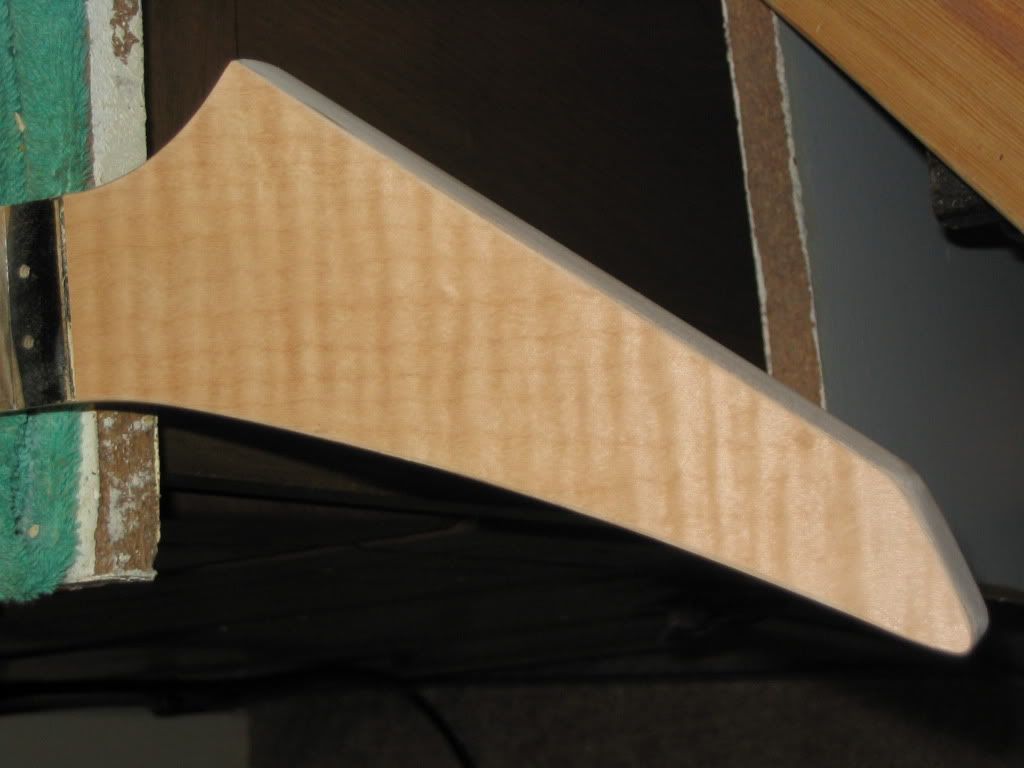
After some level sanding, I laid on some scrap veneer I had laying around so I wouldn't have filler
on top, waiting to get dinged.
-
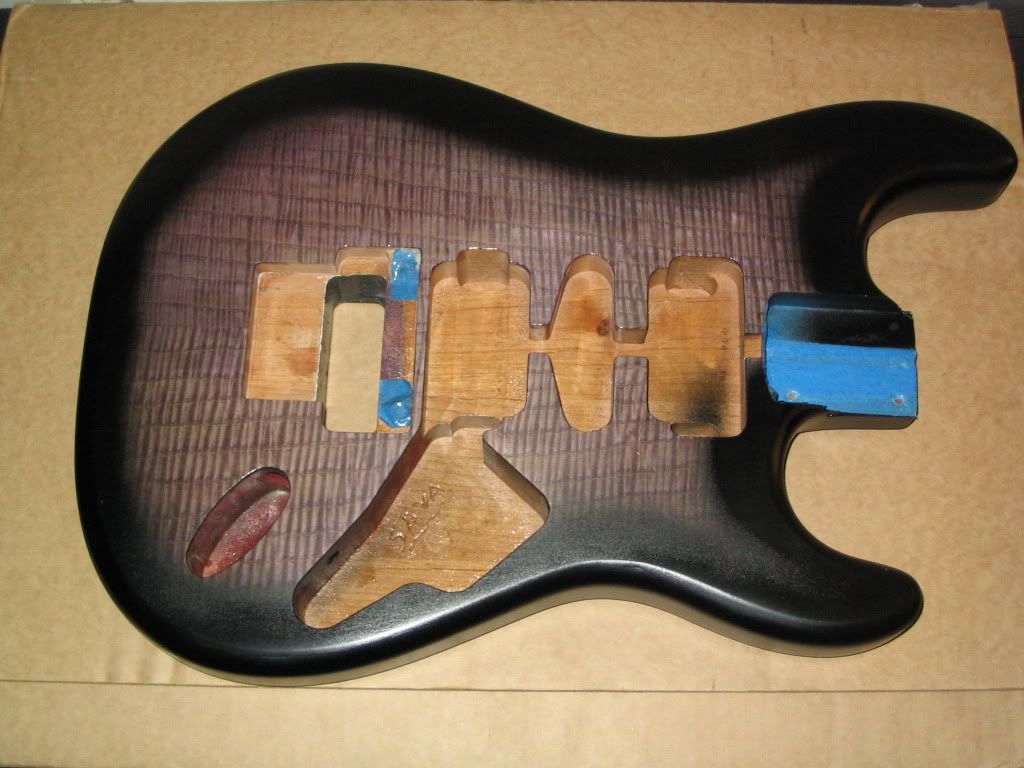
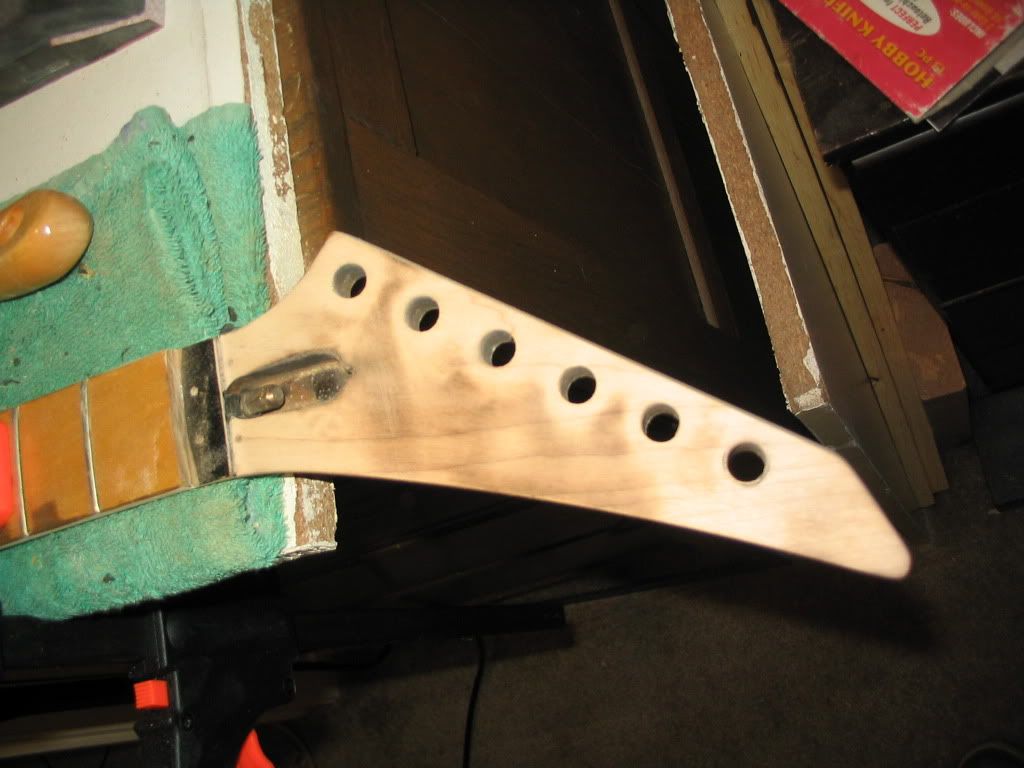
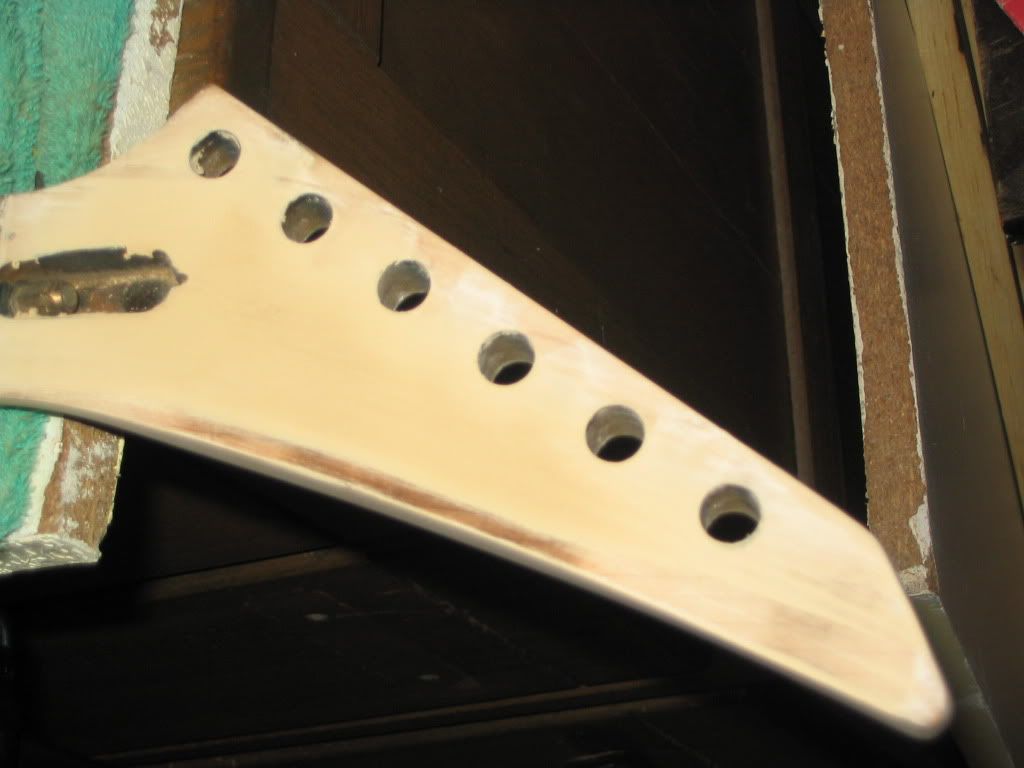
Received this "gift" from a friend who I helped move. He couldn't carry everything, so was forced to get rid of some stuff.
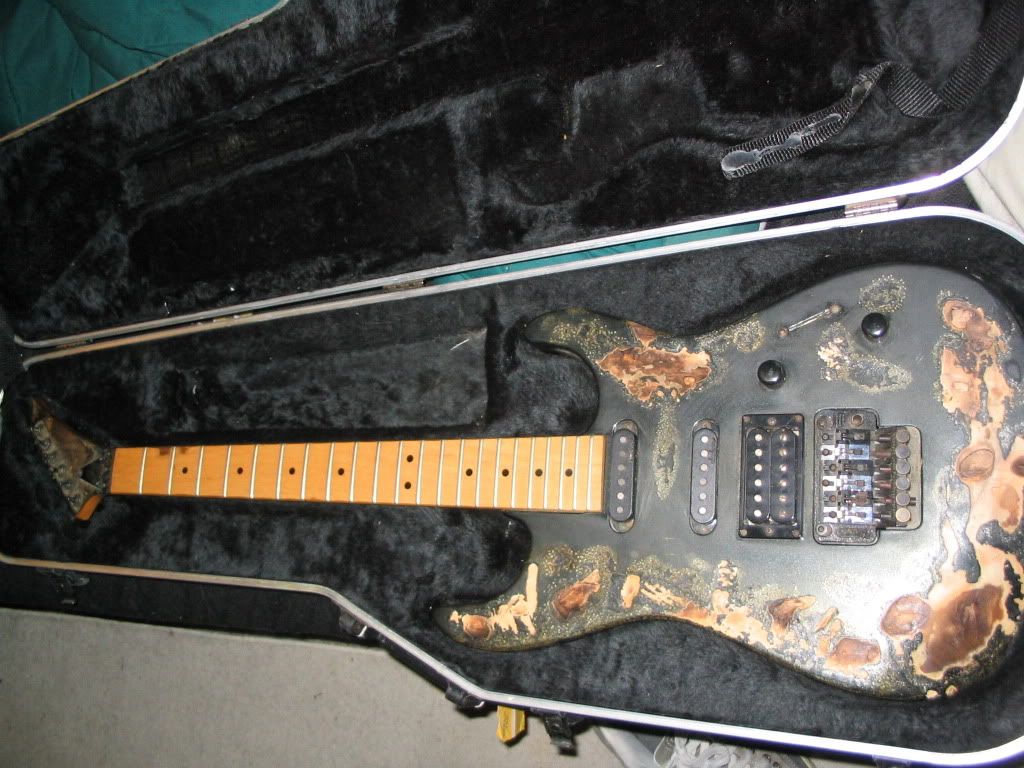
Apparently someone tried the "Hendrix" approach to guitar finishing and wasn't successful. Not sure what I'm gonna do.
The burns go pretty deep in some spots, so this would definitely be a good way of perfecting your wood filling skills.
I thought about filling them in with clear lacquer stick and then clearing the whole body and neck, but the more I look at
it I may just fill them in with regular wood filler and try another veneer top or some other finishing technique (swirling
comes to mind). Any suggestions?
The neck is in good shape even though the headstock received the same "burn in" treatment, so it's a bit uneven in
some spots. A good project to hone my refretting skills (Stew Mac jumbo fret wire on the way). Still a good score for
free.
-
I'd love to try the tremolo version of that bridge. XE.com put it around $581 USD. Ouch! Still...nice piece of work.
-
You can shim the string saddles to match the 14" radius you have. Just sayin...

Build #5
in In Progress and Finished Work
Posted
Cool. I was thinking about buying one of those for my Dremel. Do you think it's worth the purchase or would it be better
to just buy the Stew Mac router base?