


iluvteles
-
Posts
236 -
Joined
-
Last visited
Content Type
Profiles
News and Information
Tutorials
Product Reviews
Supplier Listings
Articles
Guitar Of The Month
Links and Resources
Forums
Gallery
Downloads
Posts posted by iluvteles
-
-
I have a Ibanez ST50 which I have owned since 1987 but it was built in March 1980 so it now 34 years old. The frets are a bit worn so I have decided to make a new version. I'll stick to the original body shape but change the headstock as I have always though the original Ibanez headstocks were a bit big. I'll do a new one a bit like a PRS.
I have made a start by gluing up two bits of Padauk which I'll chamber before gluing on a bookmatched figured Walnut drop top.
I'll post some photos once I figure out how to post photos. I've tried copy and past from Photobucket but does not work. It used too but not any more.
-
+1 for the tasty burger. The finished build is going to be stunning.
-
Thanks Scott. I've just had a Gin and Tonic and a play of classic Rush. Good on both accounts
-
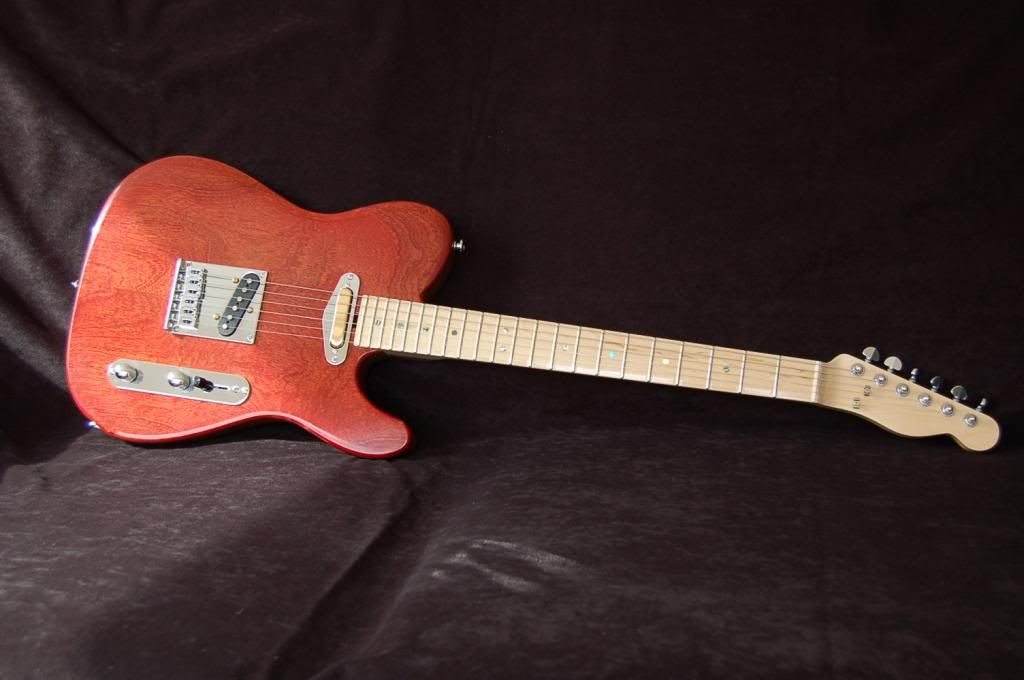
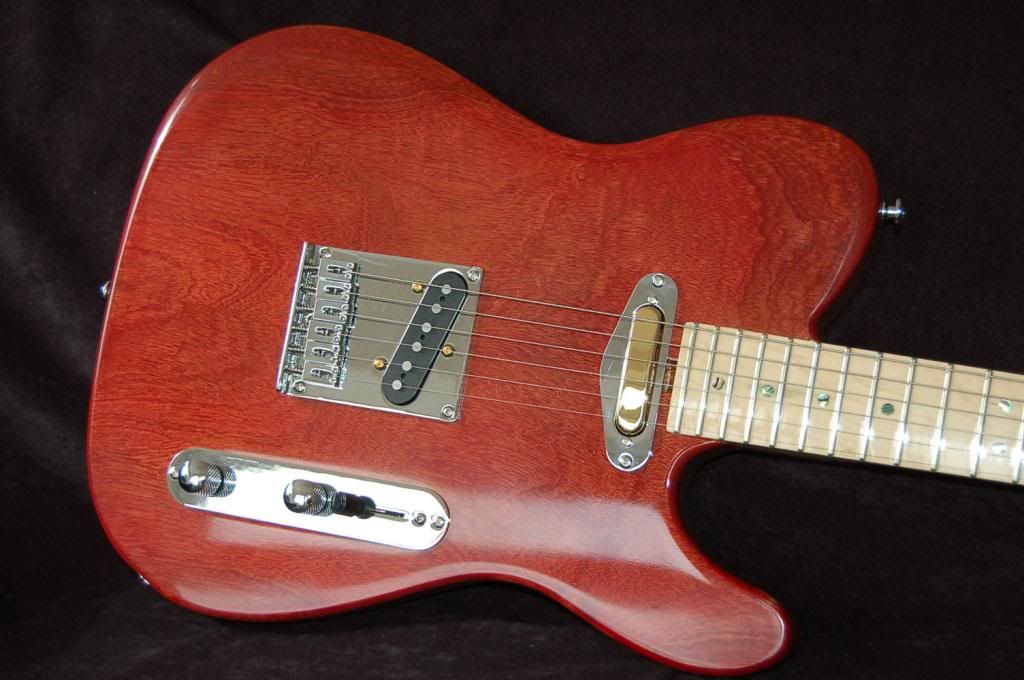
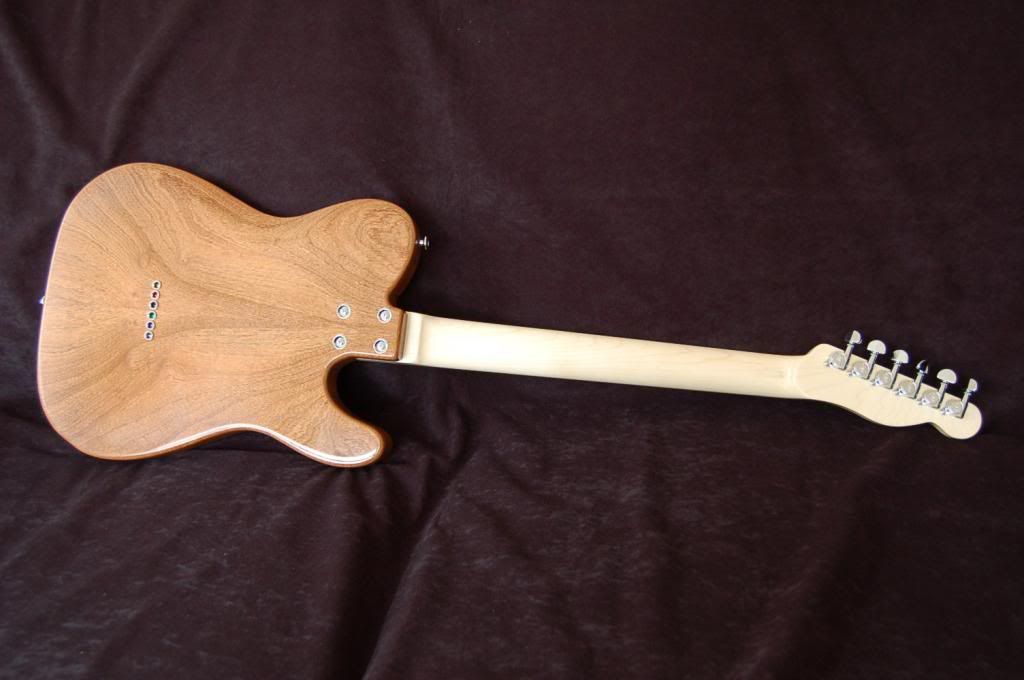
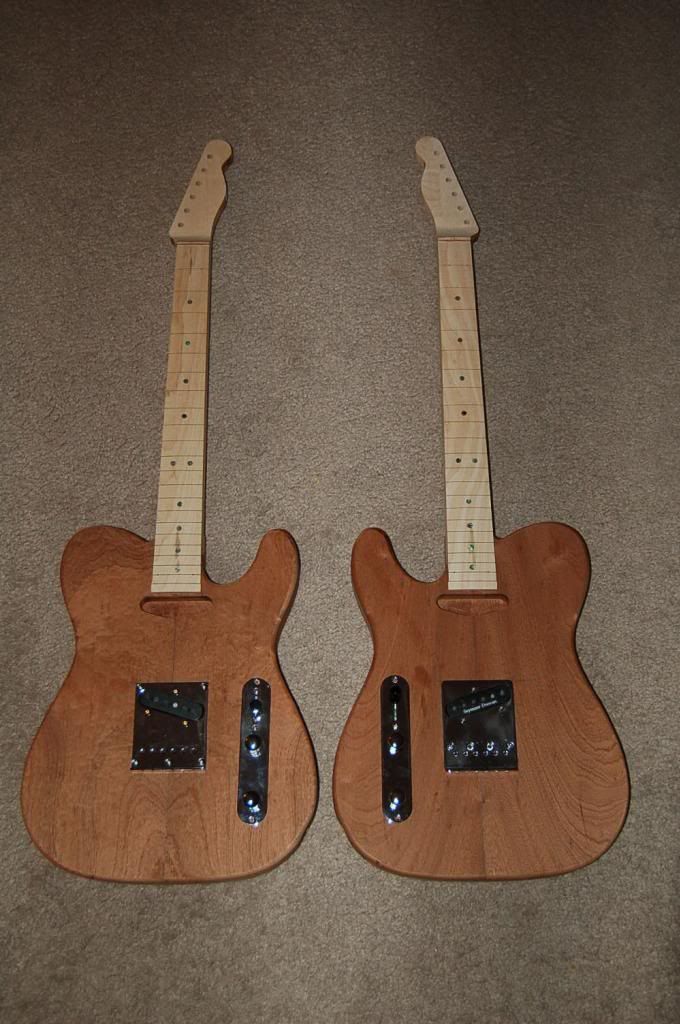
The right handed is now complete. Its a cheapocaster but plays very well. Very bright sounding like a vintage tele. It does not look like a £100 guitar but I made it alongside the left hand as a practice guitar. I'm going to put little stickers on the fretboard so I know where all the notes are. It will spoil a good guitar but that's why I made a cheapocaster.
-
That's very neat work on the inlays. Its going to be a stunning neck.
I've only used ebony once and I used black methanol stain. Worked a treat. I share your love of jet black ebony.
Keep up the good work.
-
I am a bit hard on myself sometimes but I do want perfect guitars and I get frustrated with myself for not making that fault free guitar. My problem is I rush things or don't step back and ask myself what is the best way to do this. Having said, my brother thinks his new tele is 100%. Its just what he wanted and at the right price i.e. dirt cheap.
I just need to complete the right hand tele now. The problem is I'm finding it difficult to get scres that fit through a metric ring and through a imperial pickup and have a nut. I like to fit a nut as I don't thin a little bit of plastic holds together very well. AND this is a cheap guitar so more more money can be spent. There lots of old tins at work that have odd small nuts. Its just a case of finding two.
-
Thanks for the kind words ScottR. I forgot to say that the hardware for this guitar came from my brothers old Tele from 2009. So the only things that need to be paid for was the wood, lacquer and fret wire. I don't know how much it has cost but its probably around the £60 mark.
-
The left hand is now complete and will be given to its new owner, my brother tonight. Since its left handed I wont know now it plays. Due to its chambered body its not very heavy and it sustains well. Its a shame I cant give it a good blast.

-
 1
1
-
-
I've knocked back the neck lacquer with a 1500 Siasoft foam pad and that's it as I want the neck back to be a smooth finish and no thumb drag. However I have buffed everything else with a foam pad in a had drill wetted with water and 3M Finesse-It cream. Its looking good. Good feel but not too glossy. The frets have been finished by masking off the fretboard and going over the frets with my fret leveller. Then using the same technique as the PRS video on utube go over the frets by hand using Siasoft foam pads until they are rounded over and shiny. Good results.


-
The nut is out of the slot and in bits in the bin. Had to just bash it with a screwdriver in the end.
£3 for a new nut so its not that bad.
I wont use superglue again. Maybe just a bit tightbond so it wont dry so quick.
It was the right thing to do.
-
The glue was "Krazy" super glue.
I'm just going to have to bite the bullet and get this nut out because if I dont it will bug me forever.
-
I've not done much work on these over the last month. Got the necks shaped but dropped a big clanger gluing the nut in on the left hand. Its got a big gap and the glue has set. The problem was that the glue set so fast when I was trying to align the nut in the centre.
Its stuck solid so if I try and knock it out it way split the fretboard.
I was going to fill the gap but I'm concerned that it will suffer in tone and sustain.
What does the forum think??

-
Never done an update for a while but there is not much to tell. Here goes.
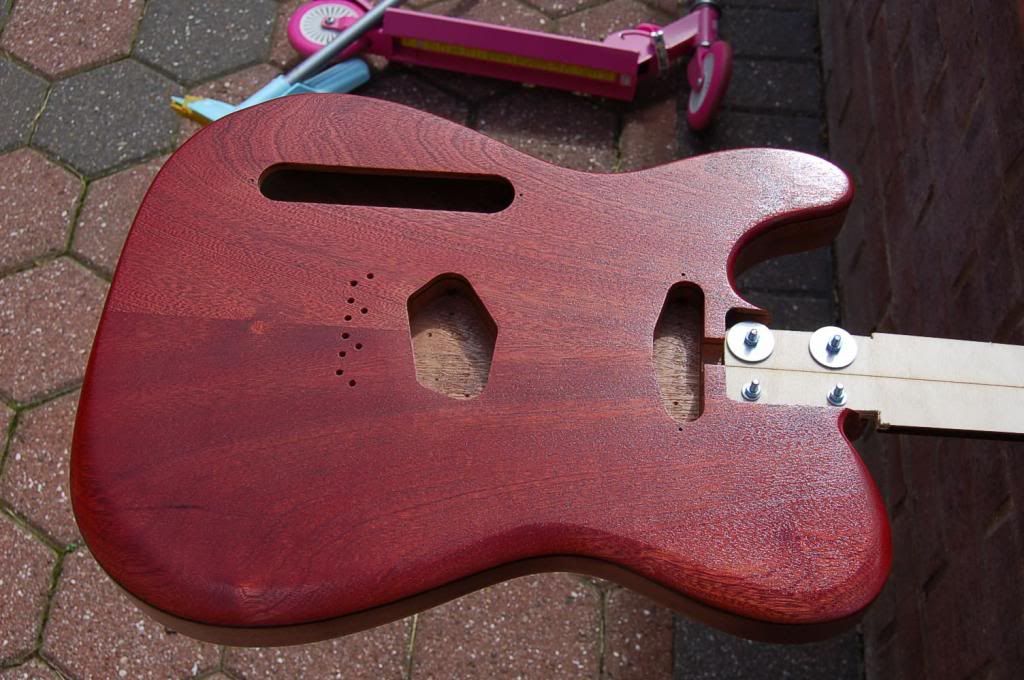
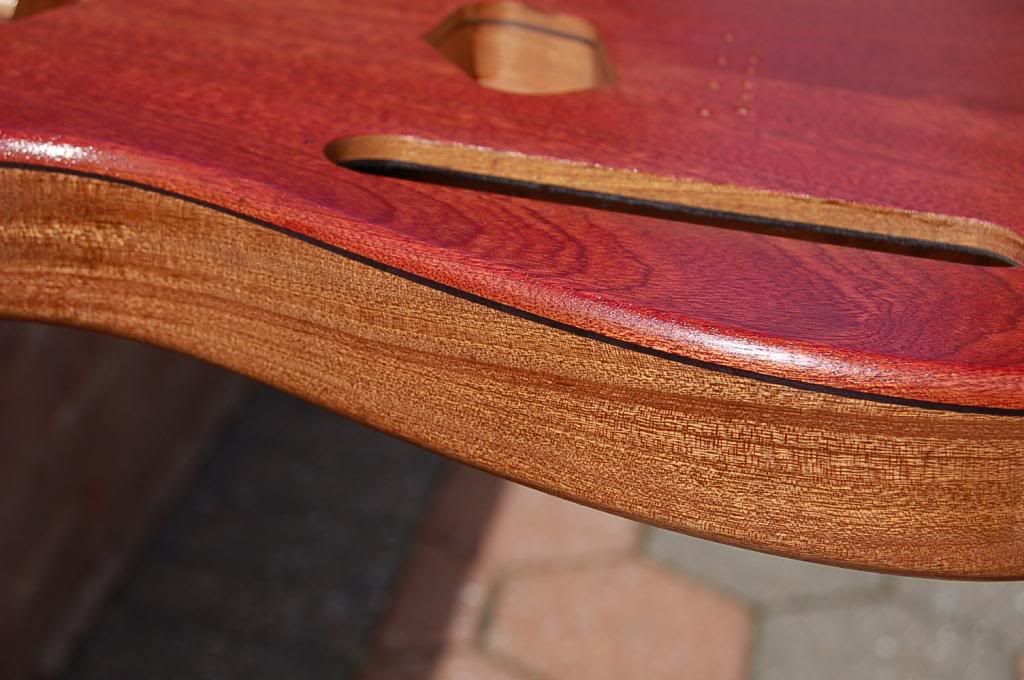
The lacquering is now complete. I'll leave it for 1 week and then start to sand it back. I've used the water based lacquer and so far I like it. Very much. The photo shows the two bodies lacquerd and sanded to 600 grit after the first coat.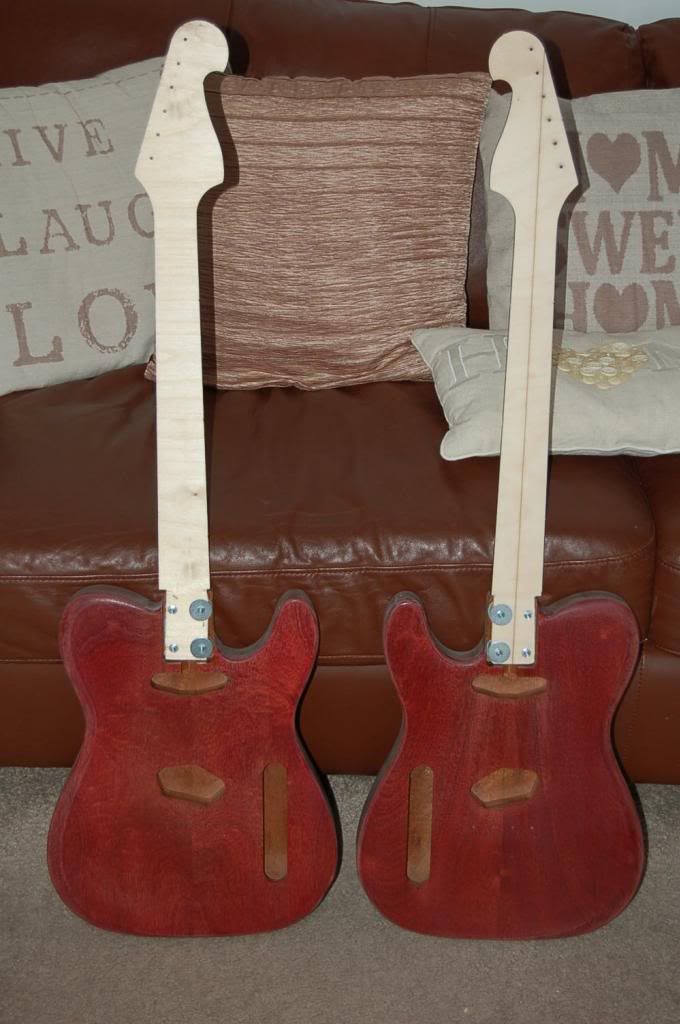 The next photos are of a fret bevelling jig that I'm making. You can see where the file sits but there is a problem. The file has a handle on and I'm having trouble cutting it off as the file is so hard. Time to go to work and use a grinder.
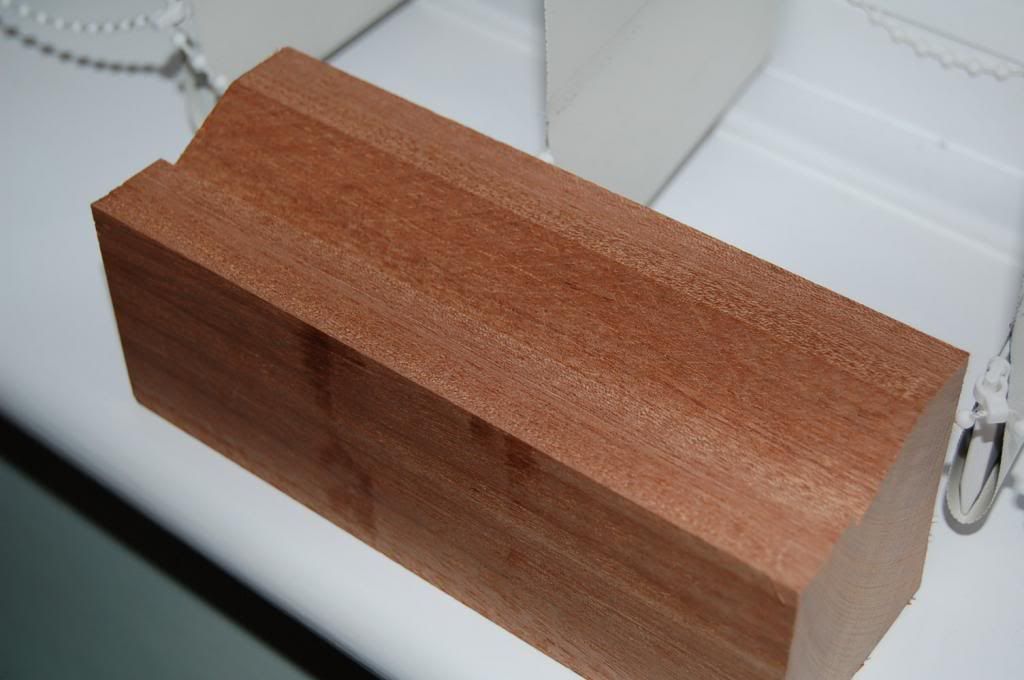
-
Yes they are starting to look good now and not too many mishaps this time. I was in two minds about the two tone colour but the more I see them the more I like them.
I'm starting to think that the really cheap pickups and the letter note stickers I have for the right hand is going to be abit of a shame. I.E. good guitar but pap hrdware but I started out to make a cheapocaster so I'll stick to the plan.
-
The necks have had a first coat of lacquer. I'll denib them with 600 grit then I'll bang the frets in.
Also sanded the grain fill back. It was hard work and I think most of the filler has also been sanded out. Note to myself: never ever use grain filler again. Dont even say the word.
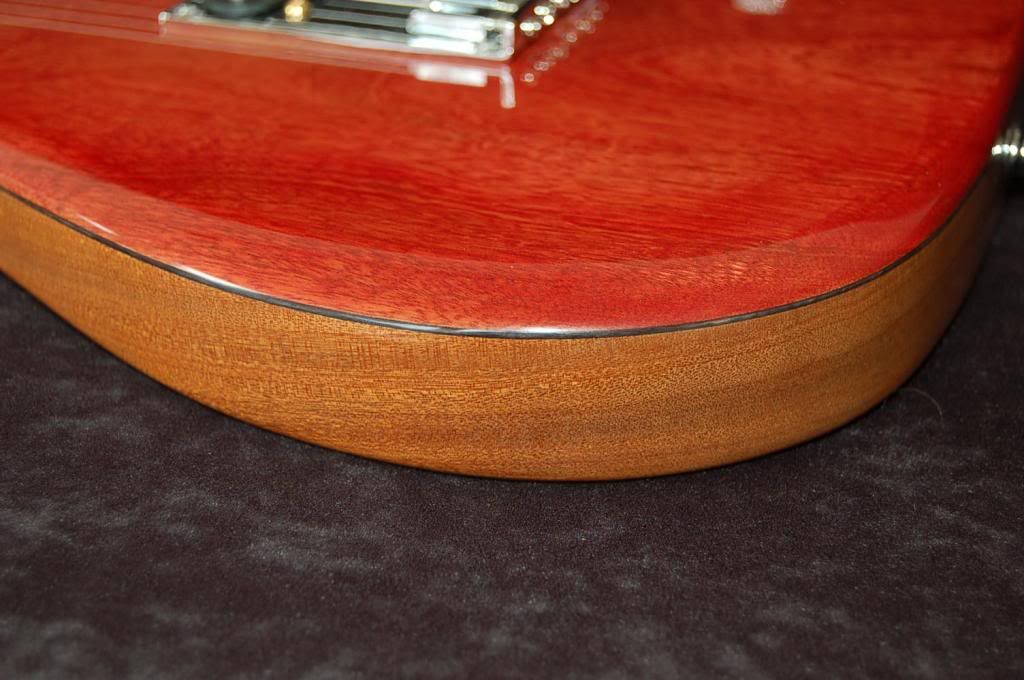
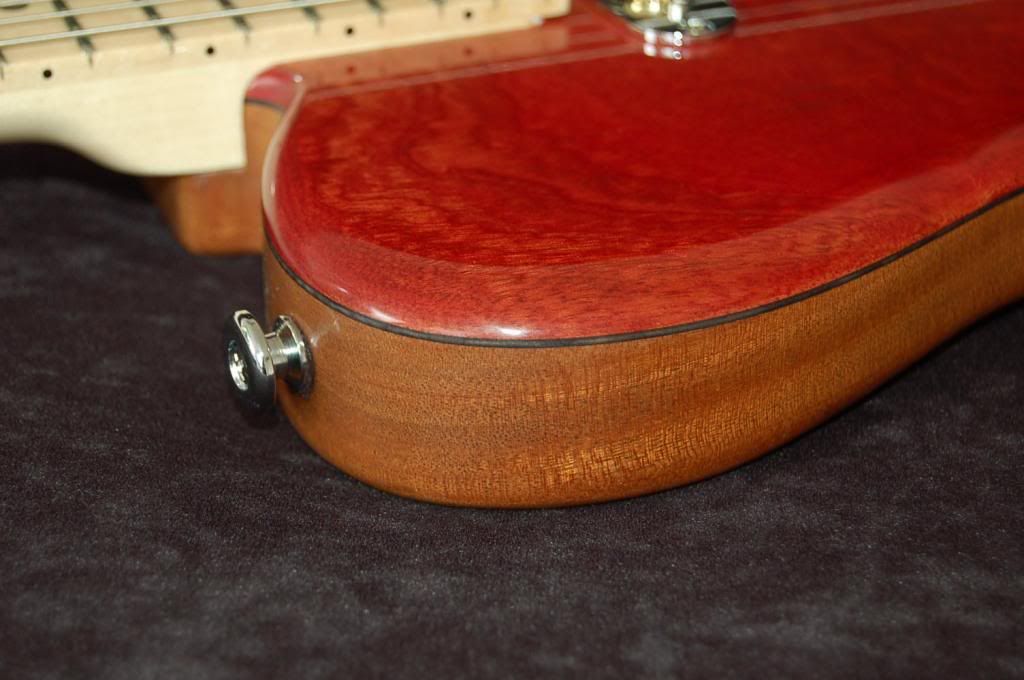
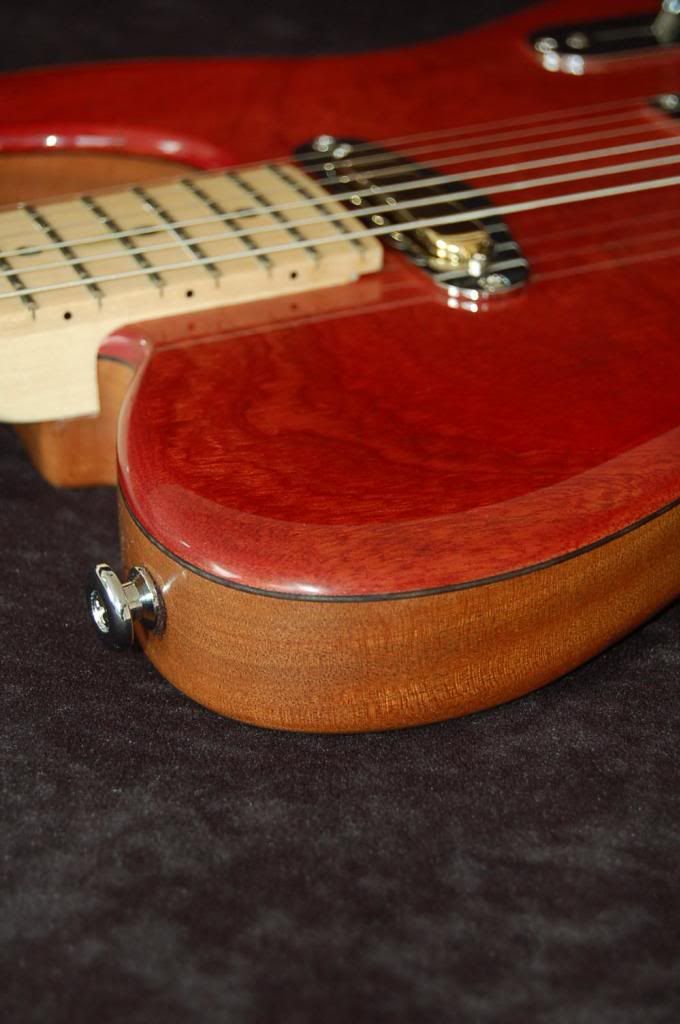
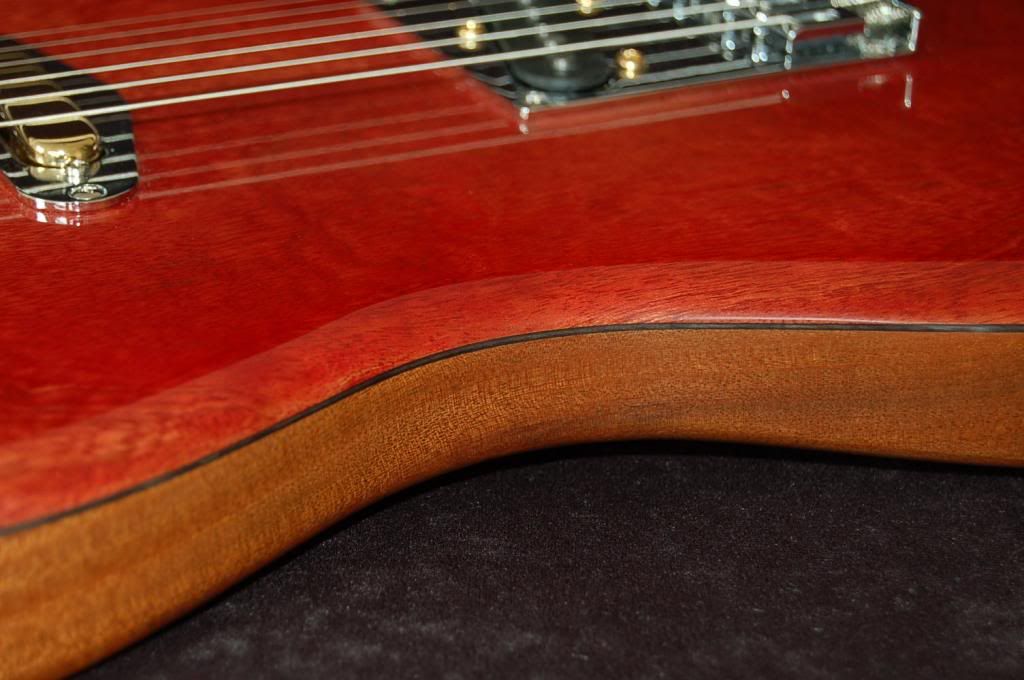
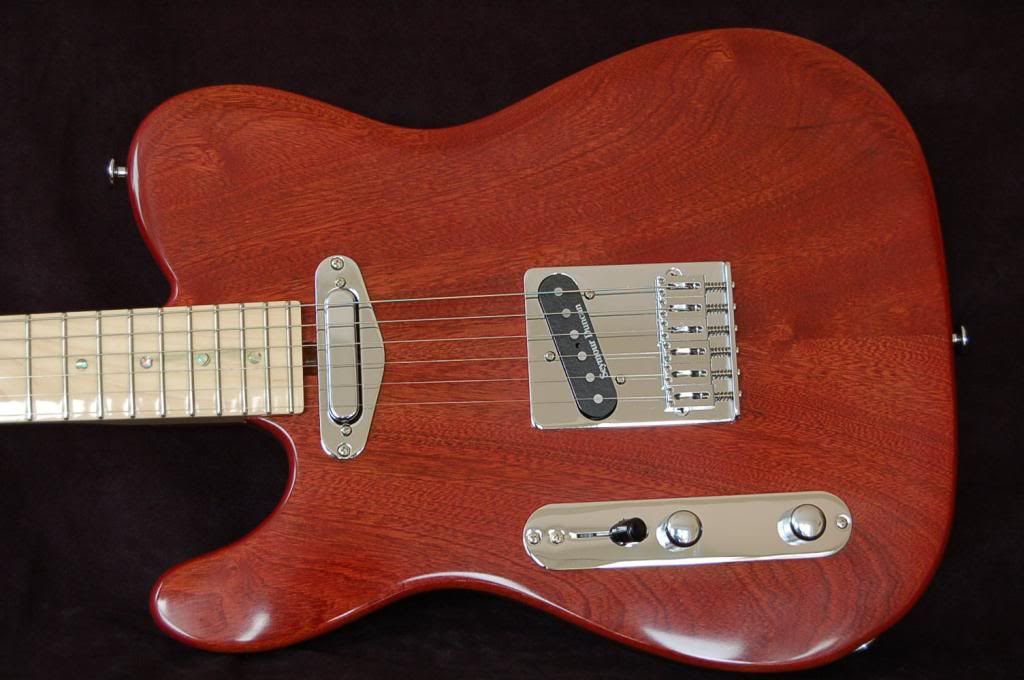
I've washed them in methonol and then applied the red methonol stain to the drop top. I've applied the first coat of lacquer.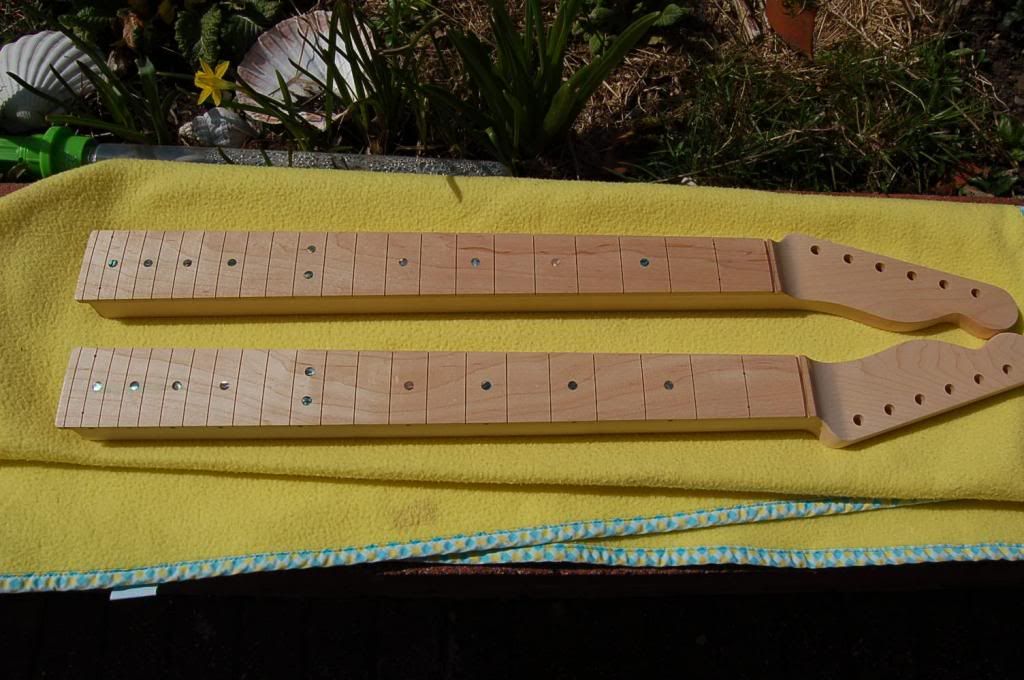
-
Yes Muzz, I'm using the red Methonol based dye on the tops with the black Sycamor seperating it from the natural back.
If I dont like it I'll just use the red dye on the back also.
I'm going to add about 25% Methonol to the dye to dilute it a bit though.
-
ScottR when you say one of each it got me thinking. Red dye top and natural back. Thats until I change my mind again.
Not much progress to report but:
As the good weather will be my way soon I've been starting to prepare for finishing.
The fretboard has been sanded to 240 grit and will get one coat of lacquer before freting as Maple can sometimes react with the fretwire and turn slightly green where the fretwire comes into contact.
I've also sanded the bodies to 120 grit and applied the grainfiller. I'll sand the grainfiller back to 320 grit then the dye then lacquer. I'm using watrbased lacquer for the first time.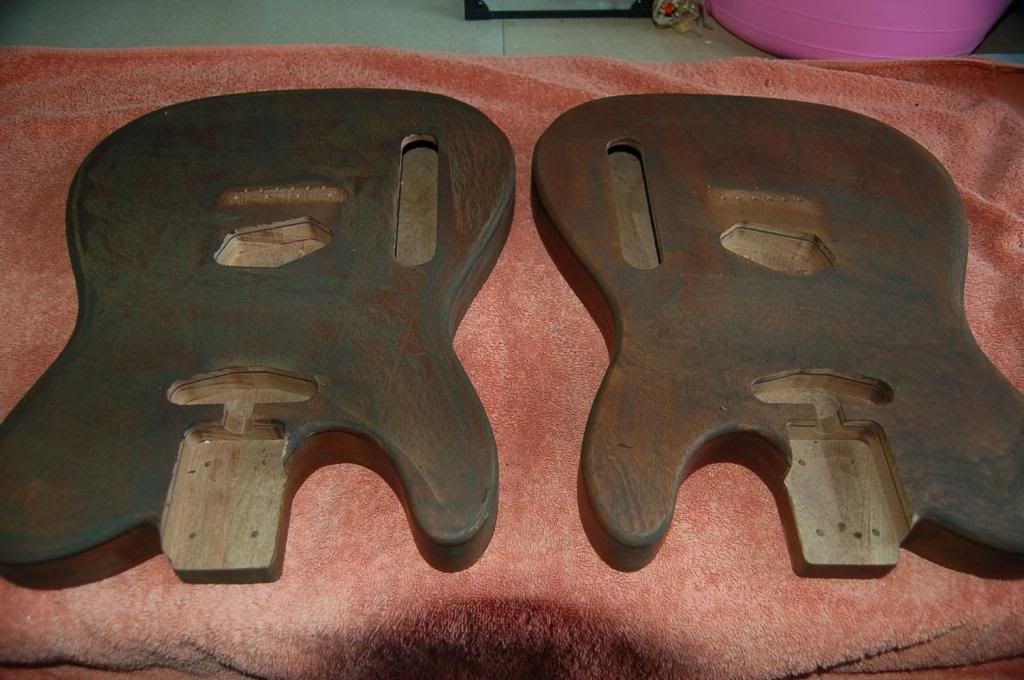
-
I've done a test with lacquer brushed over red dye and natural.
What should it be..red or plain?????

-
Hi Scott. yes the bodies will turn out nice once the lacquer goes on. I'm undecided if I should just have plain gloss lacquer or dye the bodies red first. As for not being happy its just a case of being fustrated when things are not perfect.Once they are complete they will turn out great.
I'm kind of regreating making the right hand as cheap as I could. I think I should have spent a bit more money on hardware.
-
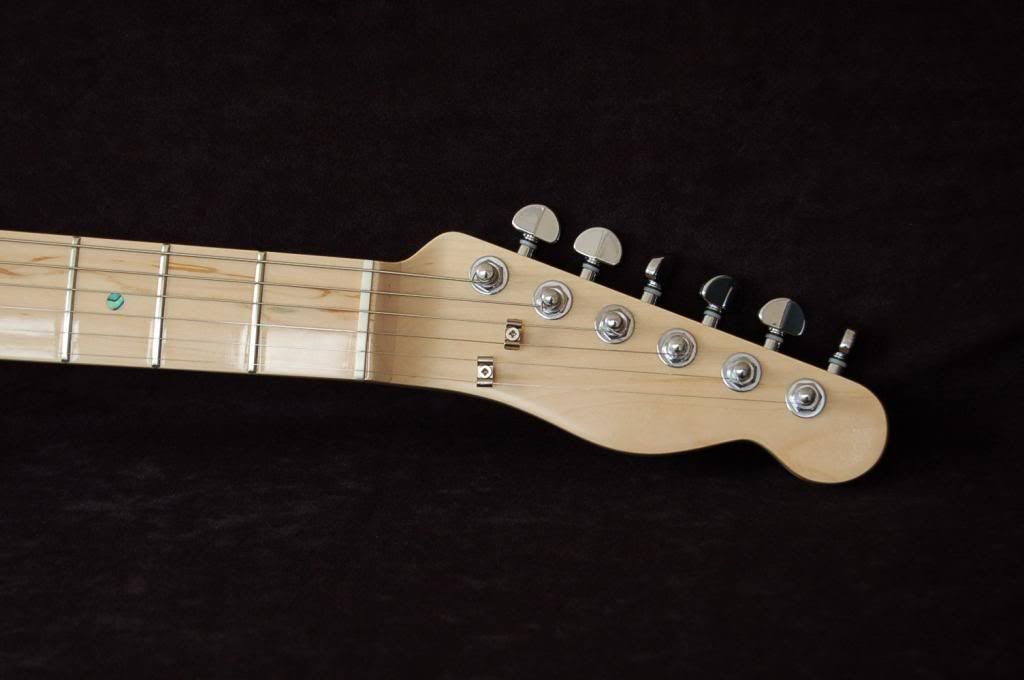
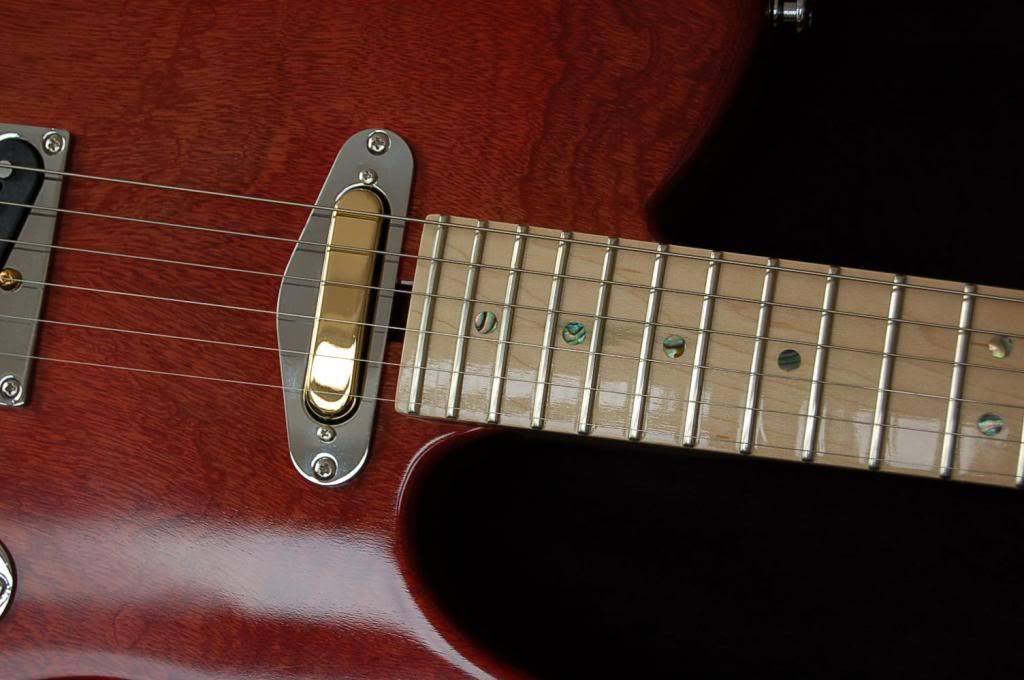
I now have the side dots in the neck although not sanded flush yet. I did not have ant 2mm dots left so I used 3mm as I'm not spending much money on these. The 3mm are OK but I think the 2mm are better.
I have also cut the access slot for the truss rod. I do not like it one bit. It looks pap and will make access to the truss rod difficult. I did it this way as drilling the hole at the headstock ends always ends bad for me. But, as we say up north mus'nt grumble.


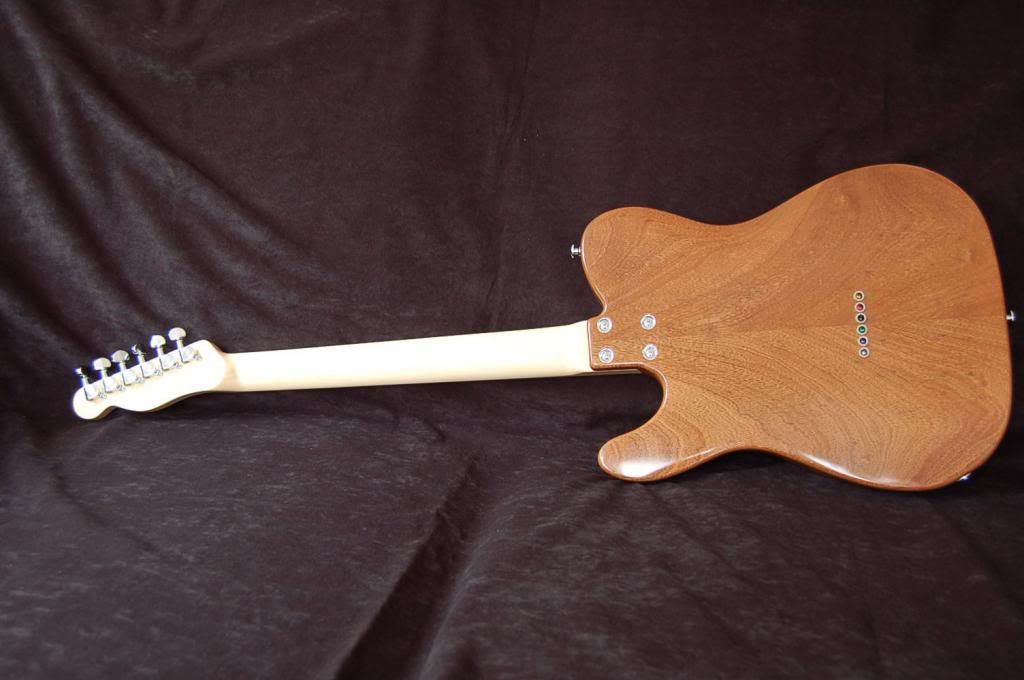
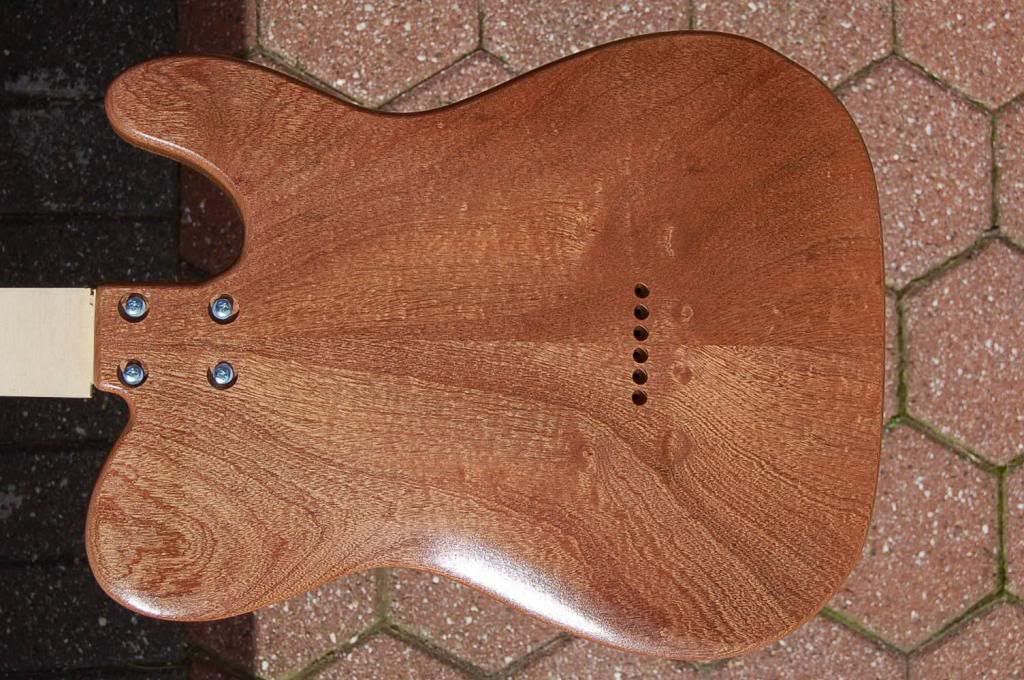
I have also rough shaped the body contours and drilled the counterbores for the string ferrules.


-
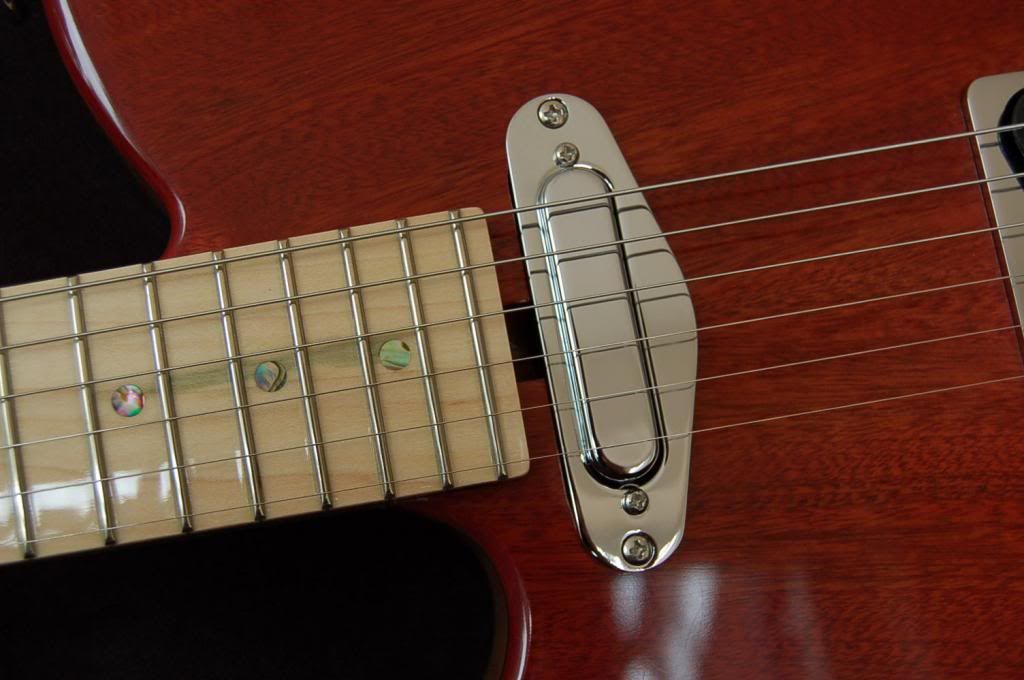
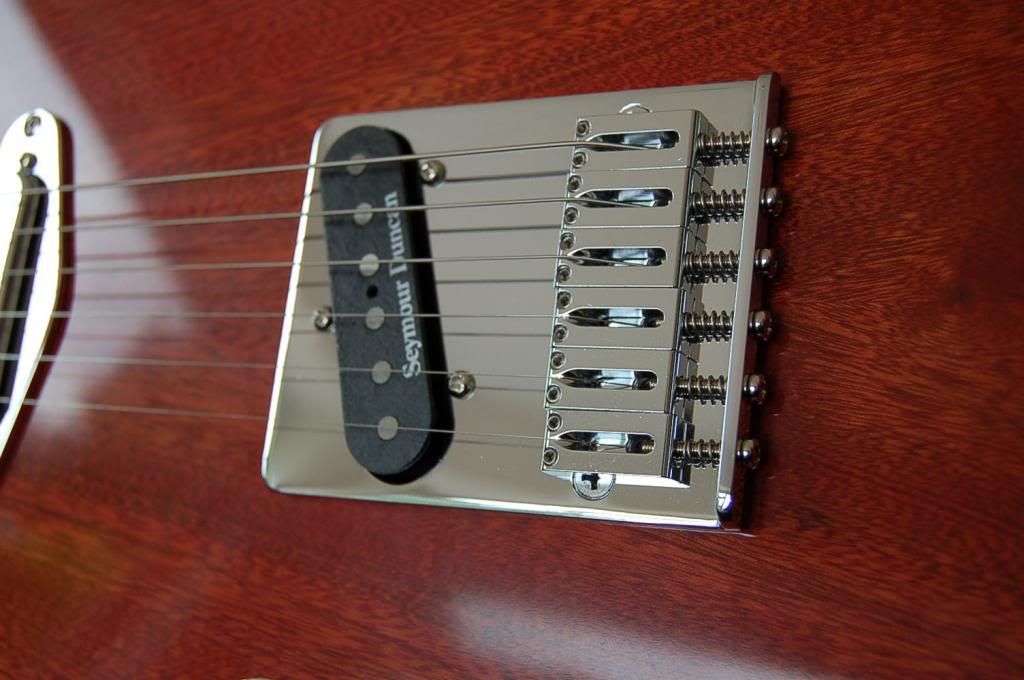
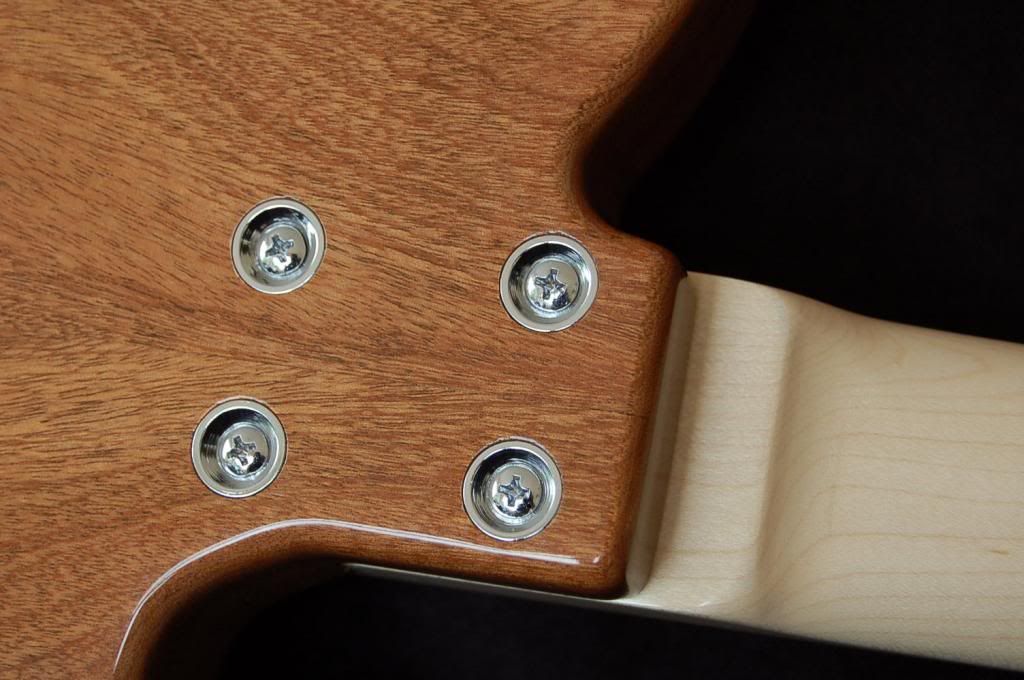
Today I have drilled the bridge screws and string through. I'm alright at this type of work and all the holes are where they should be. Its the stuff by hand I'm not good at like sanding fretboard radius, carving bodies and shaping necks. Thats why I build strats and Teles.
-
Pauliemc...I never thought about the temp of the bit. I'll keep that in mind for the next time as well as all the other things I keep in mind a then for get. As I get old it gets worse.
All the ferrules fit now. I got the old Dremmel out and just touched the sides until they fitted. All is good now.
I havent worked on these for a while as I have builders block. I dont know what to do next with them and dont have any motivation at the moment so I'm taking a little building holiday. Will be back soon though.
-
I'll have to try to find a router bit that size as I'm not good at sanding rads by hand.
I did not want to use these neck ferrules and screws but I had them spare and its a shame to waste them so on they go. Also I'm not spending much on these teles so could not use the Aluminium machine screws and neck inserts that I now favour.
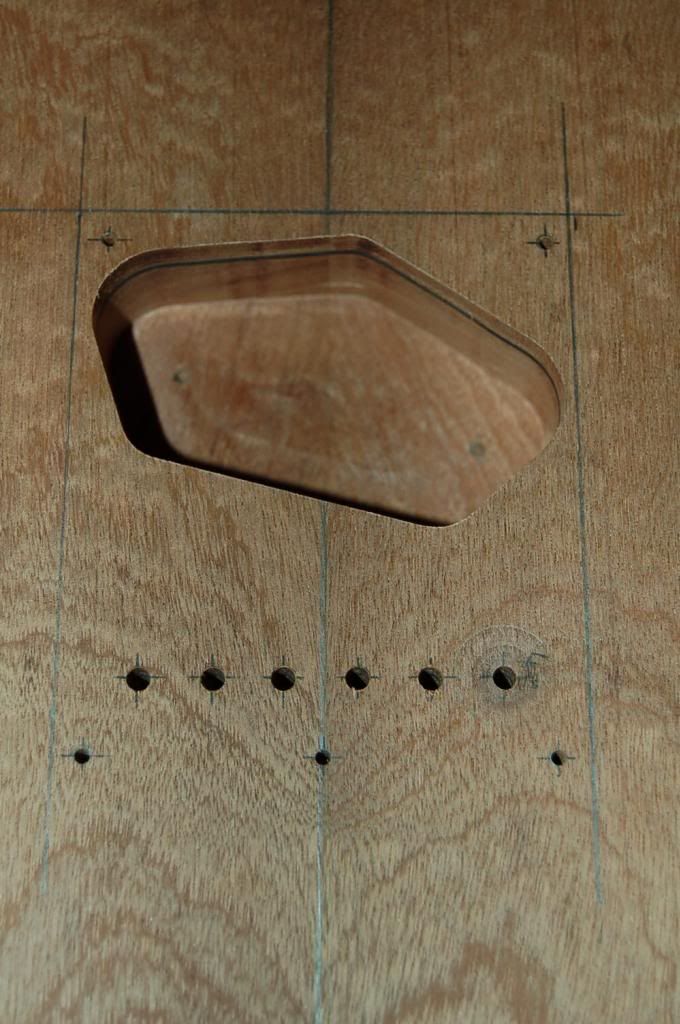
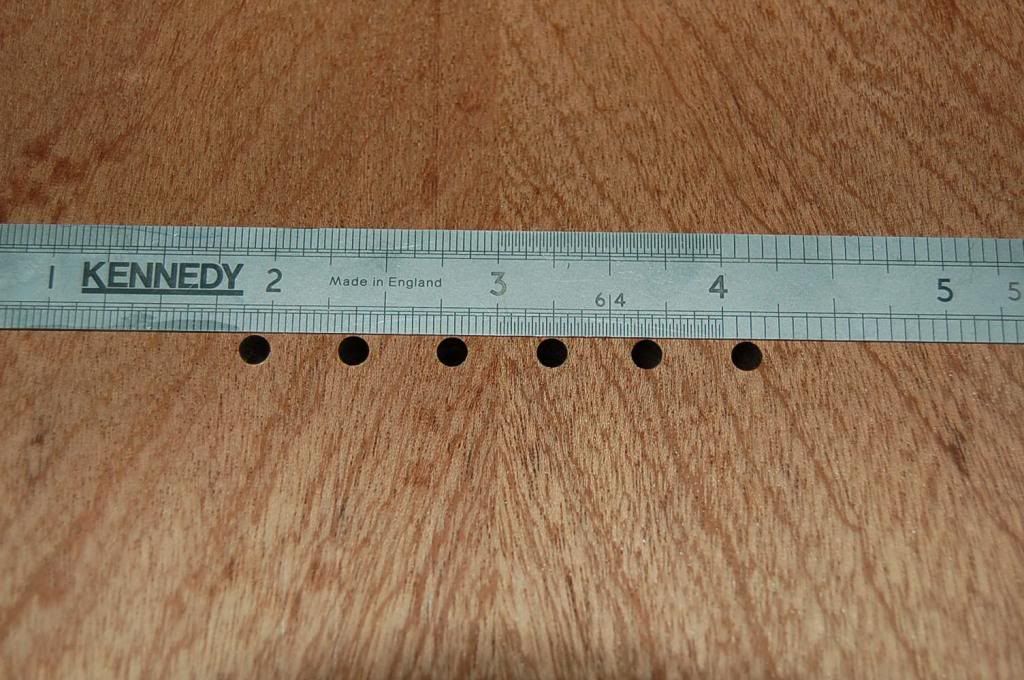
Its also interesting to note that I used the same 15mm dia flat drill but some holes are bigger than the others. I tried the same insert into each hole, some drop straight in and can wobble and others will not go in at all. The photo shows 3 out of 8 are to small the other 5 dropped straight in.
It must be how tight I have the bit in the drill chuck. :-\

-
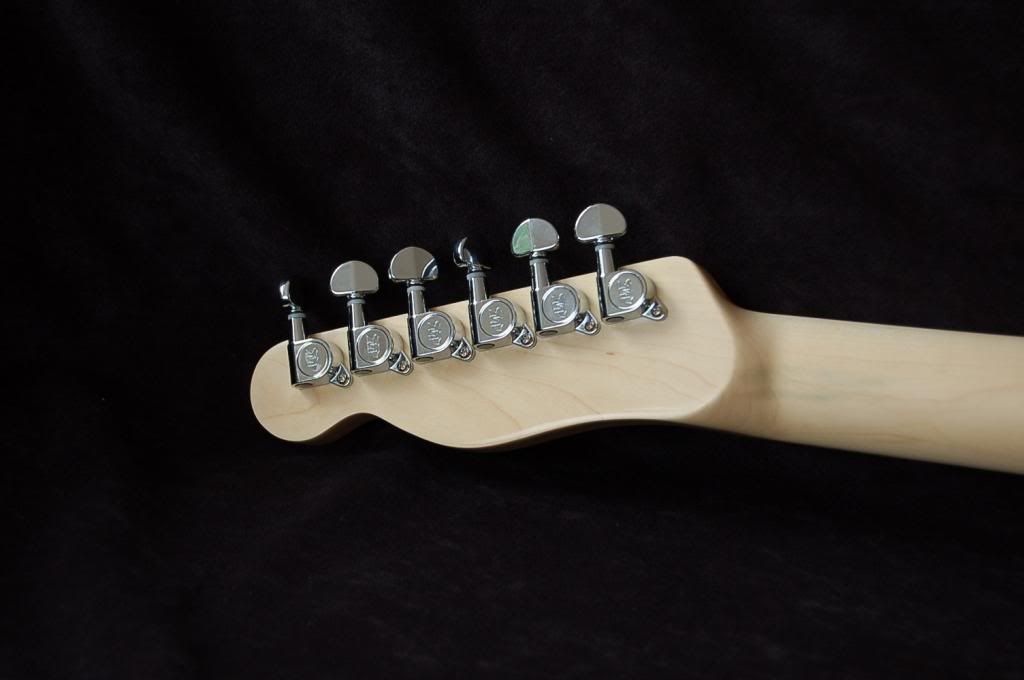
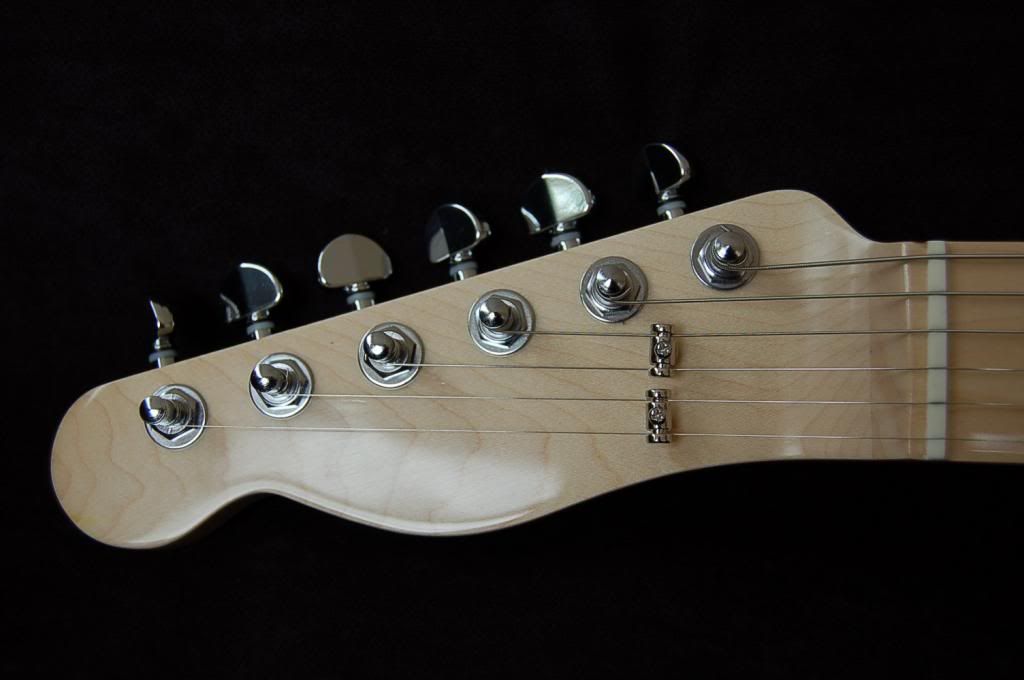
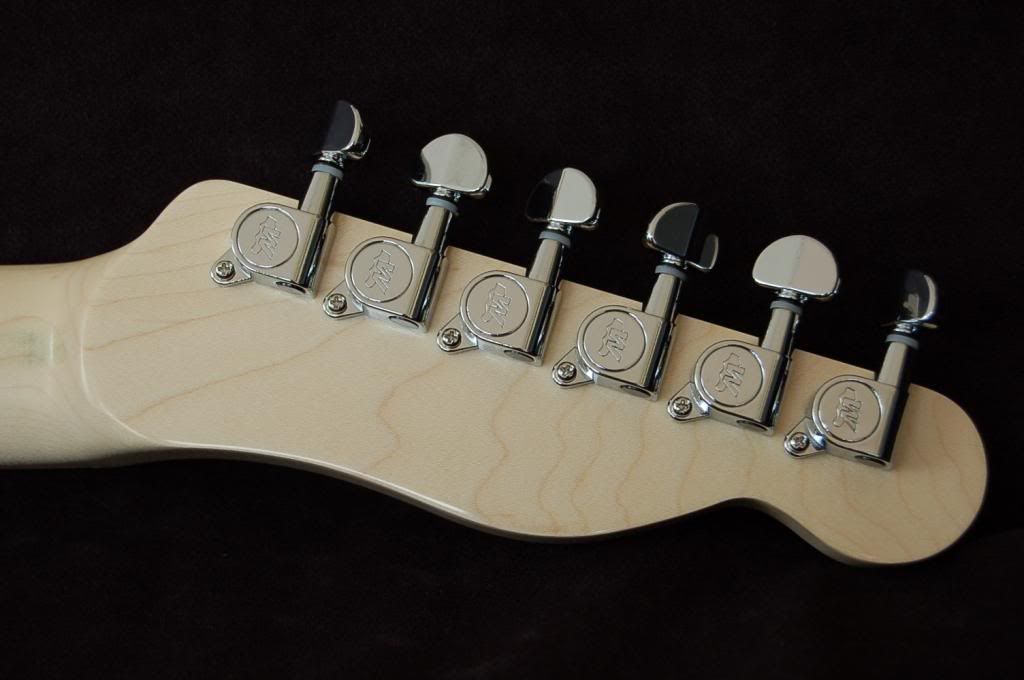
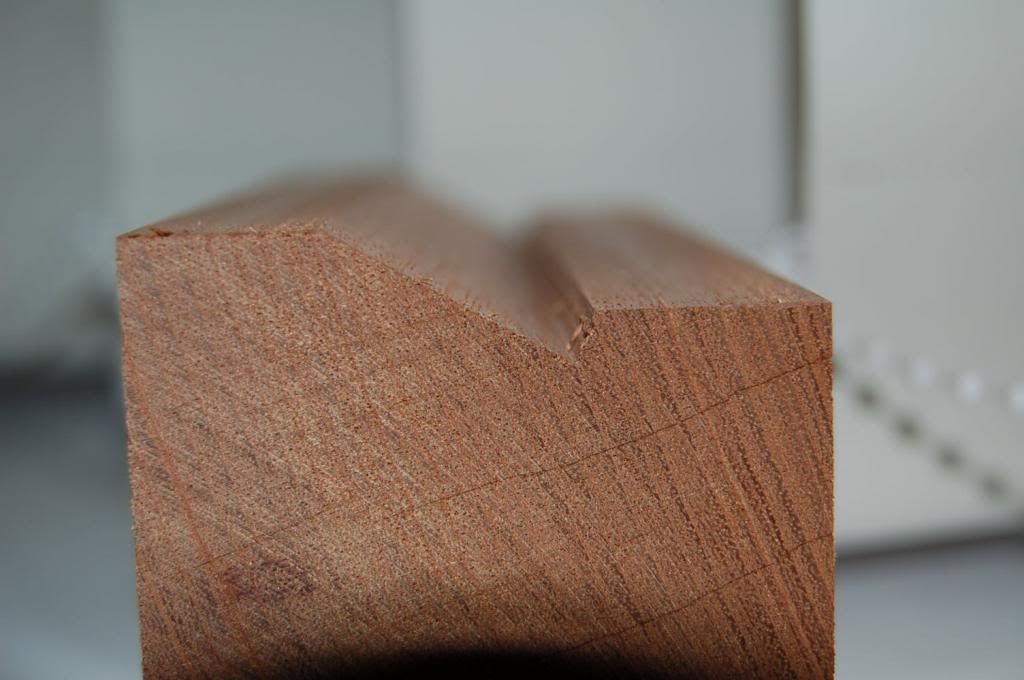
Done the headstock shaping today. They will do but they arnt great. If only there was a big router bit to do the radius then I would be happy.


Padauk and Walnut ST50 build
in In Progress and Finished Work
Posted
Hi Scott, that's what I have been doing. It works on other forums but not this one. I don't know what else to do.