


bghk6581
-
Posts
36 -
Joined
-
Last visited
Content Type
Profiles
News and Information
Tutorials
Product Reviews
Supplier Listings
Articles
Guitar Of The Month
Links and Resources
Forums
Gallery
Downloads
Posts posted by bghk6581
-
-
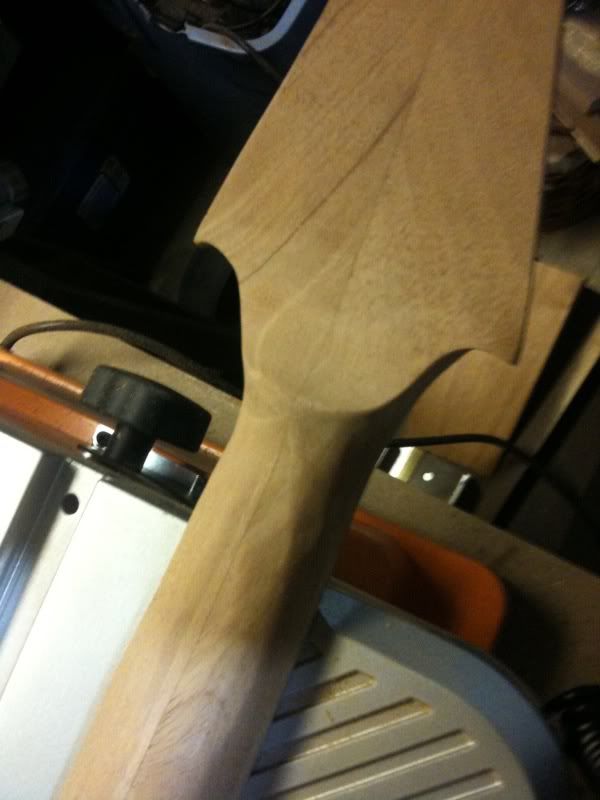
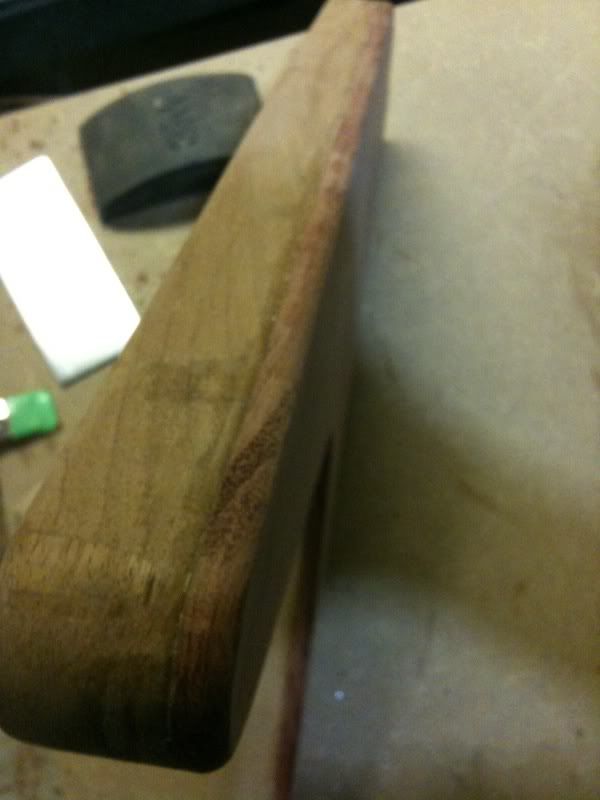
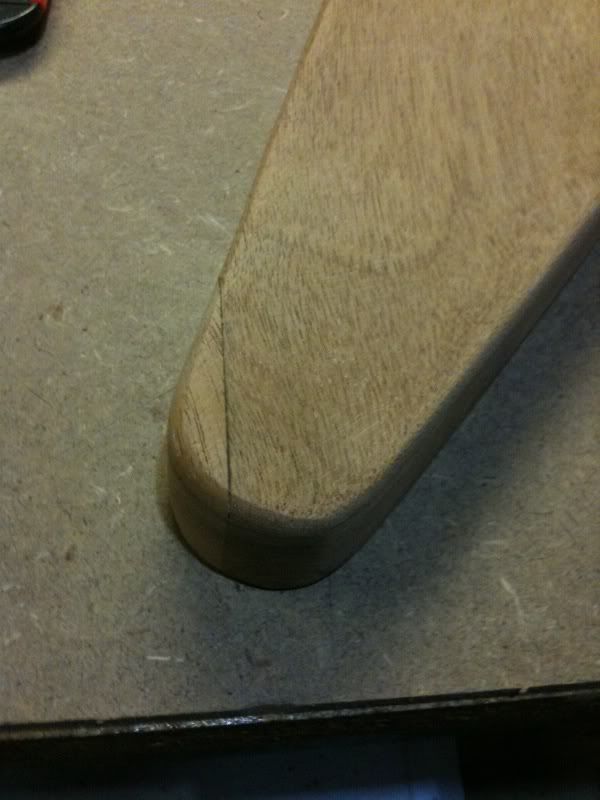
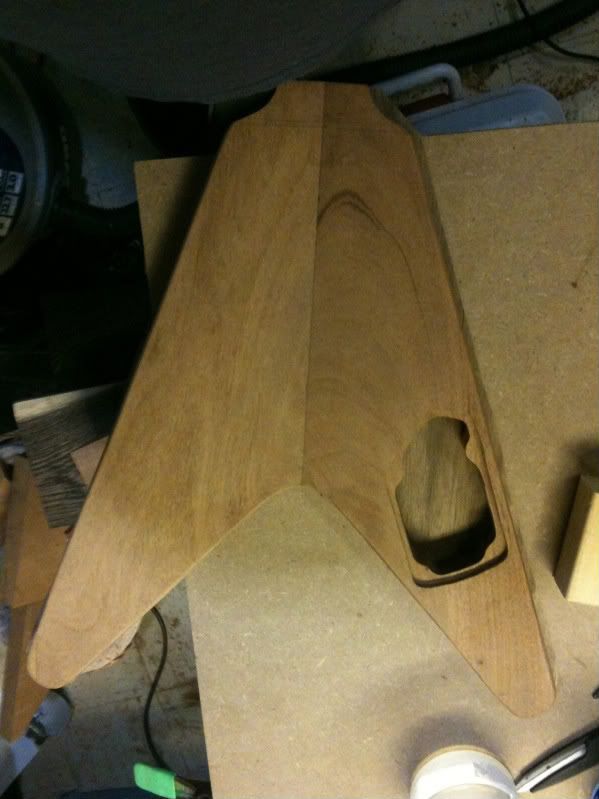
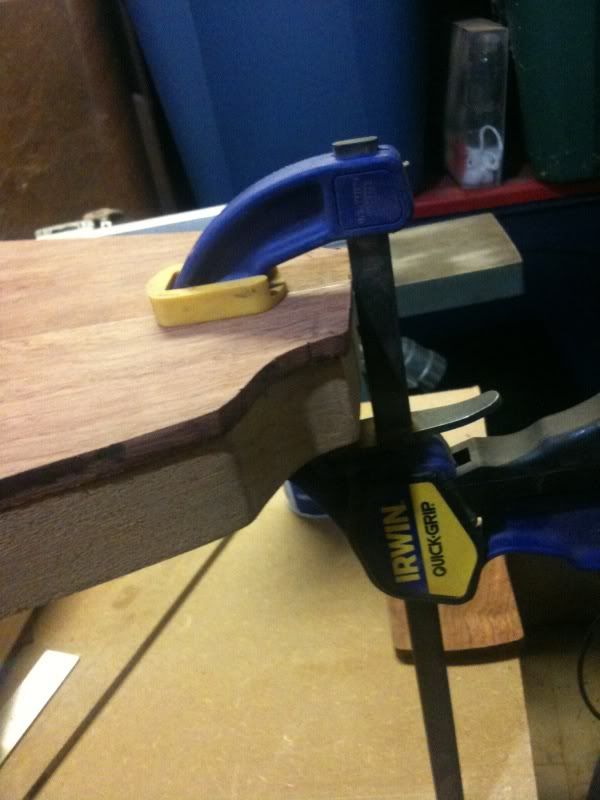
filing down flush
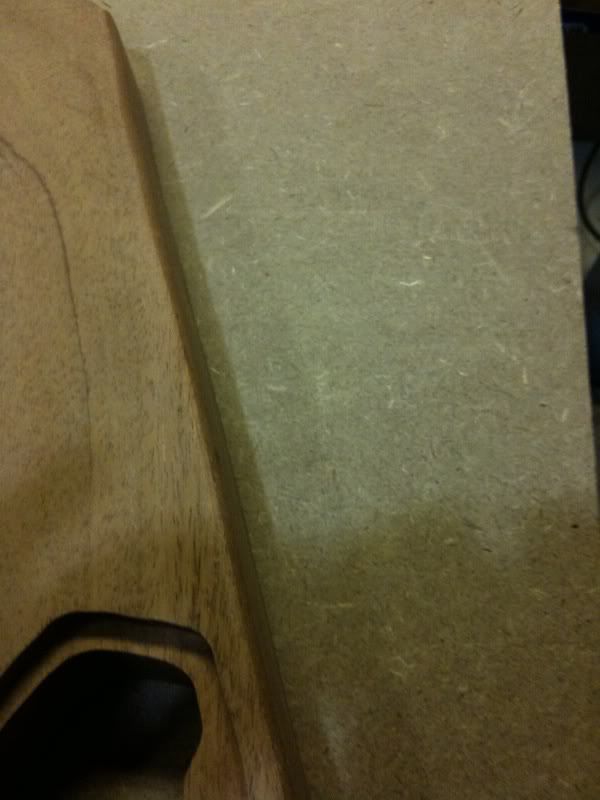
another wiz on the router table to take down the outside profile, hmm that wasn't as bad as I thought it was going to be
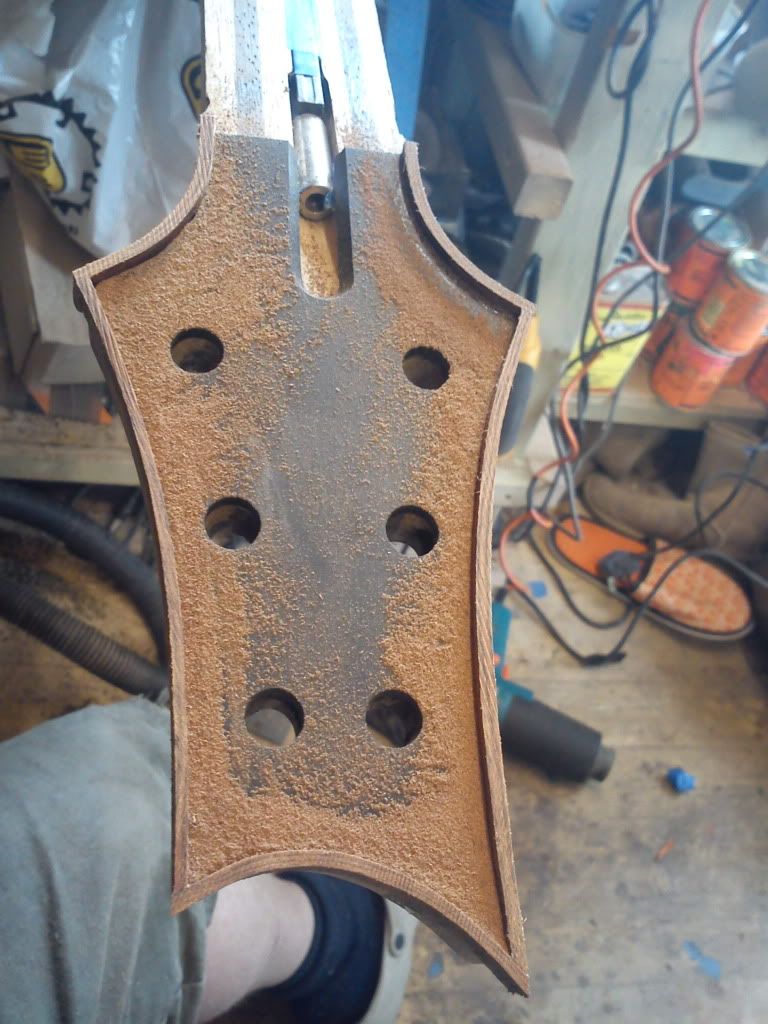
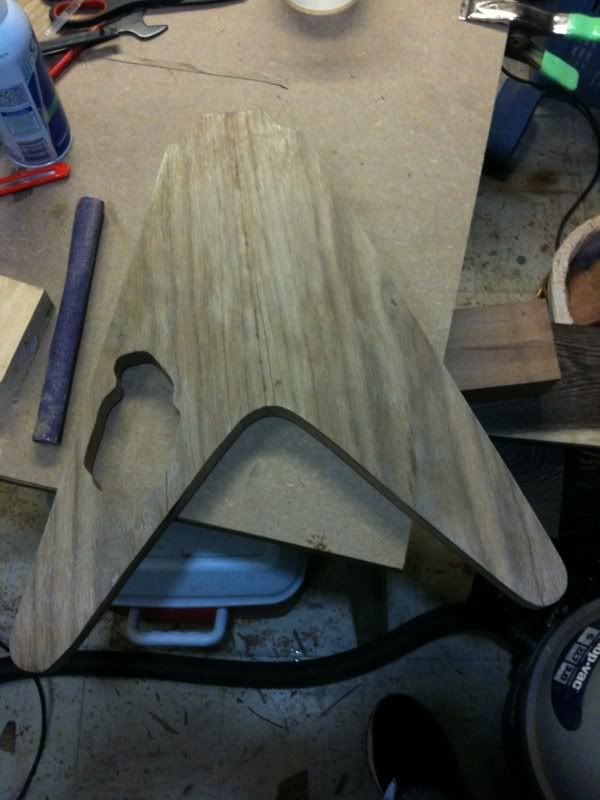
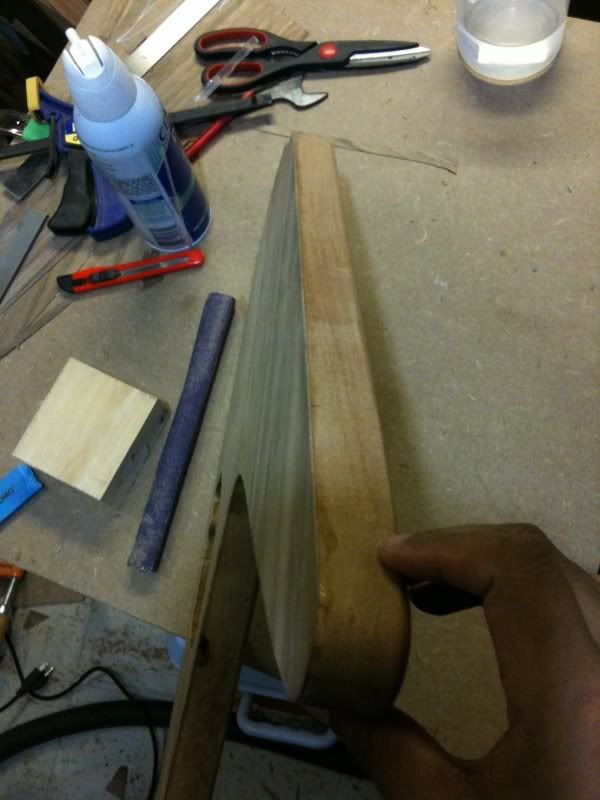
thicknessed down the headstock on the sander
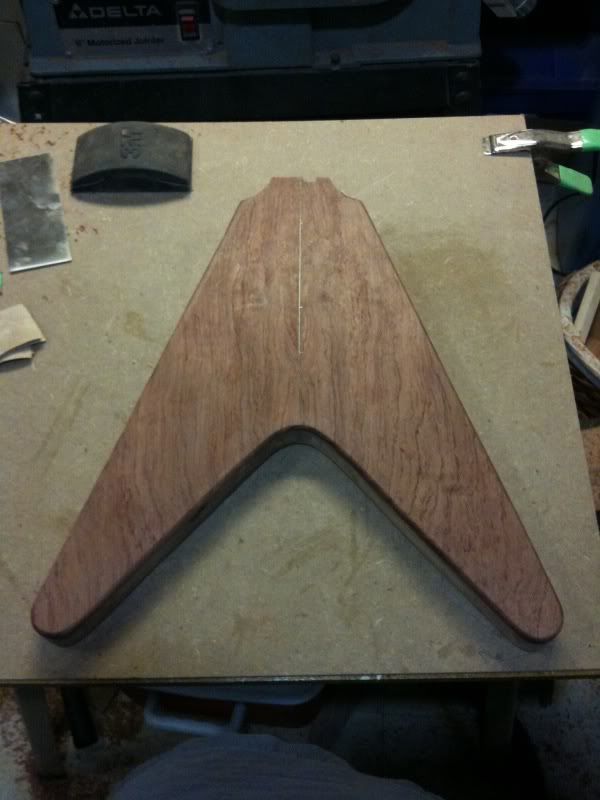
Thats gonna be a BIG volute, lol. Love the binding/headstock cap combination.
-
 1
1
-
-
Looking good so far. I have a suggestion and a question. I notice that with most PRS builds, the biggest thing they mess up on is the carve on the bottom cutaway. They don't make it big enough. On the PRS, its more circular than I see people make it on their builds. As for the question, I notice you use wenge. I have a big slab of wenge but I heard about skin irritation problems when cutting wenge. Could you share your experiences with using wenge? Thanks.
-
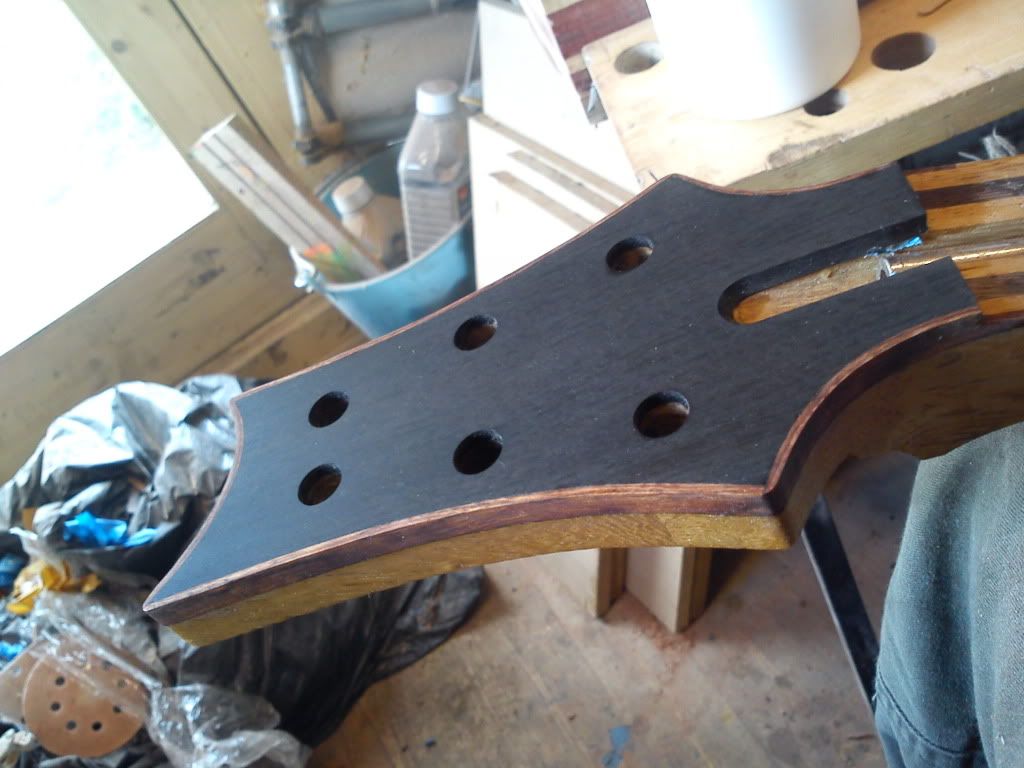
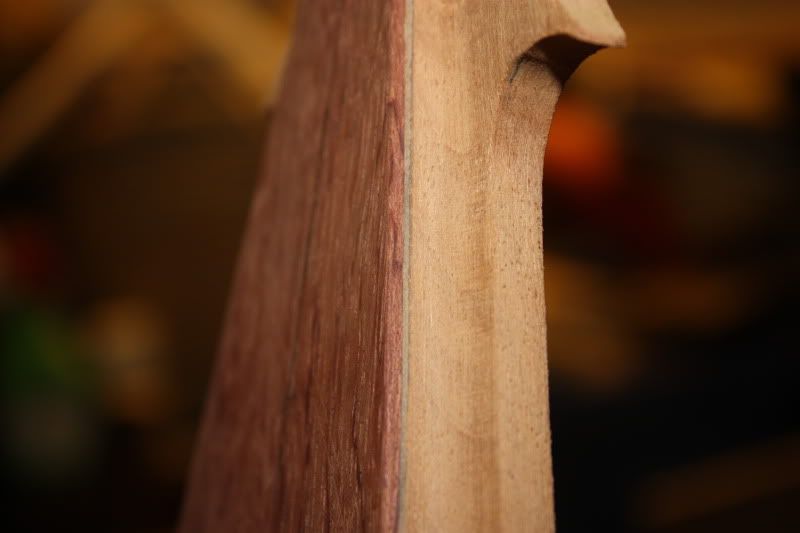
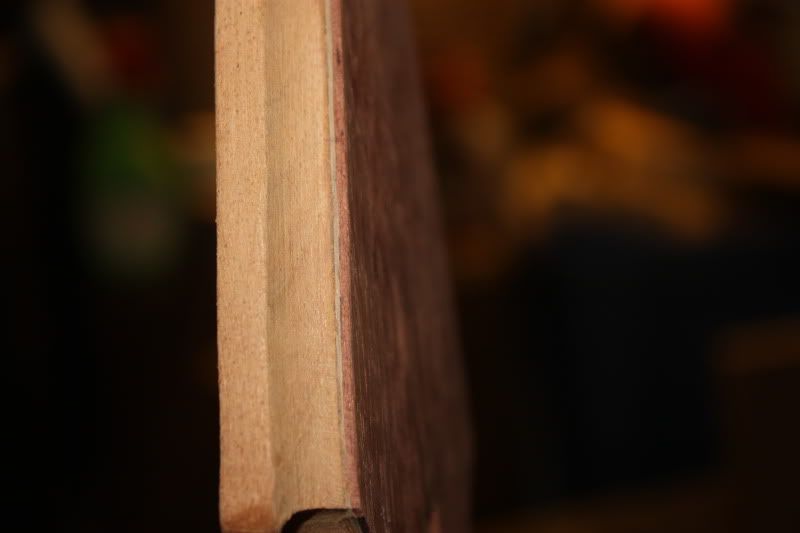
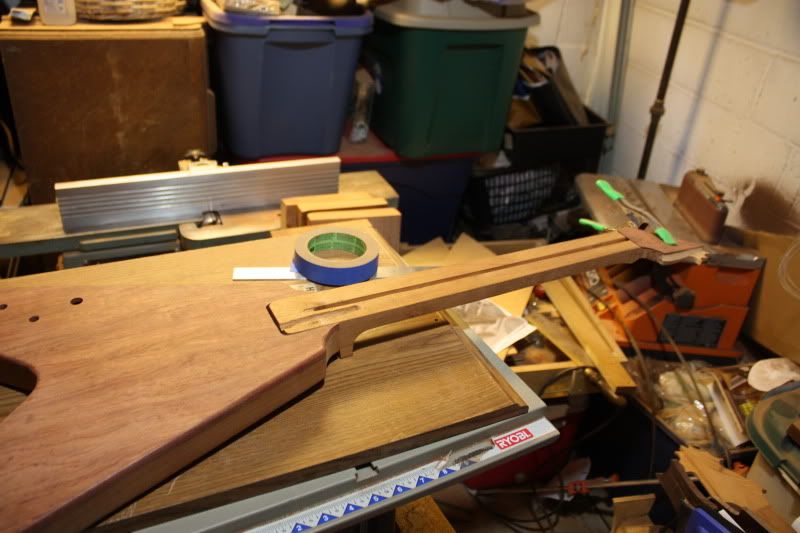
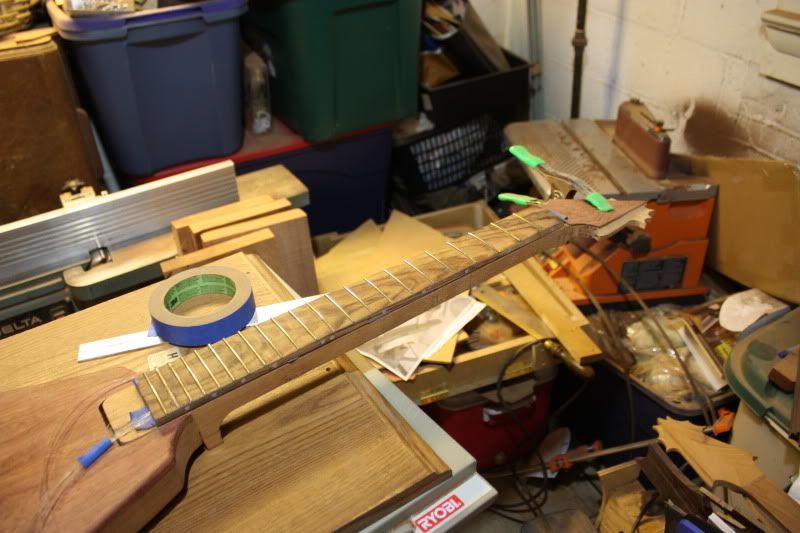
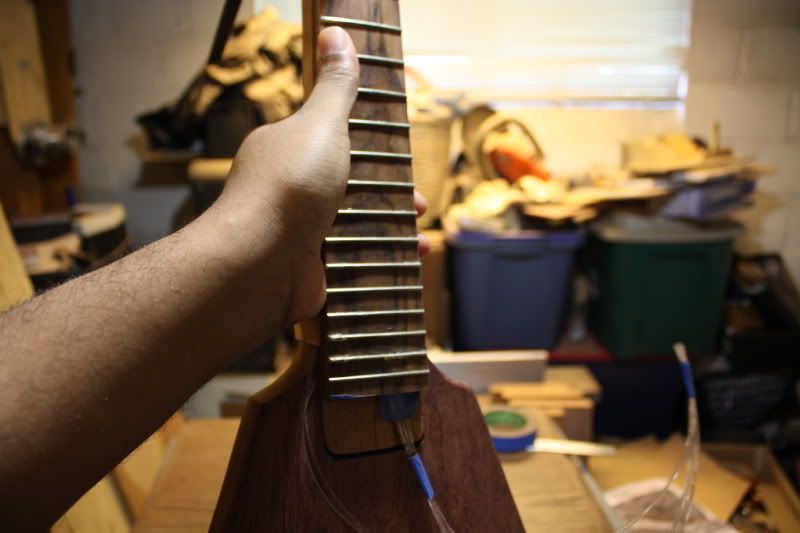
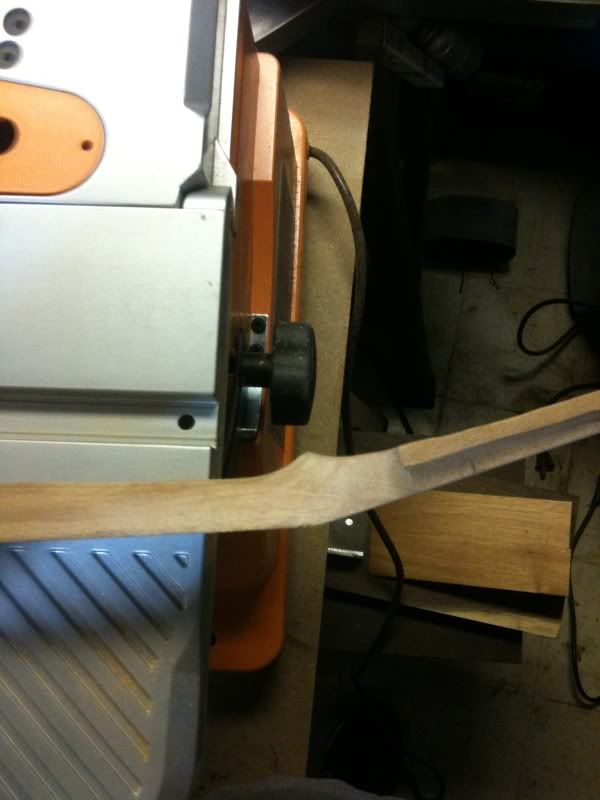
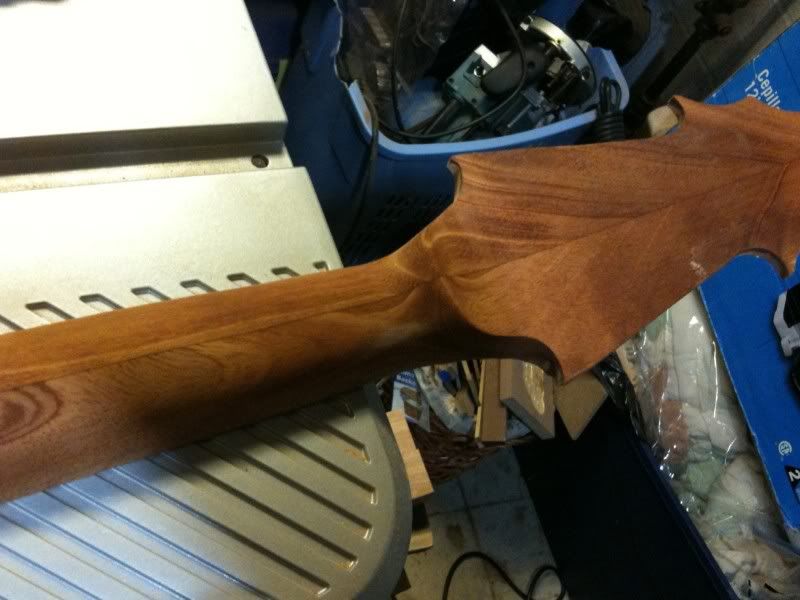
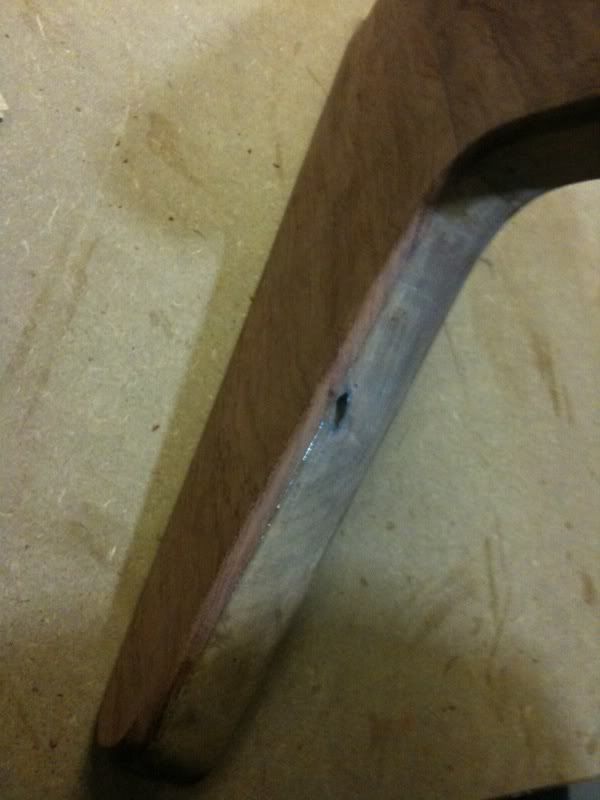
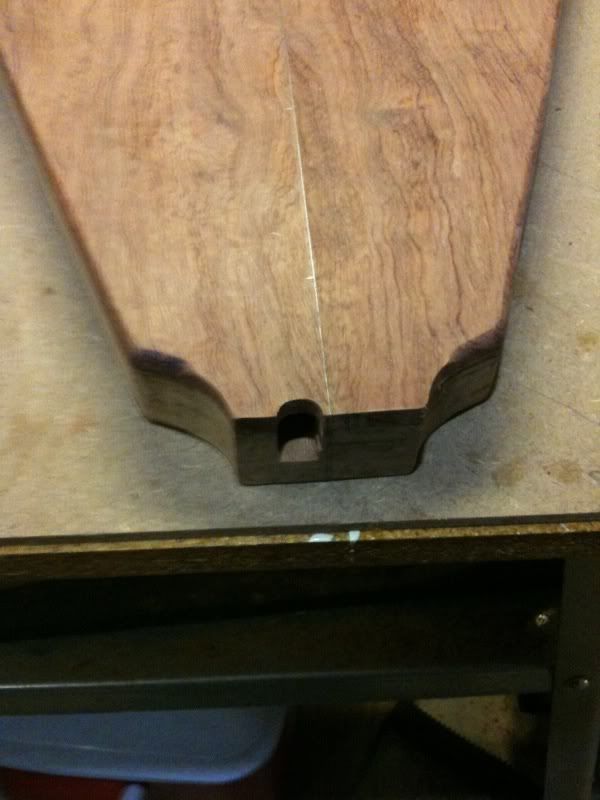
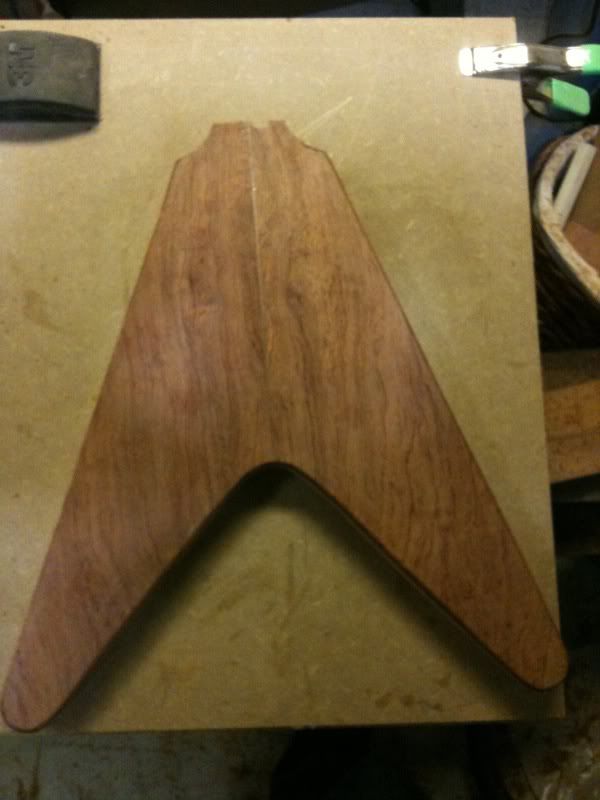
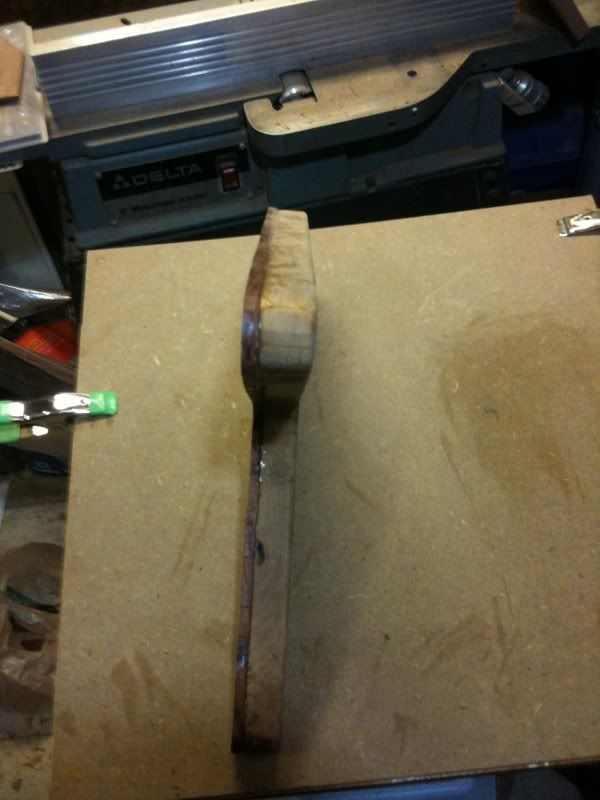
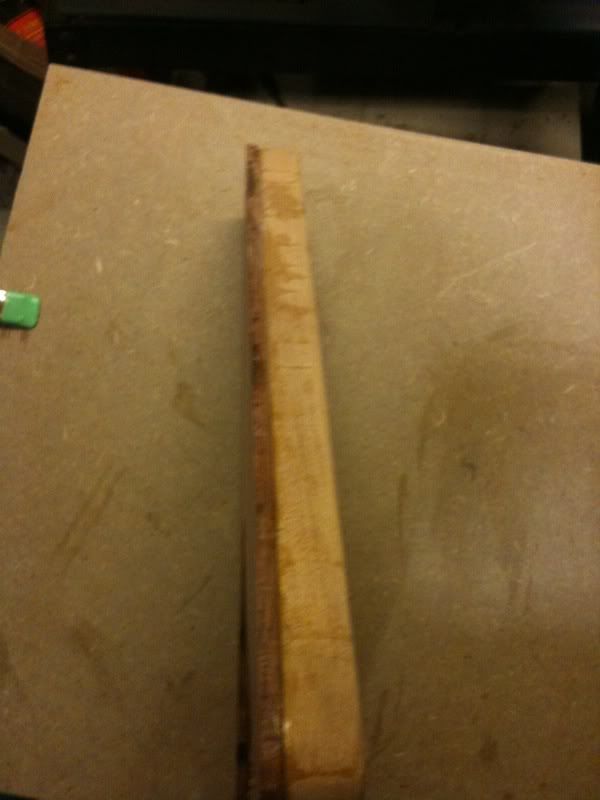
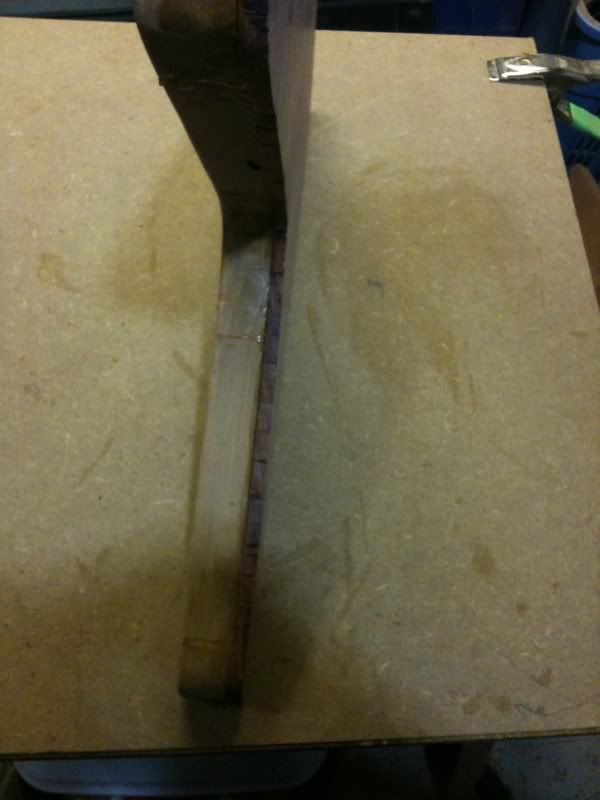
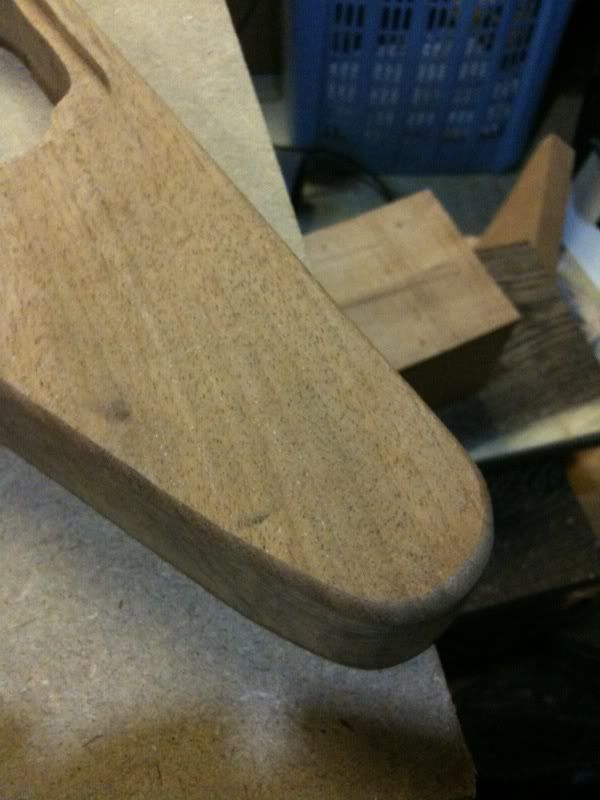
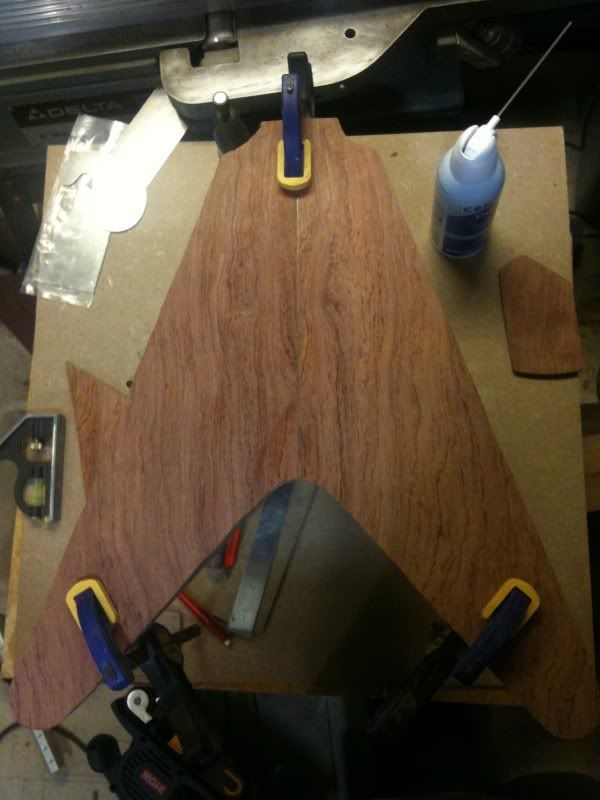
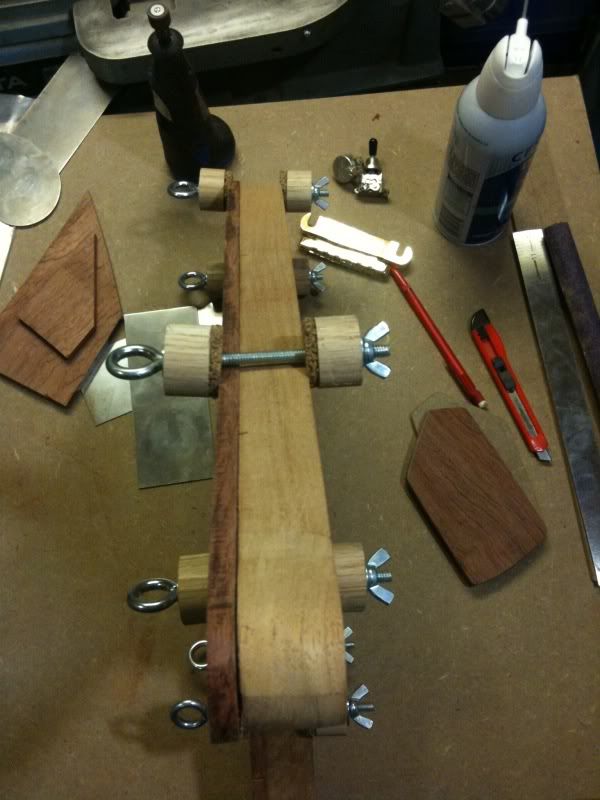
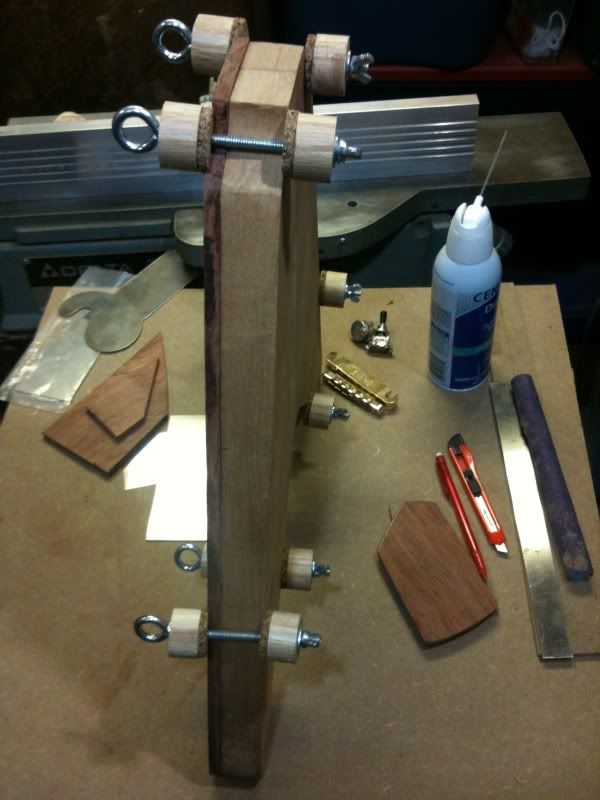
As promised, here are pics of the neck heel cleaned up, as well as the finished headstock. I cleaned and trimmed up the headstock cap a little. Now I have a question. The only steps left is before finishing and assembling is drilling the tuner holes, gluing the neck on, gluing the fretboard on, carving the neck profile, and trimming the neck portion of the neck pickup cavity. The only problem with this procedure, is if done in this order, the router might hit and cut the fiber optic strands and may damage them. If I glue the fretboard on after trimming the neck PU cavity, I will have to wait to carve the profile afterwards, which I planned to do on my spindle sander. Any suggestions?
BTW, the contrast in color between the neck and body may be because the body is honduran mahogany and the neck is african mahogany.
-
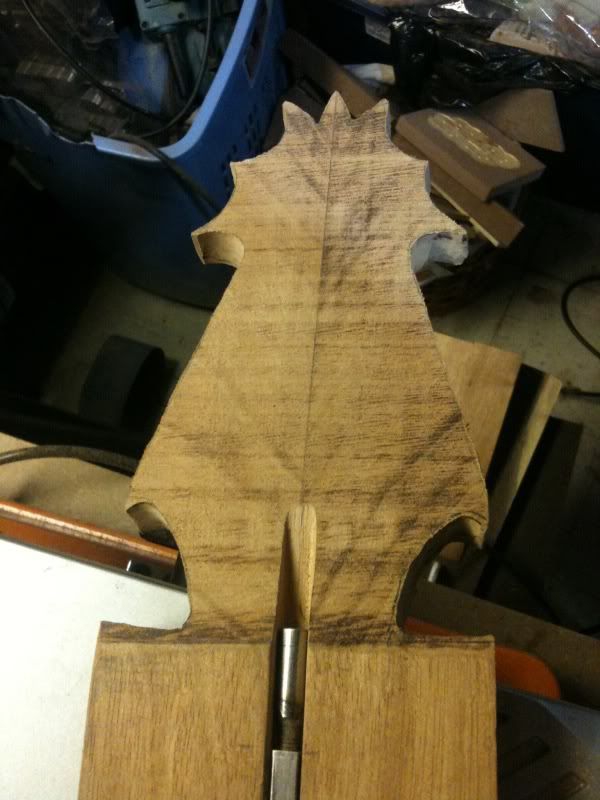
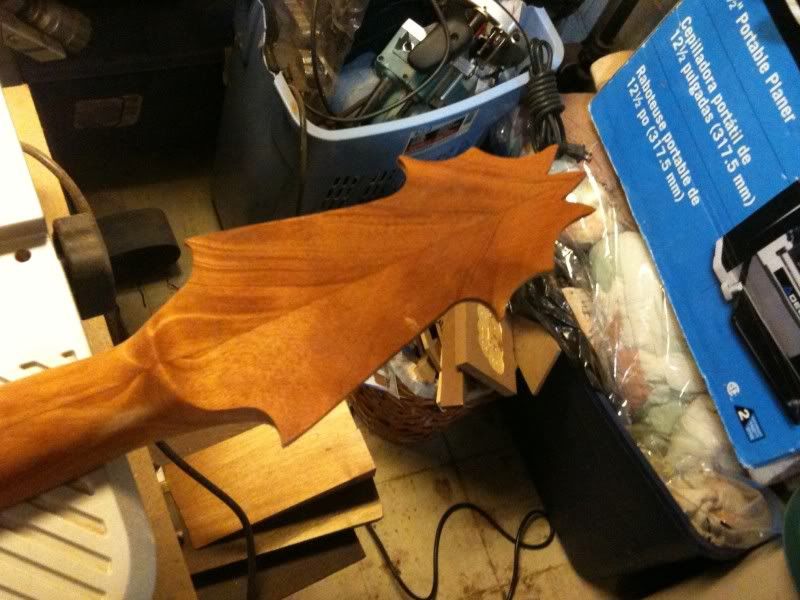
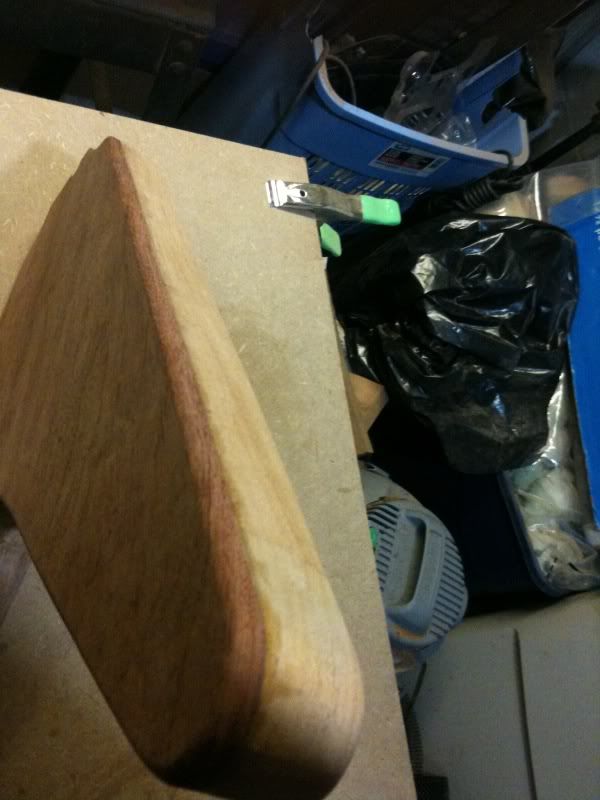
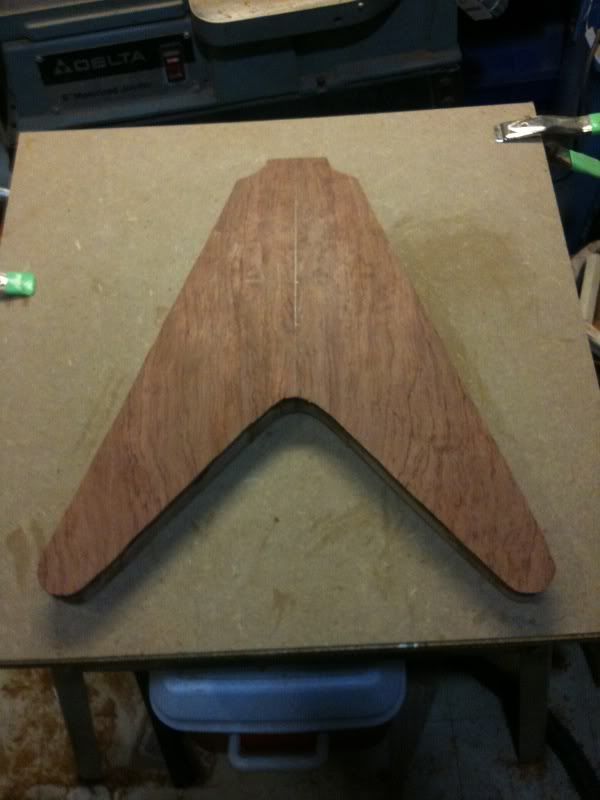
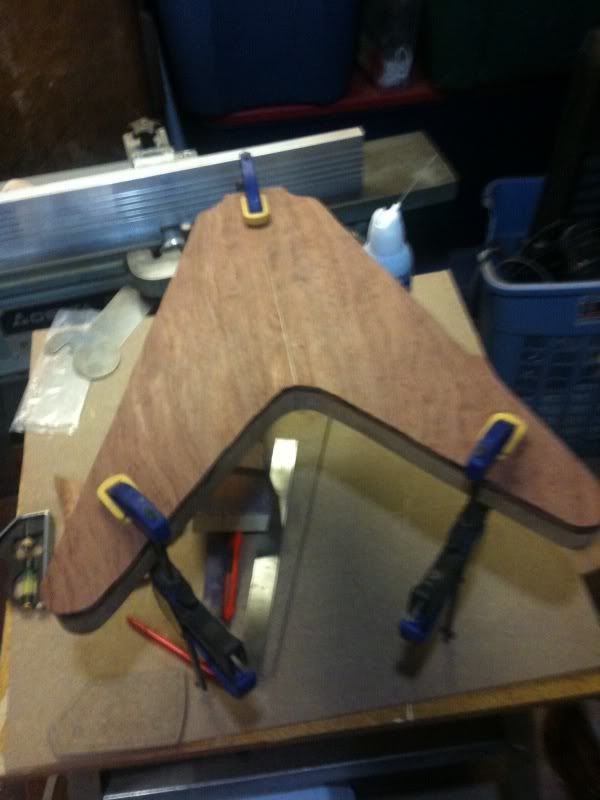
Today, I worked a little on the neck. I shaped the heel of the neck(not pictured), and I shaped and glued the bubinga/walnut headstock cap to match the body of the guitar.
Front:

Back:
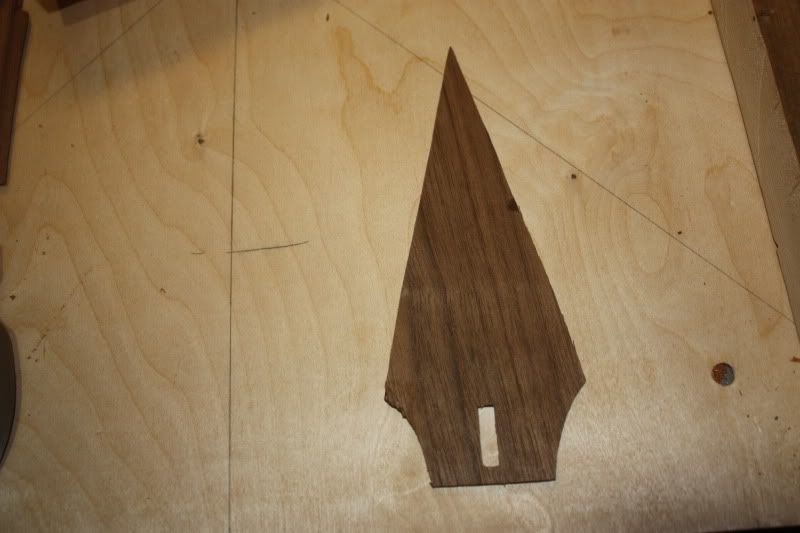
All glued up:
I'll take pics of the neck heel tomorrow.
-
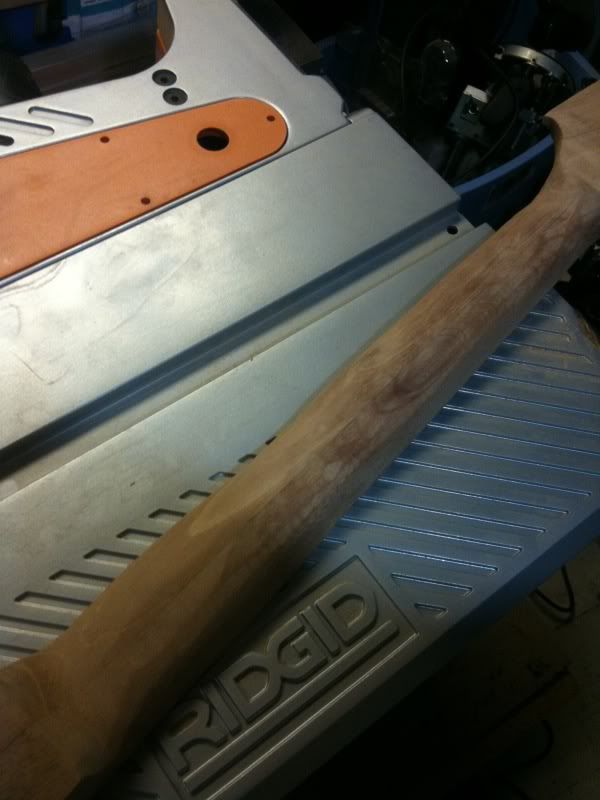
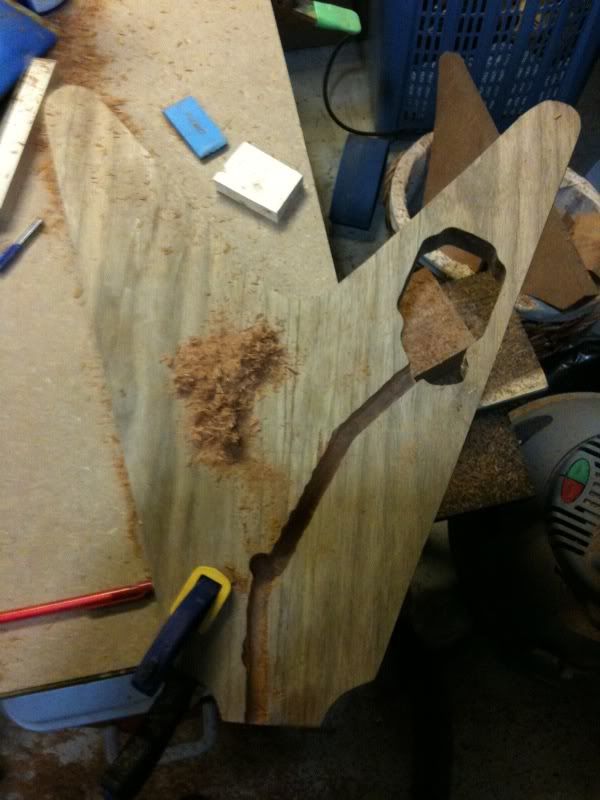
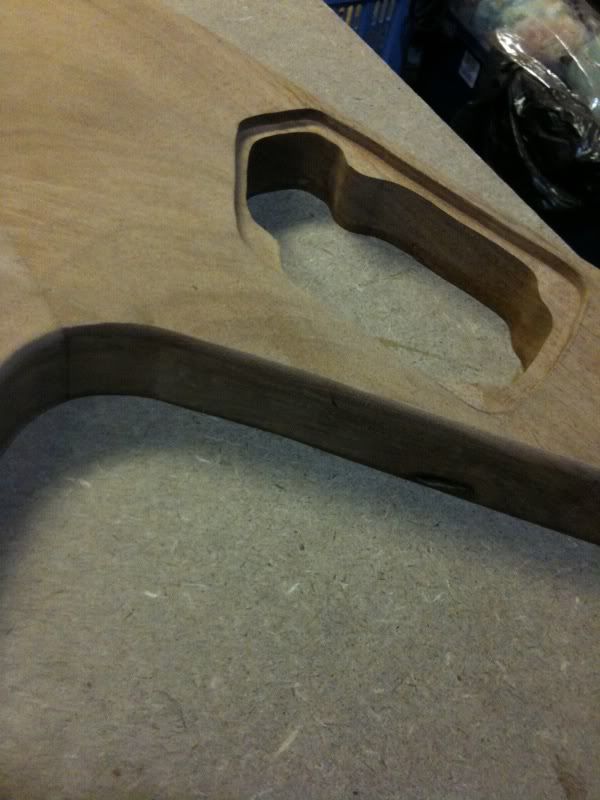
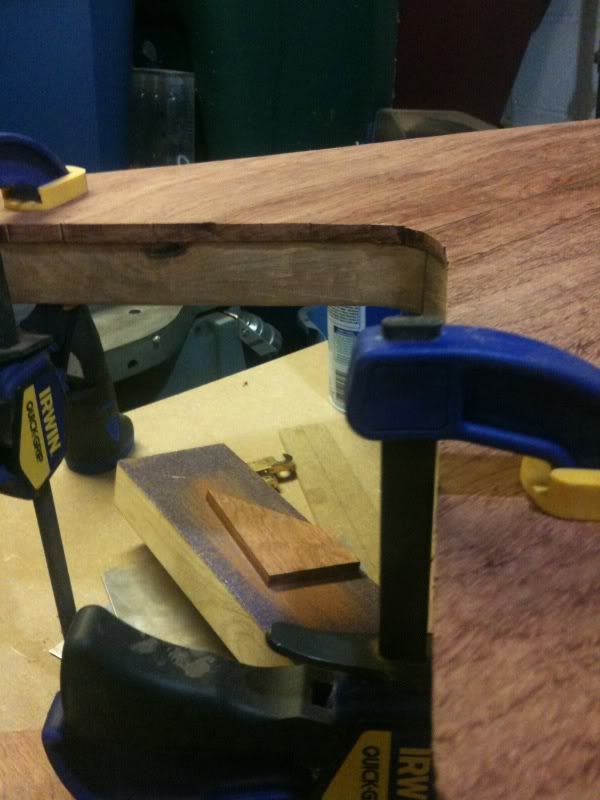
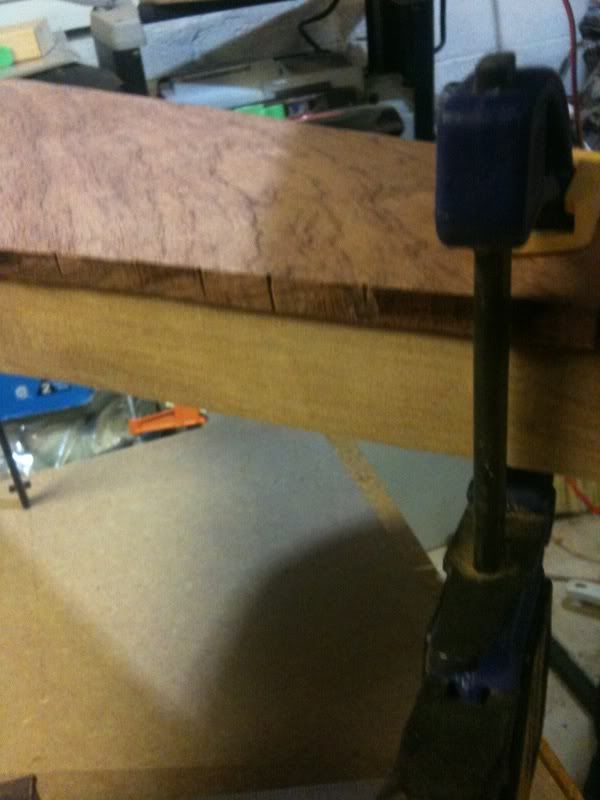
Its been a while since I worked on this build. I had to fix the neck heel and I just got around to fixing that. Today, I only routed the pickups. I bought fiberglass pickup templates, but I transfered the template to 3/4" plywood so I won't run the risk of messing up the original template.
I still have some fret dressing to do and route the bridge/tailpiece and drill for the tuners and input jack.
-
Very excited here to see the finished neck! Great ideas. I build amplifier stands and use LEDs sometimes. Will they come on when you plug in the guitar? or will you use a SPST?
Great work!
Josh
I'm going to add a spst. On one of the body pics, I have a small hole next to the holes for the pots/switch, that is for the mini switch. I didn't know how large to make it so I just used a small bit and will make it bigger once I buy a mini switch. I want to figure out how to have a mini 3way switch that if its in the up position, the pickups/fiber optic circuit is not getting power, the middle position, the pickups is getting power, and the down position, both the pickups and circuit is getting power. This way, I can turn everything off and keep the input cable plugged in and the batteries to the pickups won't lose any juice.
-
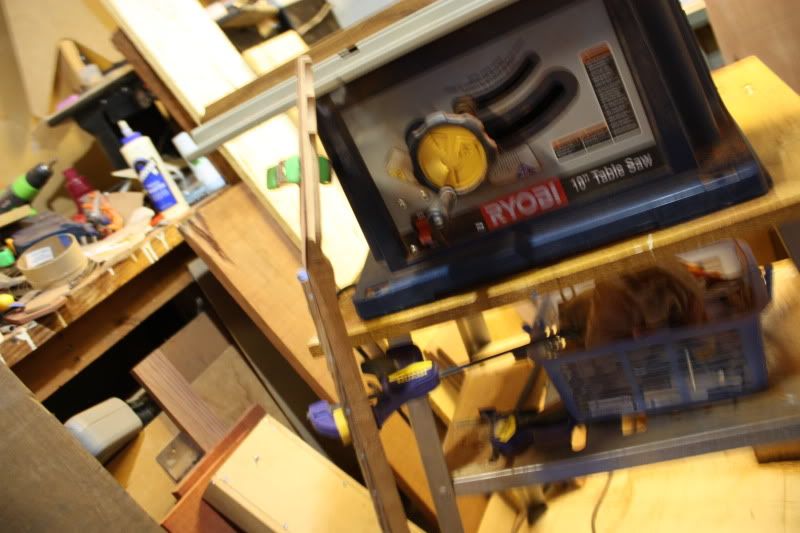
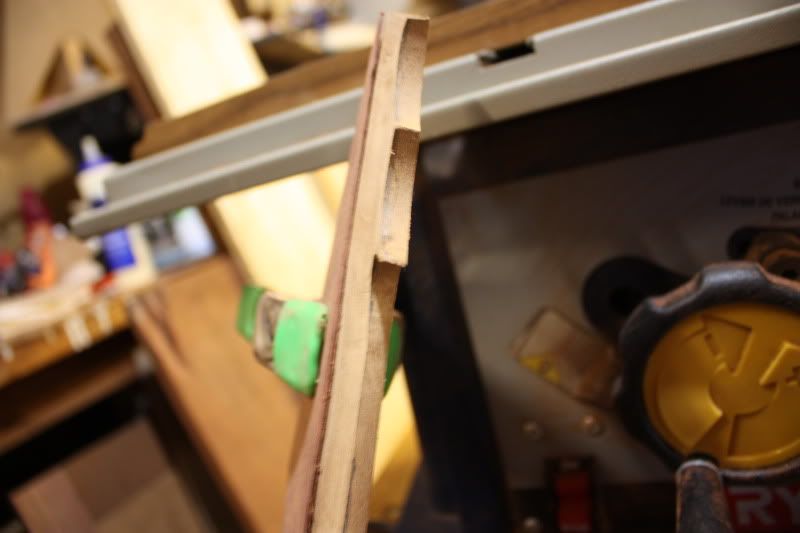
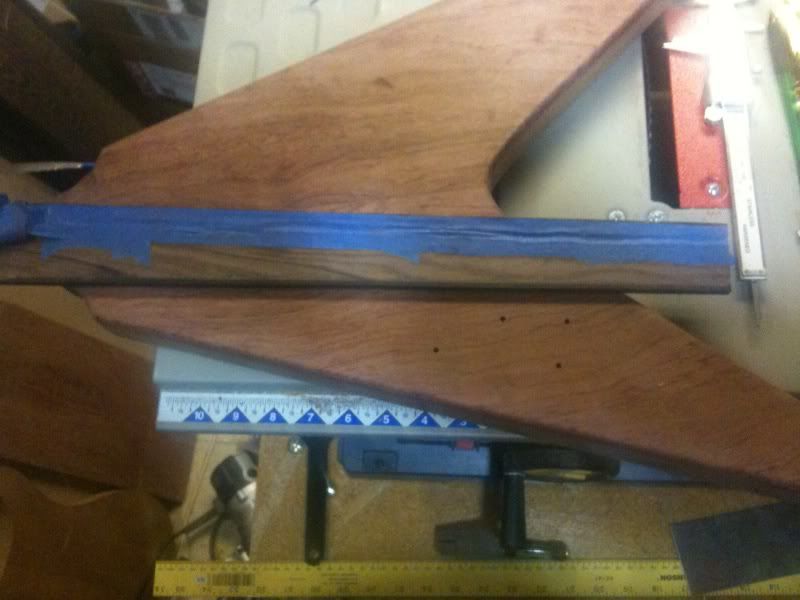
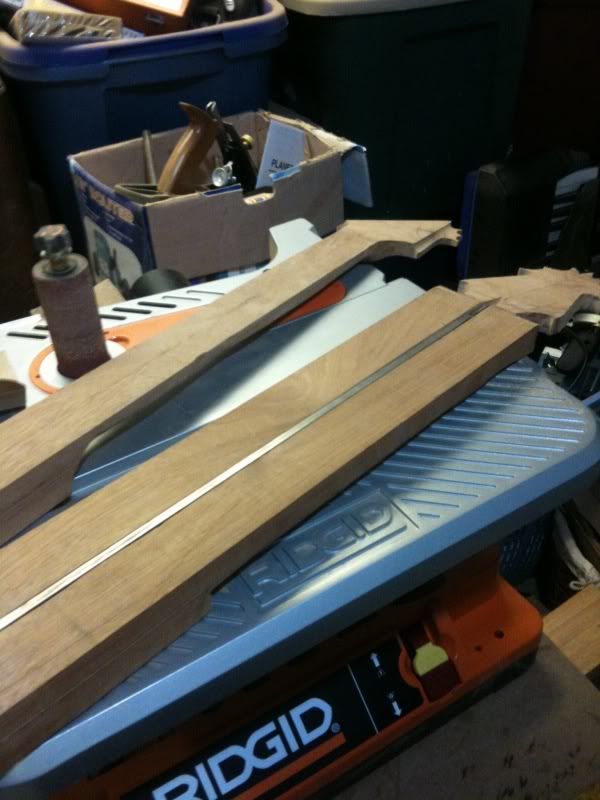
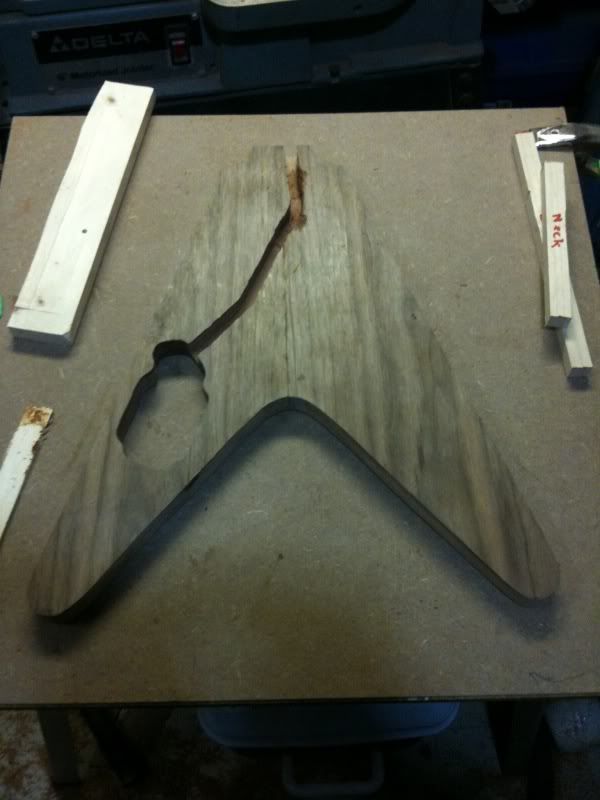
Its been a while since I posted progress to this build. I have been SLOWLY making progress to this build and hopefully have it finished in the next few weeks. In the meantime, I bought a new digital SLR and have been taking pictures with that. I had to make another fretboard because the thickness, along with radiusing would cause damage to the side dots. This board is bolivian rosewood and I think its the best board I have worked with in terms of looks. I also am using a circuit that I designed to change the LED color. This circuit was made for me by a friend who lives in Russia. He has his own amp company and he offered to make me a bunch of circuits for my future builds. I was able to route the neck joint but I'm still having trouble with the neck where it meets the body. Anyone have any ideas on how to cut at an angle on the neck so that it is flush with the body on the side?
First the fretboard:
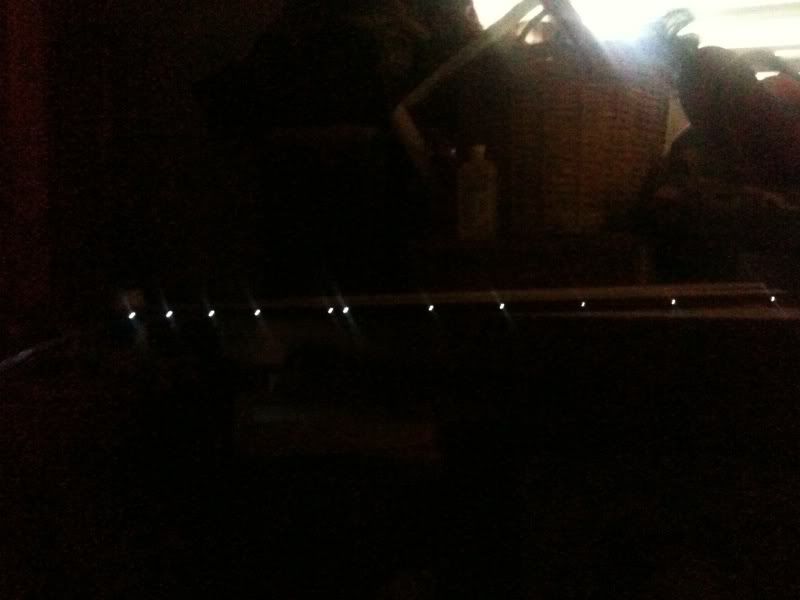
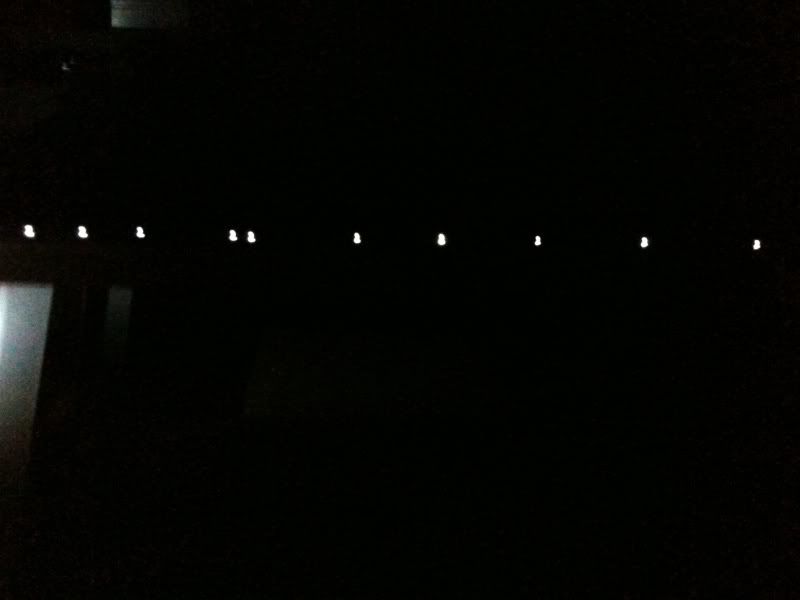
With the light off and the LED circuit on. The LED can display red, blue, green, violet, aqua, yellow and white.
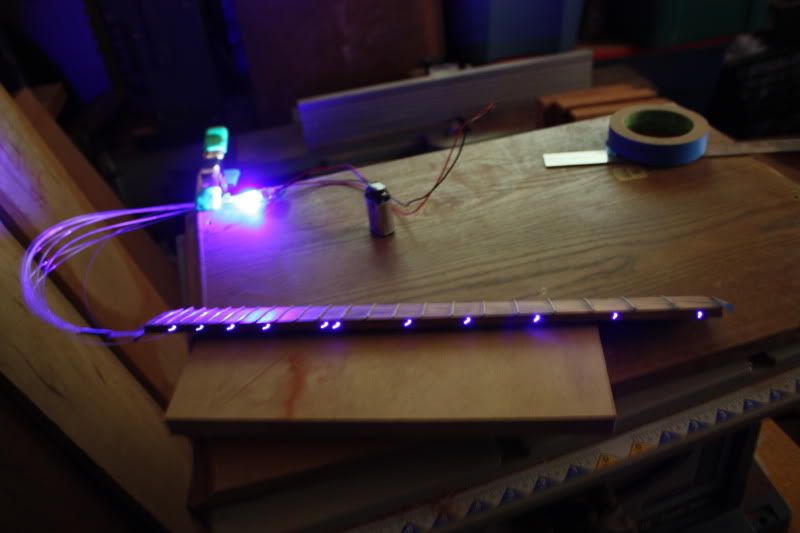
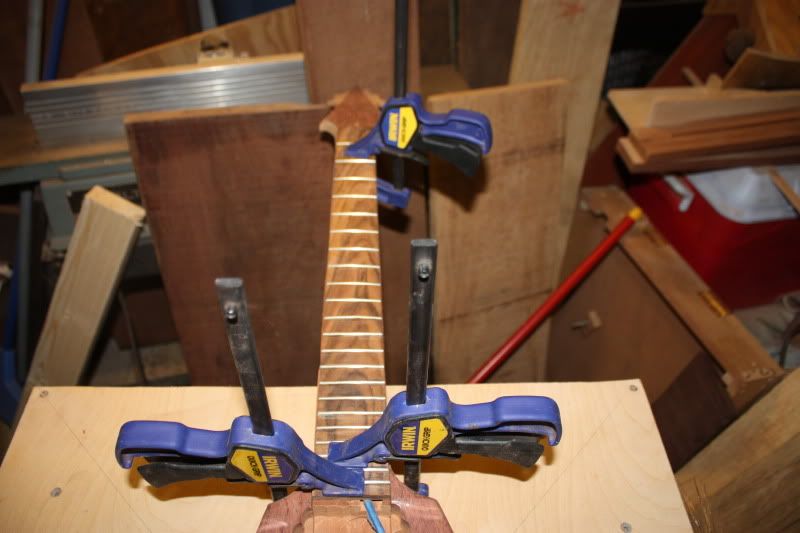
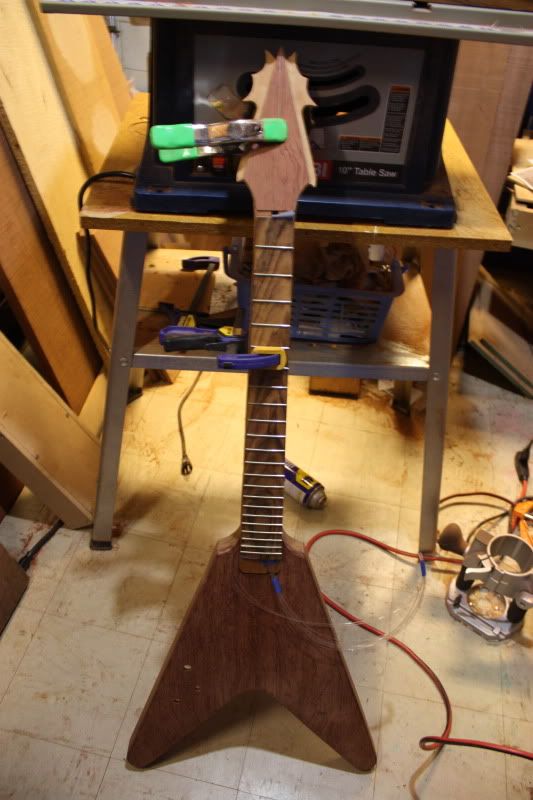
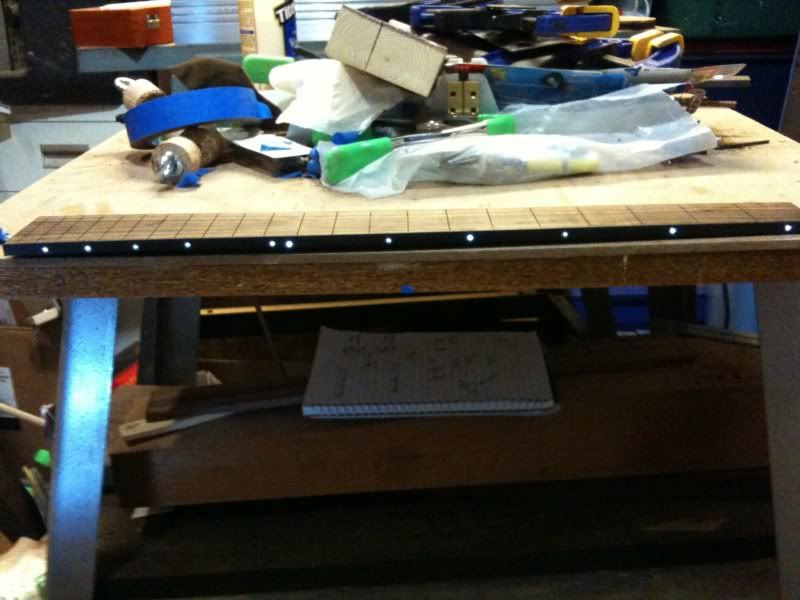
Here is the neck in the body of the guitar. I haven't glued the neck in. I wanted to finish the fretboard and glue that in first before I glue the neck in.
With the fretboard on.
Tight neck fit.
Now its looking like a guitar!
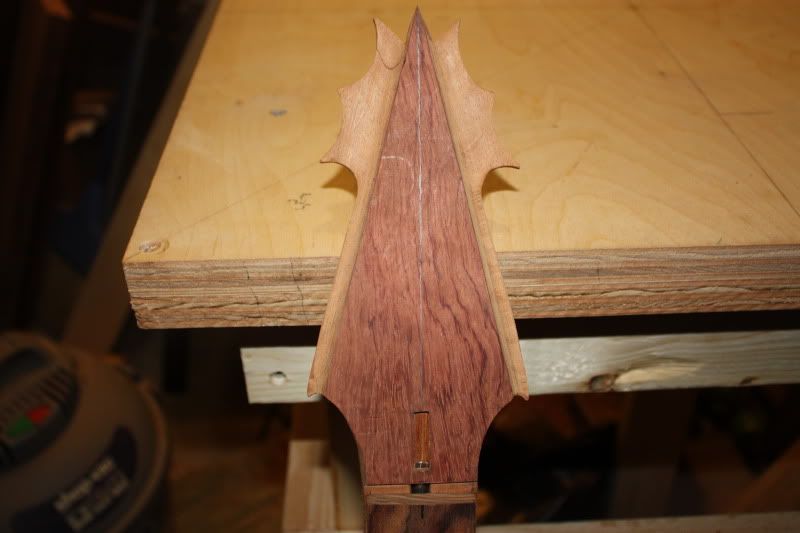
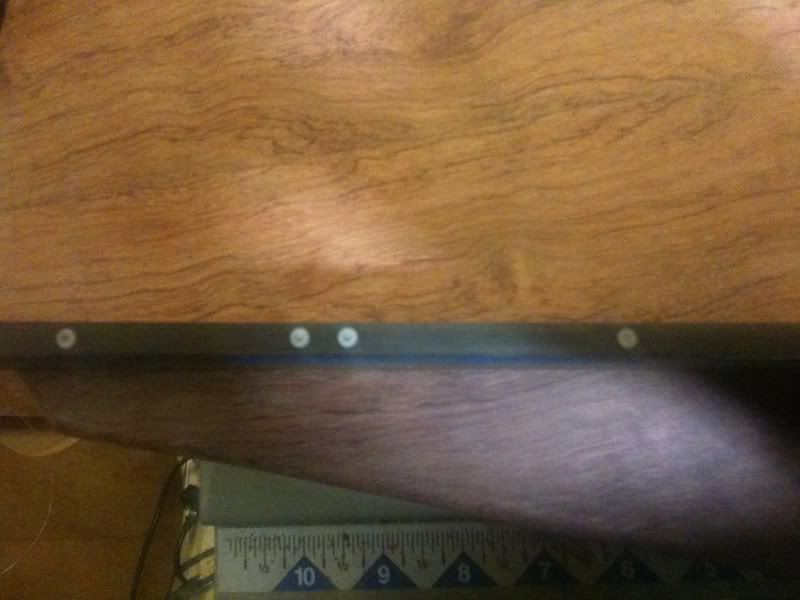
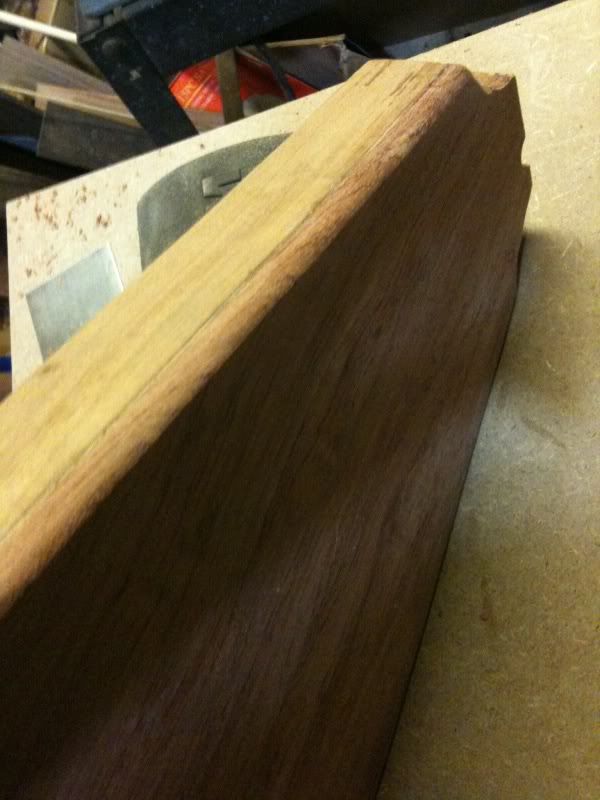
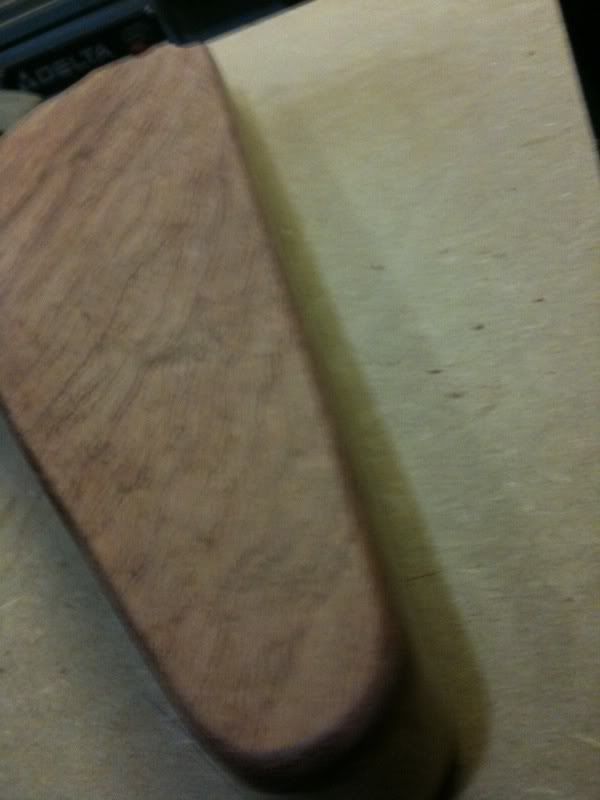
Side view of the thickness of the headstock. The bubinga cap is about 1/16" but the bottom is still rough so I have to still sand that.
Closeup
-
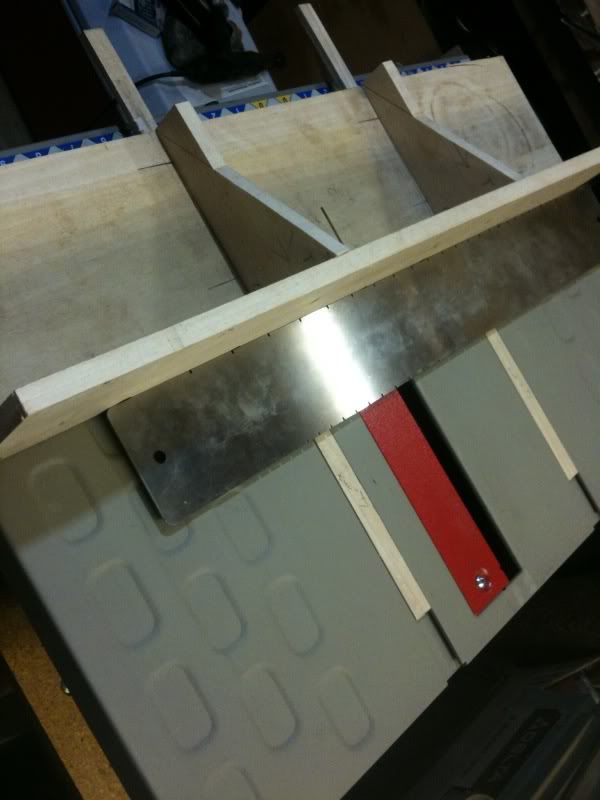
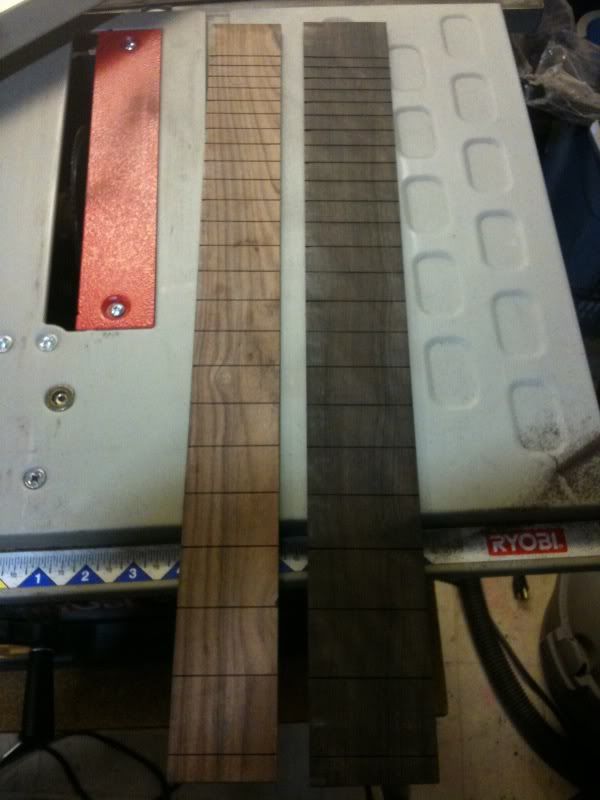
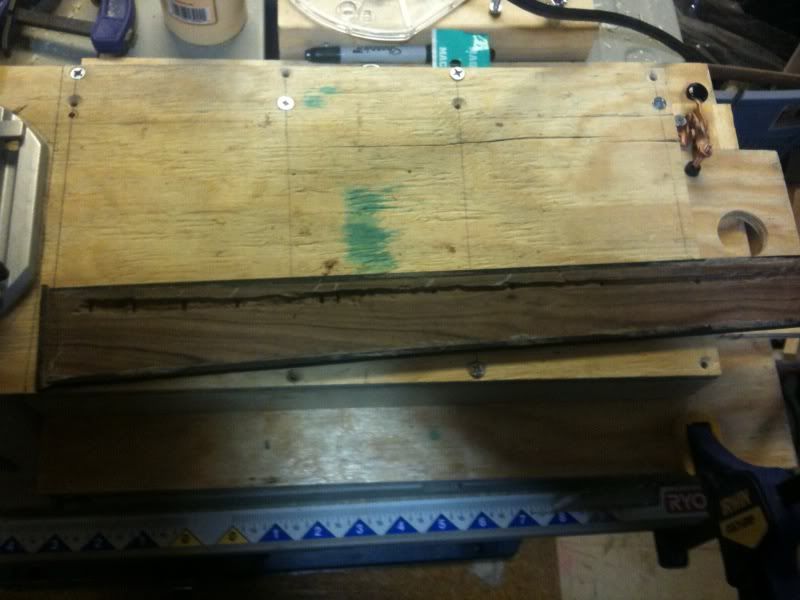
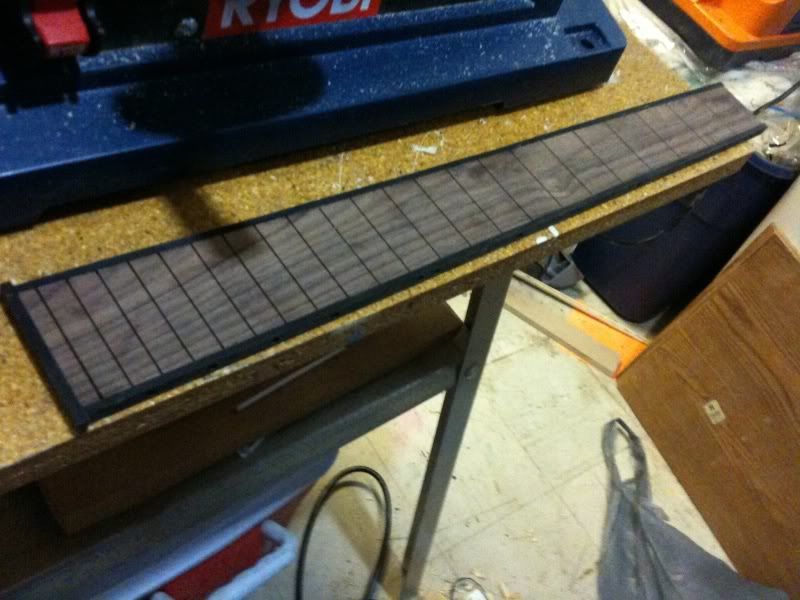
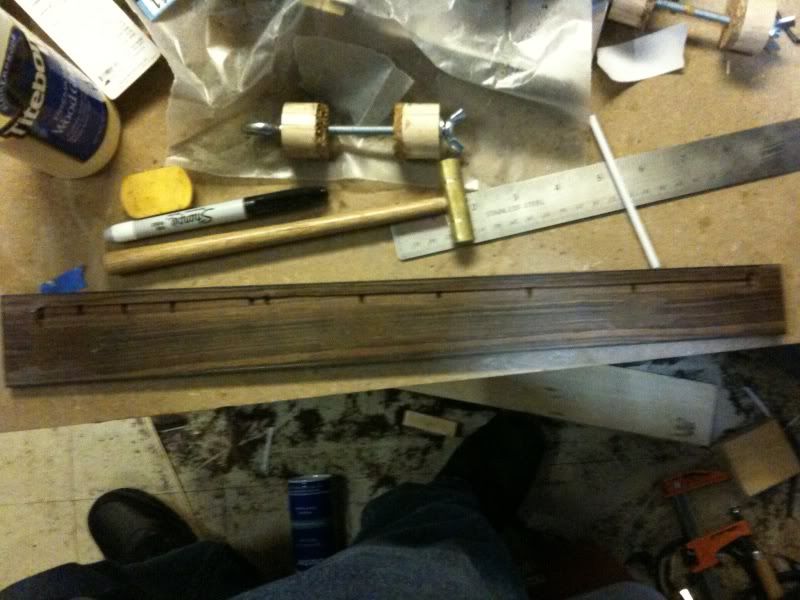
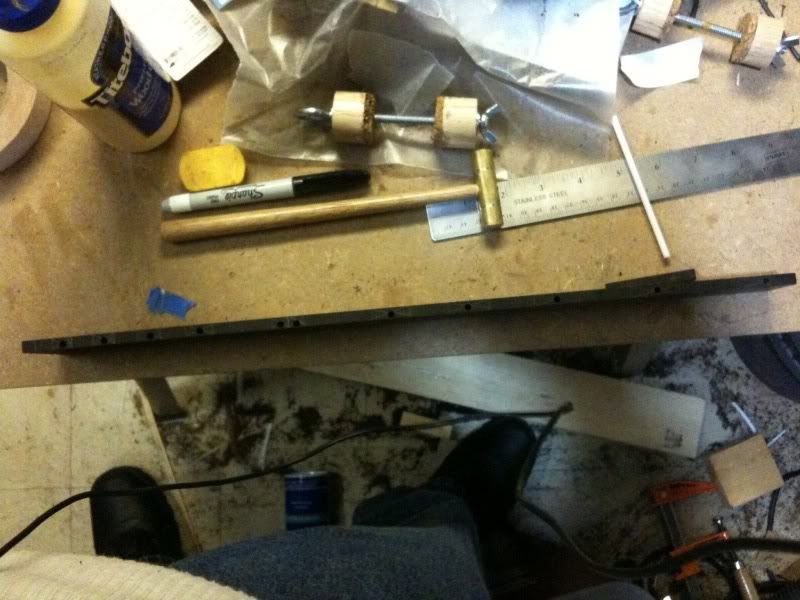
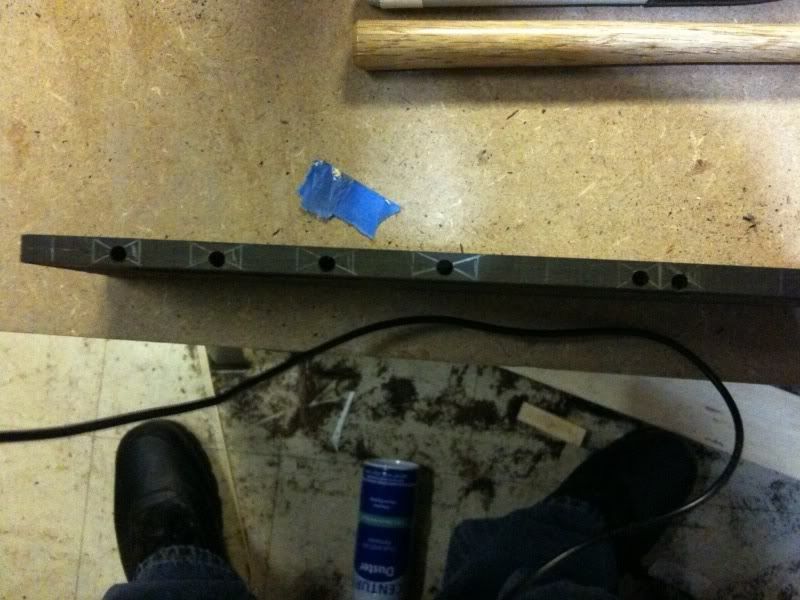
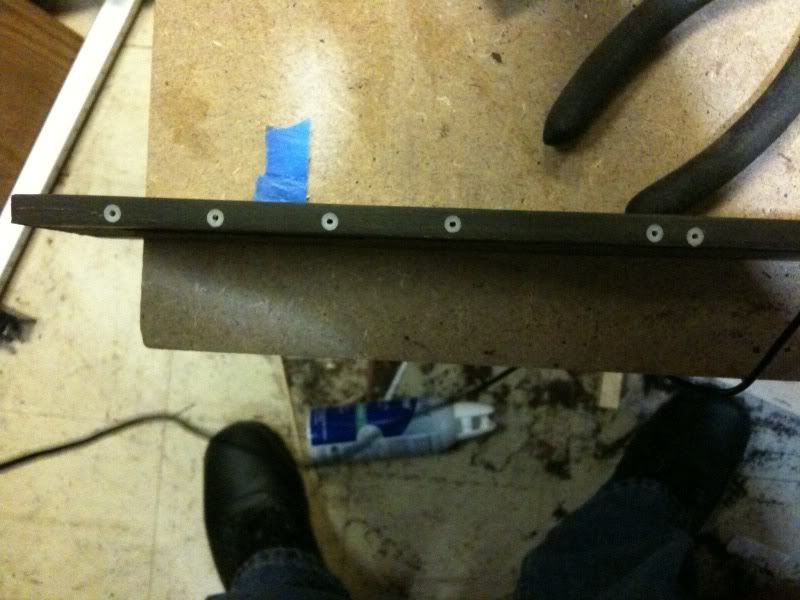
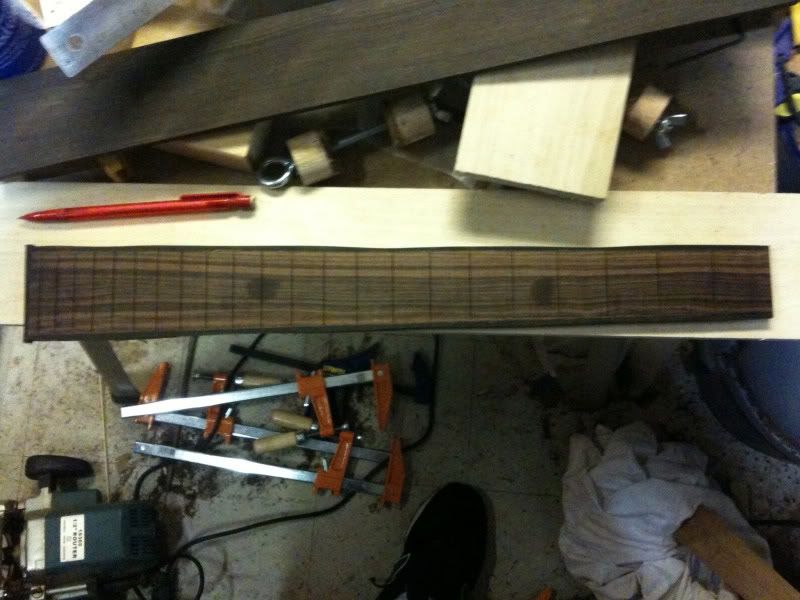
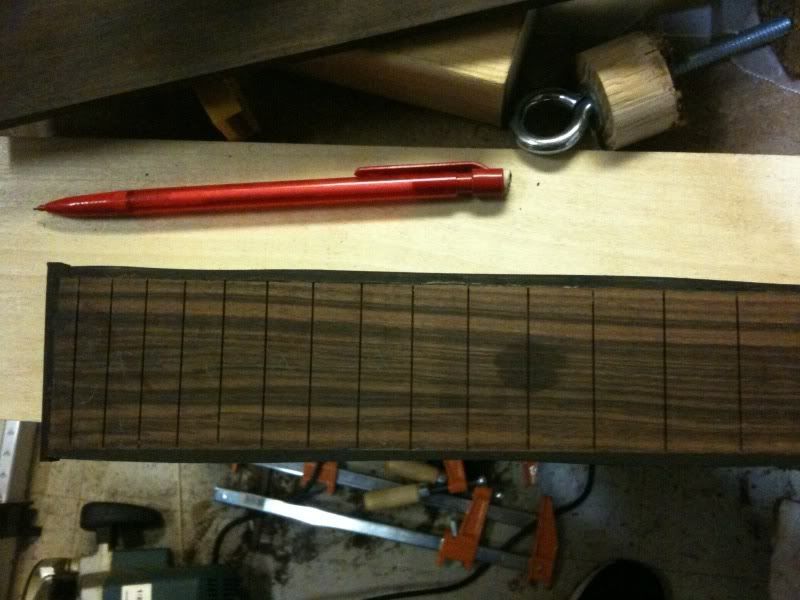
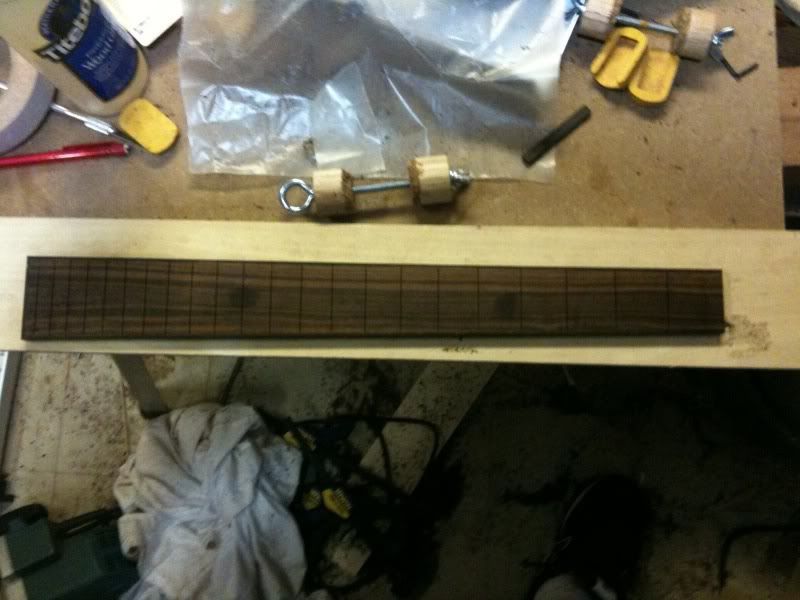
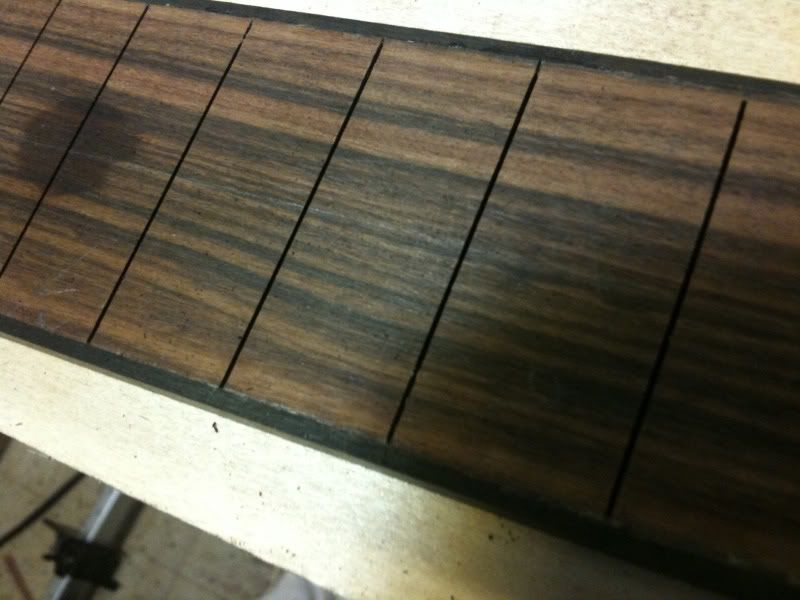
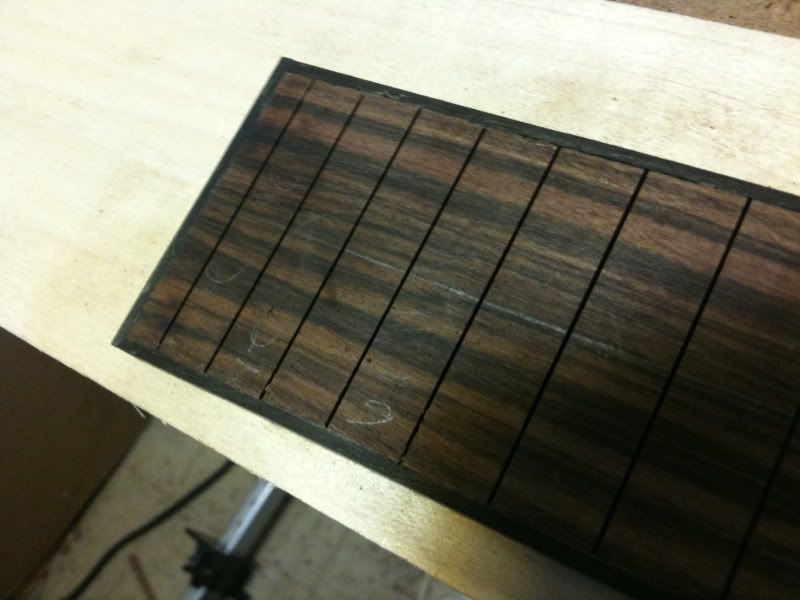
Alright. Its been a while since I posted updates to this guitar. I should be finished with it, but I've been taking my time, and buying more supplies for my guitar building. I made another fretboard; slotting the board and and did the fiber optics on that board. I also drilled the pilot holes for the controls on the body. Enjoy!
I made a fret slotting jig to slot the fretboard. The saw blade is a stewmac slotting blade. It took about 3 minutes to slot 2 boards.
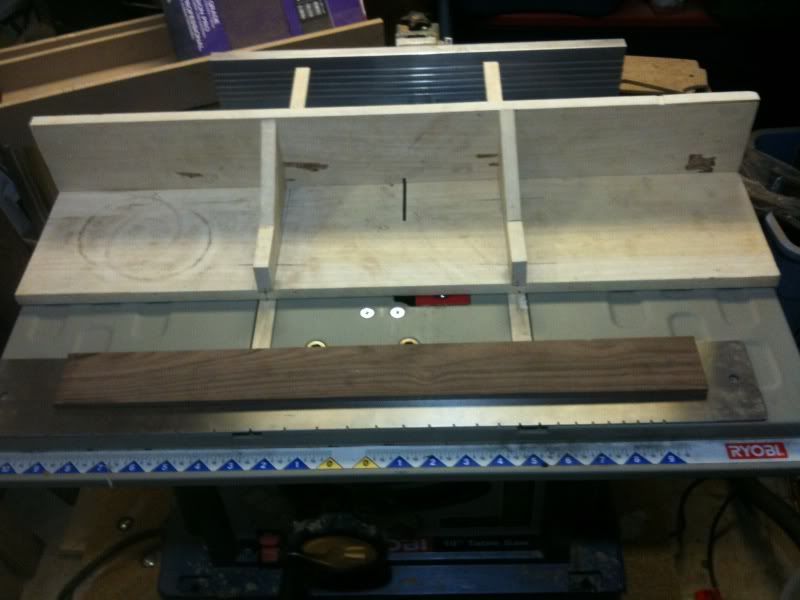
Not shown is me using the same stewmac slotting saw to cut the ebony into binding but that didn't take long either.
I also used a dremel to route out the fiber optic access on the underside of the fretboard. It doesn't look pretty, but it won't be seen anyway.
All epoxied and taped up, waiting for it to finish curing.
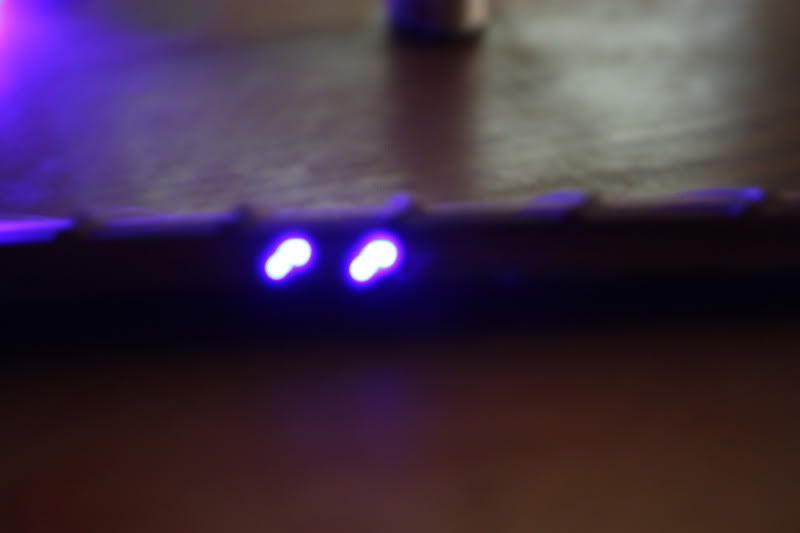
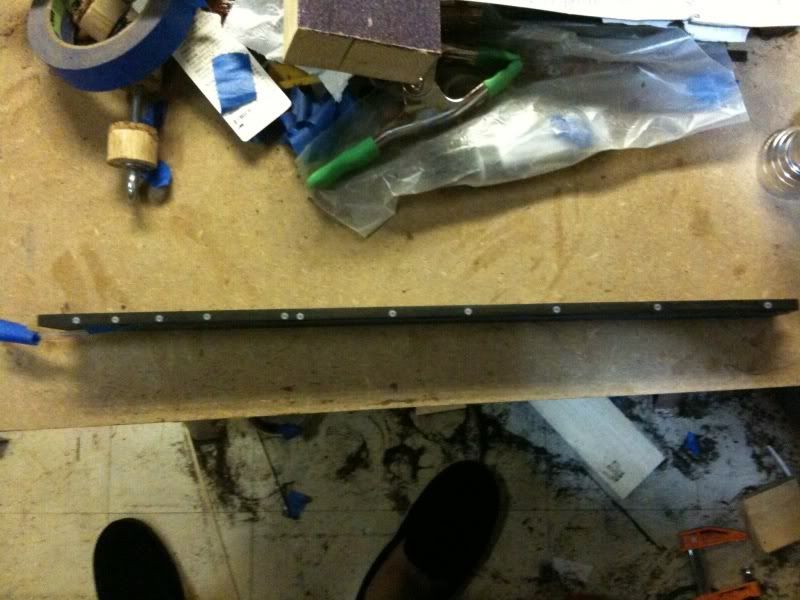
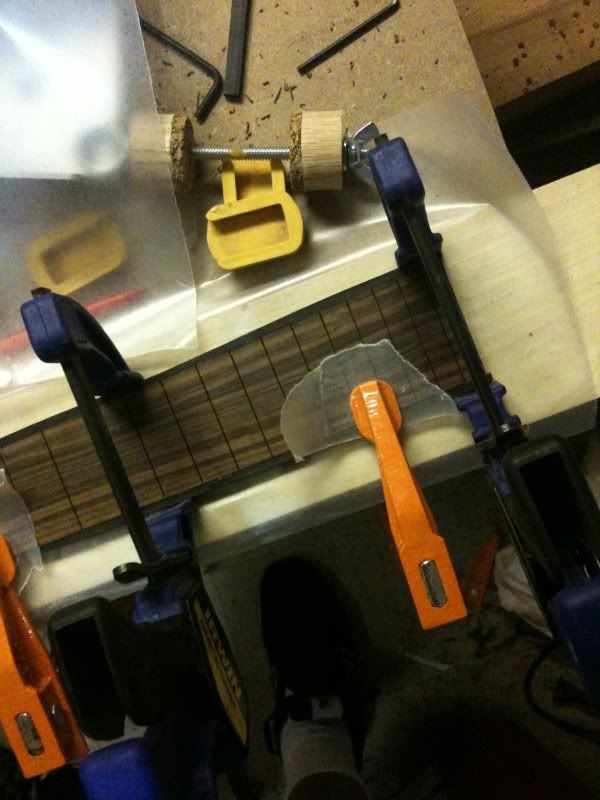
I also did the side dots. I put a tiny bit of epoxy inside the hole where the fiber optic goes in the side dot and sanded it flush. I finally got the 12th fret dots straight!!!
Here is the side shot of the fretboard with light going through the side dots.
-
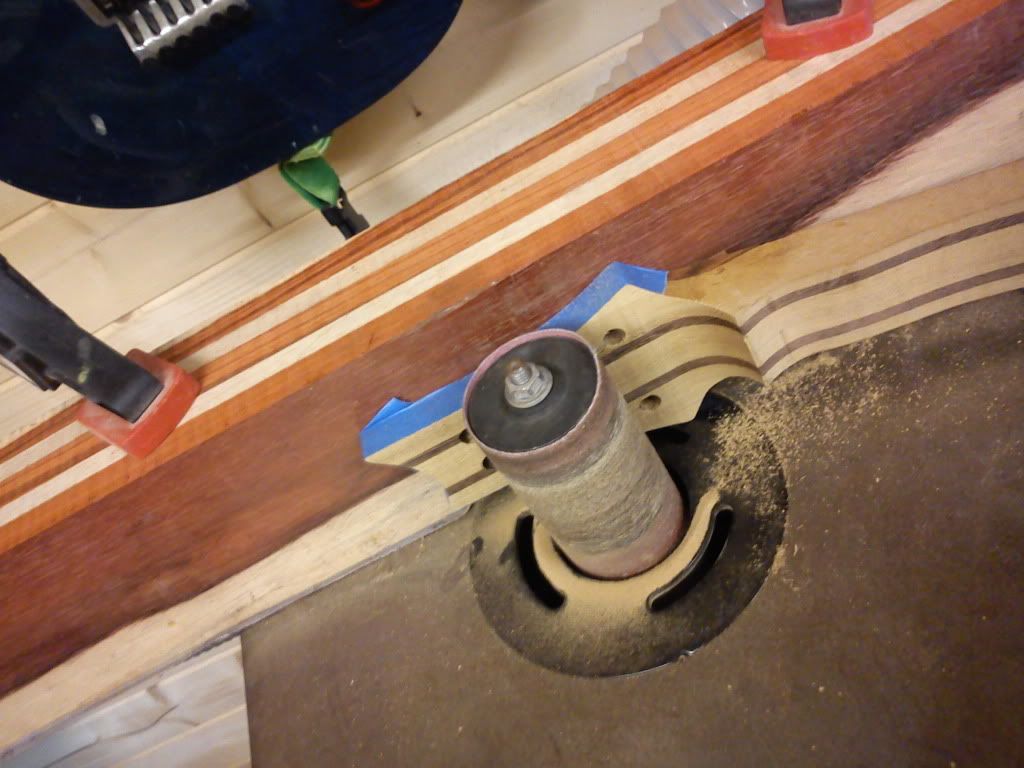
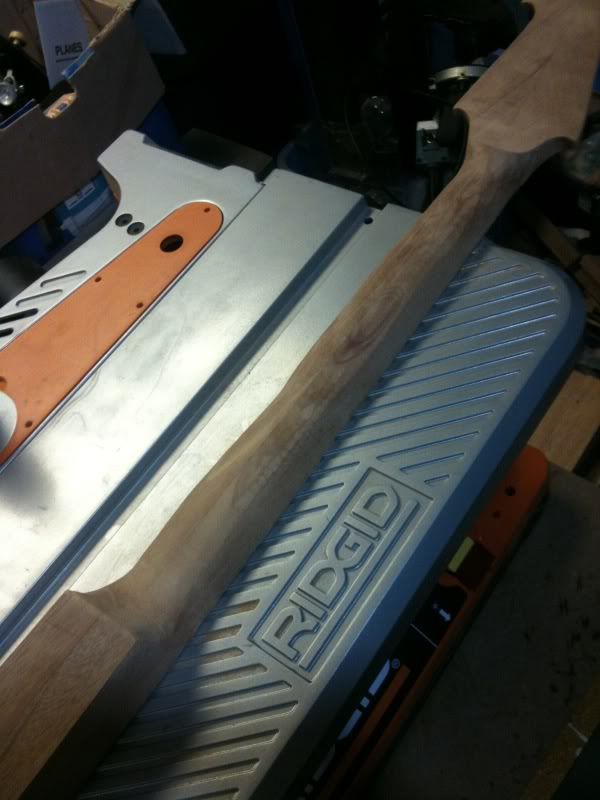
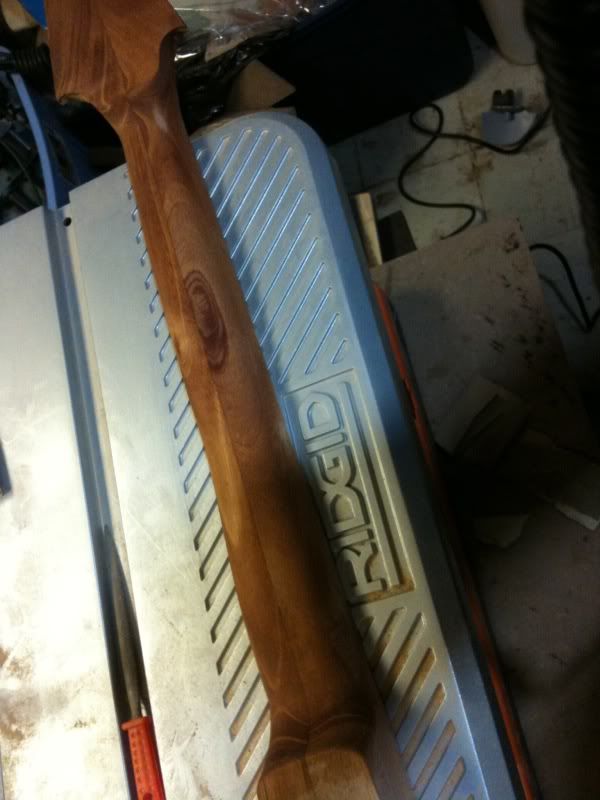
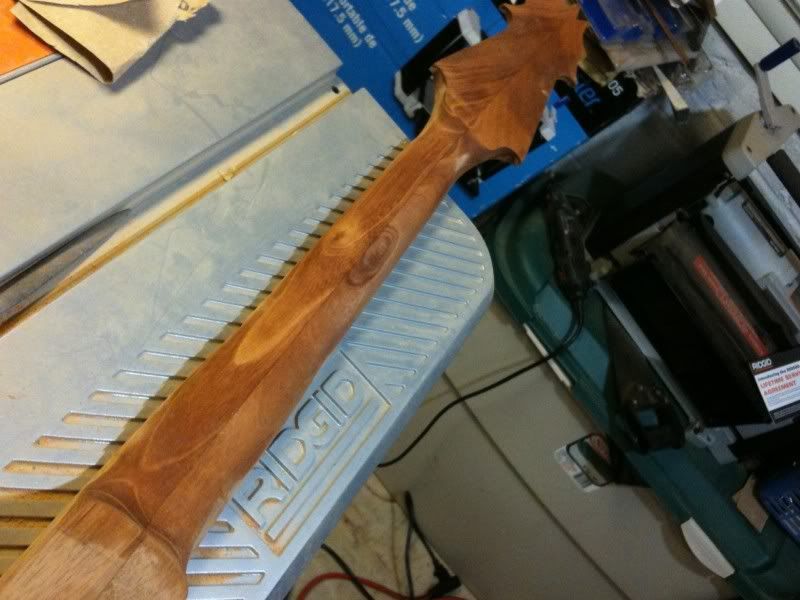
Today, I decided to practice on making the neck profile. I saw someone from another message board use this machine and I thought I would do the same. I used a Ridgid belt/spindle sander to make the profile. I initally messed up a little on the first neck with the sides(too narrow) and parts of the headstock, so I used this neck to practice on. Also pictured is the new neck with the truss rod routed. After the test neck was done, I used 60 then 120 grit sandpaper to finish it off. I then put a little water on it to show the figure. I wish this one wasn't a test neck. Its got alot of crazy figure going on.
-
I've been slacking lately with the guitar build. I decided to make a new neck/fretboard since the side dots didn't align and it looks like if I radius the fretboard, it will go into the the side dots. I ordered some thicker wood for the fretboard so when I radius it, it won't go into the side dots. As for the neck, on the current one, I had a couple of snags on the side when cutting the sides. Lessons learned. Anyway, I did get to make the LED circuit. Here is a link to the video I made of the circuit.
-
Next time try drawing a common center line across the length of the board in addition to your X's. Also try drilling with a smaller bit (but not to depth, just to make sure you're on center) and then go back over it with a bit that is to your spec.
I was more worried about not having enough wood after I radius the board, than centering the dots. I was thinking afterwards to have a centerline. Oh well, a great lesson learned.
-
Aside from the centering issues, it's pretty cool.
SR
Yeah, thats one thing I regret not doing better. Plus, I haven't radiused the board yet so I 'm really afraid of how much room I'll have after its radiused.
-
Last night, I did some work on the fretboard. For my first project, I decided to try my hand at doing fiber optic side dots. In my opinion, I thought I did a pretty ok job. A few things I learned from this part of the project:
- Epoxy is tough to deal with, especially when trying to hold the fibers down and not getting any on your fingers
- Make the channel a little deeper and a little farther from the side. This will cause a better bend in the fibers from the end to the channel
- Sand lightly and wait til the epoxy has fully cured before sanding. This will cause the ebony to not get in the side dot hole.
- Use a scraper to finalize the side dot to prevent any ebony dust in the dot and to brighten the dot material
Any comments and criticism is strongly welcomed.
-
Yesterday, and today I began work on the fretboard. The fretboard is morado and the binding is gaboon ebony. I already slotted the fretboard and started to add the binding to it. Once the ebony was glued and dried, I used a router to cut it to size.
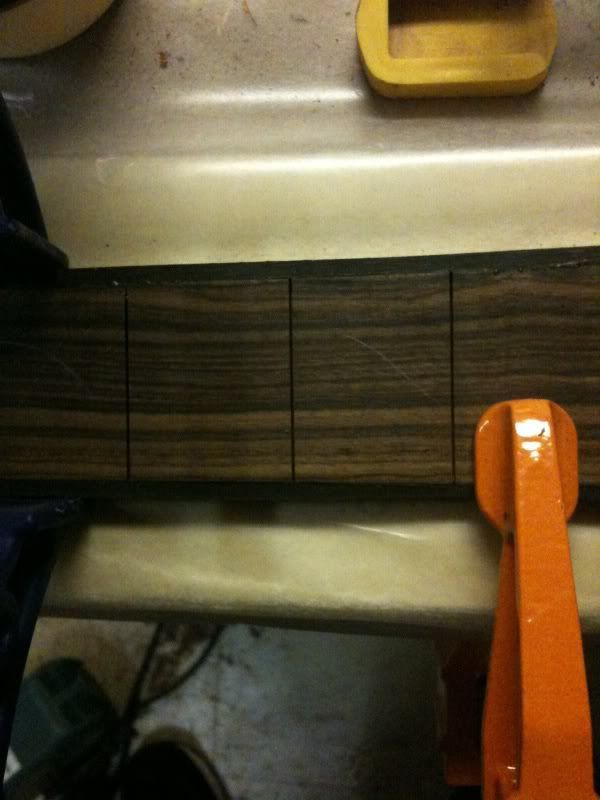
Tomorrow, I'll radius it and then add the side dots.
-
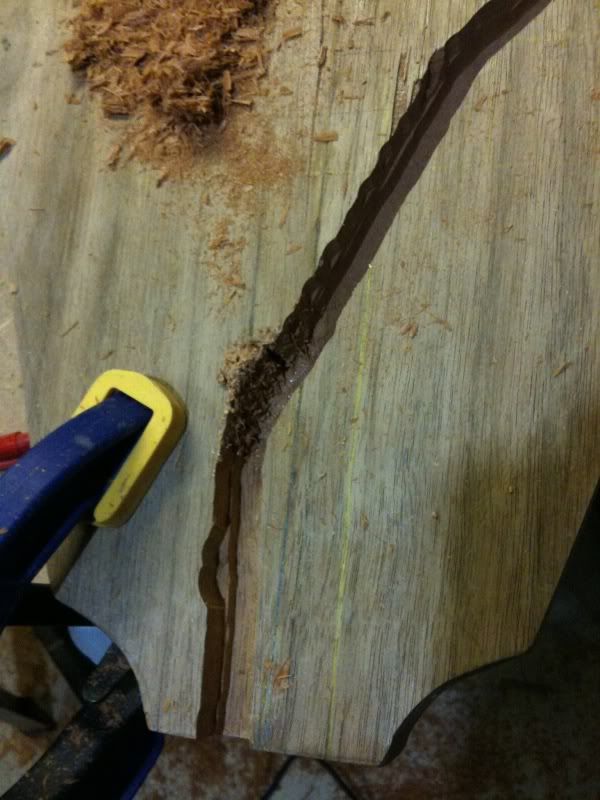
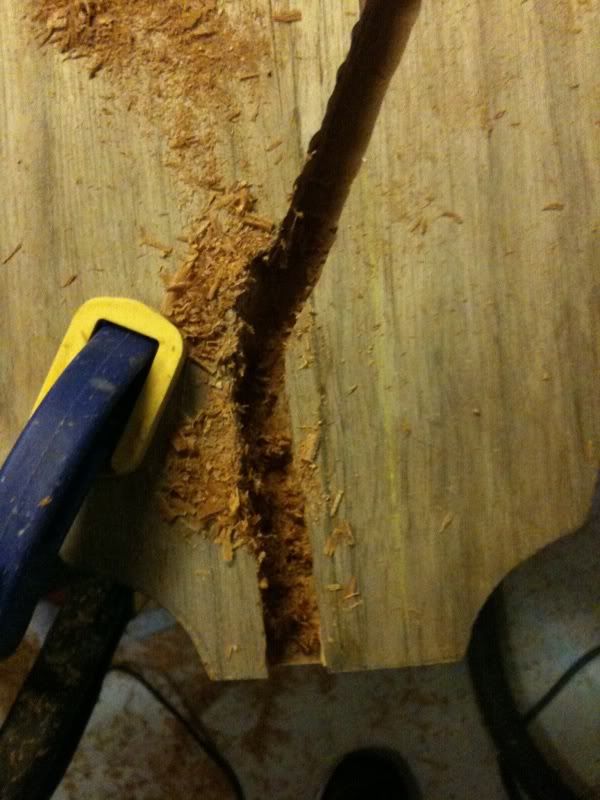
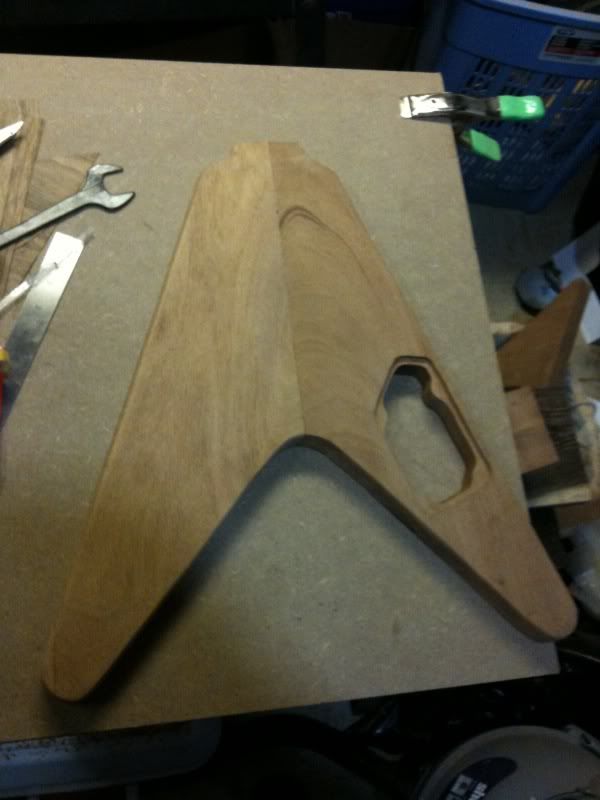
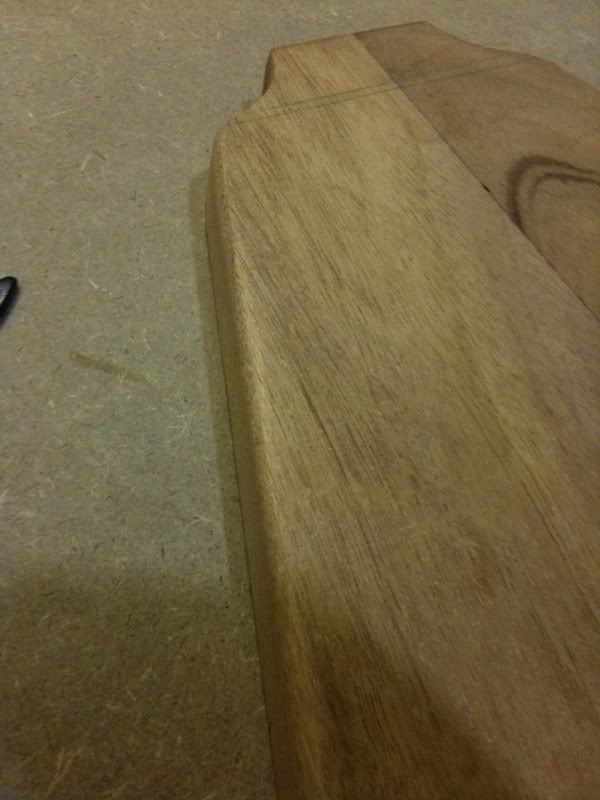
I didn't finish the route at the top of the guitar because I'm going to route it anyway, and there has to be a sharper transition from the body to the neck, especially at the join line.
Now, its looking more and more like a guitar. Thats it for today.
-
Alright. Today, took all of the clamps off and use a flush trim bit and rounder bit on the router to round the top of the guitar. I had to remove alot of the glue that ran down the sides of the guitar before I could efficiently use the router. Most of the glue on the sides is off but I still have to sand the remainder off.
Before:
After using the flush trim bit:
Ahh, I forgot about the wire access route!!! Meh, doesn't matter, its going to get routed anyway when I add the neck.
Now, after using the round over bit:
-
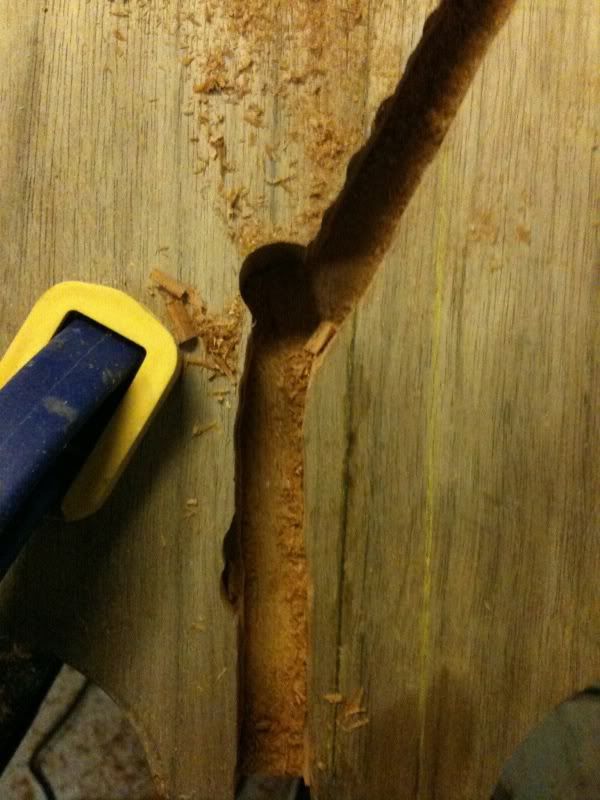
Lookin good! Can I ask on your tearout if that happened because you tried to route too much off at one time, or if the bit was dull, or if it just plain happened and there is no specific reason why....
Its a combination of 3 things. Me going too fast with the router, not having some sort of template for the channel for the router, and not drilling holes in the direction of the channel so that the router doesn't have to cut as much. When it went off, it went to the left and the router was wobbling. I had to quickly turn it off. The next time I do route anything on the guitar, or future guitars, I will use templates and not goo too deep on the first pass.
-
Today I routed the wire access channel and glued the bubinga top on the body.
Lessons learned today:
1. If I'm going to have a veneer in between my top and body, make sure to route all cavities and channels before putting it on
2. Make sure I make a template for my wire access channel.
I learned these steps the hard way. Overall, it doesn't matter because the top will be covering it, but I wanted to fill in the mistakes. I used a sawdust/wood glue mixture to fill in the routes that I went off on in the channel.

Looks pretty good.
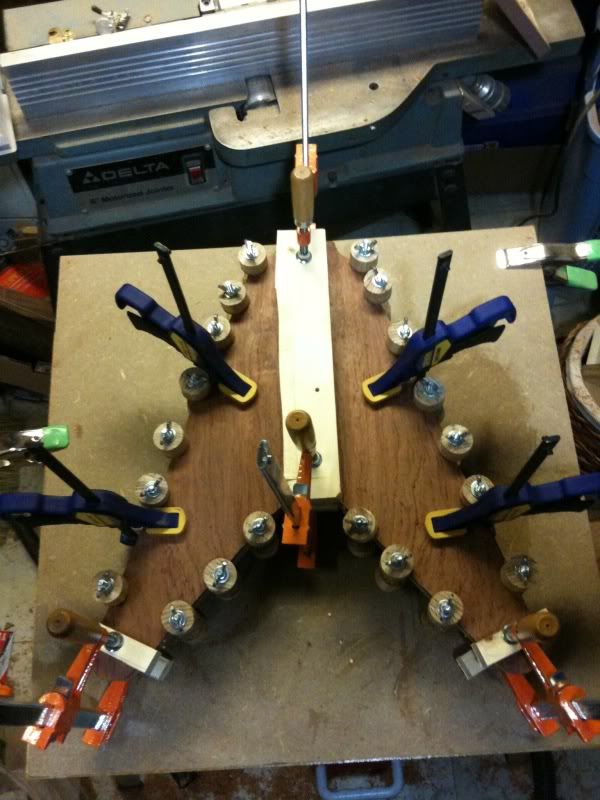
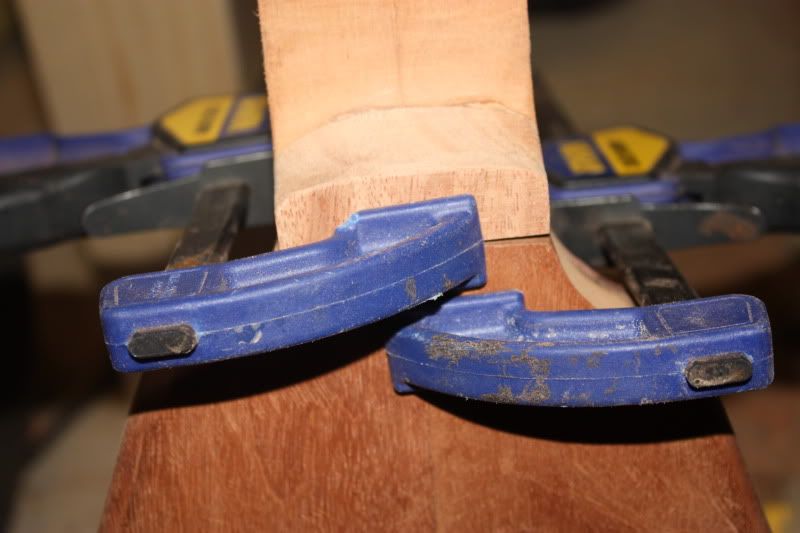
I decided to add some more clamps for support around the control cavity and middle portion of the body.
That is all for today. This week, I'm going to work on the fretboard.
-
I bet he's going to iron it down, that's the only reason I would be applying a glue substrate under a veneer like that.
...And if you do, beware, FWIW.
The reason I didn't like ironing veneer is because the heat will shrink your veneer, so if you're doing a bookmatch, the centerline will open up on you right in the middle of the operation, as well as other parts of the veneer shrinking and doing weird **** on you, right at the moment when you'd pay a year's salary to have an extra hand coming out of your torso.

The iron-on method works fine if you're doing one piece (not bookmatch), and of a normal, straight-grain wood, the kinds of veneer wood we guitar builders usually don't like to much.
The exotic stuff, burls, flames, quilts, have a lot of 'energy' inside of them, and when heated, all hell can break loose on ya.
Just sayin'...

Very nice build so far, I like your templates, looks quality-1.
Thanks and thats exactly what I'm doing and thats exactly what happened, lol. The shrinkage caused splits in the walnut, but I don't really care. The walnut veneer is just going under the bubinga top. Just a style type of thing. Next week, I will glue on the bubinga top. Here are some more pics:
I decided to round over the back. I tried a 1/4 and 3/8 round over bit. I stayed with the 1/4" bit. Pretty happy with the results
Really glad that there was no tear out here.
...and onto the ironing. I think this is the most ironing I have done this year, lol. Sorry for no mid-ironing pics. I did not want to burn myself while taking a pic. If I did, I would have taken a pic of those results too.

I did forget to route the channel for the pickup wire, but I can still do that later.
-
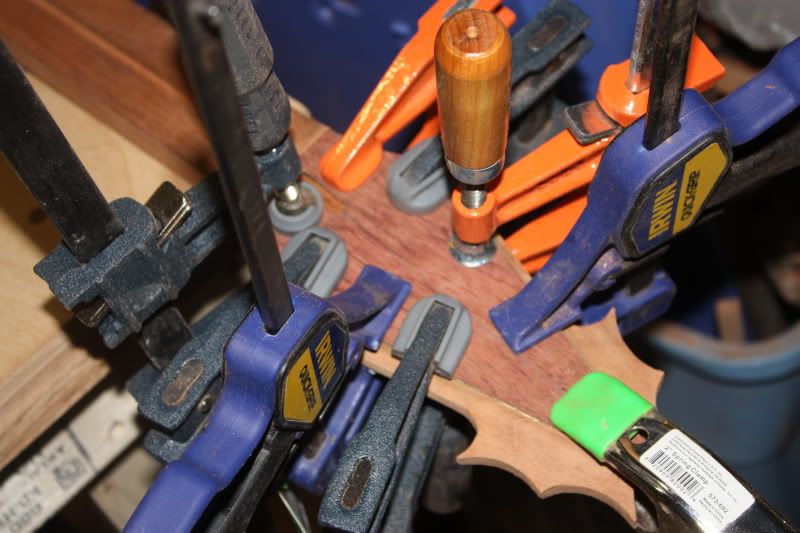
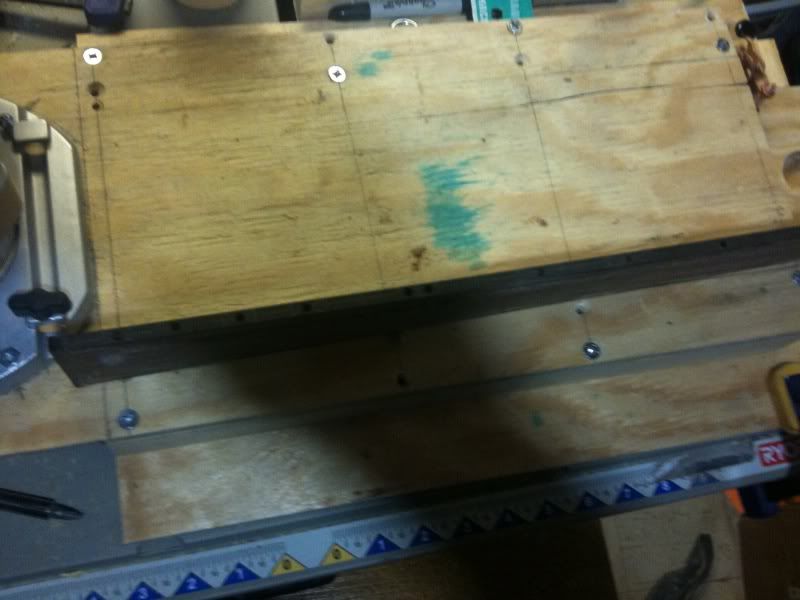
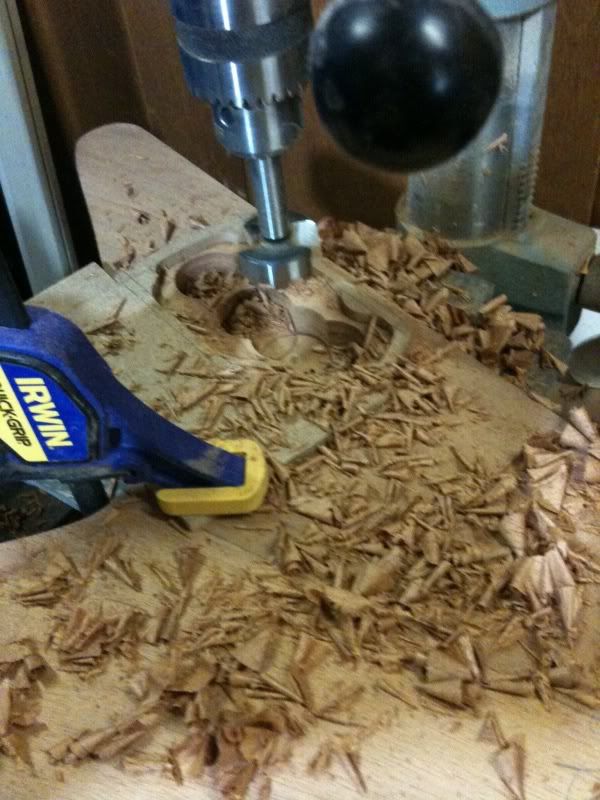
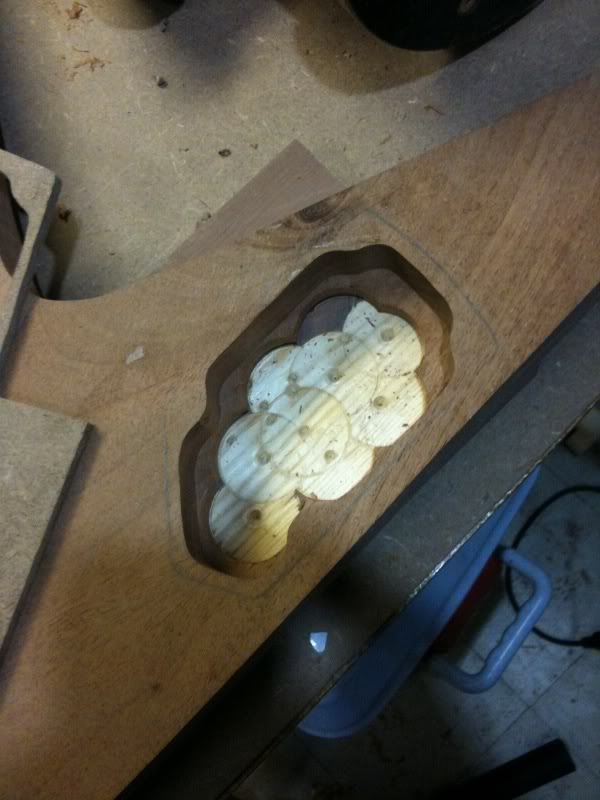
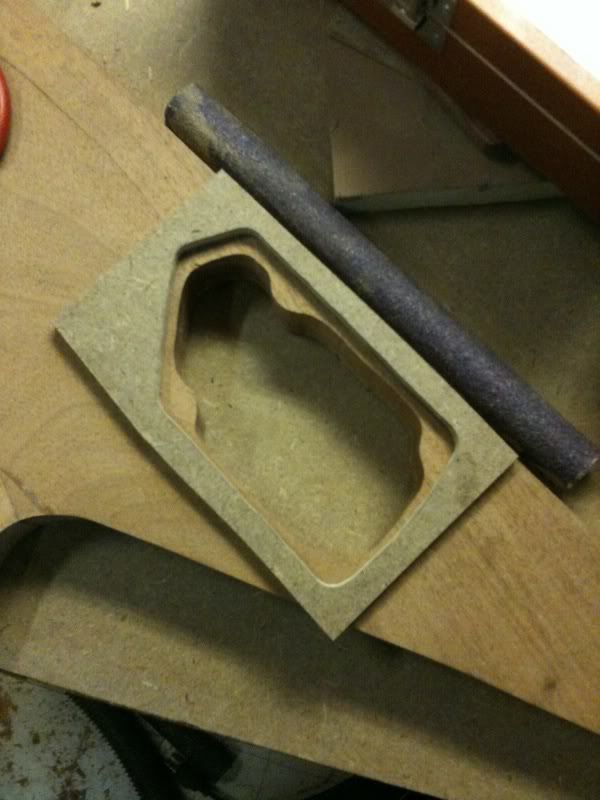
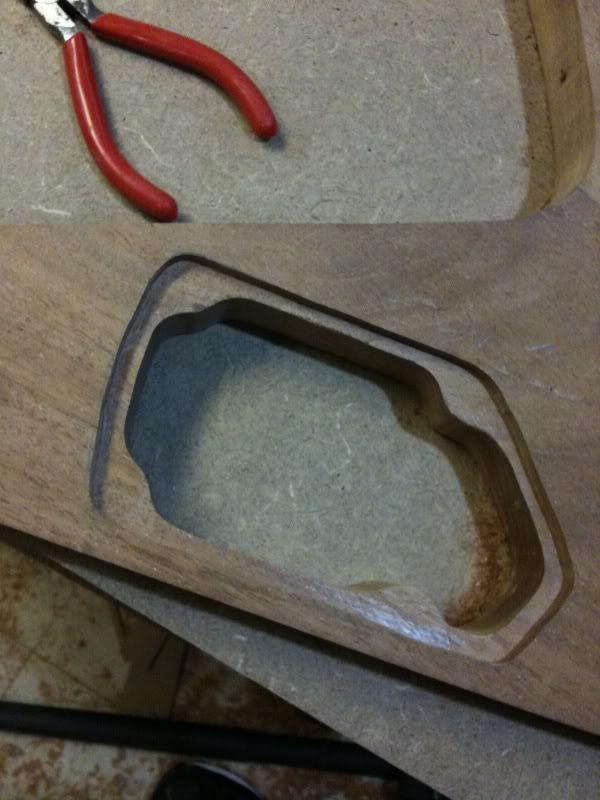
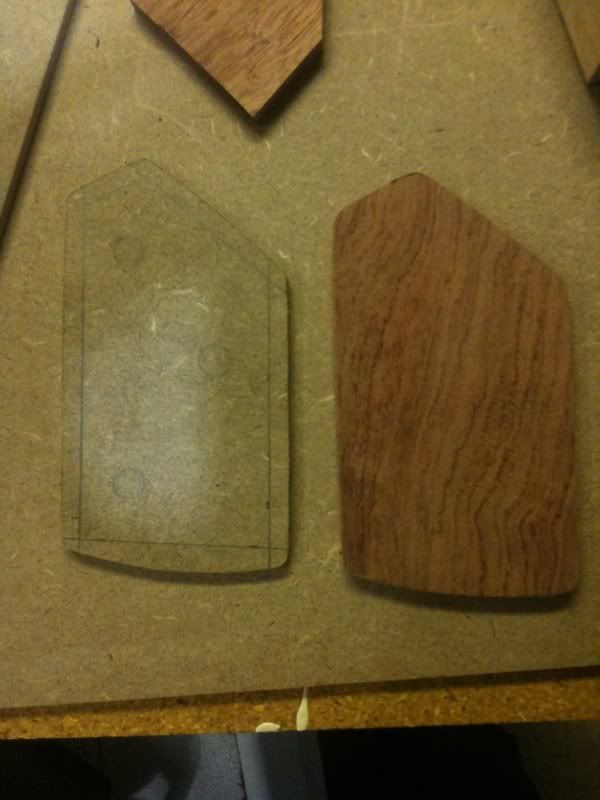
Today I decided to work on the control cavity since thats the last thing I have to do before I glue the top on. I thought it turned out well. I made my own templates for the cavity. I had to make one for the inner cavity with the portions of wood that the screws go on, as well as the template for the outer cavity.
I used a drill press and largest forsner bit to route the inner portion of the control cavity. Then I used the router for the rest.
I put on a layer of glue with a small paint roller and I will let it sit and dry before I put on my walnut veneer.

-
I was thinking about either that or putting some weights in the middle of the body for added pressure.
IMHO weights do not add enough pressure.... Maybe if you parked the car on it for the afternoon.
Here are a few other articles to read. While they are not he be all end all I will say that they are a good explanation on why 60lbs of sand is probably not enough.
How to Glue-Up Joints: Different Woods Need Different Clamping Pressure - Fine Woodworking
How to Glue-Up Joints: The right number of clamps - Fine Woodworking
How to Glue-Up Joints: Tips on gluing - Fine Woodworking
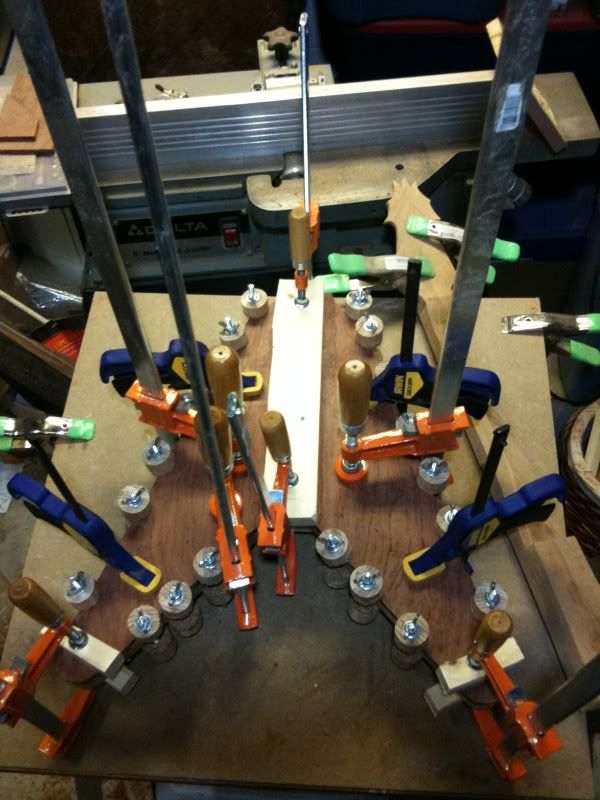
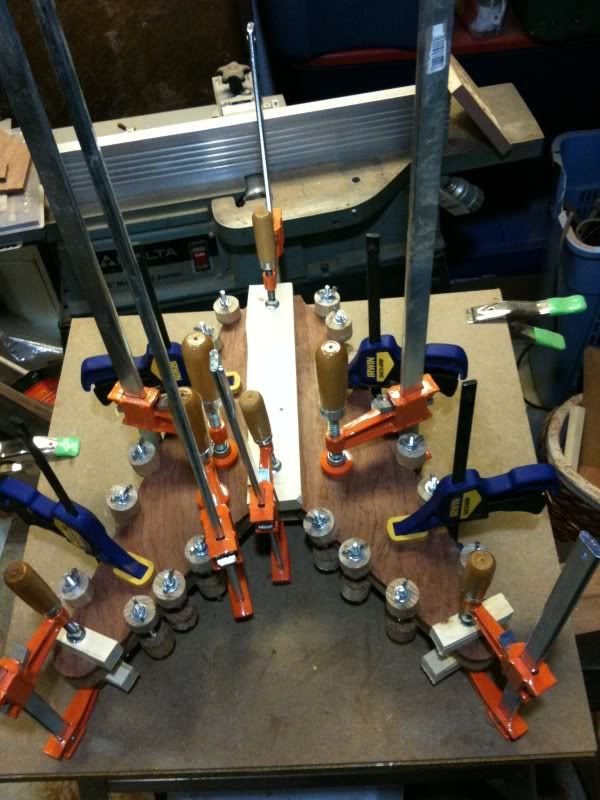
Thanks for the articles. I guess I gotta get some maple boards along with my spool clamps. Do you have any pics of a clamped up guitar for reference?
-
You are going to need more clamps when you plan on gluing that top on. A lot more clamps....
Oh yeah, I know. Those clamps in the pics are homemade spool clamps I made a few weeks ago. I have alot of them and I'm going to make some more this week to glue up the top to the body.
Ok.
You will probably need some pressure in the middle of the body. The easiest way to do that is make a maple spanner bar that has a slight curve in the bottom. Then you clamp it on each side. The curve loads the middle with pressure.
I was thinking about either that or putting some weights in the middle of the body for added pressure.
-
You are going to need more clamps when you plan on gluing that top on. A lot more clamps....
Oh yeah, I know. Those clamps in the pics are homemade spool clamps I made a few weeks ago. I have alot of them and I'm going to make some more this week to glue up the top to the body.
-
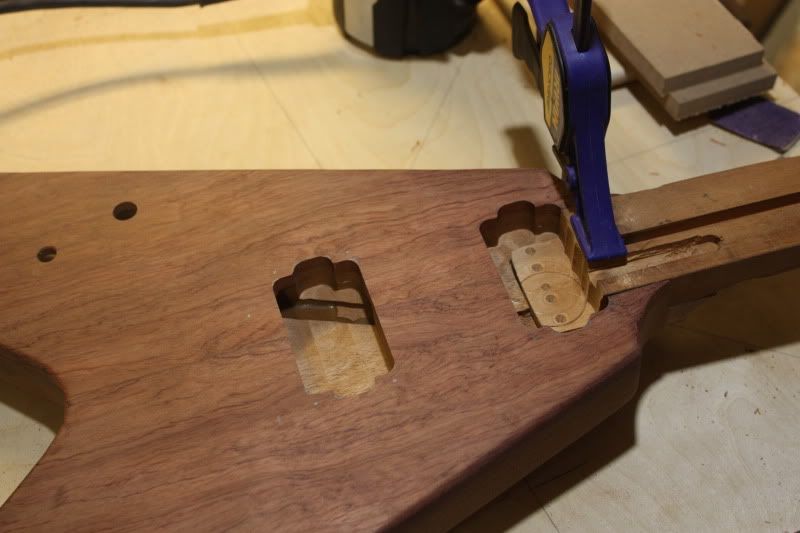
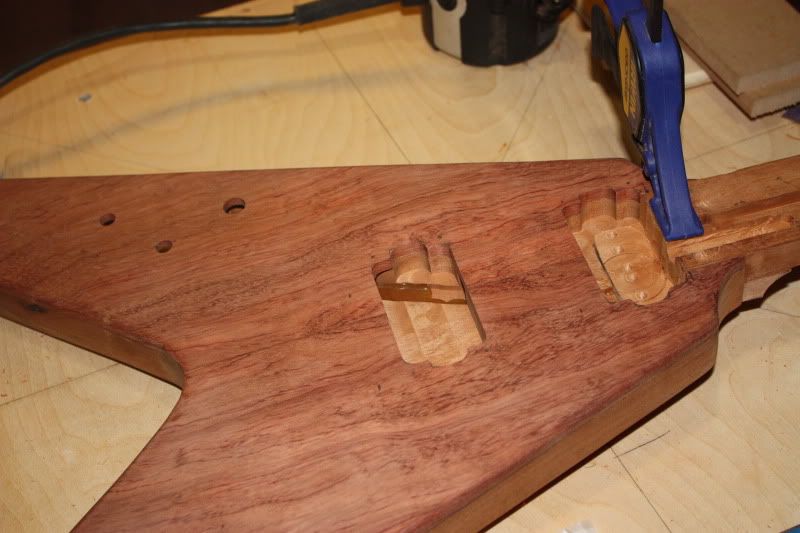
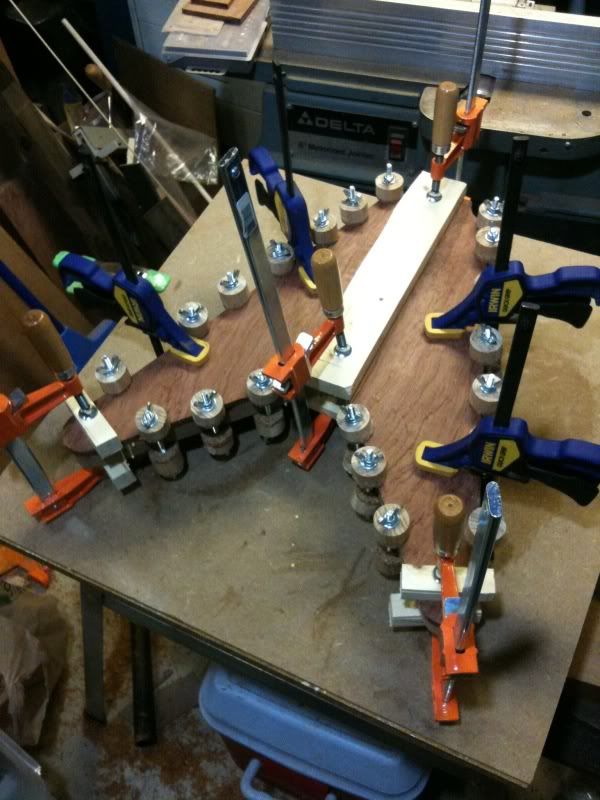
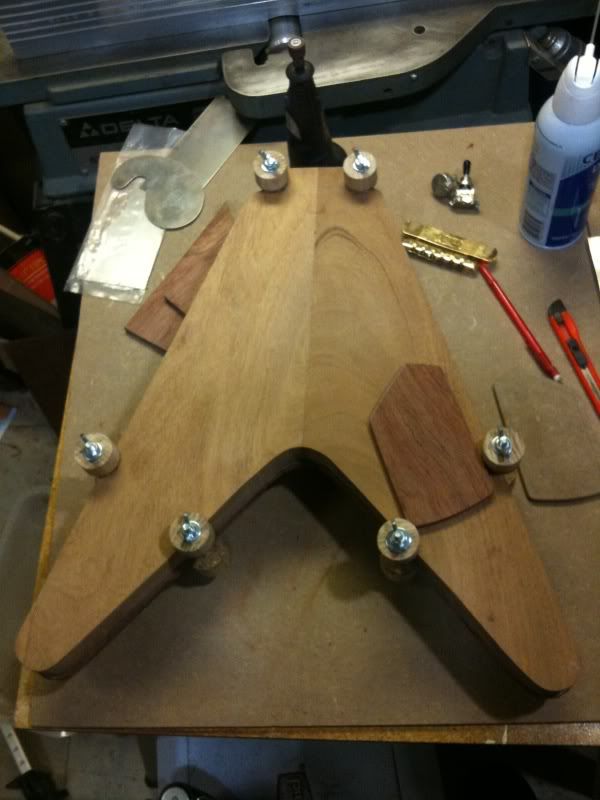
I rough cut the bubinga top to shape and test fit it to the body. I also made a bubinga control cavity.
I finally figured out how to deal with the knot. I'll just put the input jack there. This way, the jack cover "covers" the knot.
Here is the control cavity cover that I made out of left over bubinga from the top.


Guitar Of The Month For June
in Guitar Of The Month entry/poll archive
Posted
I'd like to enter mine. I just finished adding the hardware today. Here are the specs and a few pictures.
Lefty LP Standard based on the 59 LP standard design
24.75 scale length
1 piece african mahogany body
1 piece african mahogany neck(scarf)
2 piece ambrosia maple top, one piece headstock cap and cavity covers
3x3 kidney style tuners
black hardware(tom/tail)
chechen fretboard with 22 frets
ambrosia maple crown inlays
black binding
graphite nut
active pickups
Tru-Oil finish(natural)