


Scatter Lee
-
Posts
48 -
Joined
-
Last visited
Content Type
Profiles
News and Information
Tutorials
Product Reviews
Supplier Listings
Articles
Guitar Of The Month
Links and Resources
Forums
Gallery
Downloads
Posts posted by Scatter Lee
-
-
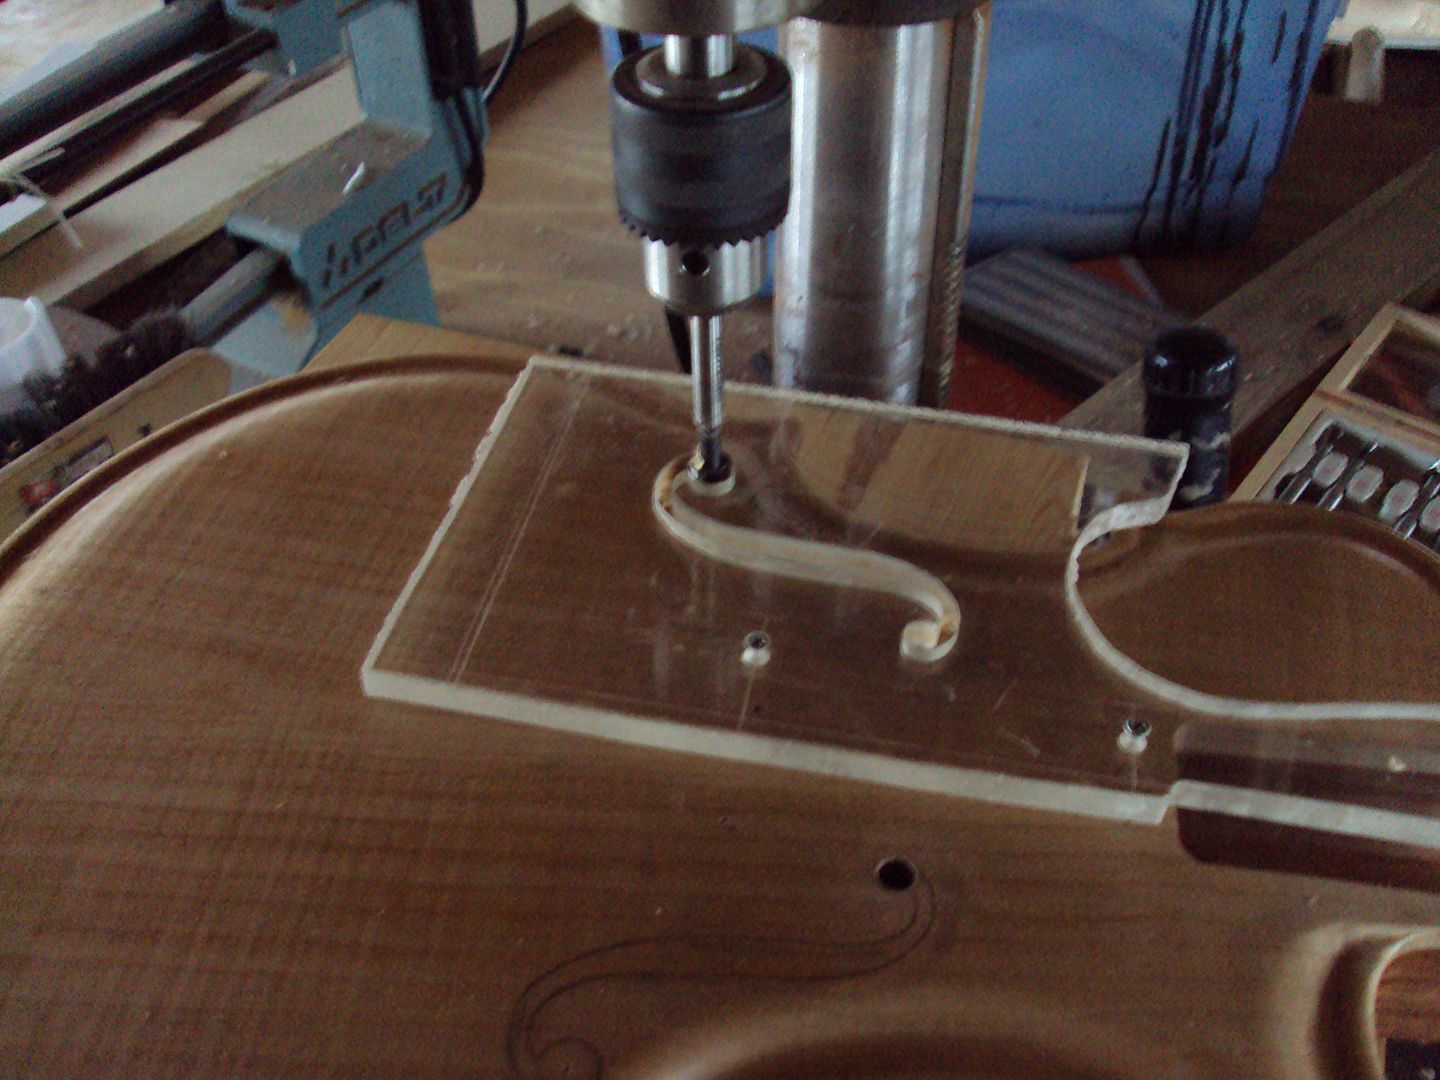
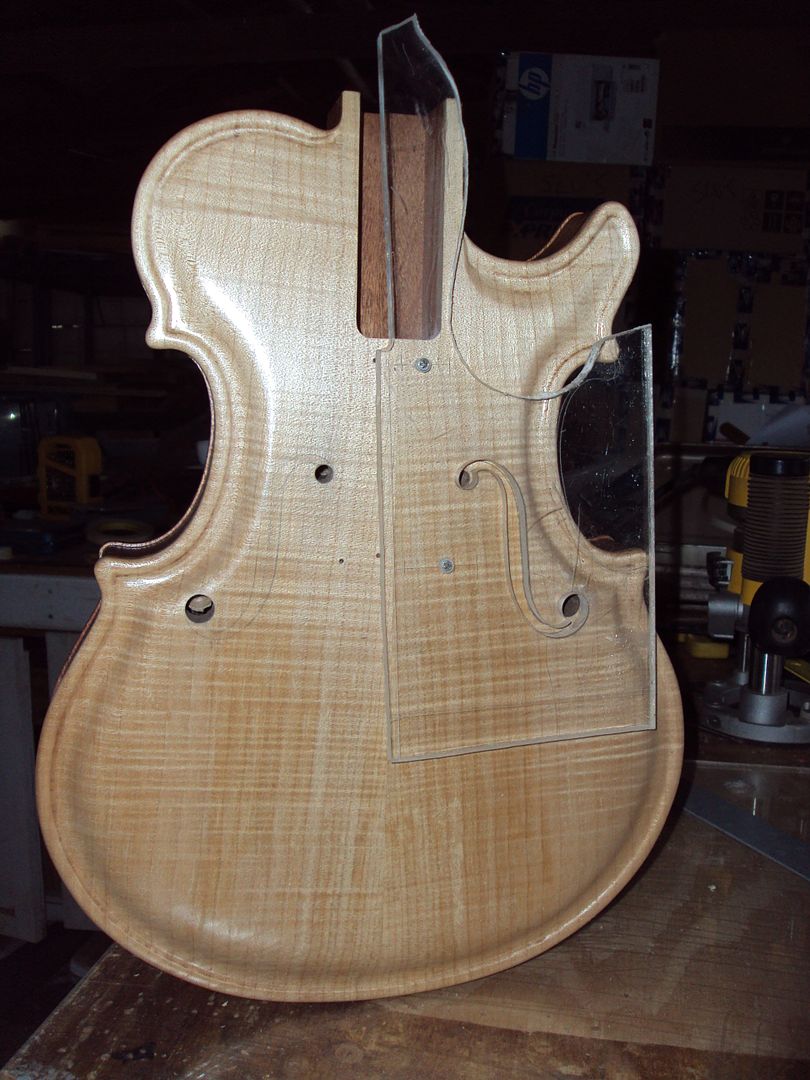
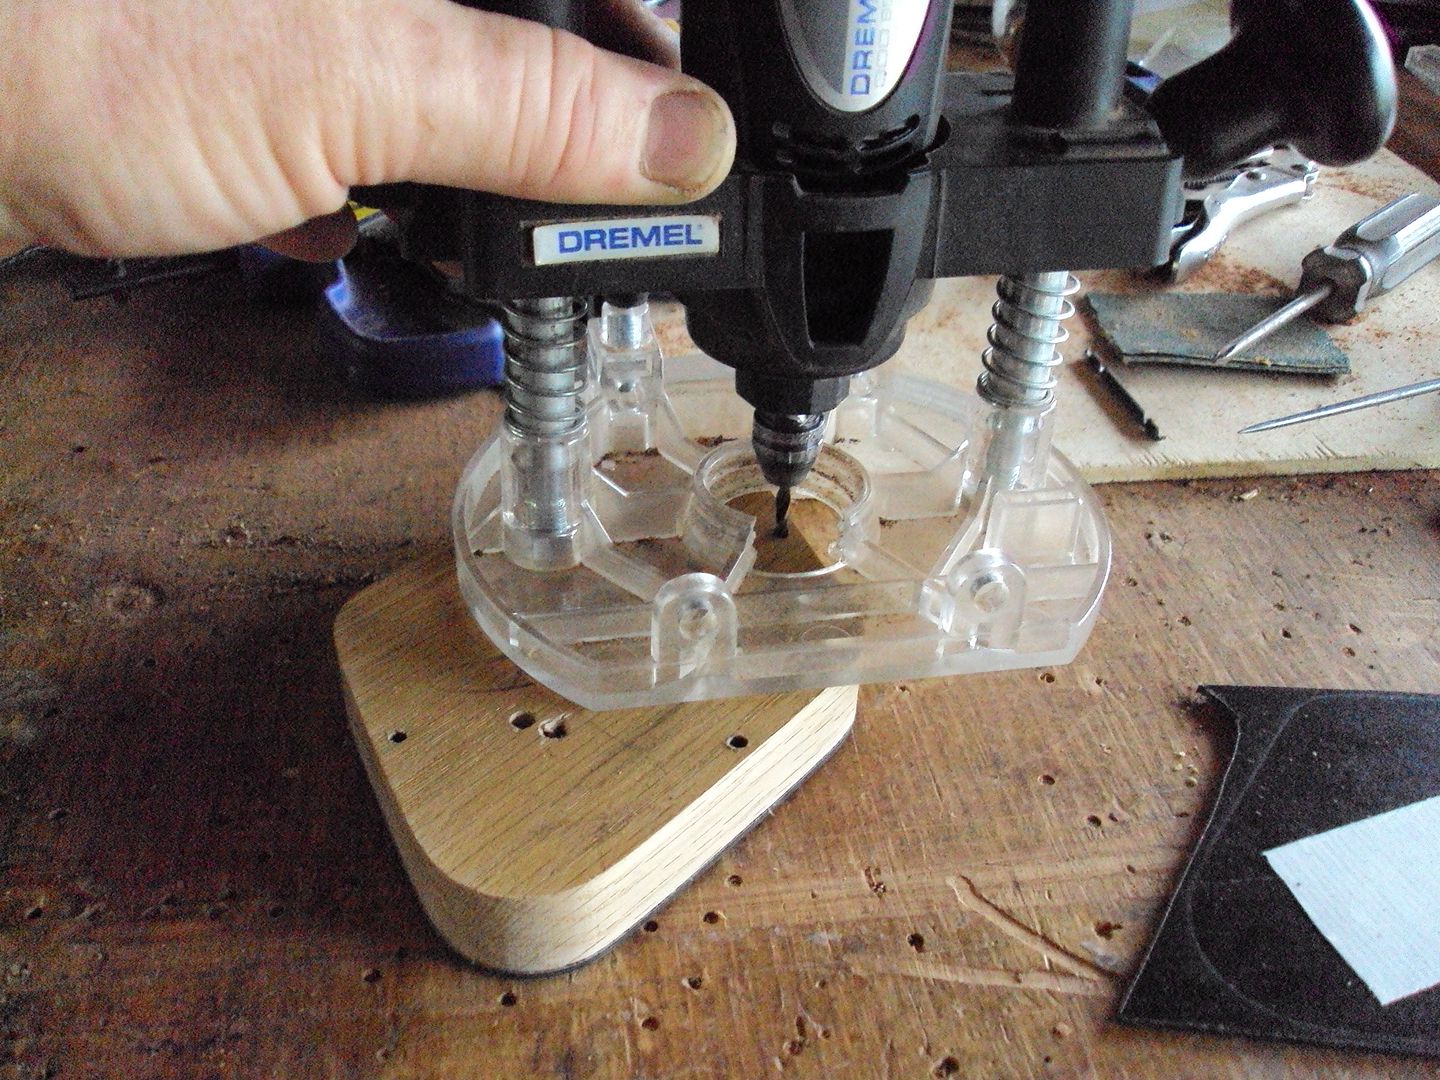
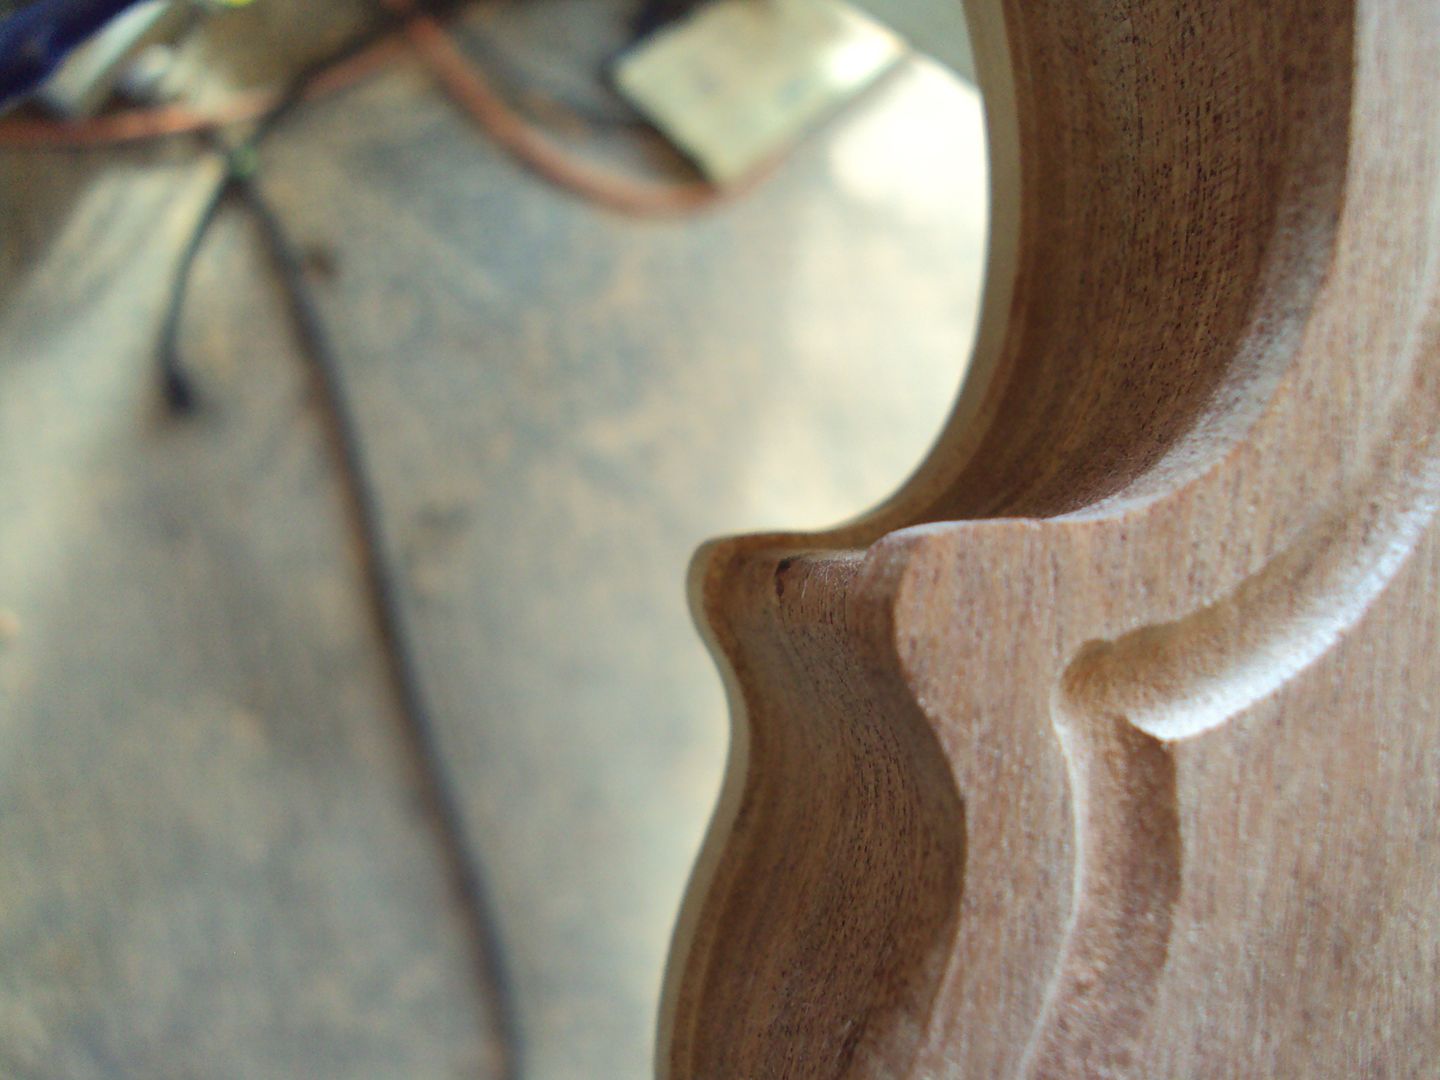
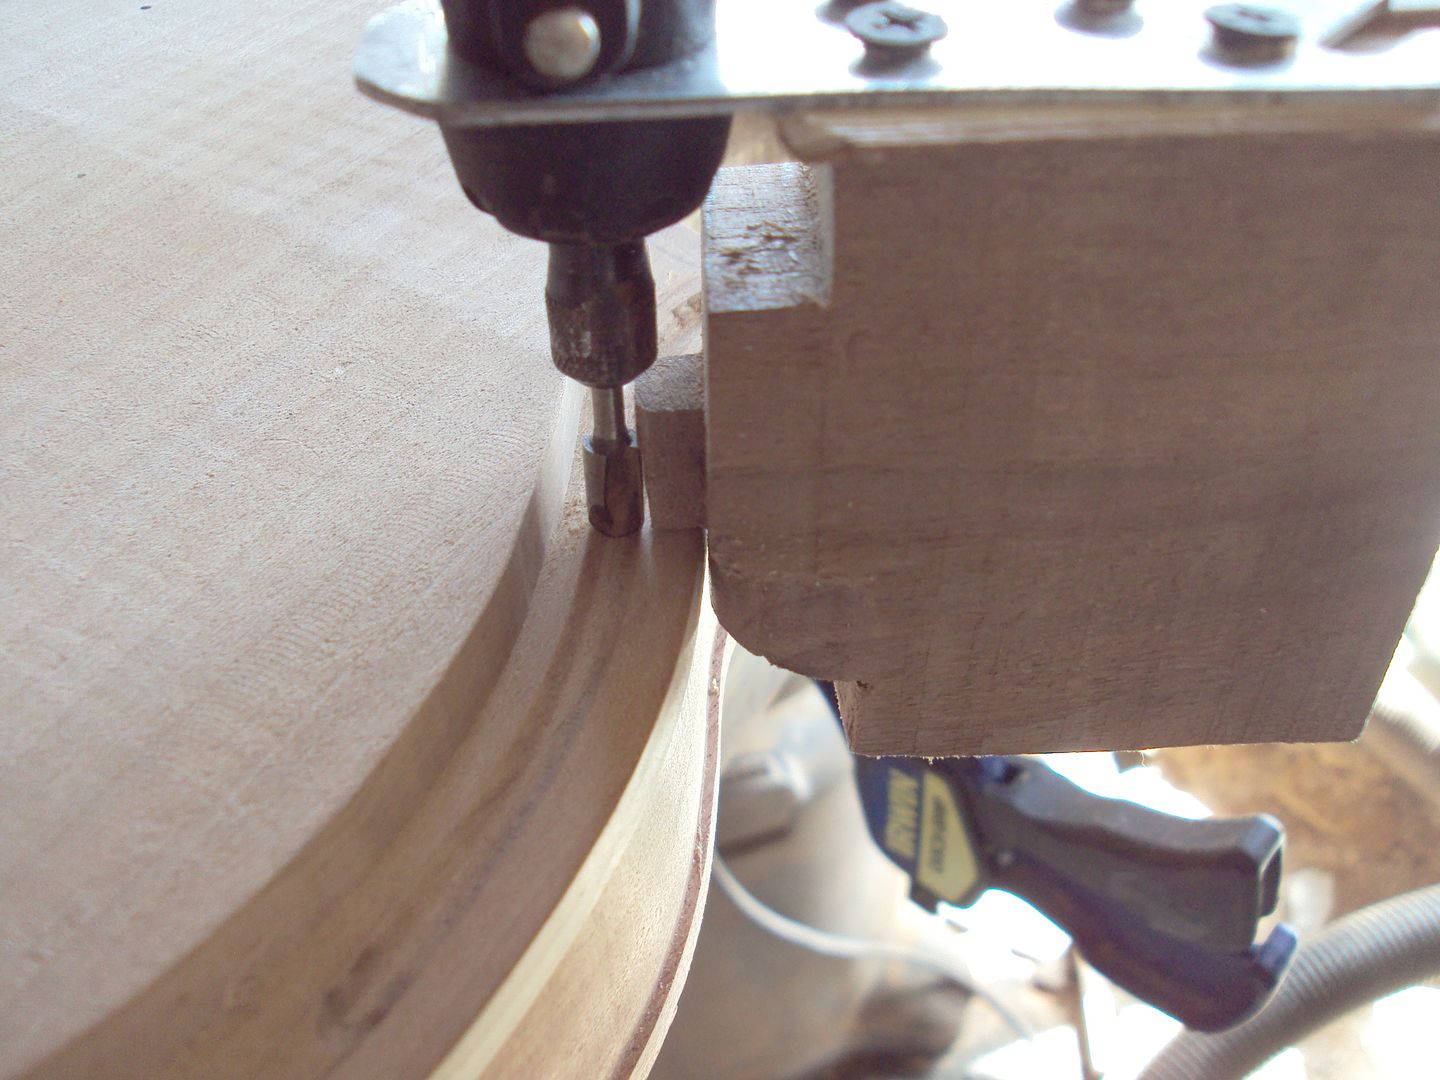
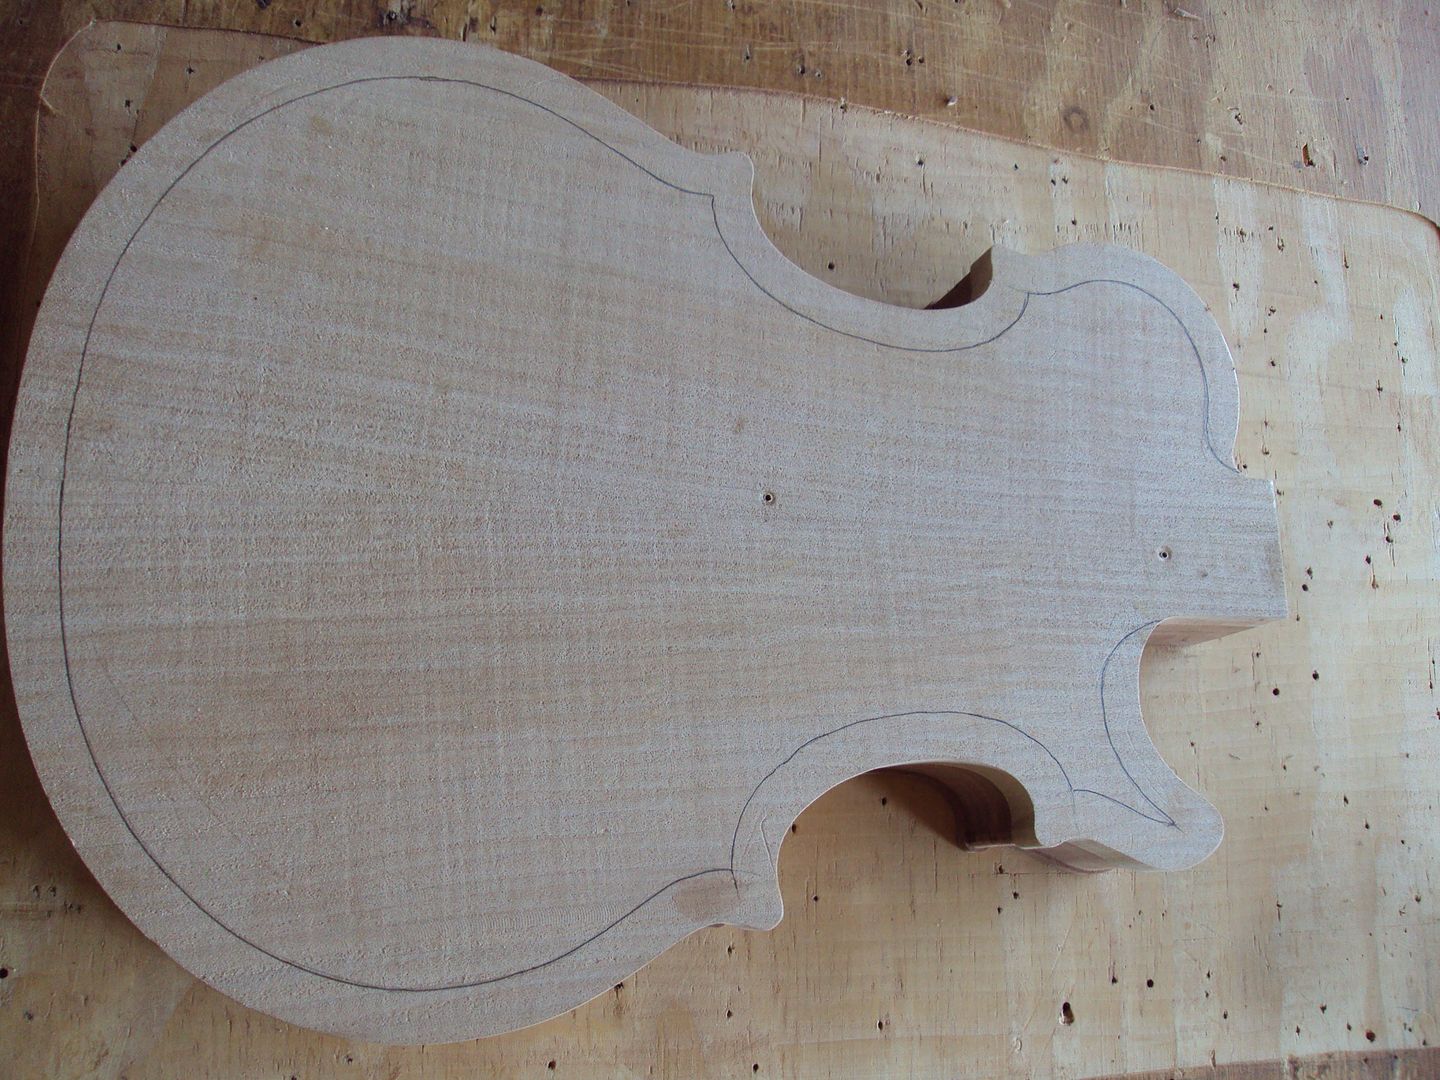
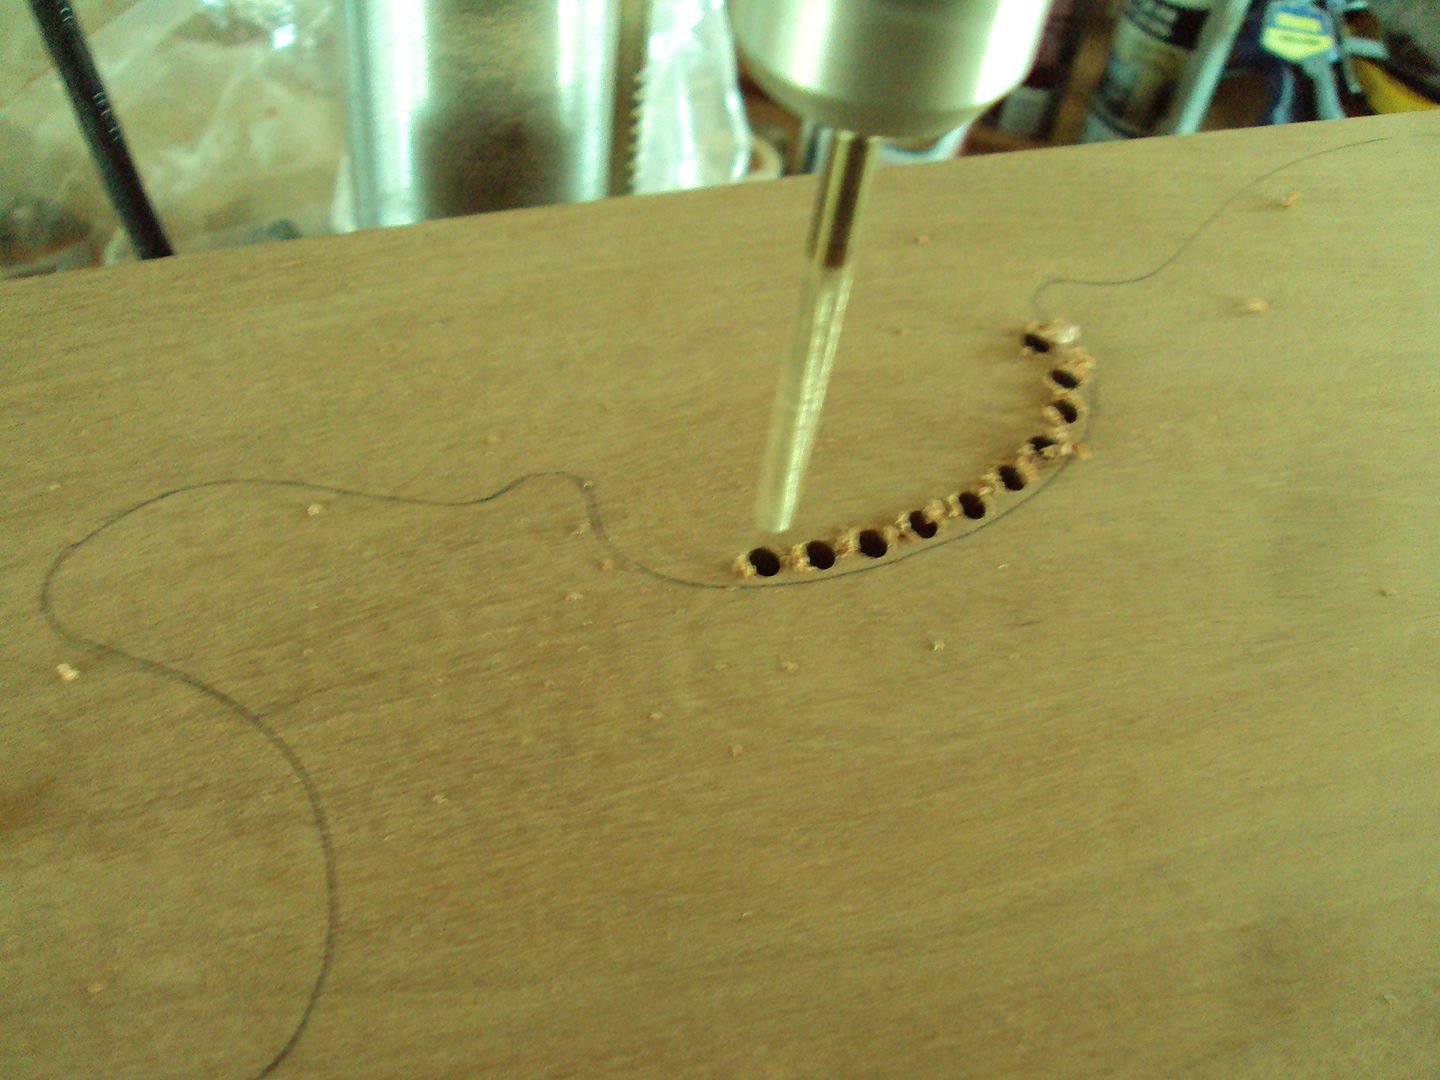
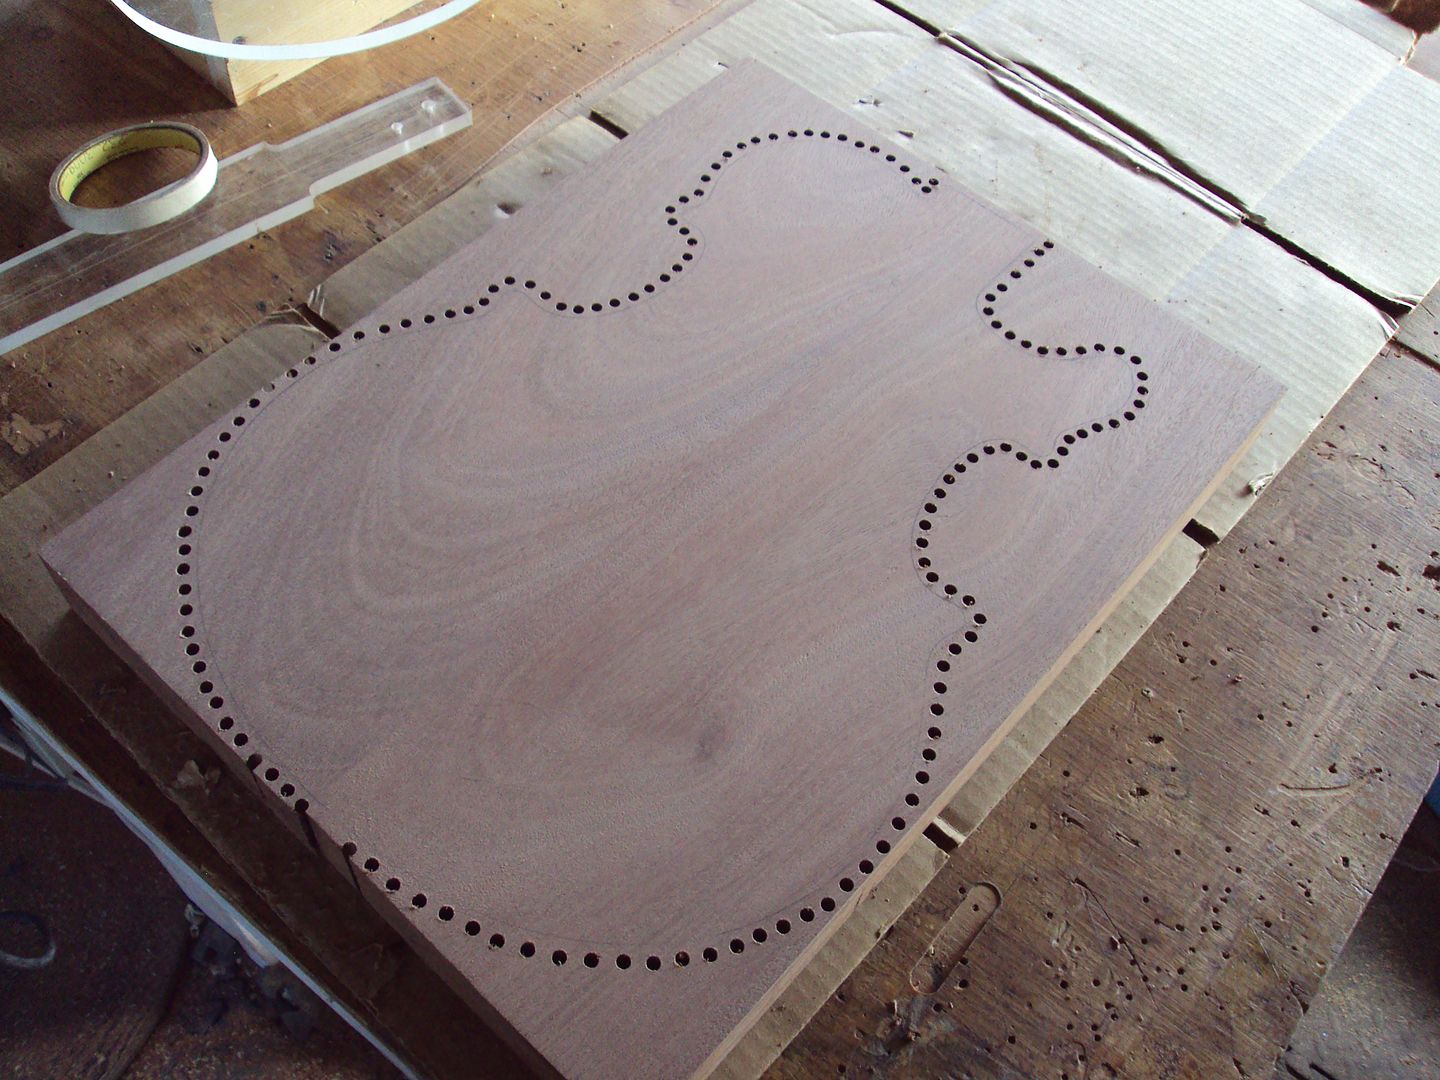
i had a little time to work on this today, thought i'd get the f-holes routed
so i got them drawn on where i want them
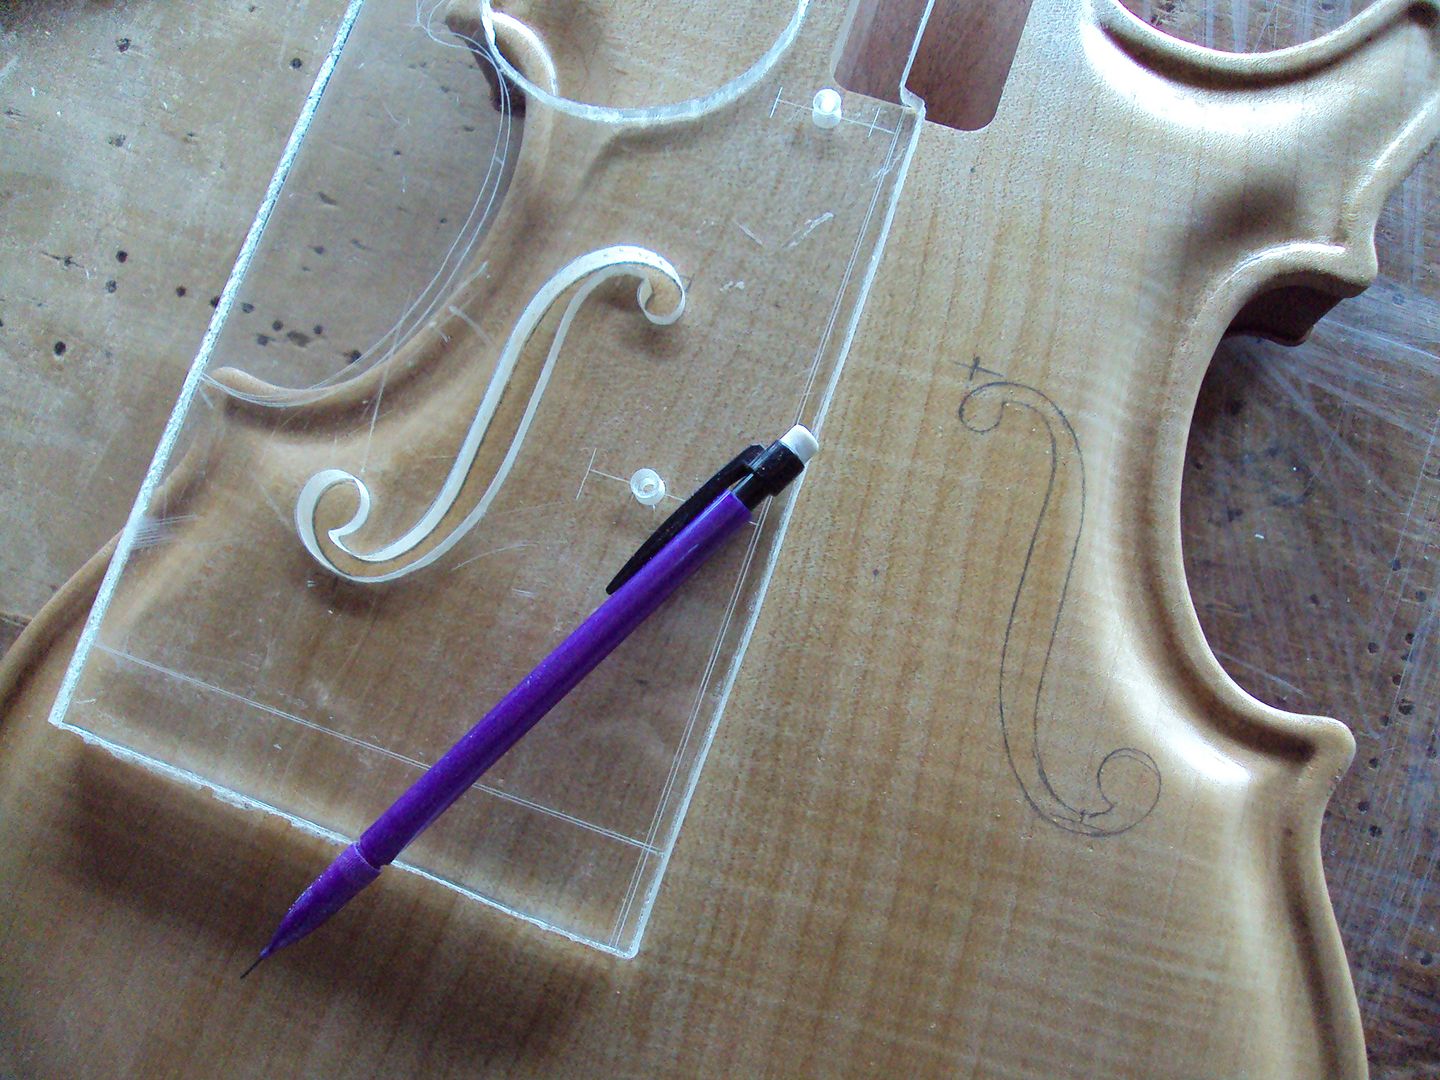
i attach the template with a couple of screws into the body that will later be routed out for the pickups
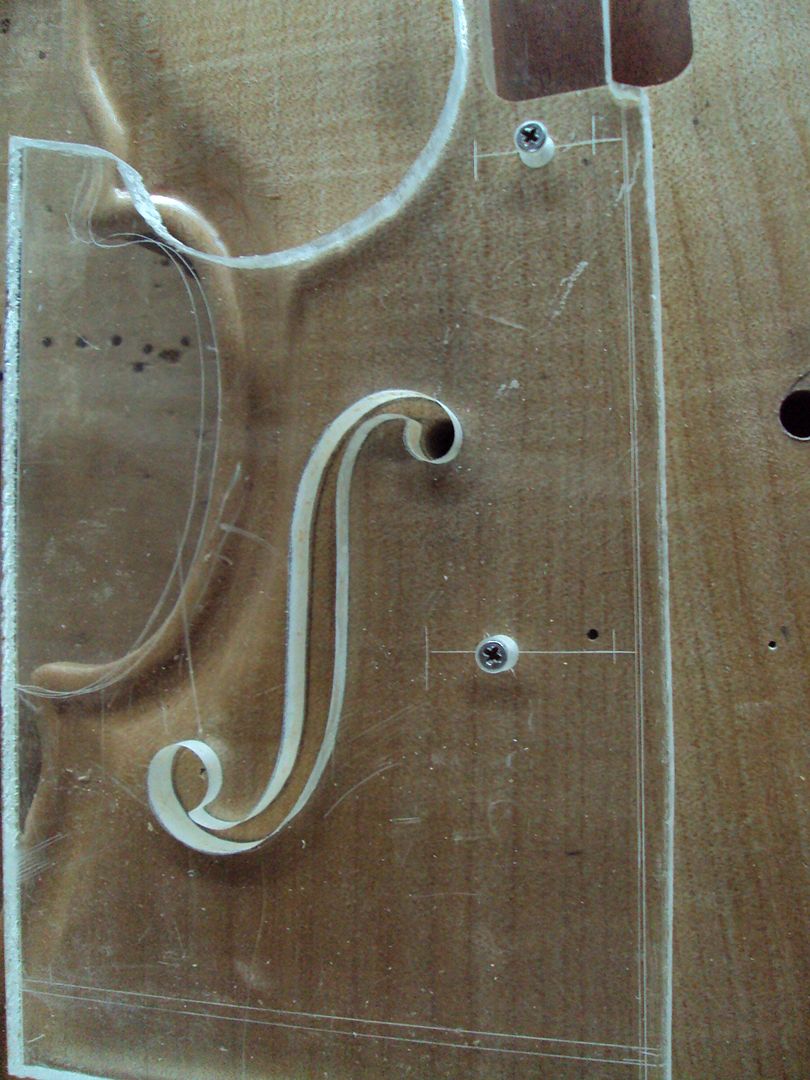
took it to the drill press and started drilling holes, i'll drill out as much as i can before i get out the dremel and an 1/8" bit to route it nice
night came, it got dark on me pretty quick and couldnt see very well so i'll try to finish them tomorrow
at least i got them started
-
-
i hope i can find some figured walnut someday, that looks great, nice job
-
Stunning!
Beautiful work!
Thanks for sharing your passion, and I'm glad you like taking pics.
Doug
This guitar is a tribute to making more with less. As a fellow (and clearly outclassed) woodworker, my hats off to you!You sir have talent !
thanks for the replys, i'm putting down a tile floor for a few days
then getting back to this build
-
trying to sell a guitar on a site full of builders cant be easy, but i'll post it here anyway
GOTM for sale
http://cgi.ebay.com/ws/eBayISAPI.dll?ViewI...em=300500174145
-
oh no, my first post won GOTM
i didnt post anywhere that i entered or to vote for me, so thanks to everyone that did vote
all the guitars were sweet -
Scatter Lee: This reminds me a lot of Les Godfrey's work. The top wood is absolutely stunning! I would love to hear this guitar. Great work!
i found this as i was curious as well
http://www.youtube.com/watch?v=v9Ve0hmjfhc
ahh, you found it, testing out a set of p-90's i made for it, i put a set of budz in it now, sounds about the same, bad video, the computer did not want to cooperate with the camera at all, i had a set of test controls in the back at the time too
-

That top looks really good. Are you just going to leave it natural or are you going to do a burst?
probably a burst of some type, if the wood didnt have that dark area on it i might leave it natural, i have vintage amber, red mahogany, tobacco brown, cherry red, yellow and burgandy on hand, all transparent nitro, so i'll have to think hard about just what kind of burst to put on it
-
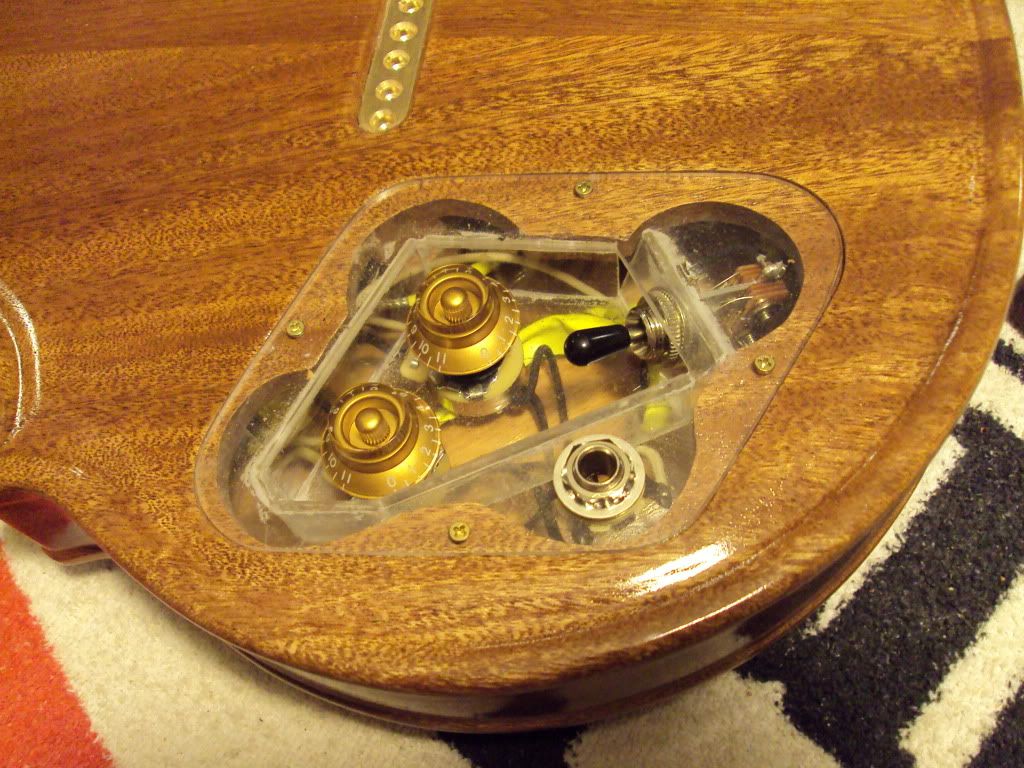
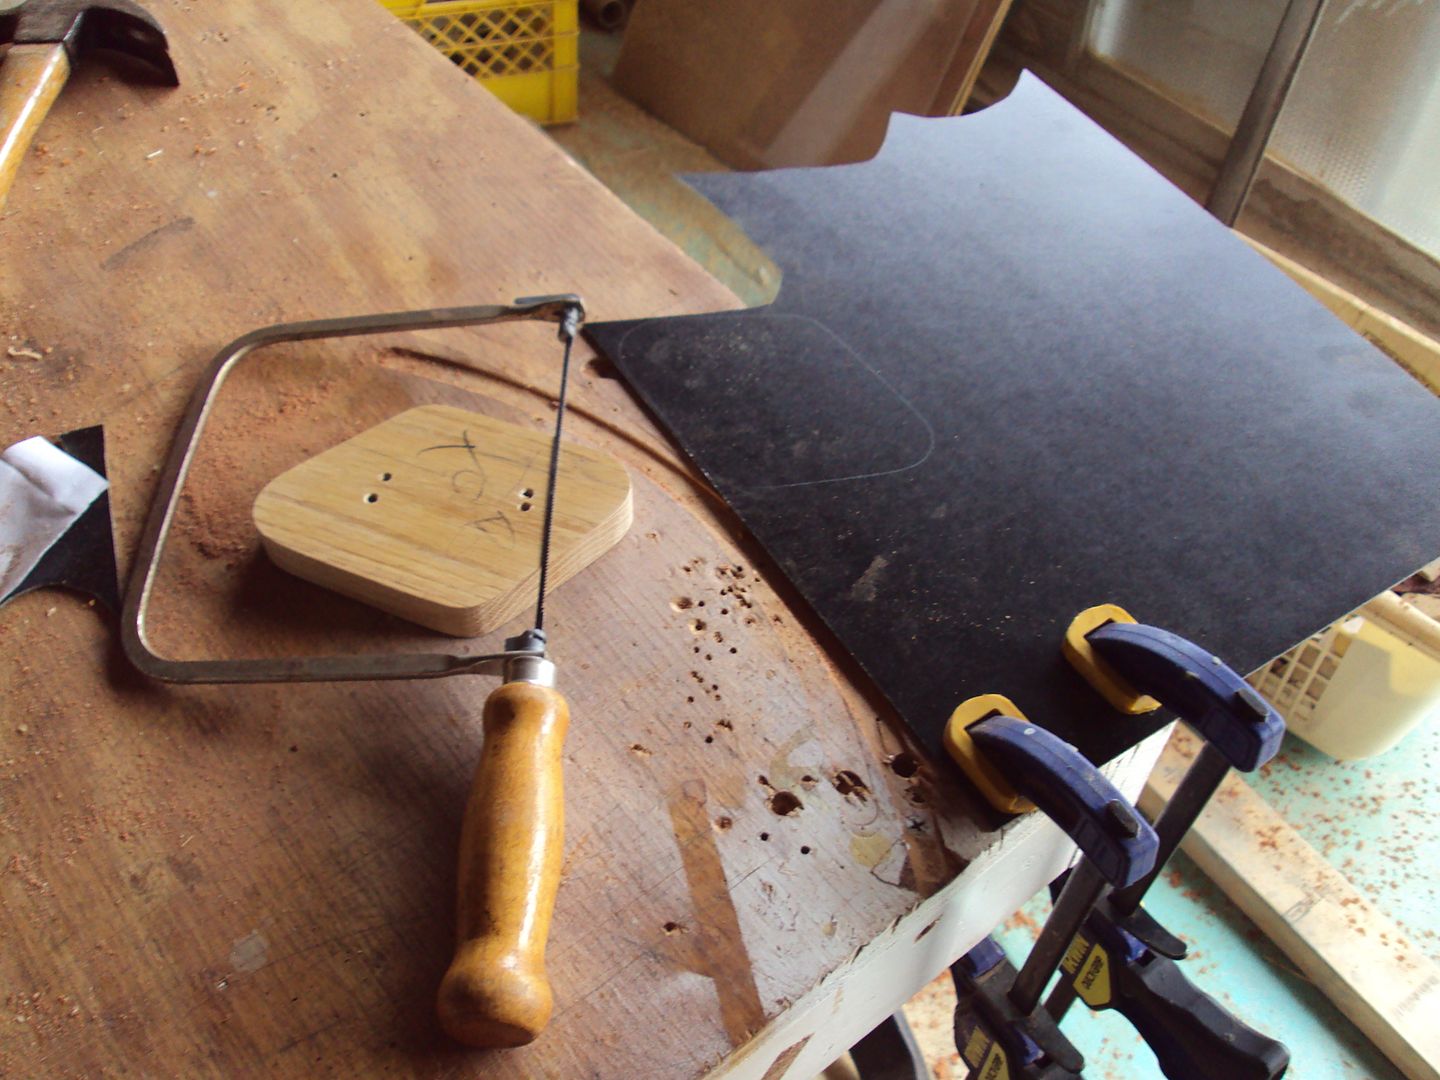
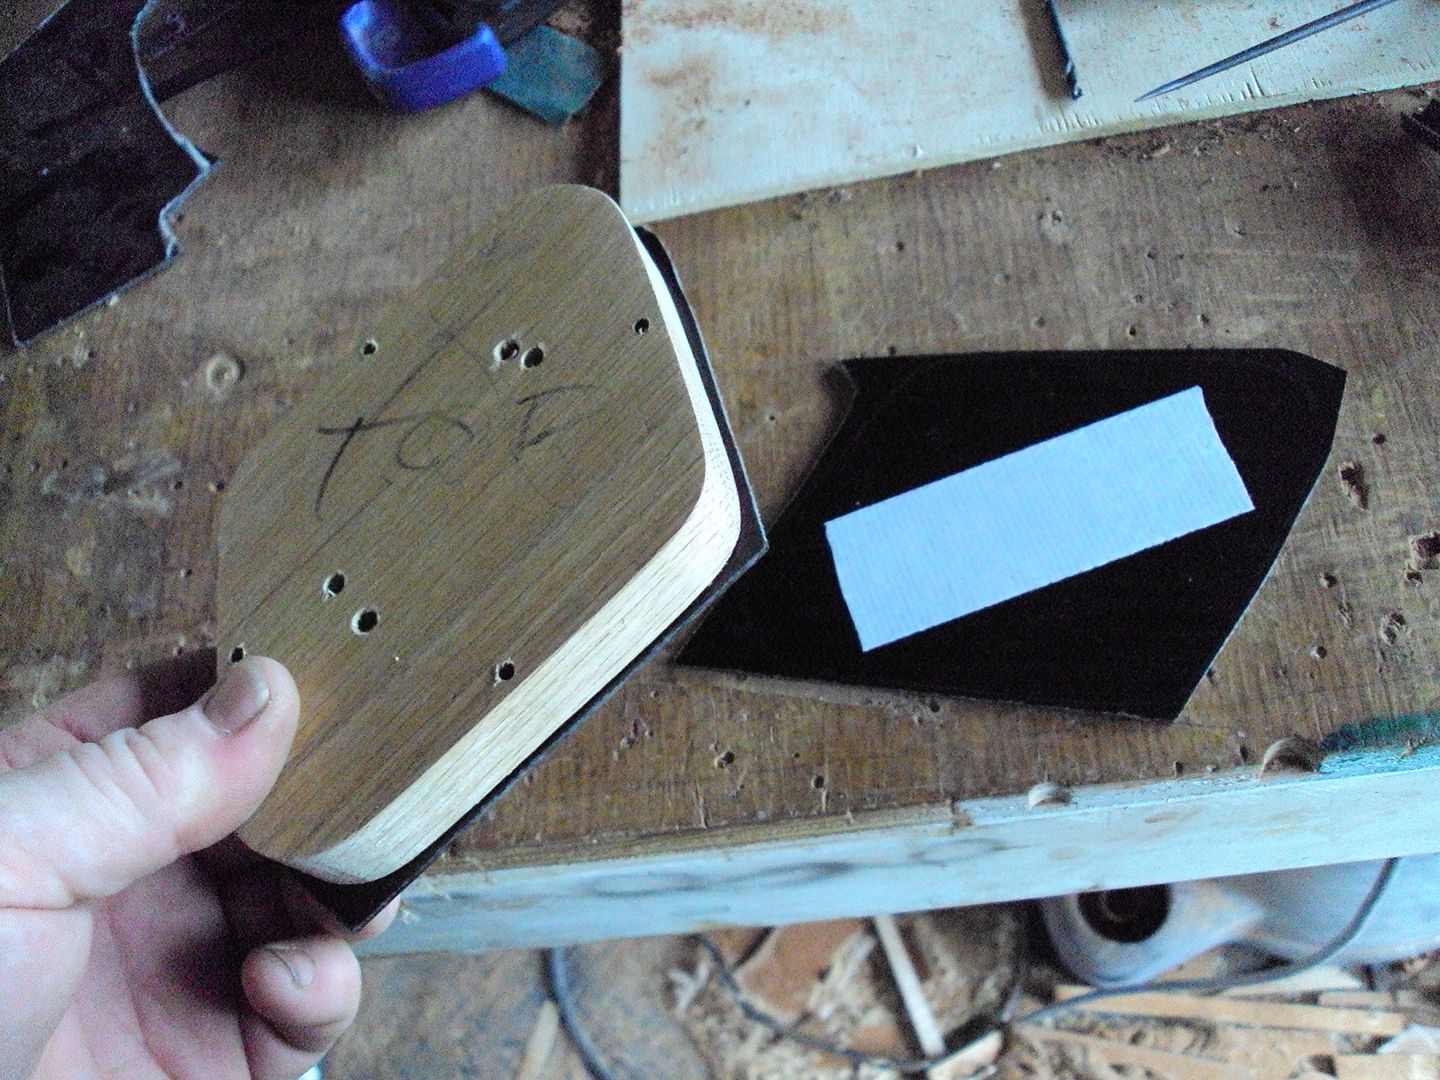
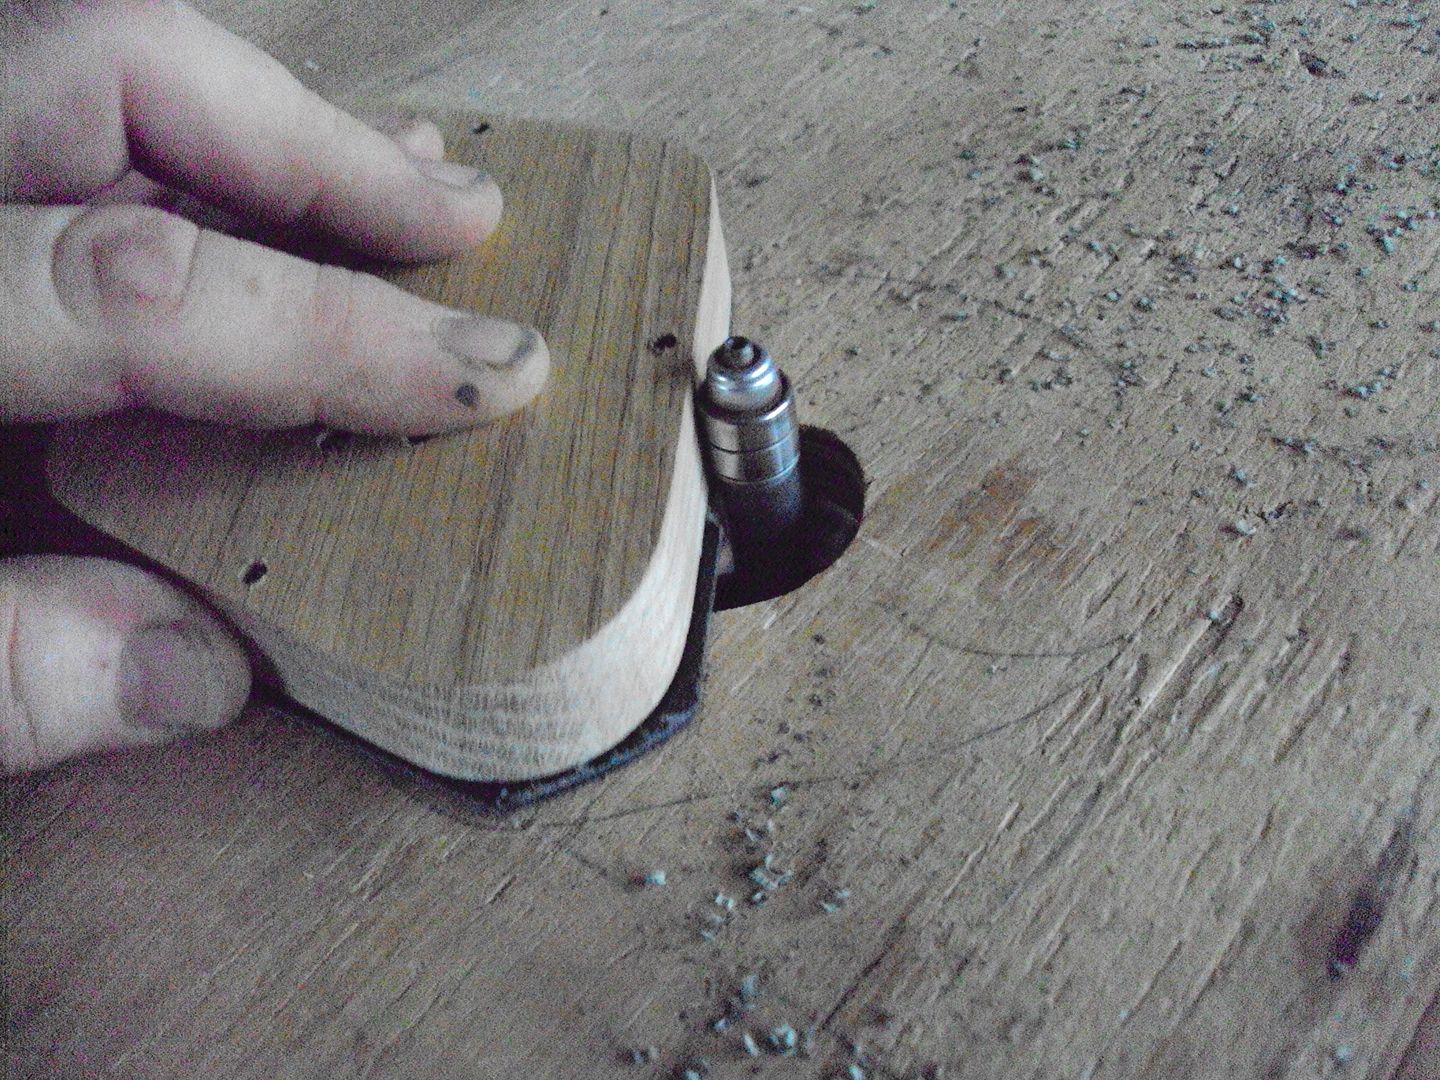
i made the covers out of black bakelite
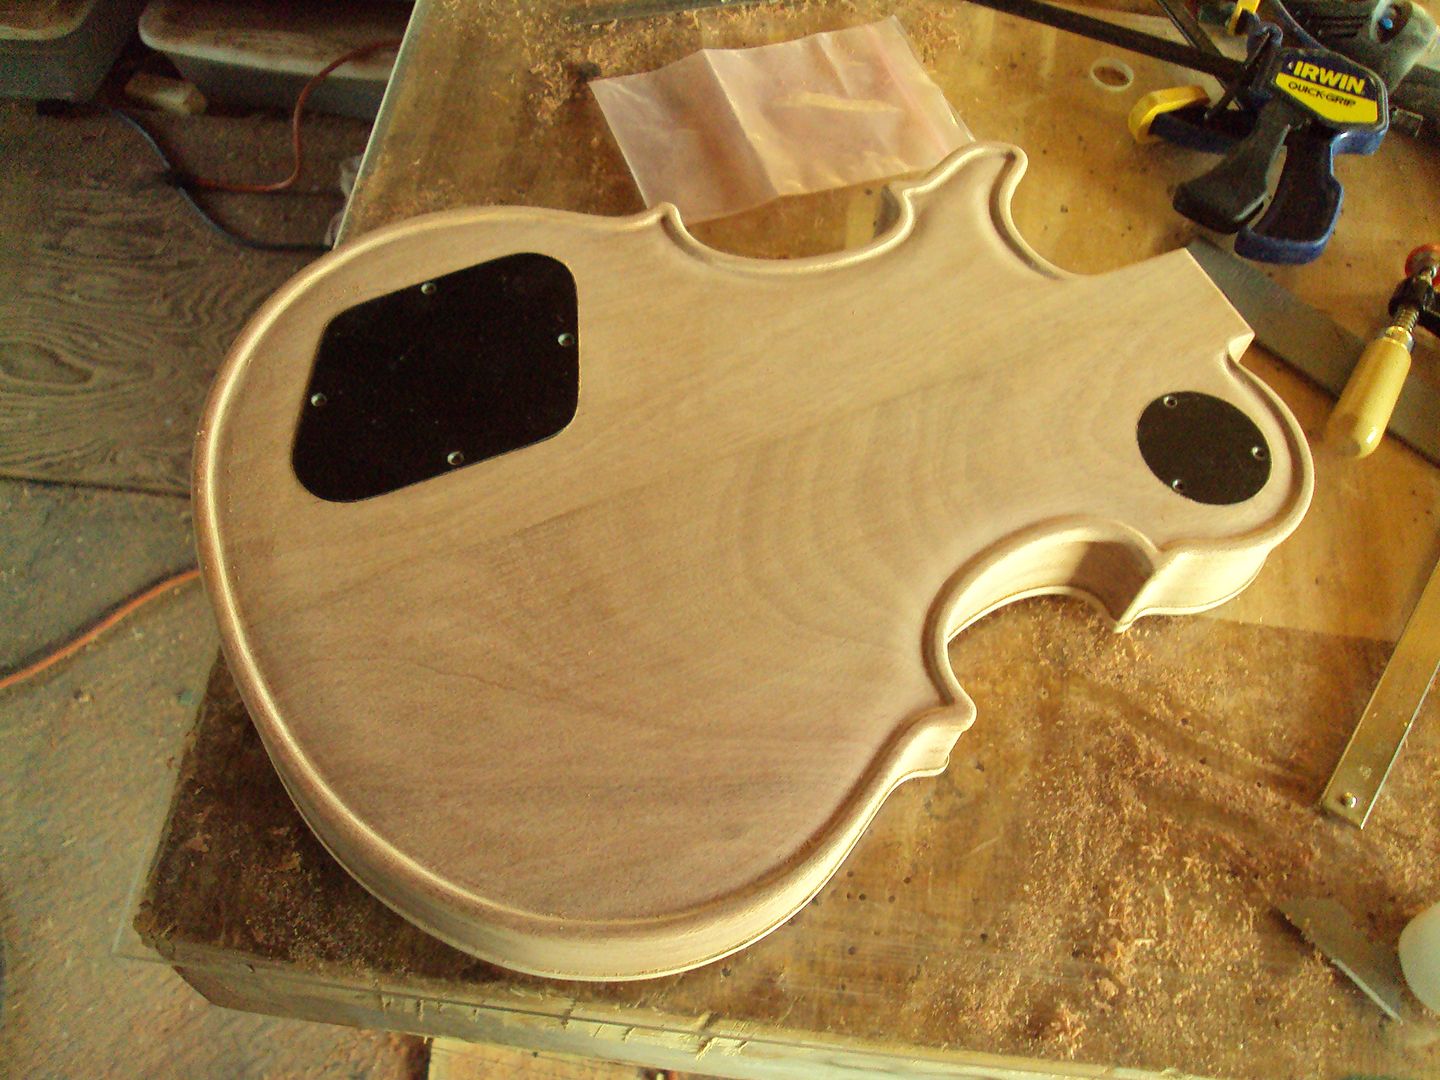
and had enough daylight to shoot a coat of clear nitro to seal the body up
-
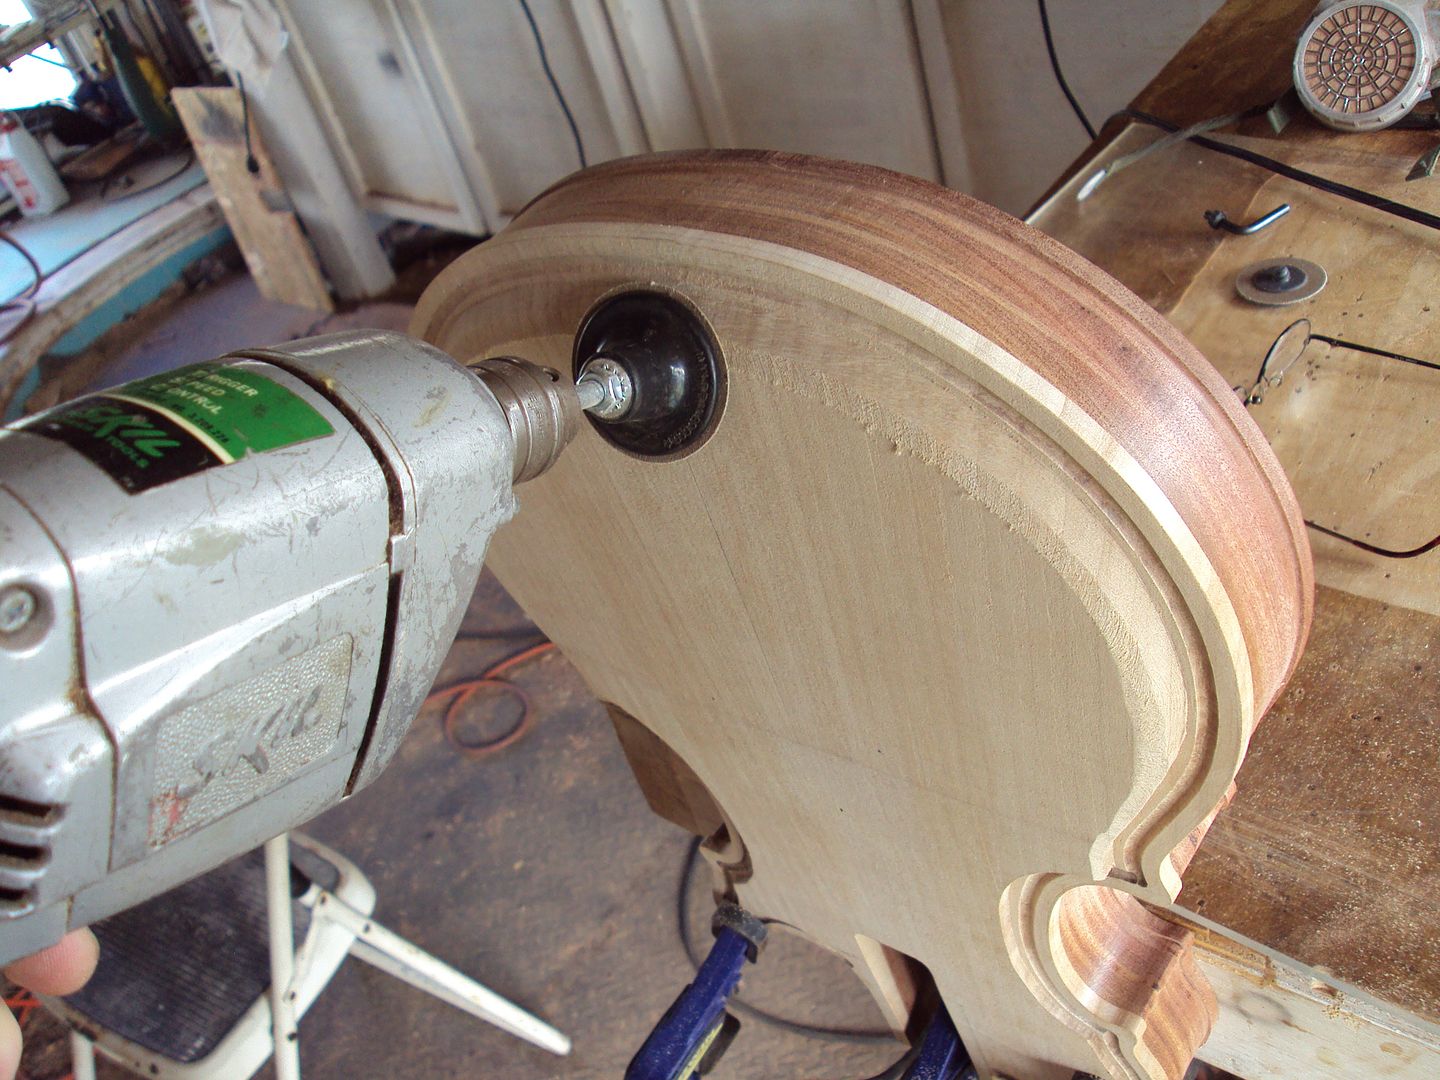
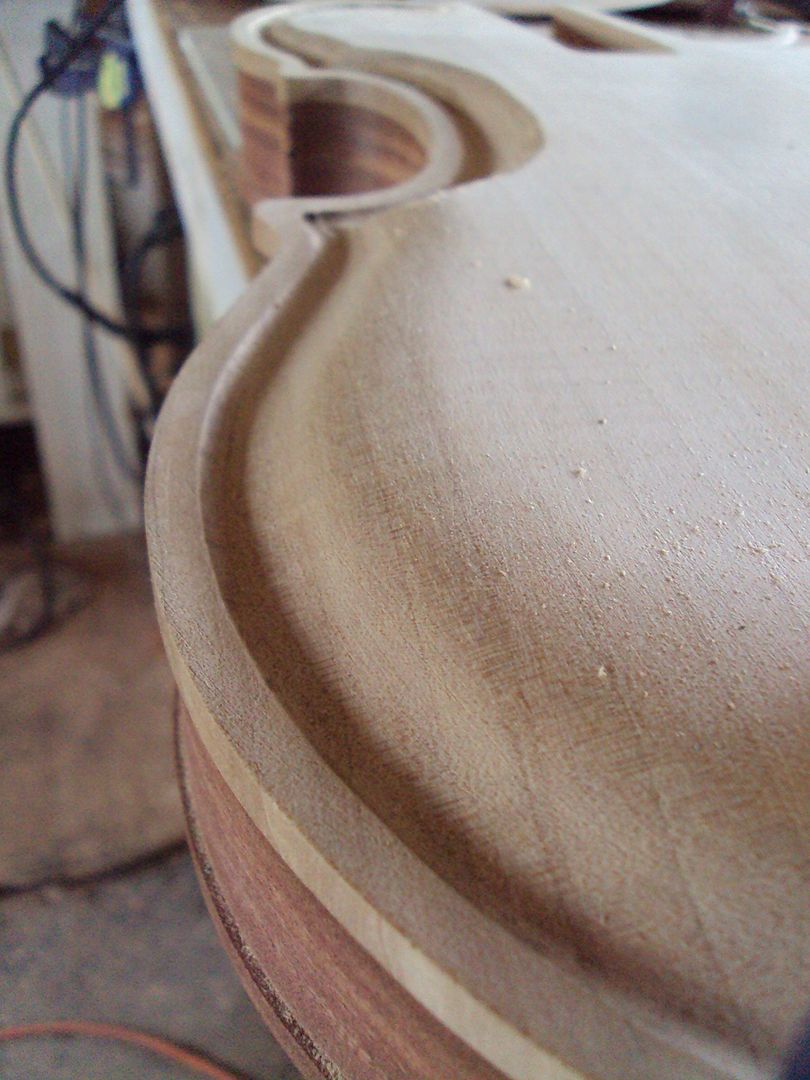
did a little roundover on the edges today
did the back with the router
never tried this before but i took the router bit and put it in the drill press and routed the top
worked good
then did some grinding and sanding on the back
looking better
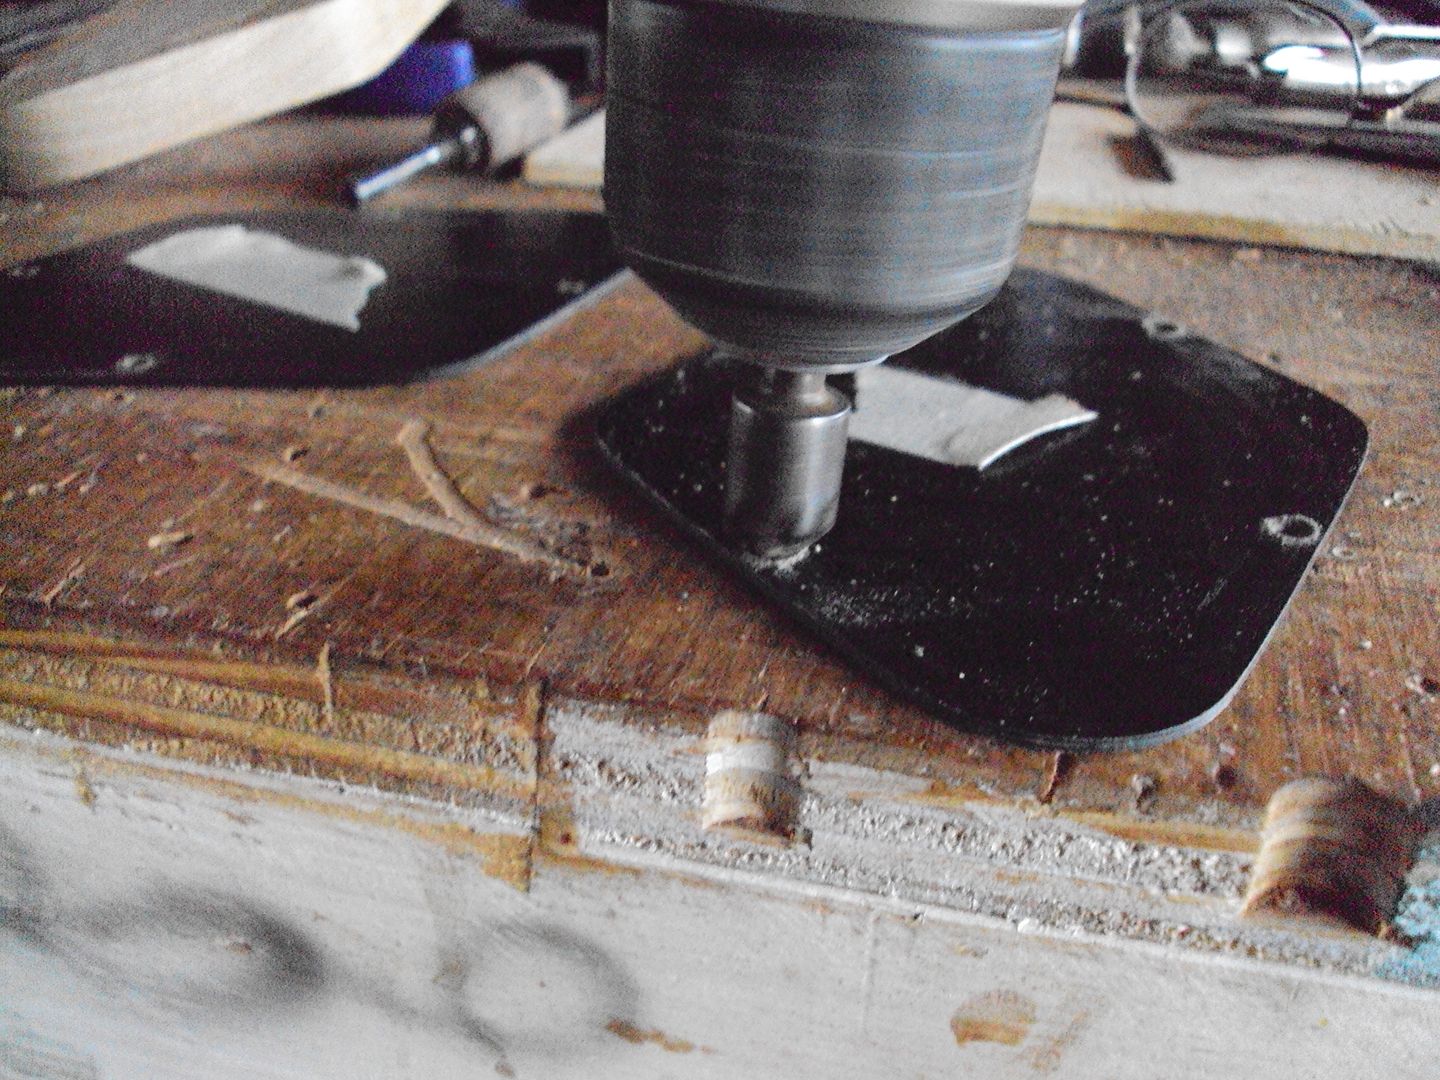
then got out the les paul templates and routed for switch and control plate cover
-
Beautiful work man. I deffinatly look forward to seing it done.
thanks
-
excellent
-
yeah the ol bandwidth got me, should be ok now
got out an old drill and a grinding disc today
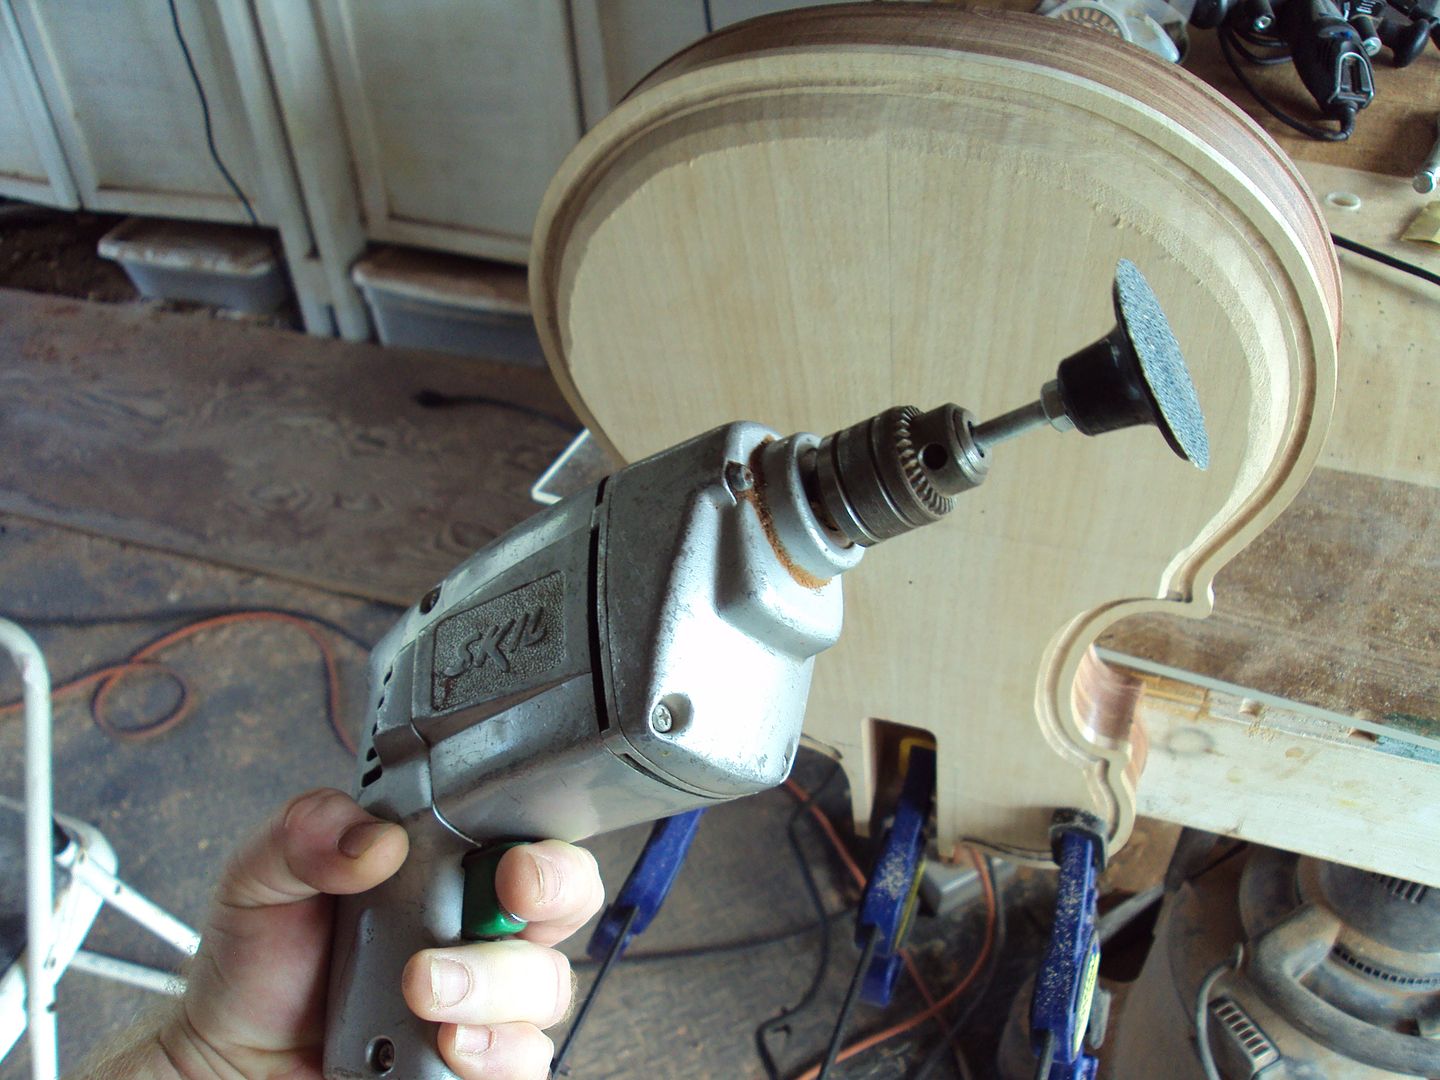
started grinding away on the top
where the disk couldnt get this dremel bit could

after getting close to shape i started hand sanding with 60 grit paper
after about six hours i got this far

and thats about it for today
-
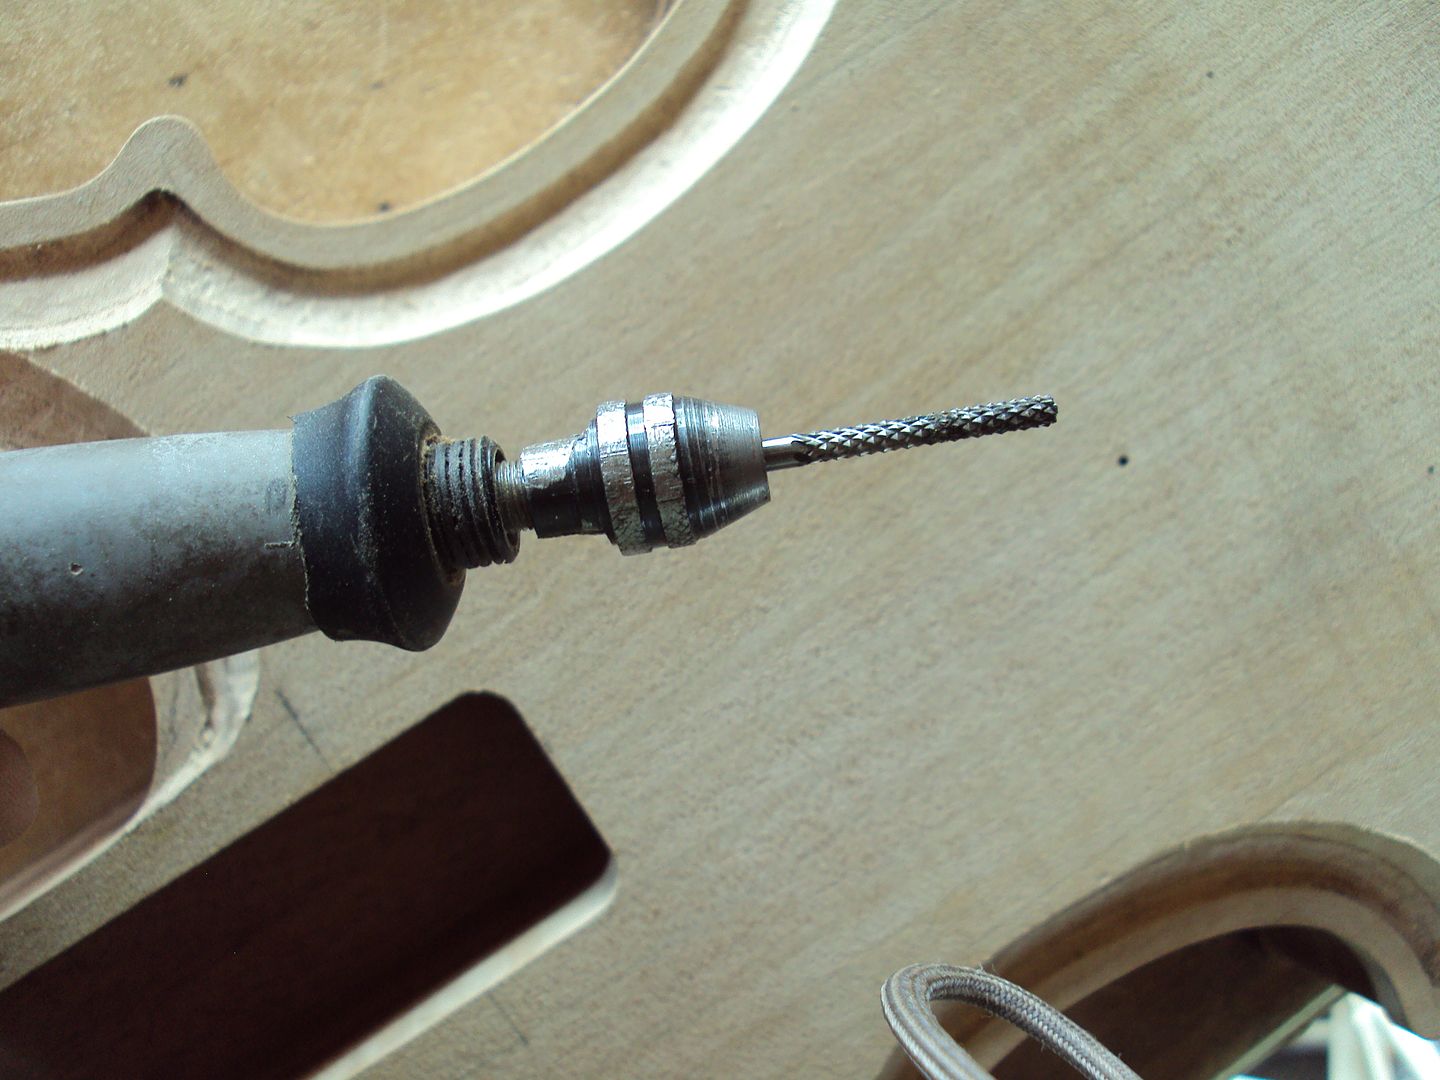
here's a thing i made for the dremel
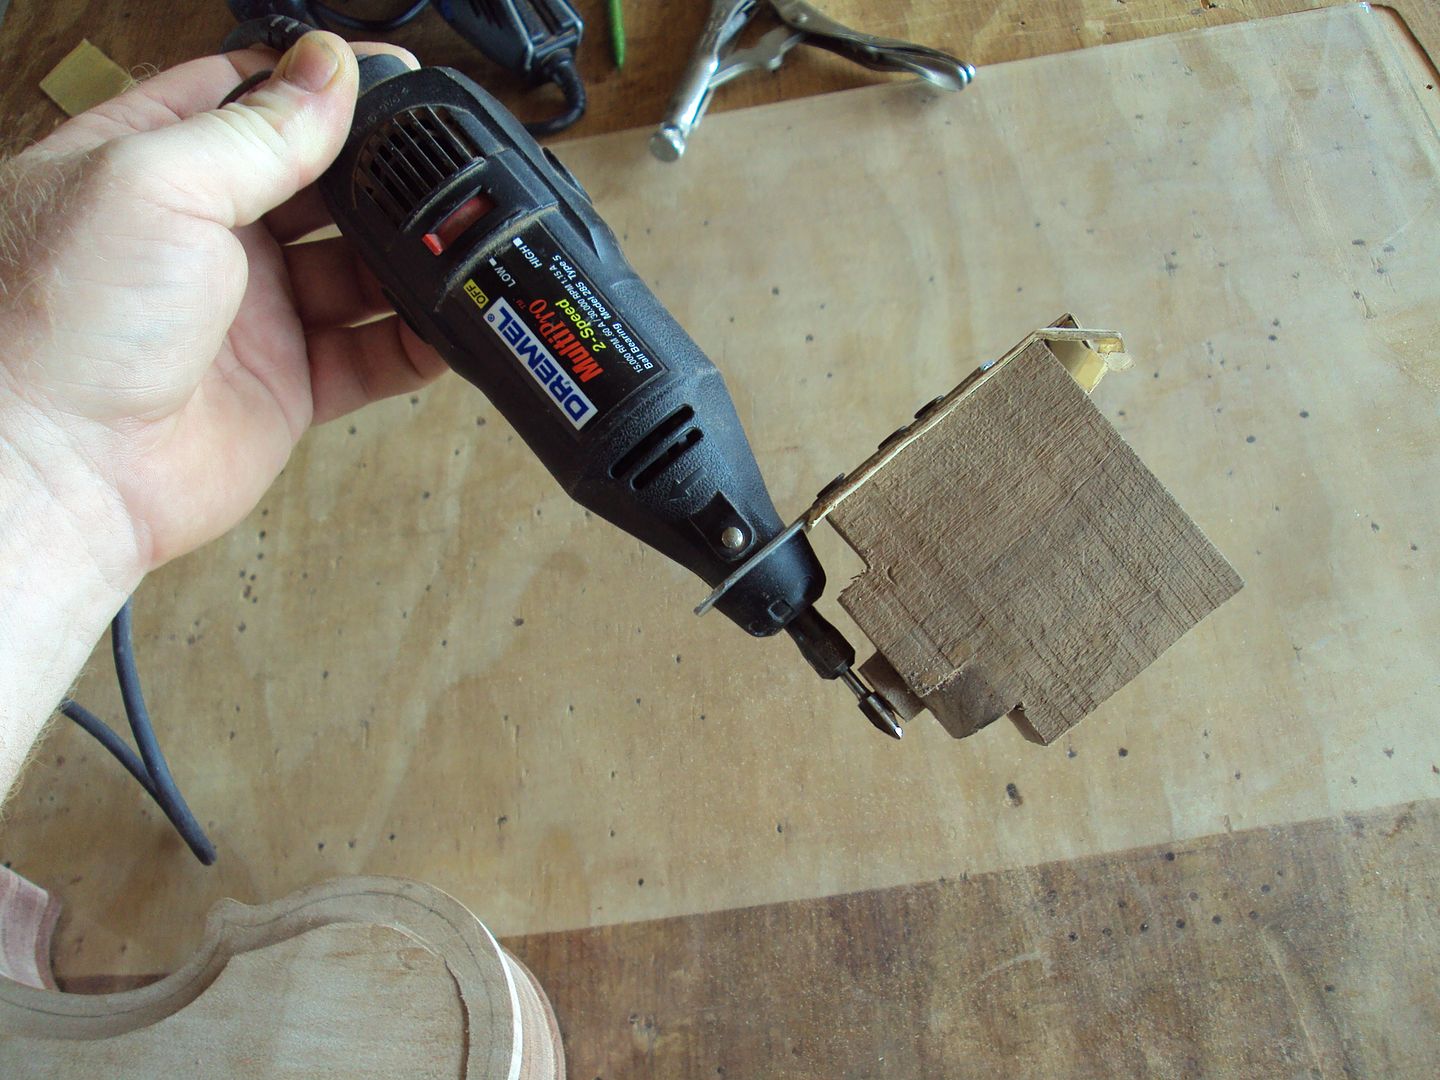
i use a round end bit, i think it's a 1/4" maybe, i never really measured it, i could use a new one but i havn't been able to find one in a single pack, i have found it in a six bit pack but i dont need the other five, i'll find one sooner or later but till then this still has some life in it
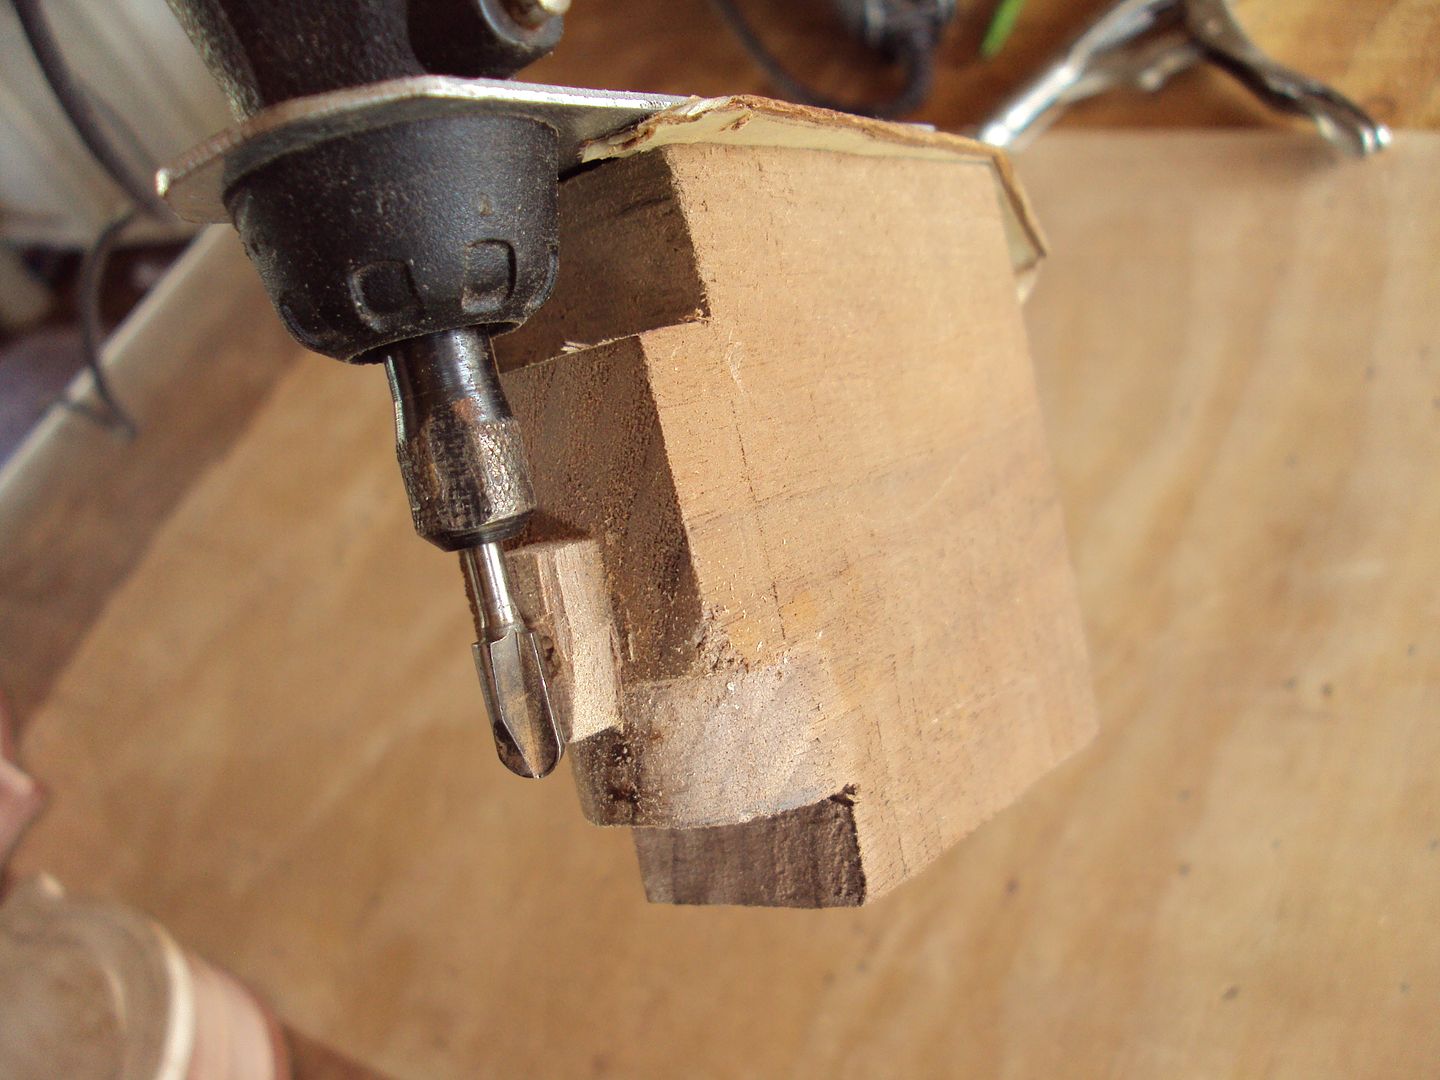
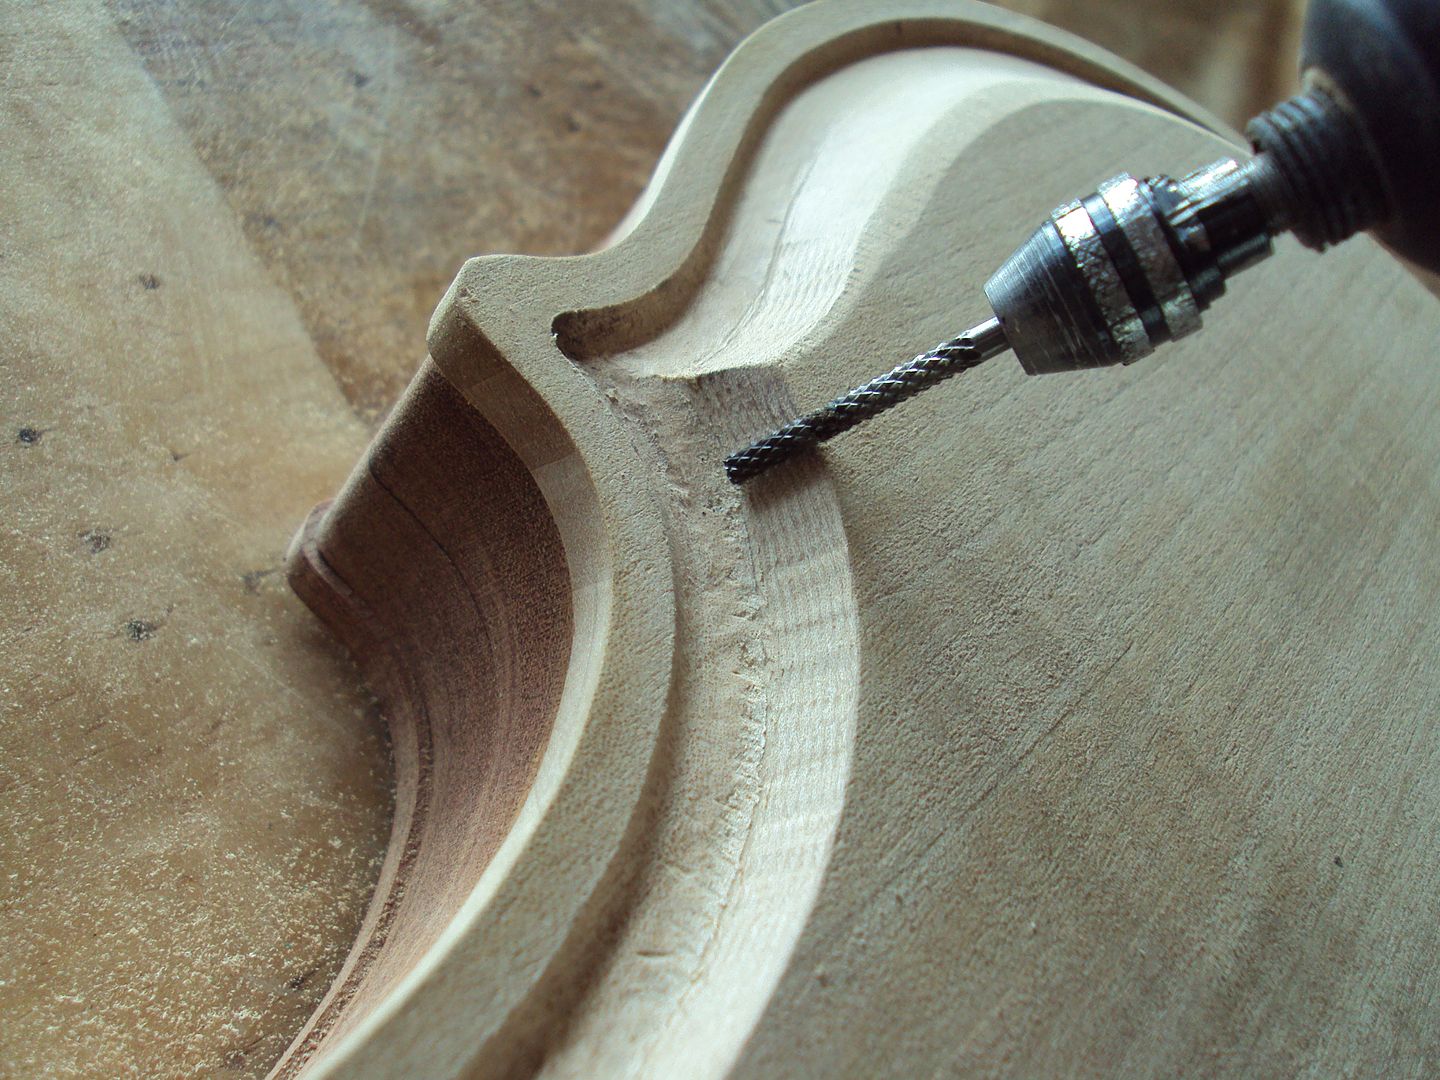
time to get my groove on
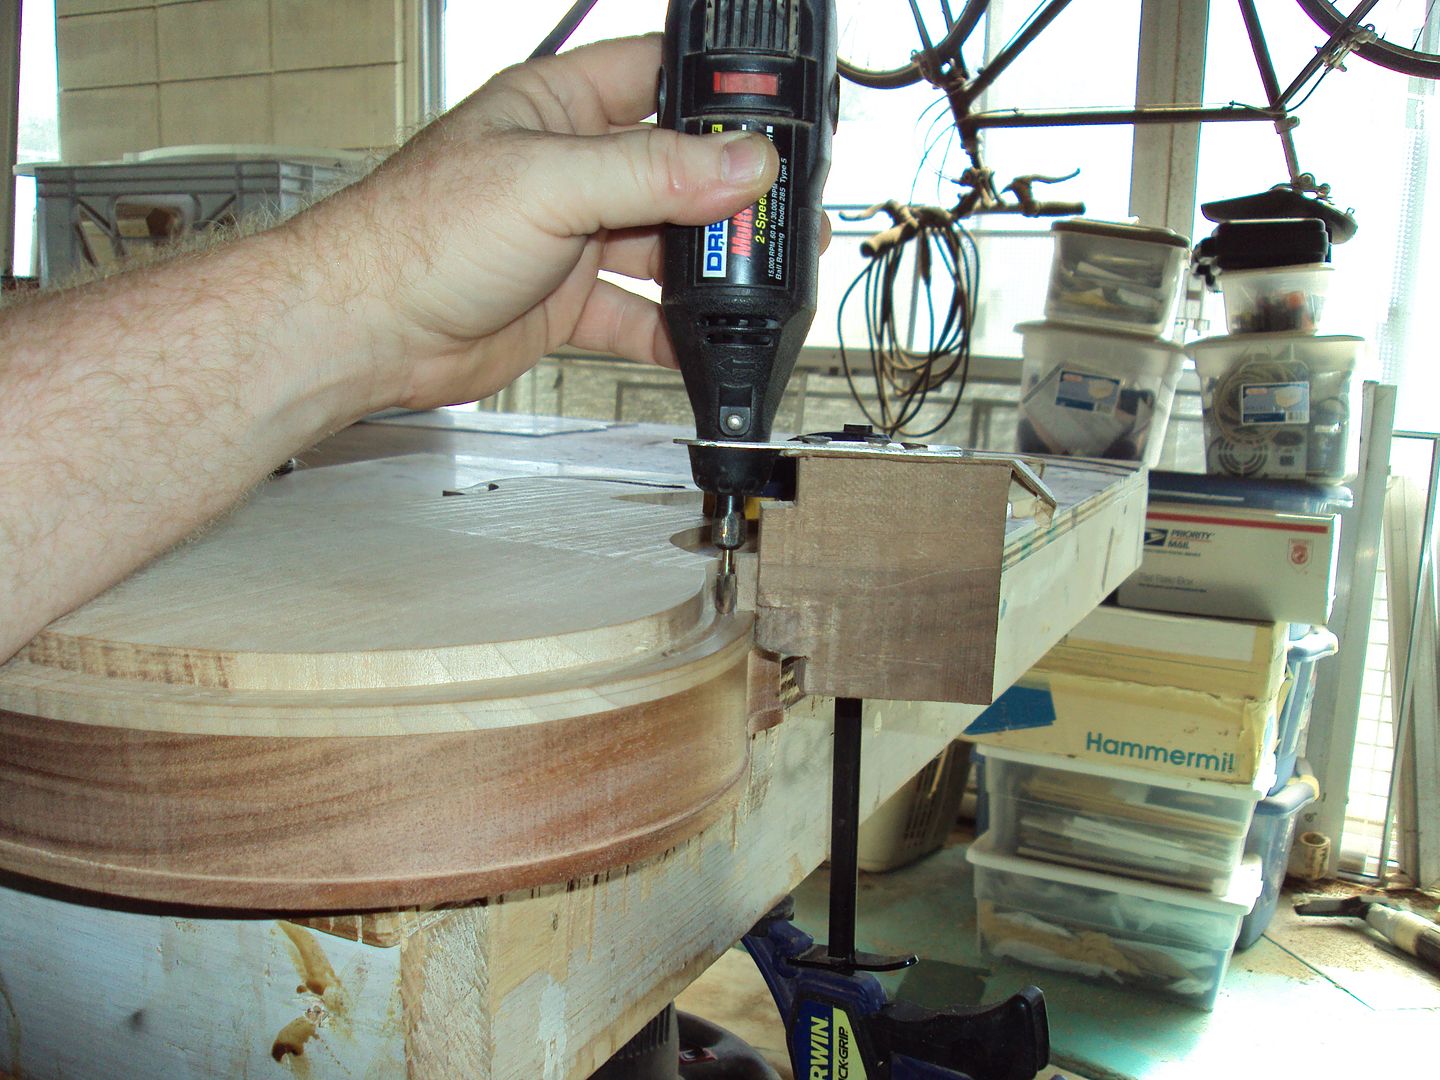
like this
i route about 4 inch's at a time, very carefully
verrrrry carefully
i really broke a nervous sweat by the time i was done with the top, and it reminded me i forgot to take my blood pressure pill
then on to the back
before
after
thats all i can take today, it's a holiday
i'm off to the couch -
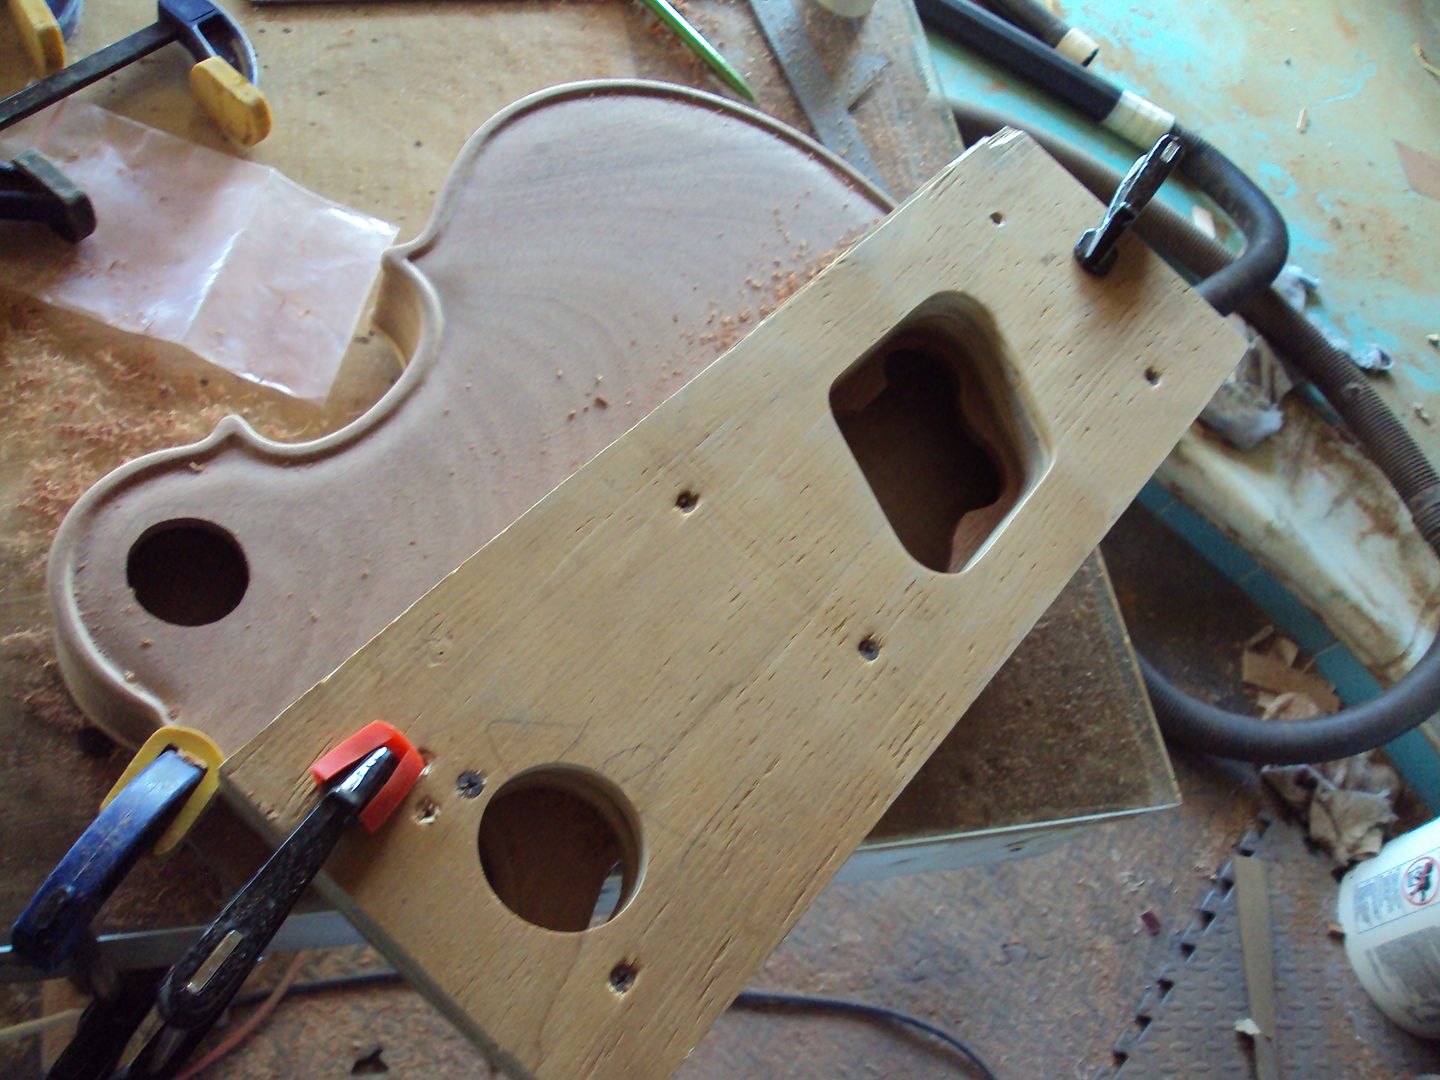
here'a a little jig that attaches to the box for routing the neck pocket, the front is held down with two screws
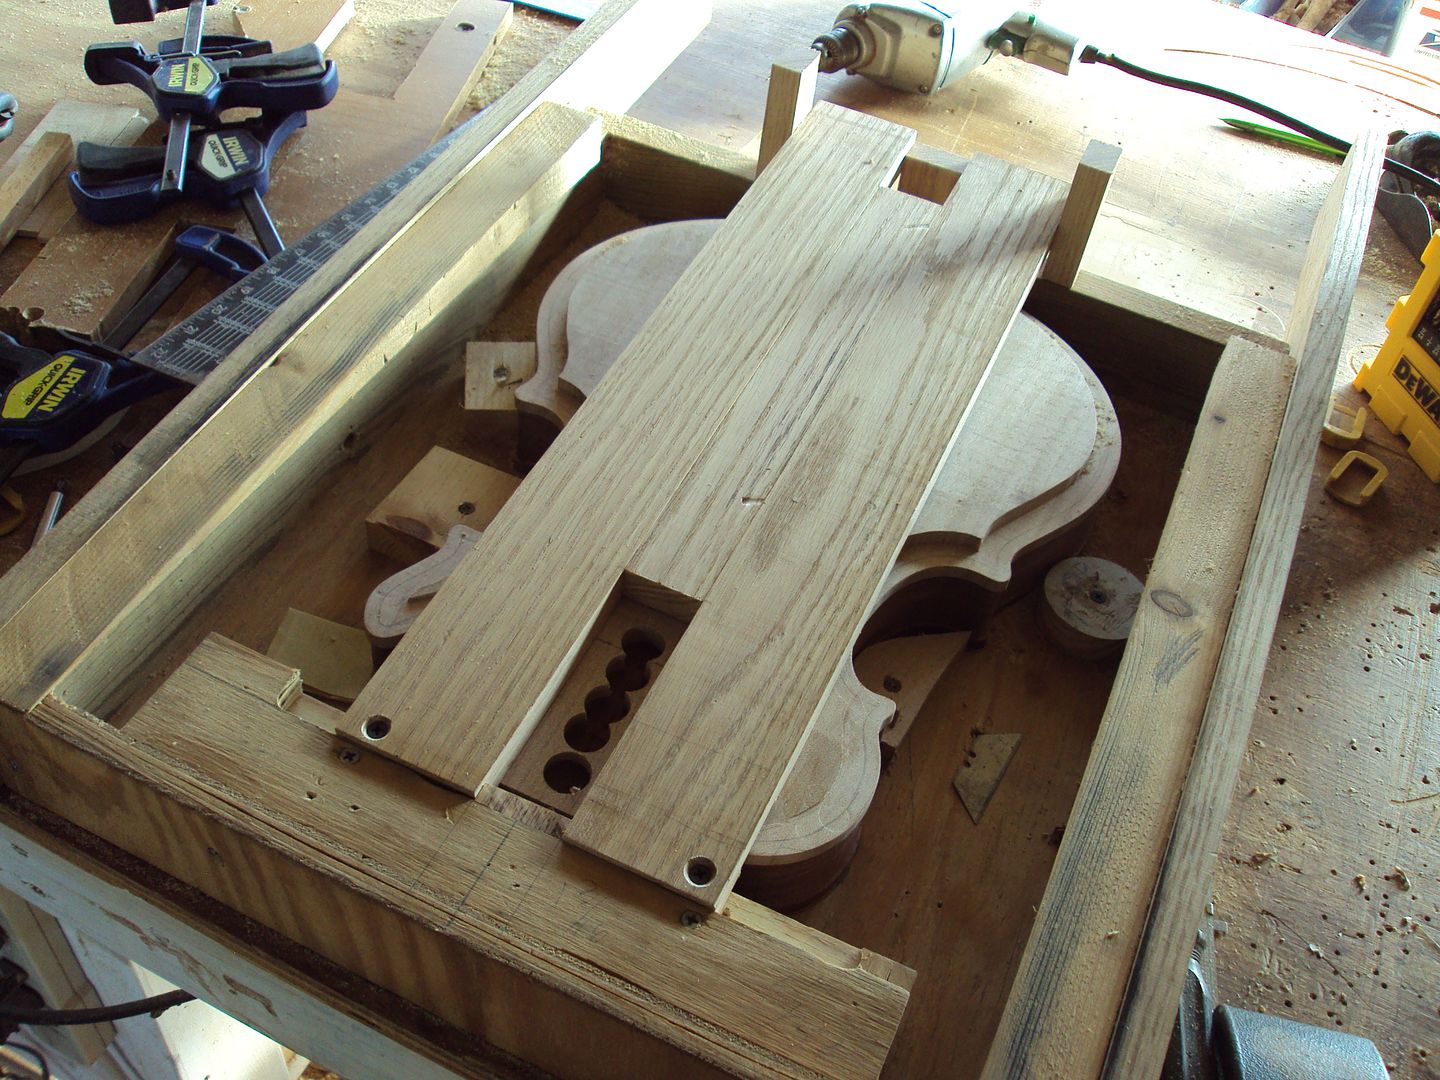
the back just kind of centers itself in place
and routes an angled neck pocket
like so
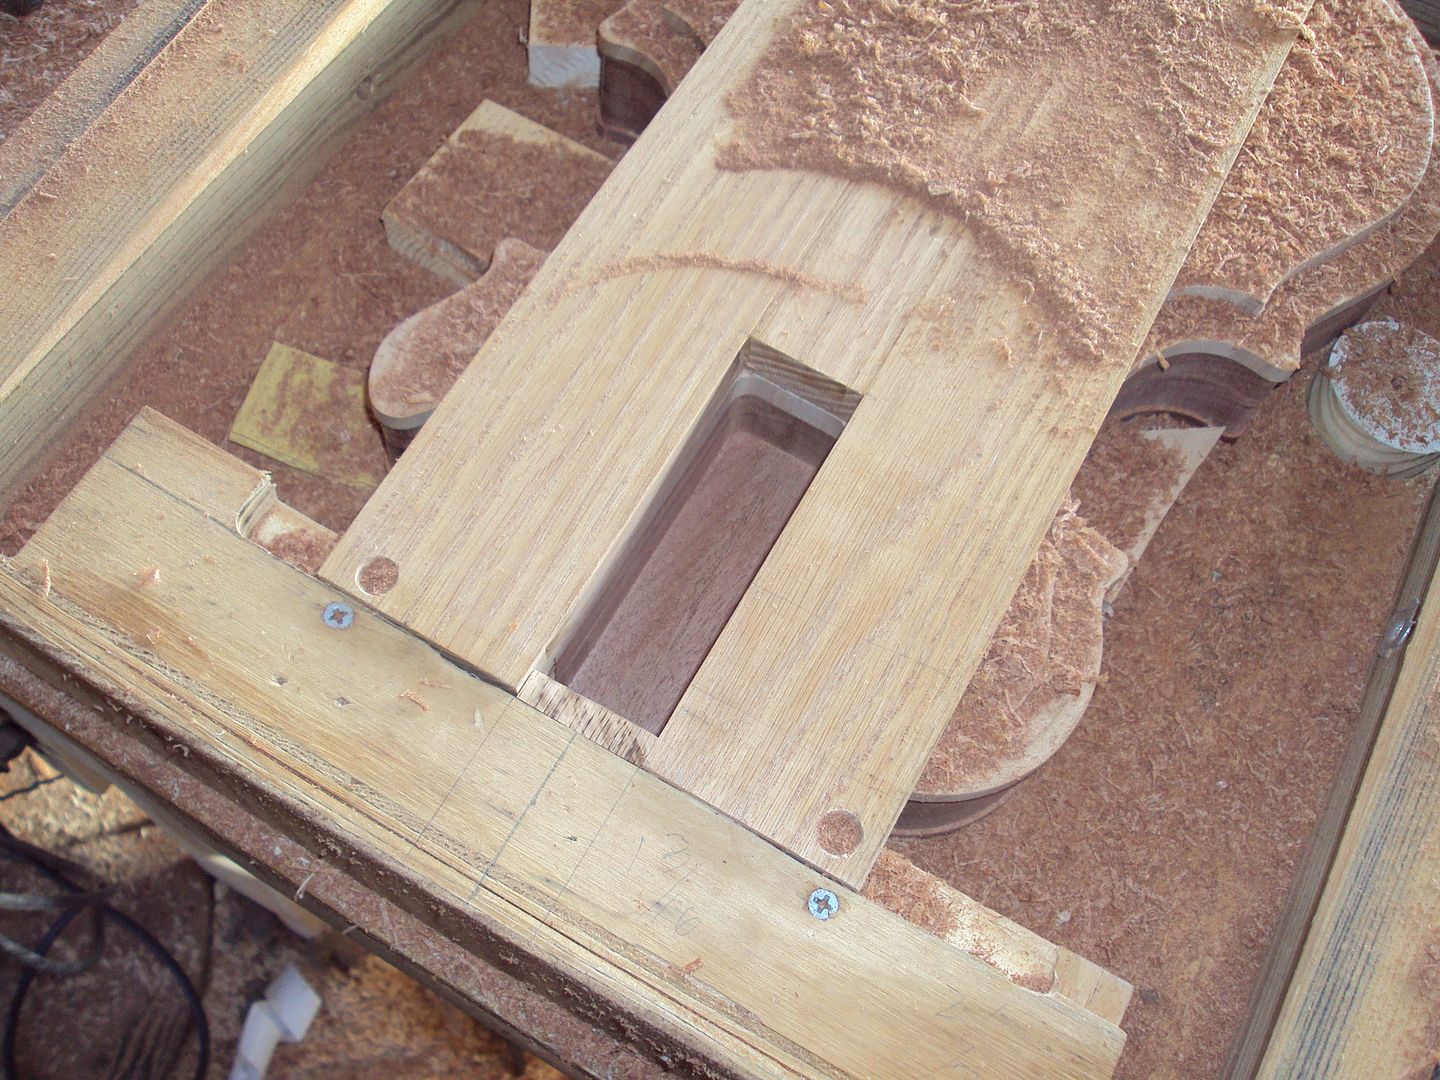
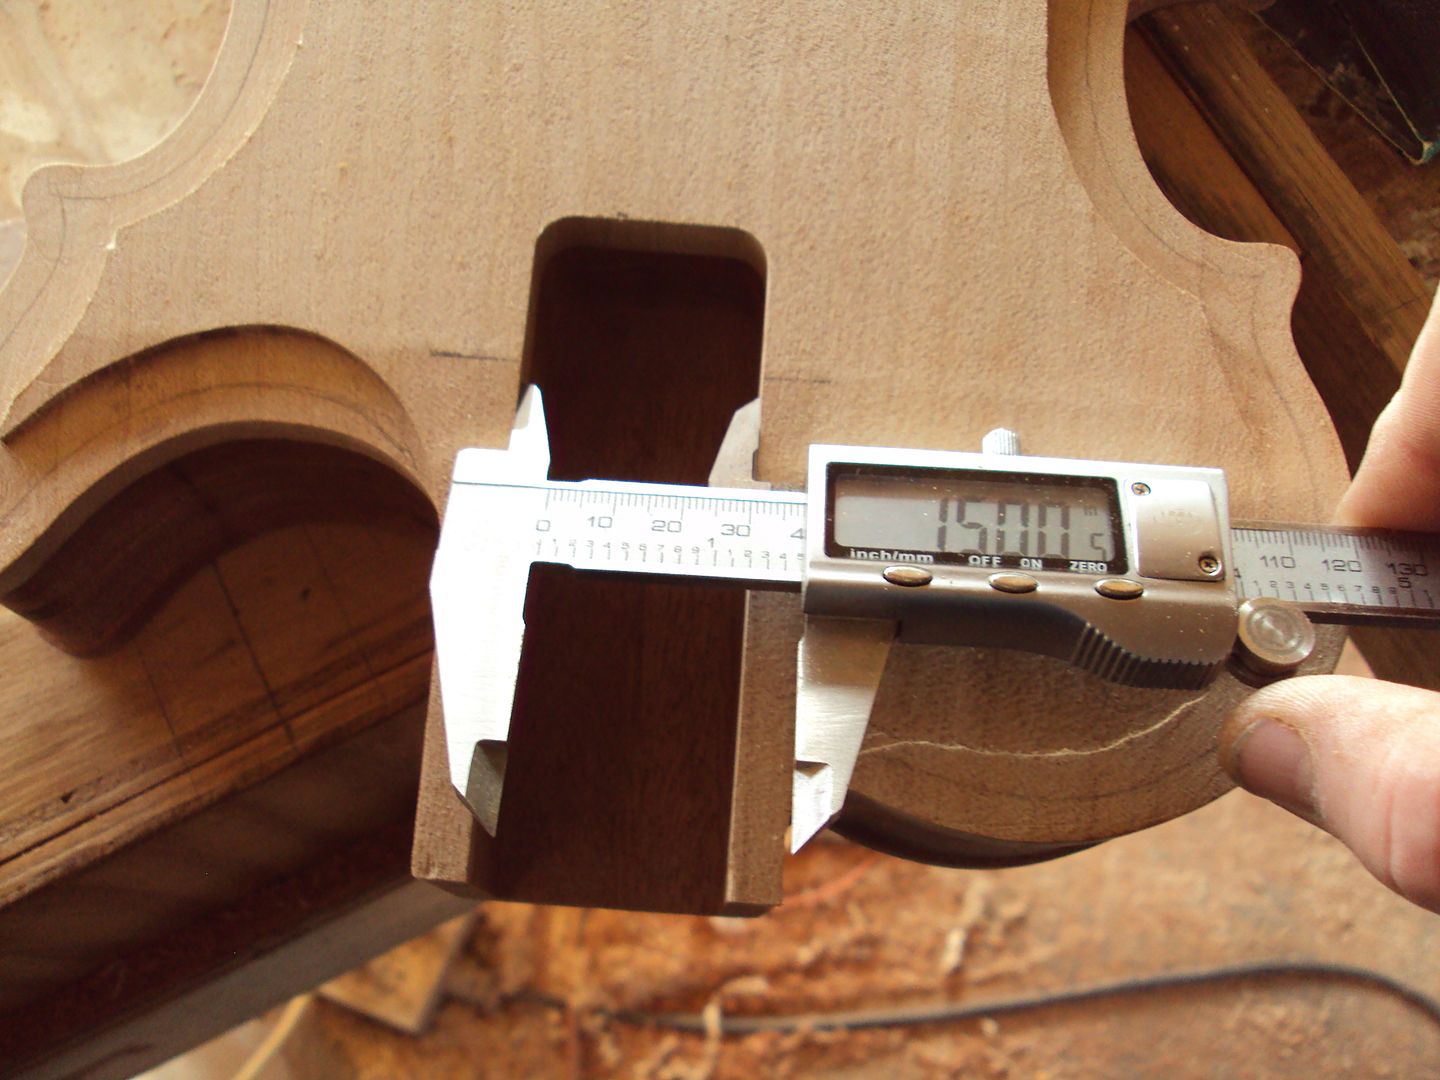
i test it with a prototype neck i made for the first one i made, fits real nice
this neck has a straight headstock like a fender, i might use this, i might make a 12 string neck for it, i'm still thinkin about it
-
just kinda freehand routed to the line
I normally use a rabbitting bit to do that....but you apparently don't need no stinkin' rabitt bit. Nice display of control.
This build is a breath of fresh air and a great pleasure to watch. Great job and thanks for sharing.
SR
i didnt have a rabitt bit the size i really wanted, it really dont need to be perfect because it will be carved and sanded more
thanks for the replys everyone
-
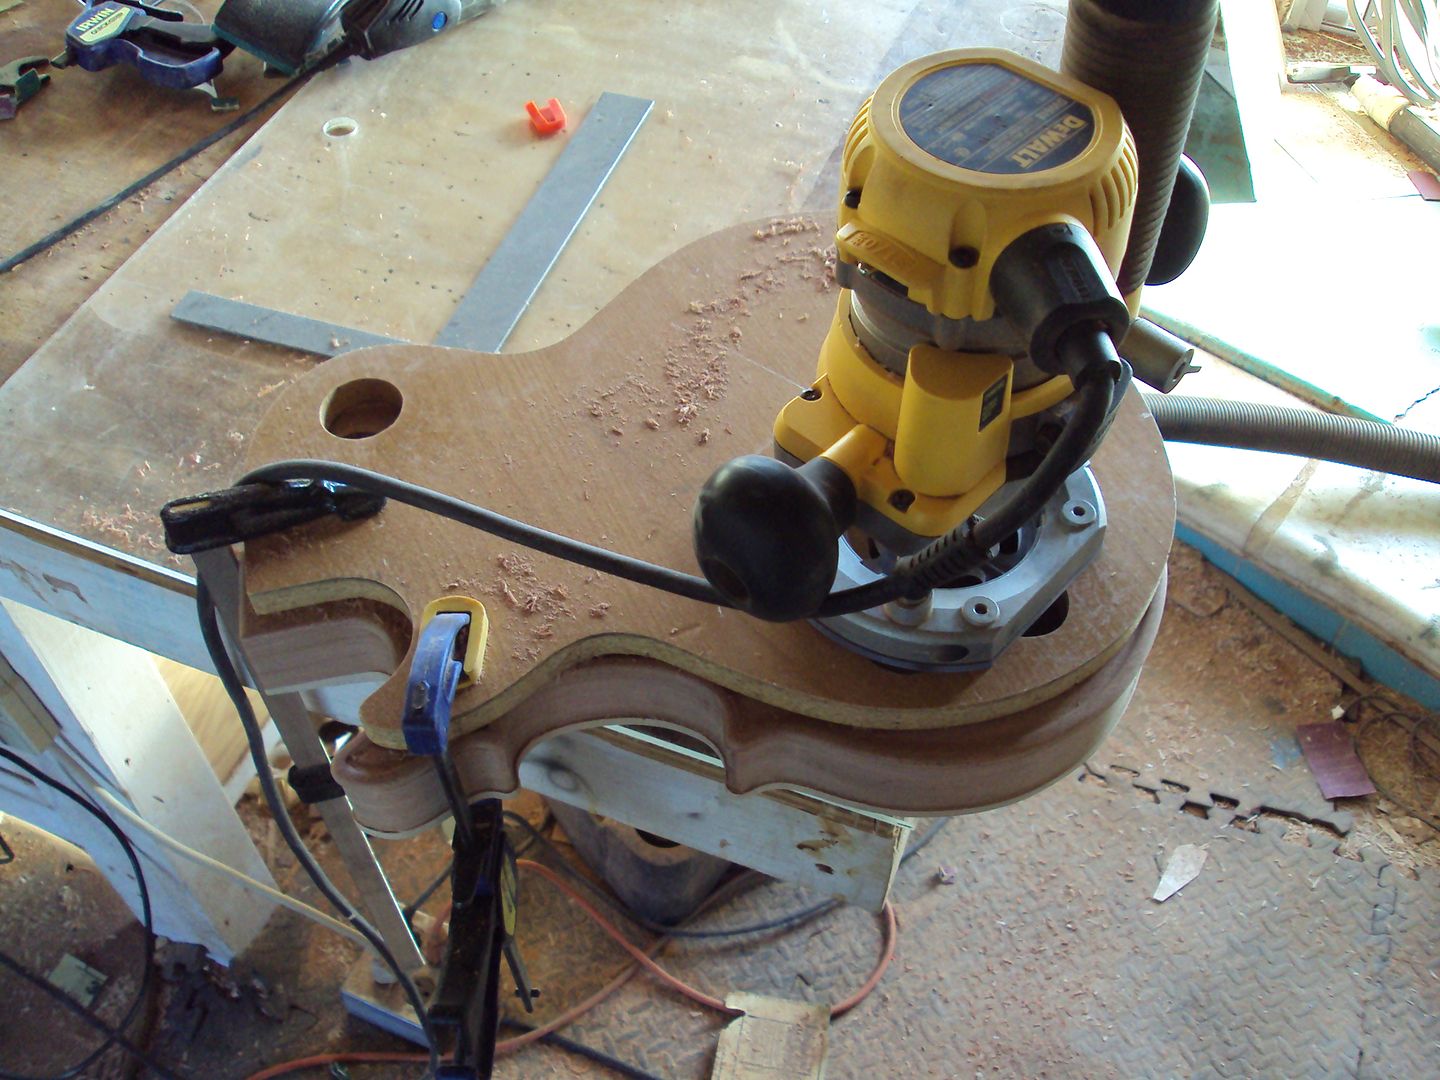
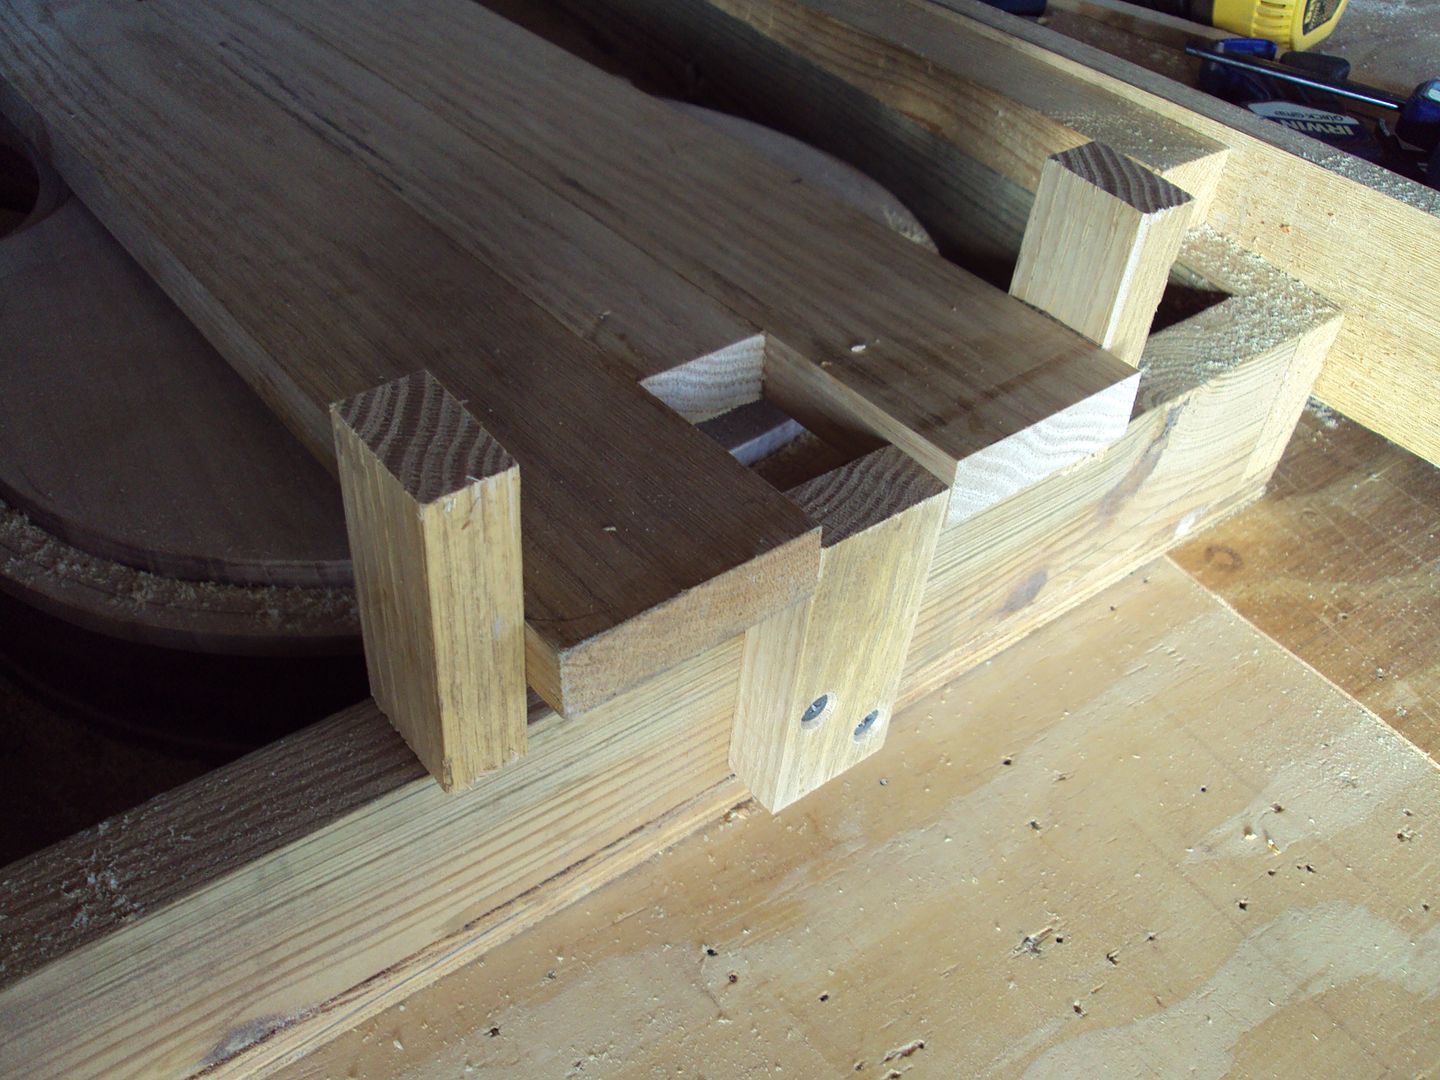
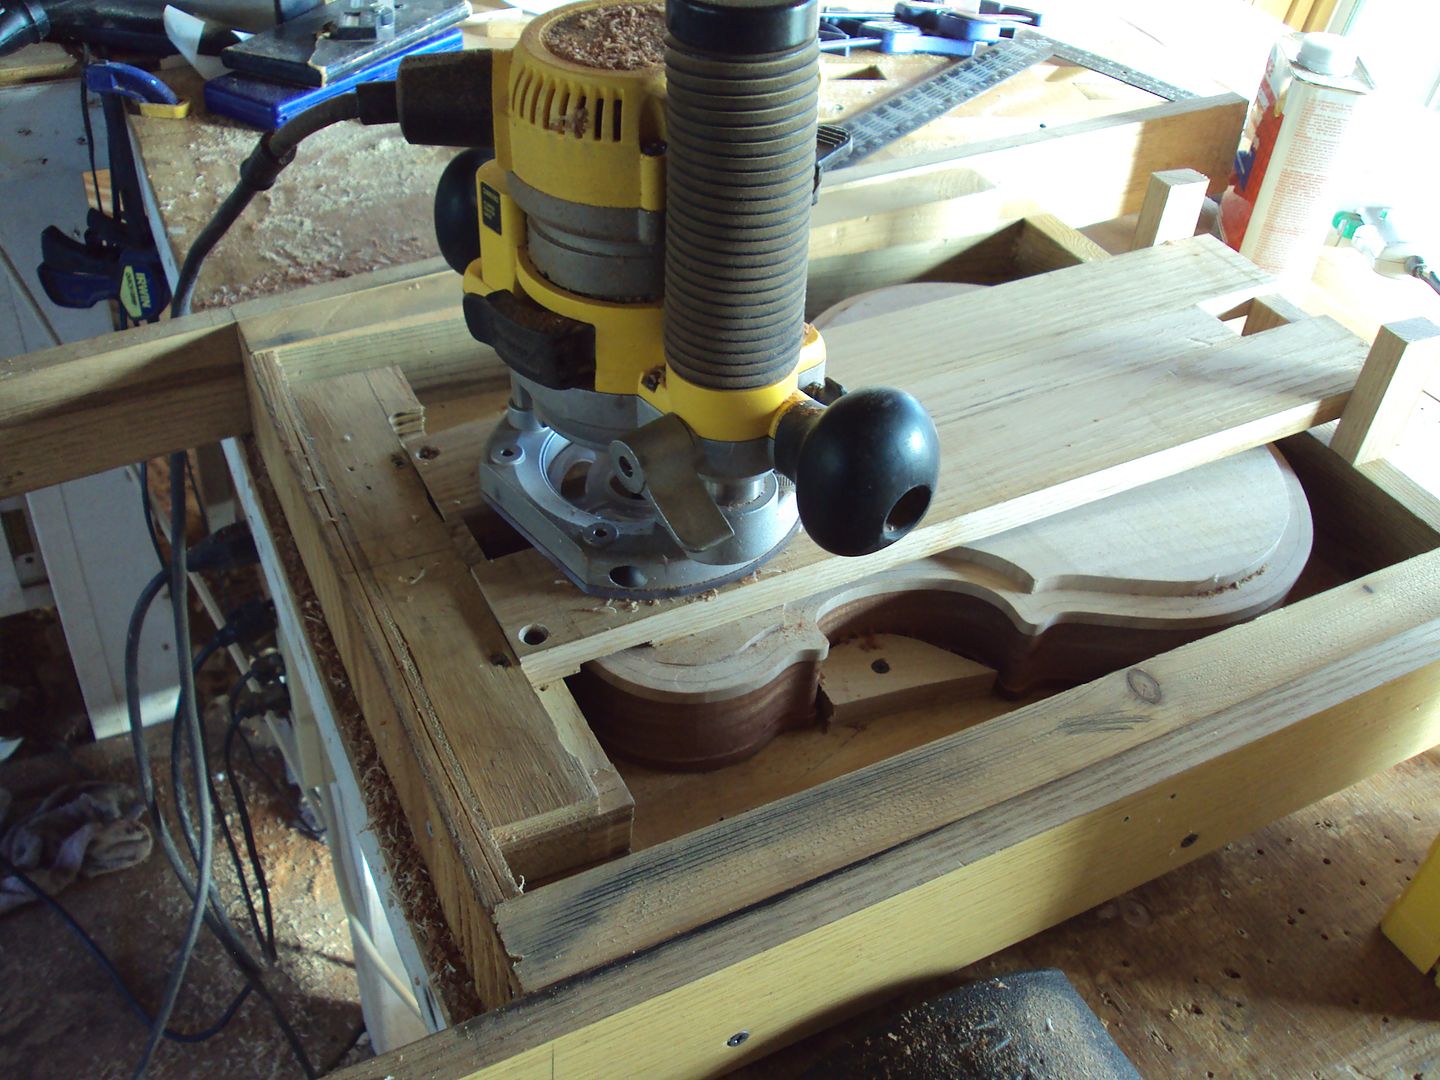
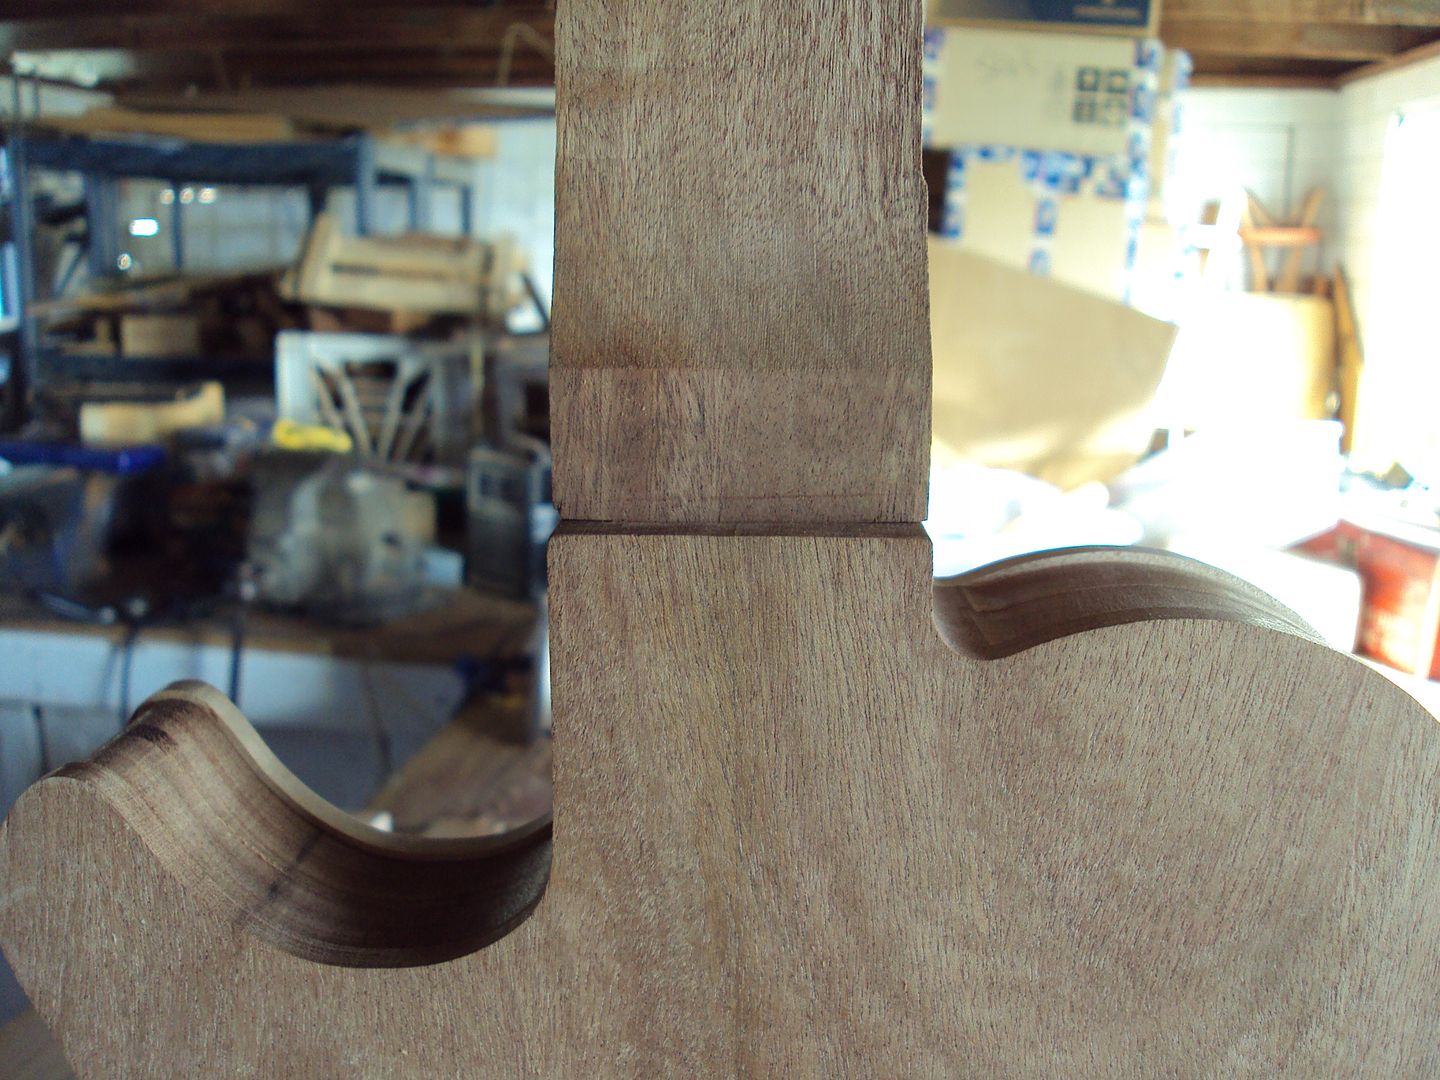
so now it goes into the box
this is setup to plane a 3.7 degree neck angle
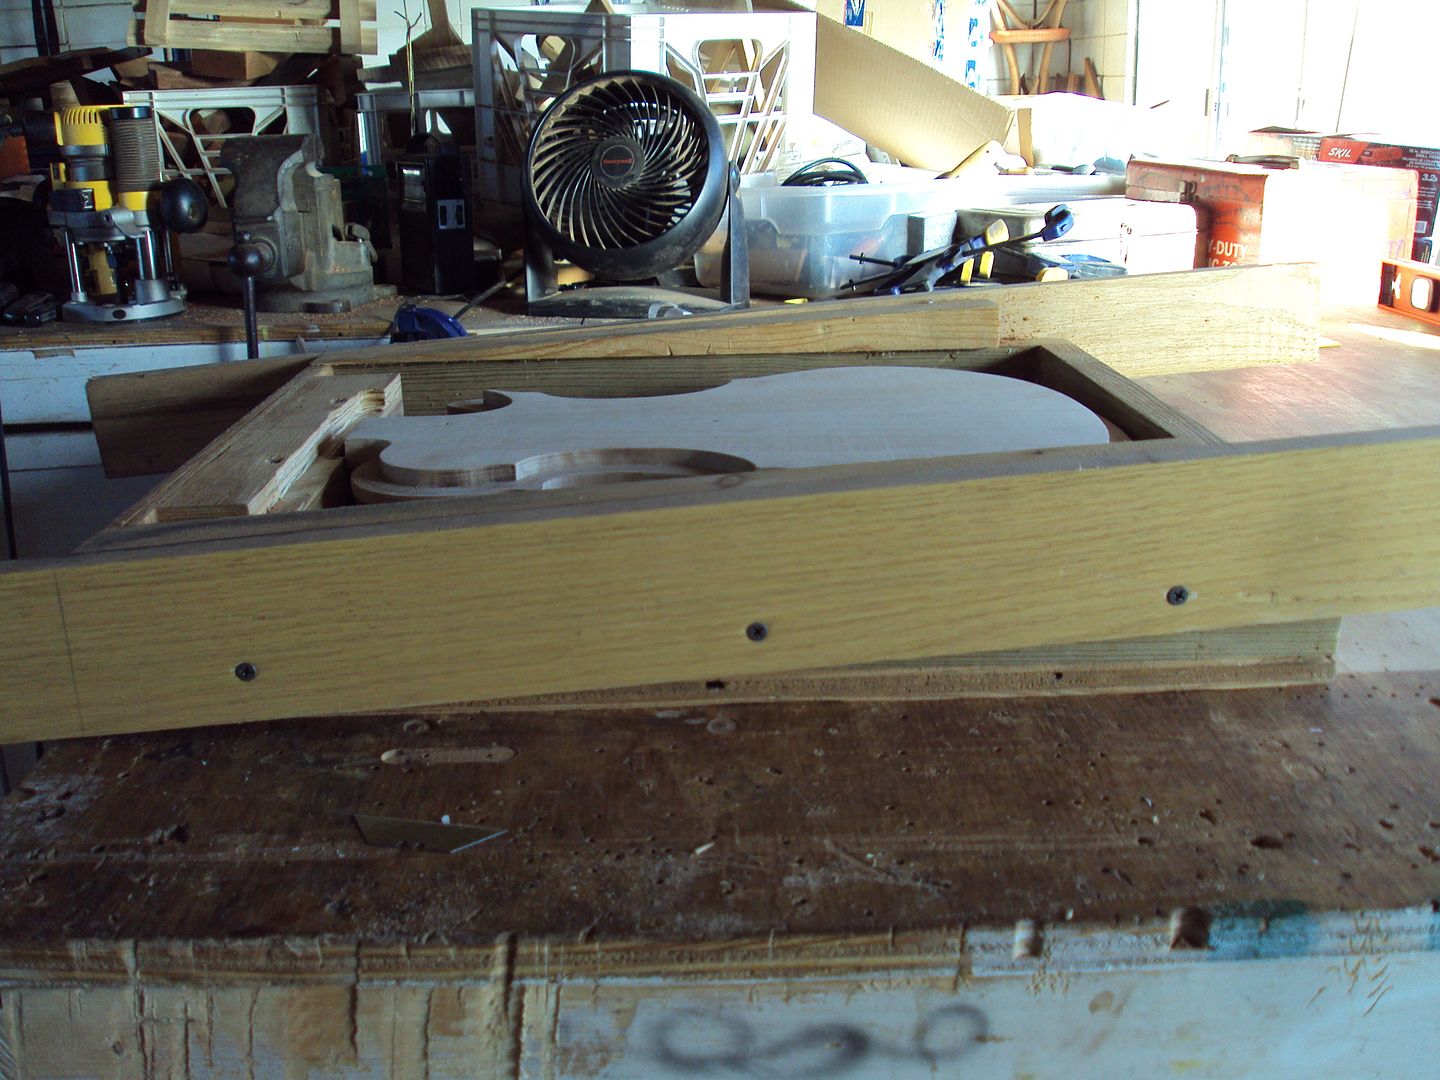
like this
sweet, i mark a spot just above the bridge area and below the fretboard
and add a couple of rails adjusted to plane flat the pickup area
like that
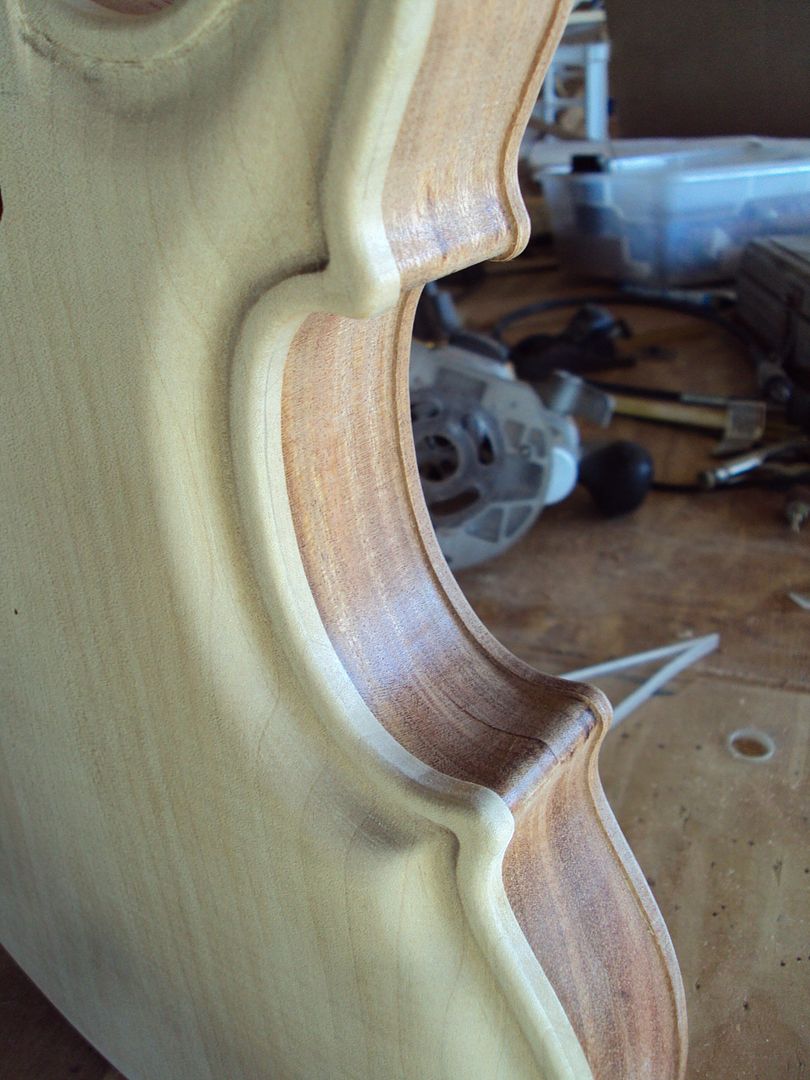
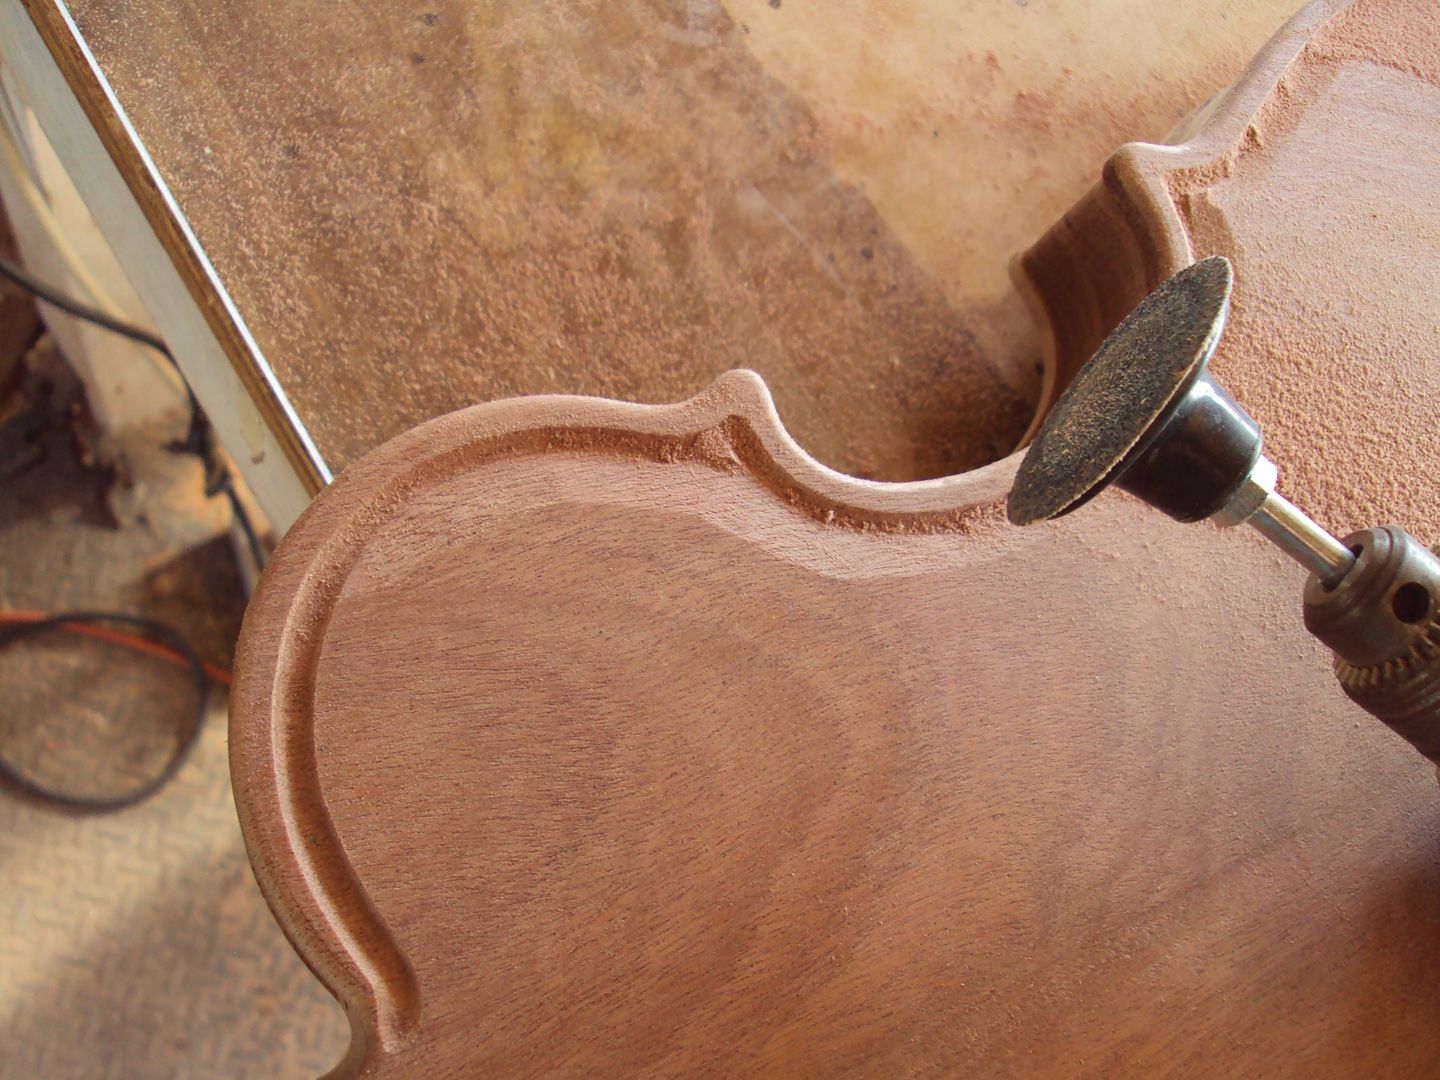
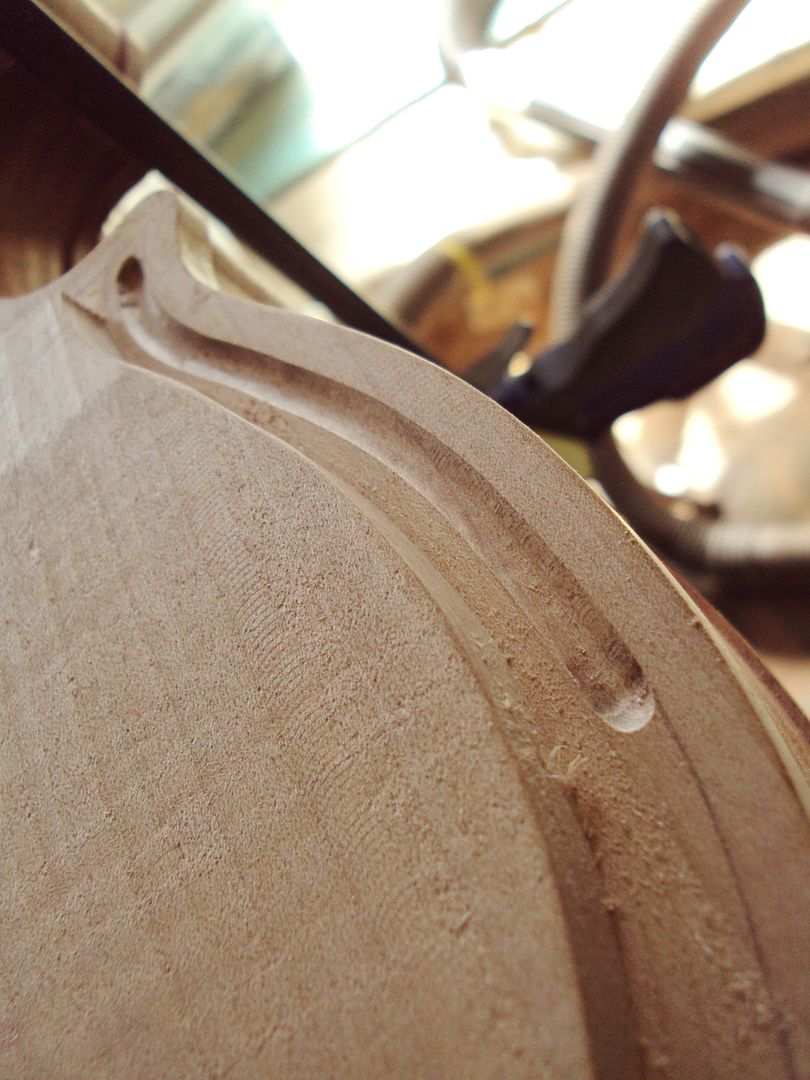
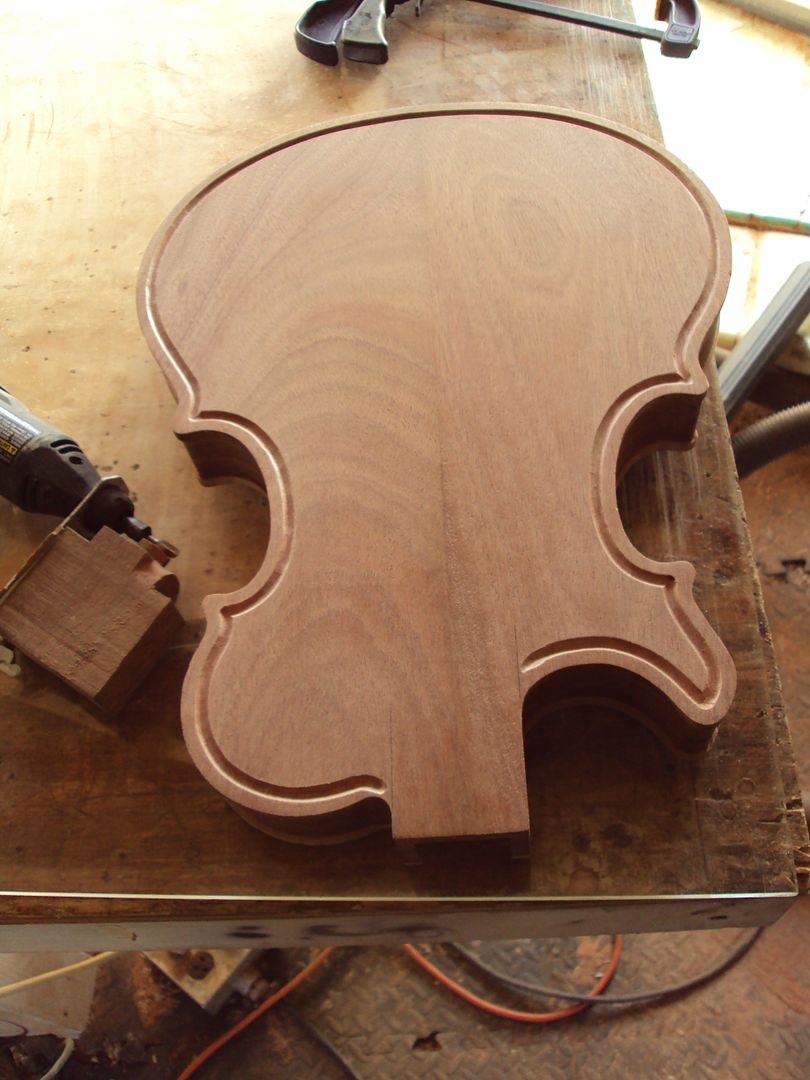
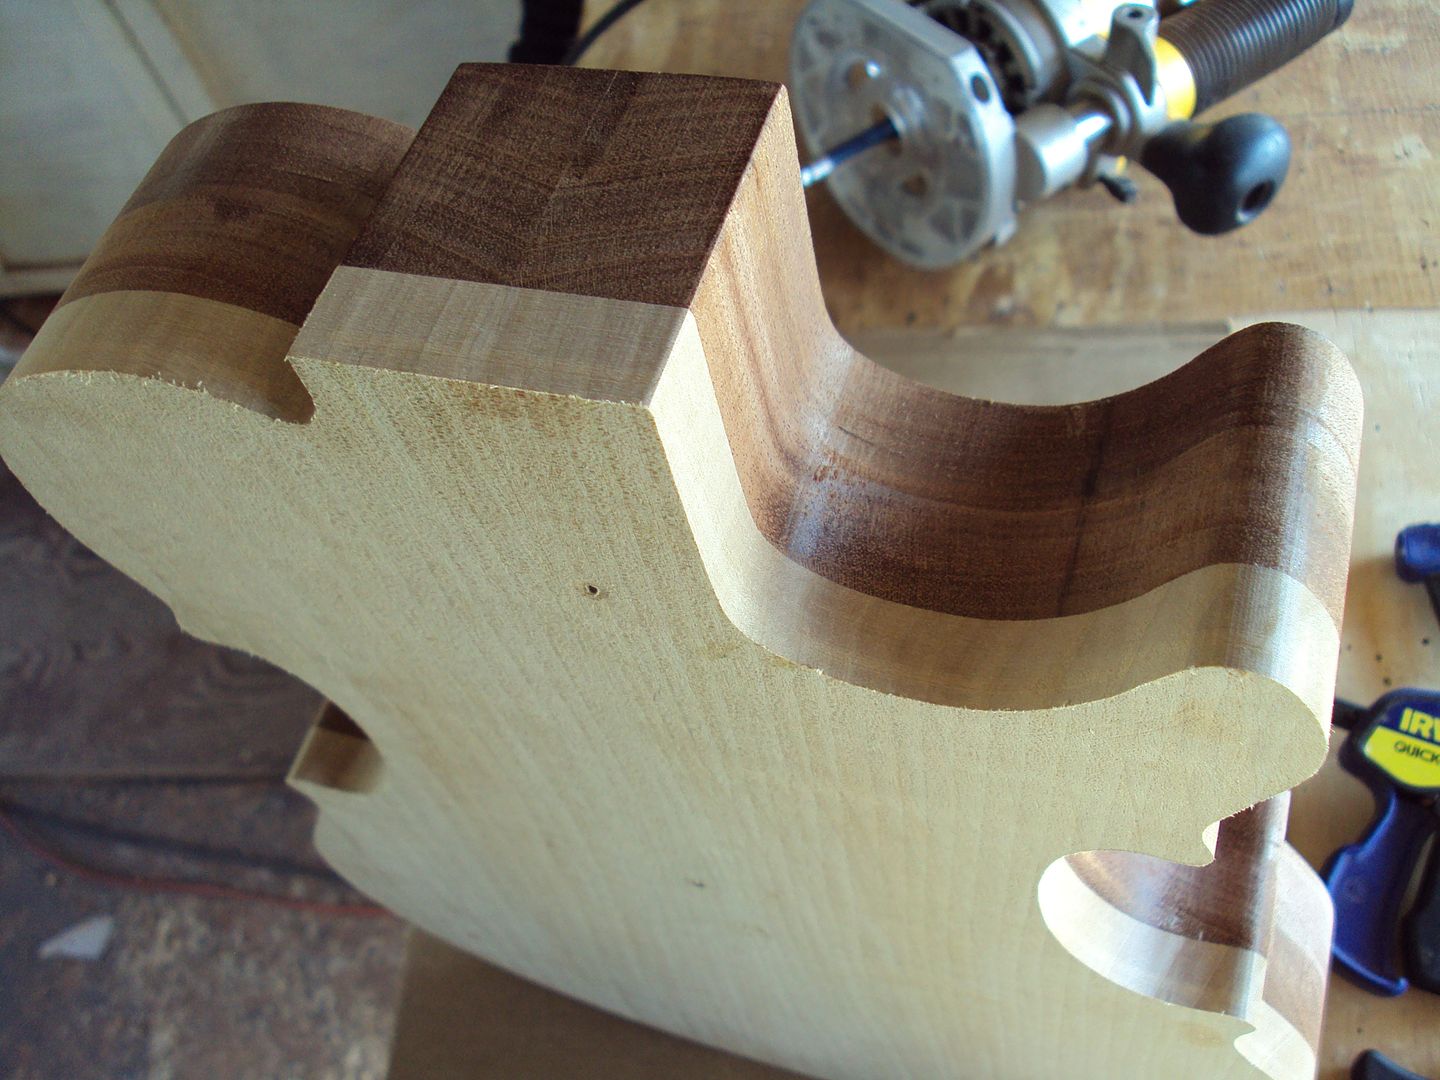
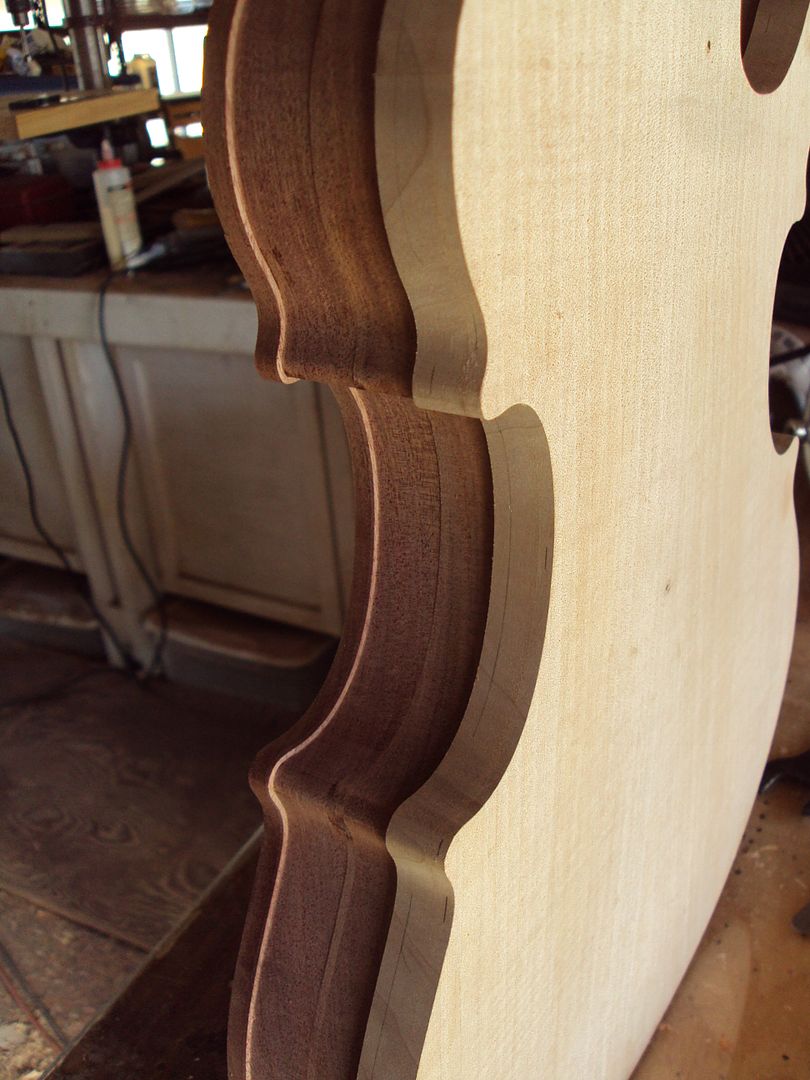
i drew on some lines for carving the top edge bead too
i would route for the neck now but it's getting late, i popped the body out of the jig so the tape glue dont soak up into the wood overnight
and there it is so far
-
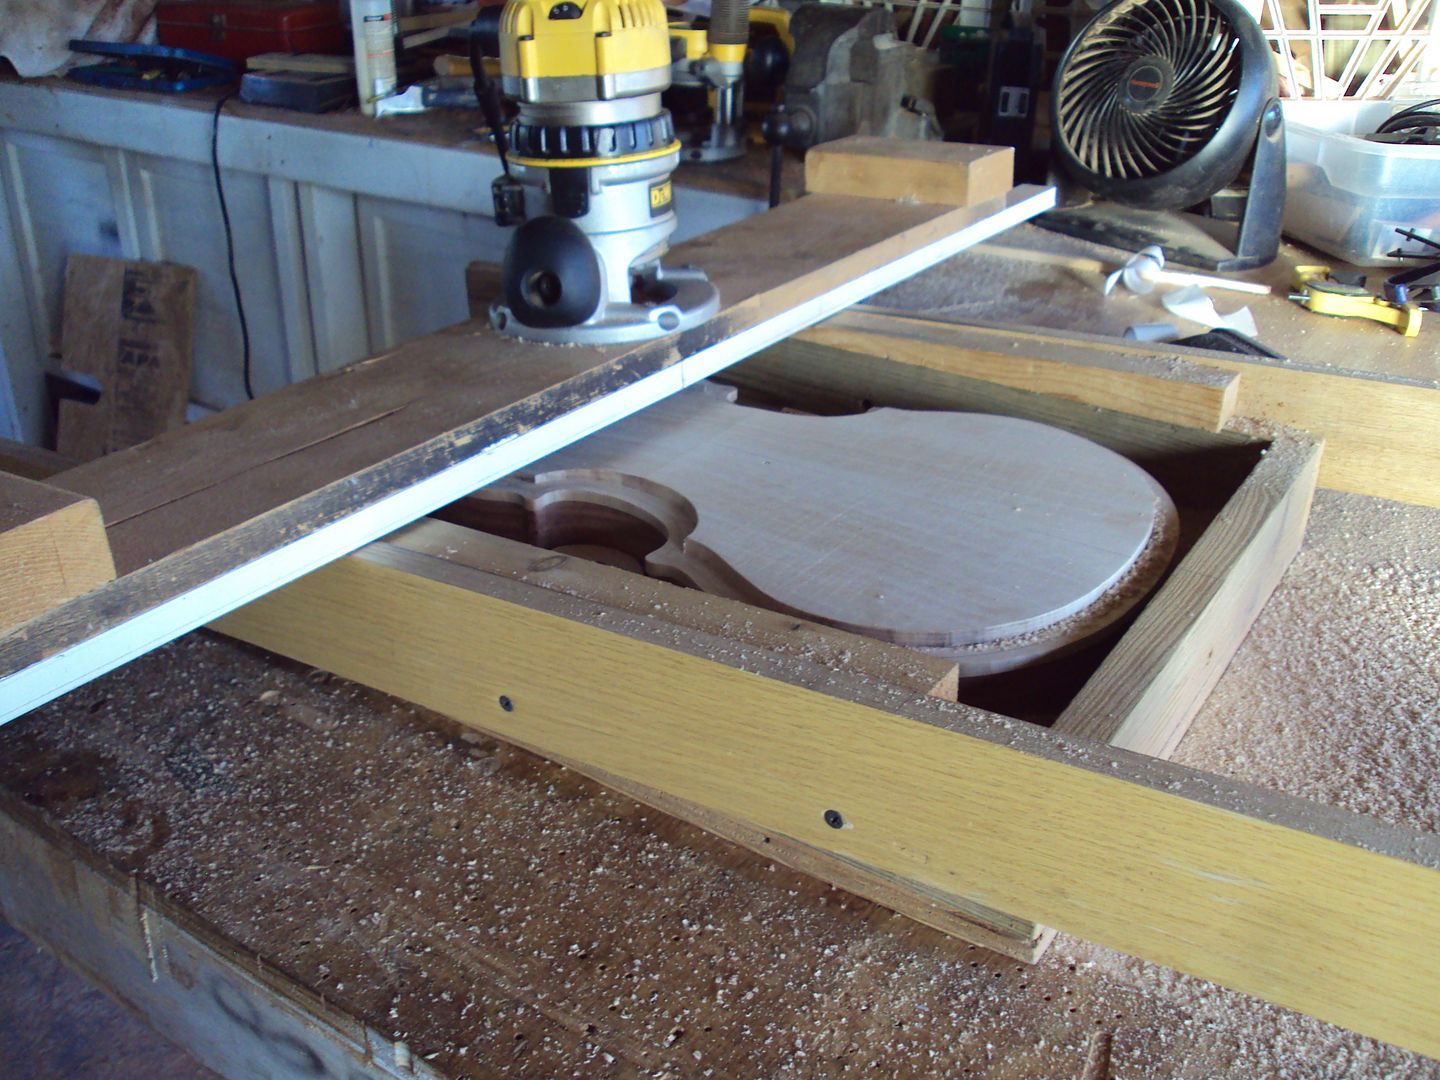
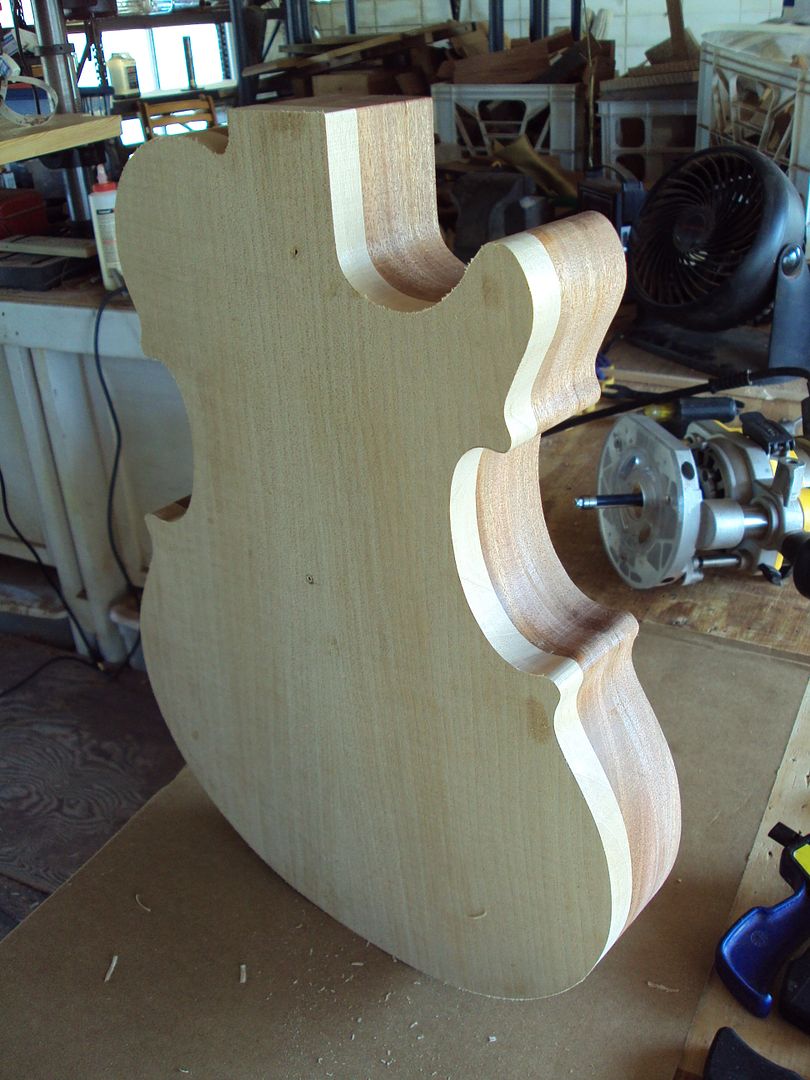
on to getting the top carve started, i use double sided carpet tape to stick it to the work bench
stuck real good
drew on a line i want to route up to
just kinda freehand routed to the line
so now i have a 1/4" side bead of maple on the top
-
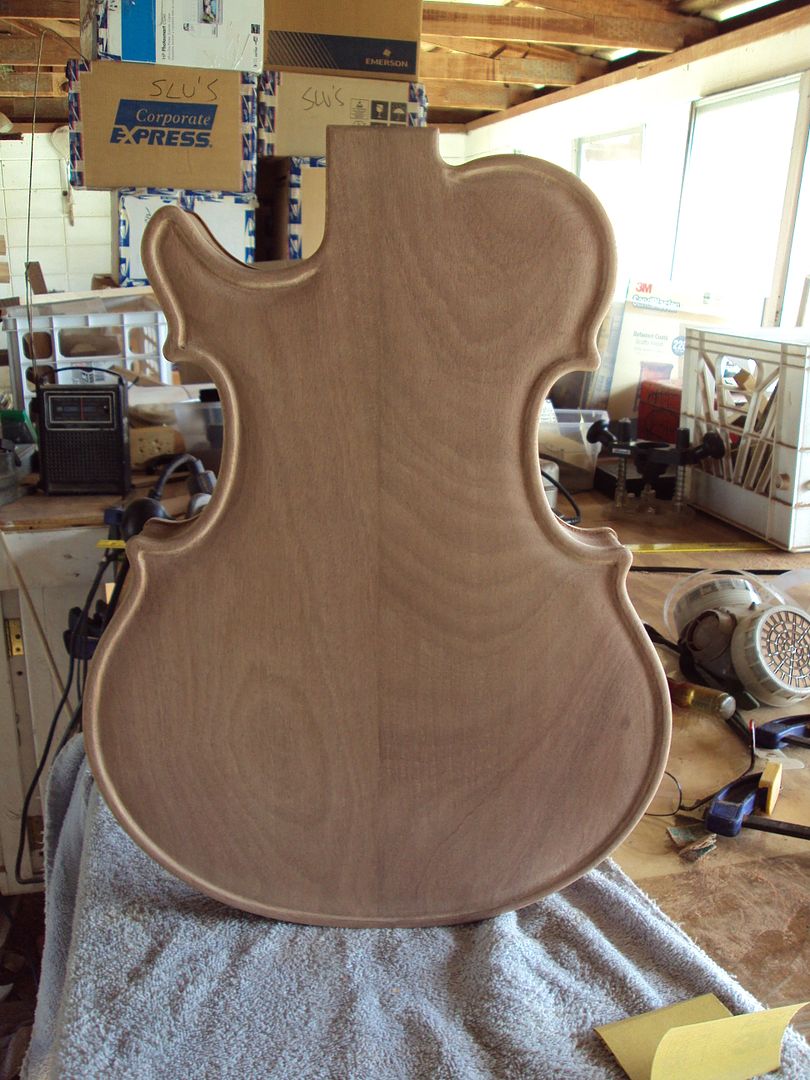
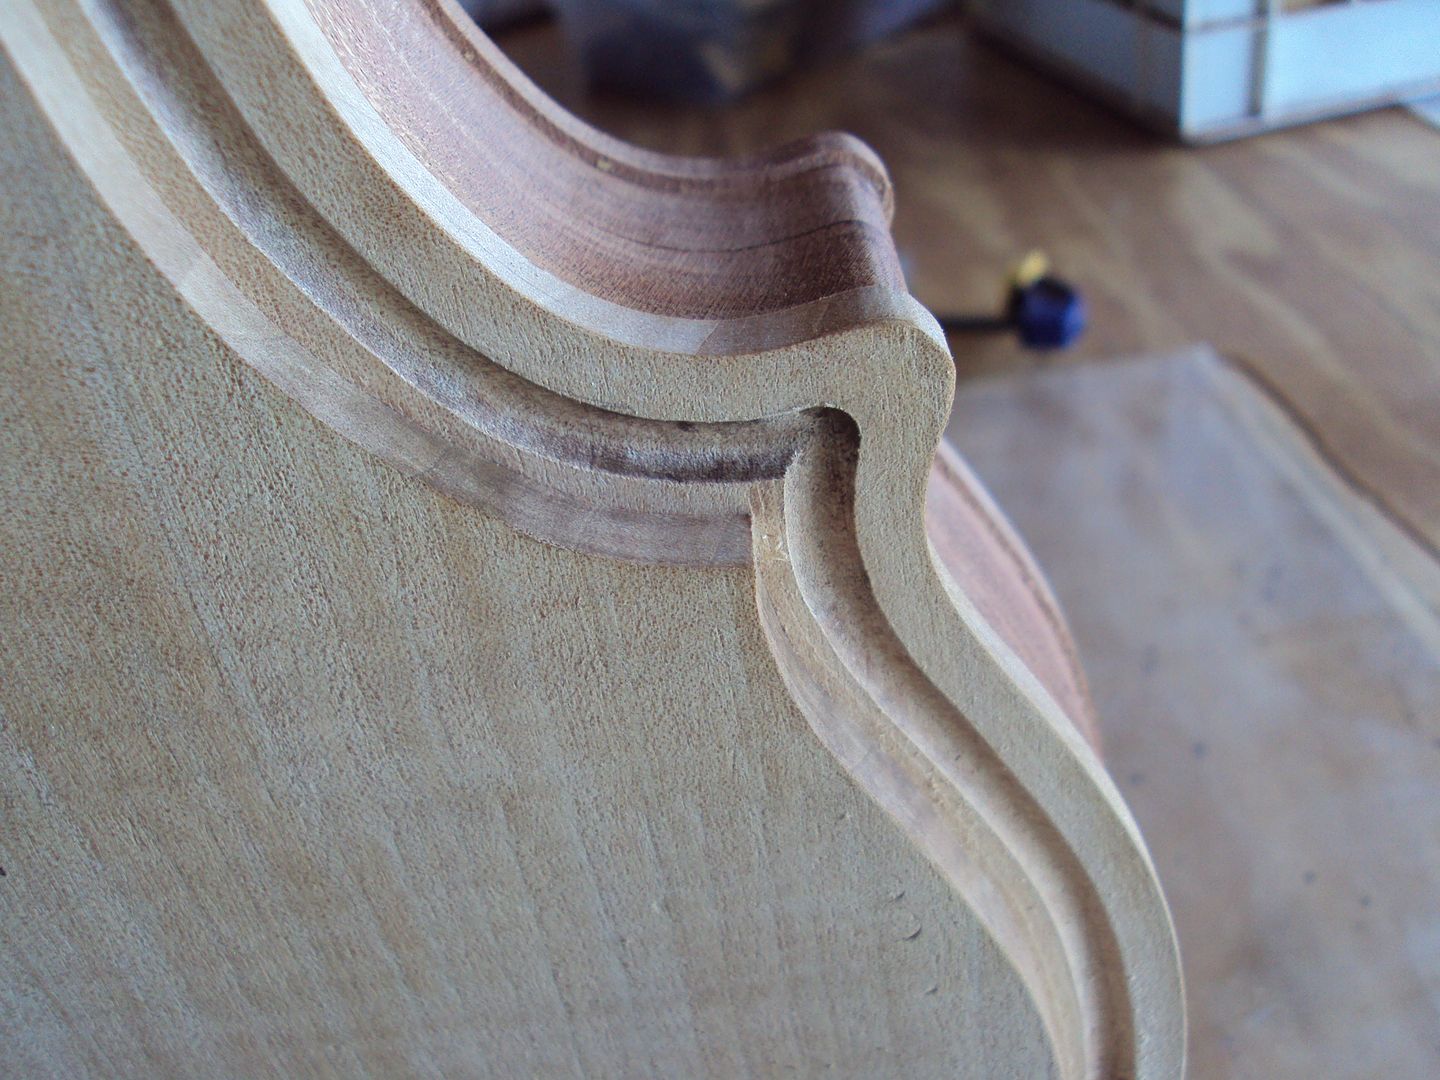
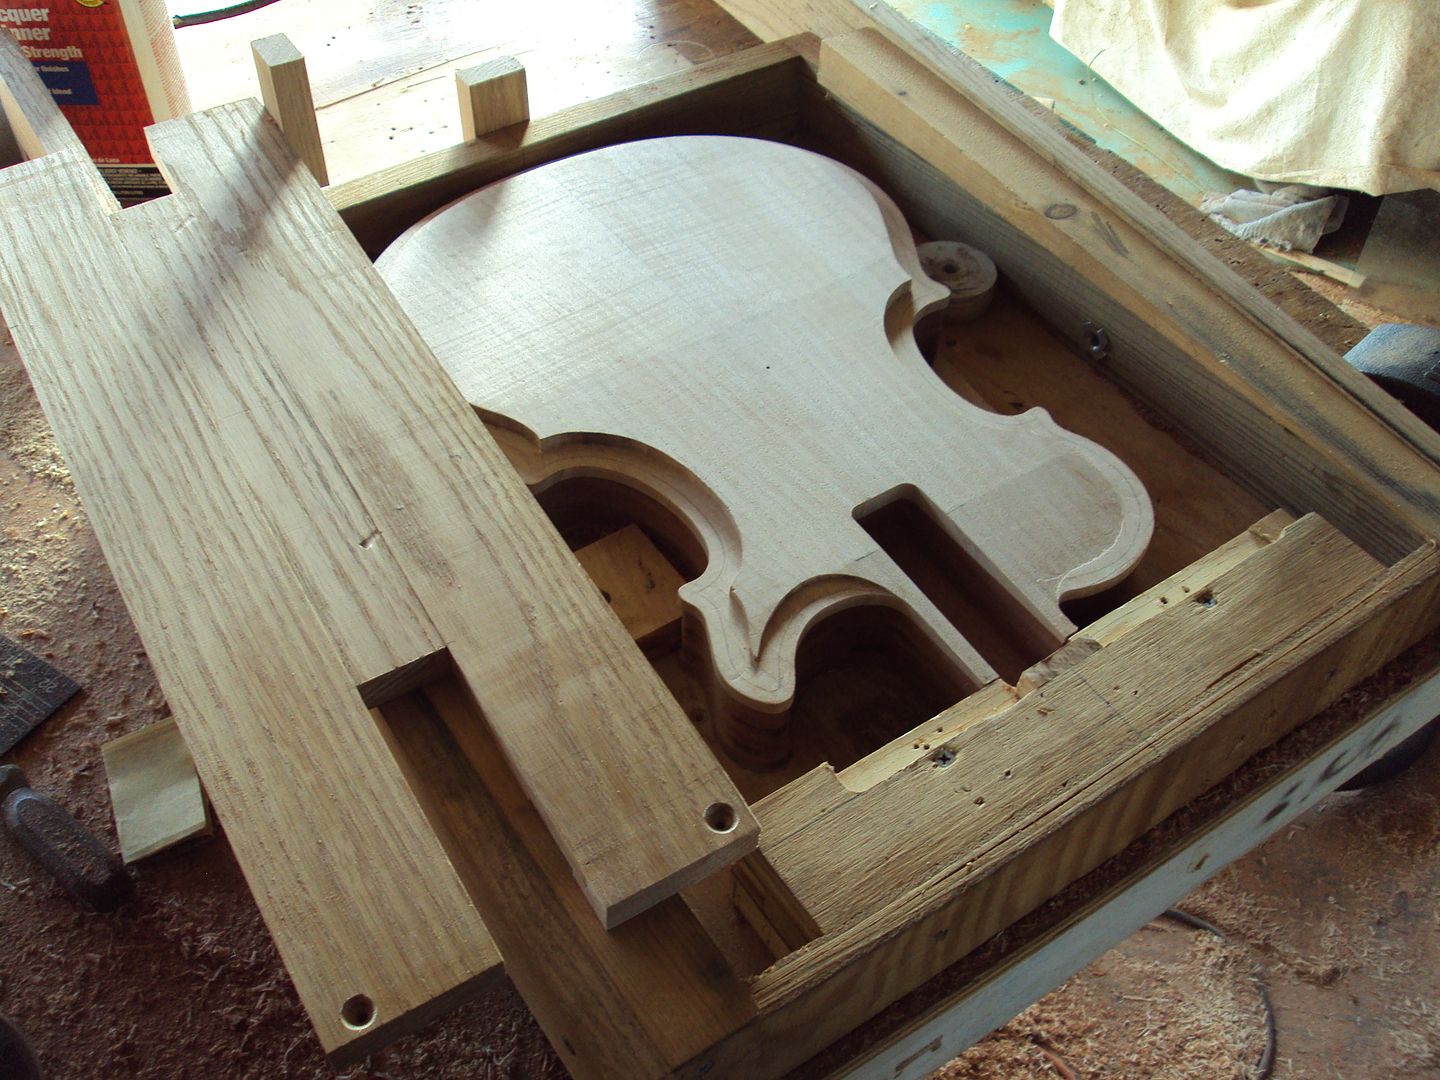
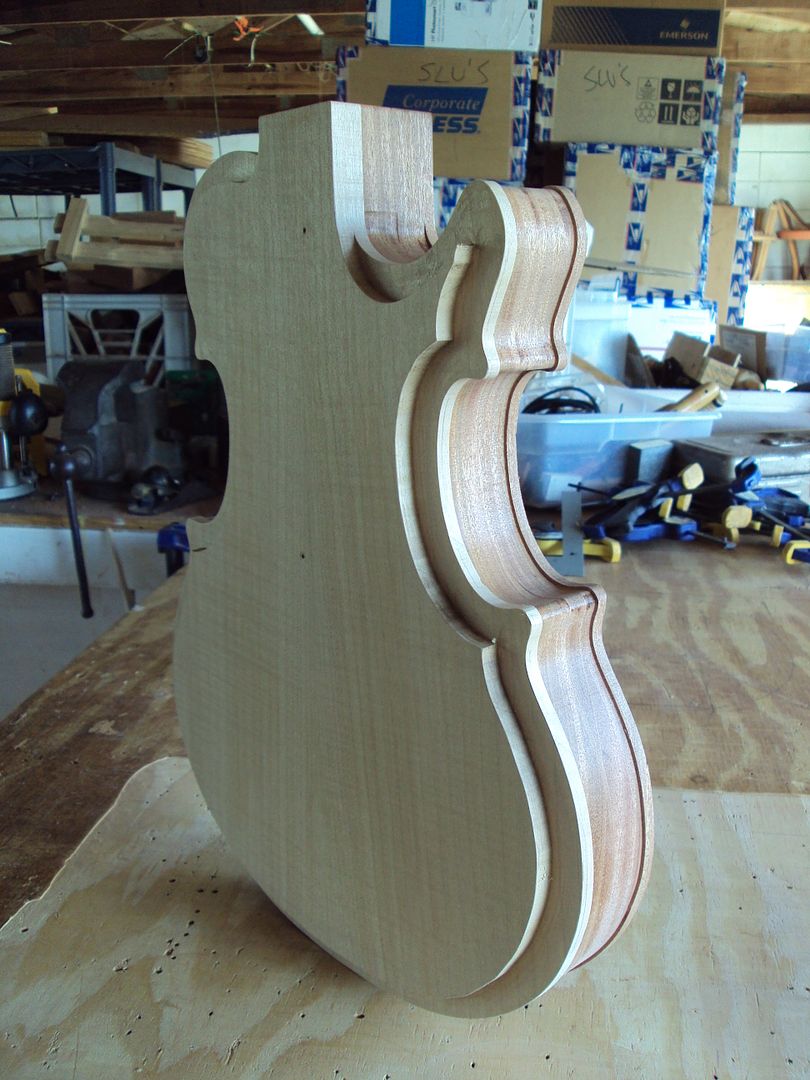
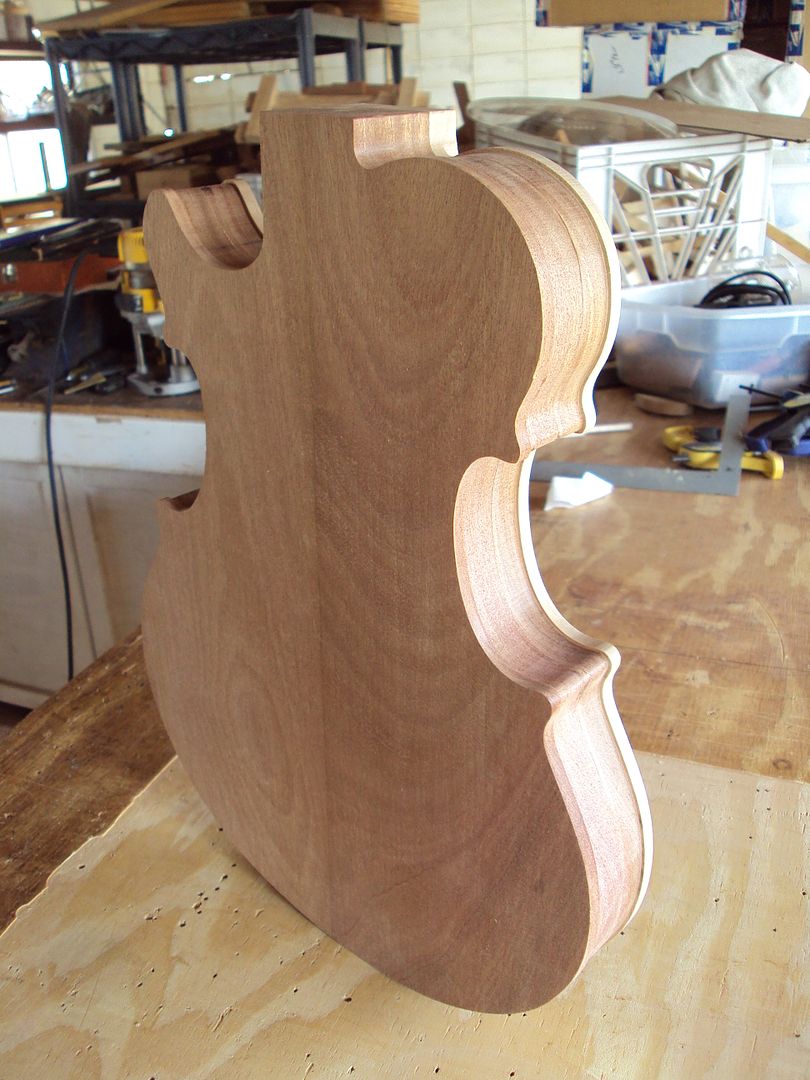
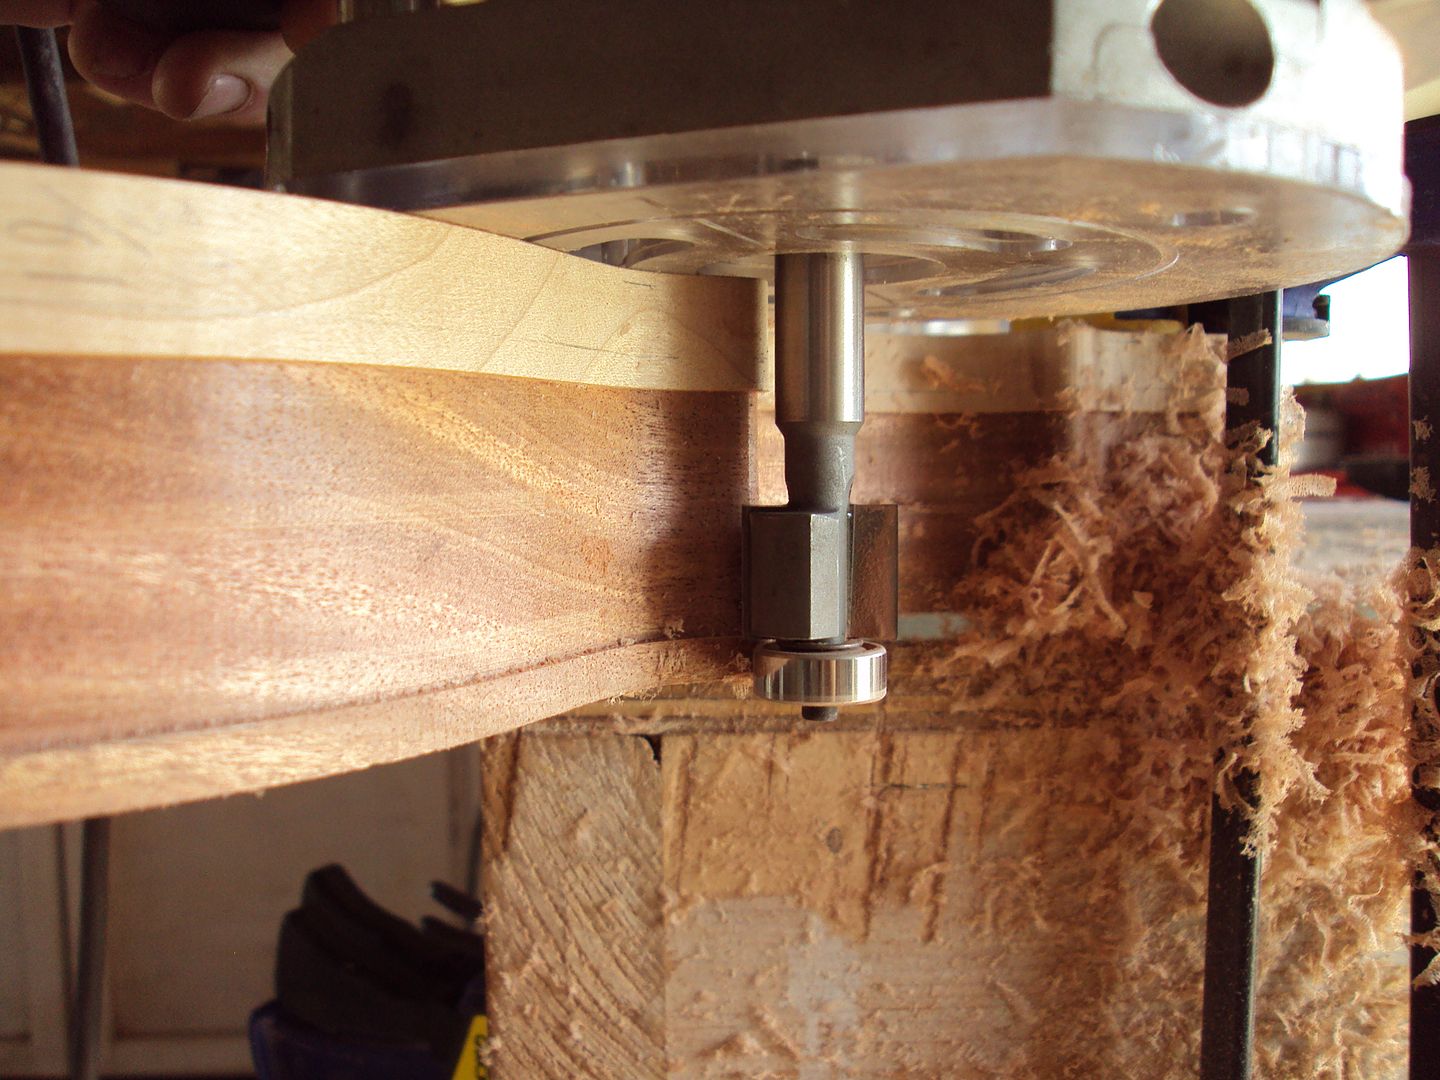
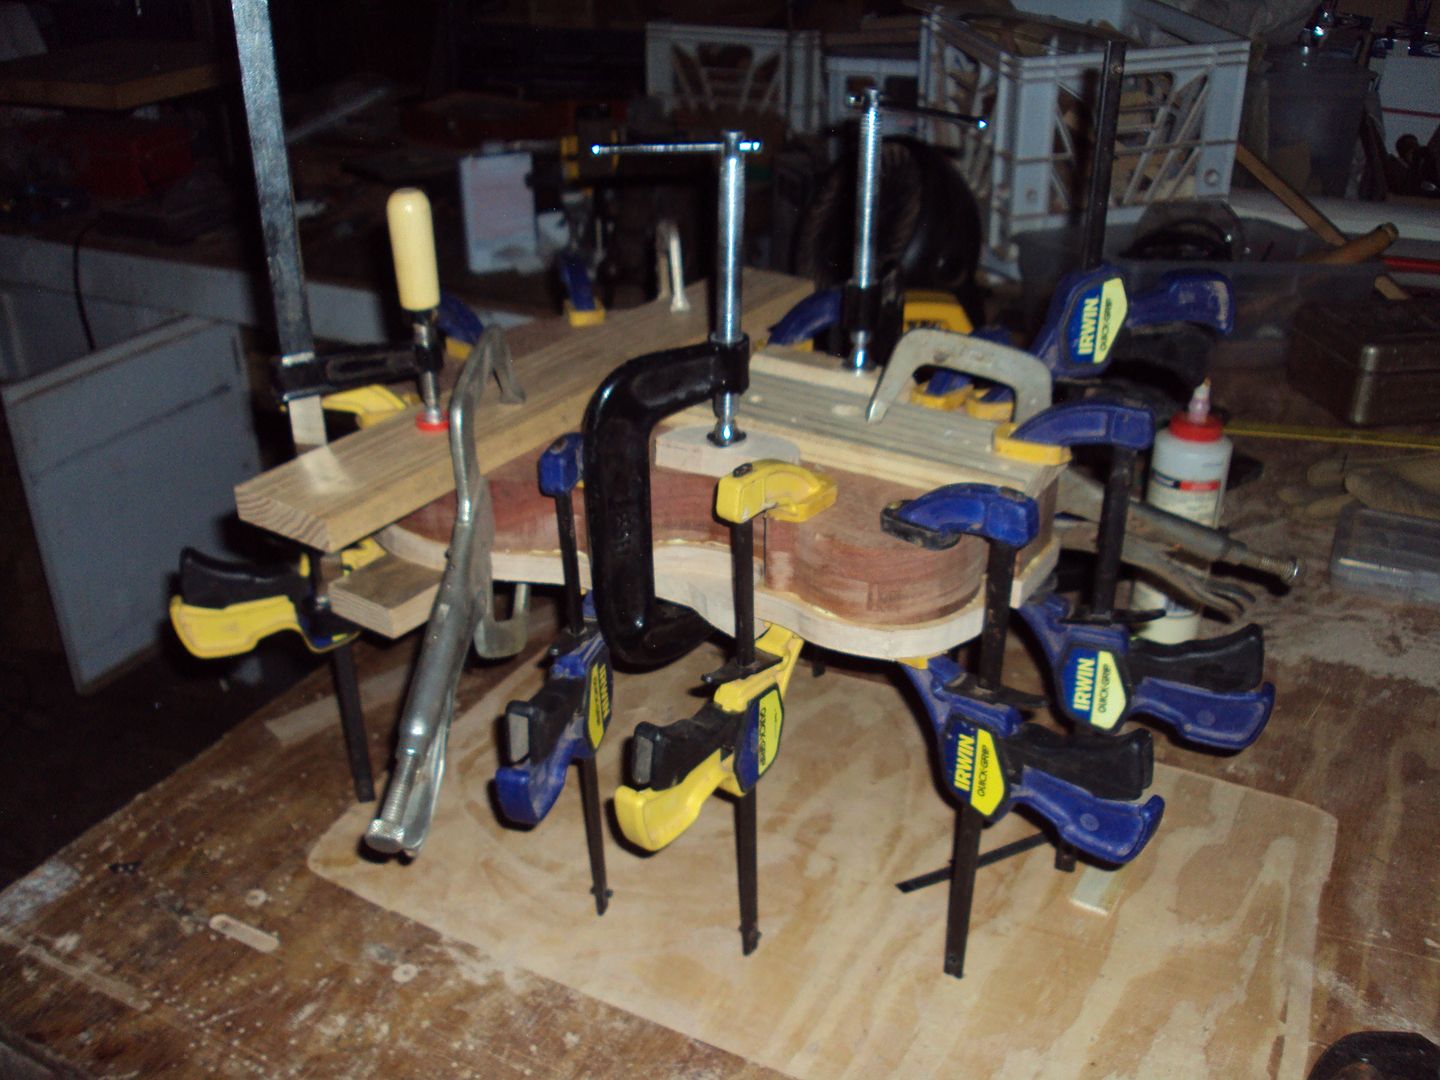
the top is glued to the body and ready for action
i clamped it to the bench and set up the plunge router
got to routing
i think this is the first time i ever routed maple and didnt get a burn spot
mahogany and maple look so good together
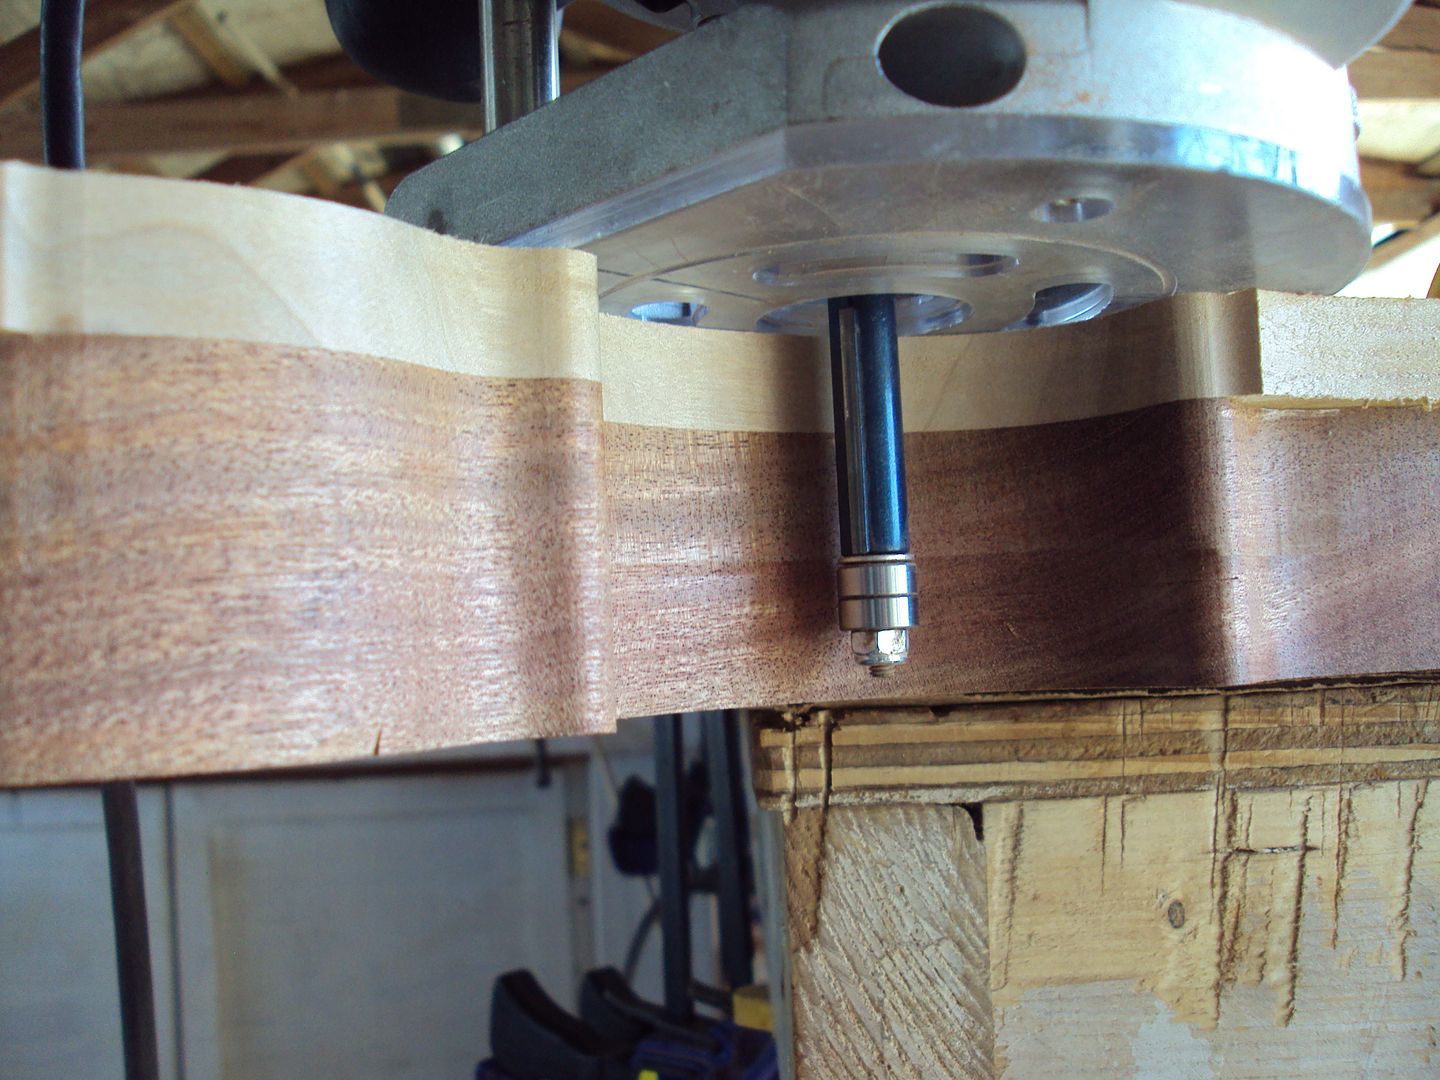
i got this router bit to do binding channels but i think i can use it to carve the sides,
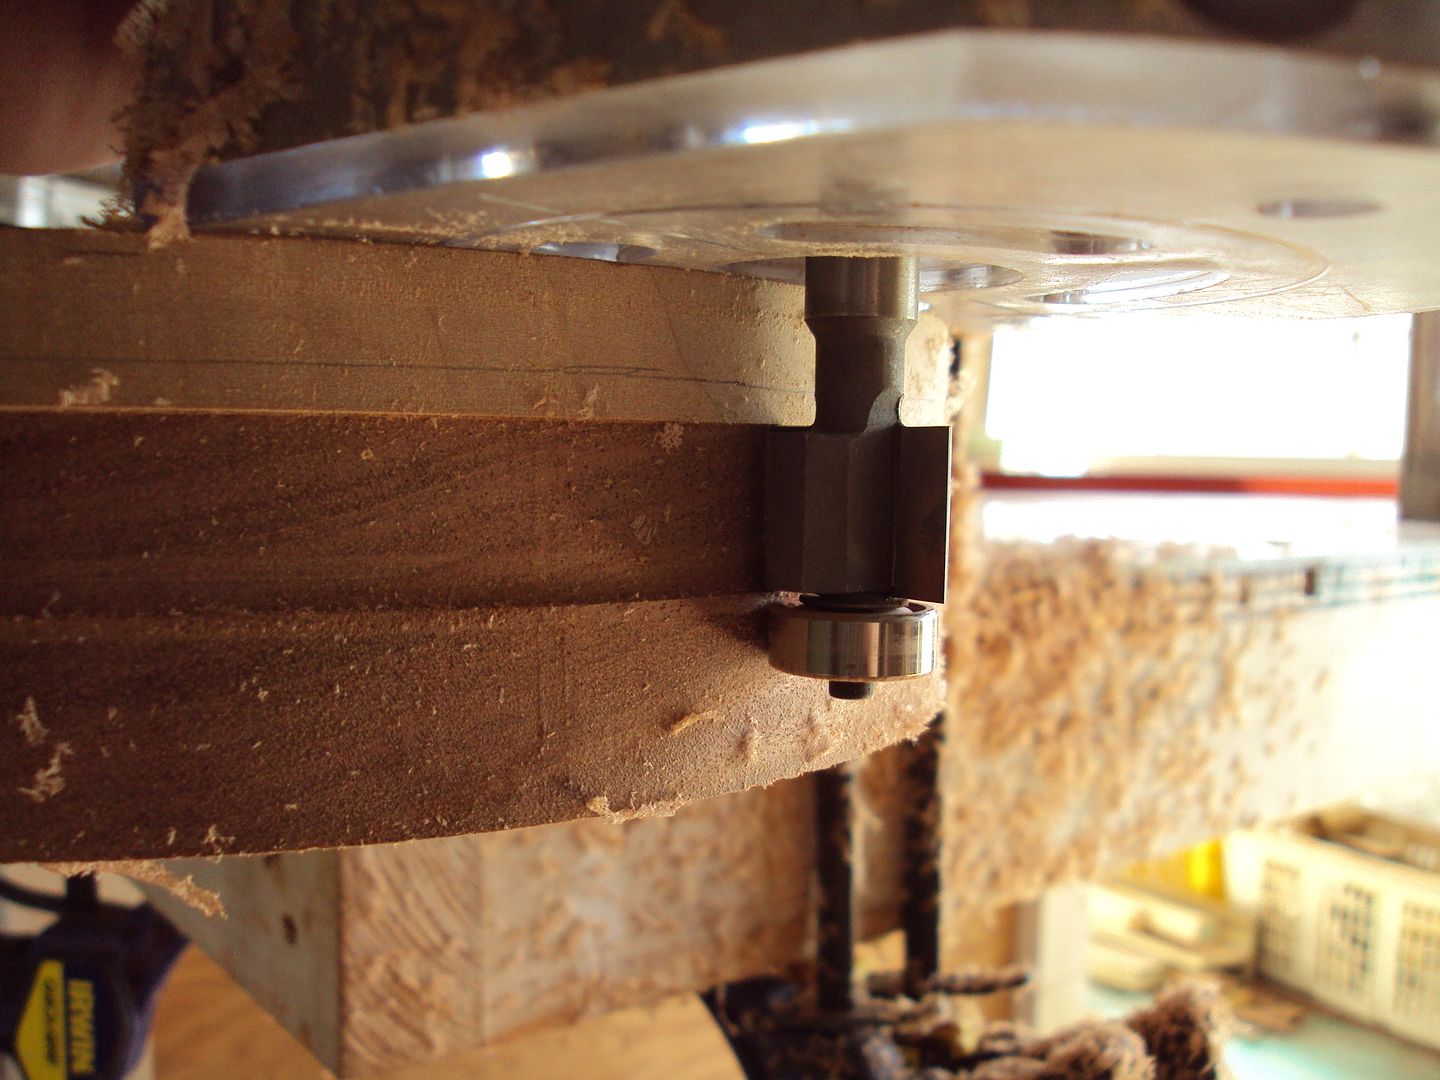
worked great, routed out 1/16" and left a 1/4" on the top and bottom for the edge bead
-
Wow, looking great so far.
thanks
Nice one! Is it going to be the same as the one you entered in GOTM? That was really sweet looking.i'm using the same templates but will be different
Welcome Mr. Scatter Lee. Always good to have a builder of your talent and experience here. I have followed a lot of your work at TDPRI and am a big fan of the Jr.s you built a while ago.This is by far the most interesting guitar I have seen in a while... but no gators? I want gators!
Looks like you worked out reasonable electronics placement...
--RAD
thanks, and the gators always show up sooner or later
I don't think it's the same one as this one says Scattervarius "II" and has a maple top? I did wanna ask though. Where you located Lee? The lagoons behind the Scattervarius I in the GOTM thread look oddly similar to mine here in HHI, SC.Chris
i'm on the St. Johns river near lake George in florida
I just peeked at your GOTM entry, and had to pick myself up off the floor.Jeezus that guitar is beautiful in every way, every design detail from pickups to tailpiece to construction is
So Well Thought Out.
I'm plum blowed away I am.
Those pics go to the HD for future idea reference.
Thank You for documenting this build as well, most appreciated, I admire your ideas and talent!
thank, i just like to build, and take pics
we gonna see a carved top and back?yep
-
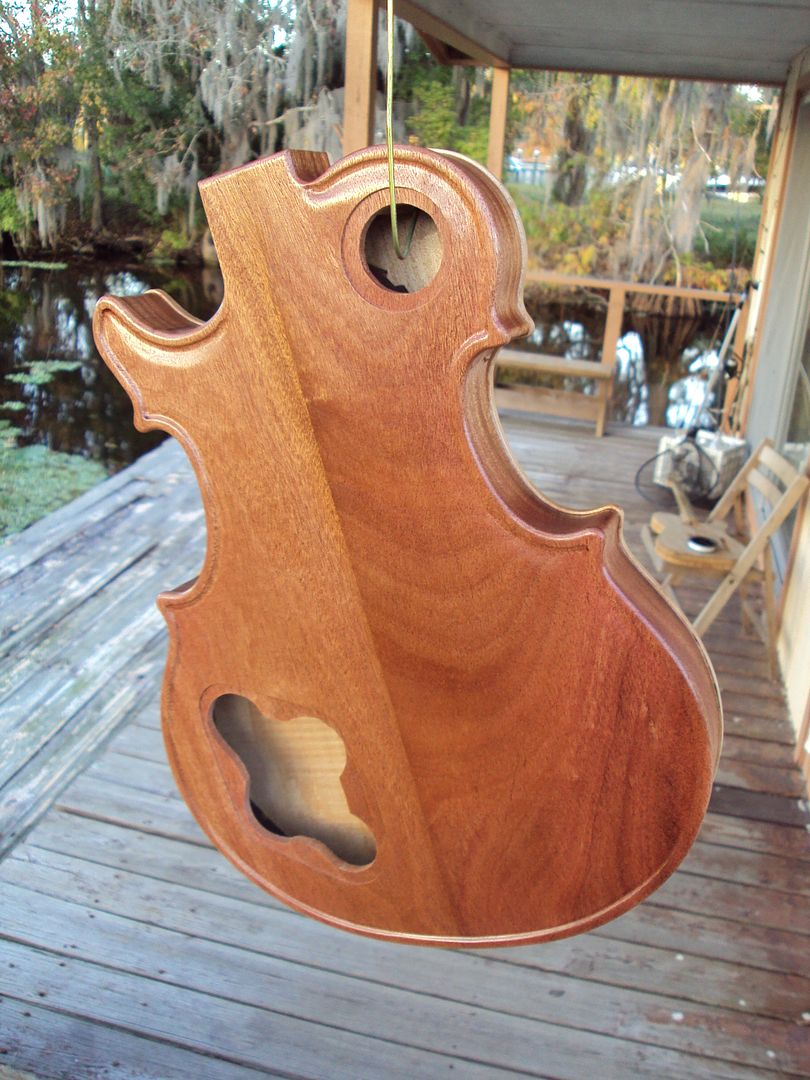
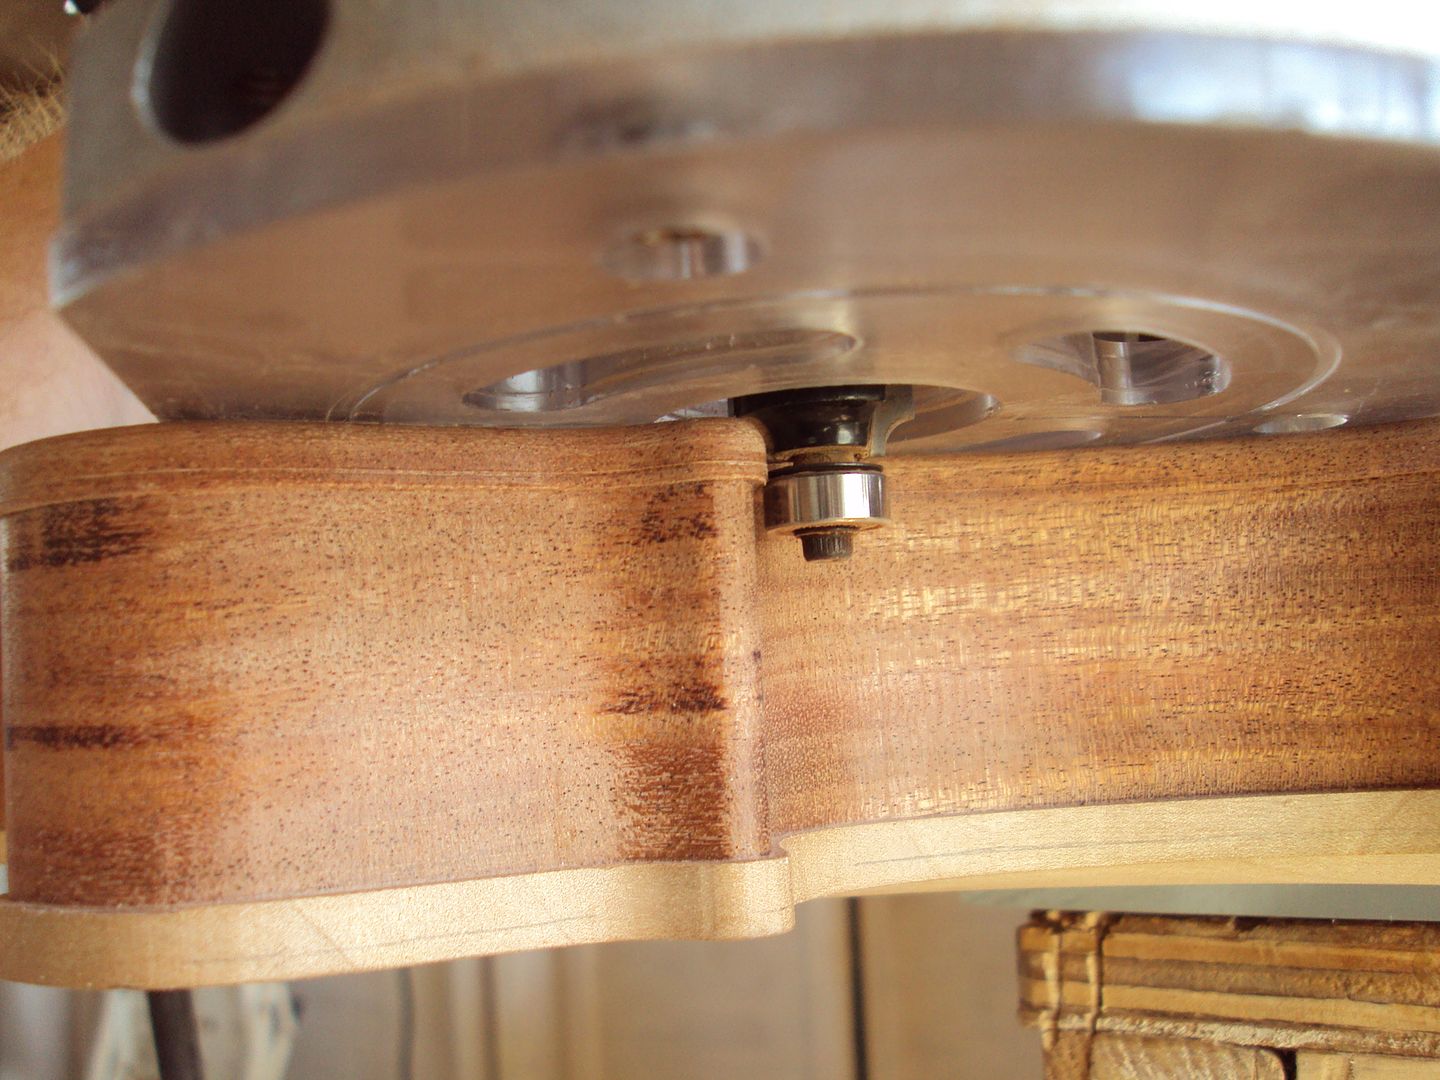
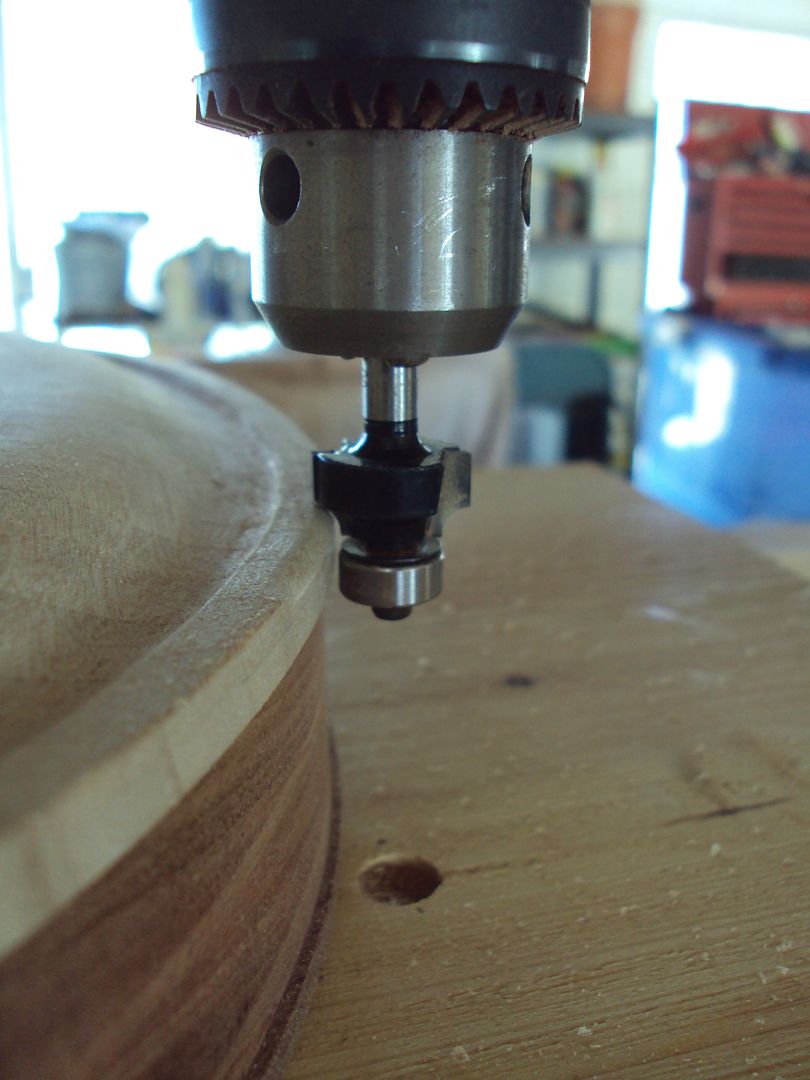
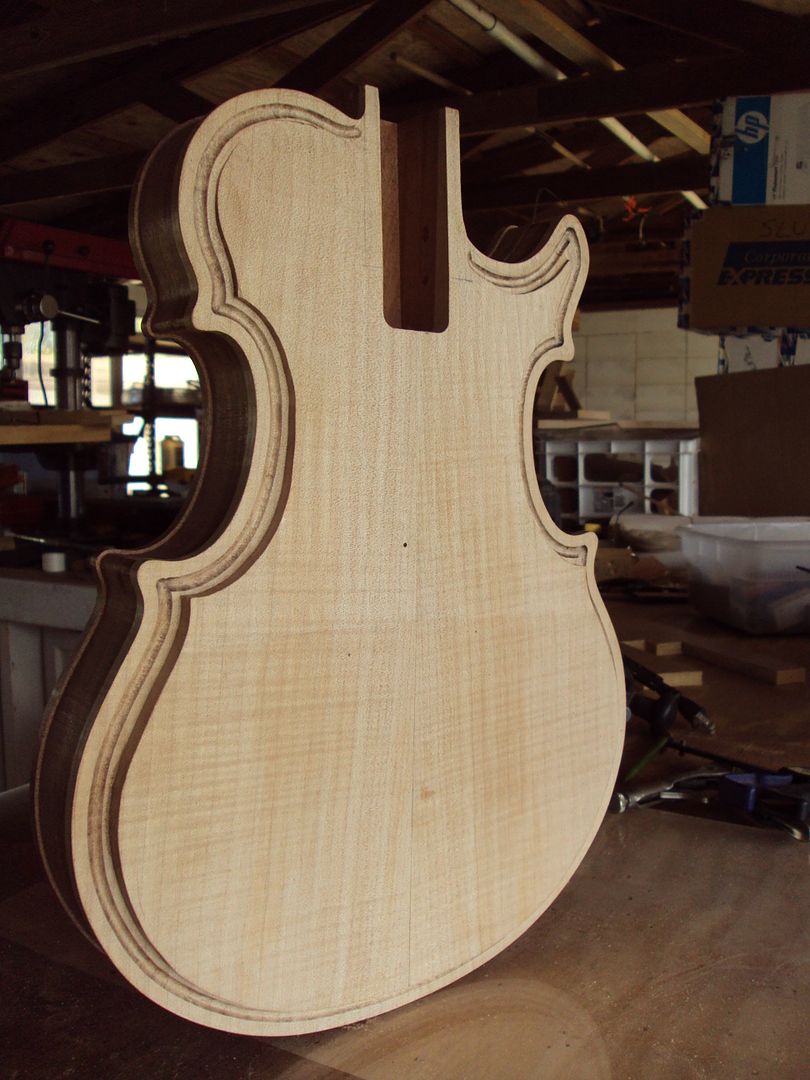
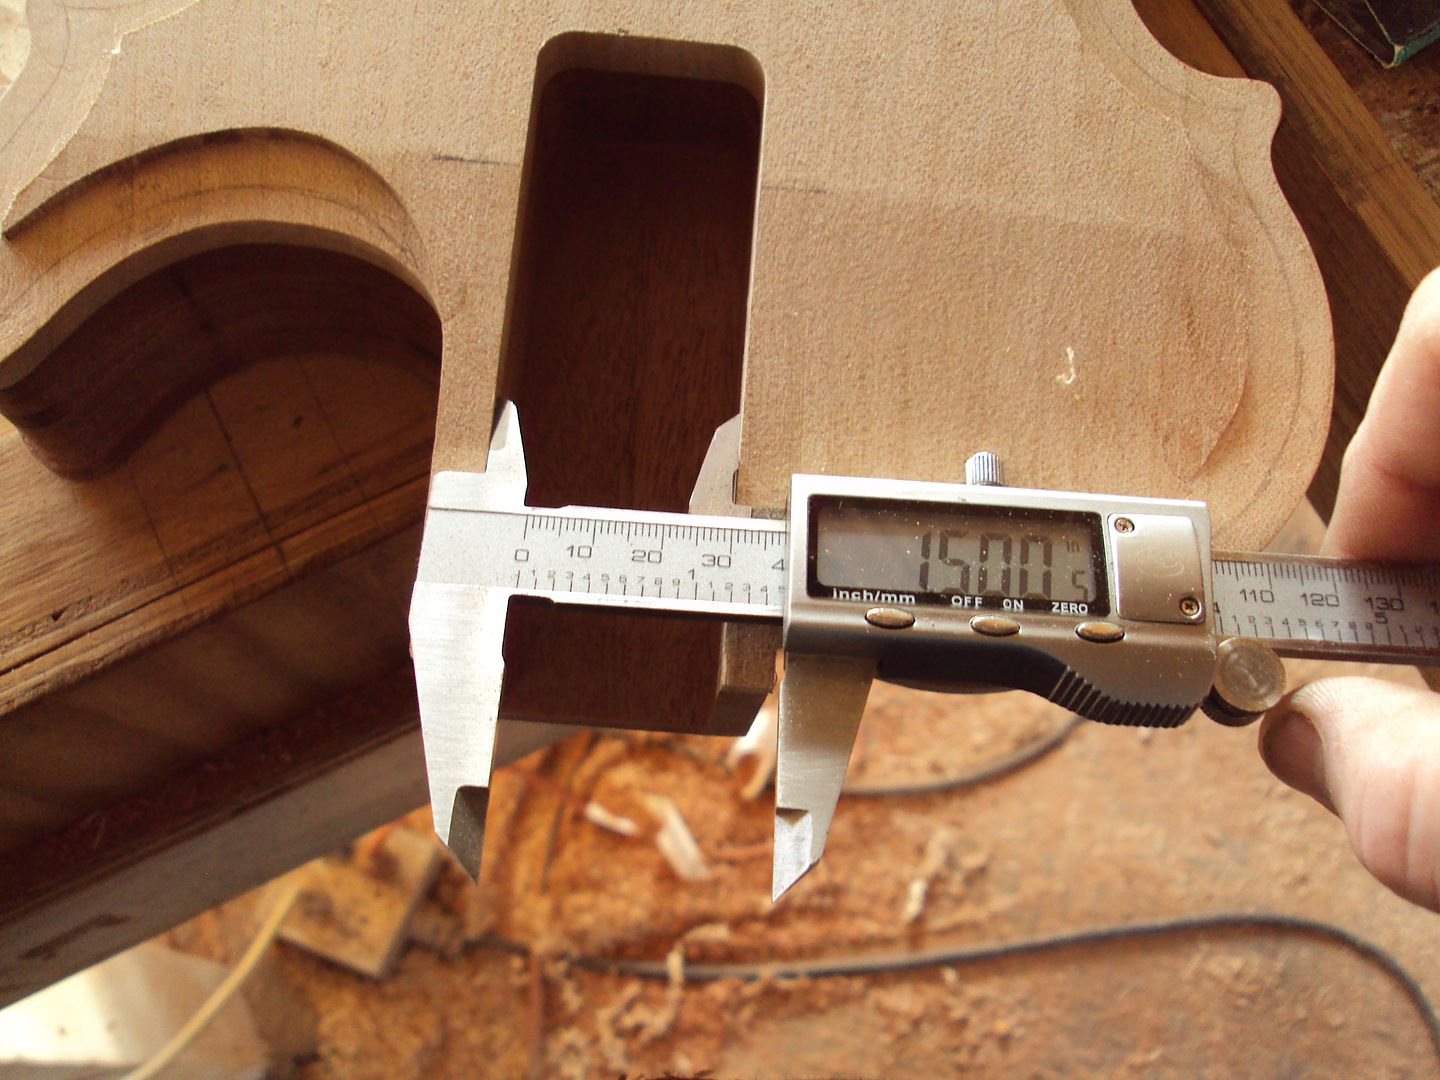
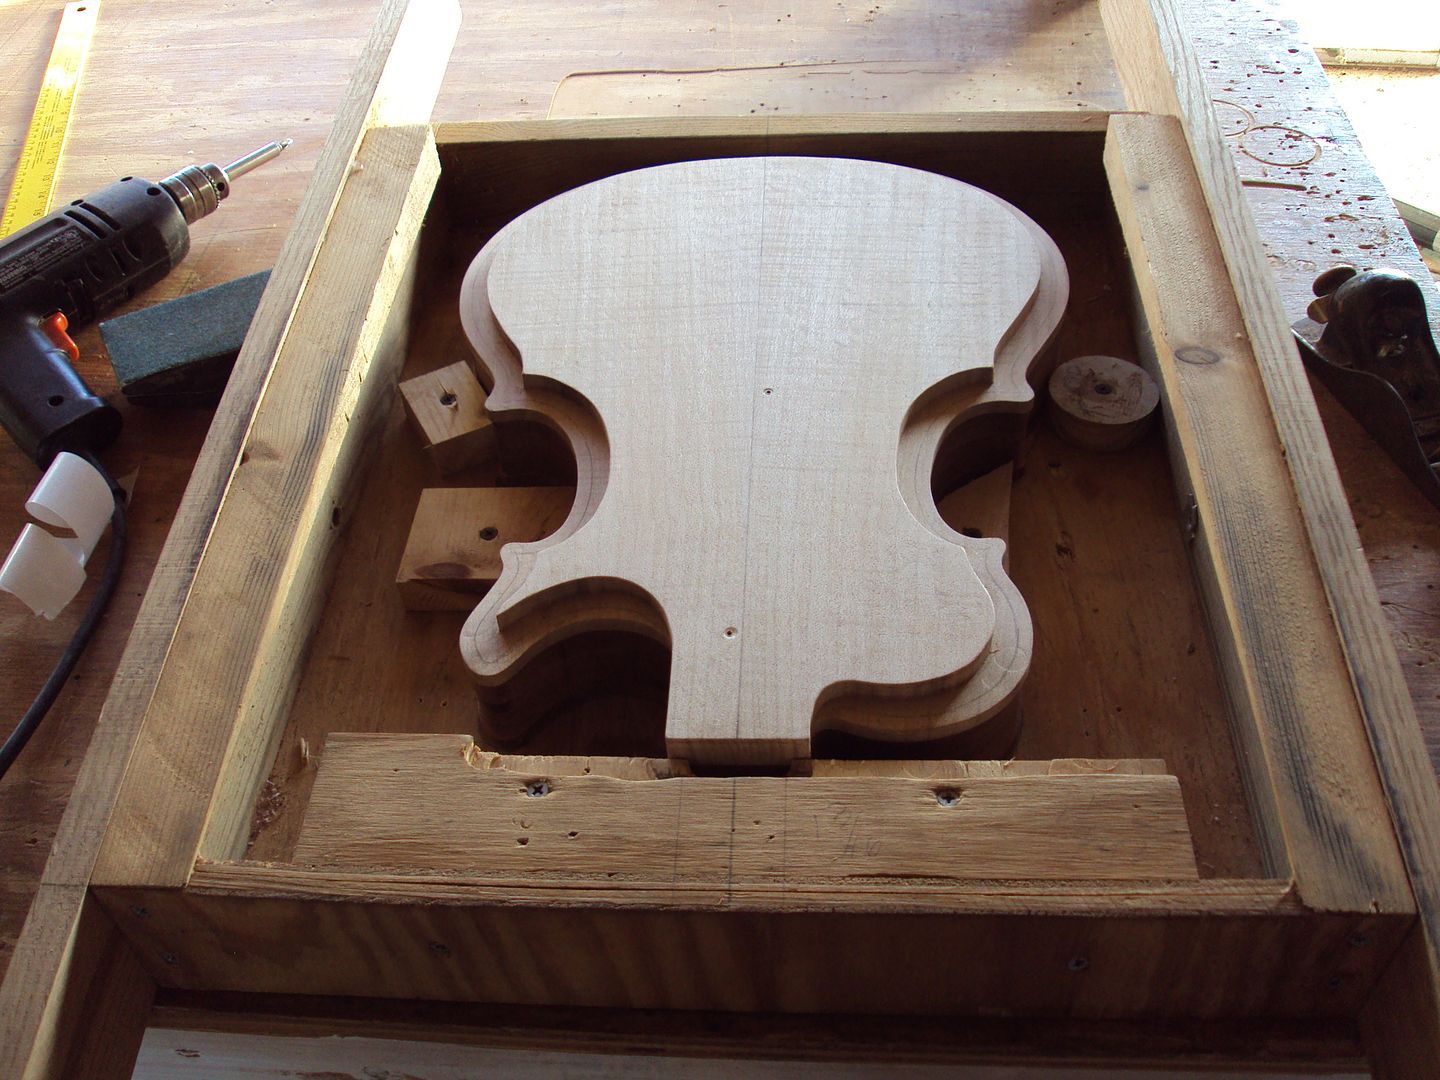
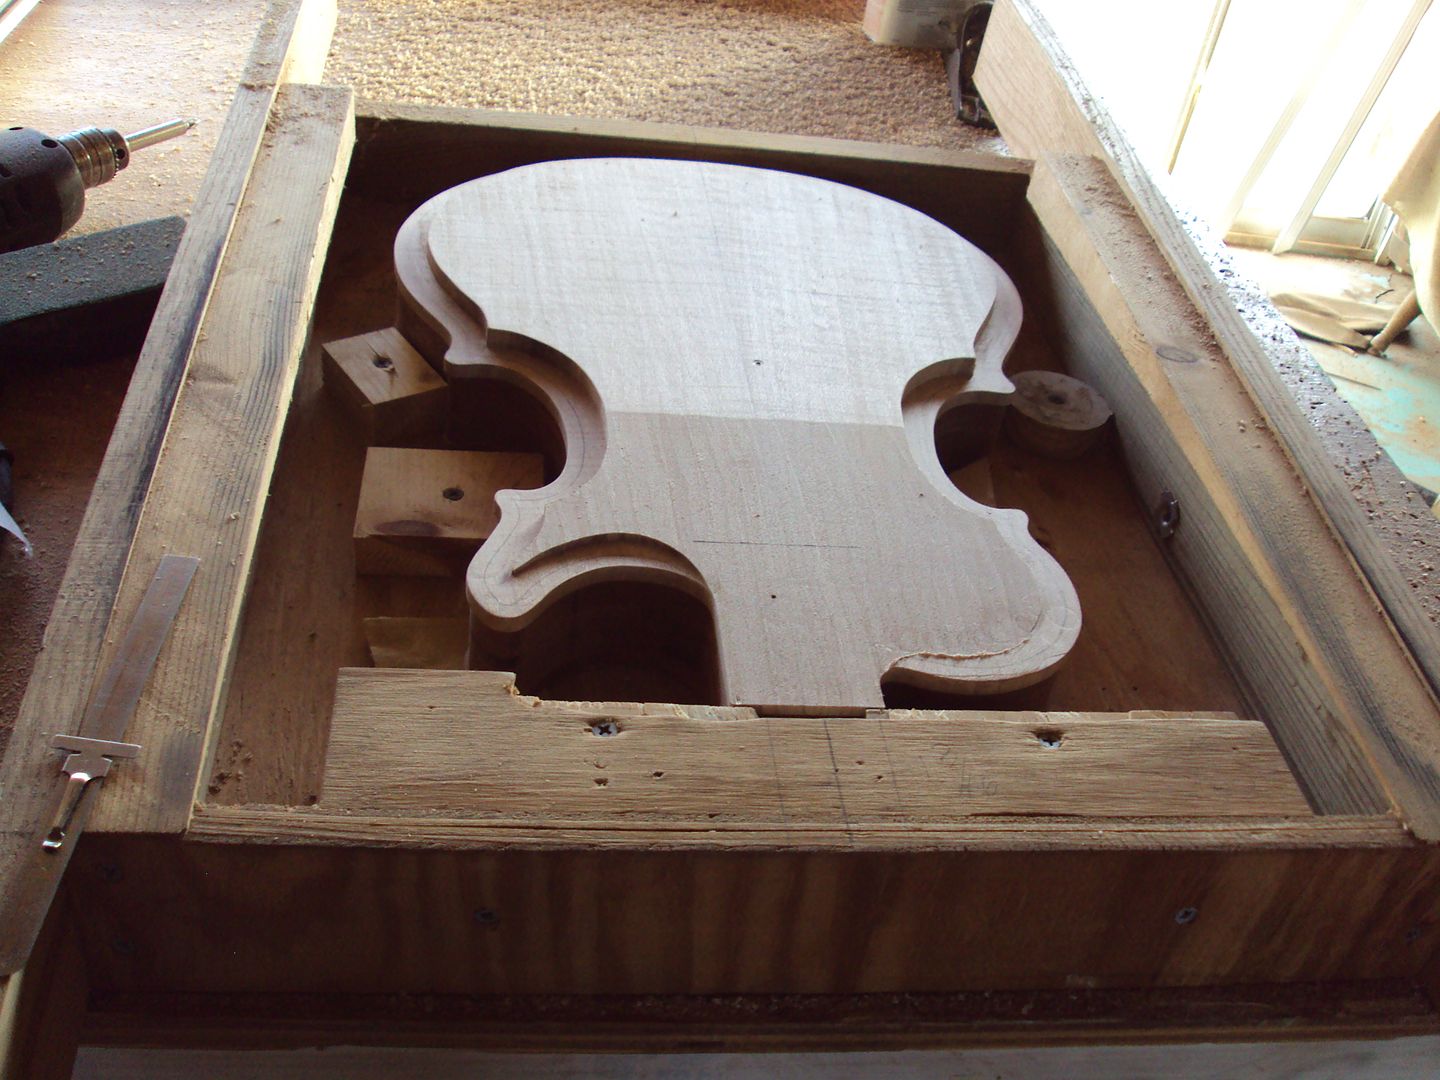
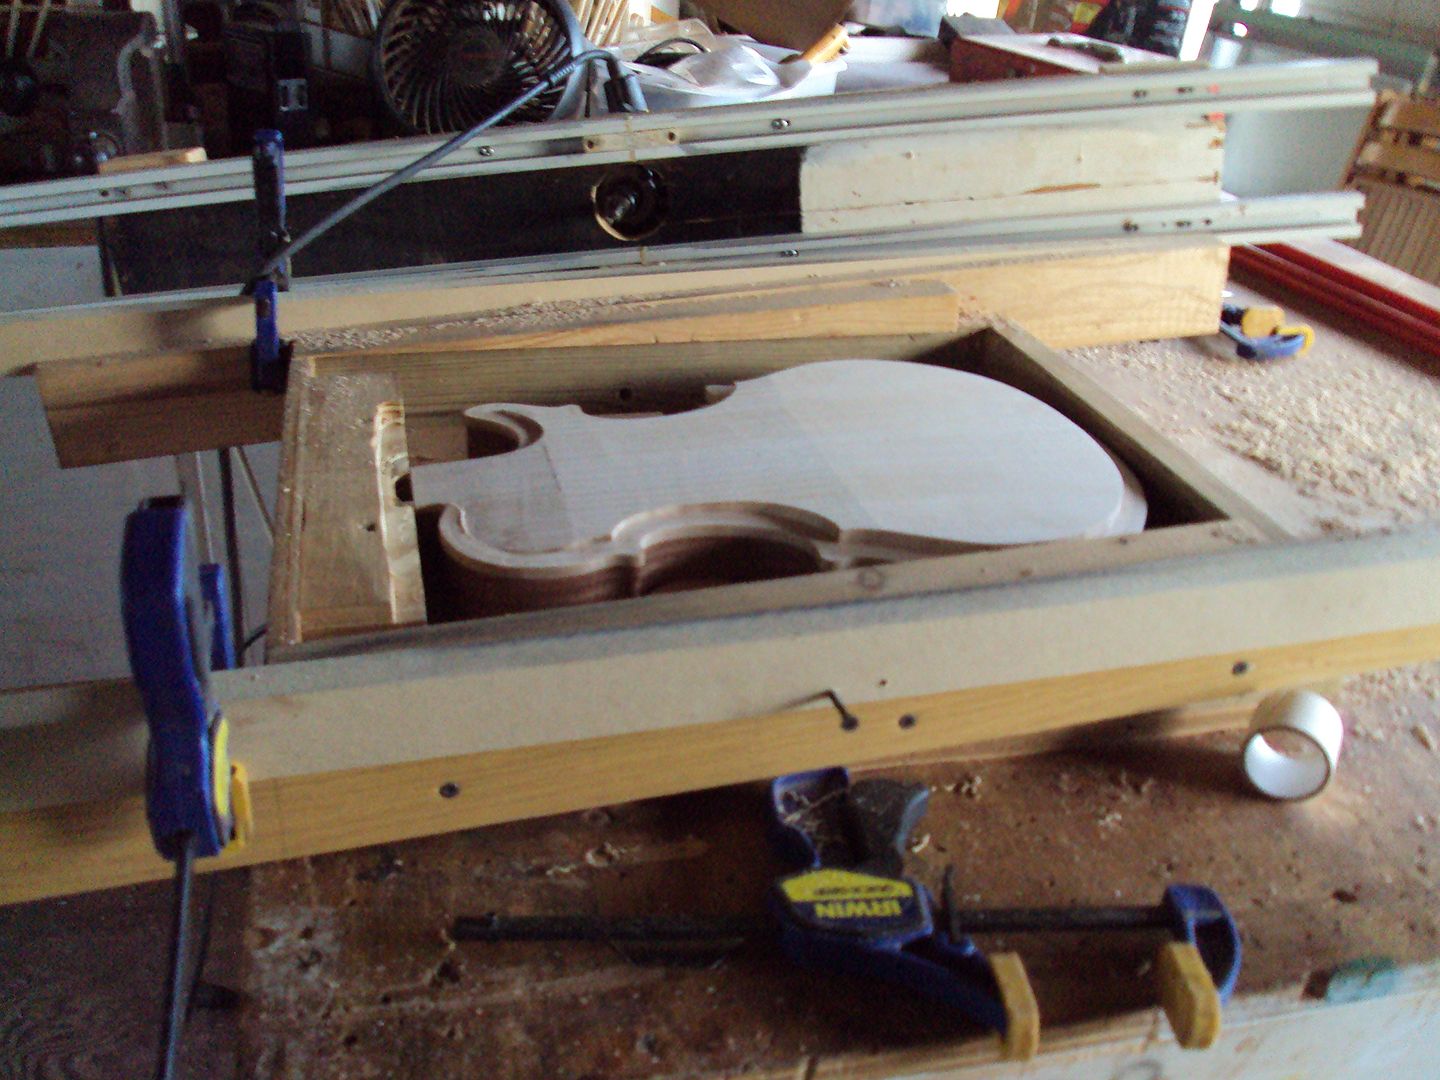
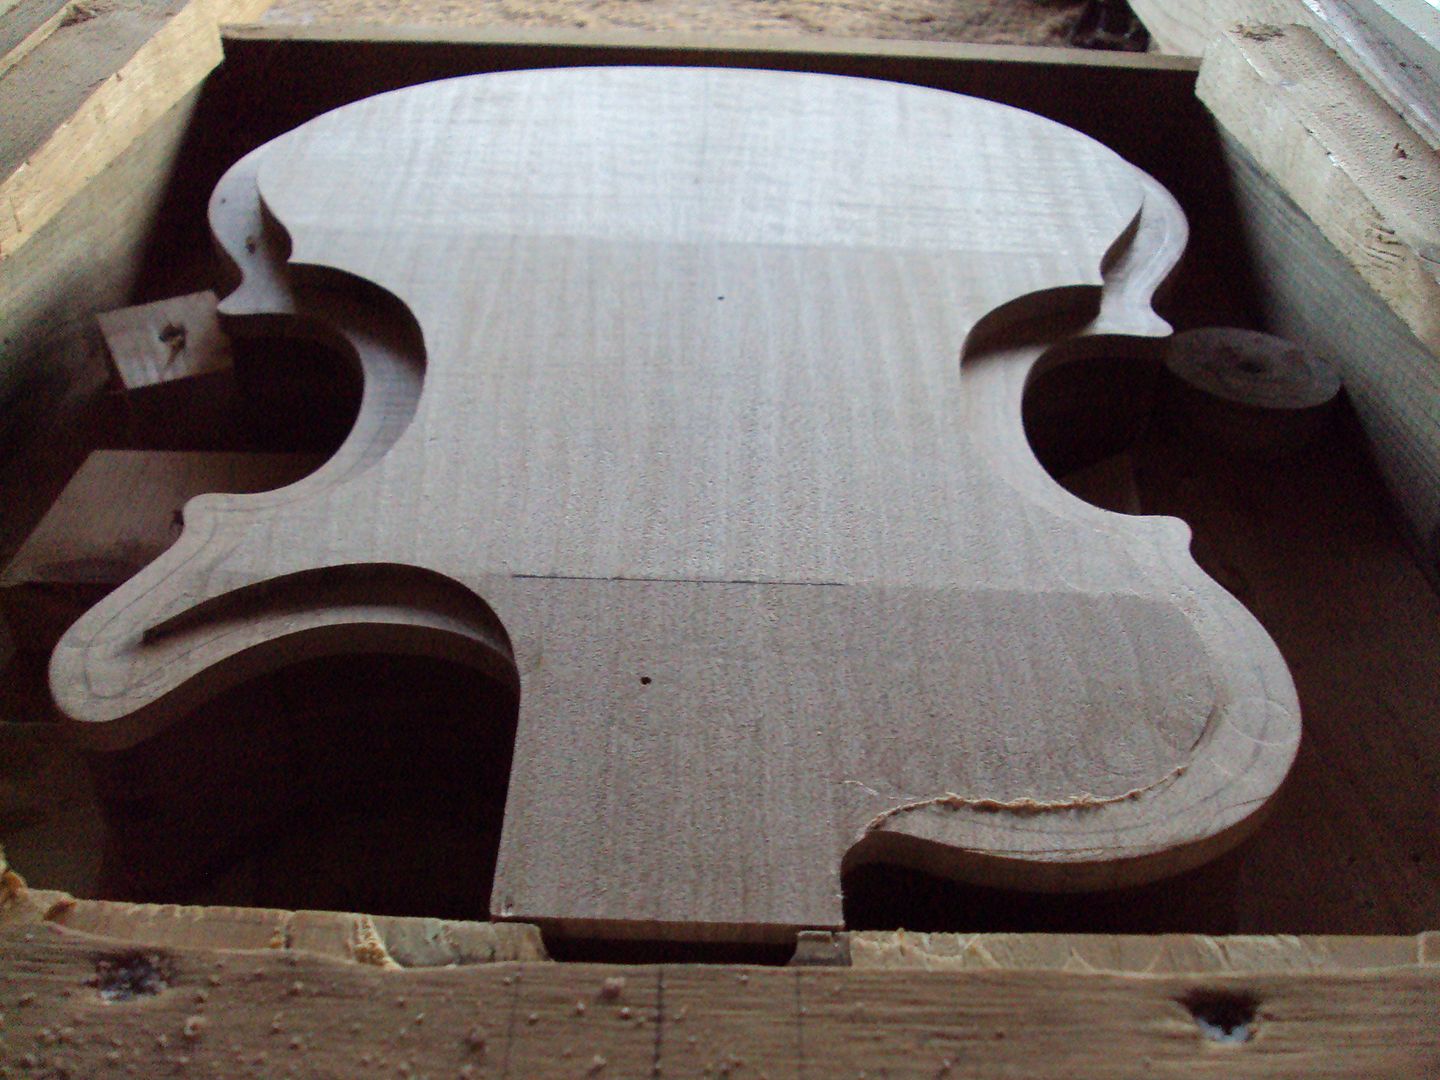
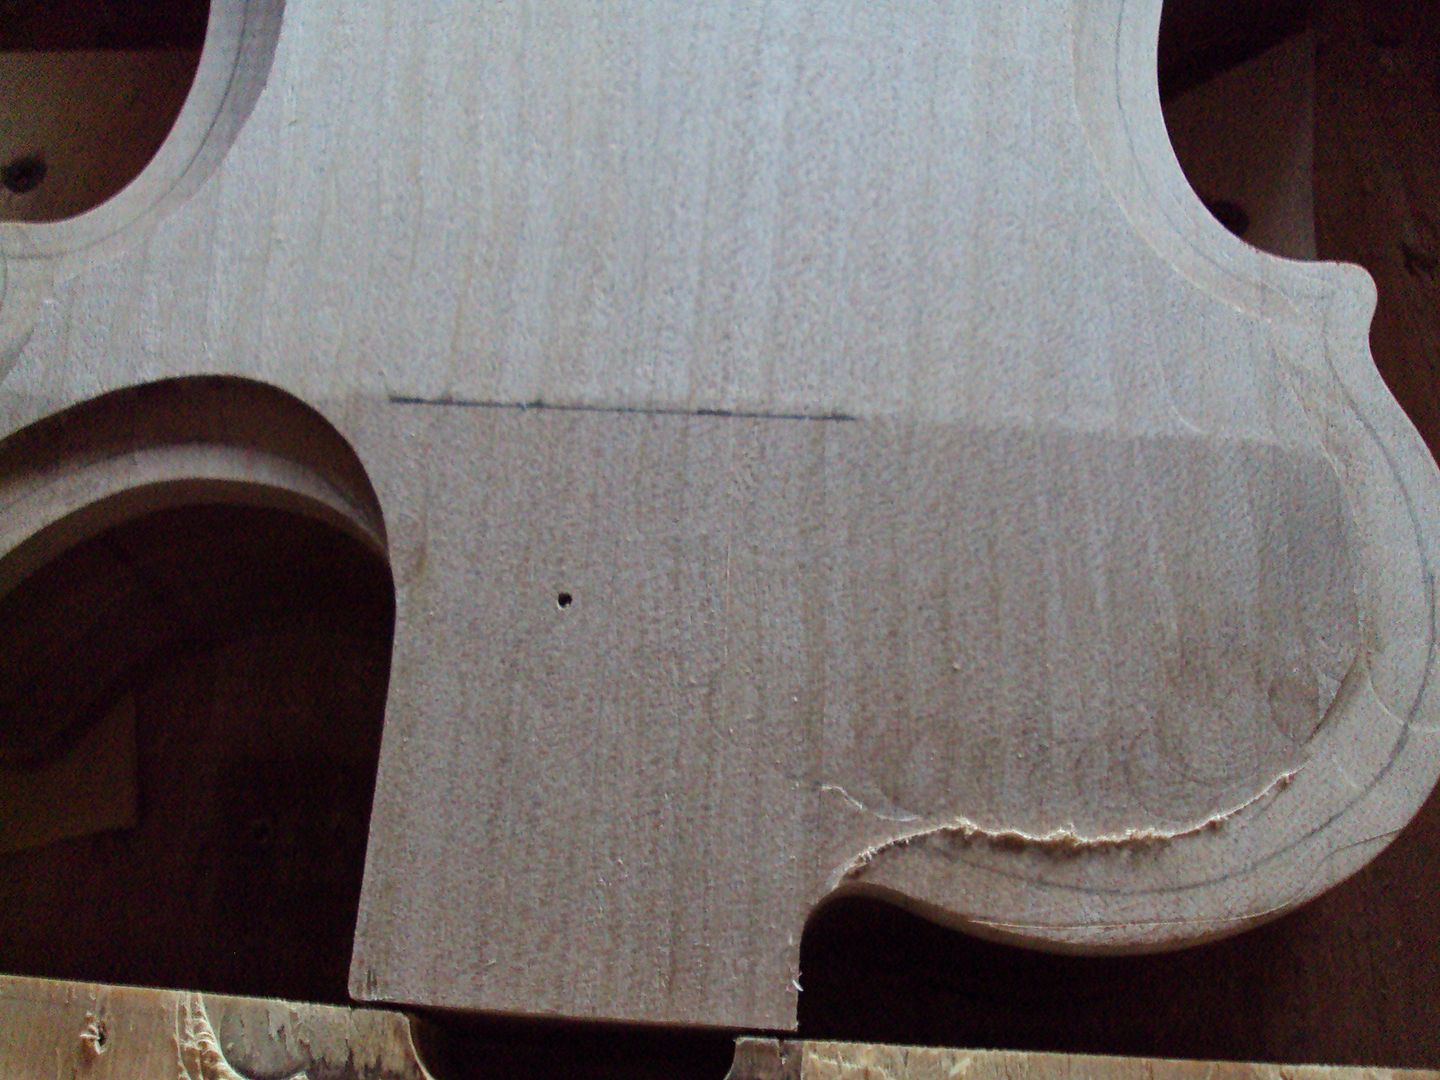
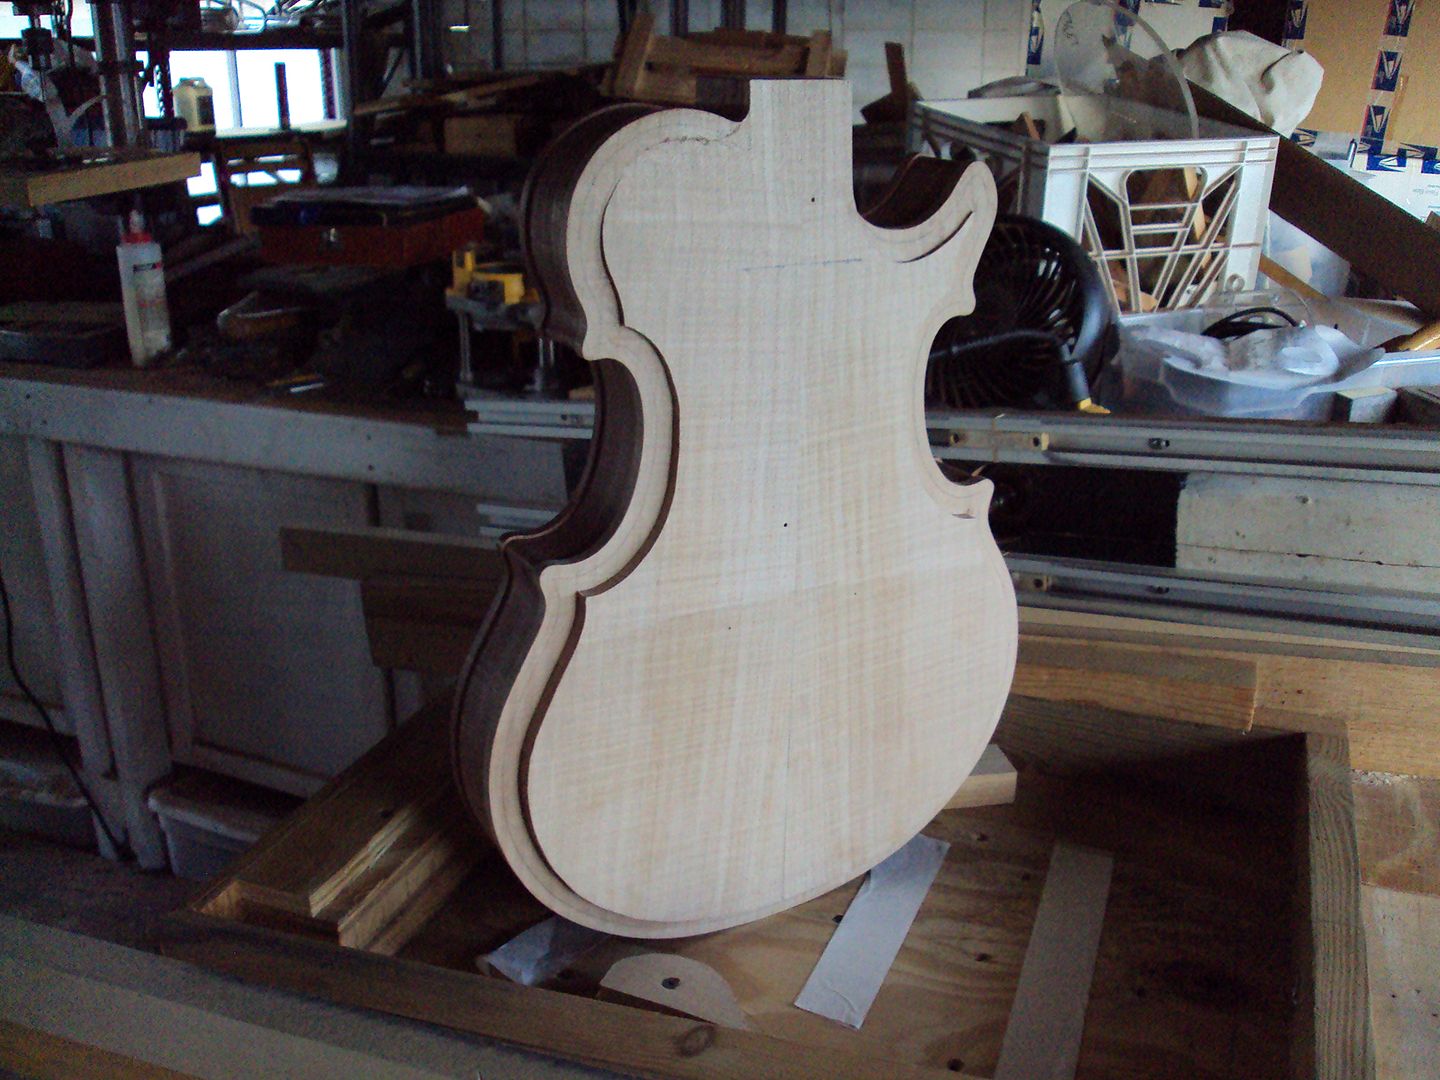
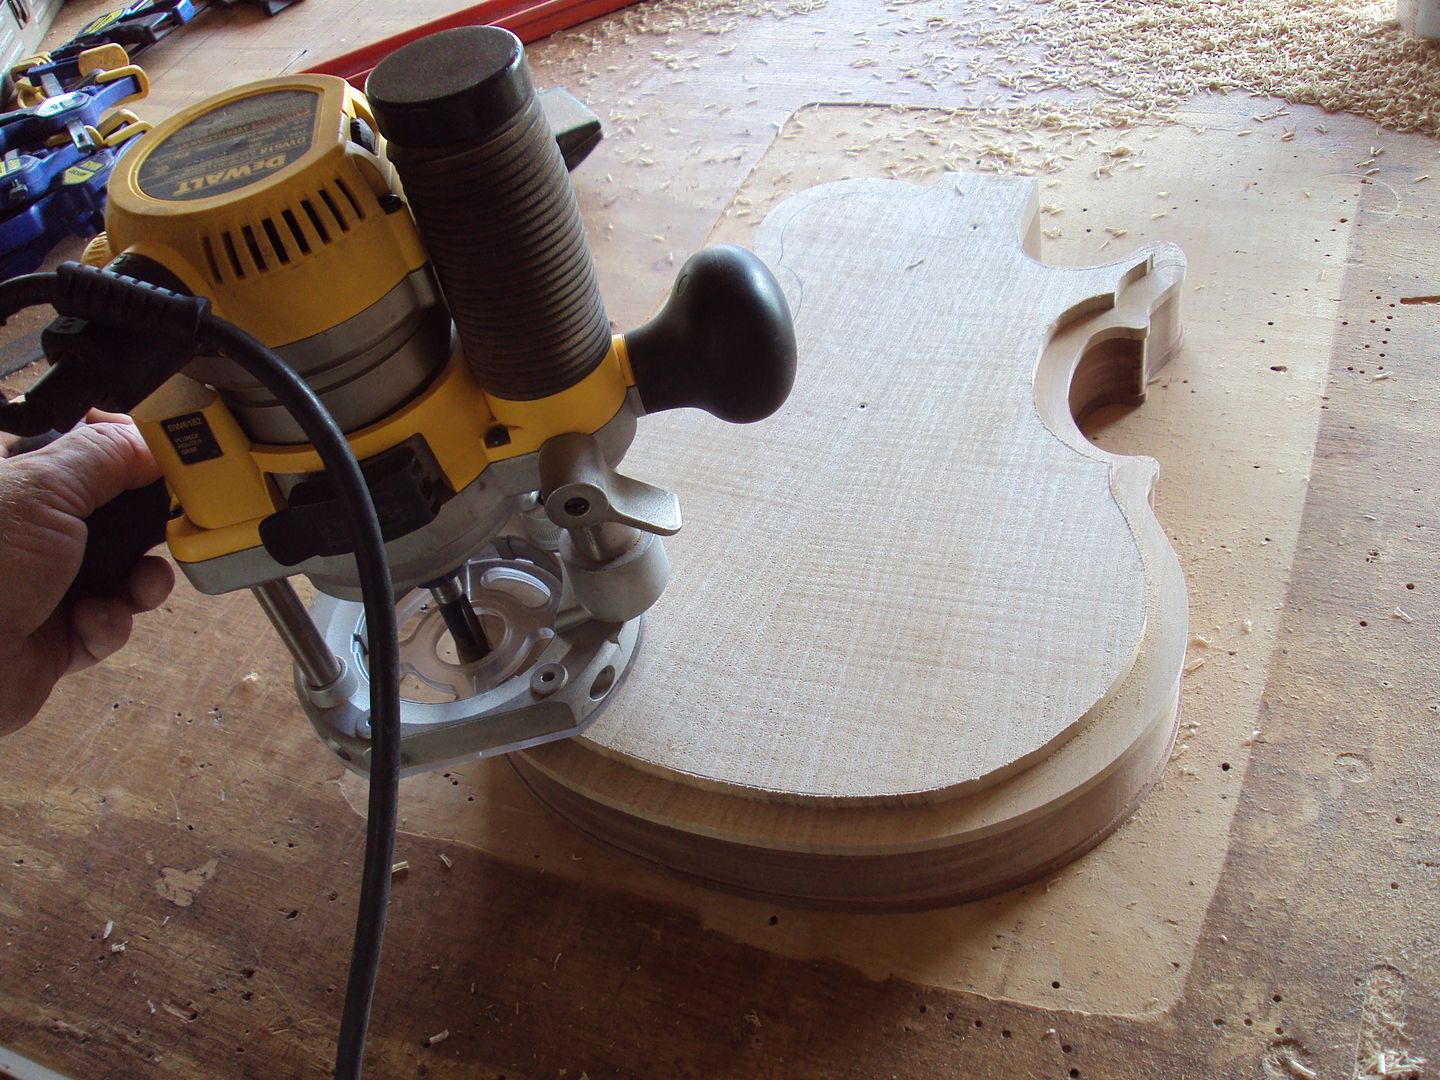
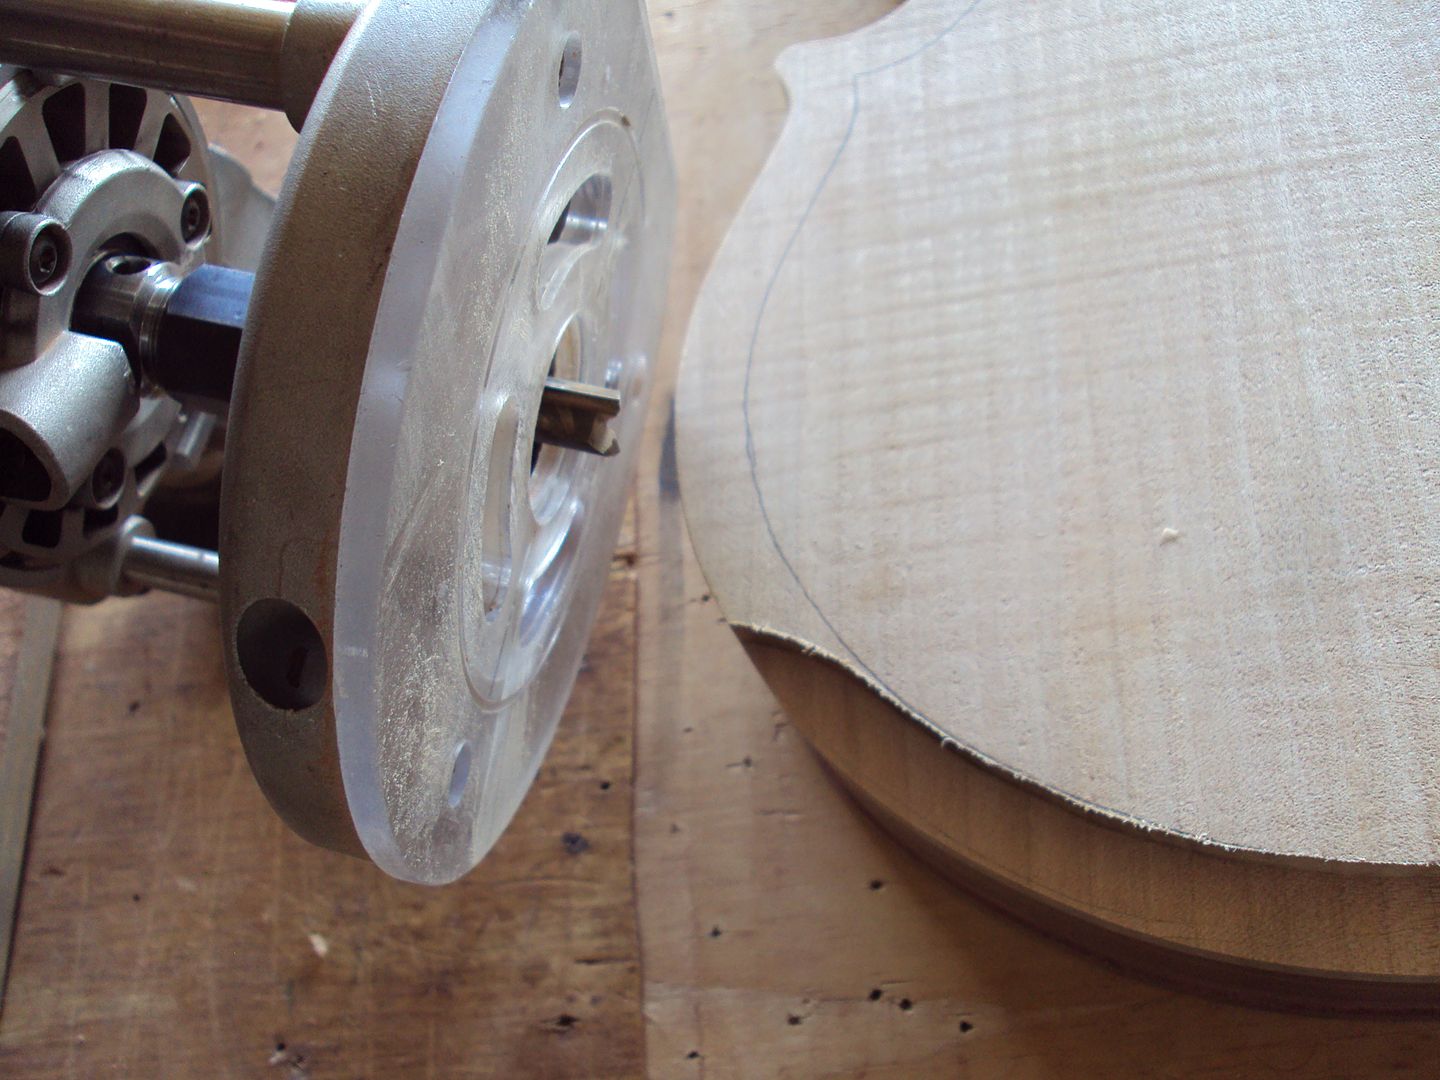
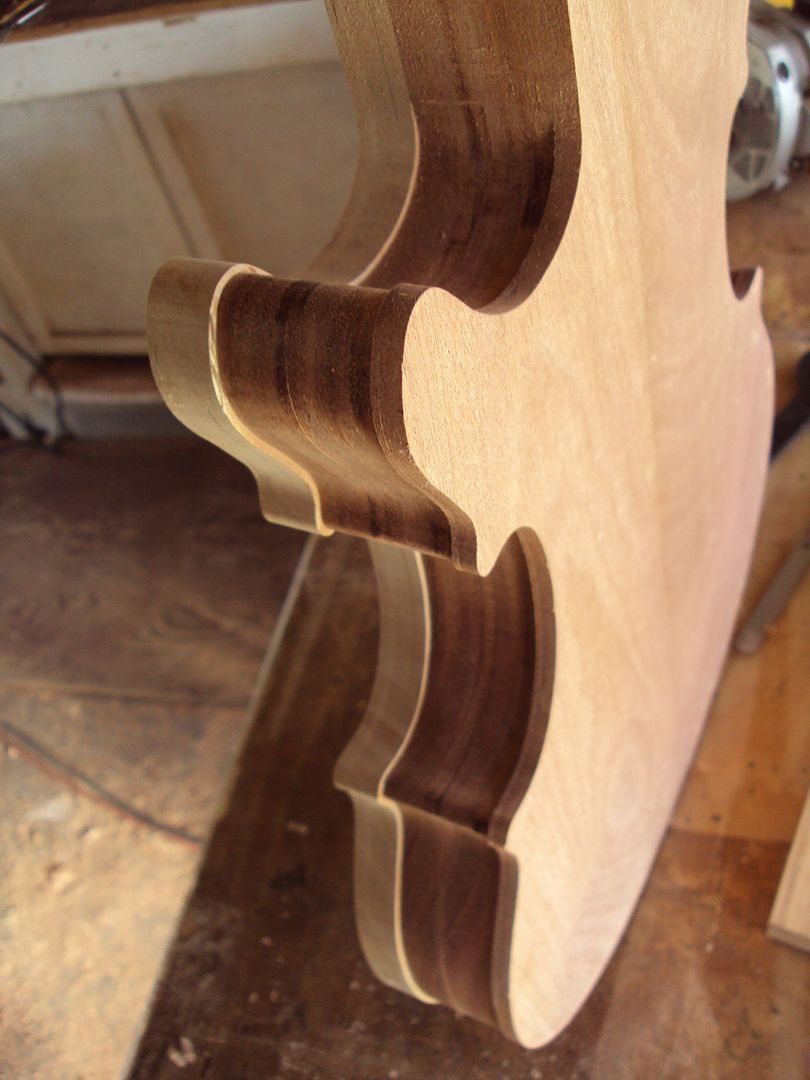
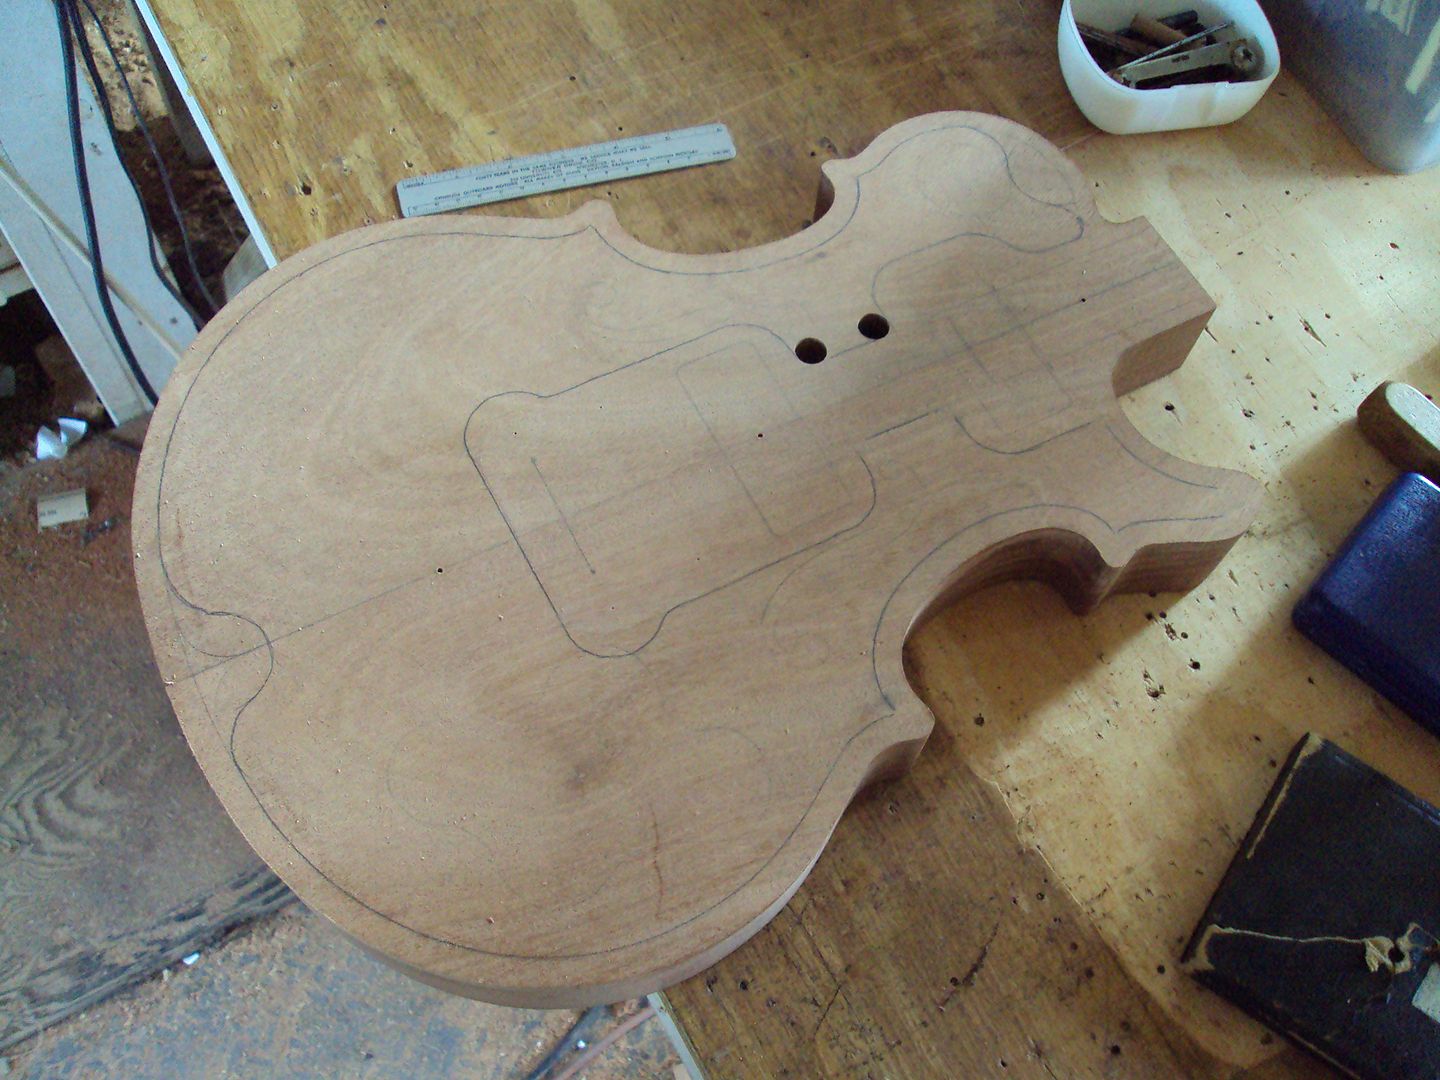
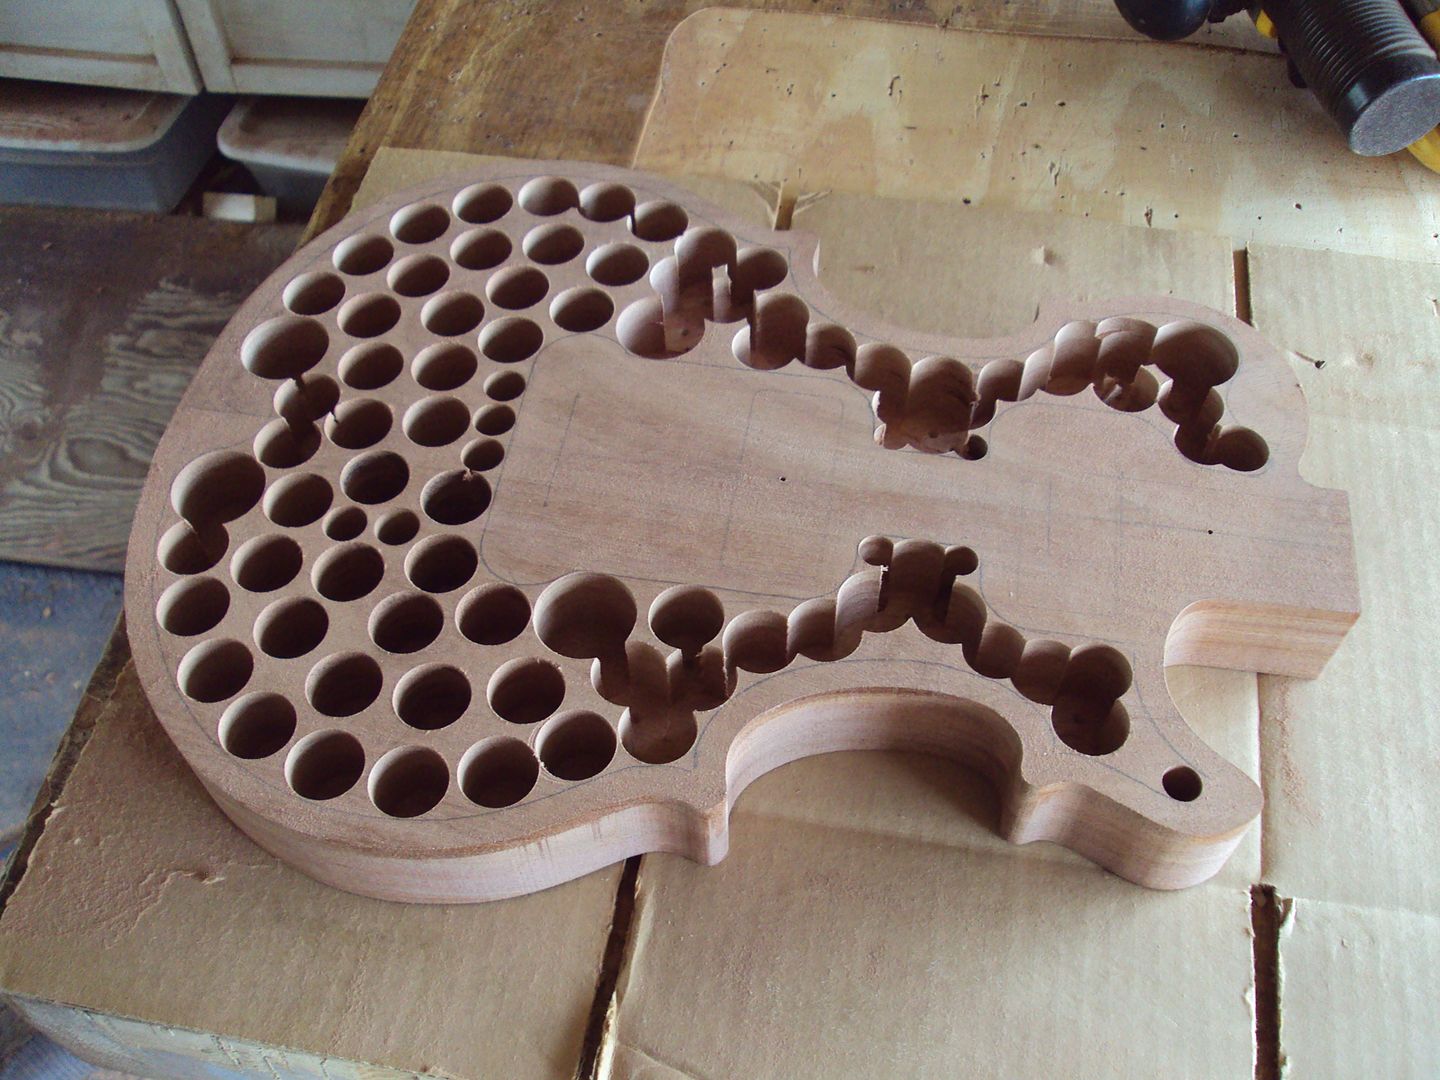
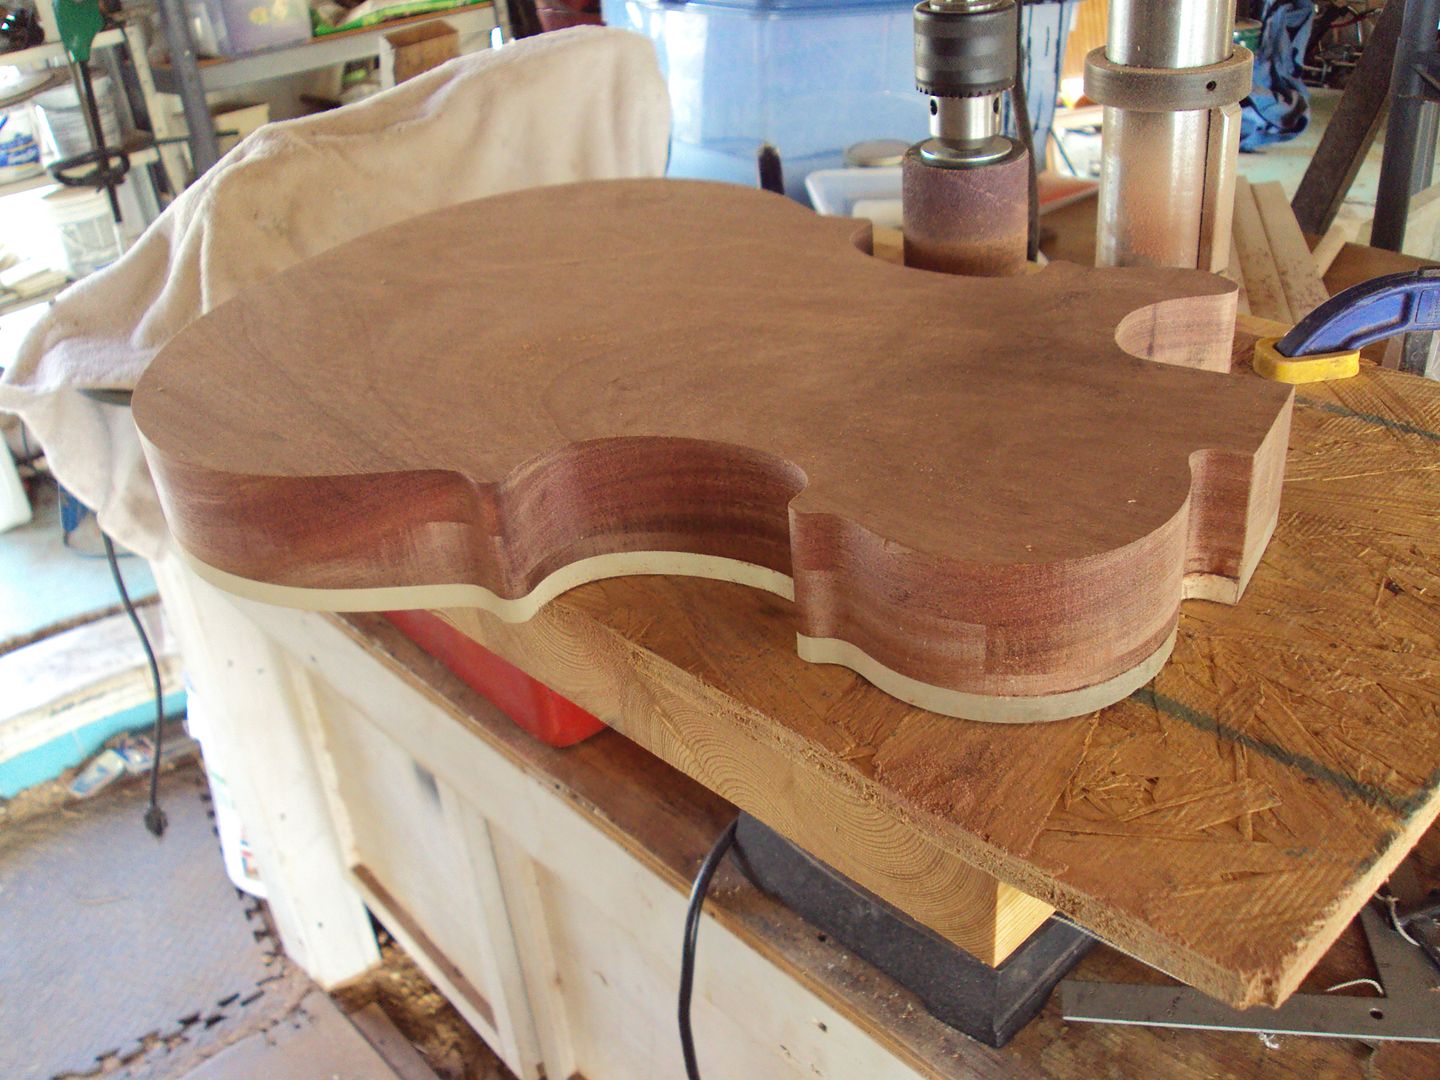
this will have f-holes and needs hollowed out, drew out what i want to remove
took it to the drill press and drilled away
got out the router and routed away
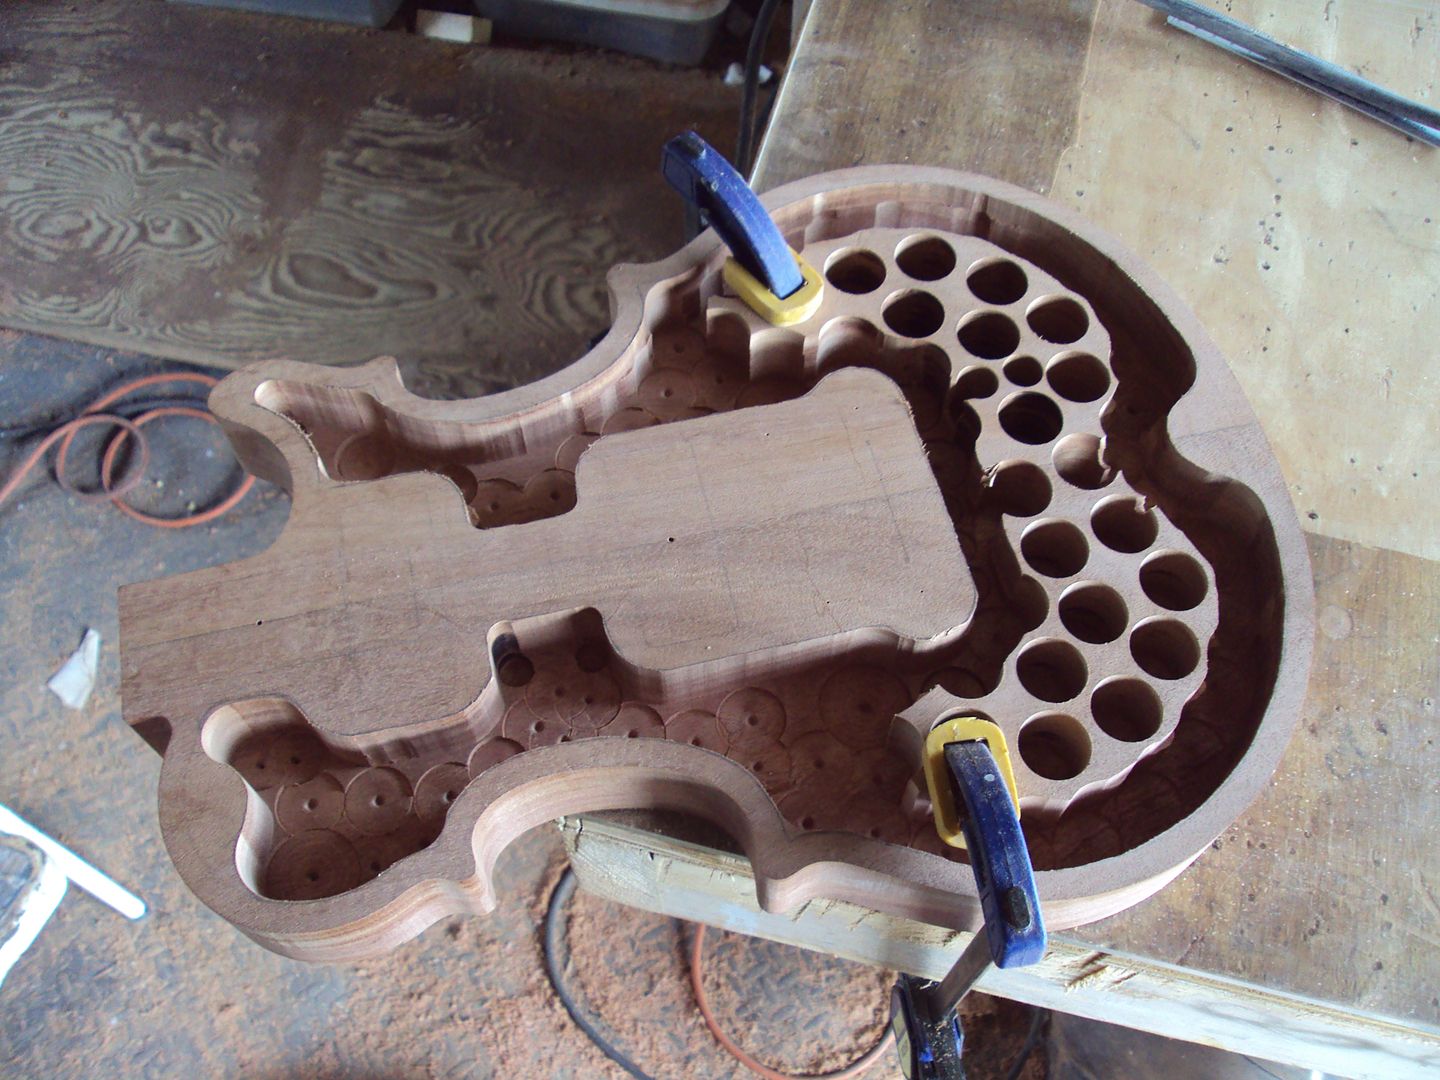
and routed some more
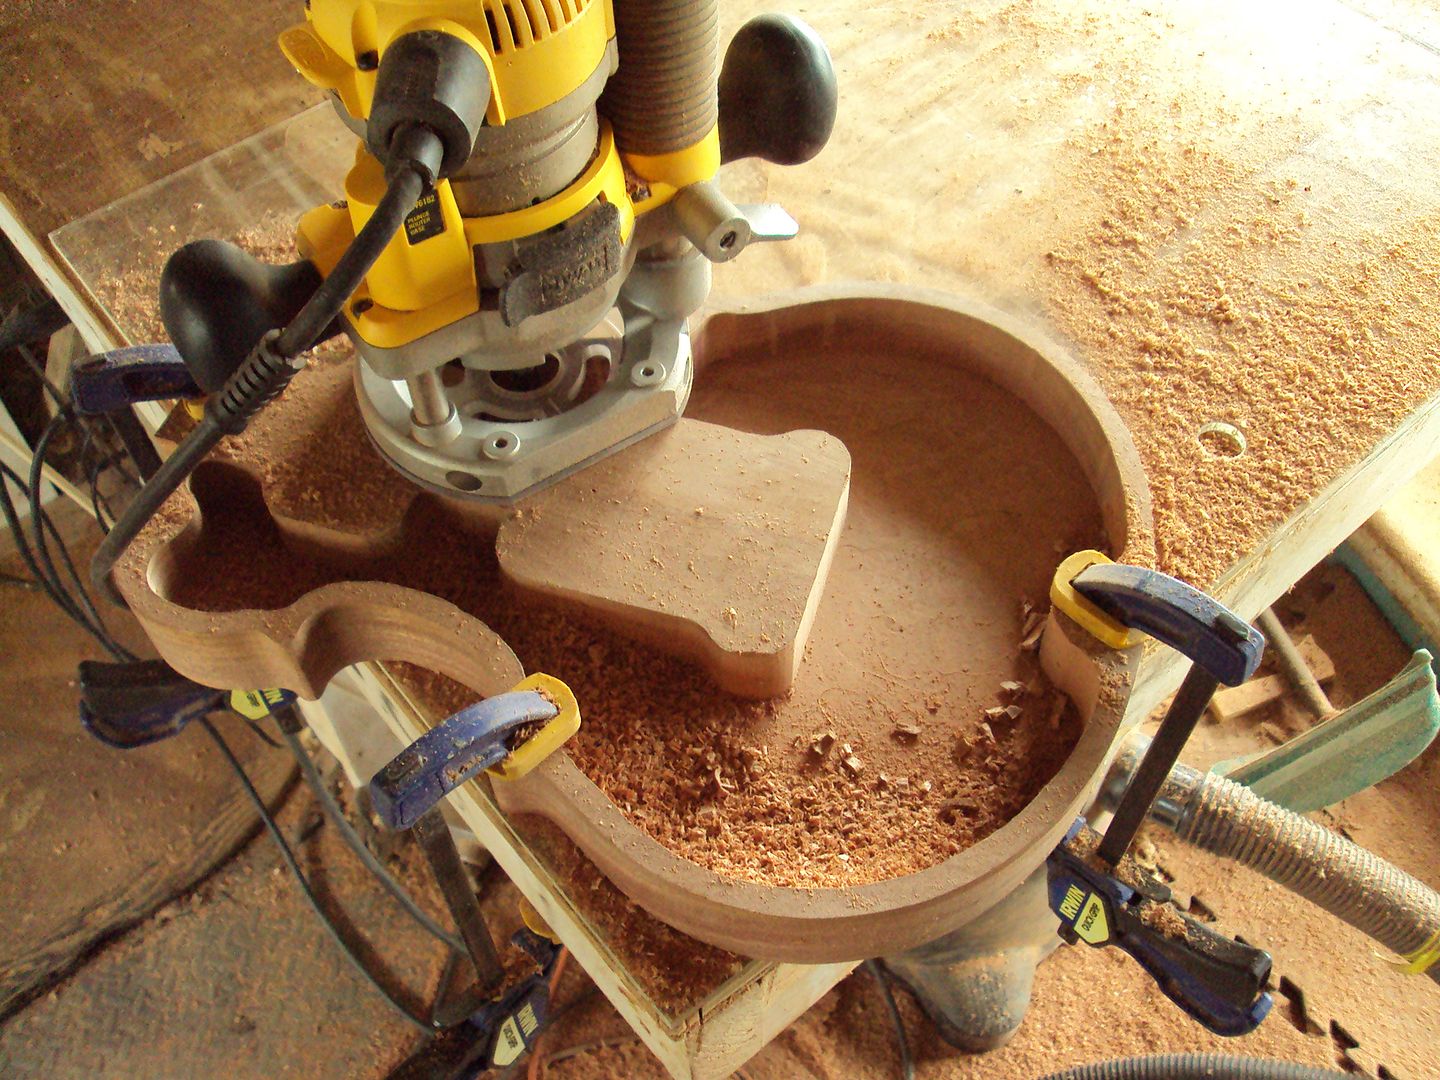
and done, i also brushed ebony stain on the inside, no pics of that
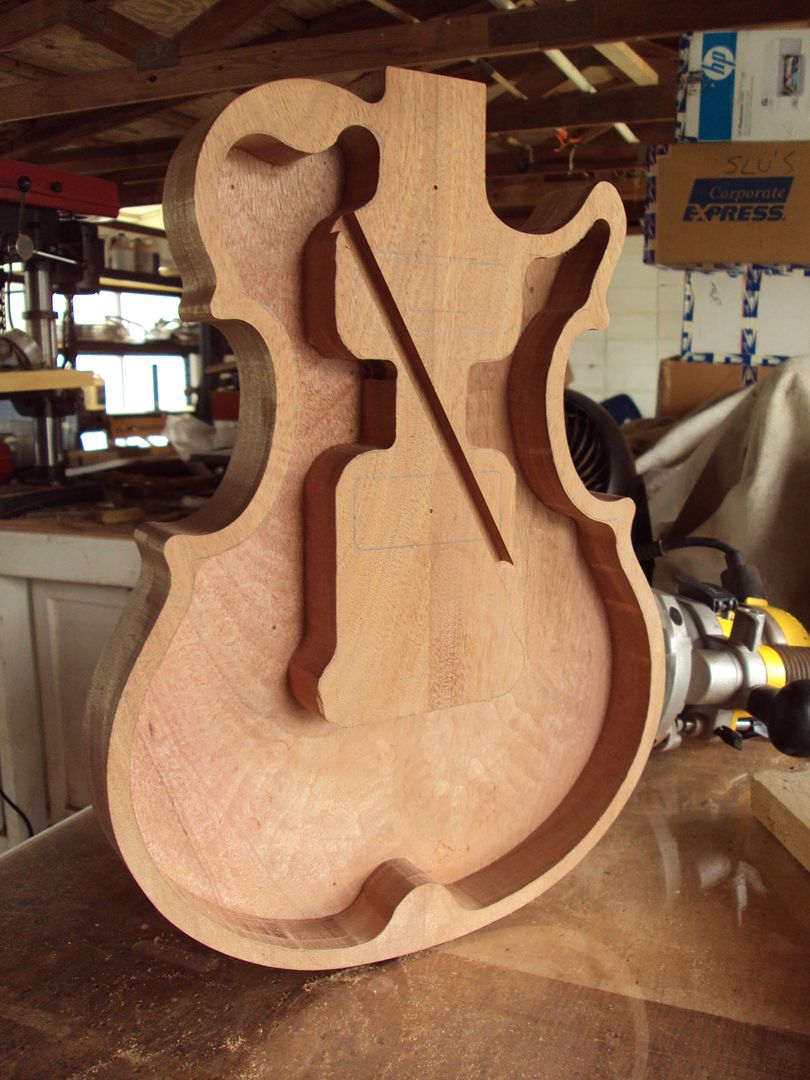
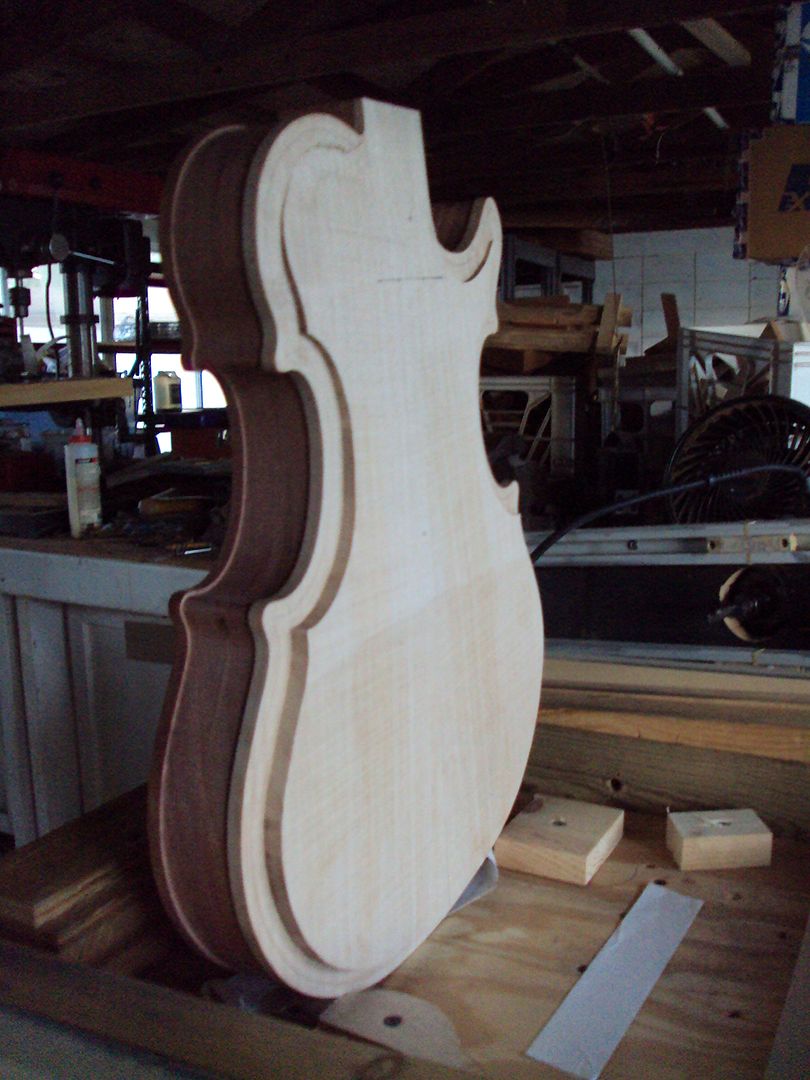
for the top i planed down some bookmatched maple just like i did the body
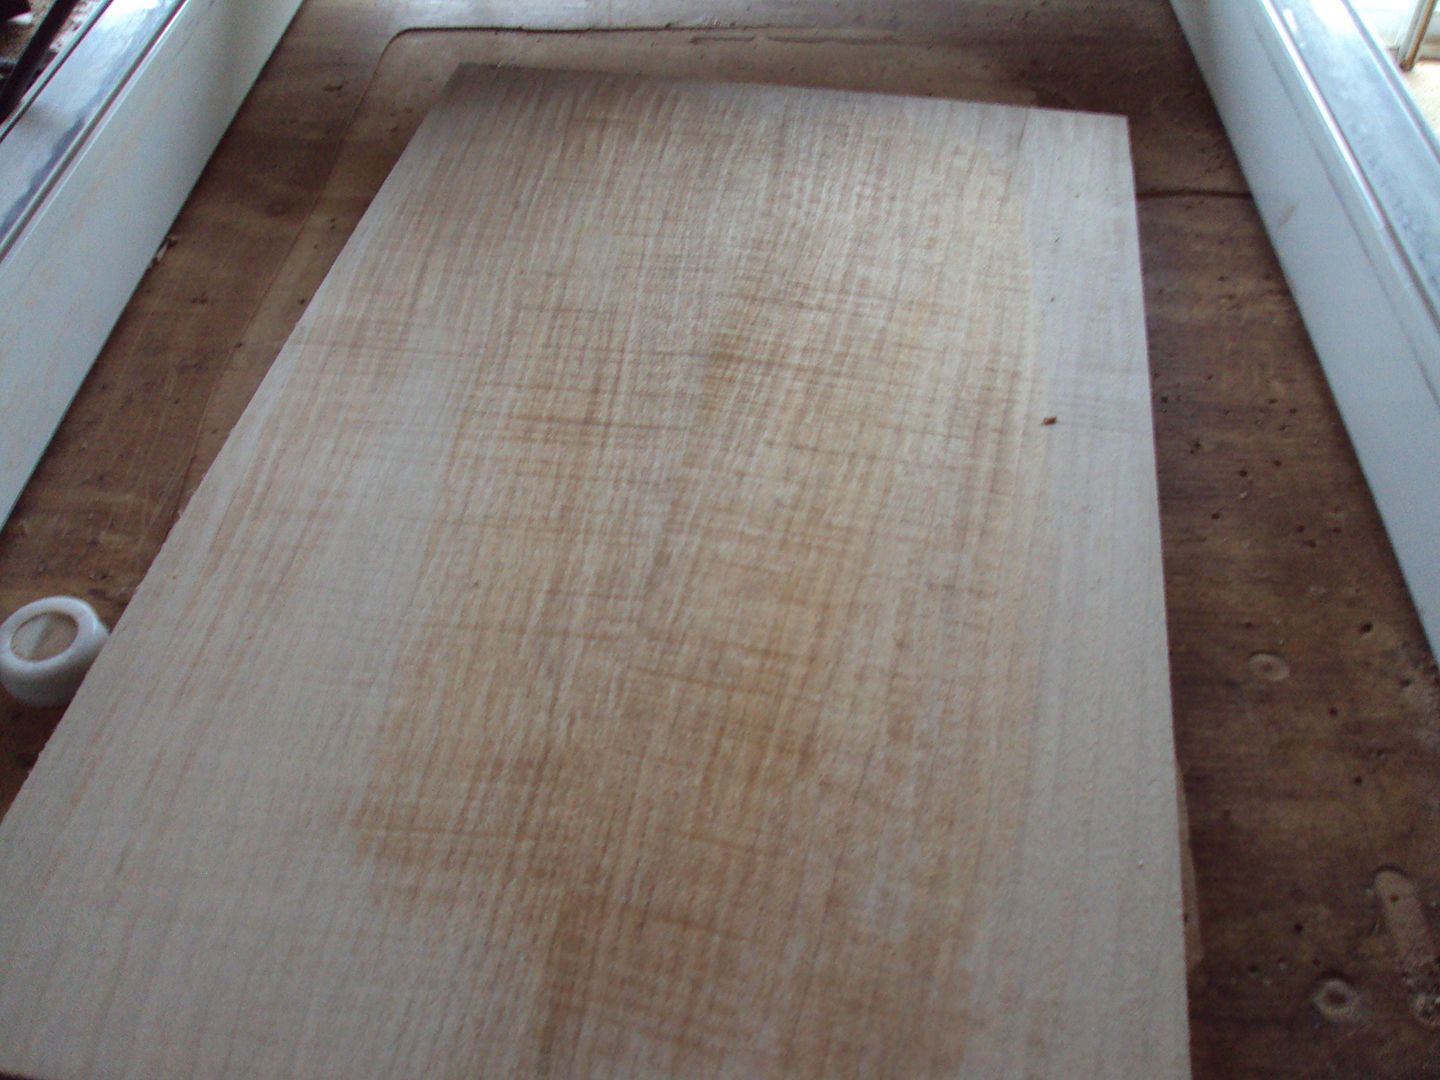
traced the template onto it
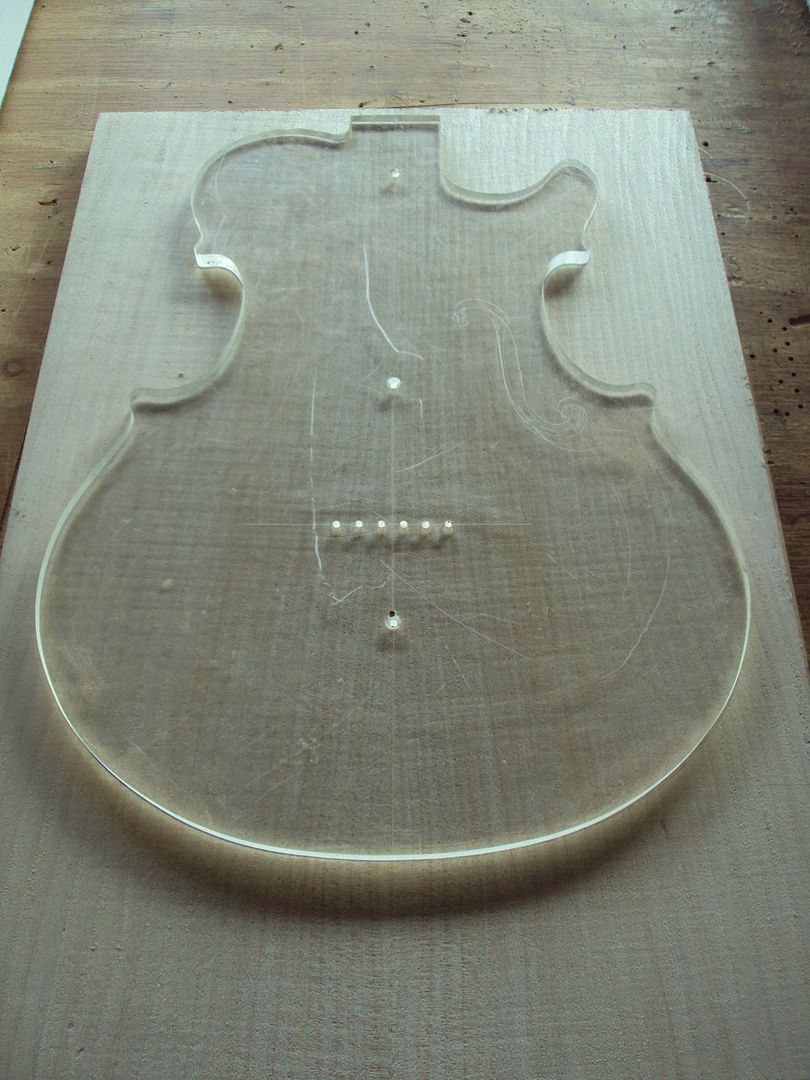
got it cut out with the jigsaw

got it glued and clamped to the body, i'll get back to it tomorrow
i get a little done each day and thats it for today
-
Hey people, can i park a build thread here? lot of different types of guitars on this forum, i like that, i see a lot of people here from other forums i hang around too, i started this build a few days ago, i change my mind a lot while building so ya never know what it will end up looking like, here's a few pics of what i got going on so far
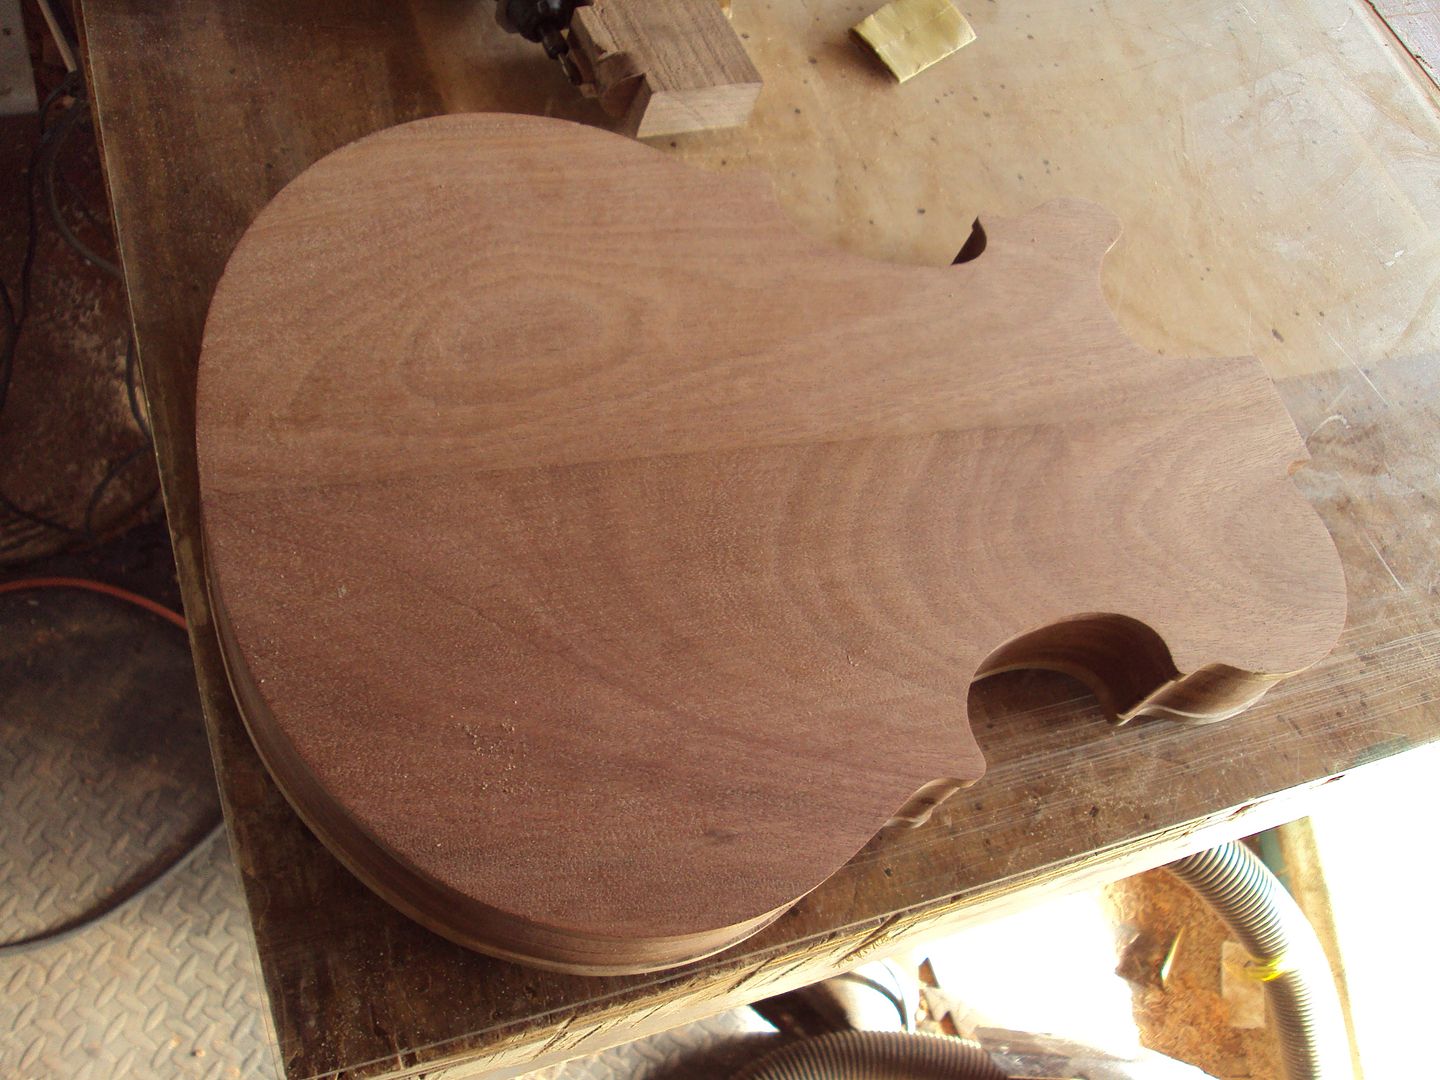
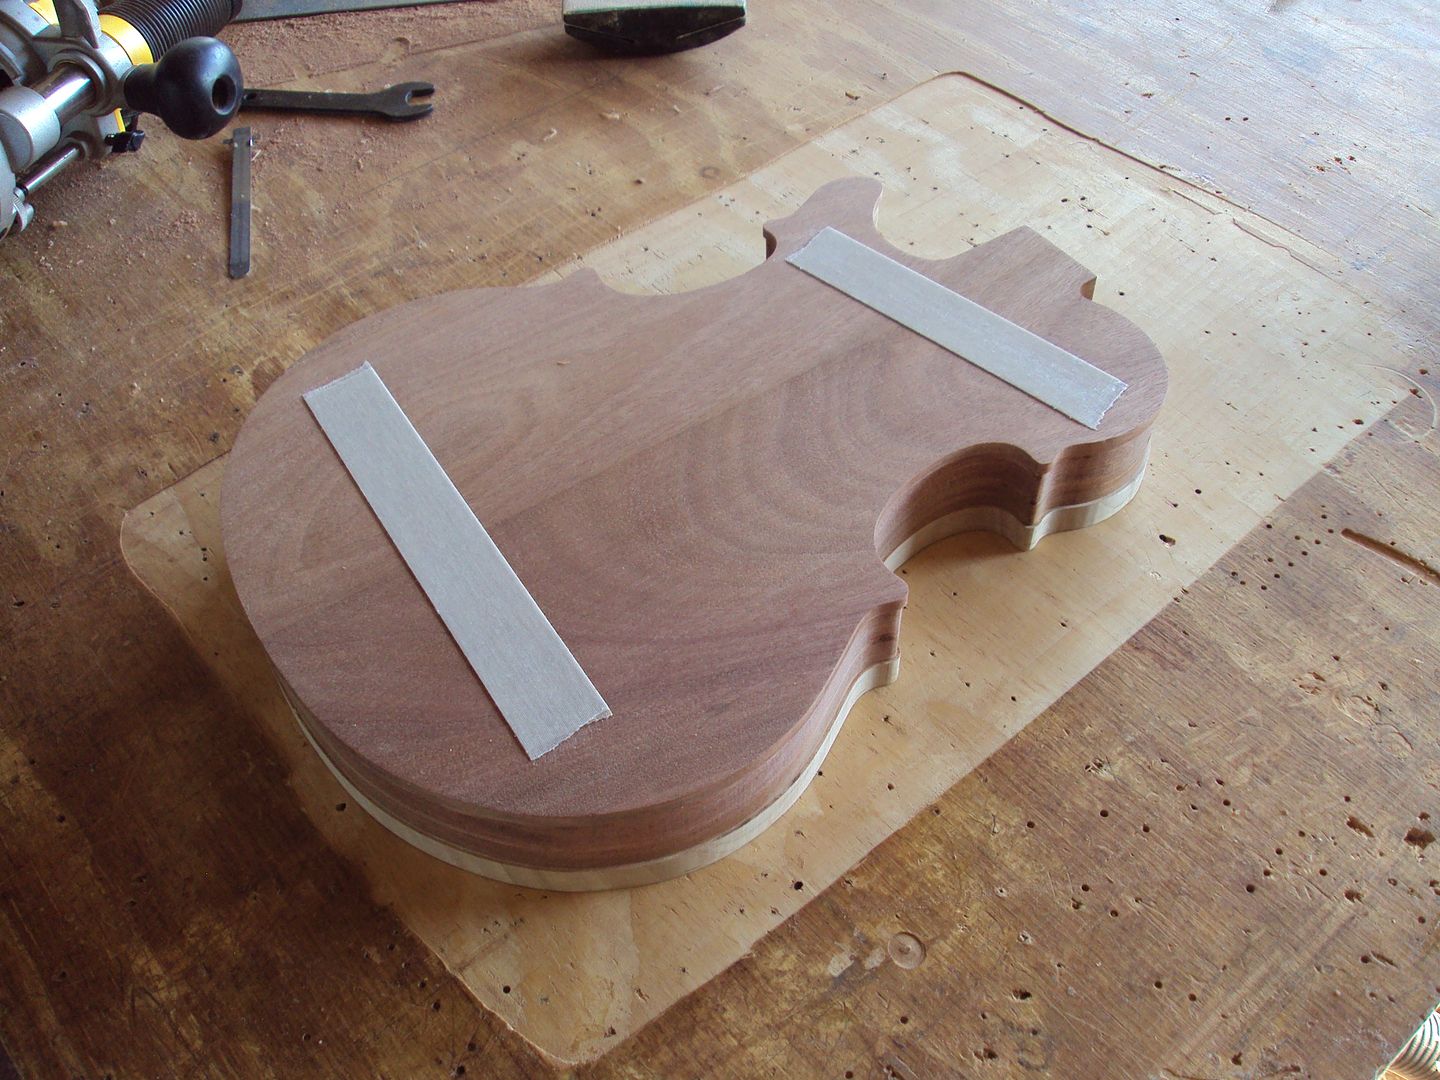
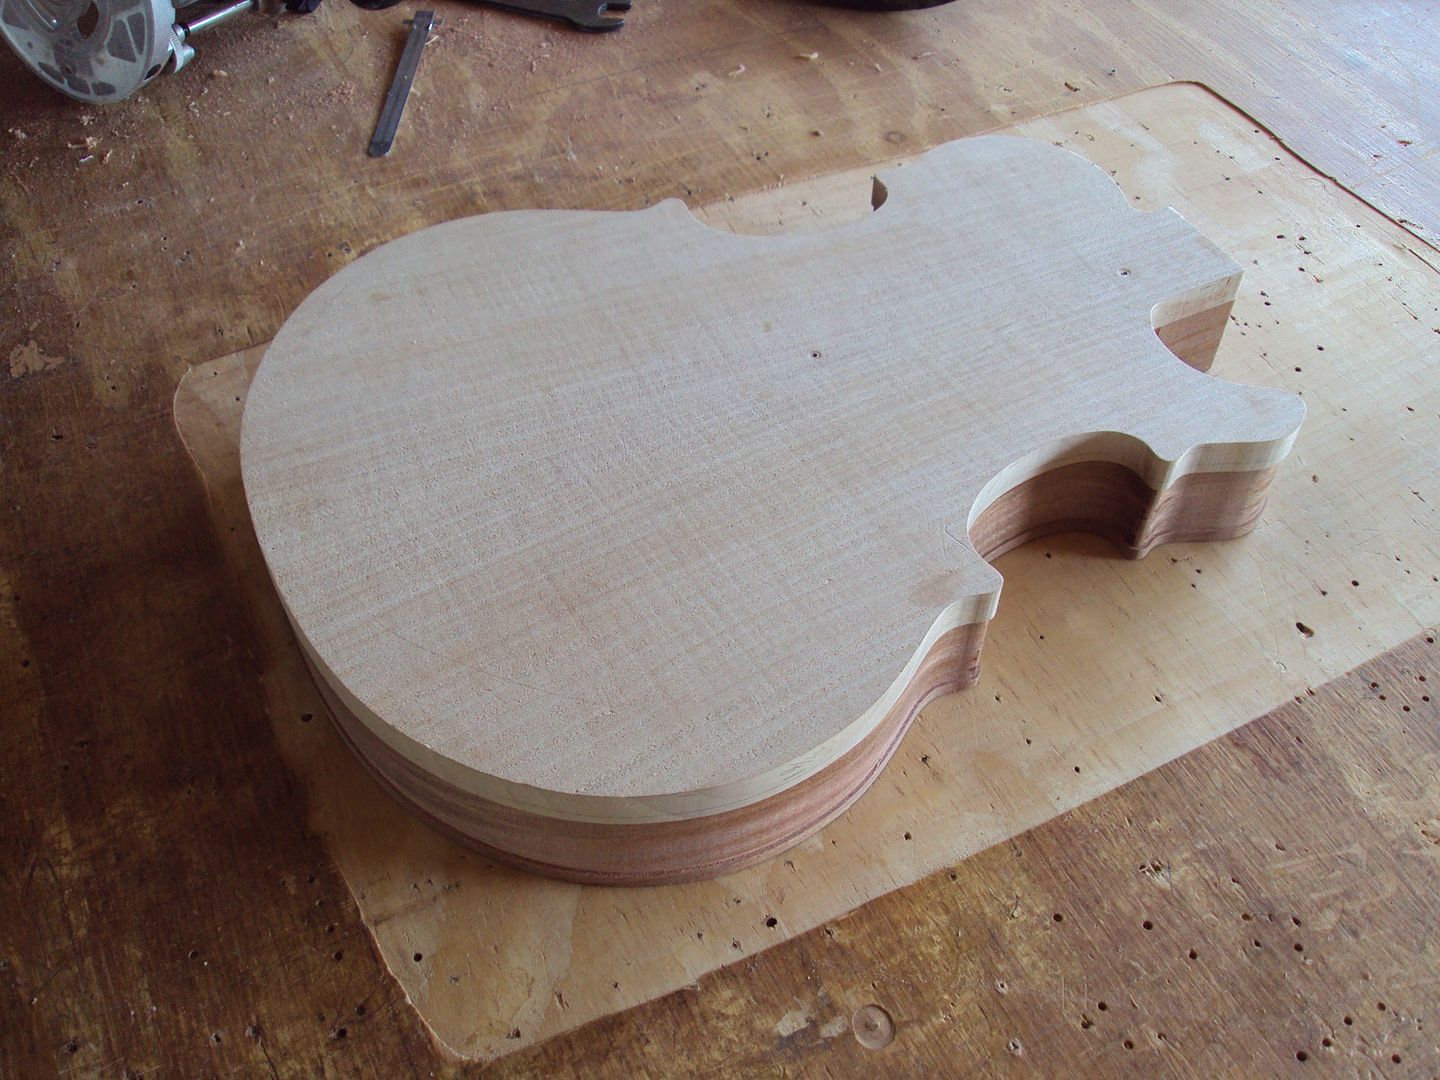
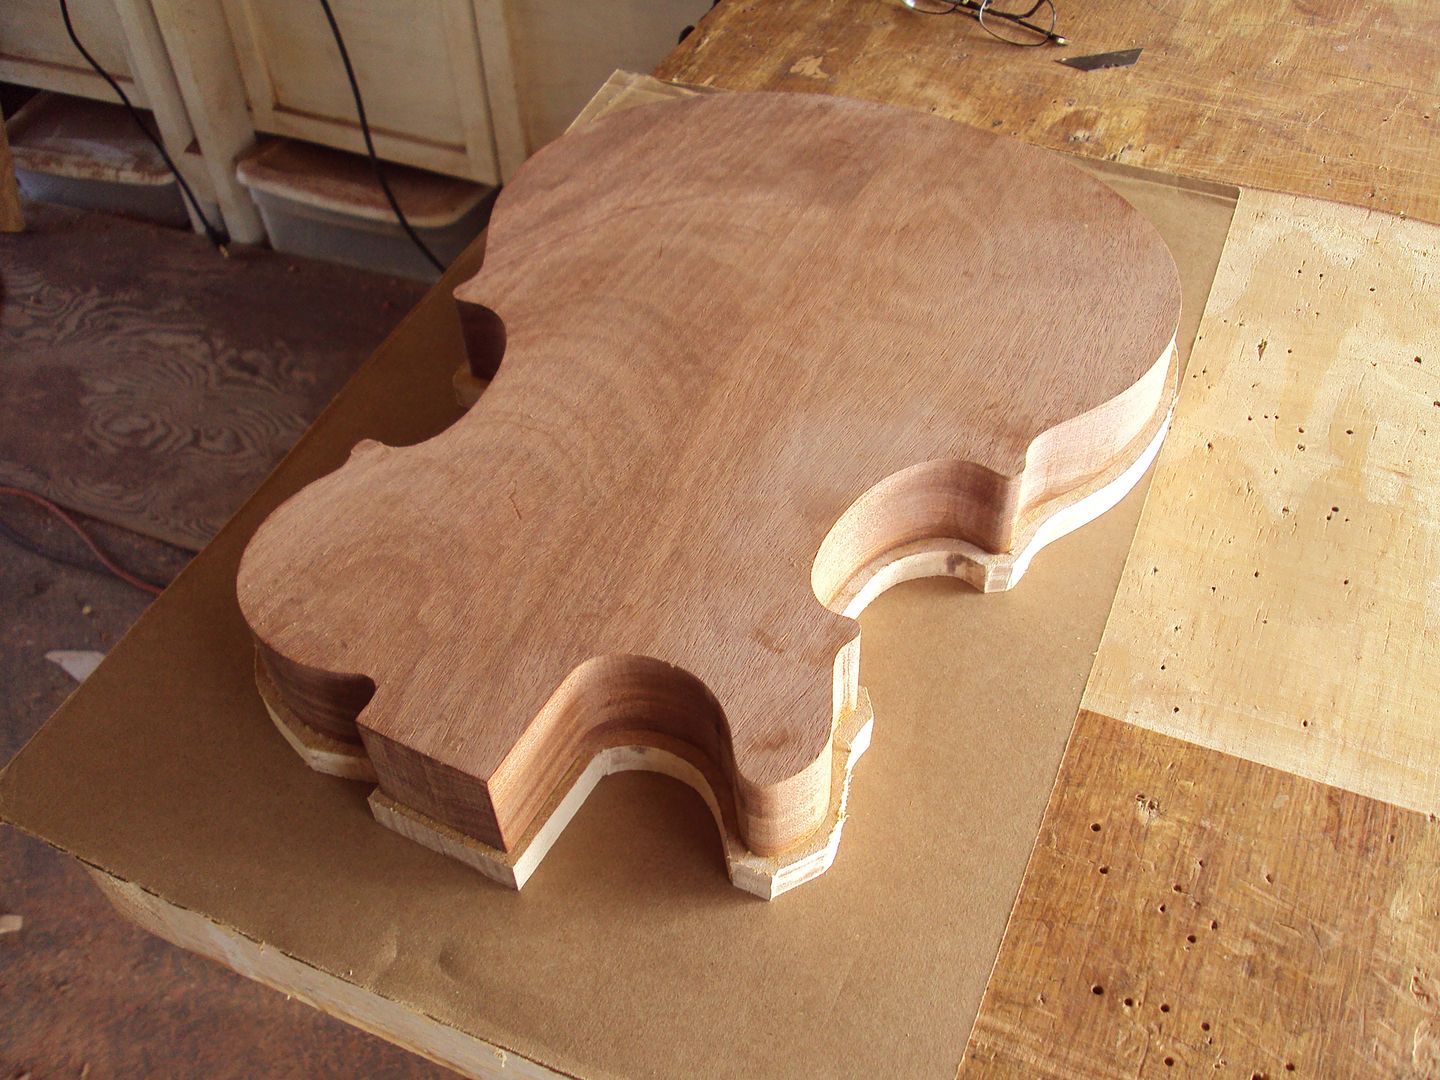
started off with a two piece mahogany blank on the work bench/router/planer rig
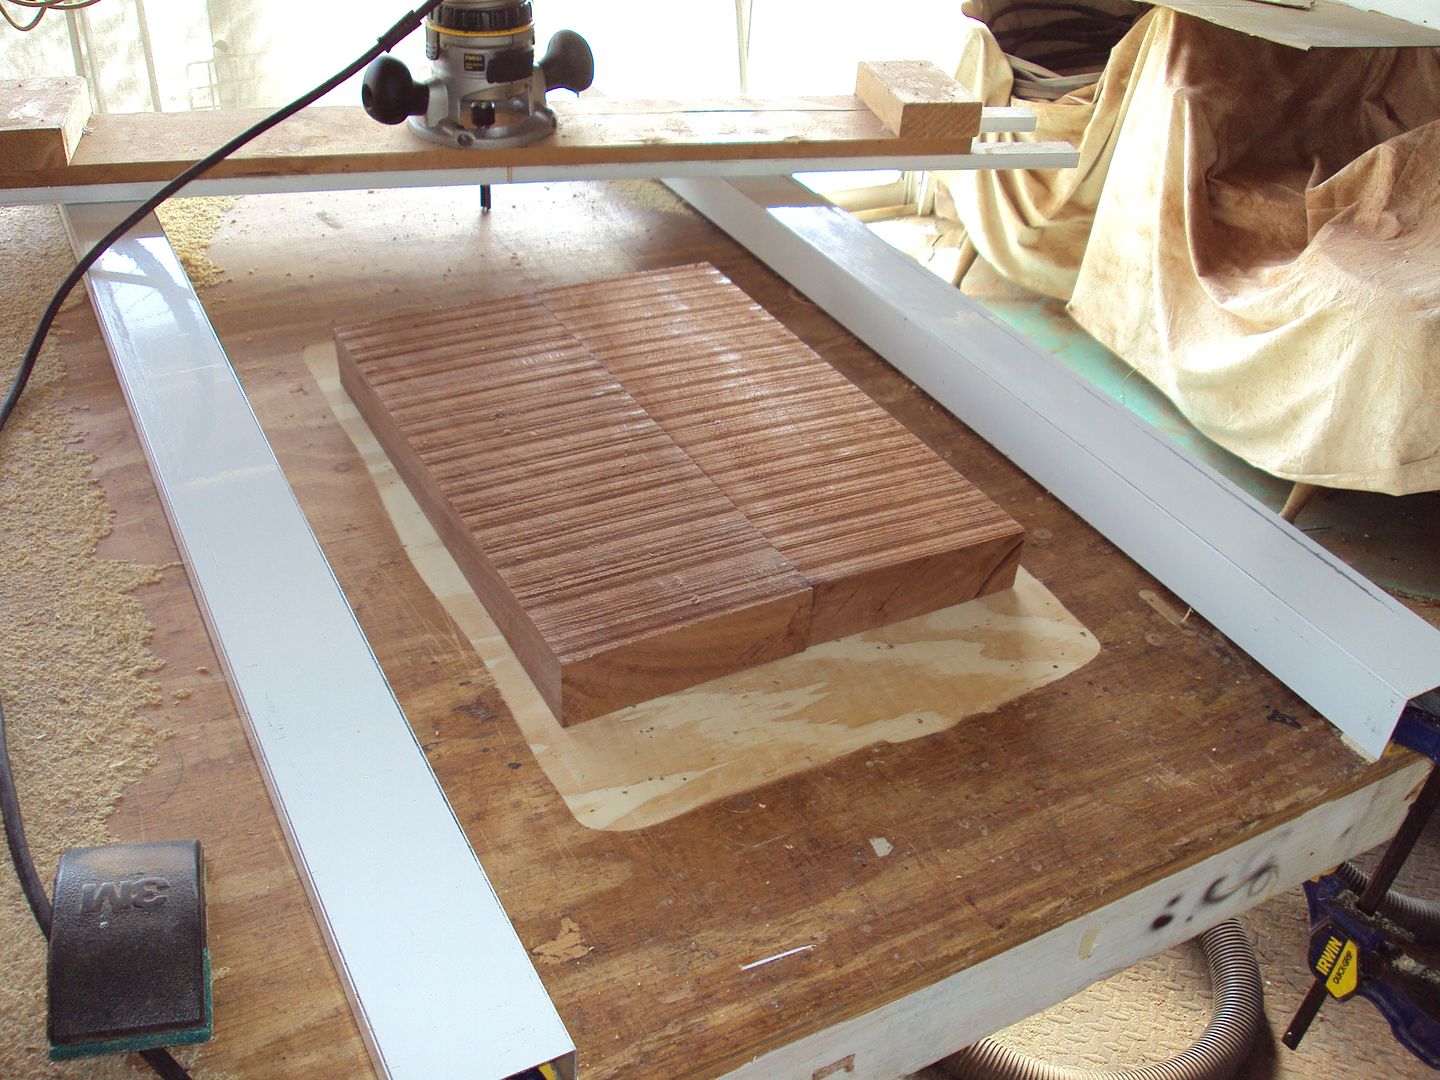
flattened out to 1-3/4"
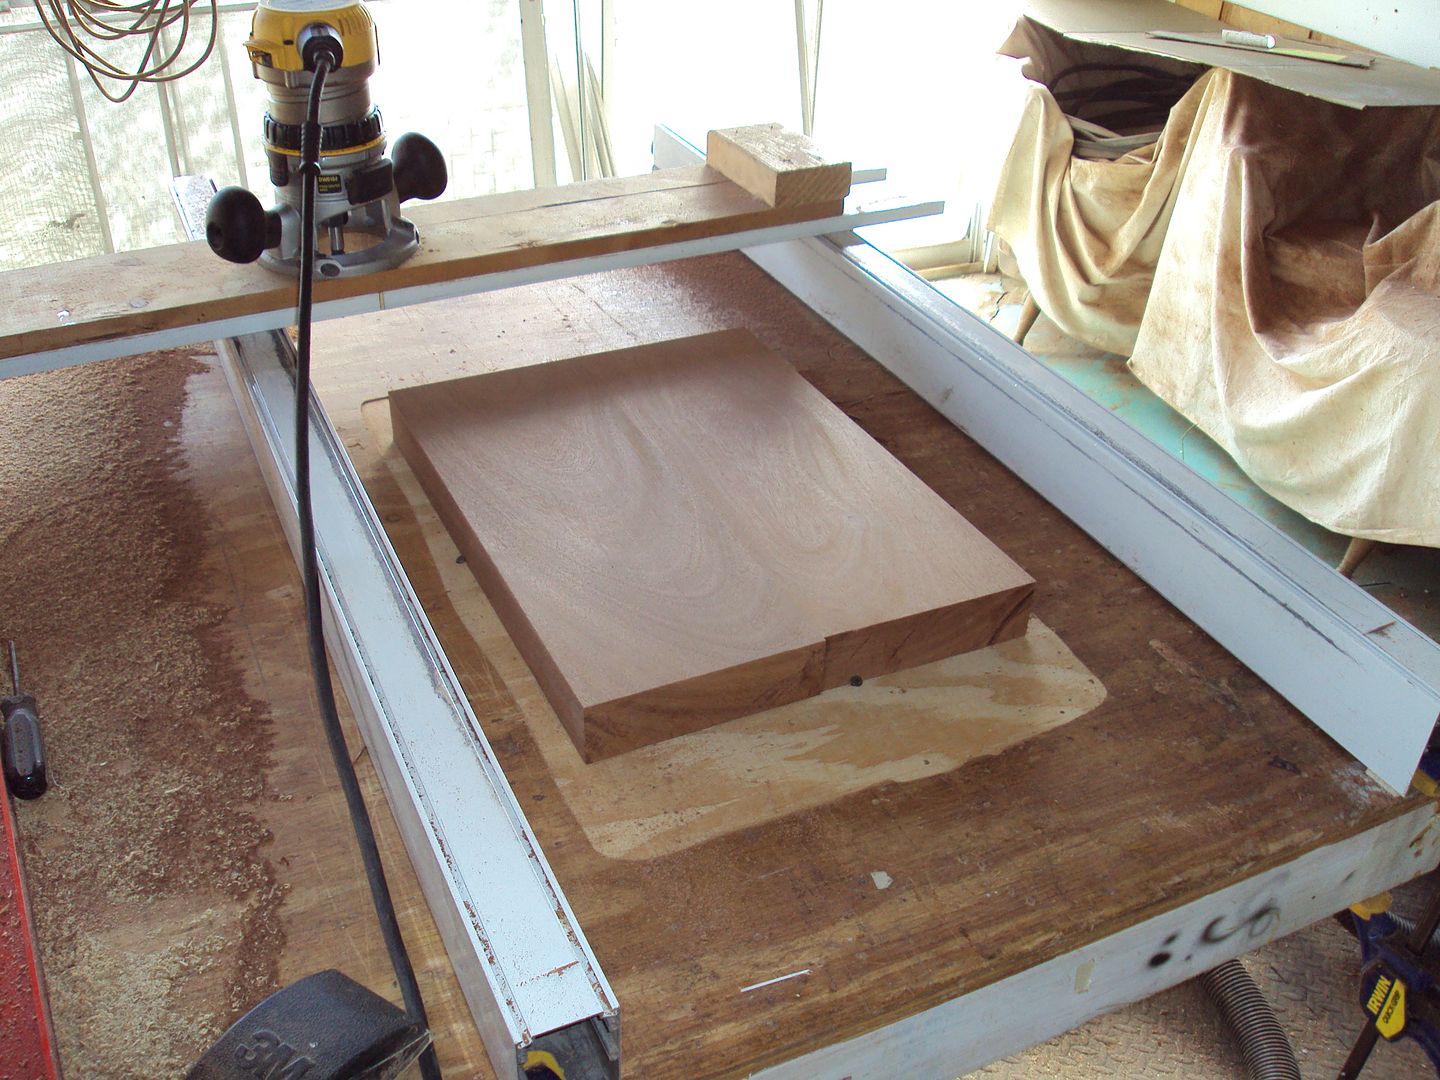
using a plexiglass template i made last summer
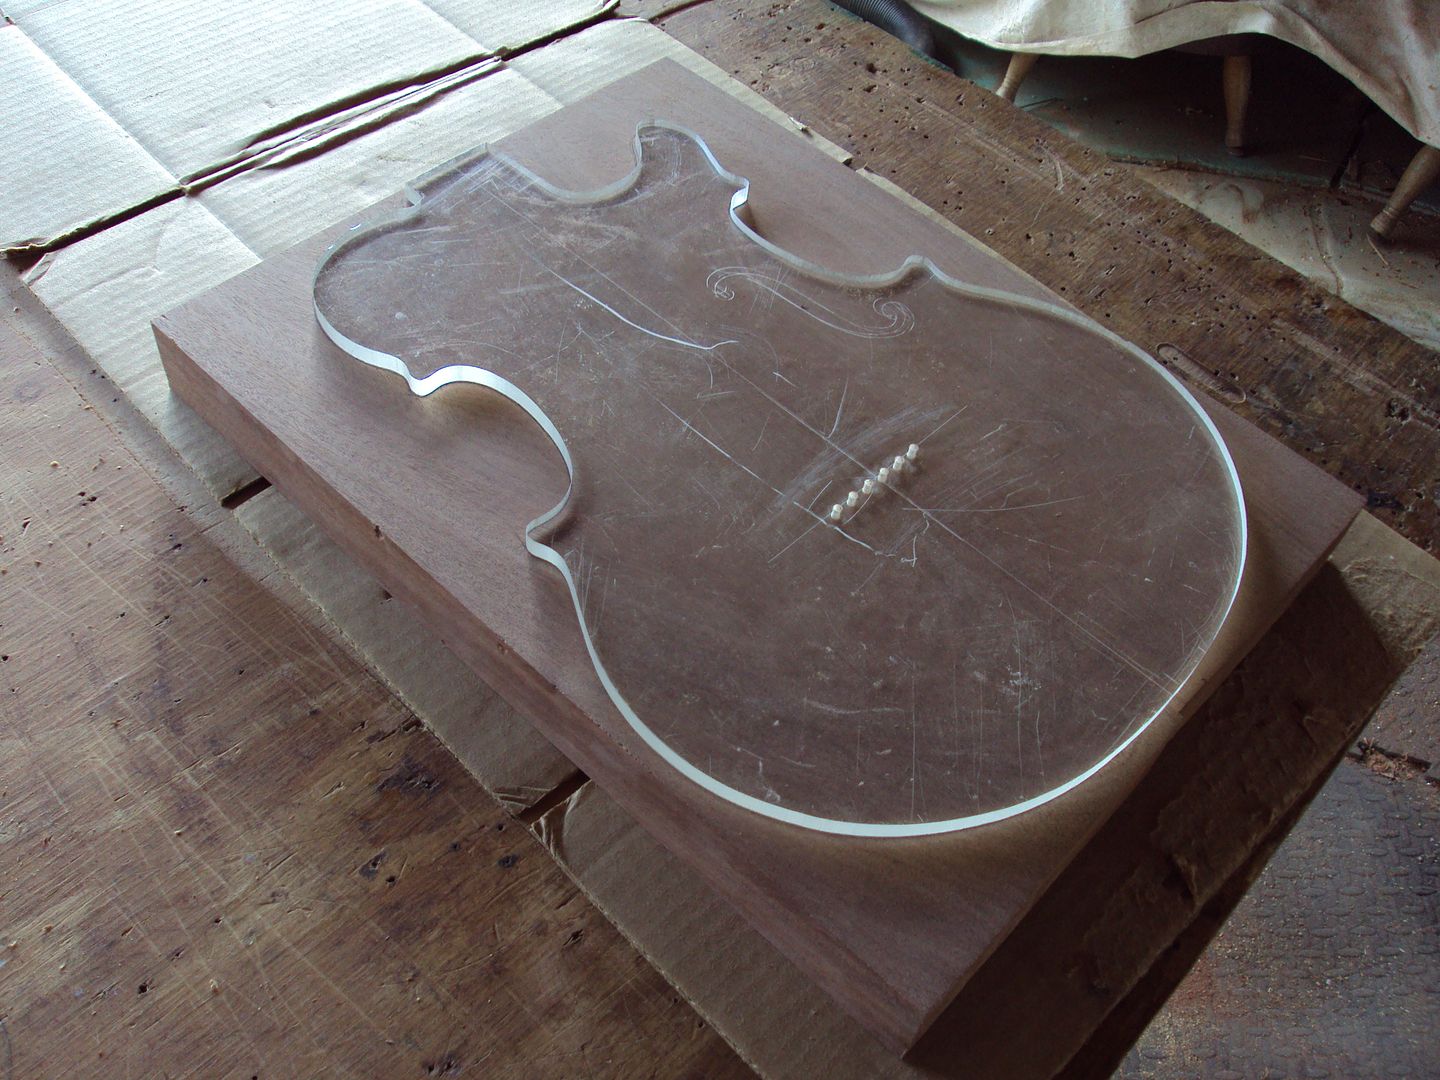
no bandsaw so i drilled some holes with the drillpress to help the jigsaw cut thru this wood
lots of holes
got it cut out pretty easy
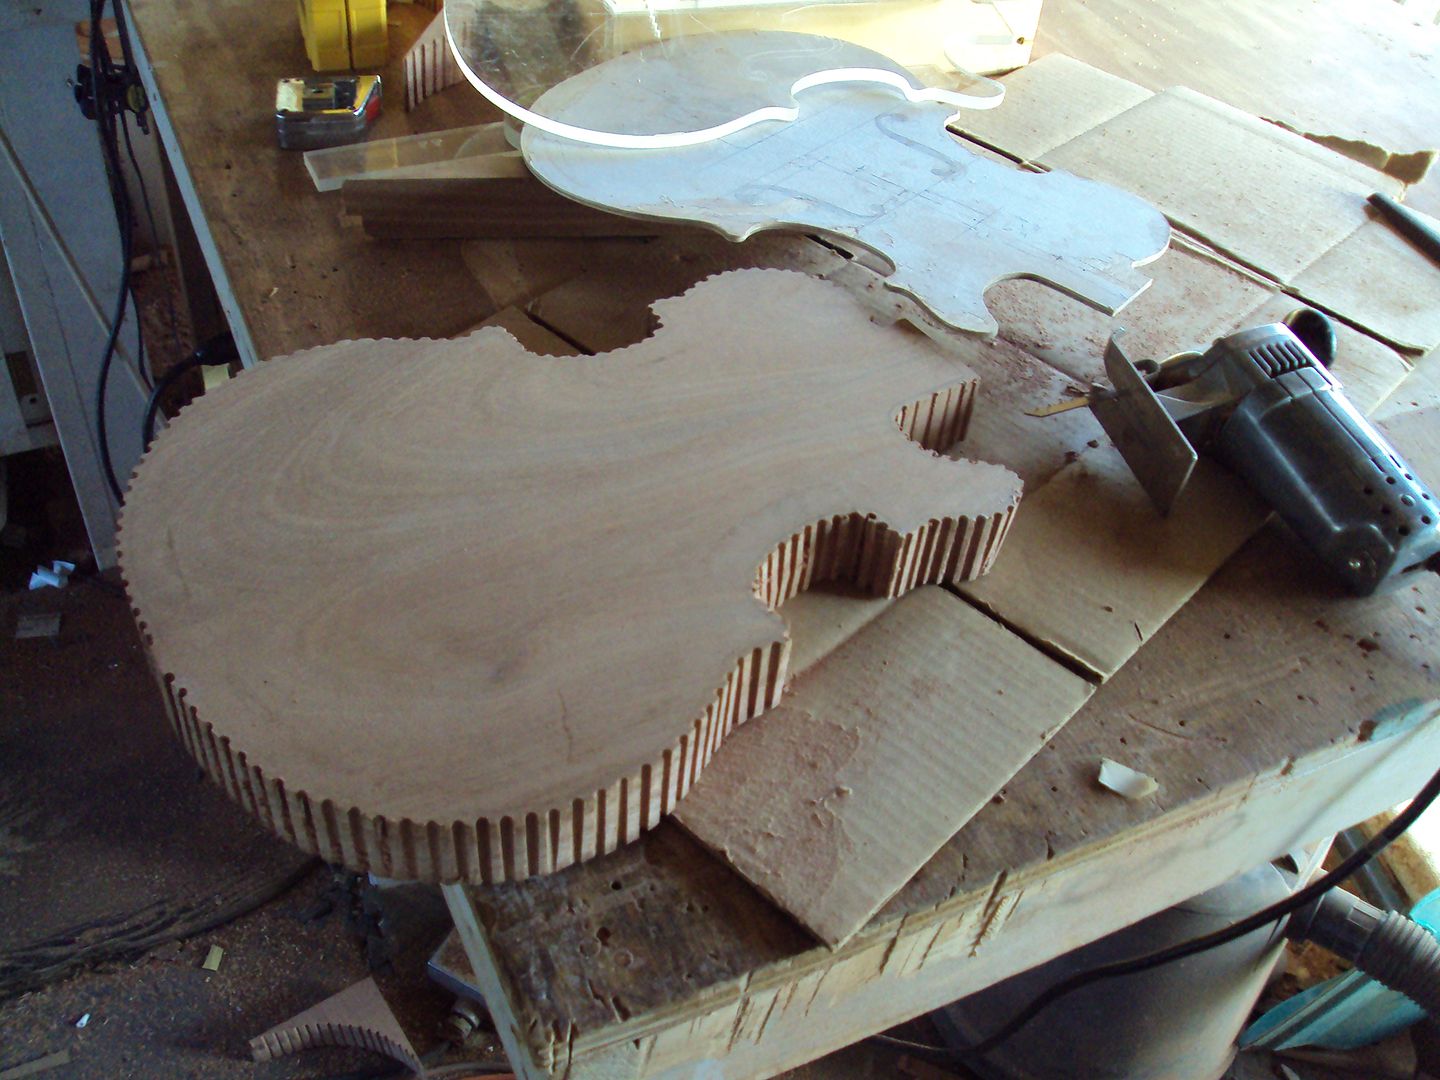
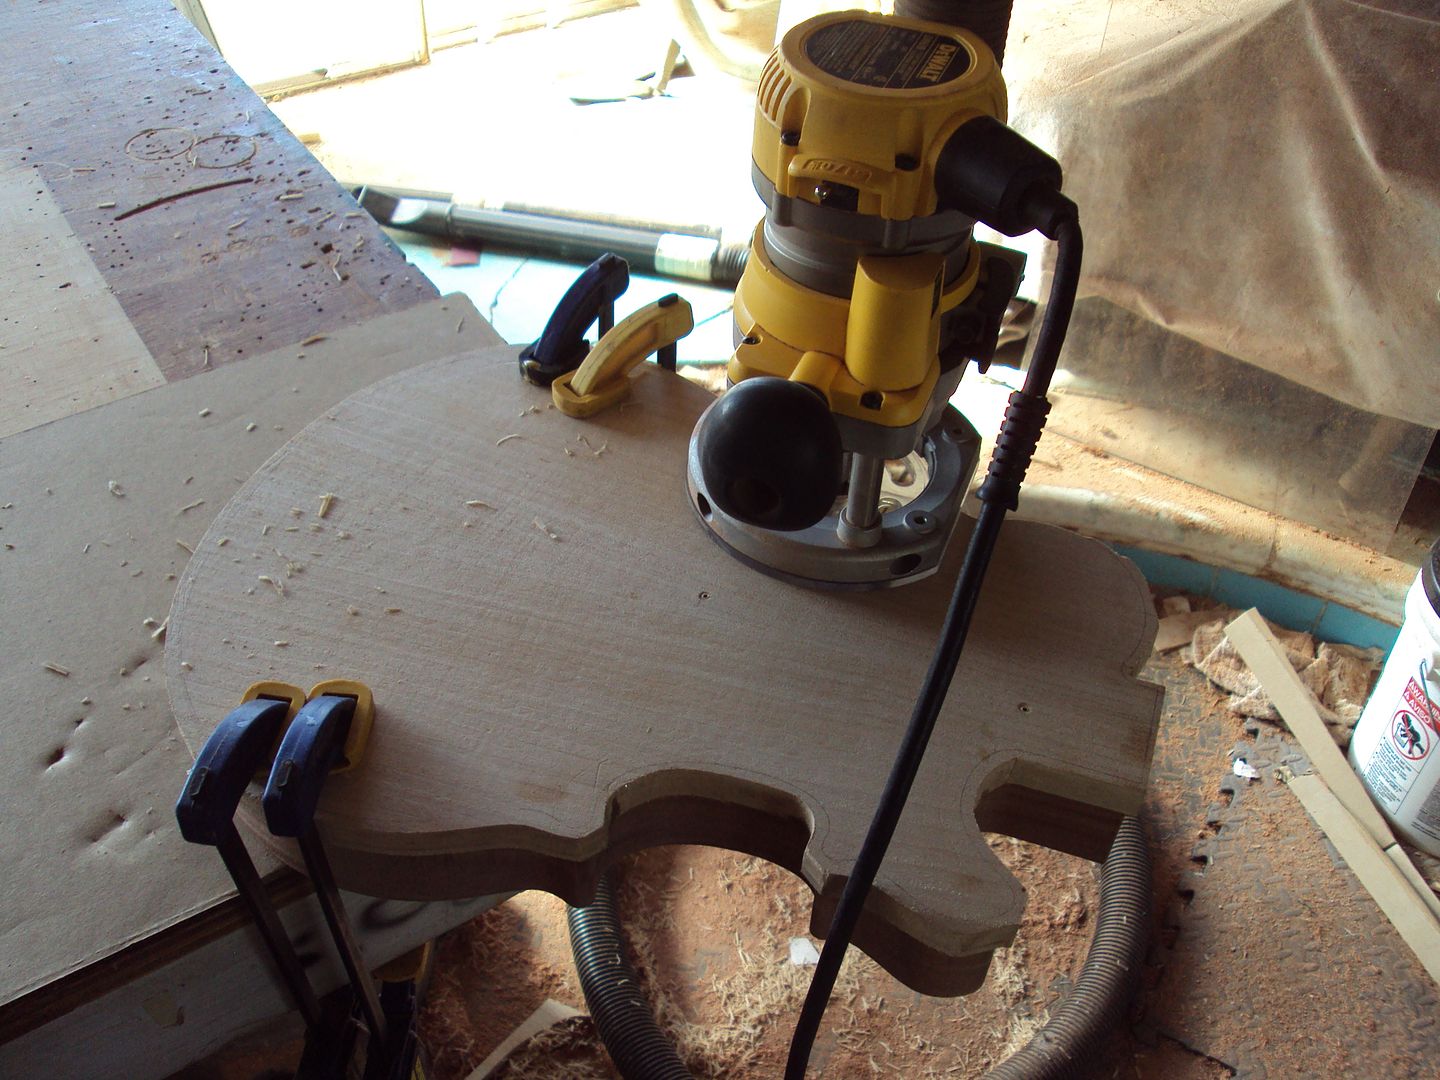
screwed on the template
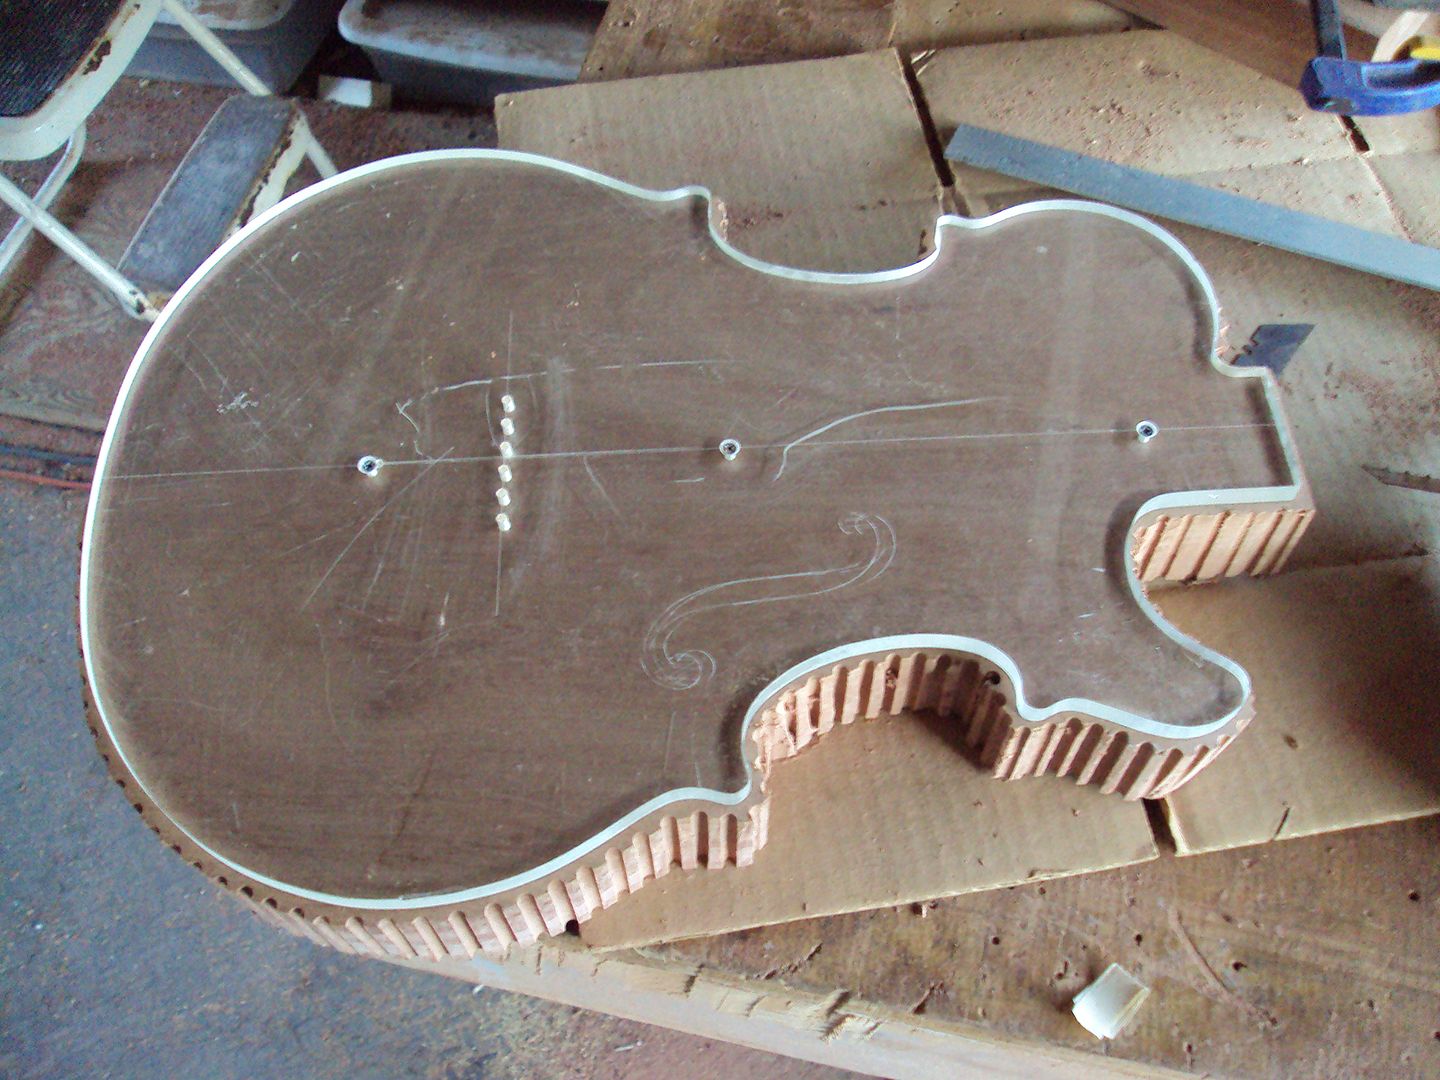
used a robosander and router to shape it up
-
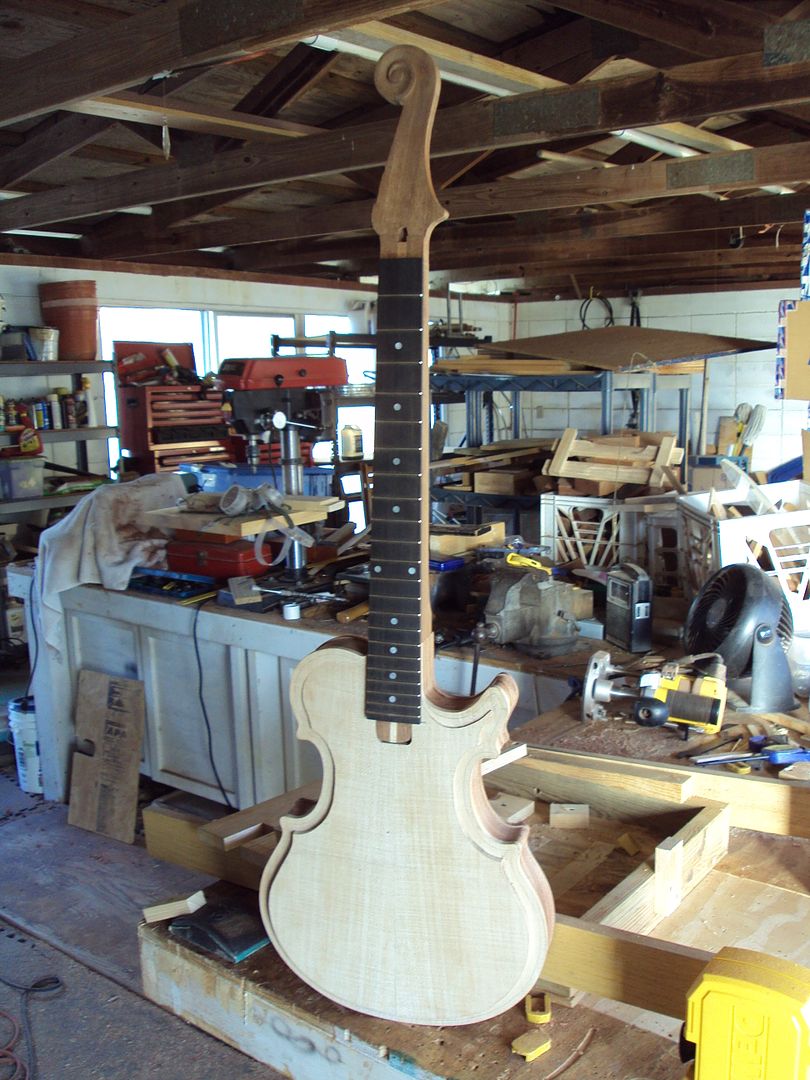
wow, what a bunch of awesome guitars, here's one i finished this month, built pretty much all from scratch, took me about three months to design, build jigs, tools and templates and get it done,
i call it the Scattervarius
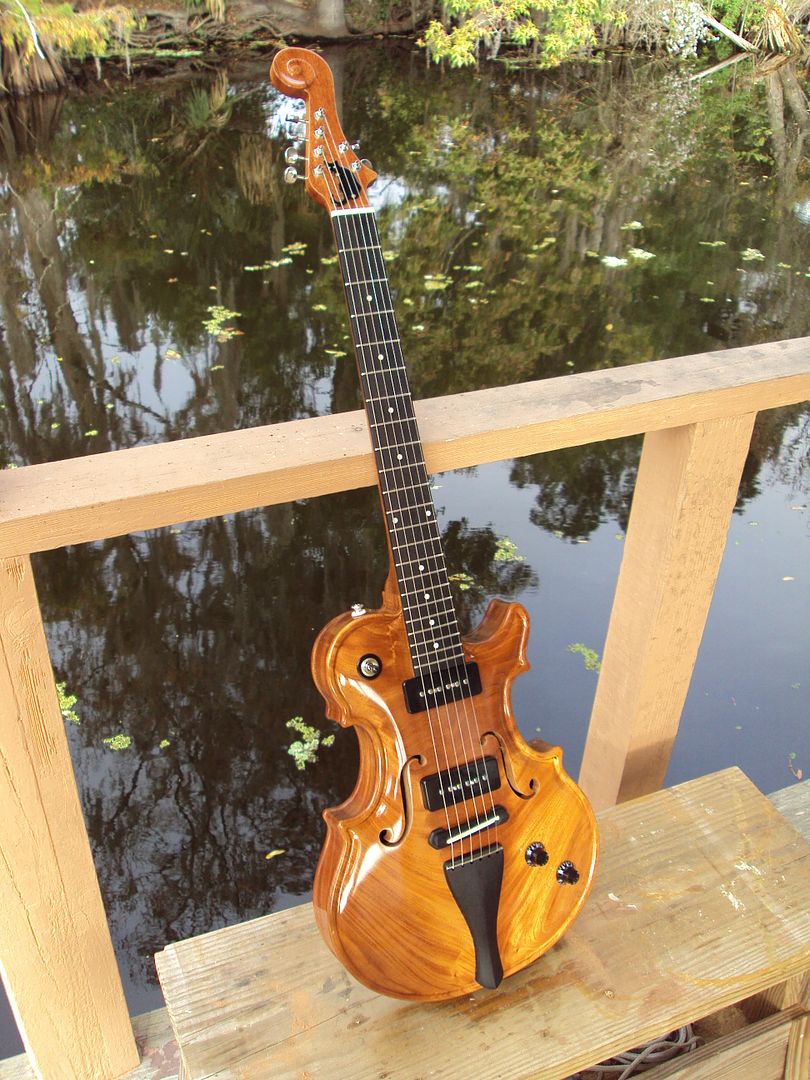
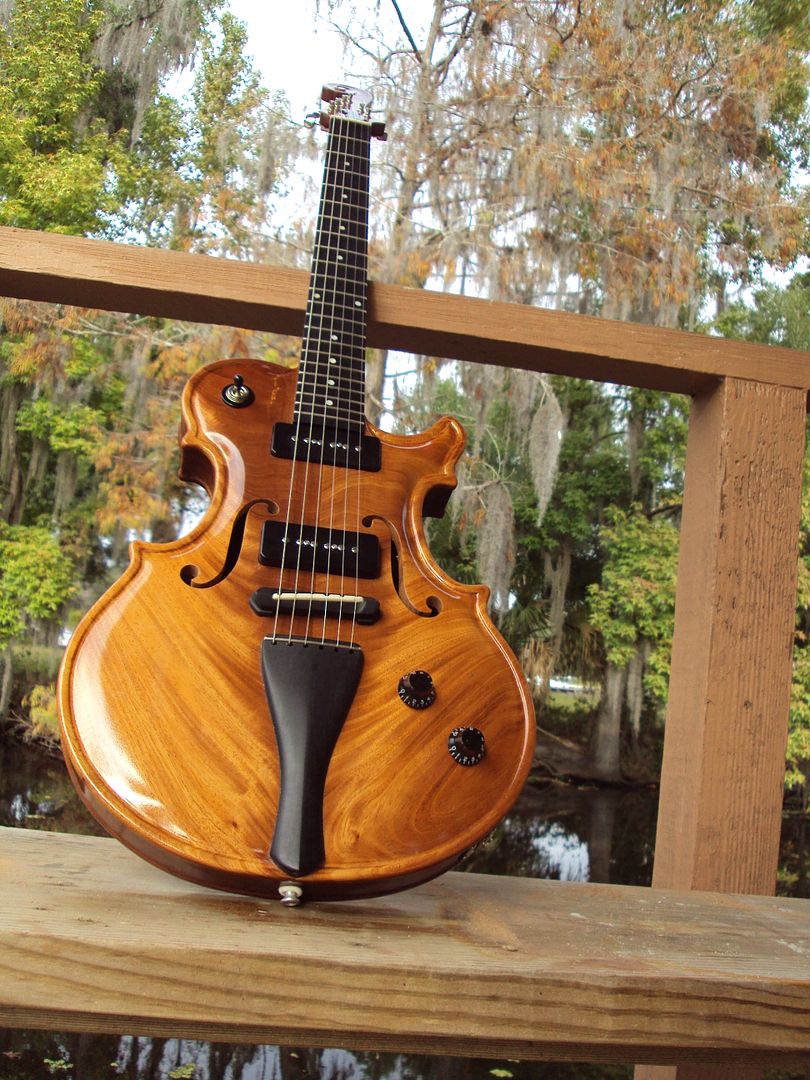
a few specs for ya,
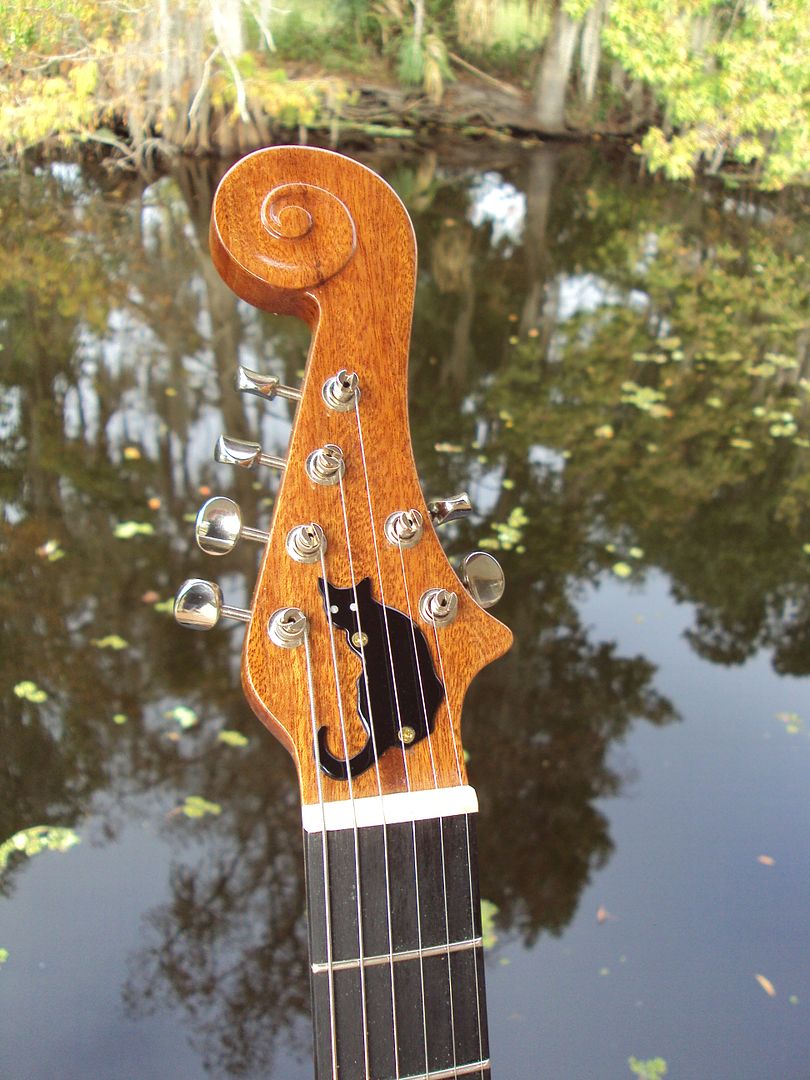
headstock angle 16.5 degrees
neck angle 4 degrees
string height at bridge 5/8"
nut width 1.743"
neck thickness at 1st fret, top of fretboard to back 9.95"
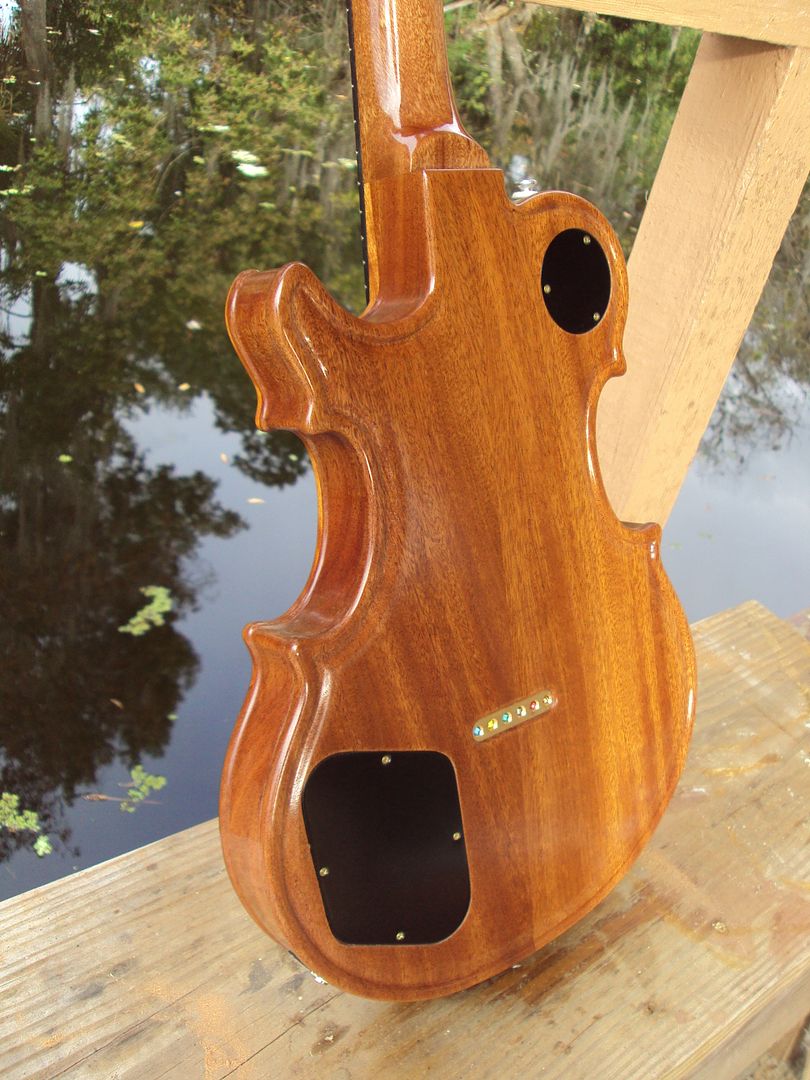
mahogany body 1- 3/4" thick,
mahogany top 9/16" thick at bridge
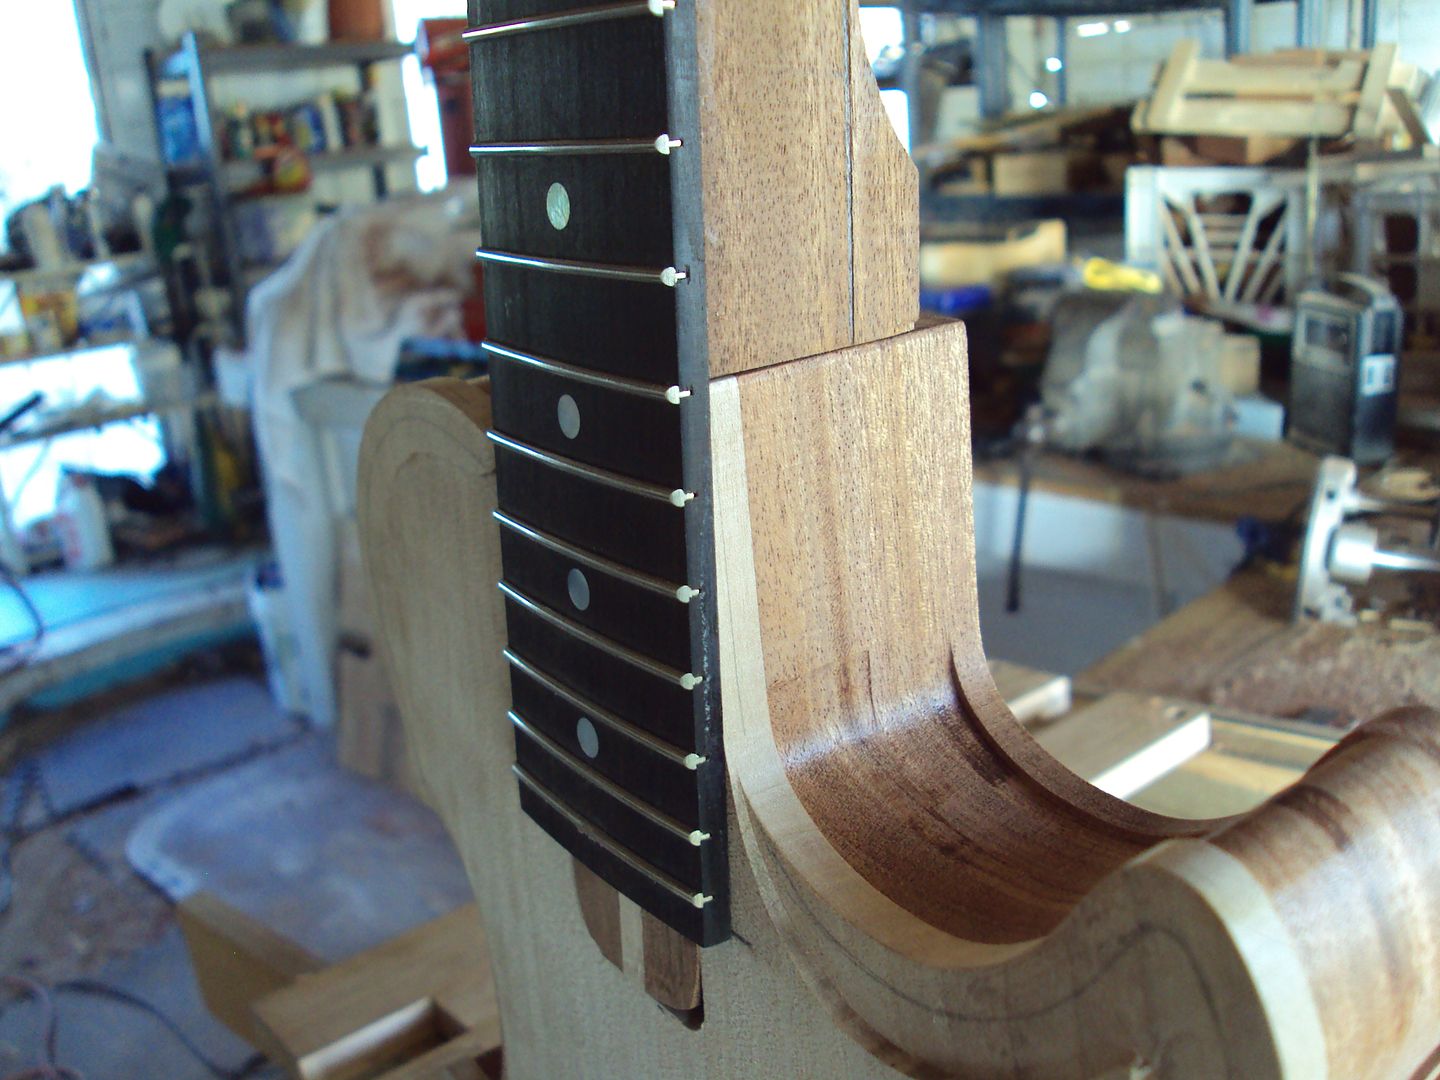
ebony fretboard
ebony tailpiece
ebony / bone bridge
bone nut
RS LP Jr. upgrade kit pots and jensen .022 cap
Budz P90's
fender tuners, nickel, vintage style


The Scattervarius Ii
in In Progress and Finished Work
Posted
put a couple hours into this today, got out the dremel
1/8" bit
got out the grinder and reshaped the top a little
looks like i got another days work on the neck before i glue it in