


scherzo1928
-
Posts
50 -
Joined
-
Last visited
Content Type
Profiles
News and Information
Tutorials
Product Reviews
Supplier Listings
Articles
Guitar Of The Month
Links and Resources
Forums
Gallery
Downloads
Posts posted by scherzo1928
-
-
That's going to be one gorgeous guitar.
-
So are you planning on scarfing the headstock? Or is the headstock piece longer than it looks?
Nope not scarfing. Might look like that because of all the lines i drew on the template.
The headstock is actually quite short, at 17cm.
-
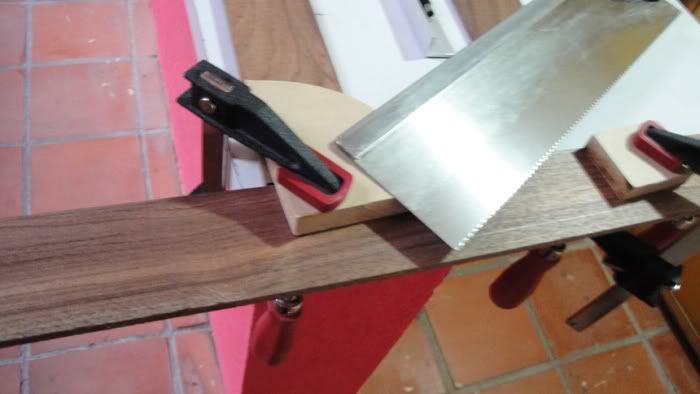
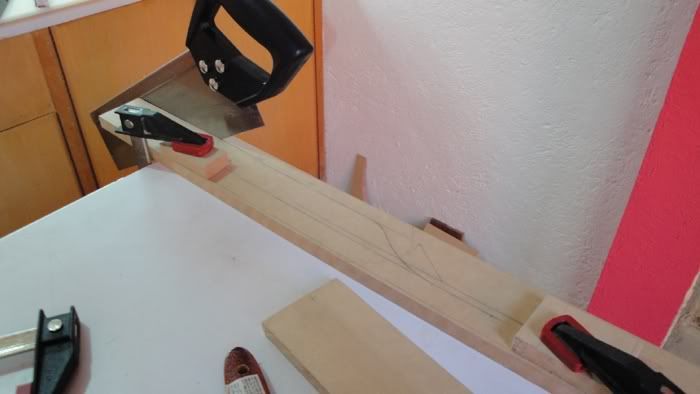
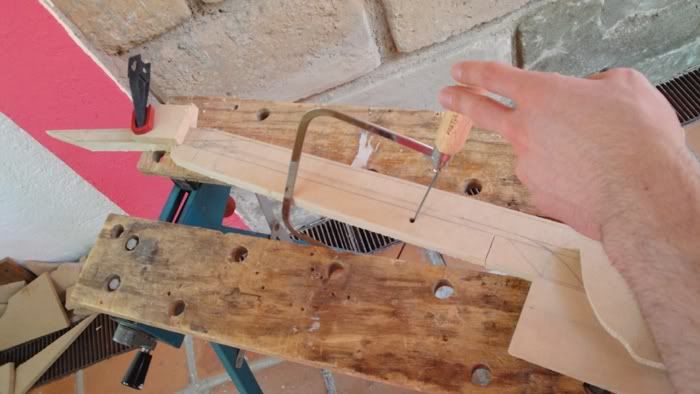
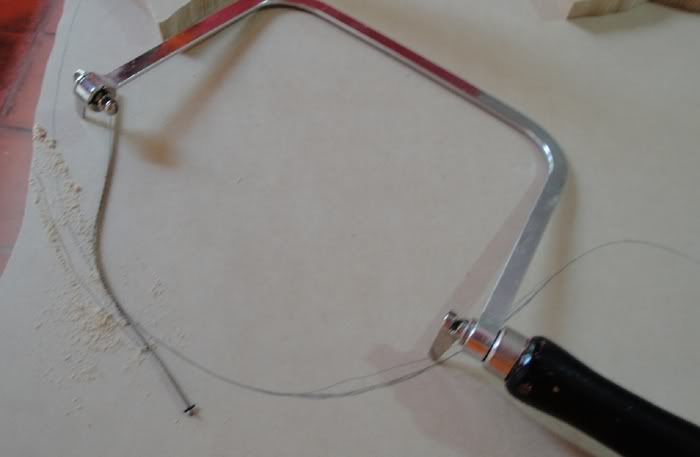
No band saw?

Thats got to be awful having to use hand saws. Do you plan on cutting the actual body with a hand saw?
Yep. Cut my first guitar with a coping saw as well... If that doesnt create a bond with your guitar, odds are nothing will.
-
That blue one!! Omnomnom
-
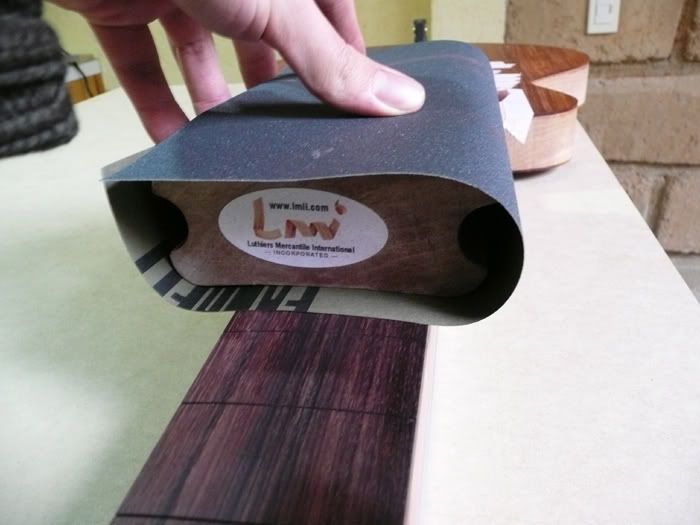
Used all the offcuts to help me keep the wood steady while cutting.
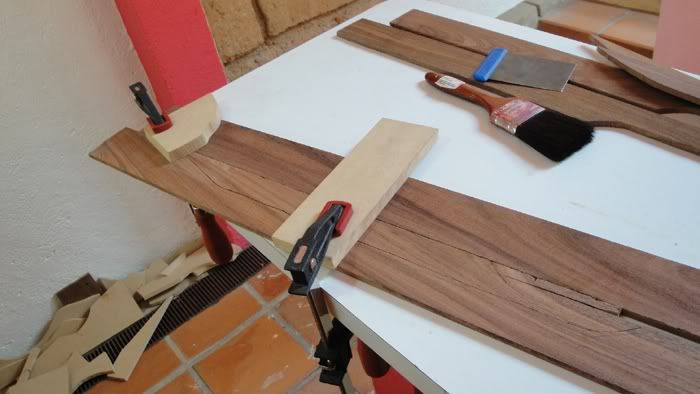
And finally!
That's where I am at with this build right now. Today I'm feeling terrible, and decided to take a small break, but I'll try and resume the build as soon as I feel better.
Please feel free to give any feedback on the build. Also, if any of you has any experience with undersaddle pickups I could use, let me know. For now, I'm considering the Baggs ribbon transducer, the EMG one, and a highlander. Mainly because you can use any string spacing. Let me hear what you guys think.
-
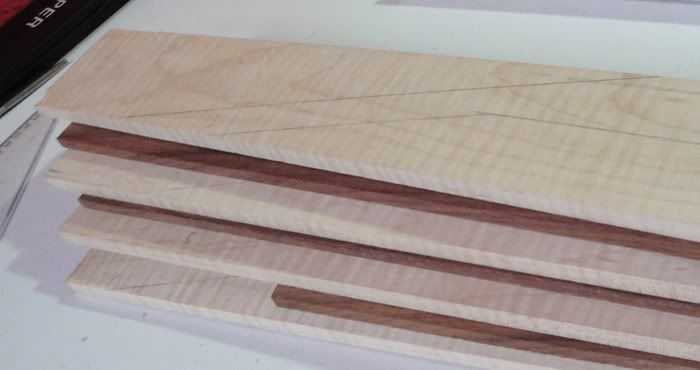
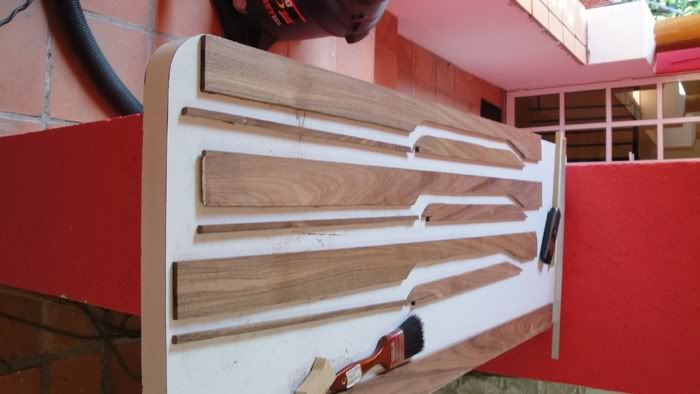
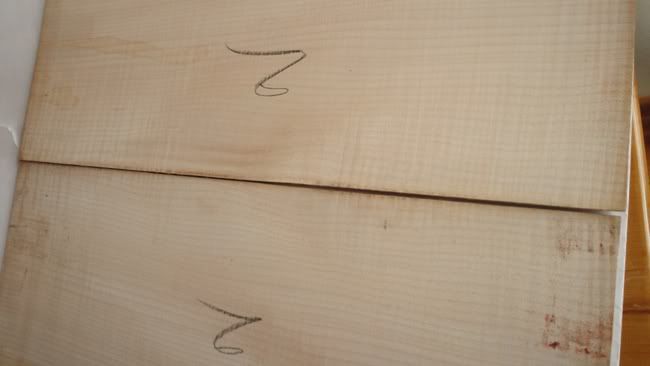
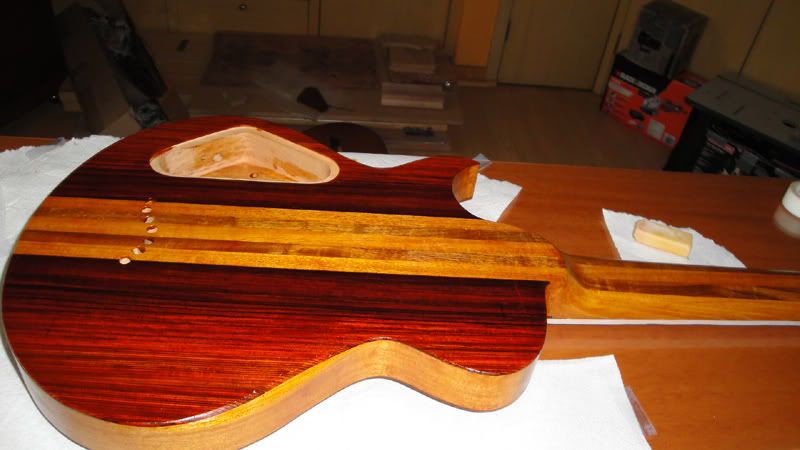
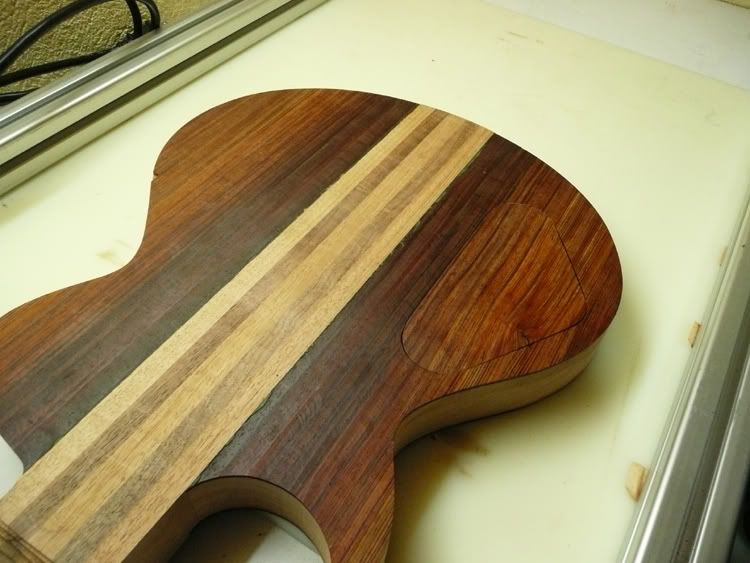
I then marked the laminate boards. I wanted to choose the best parts of each boards so that there was intense figure throught the guitar.
I marked the parts with weak or no figure, and made sure tey ended up either outside the boards when cut. Or in a place that would not be seen, like right under the maple top.
weak spot.
Constant flames all along.

Just look at those flames!!!!
How lucky can you get??
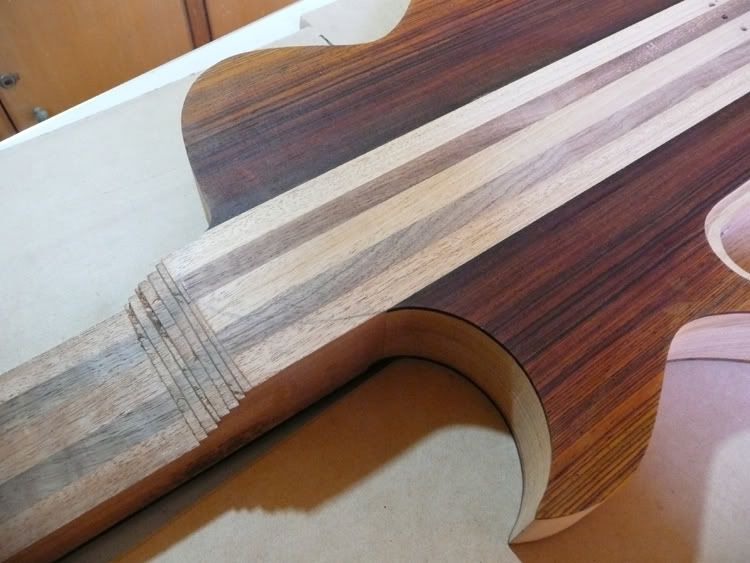
I then numbered the boards. By the way, the 2 inner maple boards are actually bookmatched, same with the 2 outside boards, and I aligned the grain.
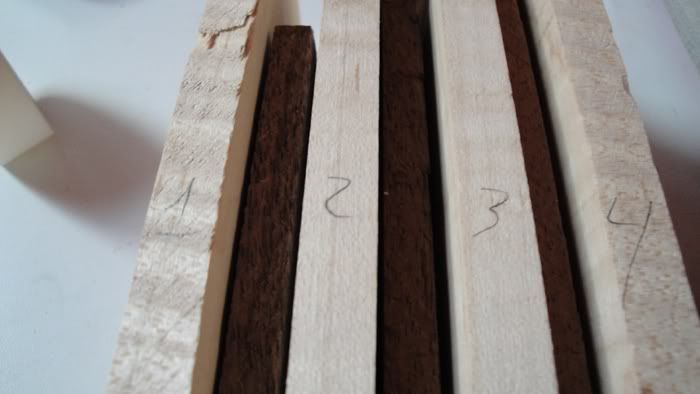
At this point, I'd like to point out that I got 8 boards like this out of the board I bought. AND, I only paid 200 pesos for that 1 board. So... about 14 USD.
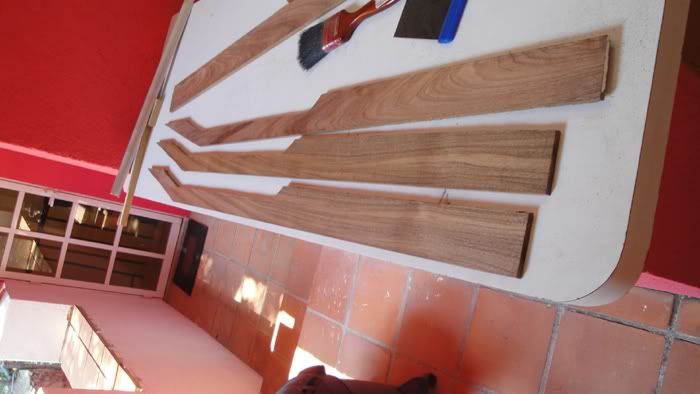
Time to cut all 7 boards.

-
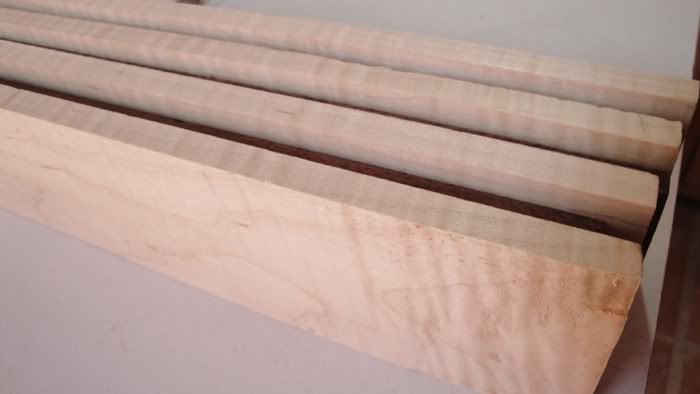
Fortunately I had much better luck with the rest of the wood. I went to my trusted lumber place, and they told me they had some plain maple that has just been sitting there for years. I spotted a very straight board and asked them to cut it up. I went home with 8 boards bigh enough for neckthrough laminates. The next day I started inspecting them and OH SURPISE!!
The maple was SUPER flamed.
More pics on the flames in a bit.
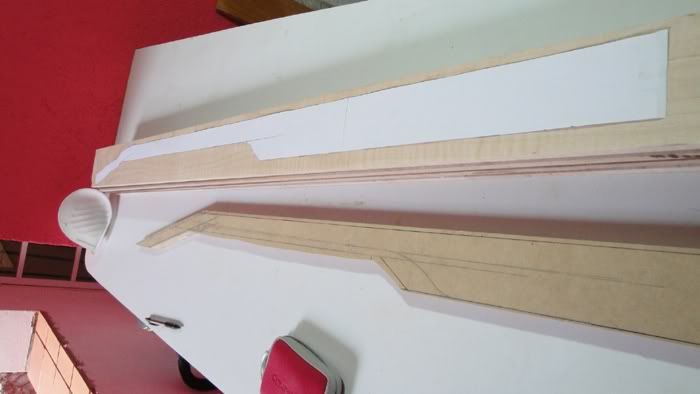
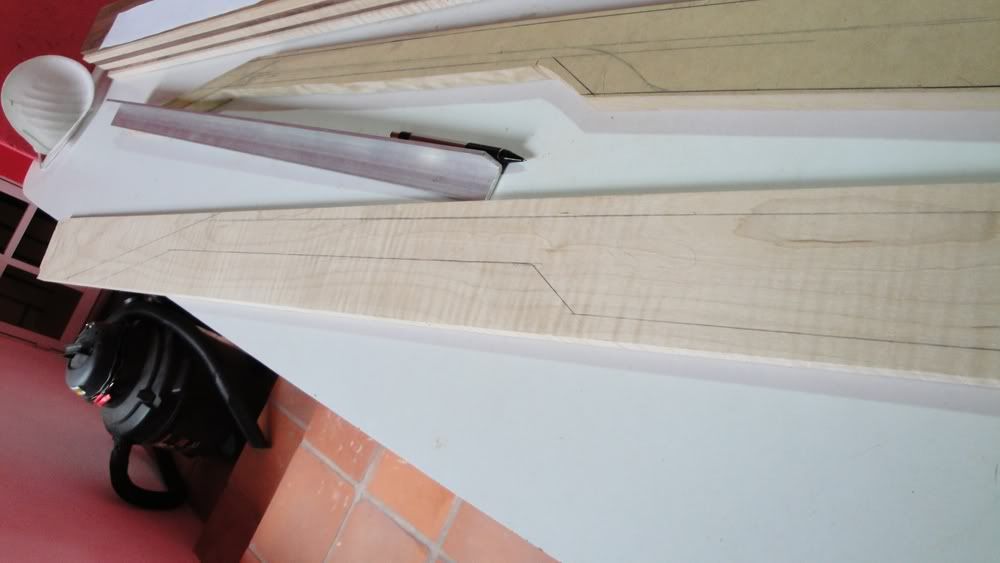
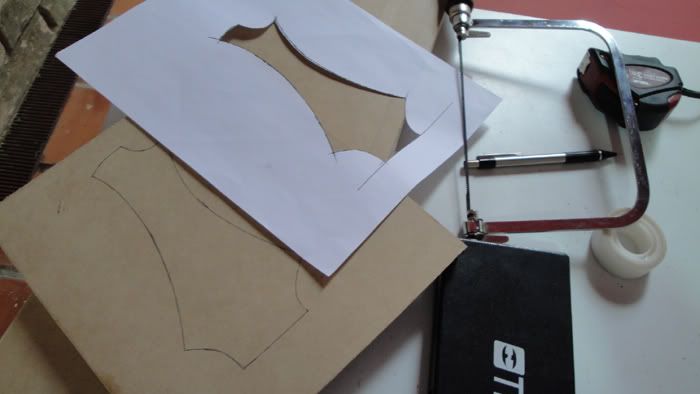
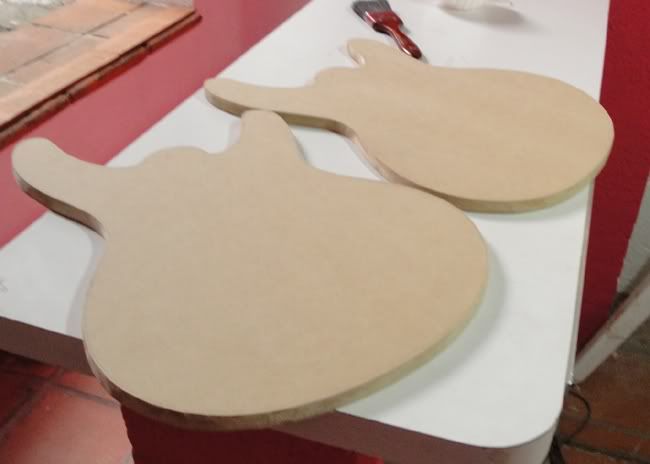
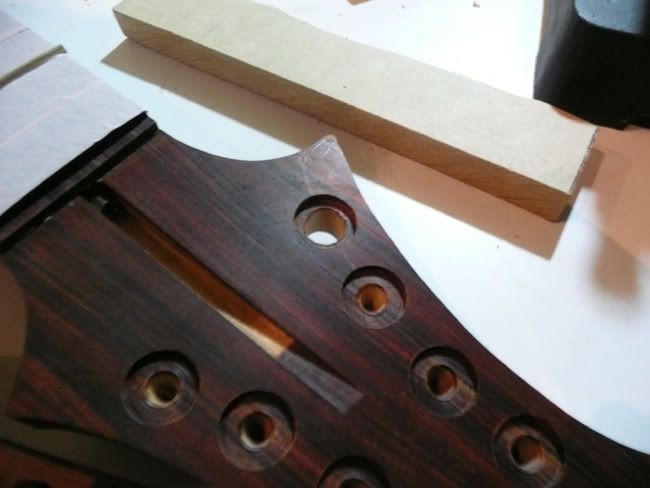
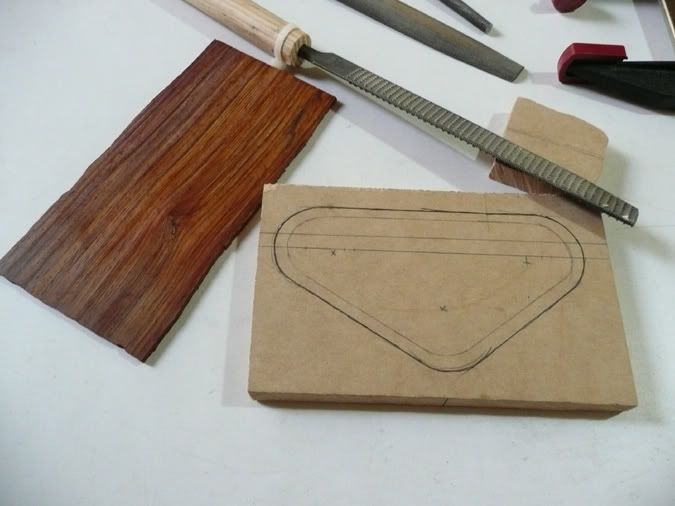
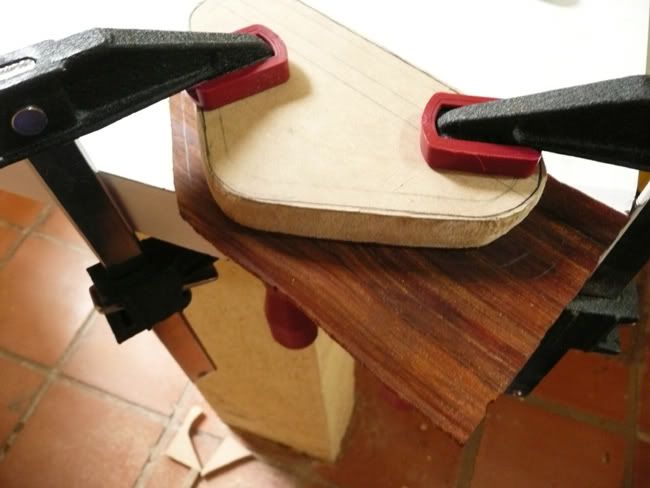
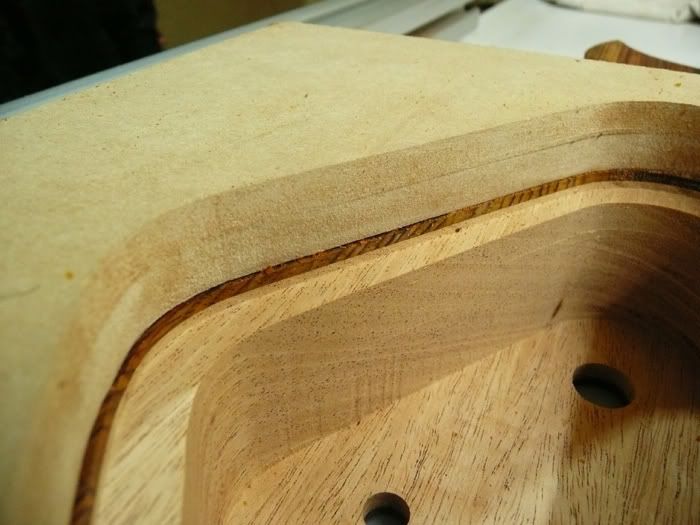
This time, I wanted to cut all the boards for the neckthrough laminate prior to glue up. So I made a template out of MDF.
Headstock front and side(ish) view
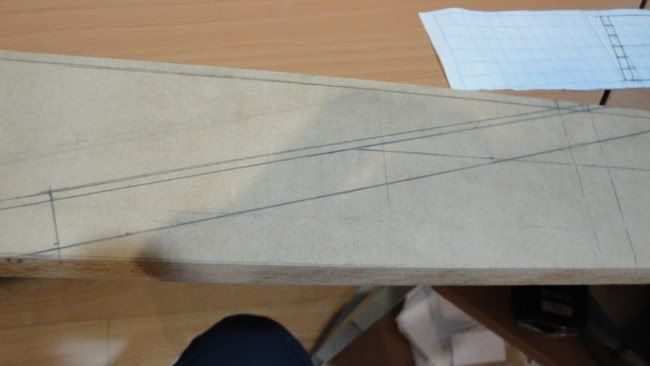
Very reasonable angle:
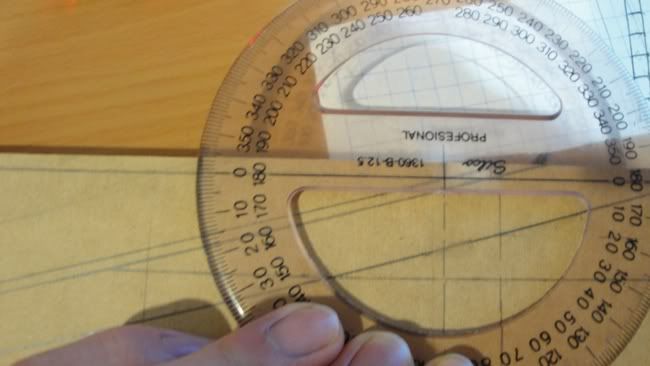
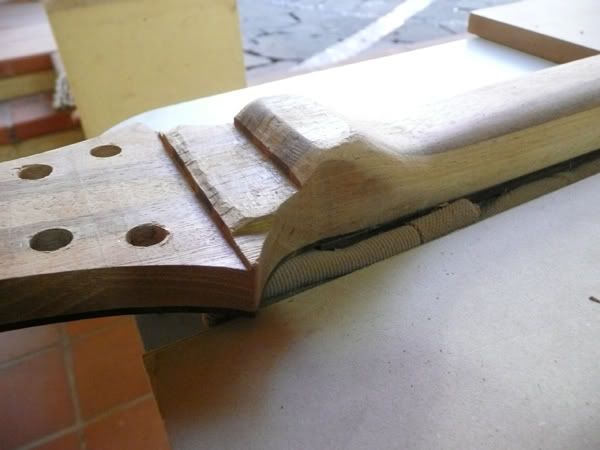
I will cut it with a straight 25mm (about 1") thickness for now. But I made sure there was enough space for a volute with a 22.5-25mm neck taper.
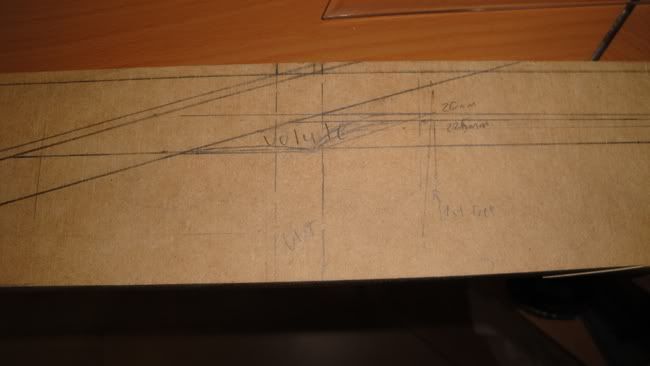
I already took into consideration a 2mm thick maple veneer on the headstock, which will be planed down to the rest of the laminate. The fingerboard will rest on top of it.
Also made sure the truss rod fits nicely.
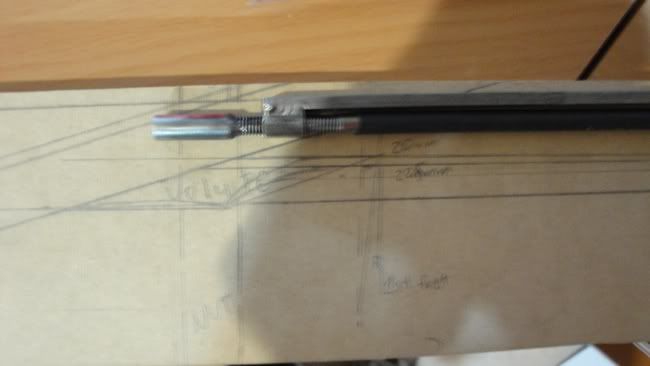
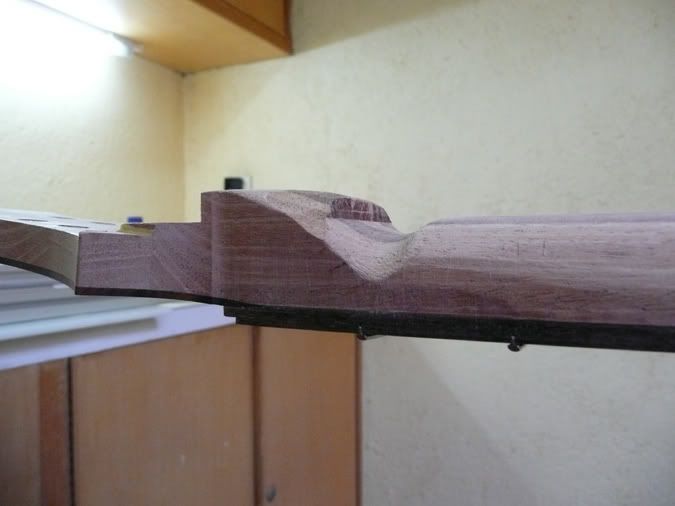
And marked the heel.
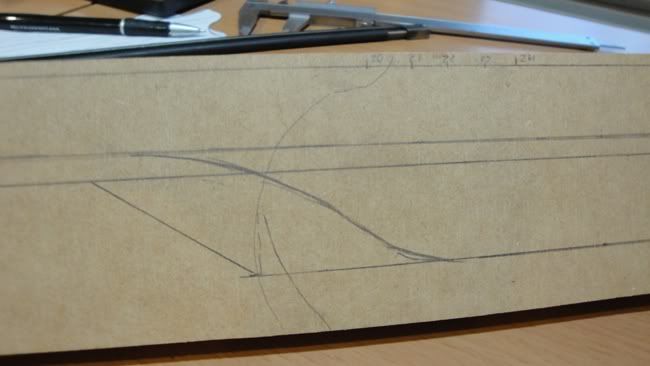
Did I mention I should buy a bandsaw?
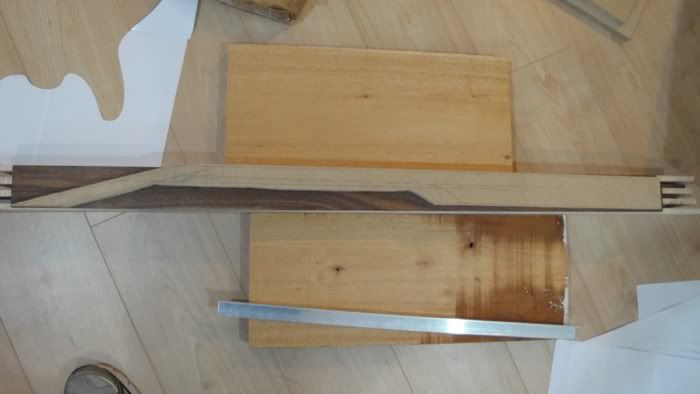
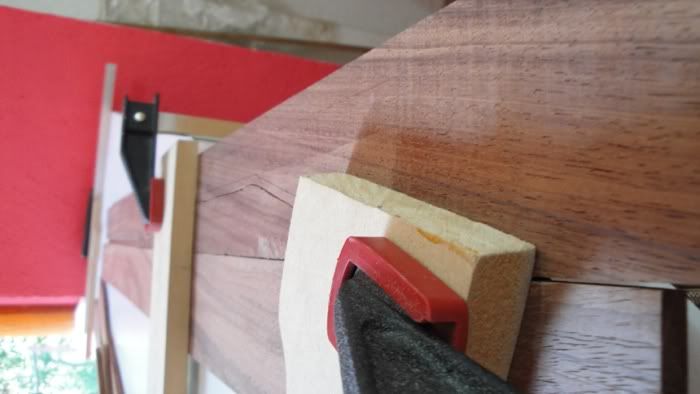
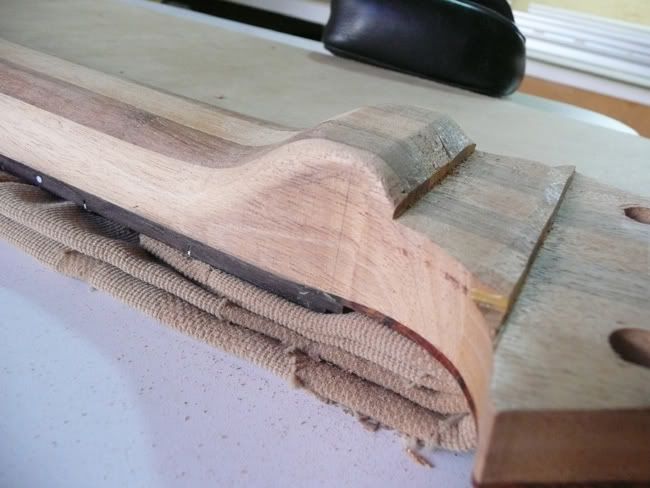
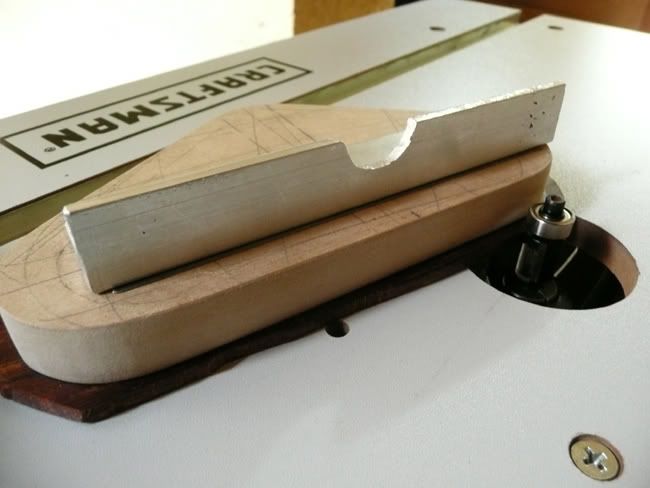
It needs a trip to the router table to get it all completely straight.
-
By the way, that other build I was talking about could end up looking something like this:
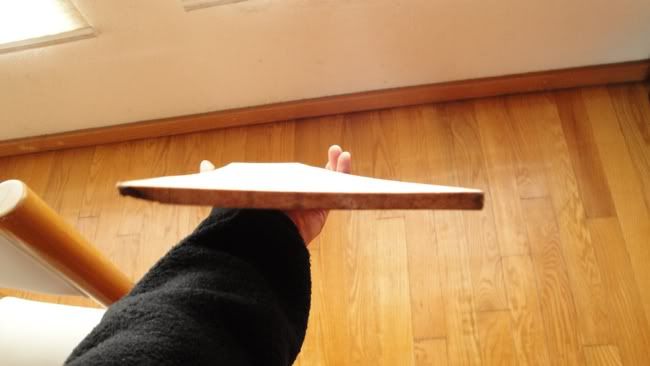
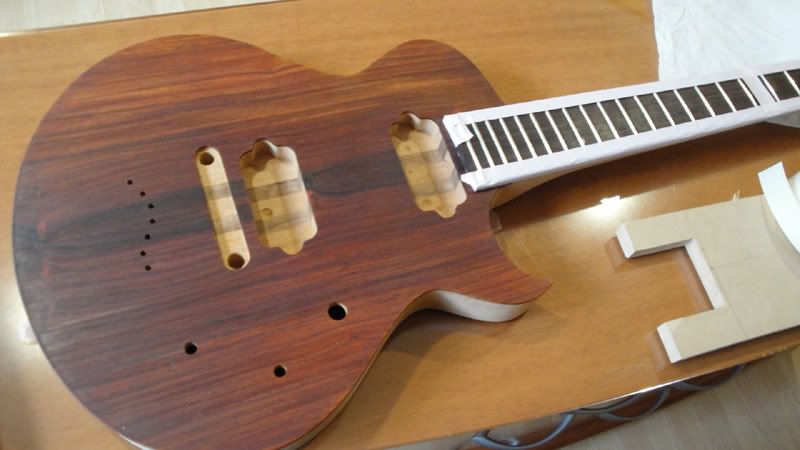
Anyways. I bought flamed maple for the top from the only person who seems to sell flamed maple in Mexico.
The figure is kinda decent, but it's not very constant.

Also, the boards are NOT what I would call straight.
So first thing I did was this:
I will repeat that a couple more times. But they are definately better.
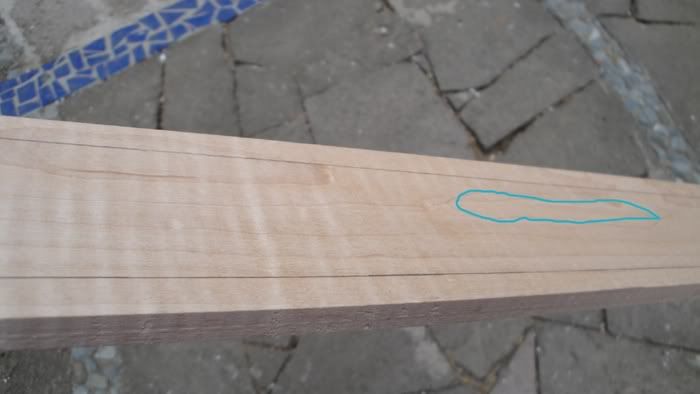
Back to the figure in the wood. As I was saying, it is not constant throughout the top.
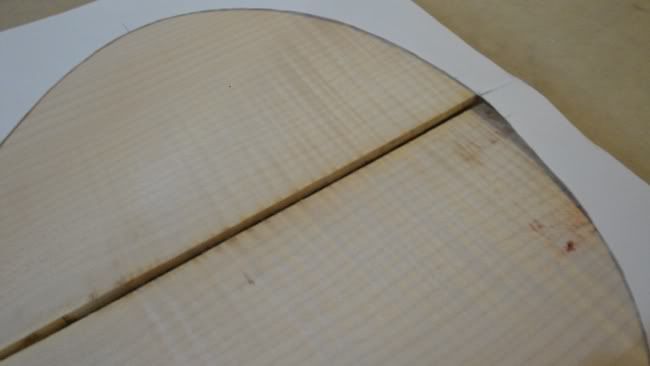
Here you can see some spots with almoast no figure
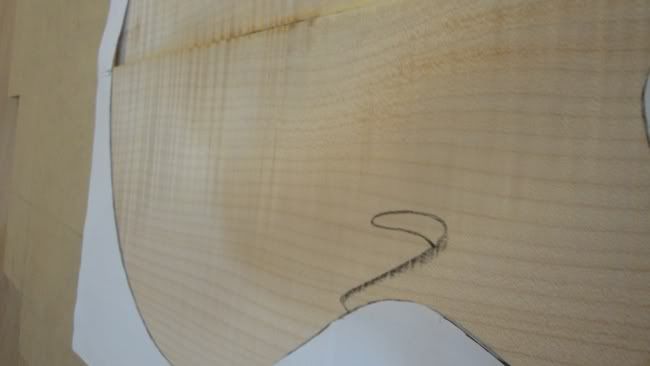
Maybe I could make some fholes around those areas.
Another option is to turn them around and cut the inside, like this:
So that each half would look like this:
-
OH NO, HERE WE GO AGAIN

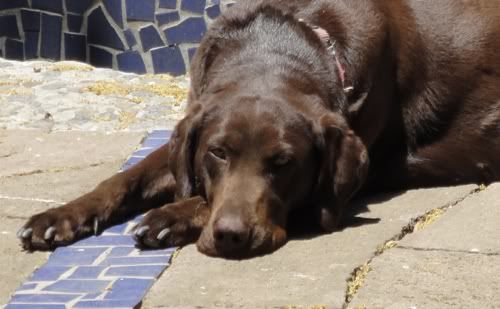
Even my dog doesnt want to see what's to come.
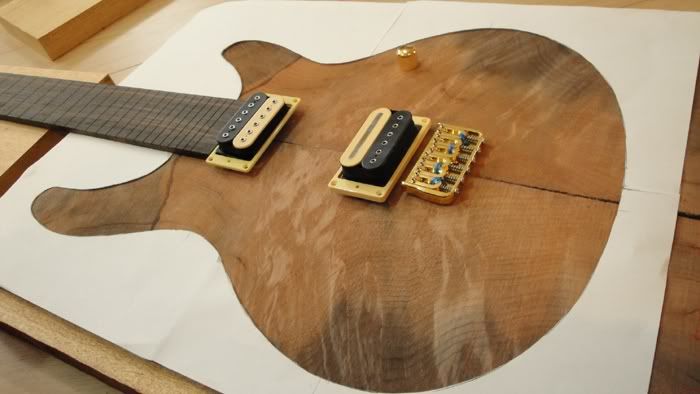
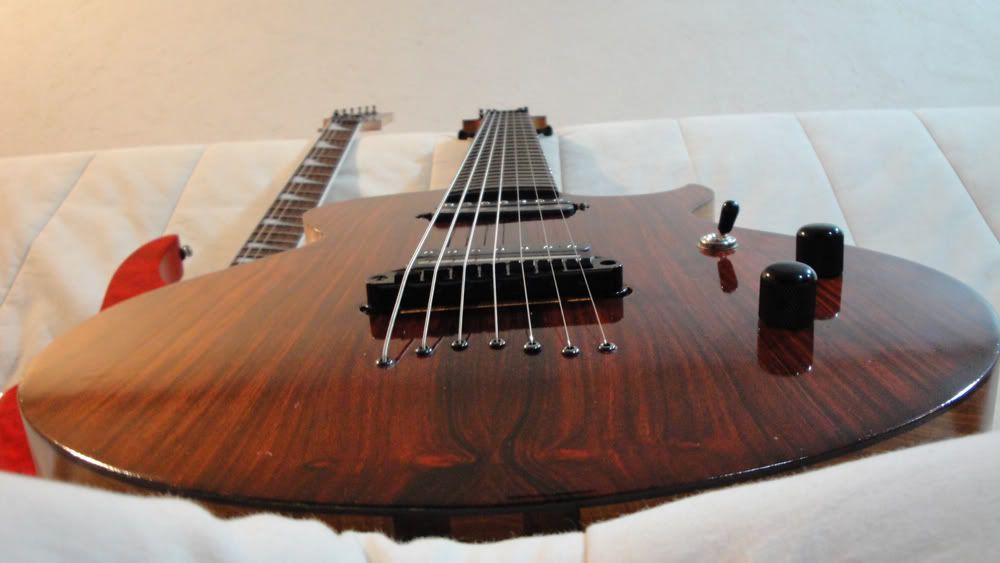
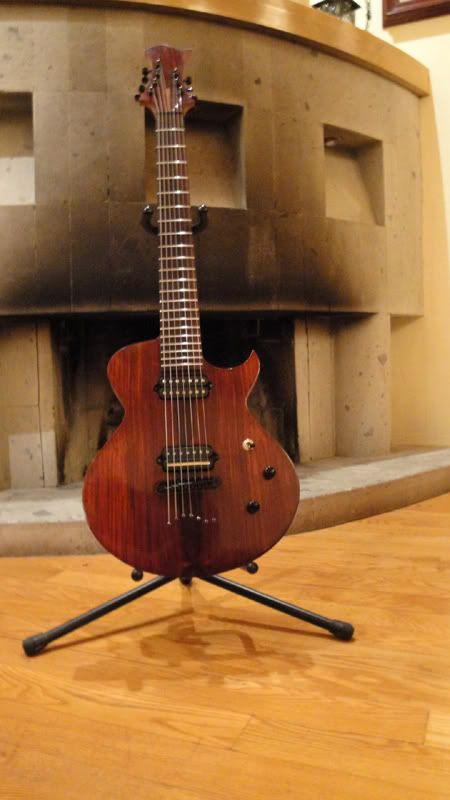
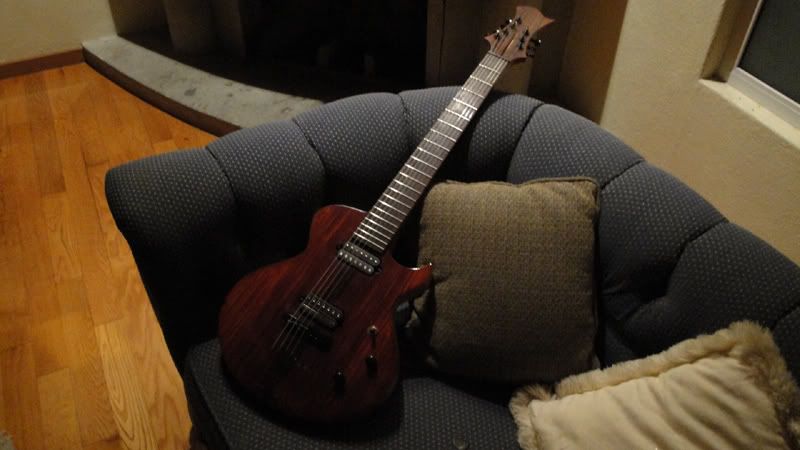
After gaving finished my 1st guitar... this one:
I was ready to start the 2nd one. I even had all the wood and hardware ready. Then I had an idea and put that build on hold.
Here are the initial specs:
Seven strings... nylons.
24 frets... I think
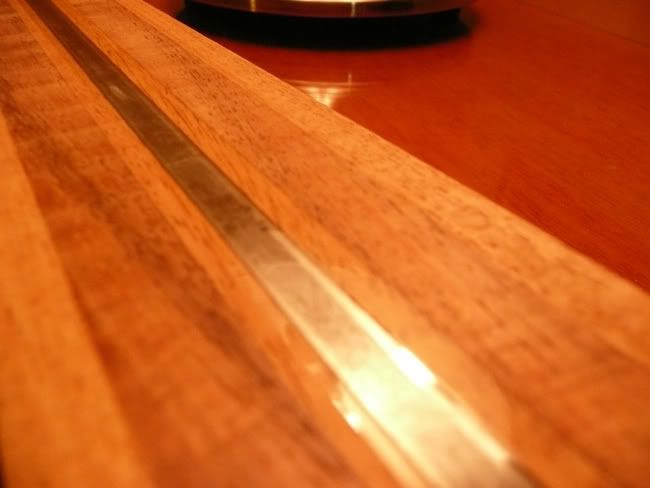
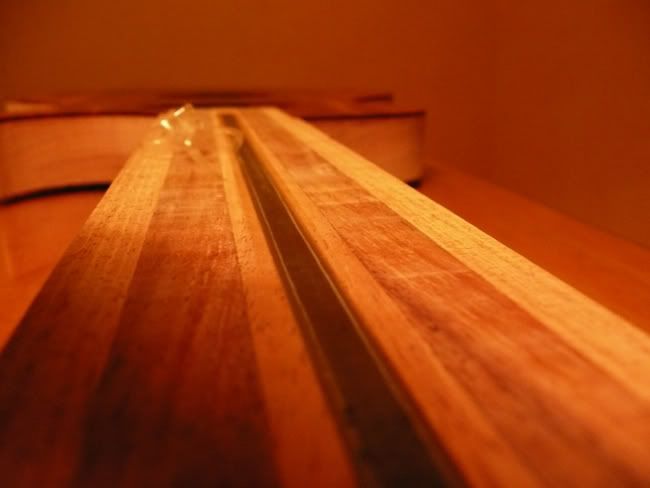
Neckthrough: 7 Piece flamed maple/walnut
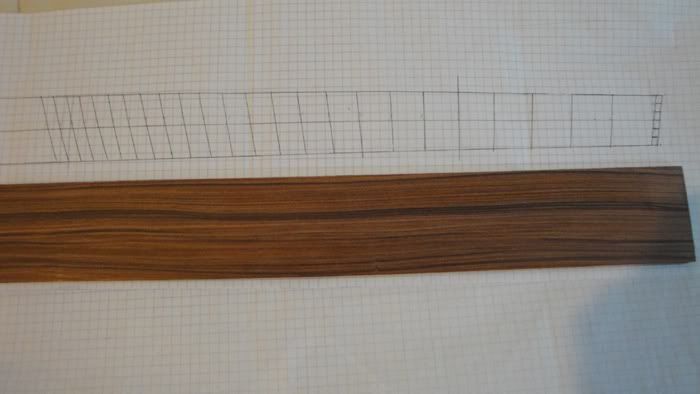
Pau ferro fingerboard 636-666 mm fan. so about 25"-26.2"
Mahogany body... chambered to all hell.
Flamed maple top... stained blue
MAYBE some F-Holes... most likely not F-Shaped.
Natural binding
Nut material: honey badger bone. Ok, ok, just bone.
Ok, this is the pau ferro board I'll use for the fingerboard:
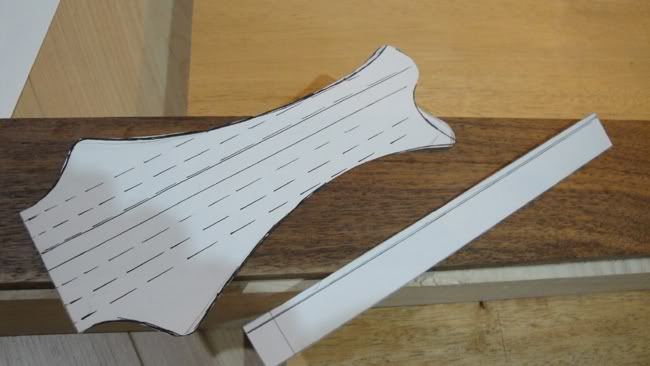
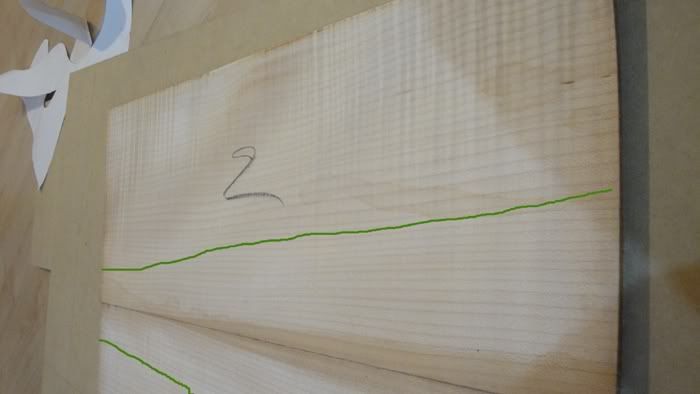
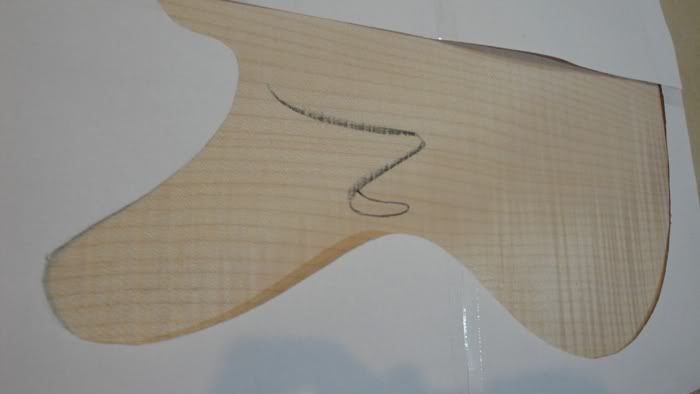
The initial shape of the headstock. It's changed a bit since I made this drawing.
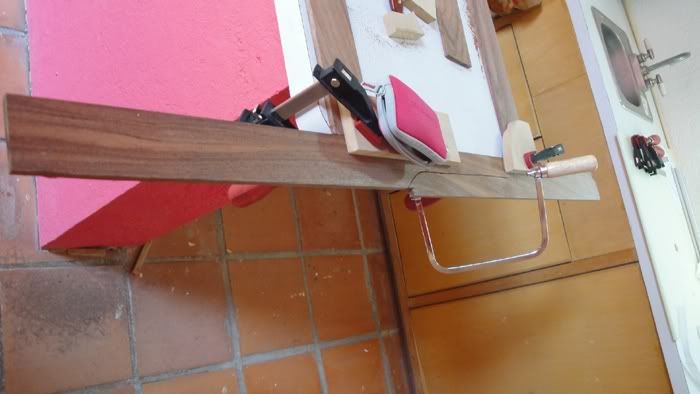
By the way, since I still havent bought a band saw, everything is being cut by hand... again.
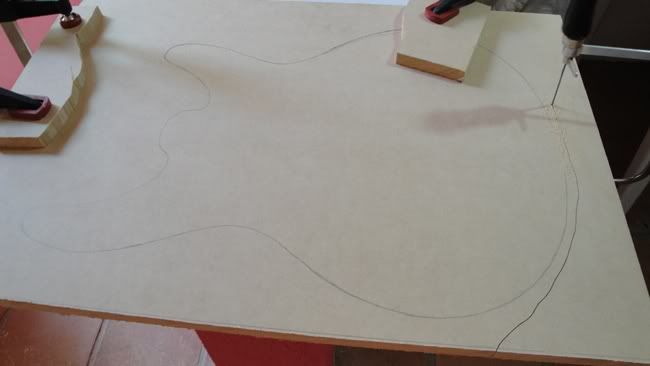
I'll eventually buy a band saw... yeah.
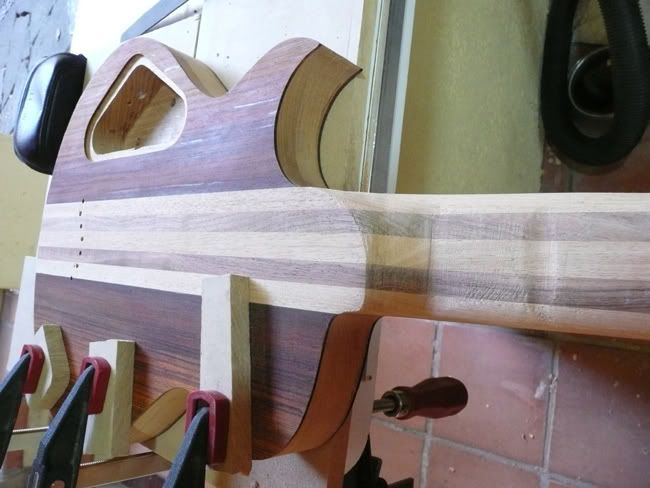
The templates still need quite a bit of work, but they are getting there.
Gratuitous pic of my dog being super bored.
-
That top is gorgeous!
Best of luck with your build.
-
Oh I'm liking this build a lot. I got an idea for a guitar that involves some serious chambering, and this thread is giving me ideas on how to do it.
-
Excellent. I suggest a run at GOTM.
Thanks for your comment and for all your insight. We need more people sharing what they know the way you do.
About the gotm, are you entering one? if so I'll just pass
FIRST!? Day-um! DAMN! Nice!
Chris
Yep, first time doing woodwork too.
That was one of the most enjoyable, humorous and well documented builds
 And what a stunning result for a first one! I just love all the ingenious solutions you came up with a limited set of tools. Like, putting that router into a thousand uses and the drill press on top of the super jig Congrats man
 I got to say it was incredibly enjoyable making this guitar. I might get new tools for the next builds, but as it stands right now, it's either a bandsaw, or stuff for other guitars. And yeah, the drill press on top of the aluminum rig was a really epic moment.
-
And after this, it's just finall assembly. My camera was on vacations though, so you only get pics of the final product.
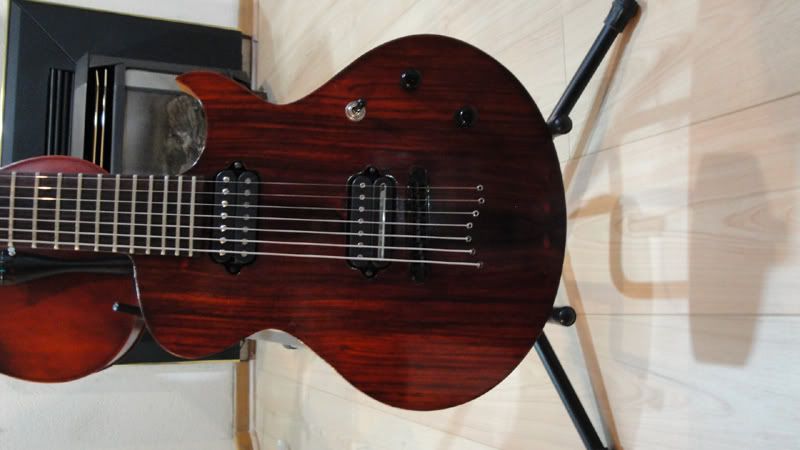
Ok, now that the pics have been administered, I would like to thank those who helped me build this. First, my dad, who helped me a lot when I couldnt build because of my leg acting up. Also, everyone on these forums giving advice, or insight, and in general cheering me on to finish this project.
When I started the project, all I wanted from it was to learn a lot. I think I succeded on that, and I got a lot of ideas, and thoughts on how to make the next ones a lot better. As an added bonus, I got a guitar that (IMO) looks quite well. I detailed the process as much as I could, and I hope it helps others.
That's all for now, thanks for reading.
-
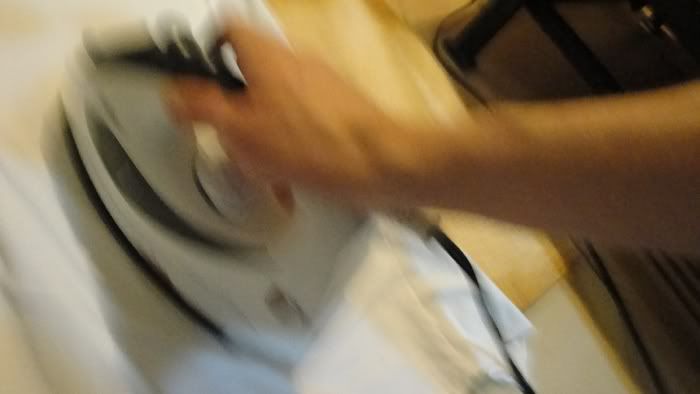
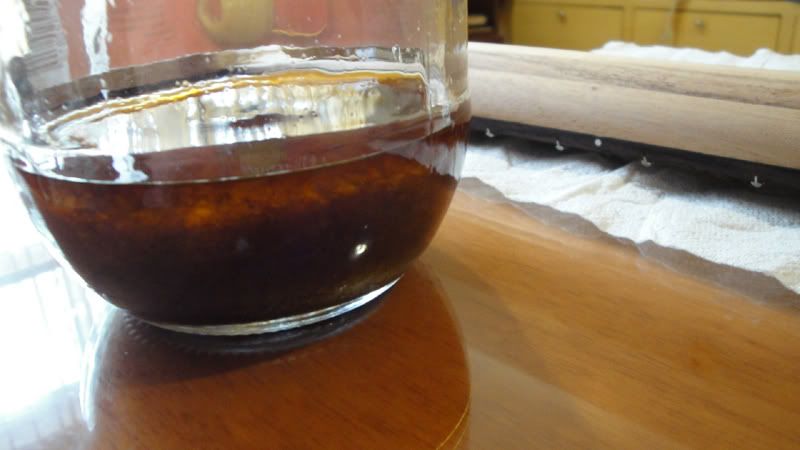
Make a muñeca, and queue some appropriate finishing music.

First pass:

After this, I did some wetsanding with 1500 grit.
And applied the 2nd coat.
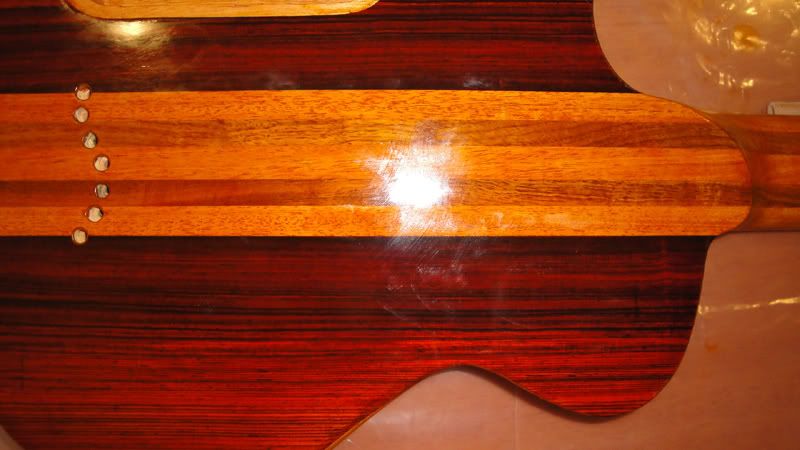
You can apply a new "layer" after about 10 min since it dries fast. And the surface starts to look beautiful.
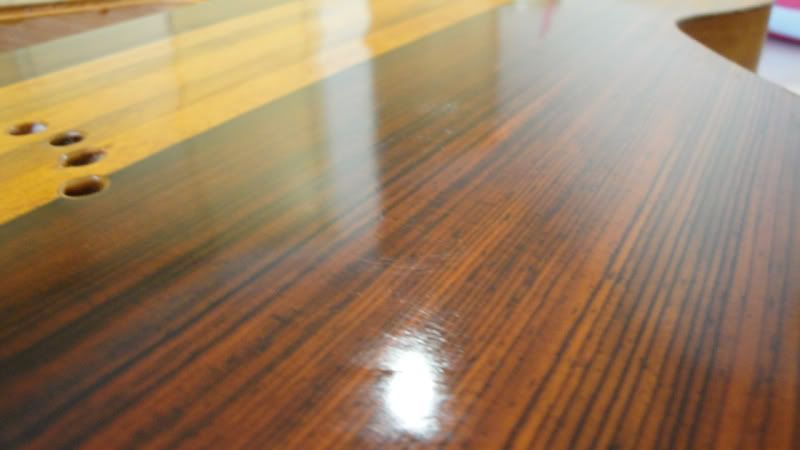
Until you end up with a playable mirror.
-

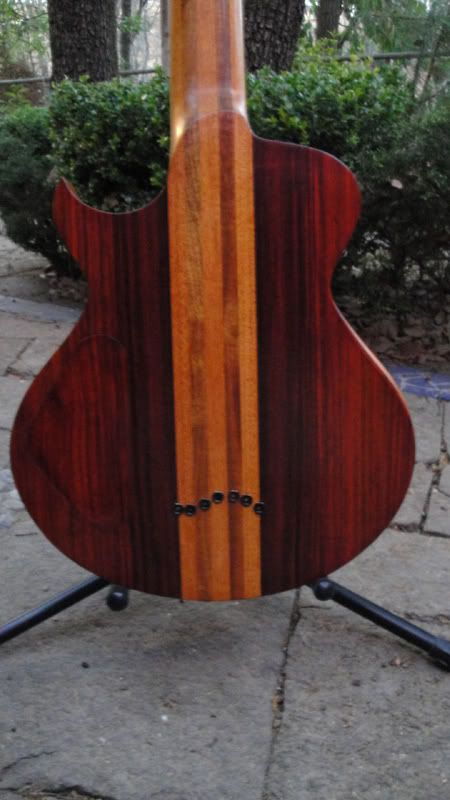
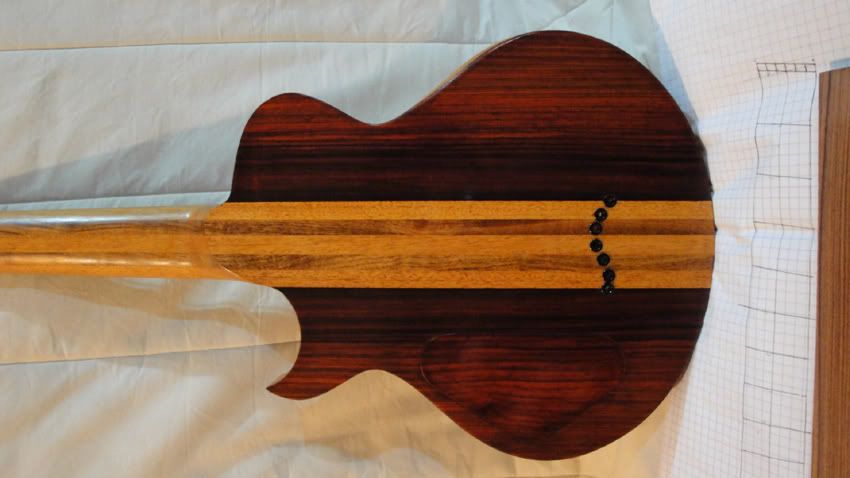
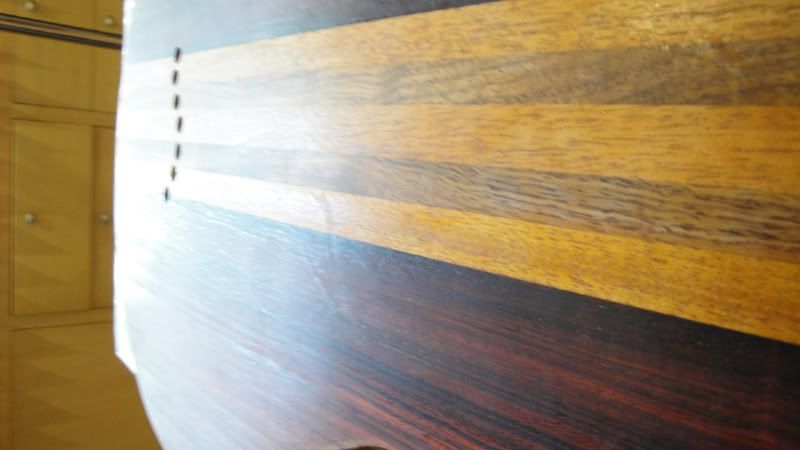
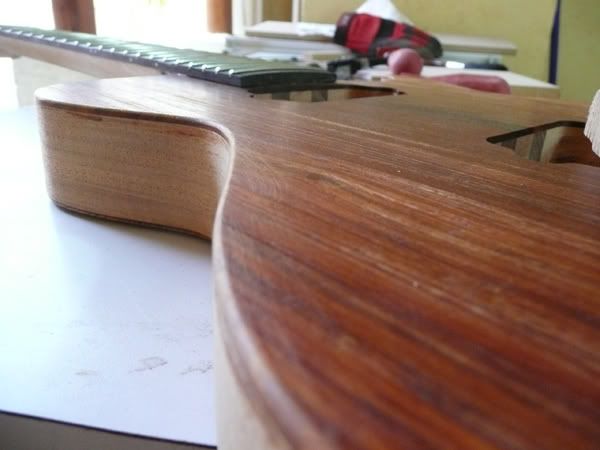
Also rounded the edges of the body.
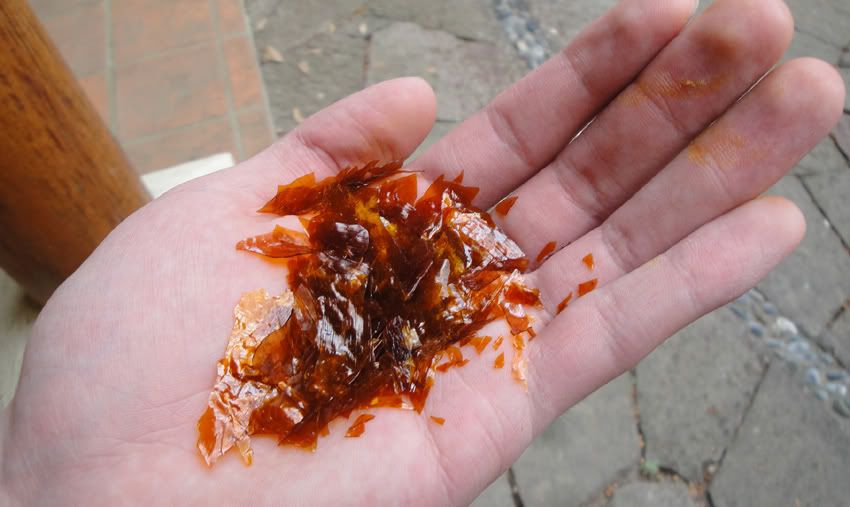
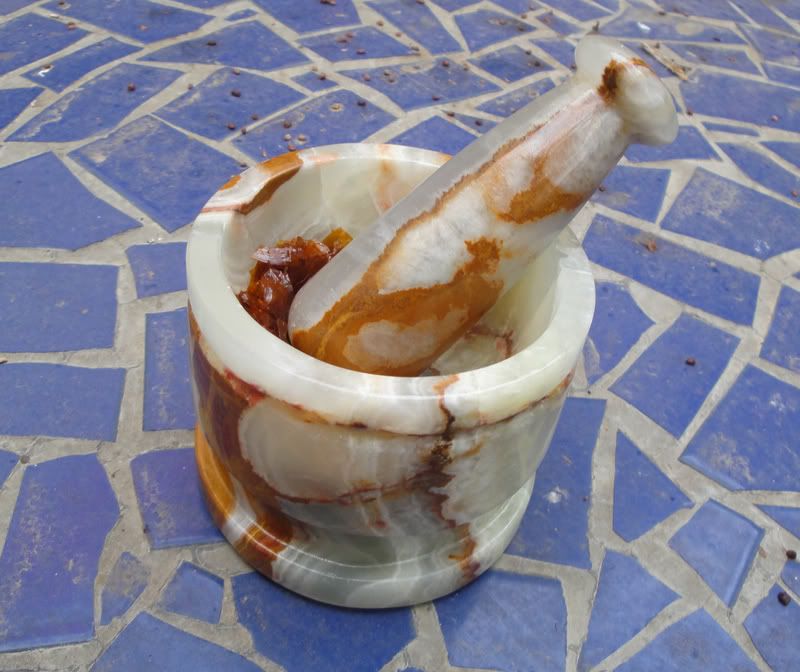
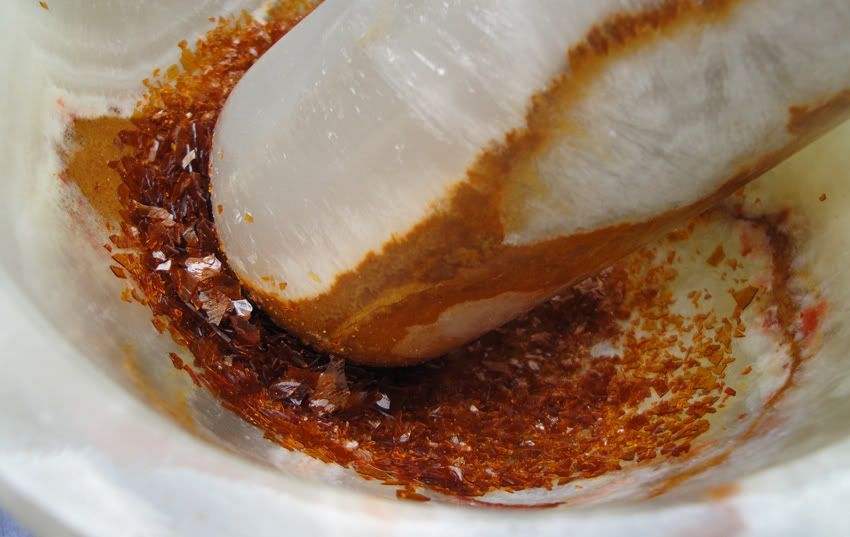
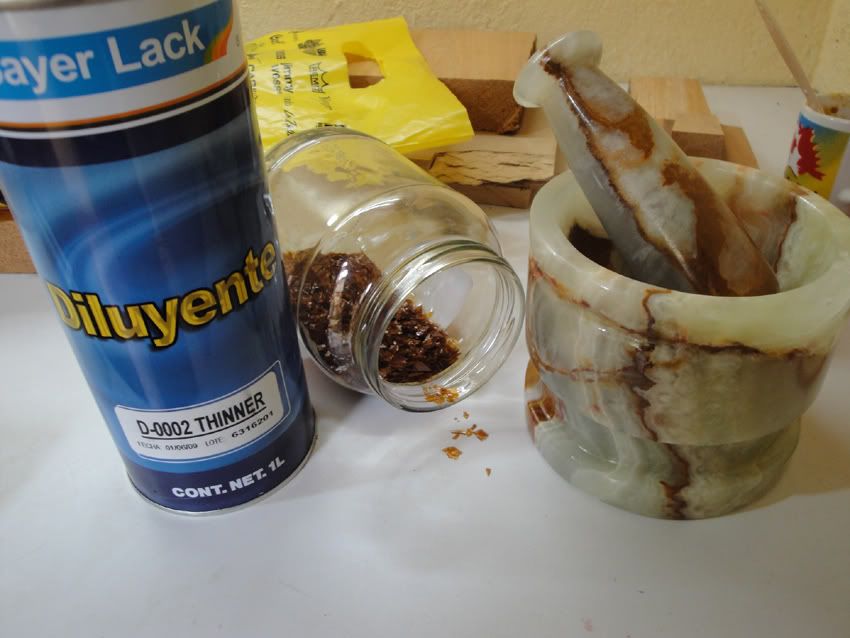
Ok, I finally got some shellac flakes. I tried out different ratios that would work on the cocobolo, and found that around 2.5 parts flakes, 1 part thinner works great.
Also learned to cruch the flakes or they take forever to dissolve.
Cleanup:
-
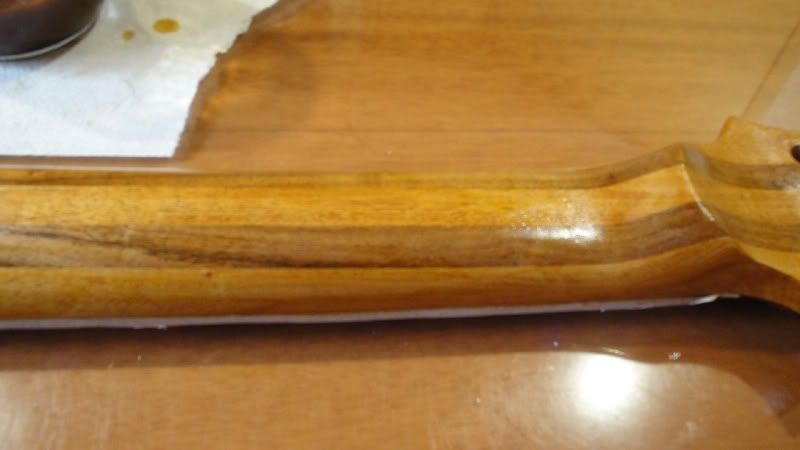
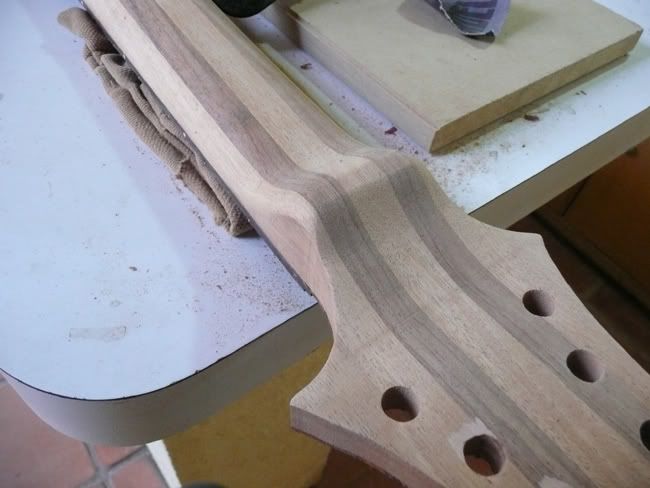
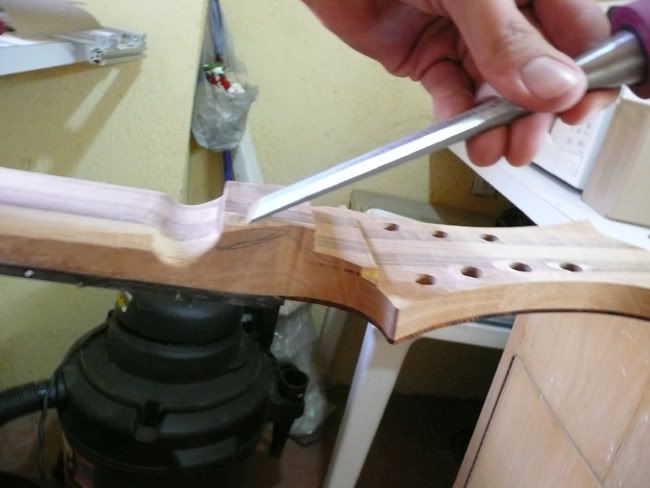
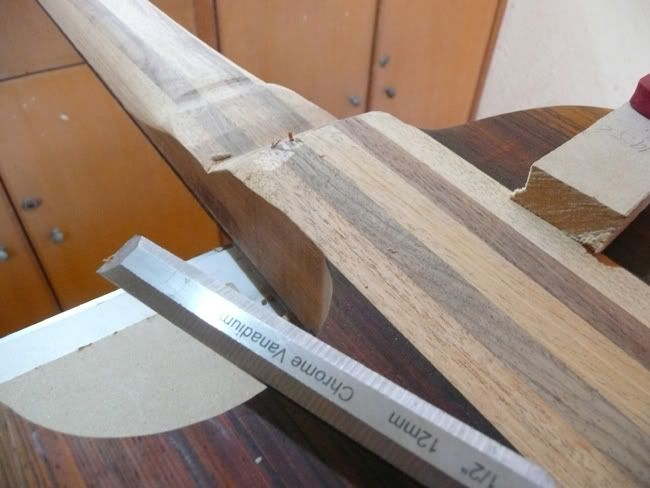
Fun part starts here. Time to carve a neck!
First finished leveling the back, since the laminate was a tiny bit higher still.
Then I marked the proper thickness of the neck at the first and 12th frets with a rasp, and joined them using a spokeshave
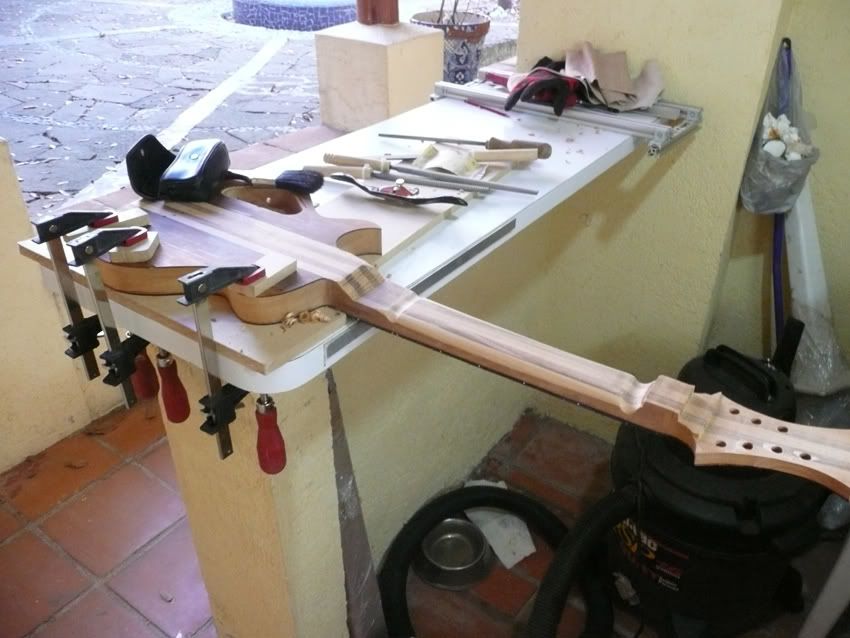
Also started to carve the heel and volute.

-
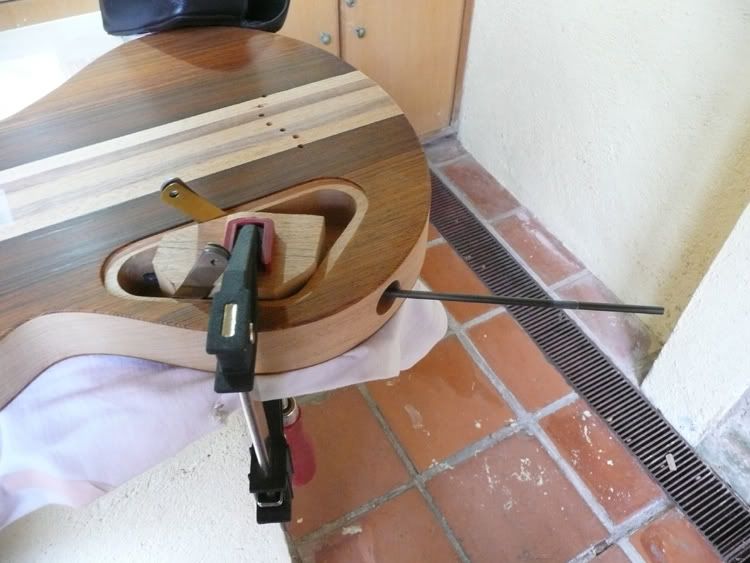
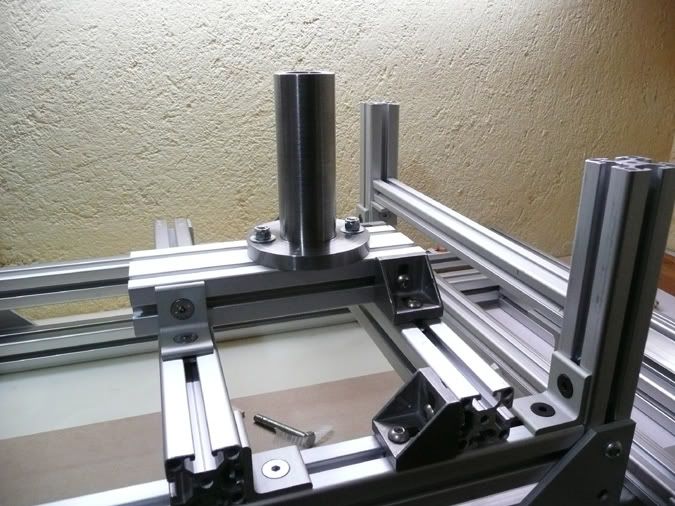
AND MOUNTED THE DRILL ON TOP!!!!
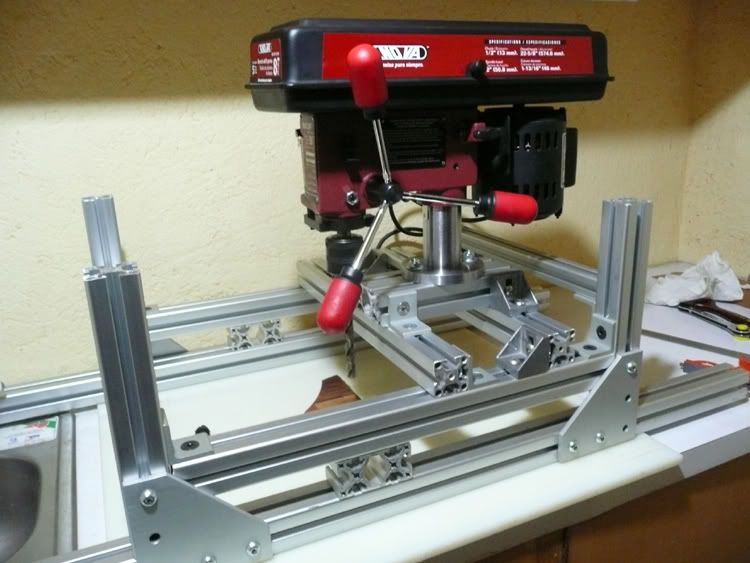
This allowed me to drill wherever I wanted. It's basically a 3 axis drill press.


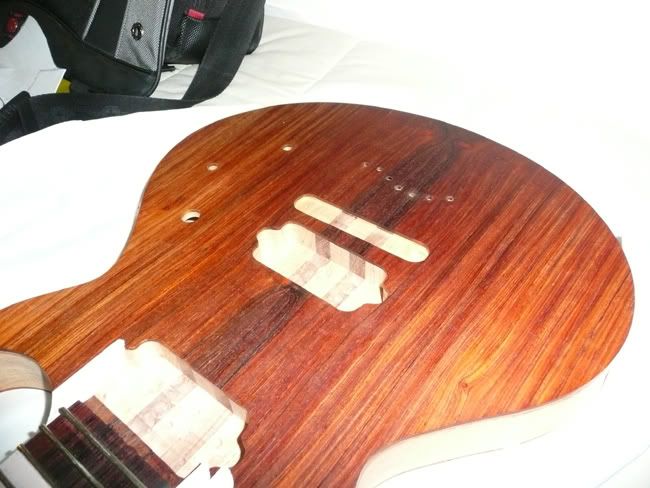
After this, I still had a ton of drilling left.
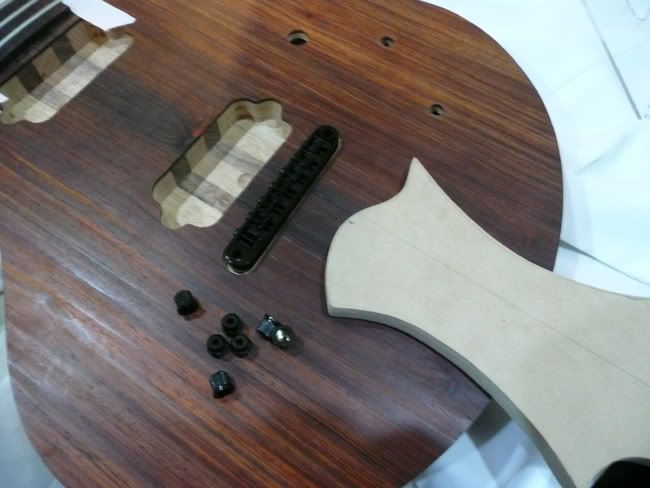
First in the list in the output jack.
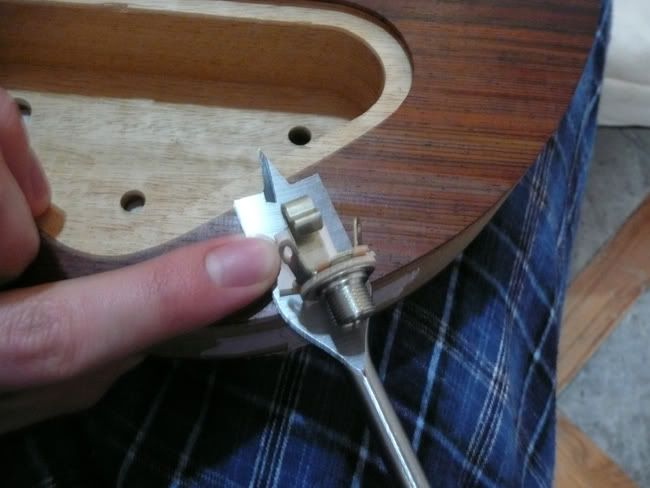
Then the bridge pickup.
Something like that, but with less of an angle... It's just weird holding it in place and taking a pic where you can see what's goin on...
Anyways, to connect the neck pickup to the controls cavity, I had a bushing made. This prevents the long drill bit from bending, at it keeps it on target.
To great results I might add.
-
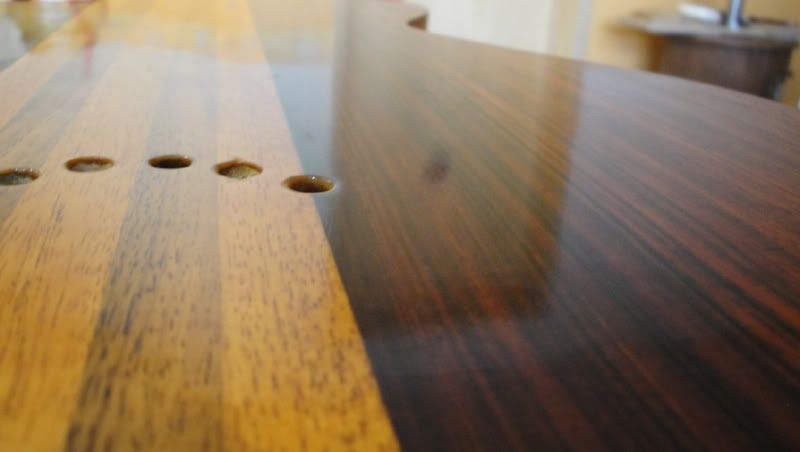
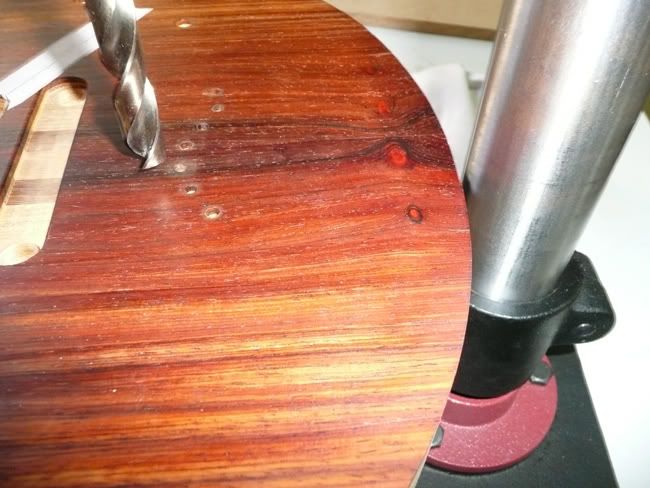
Drilled pilot holes.
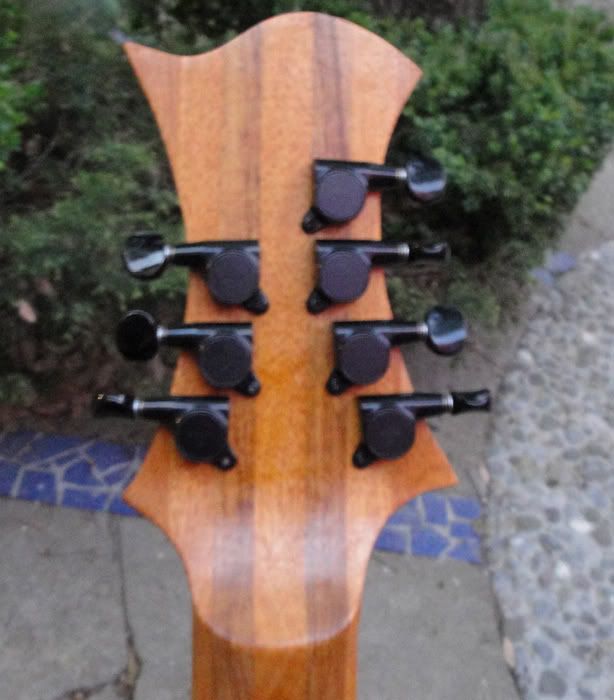
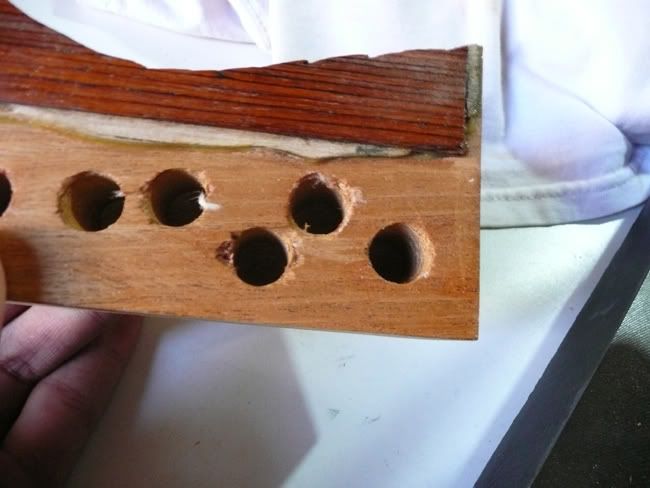
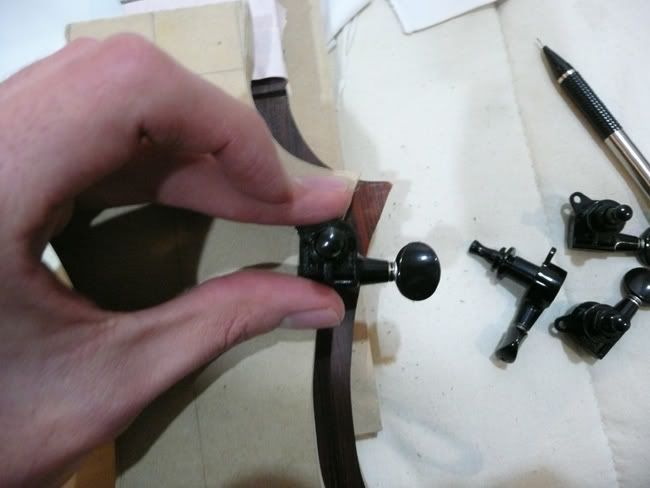
Then the recess for the tuners
and the holes for the tuners themselves.
And finally for the ferrules.
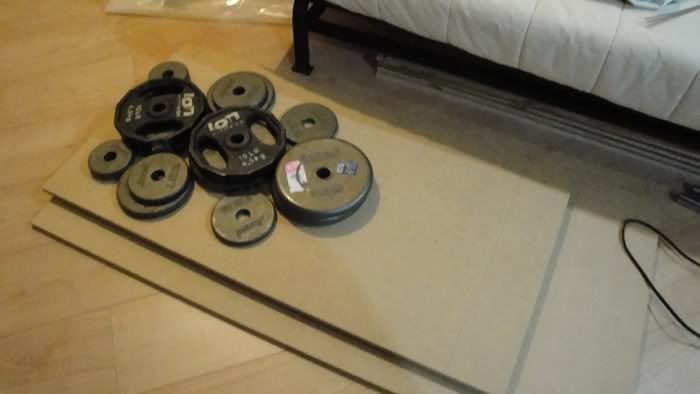
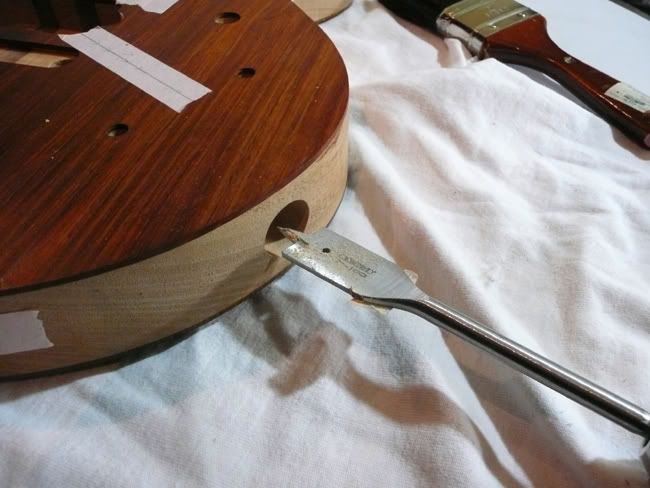
OK, so HUGE problem ahead.
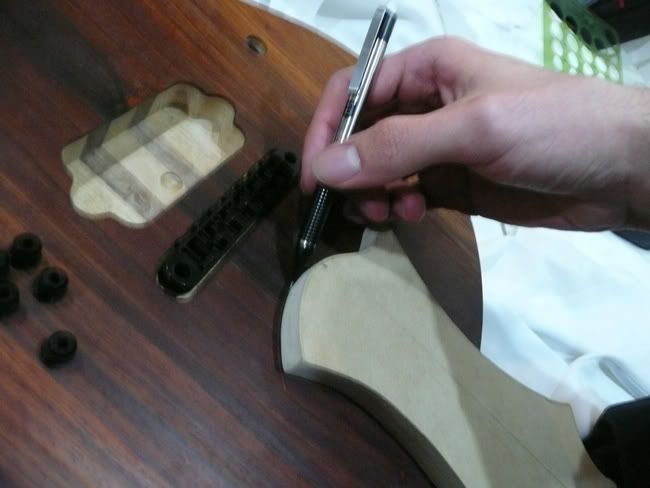
In order to drill where the bridge posts go, I had to use a drill press to be perfectly accurate.
BUT, my drill press isnt big enough.
The distance between the column and the bit is not enough. The bit itself is really agressive, and when used with a hand drill, the results look like this:
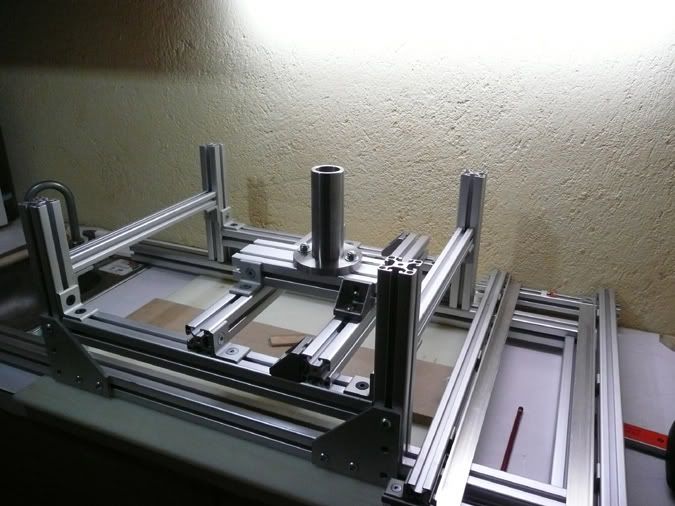
Sooo, I had to bring the super rig back from the dead.
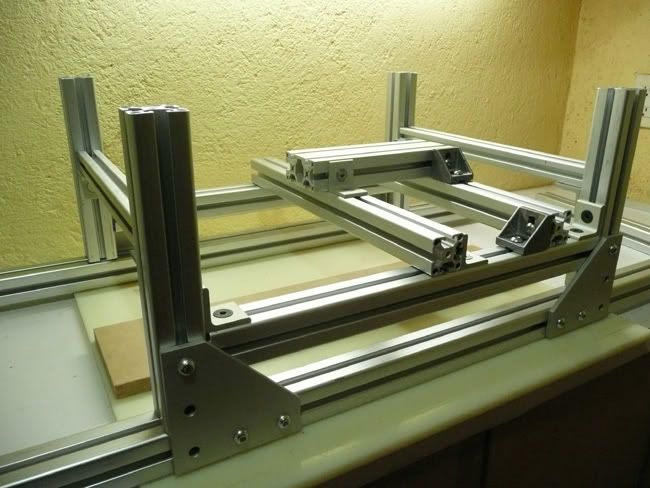
I had a new column machined for me by a friend, and munted it on the rig.
-
Fretwork!! Found some stuff to support the neck while I hammered the frets. By the way, they are SS6100, and oh man they are hard.
Those are actually tile cutting pliers. And still, I could barely cut them.
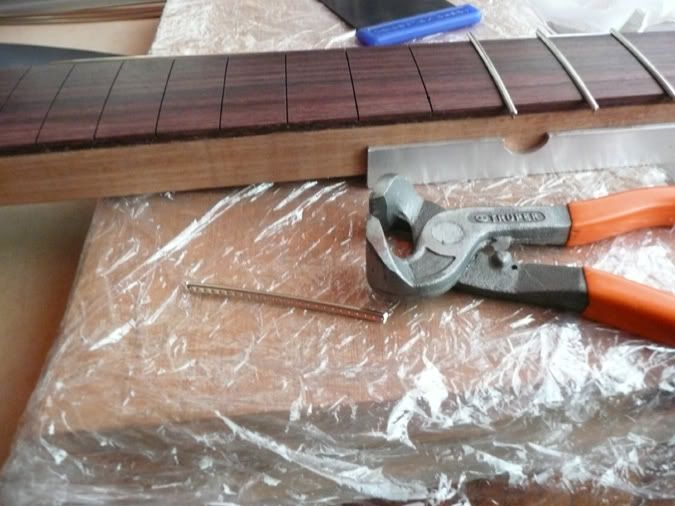
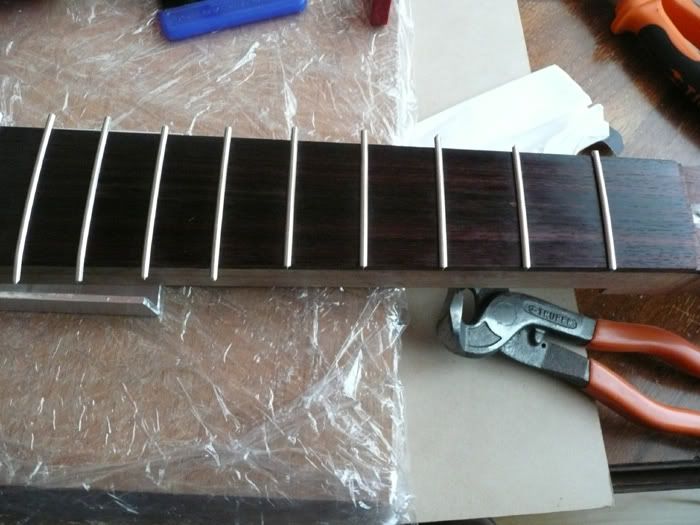
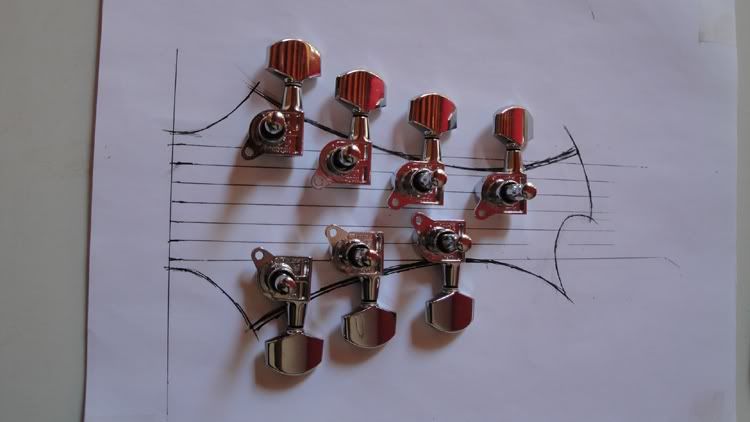
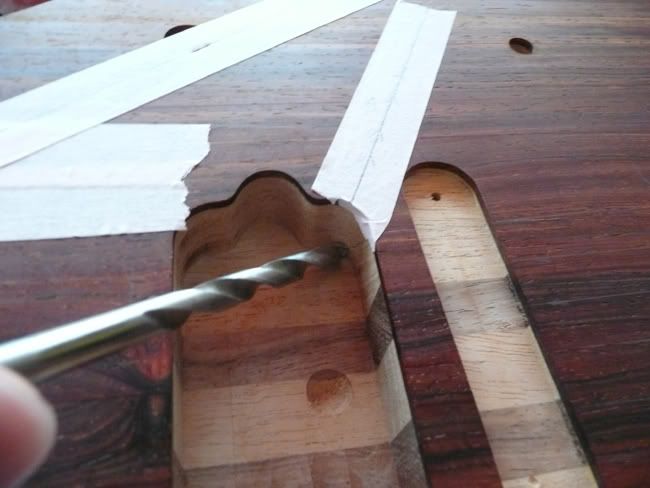
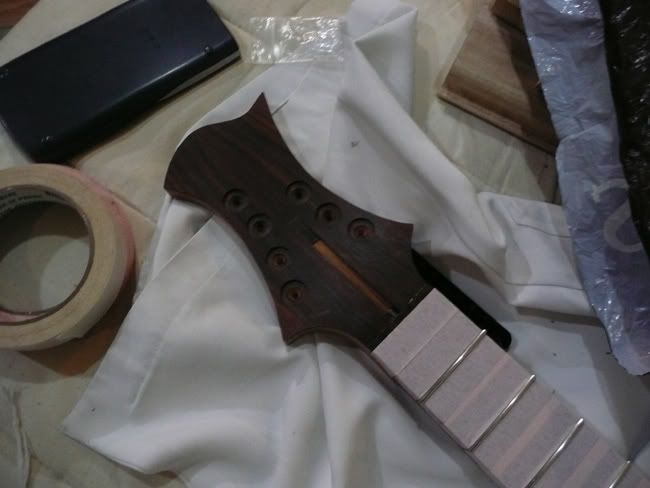
With the fretting done, I proceded to drill for the tuners and ferrules.
I used the headstock template to help me place the tuners.
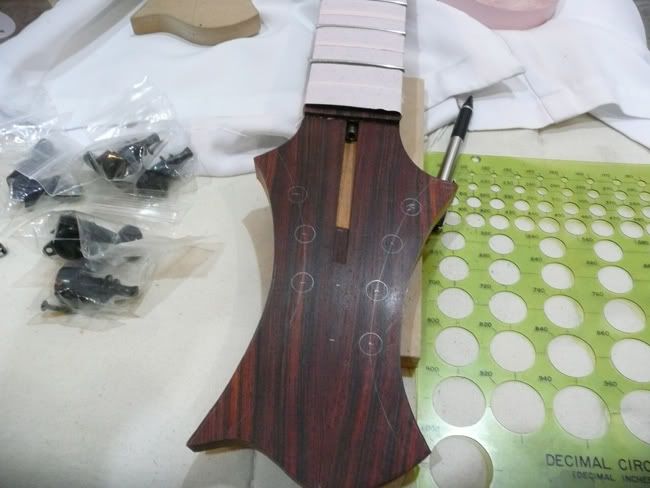
Then I used the template again to help me place the ferrules, since I wanted them to follow the same curve as the top of the headstock.
-
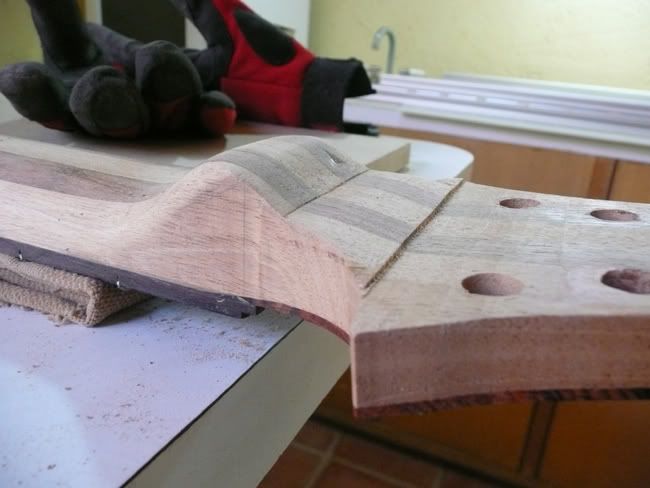
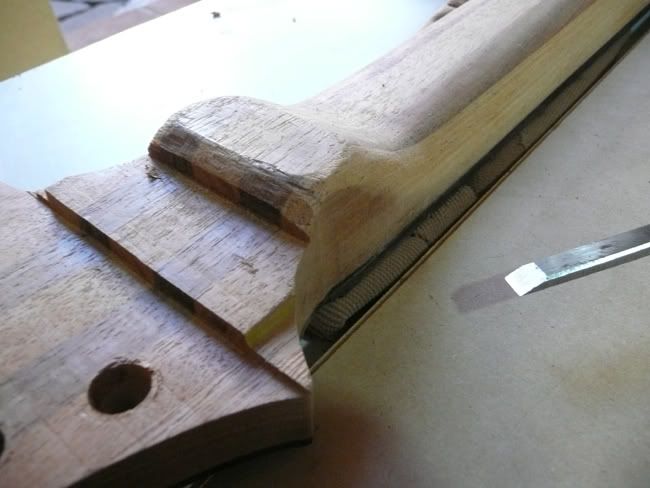
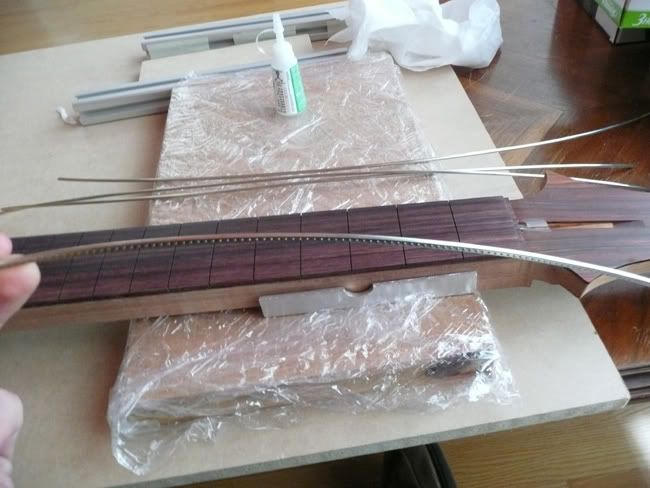
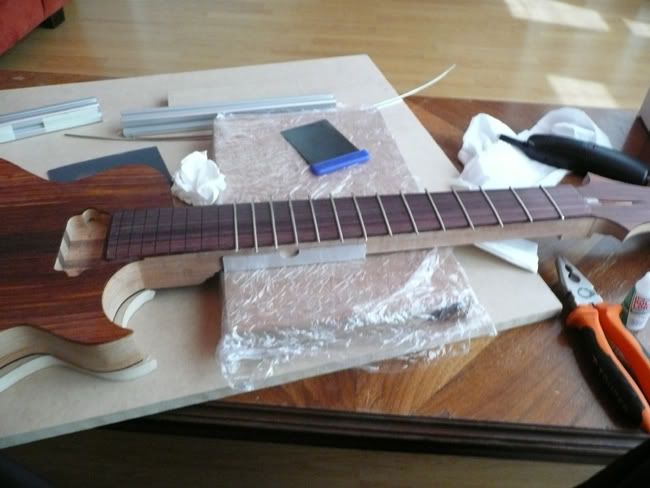
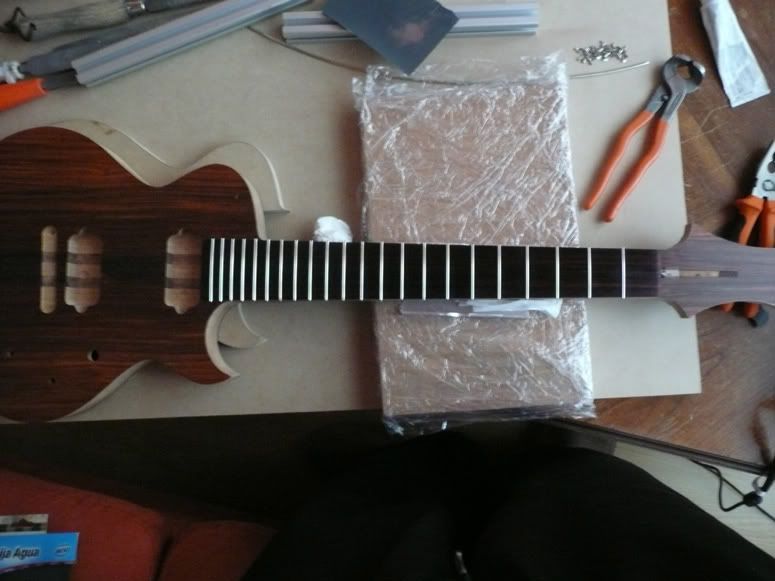
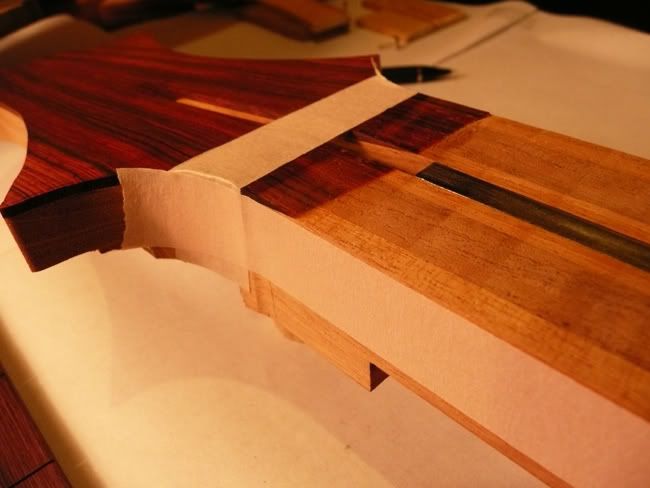
Then I proceded to glue the fretboard.
Used a bit of scotch tape over the truss rod
And cut off the excess with a blade.
Drilled small holes at a couple of frets to place pins to keep the board in place when I applied preassure.
Masked the edges.
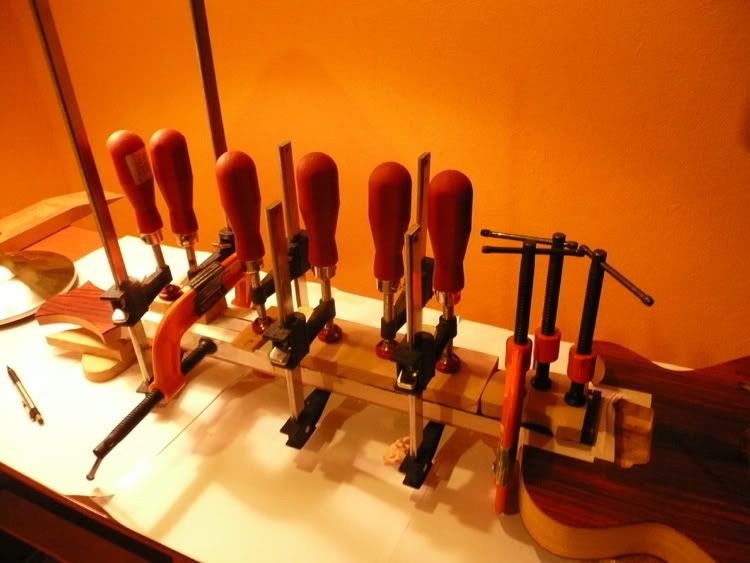
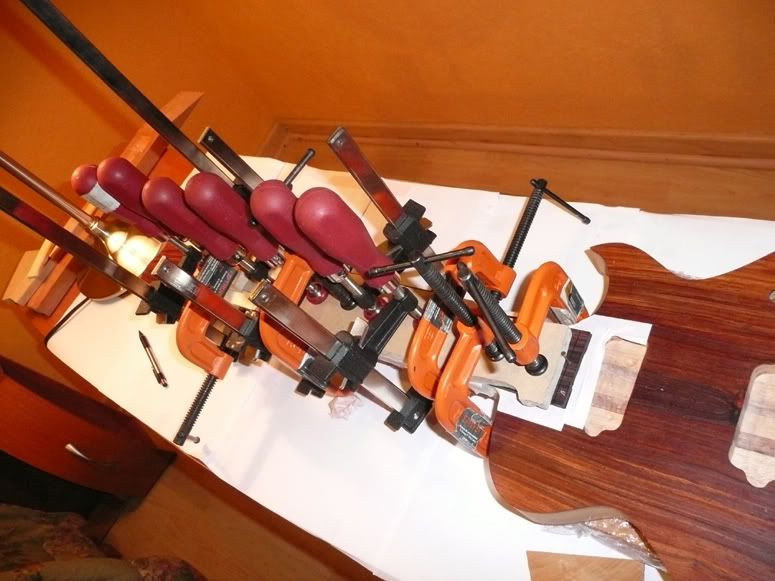
Used some alluminum as guides to make extra sure it didnt shift.
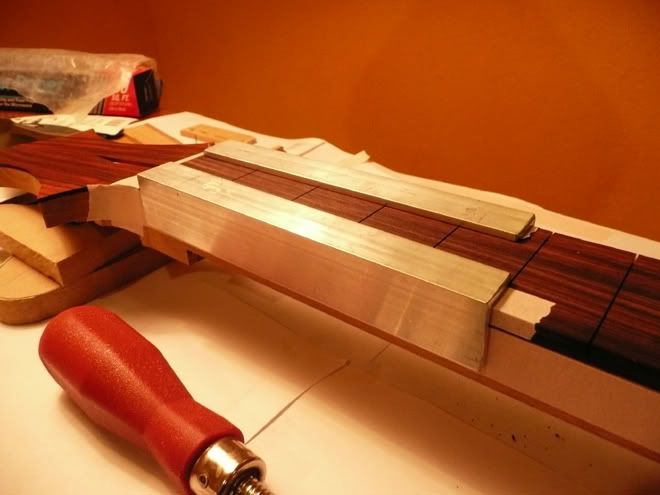
And clamped it to hell.
Afterwards I radiused the board with a 16" block.
and checked that it was perfectly straight.

-
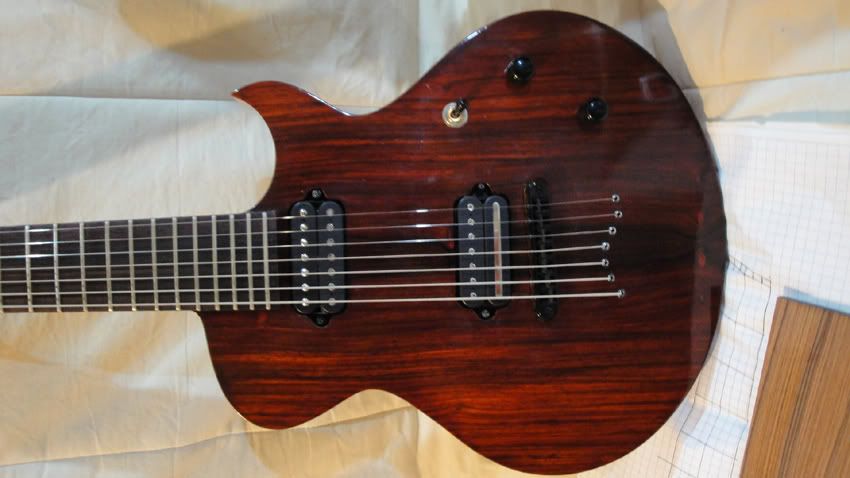
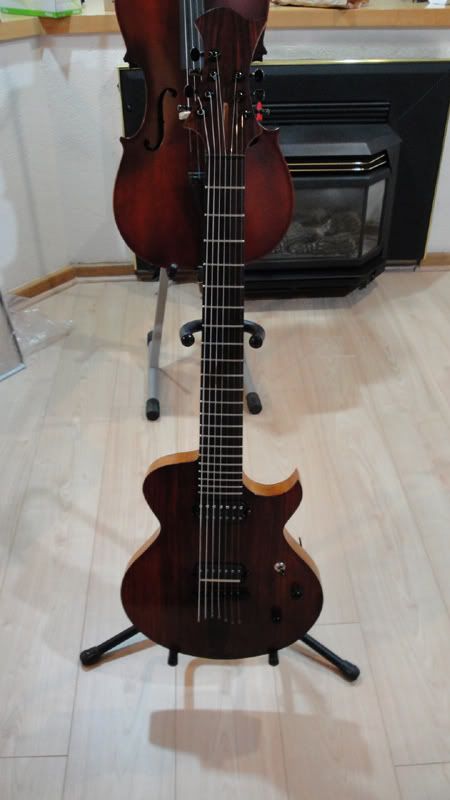
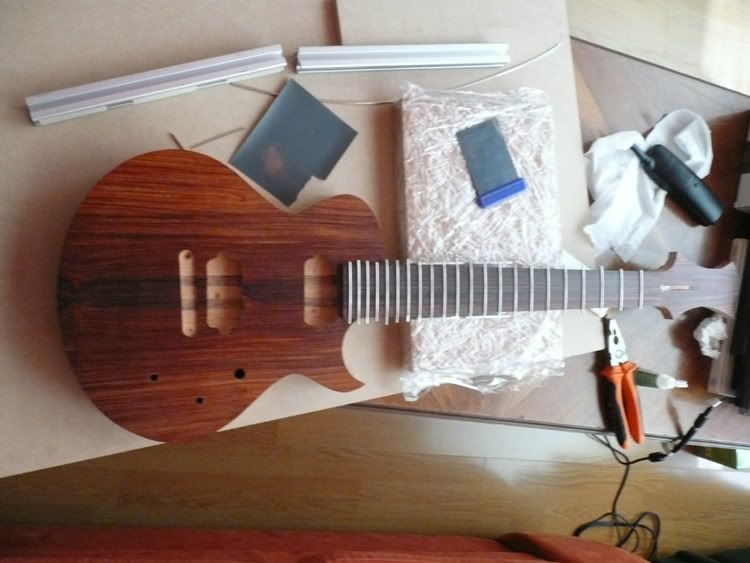
Well, I've finished the guitar. Sorry I didnt keep updating the thread in here, but I'll make up for it now.
I had to stop building for about a month because of a lame leg injury, but once I got better, I went at it again. Here we go.
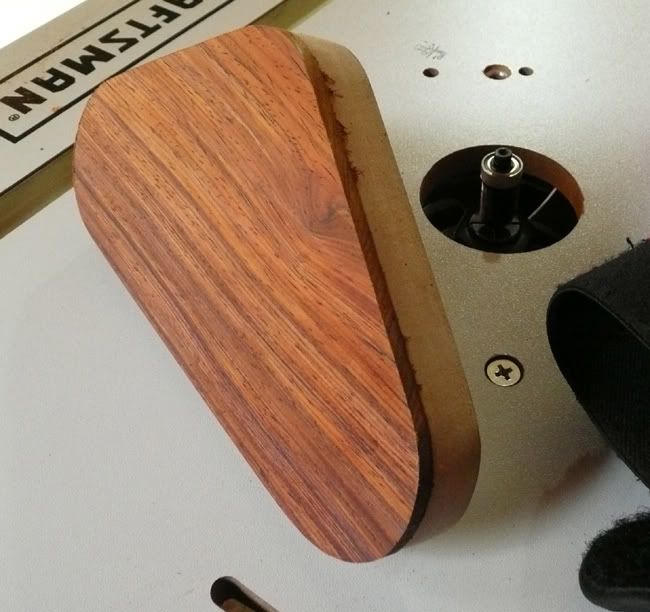
Last update was of the controls cavity being routed. Now we need to make a cover for it, and a recess to fit the cover.
Looked at my cocobolo leftovers for a piece that sort of matched the grain, and leveled it.
Cut it with my trusted coping saw
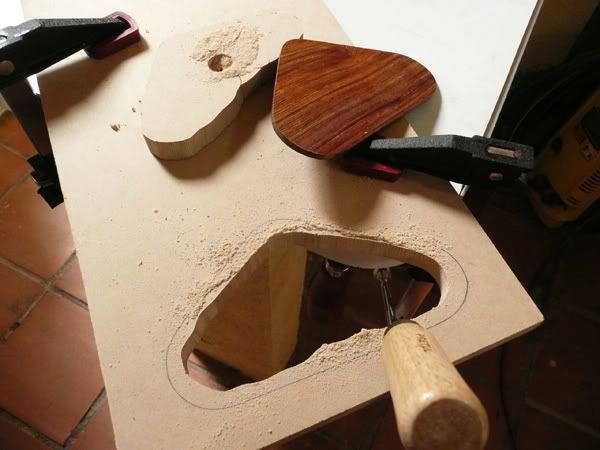
and route it with it's template.
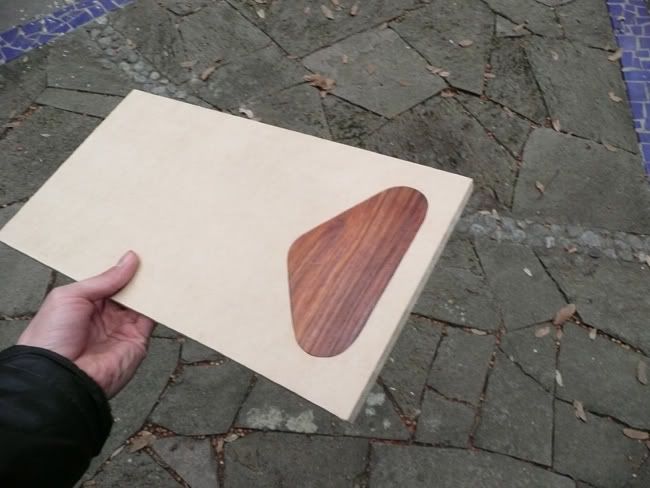
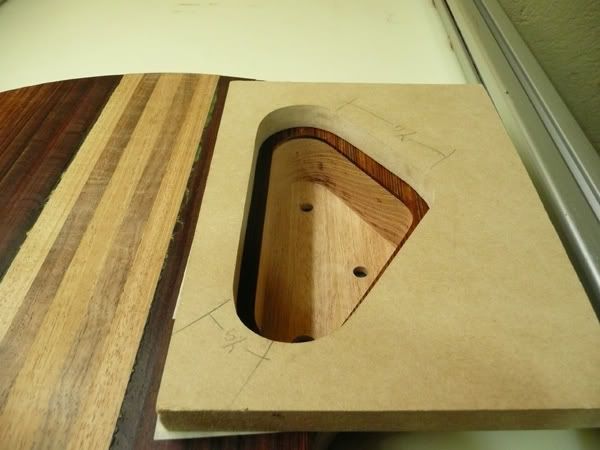
Then make a new template to recess the cover into the back:
-
I wouldn´t bother with Martí...I asked. No clue (but hey, if you want to buy a less than mediocre hiking pack for twice the money, they´re the guys!). Strange about Home Depot. Not strange they don´t know much about anything (it´s not their job), but at least to those I´ve gone to, they carry some finishing products like Minwax. They also carry Tung Oil, and finishing rattle cans. I´m not positive, but they might have wipe-on poly as well. If I can find those in Puebla, I´m pretty sure you can find them in Mexico City!
I´ve been thinking about this some more...Buying the wood plank and getting a carpenter to make the blanks to the specs I want, as well as surface them. Then, there are luthiers here, so I could buy a couple of fingerboards from them. Everything else, like fretwire, can be bought for a hefty shipping from US.
Damn it, man! I have studies to pay for! Don´t make me want to build a guitar now!
hehe, I sold one of my old guitars to buy the stuff for my 2nd build!
About the carpenter, if you can get the top and bottom of the board planed down, that would be a great start. Cutting the shape and routing the cavities can actually be the easiest part from my little experience.
Did you check the link I sent you? the guy in Yucatan has some beautiful boards, particularly a pau ferro set, but it's for acoustics also. (same with the only nice looking ziricote I've seen around here.)
-
Hey Scherzo, it´s coming along nicely. It´s ironic that finding local hardwoods in Mexico is so damn difficult. As you mentioned in a pm, LMII can´t ship wood items to Mexico...even cocobolo! I didn´t know that since I haven´t ordered anything (thanks for saving me the grievance). I guess that also rules out Erikbojerik as an option.
Gunstock oil would be perfect! I´ve been searching high and low for that thing! I´ve visited every damn sports and outdoors store in Puebla to no avail. Even googling it only yields other people looking for the stuff. There´s a gunsmen forum and apparently one of them can source it. If you can find it otherwise, please share! I have a Yamaha awaiting for finish and I´d love to use Tru Oil or something similar.
For other finishing supplies...well, there´s Home Depot where I live (three of them). Also, there are hardware shops. Thanks for the tips and I´m really looking forward to your progress.
Por cierto, donde vives?
I get angry everytime I see a nice piece of Ziricote in this forums, because even though it's from Mexico, I have only found mediocre boards for sale here. The good stuff is exported. And since you cant import wood, you are royally screwed.
I've asked in home depot, and they didnt even know you can use an oil for finishing wood. But I seem to remember seeing it in Liverppol, Hell, Soon as the holidays are over I'll even look in Martí. I might be metal enough to handsaw a guitar, but I cant deal with traffic, and endless children asking for a transformer toy.
Vivo en la ciudad de México, pero también he vivido en Monterrey Y Hermosillo. y en Estados Unidos hace muchos años.
-
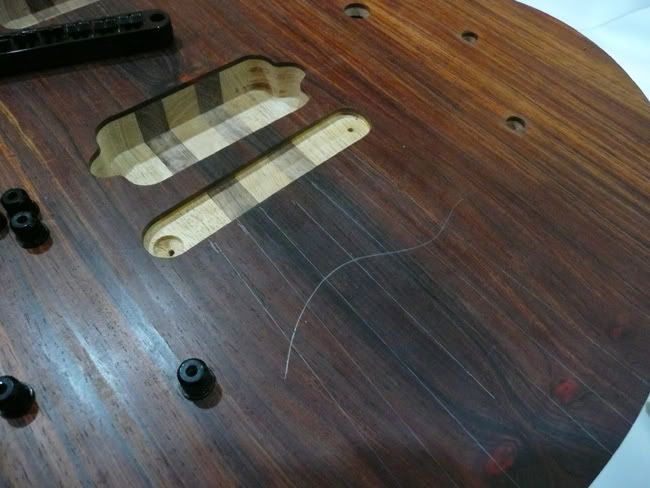
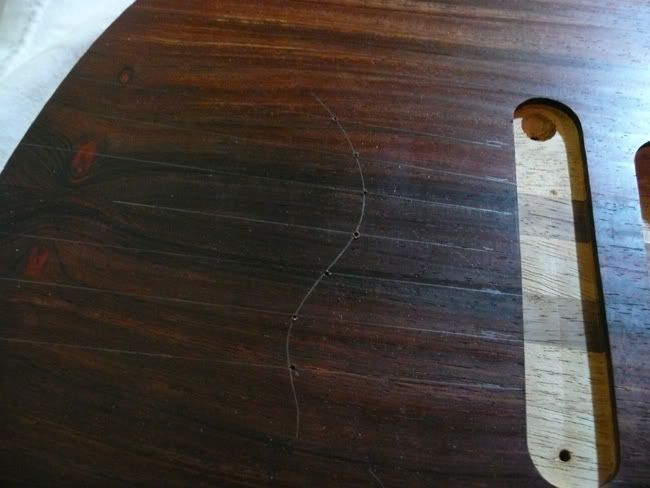
I find that the beam is wide and therefore not accurate enough...
As for the oil finish ingredients.... why didn't you order some from the internet?
What method do you use to line everything up? I use a laser as well and find the beam a little on the wide side, but I don't really have much better of a method. I've tried using a piece of fishing line, but found that as I am setting parts on top of each other the line snags on parts and tends to move with the wood. I use templates for as much of the routing as I can, but I still like to have a nice straight line for verification.
yeah, I used the laser just to verify that my template was perfectly placed. And the beam is indeed on the wide side. I just check that my center line is perfectly centered all along the beam.

 And what a stunning result for a first one! I just love all the ingenious solutions you came up with a limited set of tools. Like, putting that router into a thousand uses and the drill press on top of the super jig
New 2/3 Scale Guitar
in In Progress and Finished Work
Posted
That might just be the best looking neck I've ever seen.