


scherzo1928
-
Posts
50 -
Joined
-
Last visited
Content Type
Profiles
News and Information
Tutorials
Product Reviews
Supplier Listings
Articles
Guitar Of The Month
Links and Resources
Forums
Gallery
Downloads
Posts posted by scherzo1928
-
-
this is a great build.
what sort of laser are you using to line everything up?
It's just a laser level. Bought it really cheap, and seems to work like a charm.
can kinda see it in this pics if that helps.
 Not a big fan of the lazer... It is never accurate enough for me (guess I need a better one).
But everything else seems to be going swimmingly.
How did you make out on finding the oil finish supplies?
I've been a fan since I saw a friggin sharkk with a laser beam.
Well, I found the boiled linseed oil. Just a very very small jar though. The problem I see now, is having to buy more supplies to make more oil, and re apply it every now and then.
-
yeah i take blood pressure medicine for that
Ah, I'll have to look into that...
...Seriously.
-
Well, it seems like the pickup rings held fine.Just used a drop of CA glue on the one that "split"
and it's good as new.
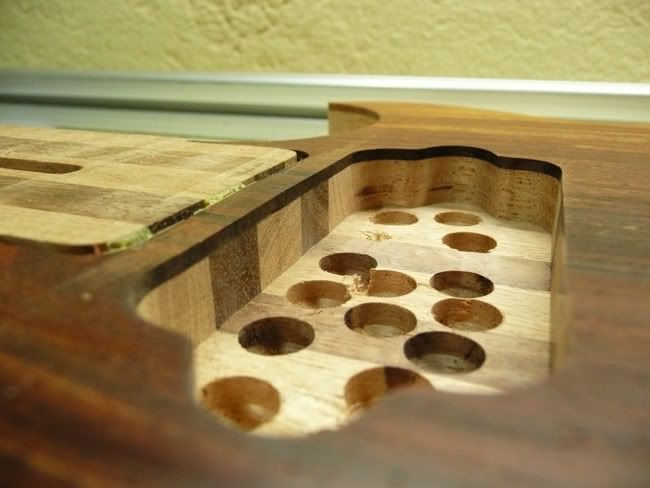
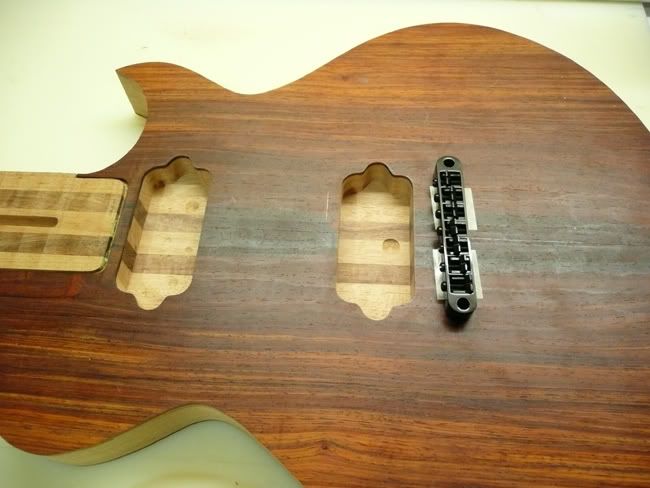
Also marked the position of the bridge and pickups. Then drilled the hell out of the soon to be pickup cavities

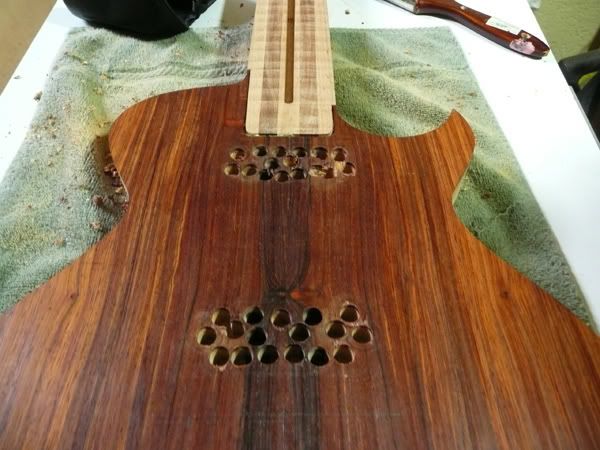
I can be really nervous at times (read paranoic), so I decided it would be better to make sure the template was spot on.
And routed.
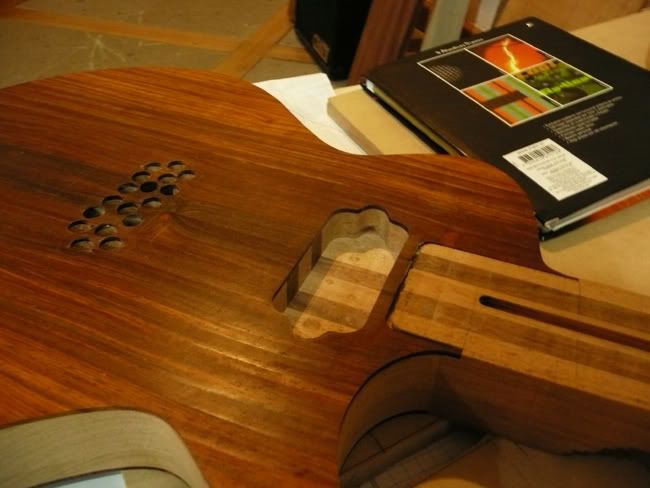
Did the same for the bridge pickup.
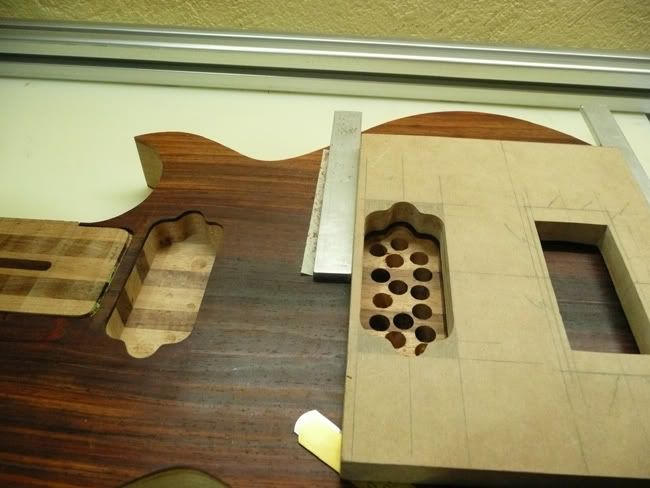
Then made sure the position for the bridge was correct, and drilled pilot holes.
-
Oh god. I joined this forum just in time to see this beauty take shape.
You sir, have some serious skill, and nerves to do that bit of freehand routing. Whenever I do any amount of routing, all I can think of after finishing is grabbing a beer.

-
And they turned out like this:
 .
.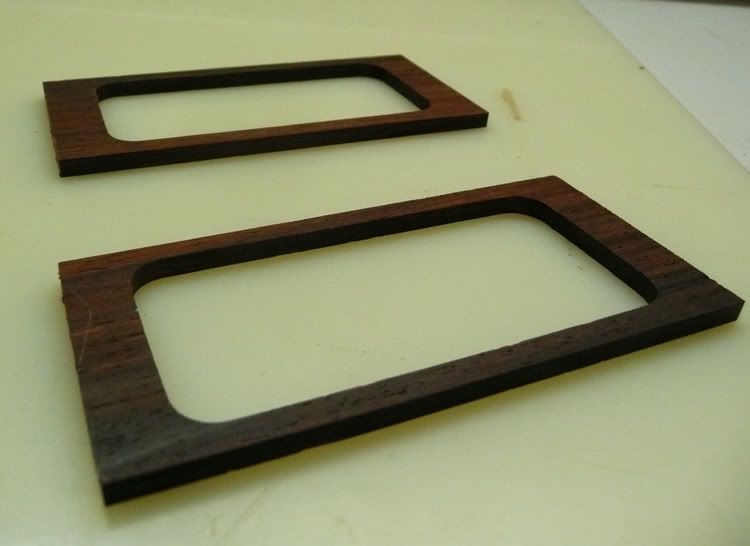
Better pics to come!
-
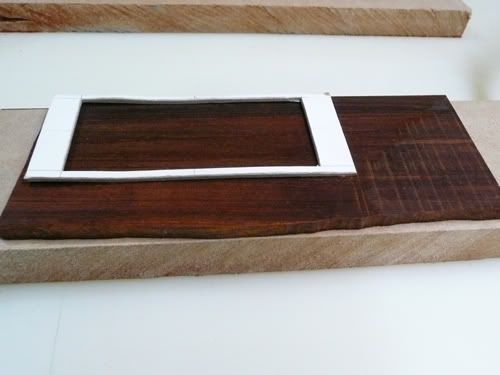
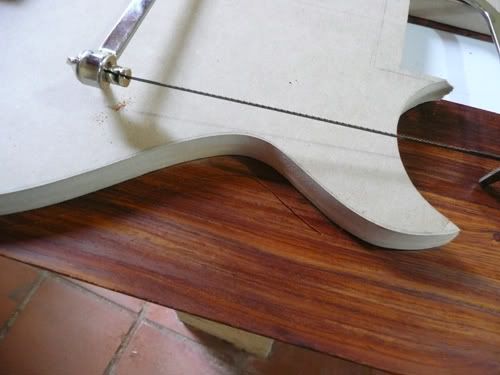
Now I needed to take care of the outside part of the rings. Started by butting off the excess wood on the sides.
First one was easy. Only had to cut a little bit, and I was following the grain. Still took my time and made smooth strokes, trying to take as little wood as possible on each one, so I didnt break them.
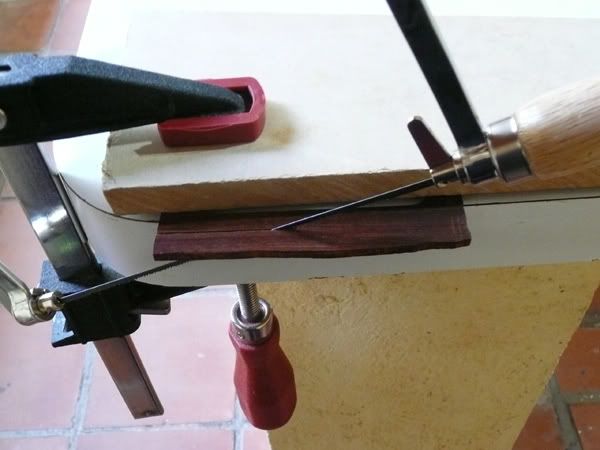
But for the second one, I had to cut on the sides, not following the grain. Went even easier on this one.
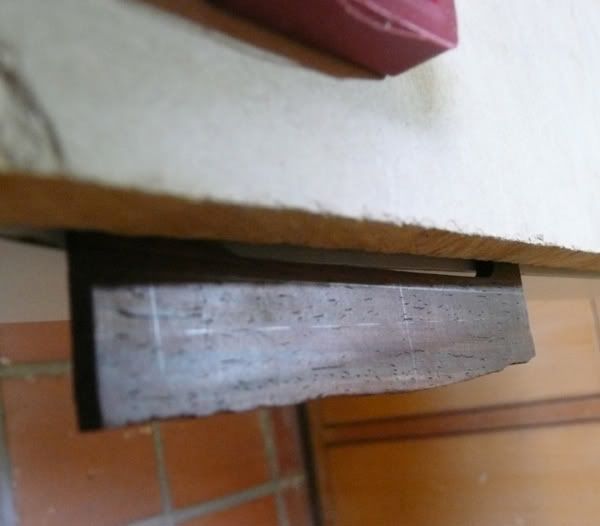
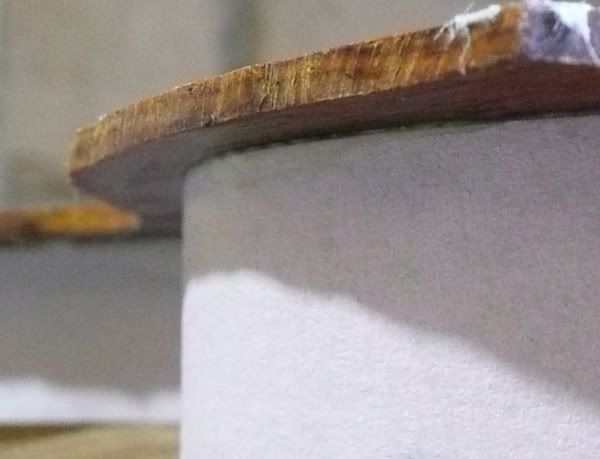
And the wood split on the outside
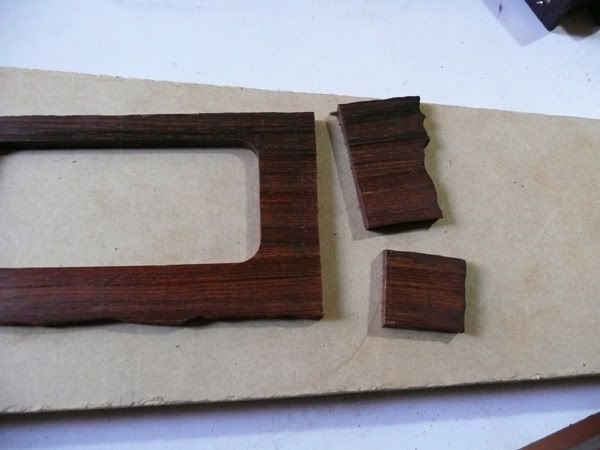
Close inspection shows it also made a check on the ring itself.
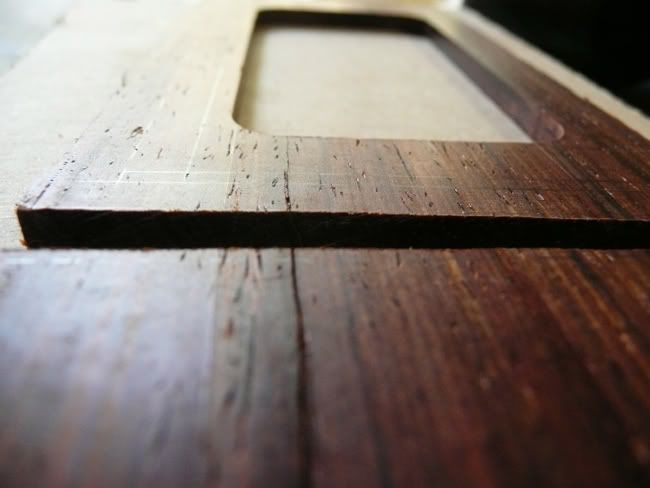
Anyways, if it holds after the routing, I'll just use a drop of CA glue or epoxy or something. It's actually barely noticeable, unless you look for it like that.
I still decided to make the rings a tinny bit thicker, 1mm more should be fine.
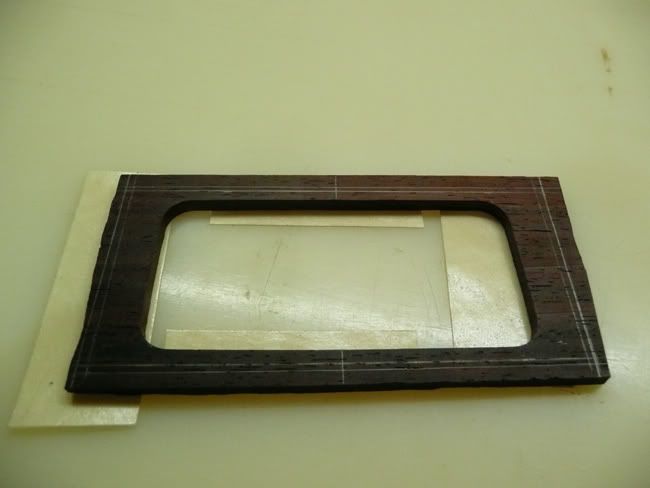
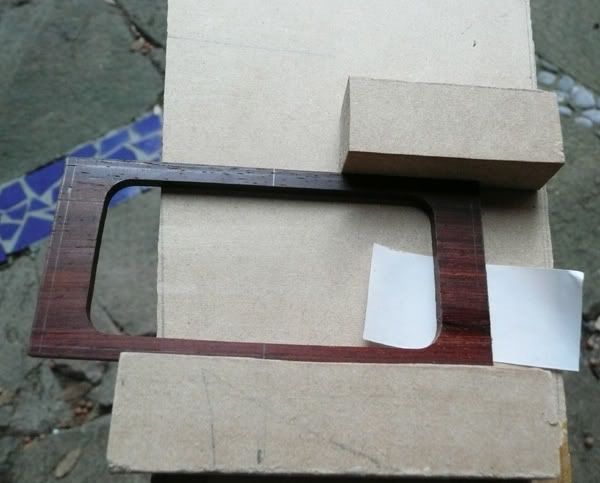
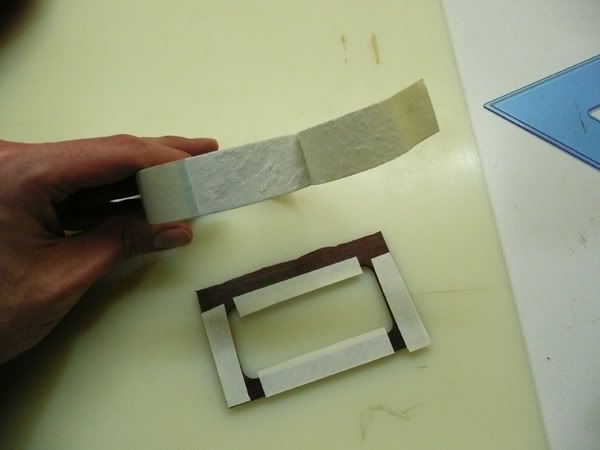
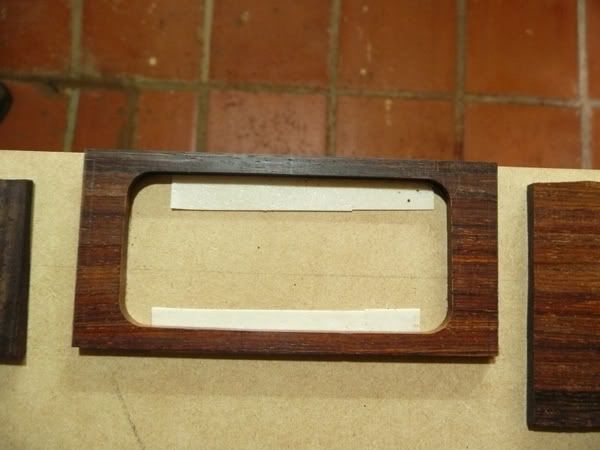
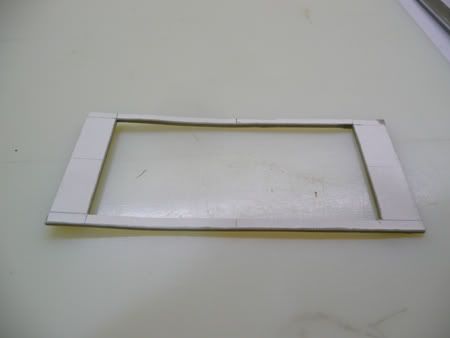
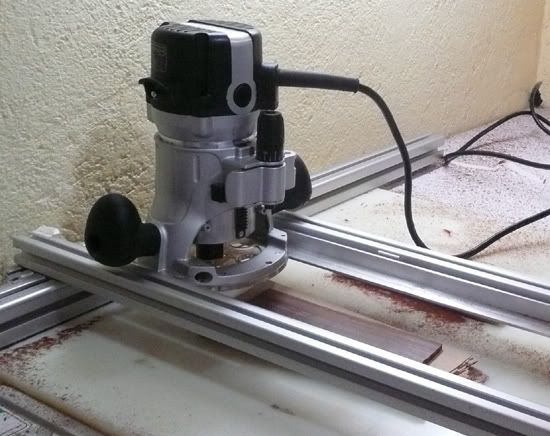
BTW, I was planning on drilling the rings, and scrweing them to an MDF or wood guide to route on the router table. But somehow I changed my mind, and simply taped them to a piece of MDF and routed them. Something like this:
-
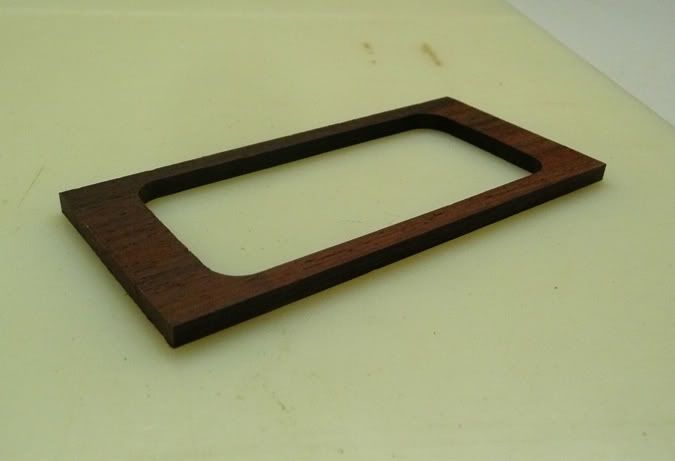
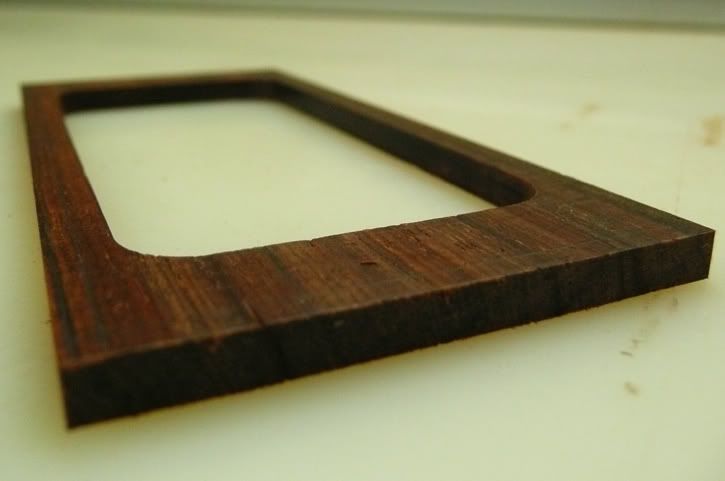
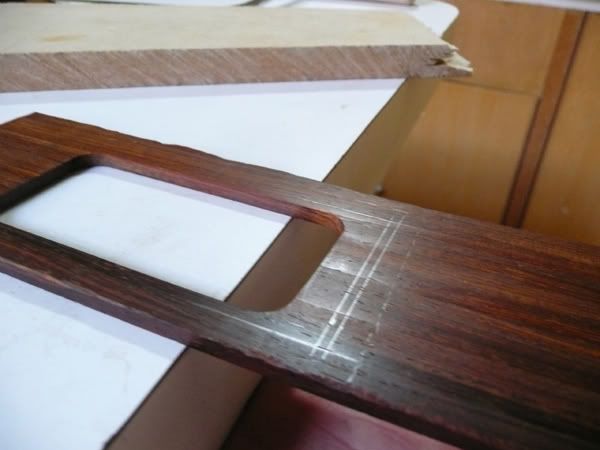
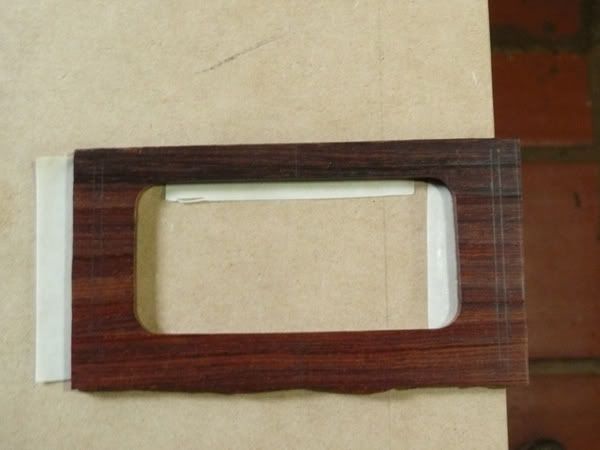
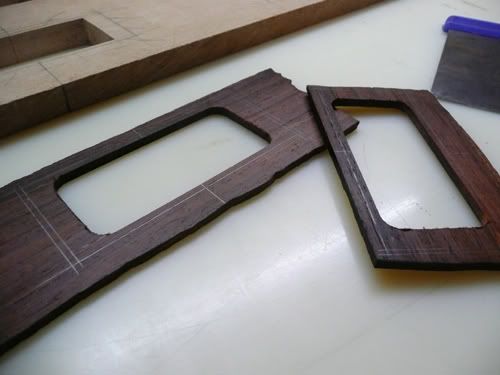
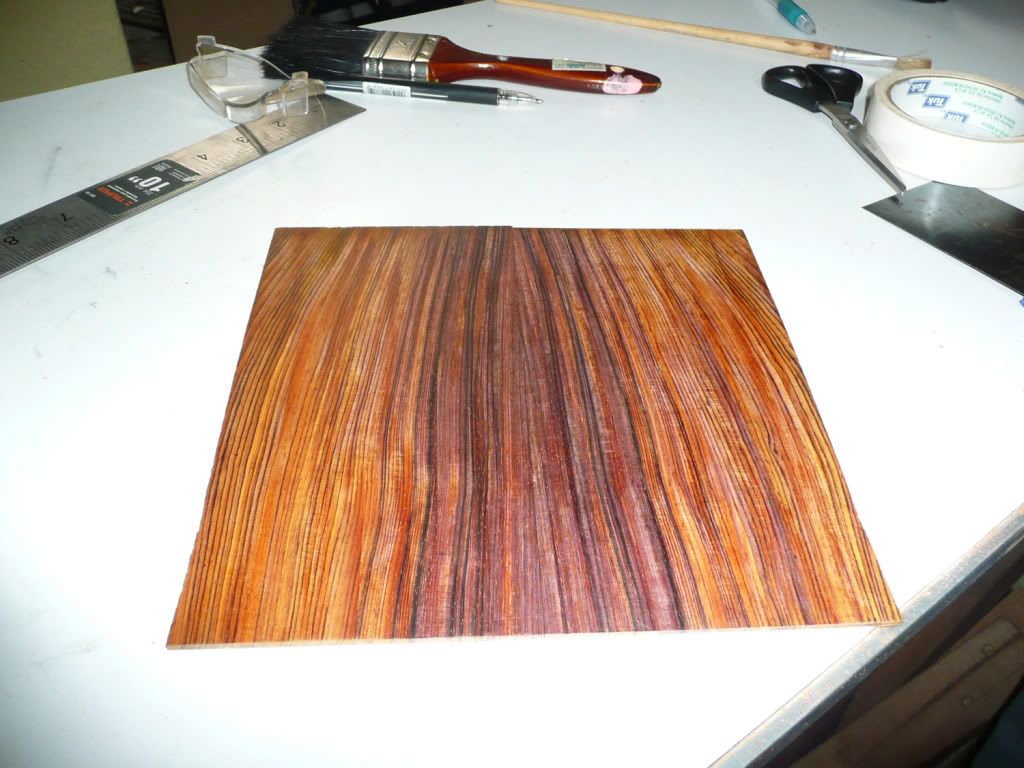
Mk, so I wanted to make something like this:
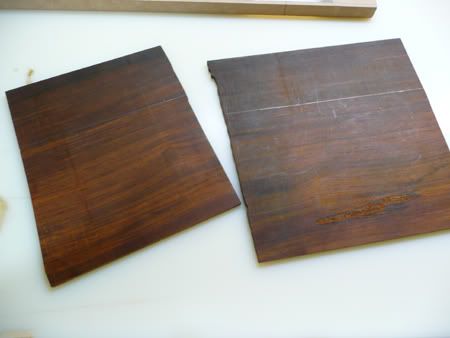
Out of this:
Made a template for the inside of the rings.
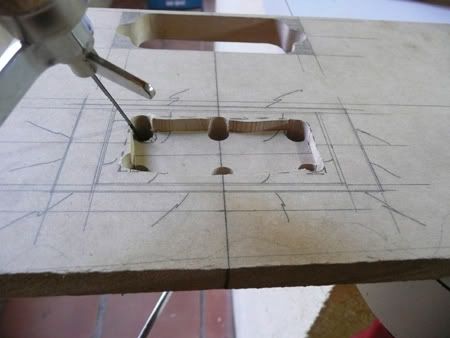
Routed the cocobolo.
Chose where to make the rings so I dont have to route the wood and make it thiner.
Drill and cut the insides:
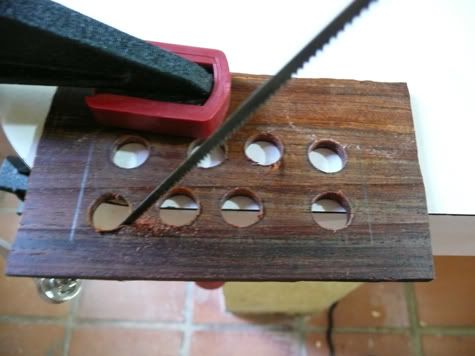

Route...

And enjoy!
-
Hopefully I will get a vacuum system next year. Then you will get a package with old clamps in it.
Don't get too excited about the back of the neck. It is not going to be some crazy ultra access thing... just not going to have a visible heal. What I always try to do is put the heal at a spot so when you rest your thumb on it you can comfortably reach the 24th fret with a pinky...
BTW -- Welcome to the forum! Glad you have migrated.
Actually, I meant I want to see the scarf joint when the back of the neck is shaped. should look pretty sweet. As for the ultra access thing, I'm never really too psyched about them, or bothered about blocky heels, but that's because I has mammoth hands. (besides, I'm used to reaching up awkwardly on classicals)
And yeah, I thought it would be nice to share my build in here too, thought I'd show you guys how not to make a guitar.
-
I think you need to send me 10 of your 200 clamps. Throw in that ziricote board too.
Also, cant wait for you to shape the back of the neck!
-
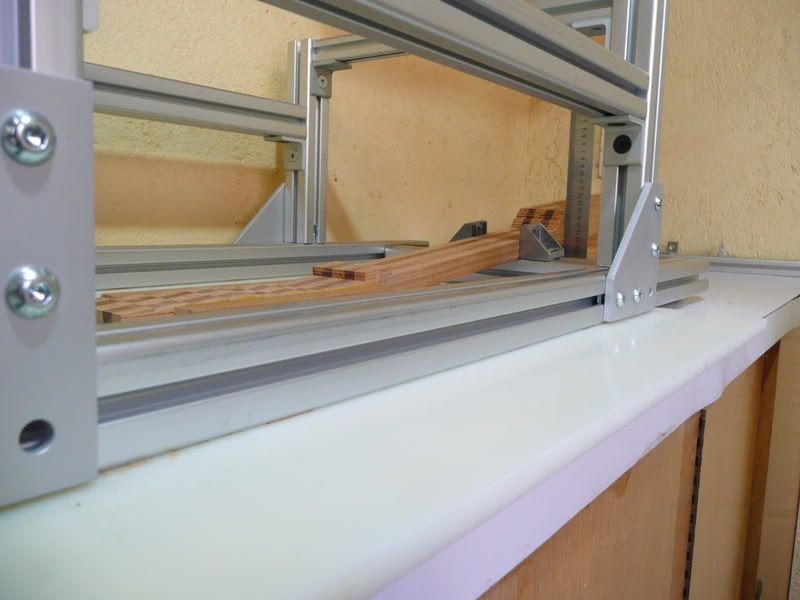
Ok, for those who were interested in the aluminum jig.
I simply bought some profiles, nuts and bolts and put it together. But there are a couple of companies who will build you anything you can think of with those things. Here's a link:
http://www.parker.com/portal/site/PARKER/m...NUM%20EXTRUSION
somewhere in the bottom of that site there is a link to their store. Hope that helped.
-
Very entertaining and thorough build! I like the guitar too
How'd you come up with the superjig? Did you make it from scratch, or did you buy certain products that just happen to fit together and work correctly for this application?
[edit]
nvm, I read through it again! Good stuff!
I have a link to a great store that will sell you the profiles, and all the pieces to assemble it. It's really like a huge lego, where you can cut the pieces as long as you want them, and then use other pieces to put your rig together perfectly. If you live in the US, they will even pre cut every piece to your specs, no matter how complex it may be.
Just give me some time to find them links...
-
You have a really interesting way of approaching some of the problematic parts of making a guitar.Very entertaining to read.
It's coming out nice.By the way,you don't need dowels on the body wings for strength,the glue joint will hold up fine without them,but it does help immensely to keep everything from shifting while the glue is drying.
I guess that just shows how little I know about actual woodworking. I'll definately keep it in mind for my 2nd build.(Look in the test area forum for a sneak peek)
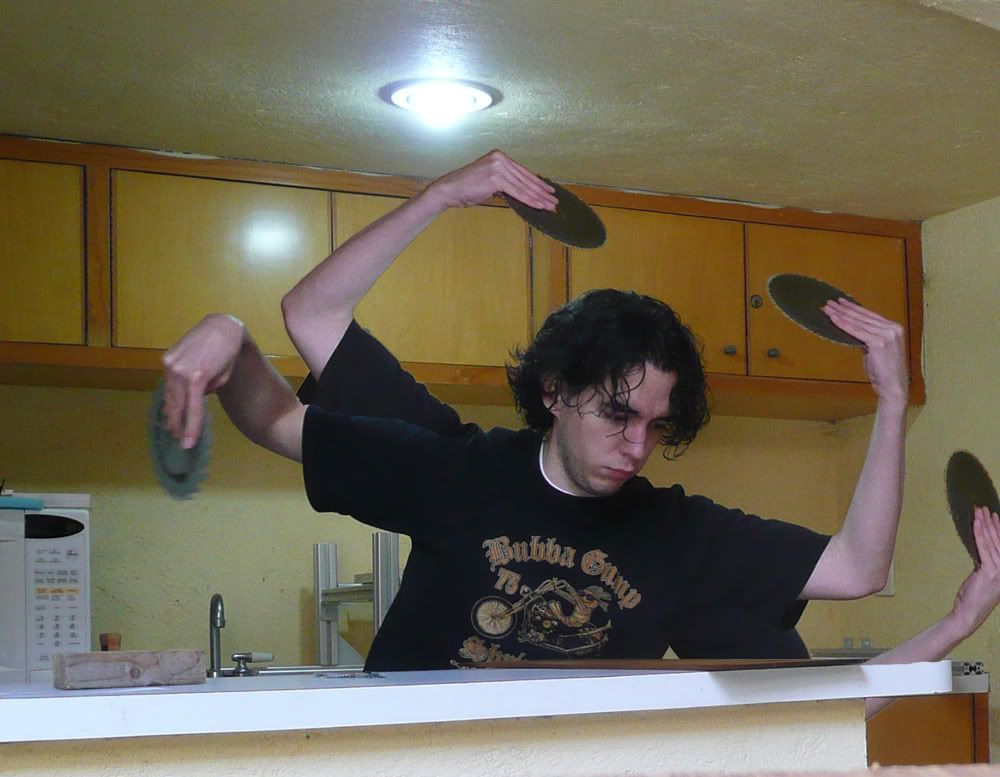
Also, glad you found it entertaining, but trust me, this was the serious version of the build.
The complete one, includes a picstory of me trying and failing to cut the cocobolo top, which involves me using a cello, and growing extra arms.

 This is a very nice build so far. Excellent creation and use of jigs and templates....not to mention determination for successfulling using a coping saw on all those rough cuts to shape. You are not an engineering student by any chance?
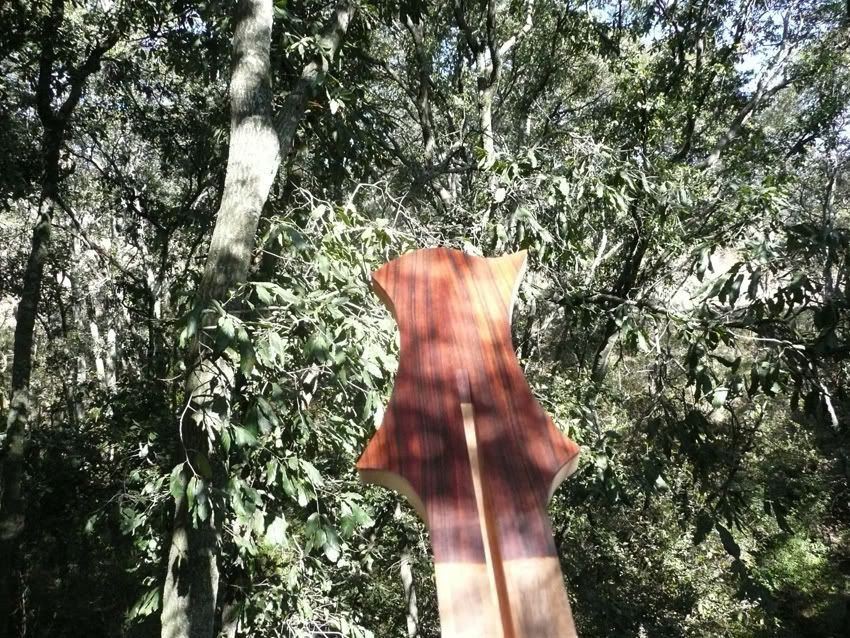
I'm enjoying the background in the outdoor shots too.
SR
Yep, mechanical engineering. Yep, cutting the body was tough, but the oney I saved on the bandsaw went to material and parts for the 2nd build, so I'm fine with that.
And yea, I live right on the edge of the woods.
-
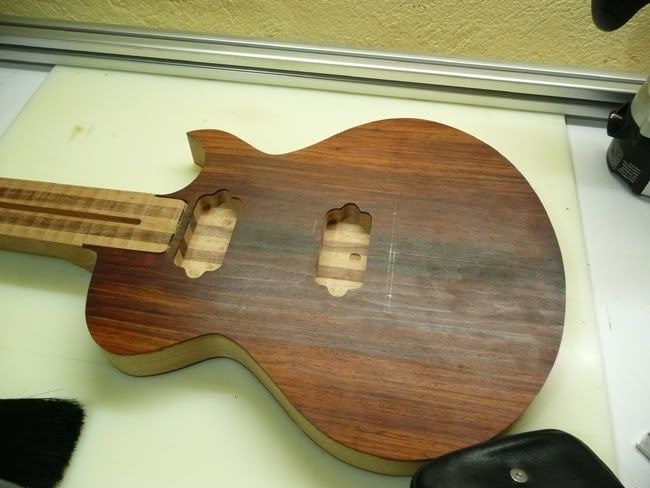
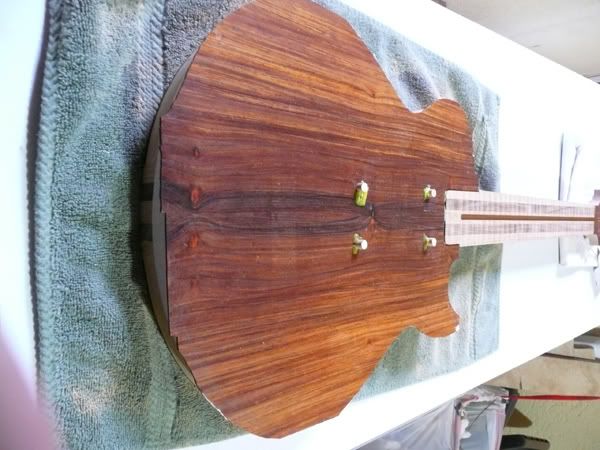
Took off the clamps. Looks good upon first inspection:
Used a drillbit to remove the dowels. Left some scratches, but this wood will be routed away anyways.

This is what needs to be routed:
I then proceded to pass it through the router table, and take a shaky picture:
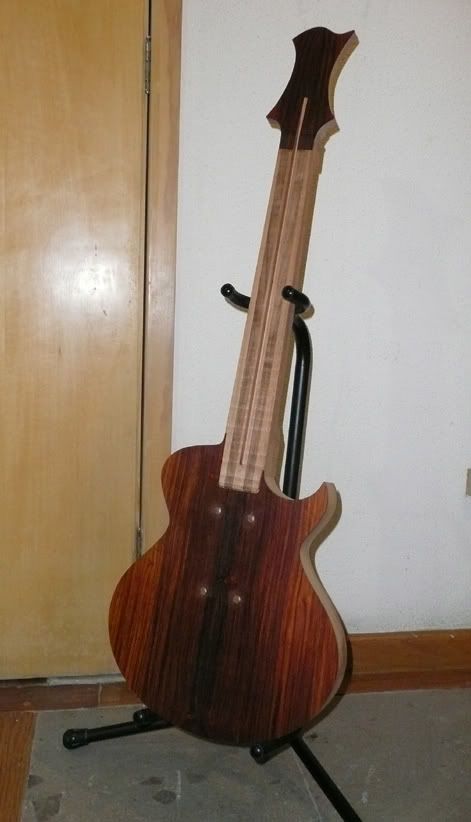
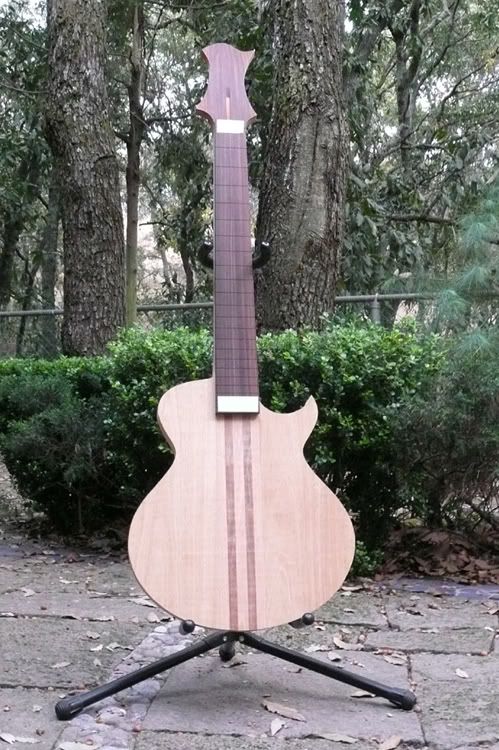
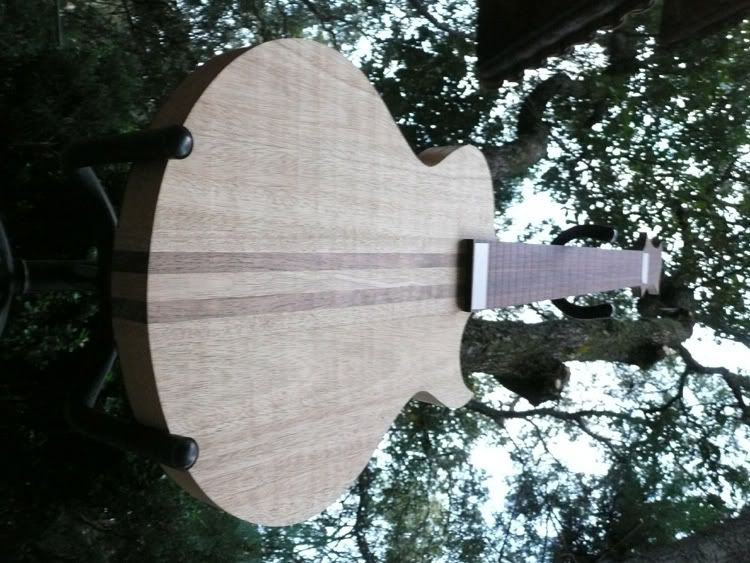
And that's where I'm at now! I hope you folks liked it, that someone finds something they can use, but mostly that it inspires anyone into making their own guitar.
-
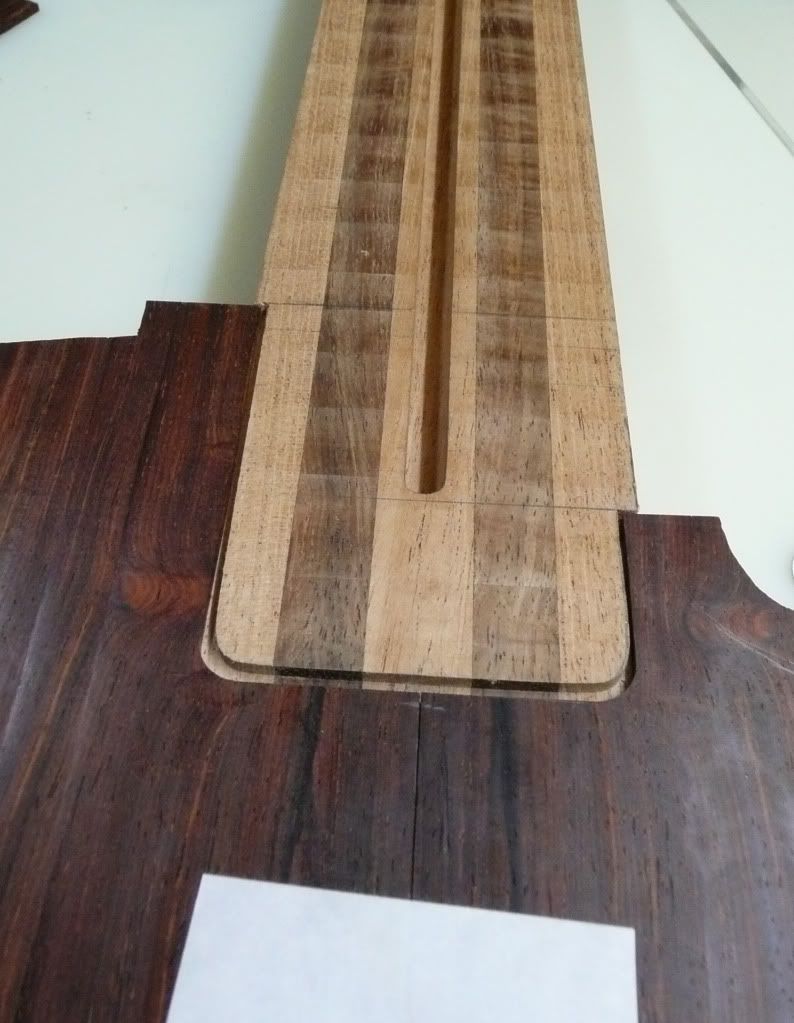
I then made a template to cut the cocobolo top, so that it fits with the neck:
And another template to route the neck to fit the cocobolo...
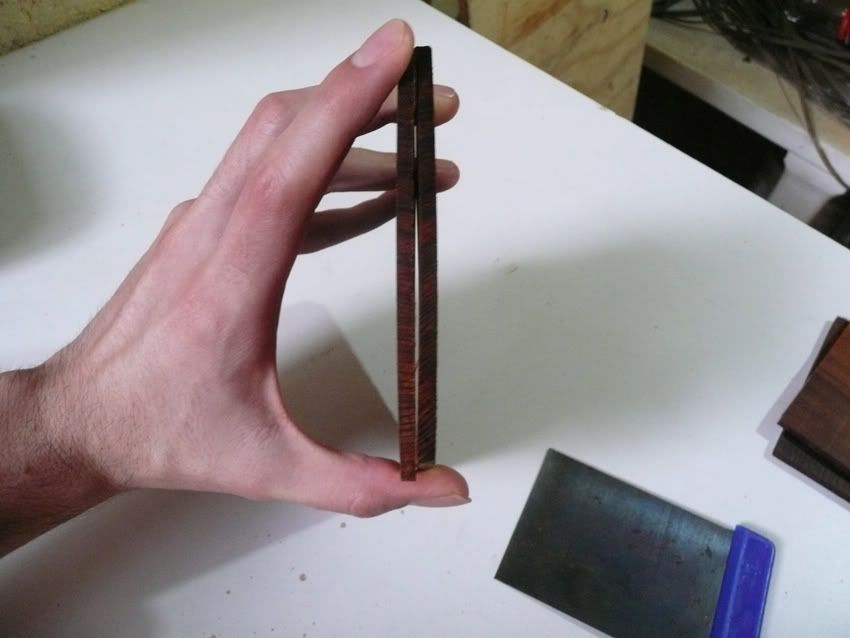
The idea is that there is a 1.5mm gap between the neck and the top. But it is covered perfectly by the fretboard.

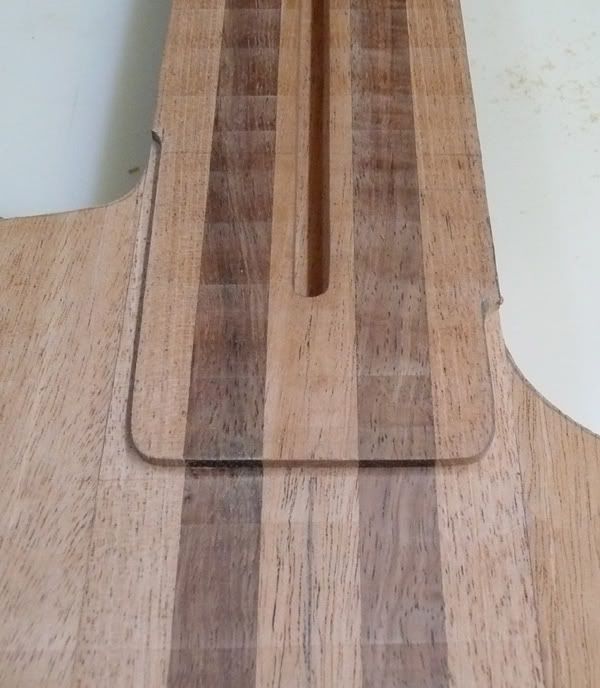
Then I just sqaured off the top curves with a chissel.
Drilled a couple of holes where the pickups would go, and placed some dowels. This way I can glue the top to the body, and not be afraid of it shifting in any way.
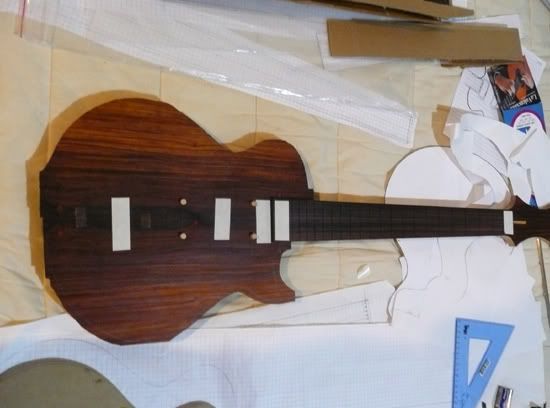
Masked the edges, to make glue cleanup easier.
glued and clamped:
-
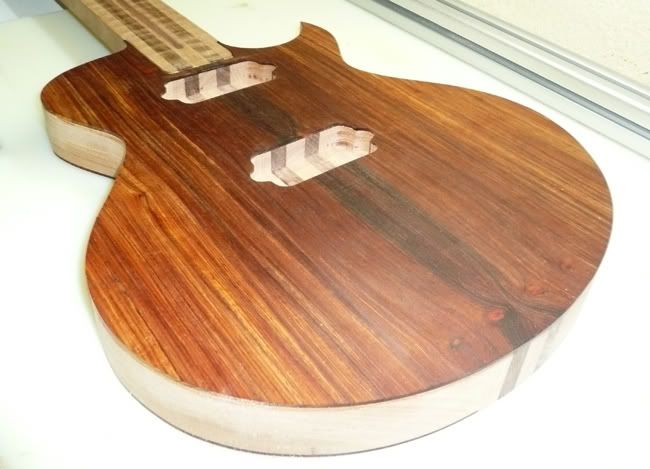
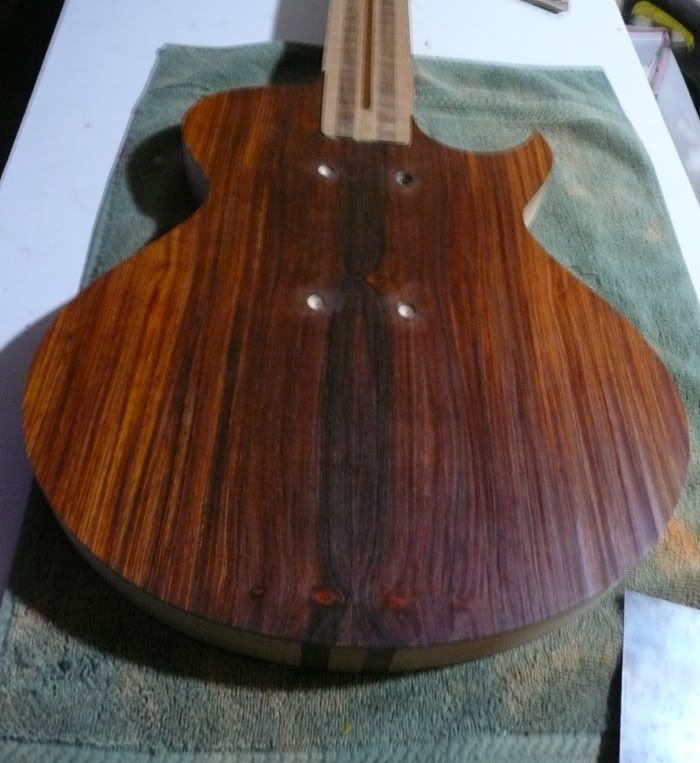
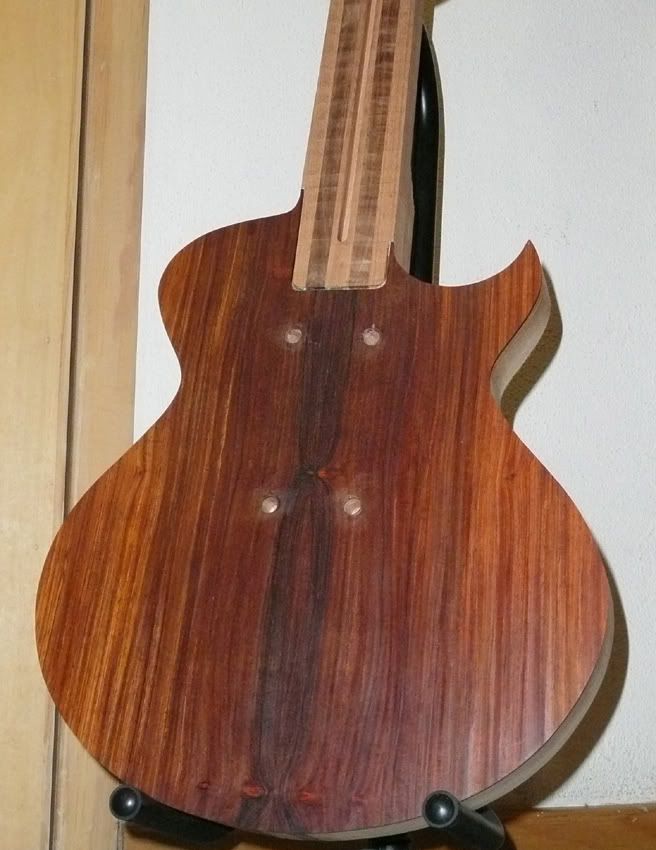
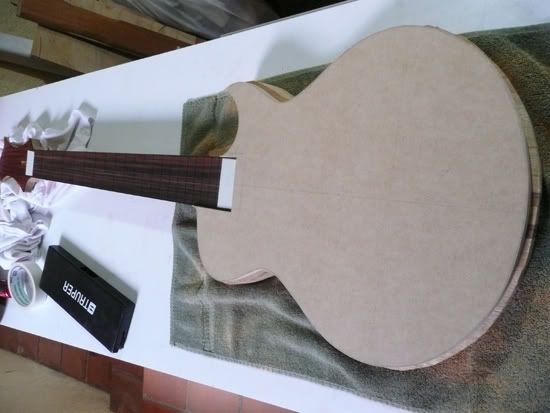
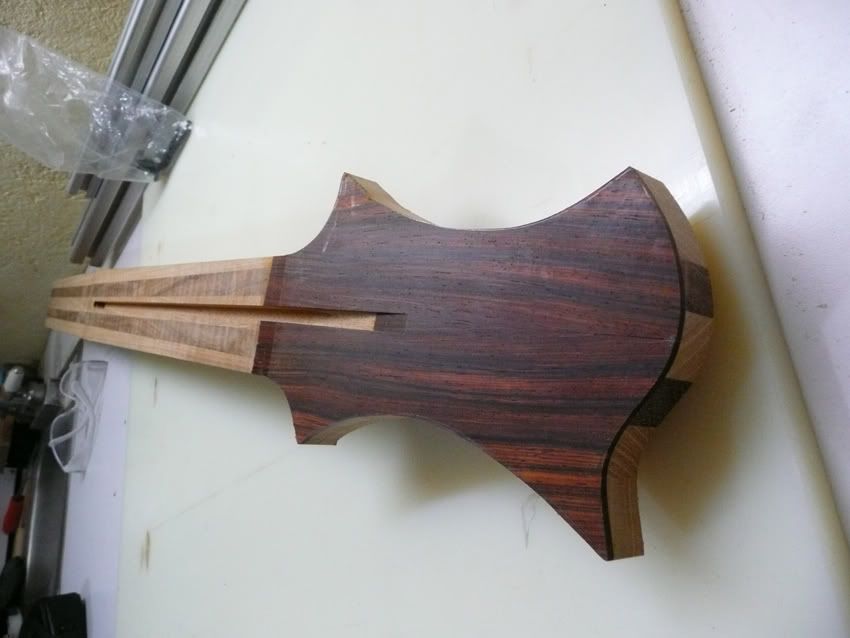
Pass though the router like ziz:
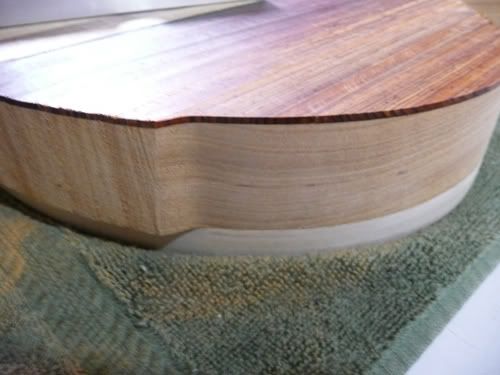
(the back hasnt been sanded after glueing the cocobolo, or the wings themselves, so it looks weird)

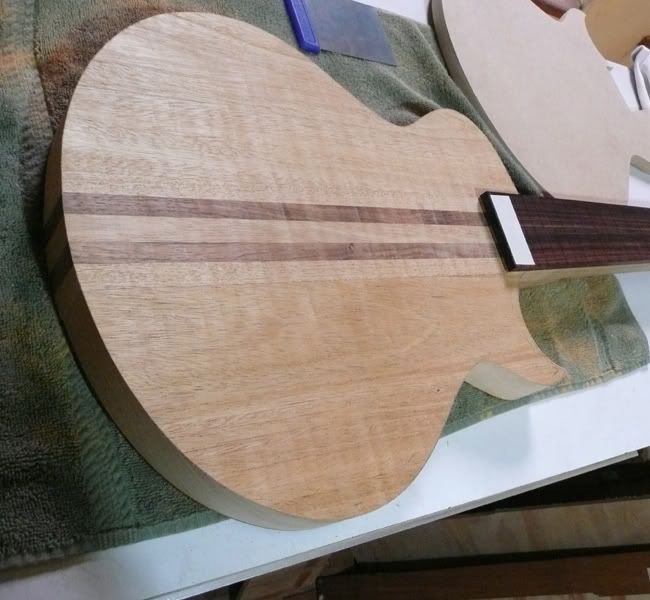
It's finally looking like a guitar. Btw, I made the body a little smaller, since I pushed the neck away for better fret access. This way it has PERFECT balance when playing in classical position, which is how I always play.
Now I cut the cocobolo top. I taped it to the body laminate, and then clamped it to a table, so that it didnt break. I also went REALLY easy on it.
-
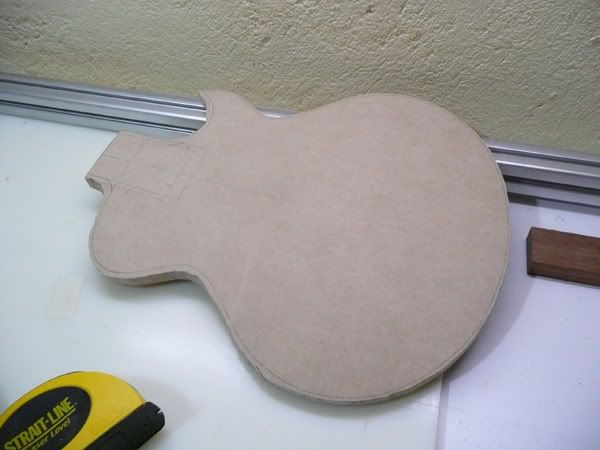
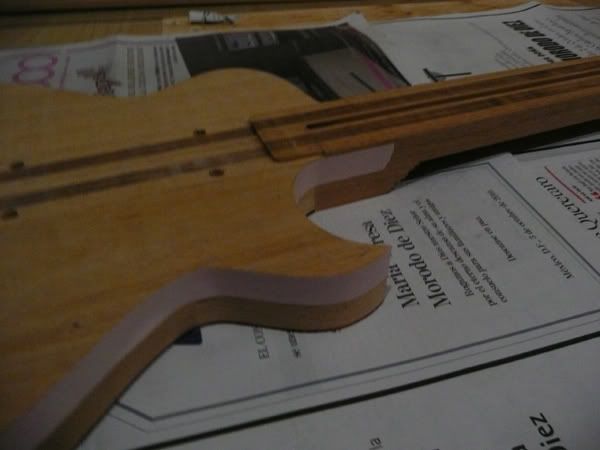
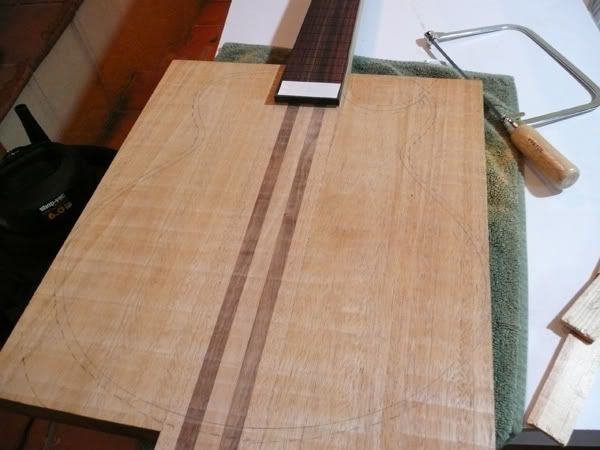
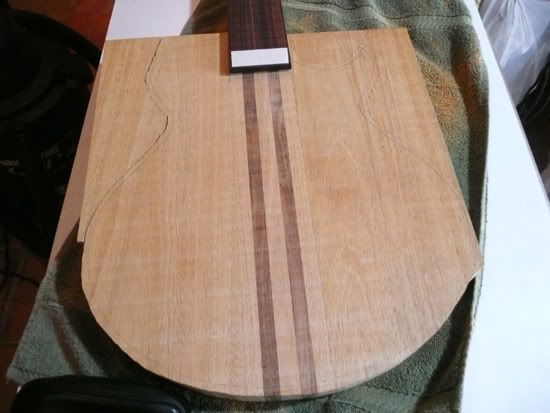
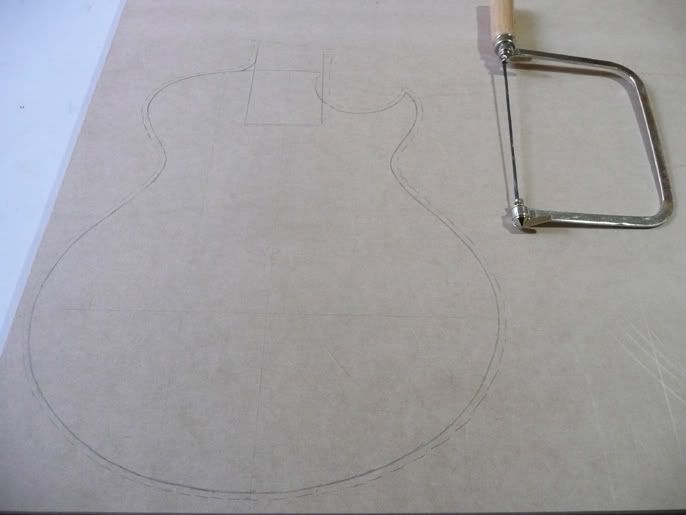
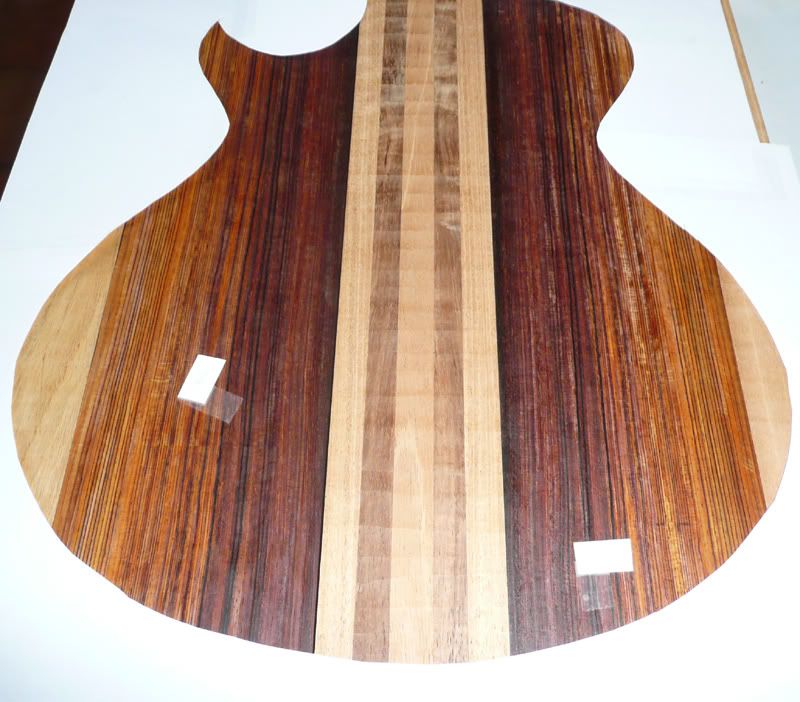
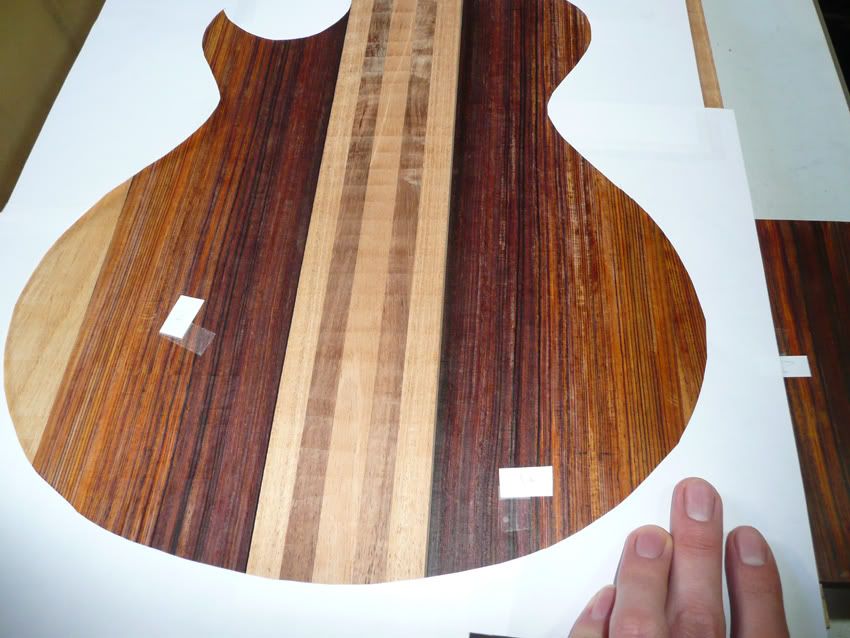
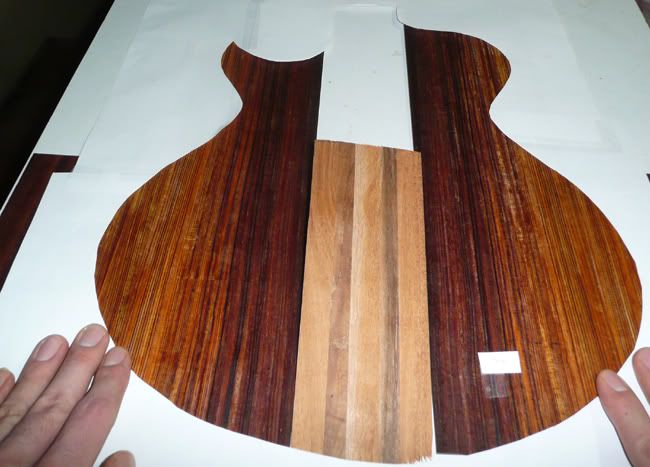
Bought some new files, and finished the body template.
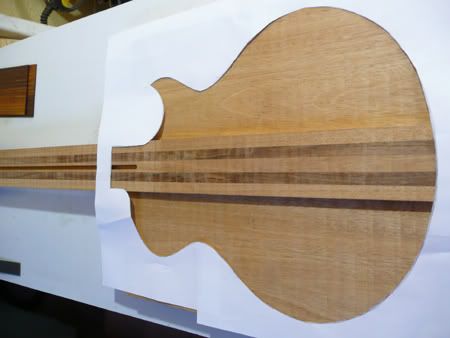
Taped the Fretboard in place, and then set the template:
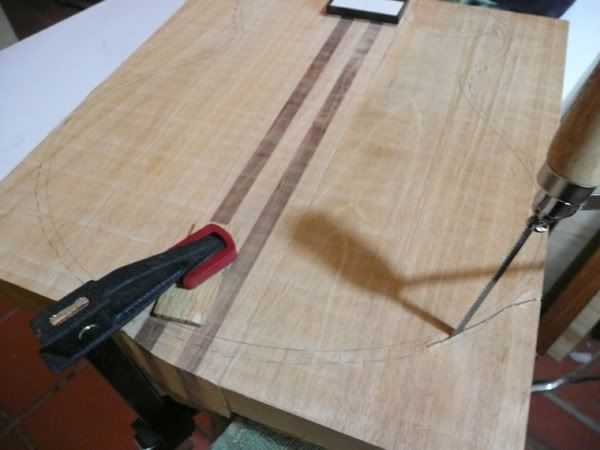
This allowed me to draw the body exactly where and how it should be.
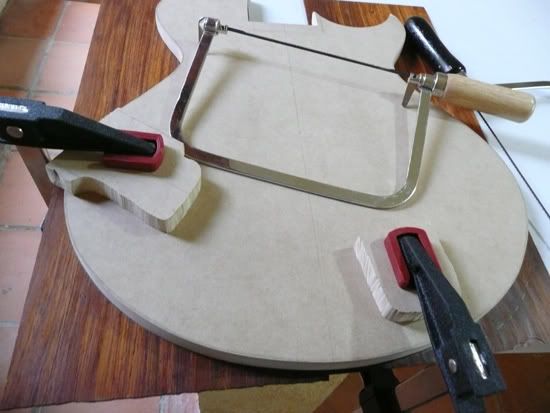
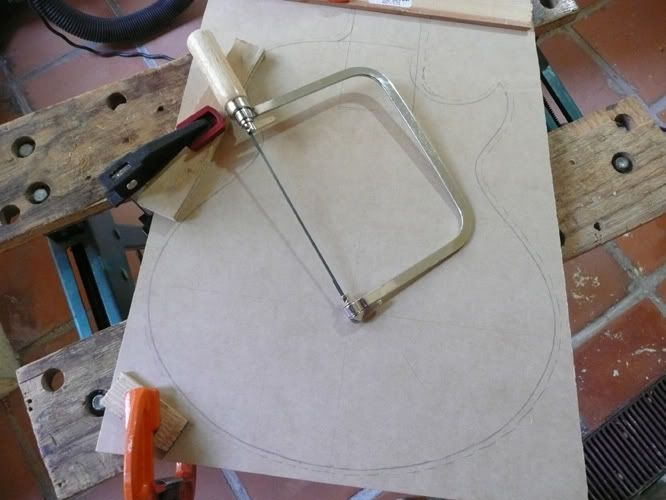
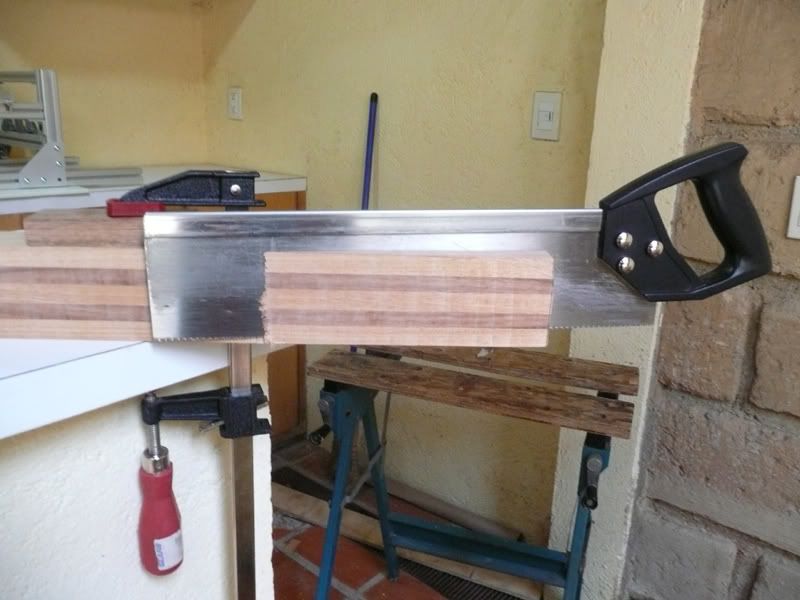
And, you guessed it, handsawed 2+" of mahogany, tzalam and cocobolo.
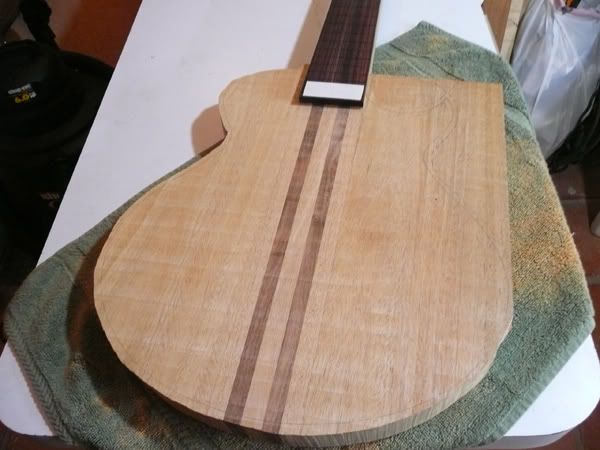
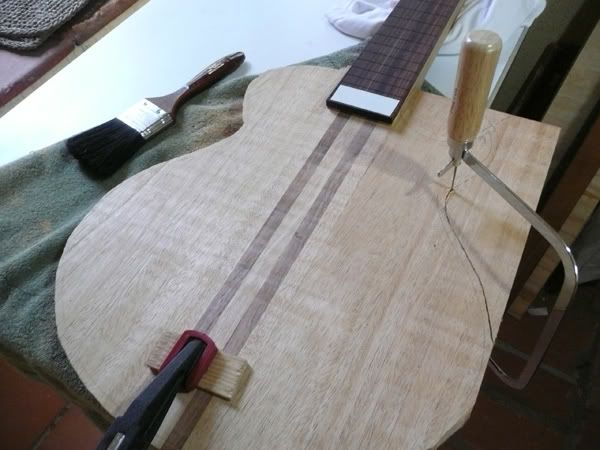

And taped the template to the newly cut body:
-
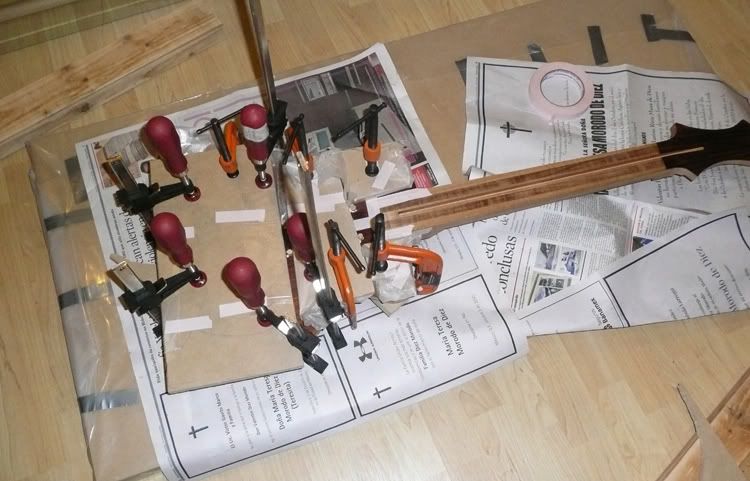
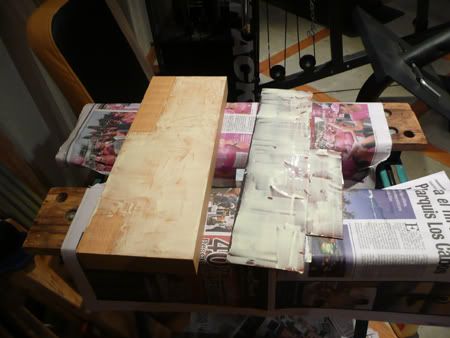
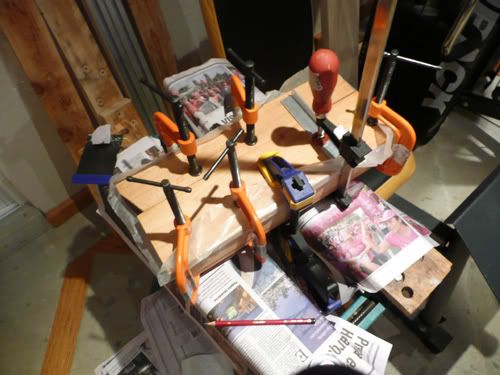
This allowed me to glue the wings:
(as recomemnded by restoradion AD who also posts here, Ive bought MORE CLAMPS!)
Let it set a couple of days, since Ive been extremely busy this last weeks.
Took off the clamps... looks good upon first inspection.
Just a quick leveling, and the top fits better than ever:
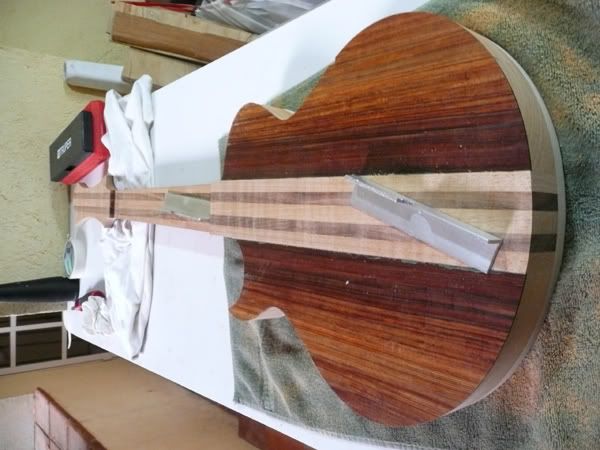
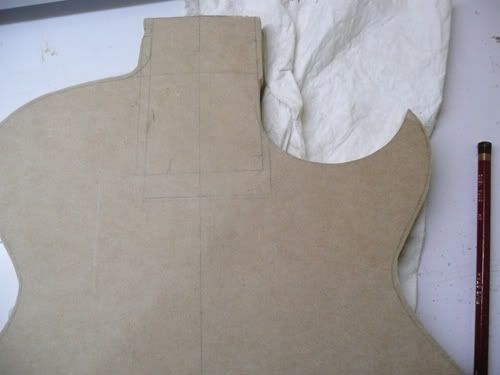
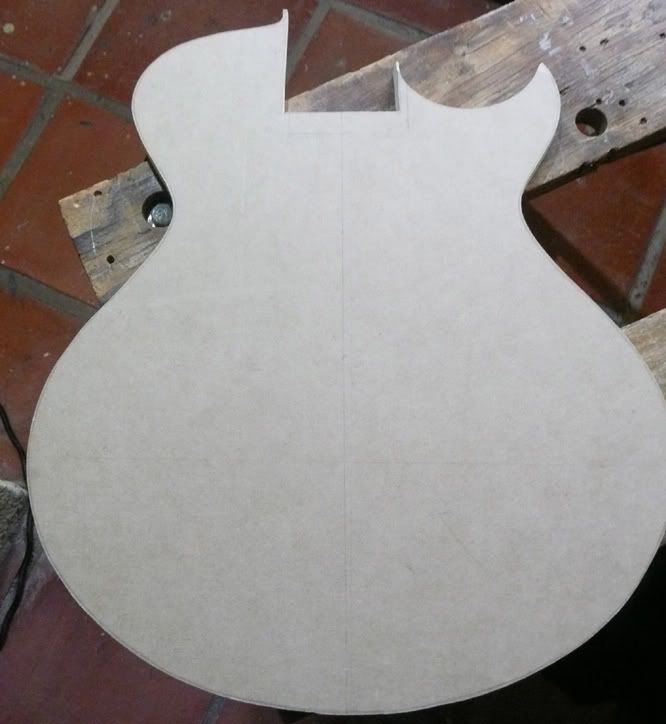
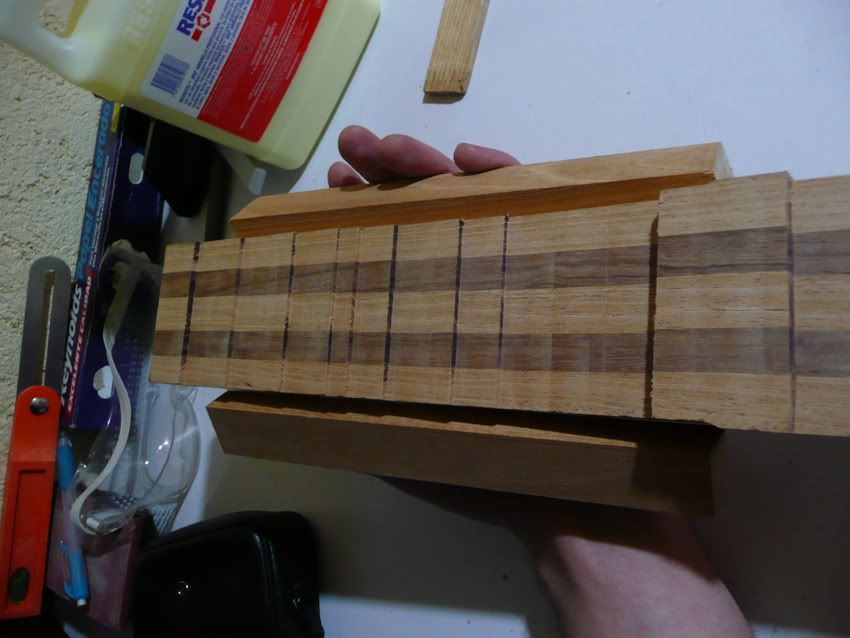
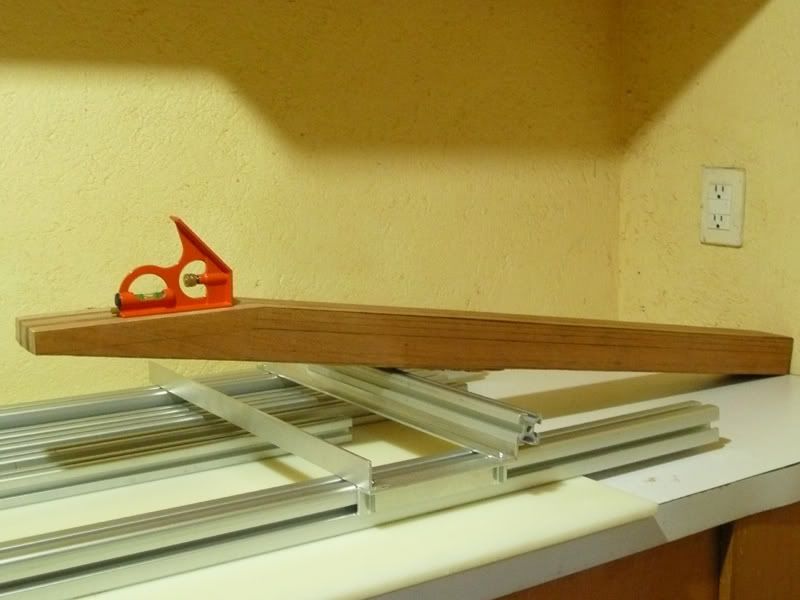
Now I made the template for the body.

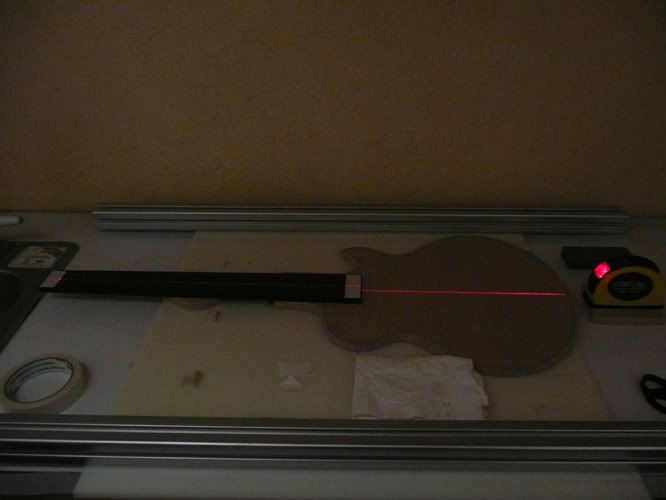
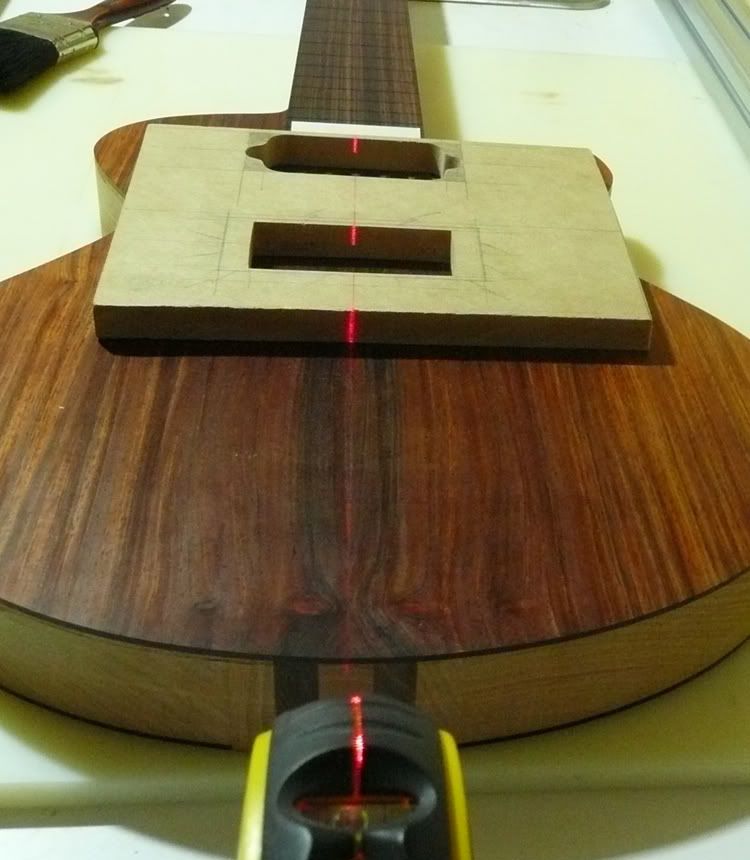
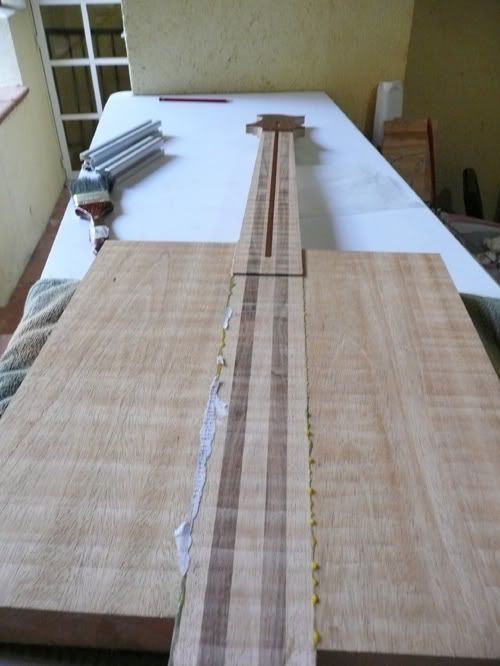
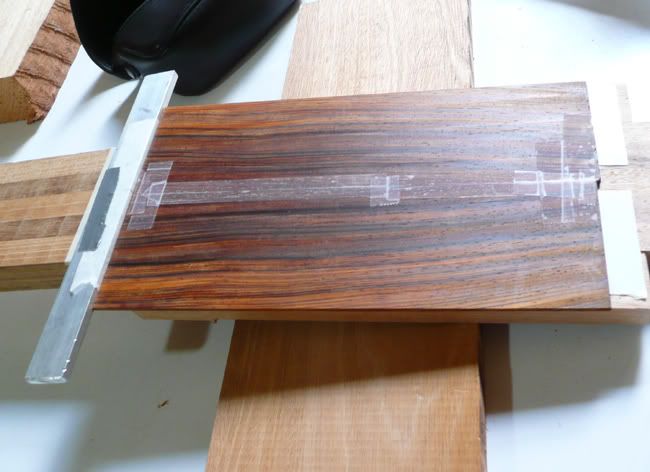
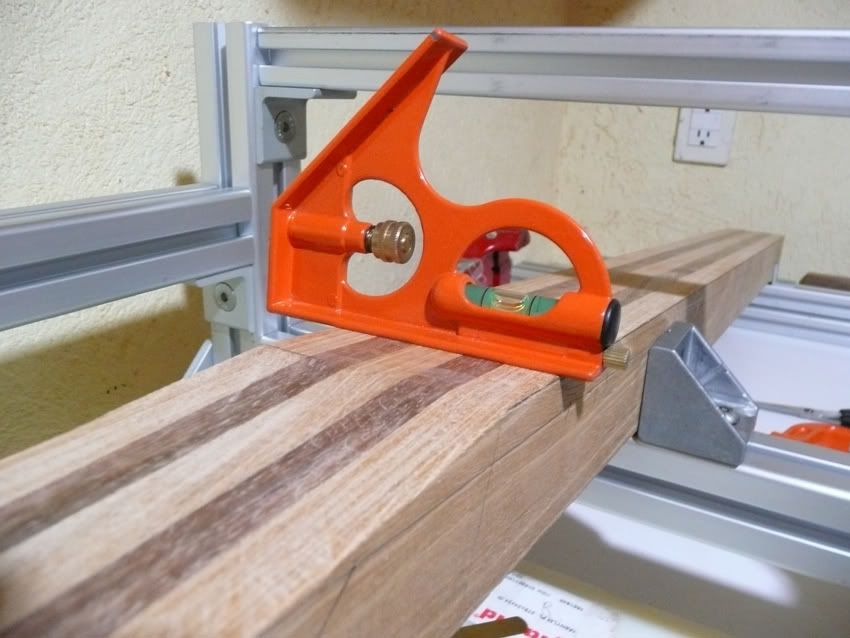
For some reason, I decided to check the placement of the fretboard on the template.It occured to me that if it wasnt perfect, the neck would end up sticking out oddly.
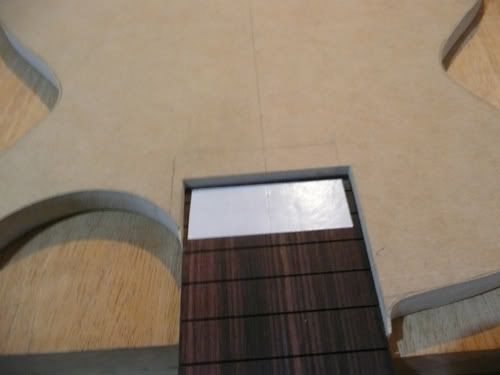
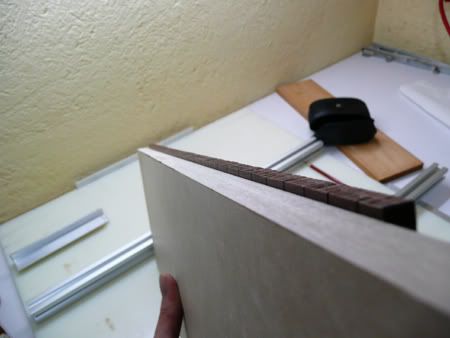
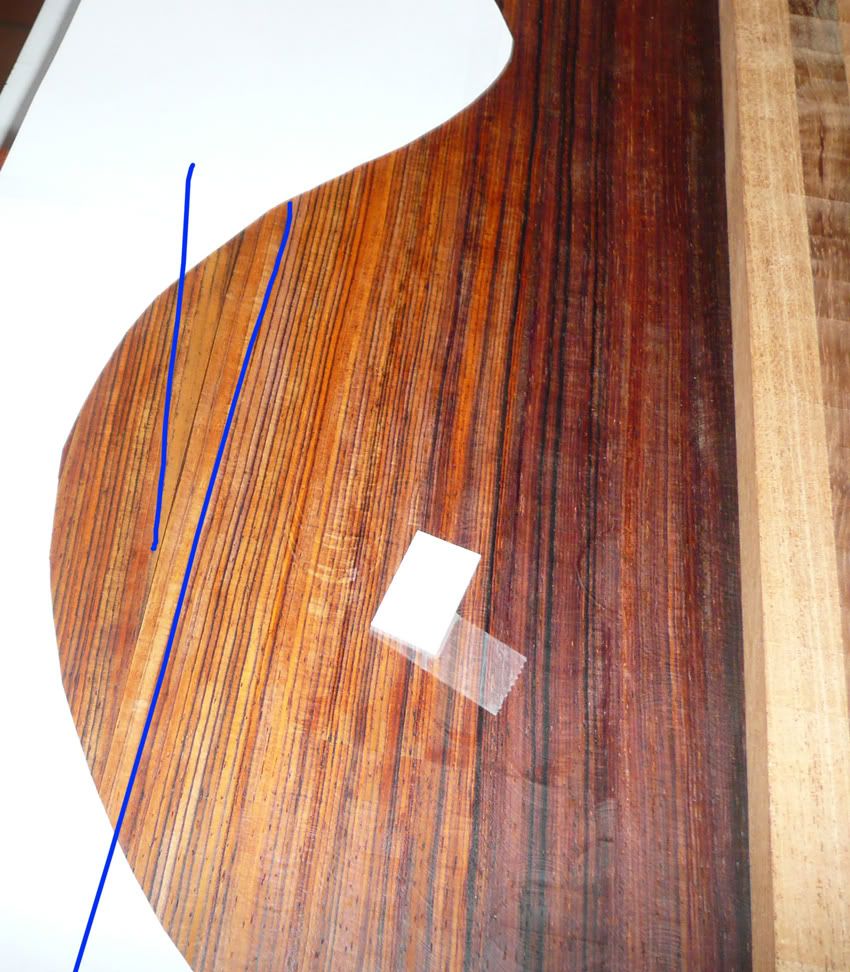
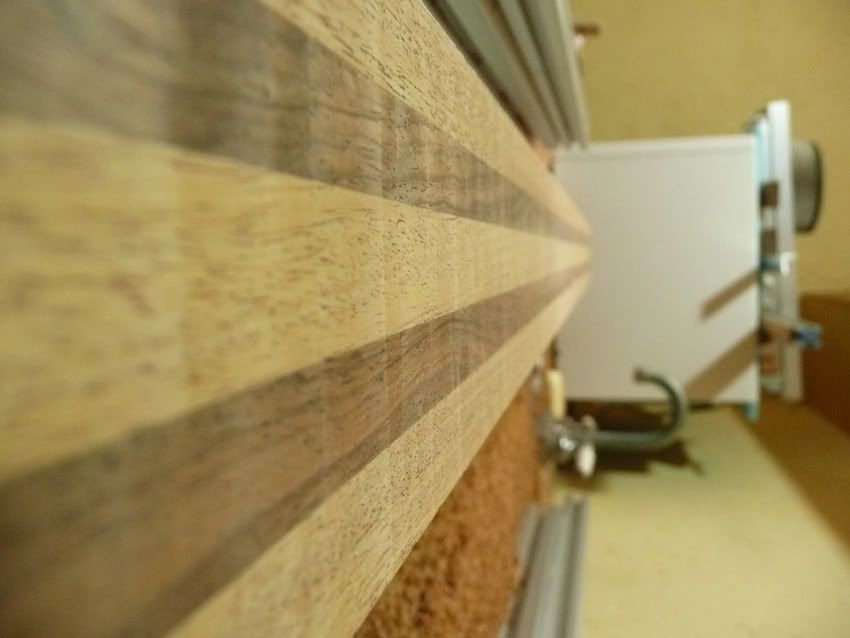
So I drawed a center line on the fretboard. And turned off the lights...

Ok, I turned on 1 light...
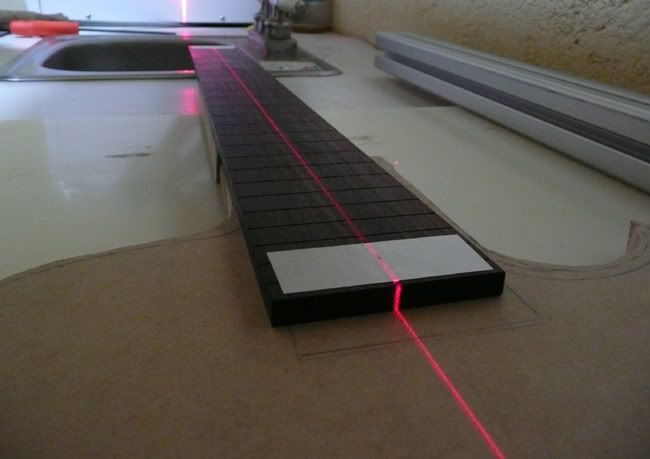
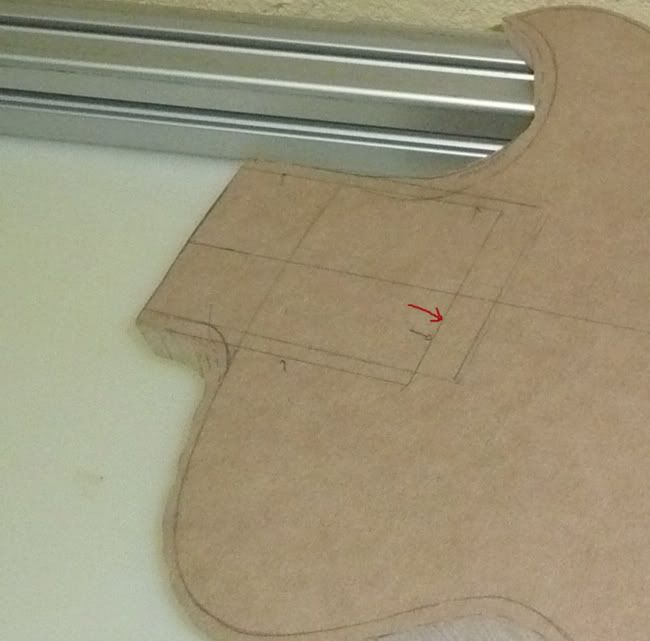
I aligned the lazer with the center line of the template. Then I aligned the FB too, just checking the correct fret access.
New placement(one with the arrows):
-
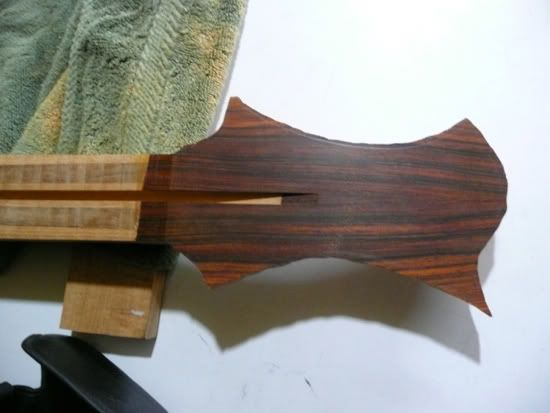
To cut the neck taper!
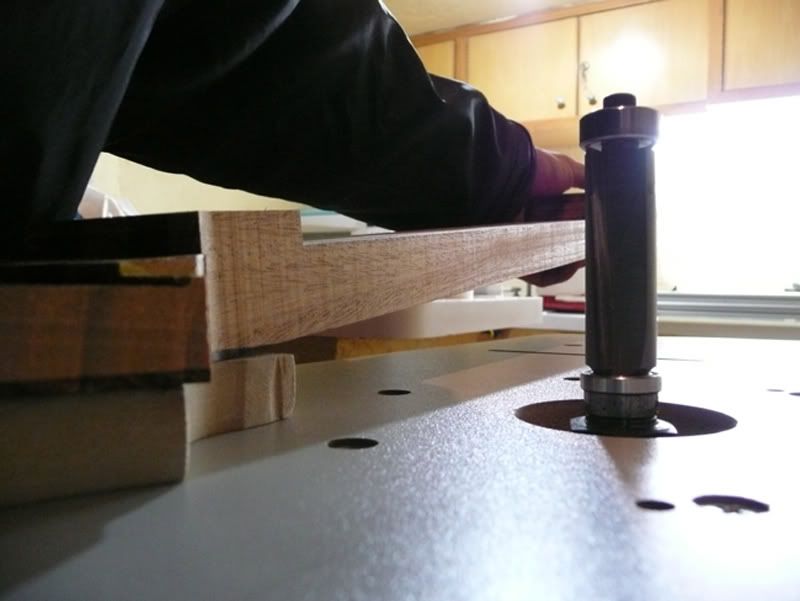
Taped the FB in place, and passed through the router like ziz:

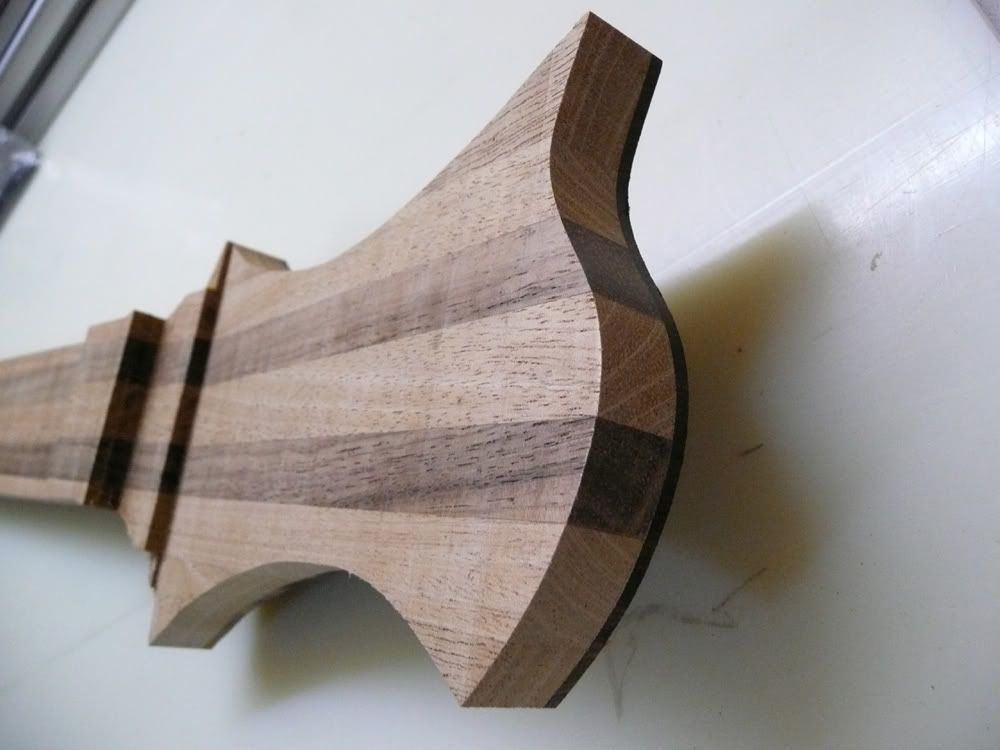
Get results like ziz!
I thought it would be a good idea to get done with the headstock before gluing the body, since it would become to heavy to pass though the router.
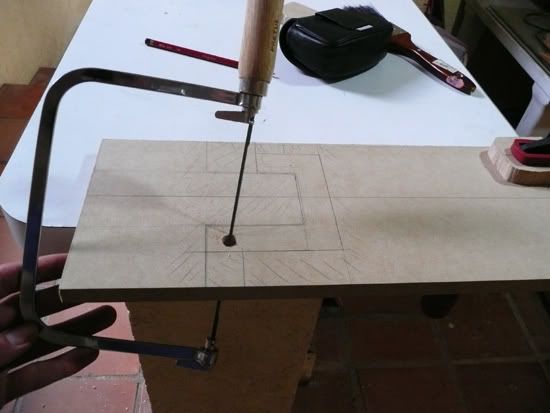
Made a template out of MDF:
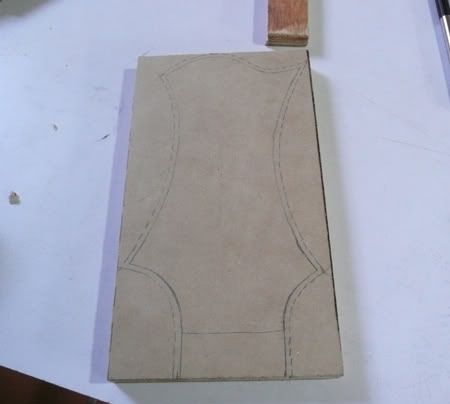
Cut on the outside line with that little saw on the left:
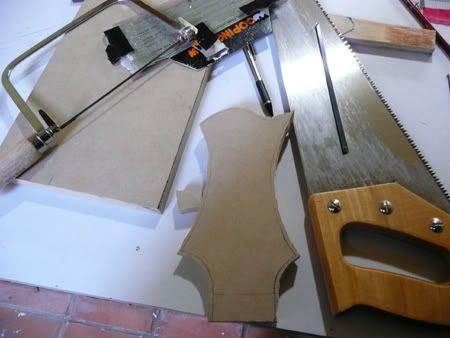
I then used a file to get the shape exactly like I wanted it. I also made the same drawings on the actual headstock:
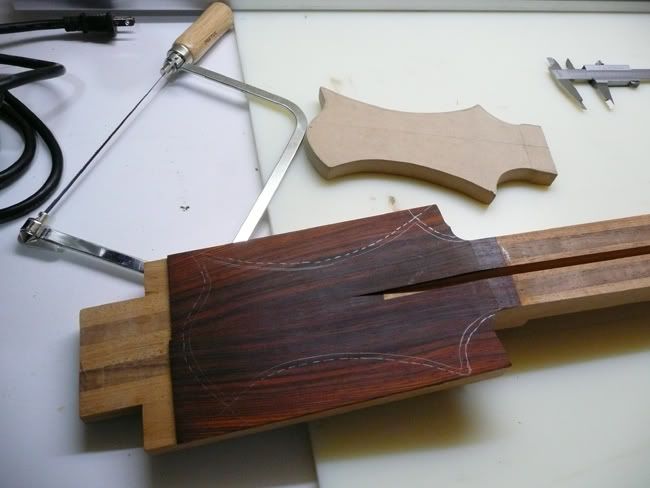
Used the same little saw to rough cut the headstock shape:
Taped the template, and passed though the router like ziz:
So that it ended up like ziz!
-
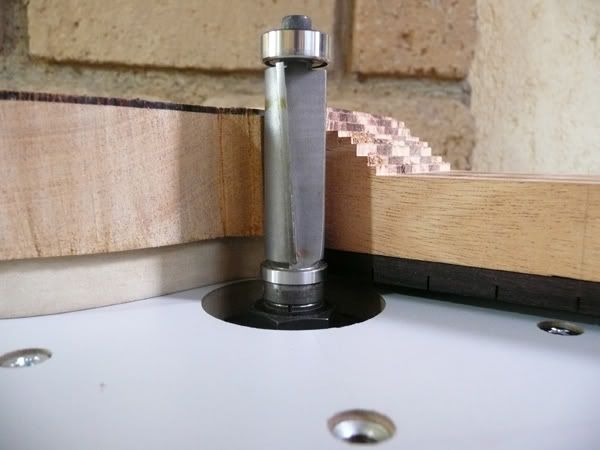
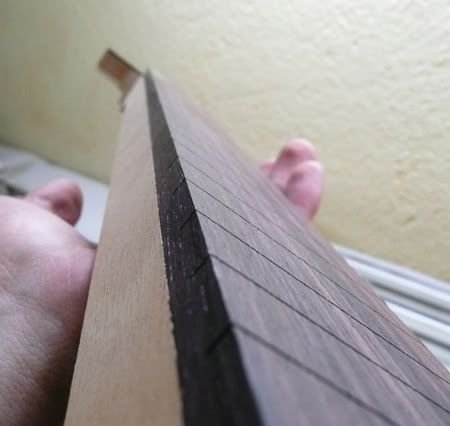
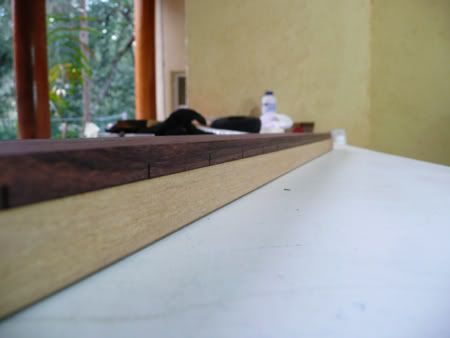
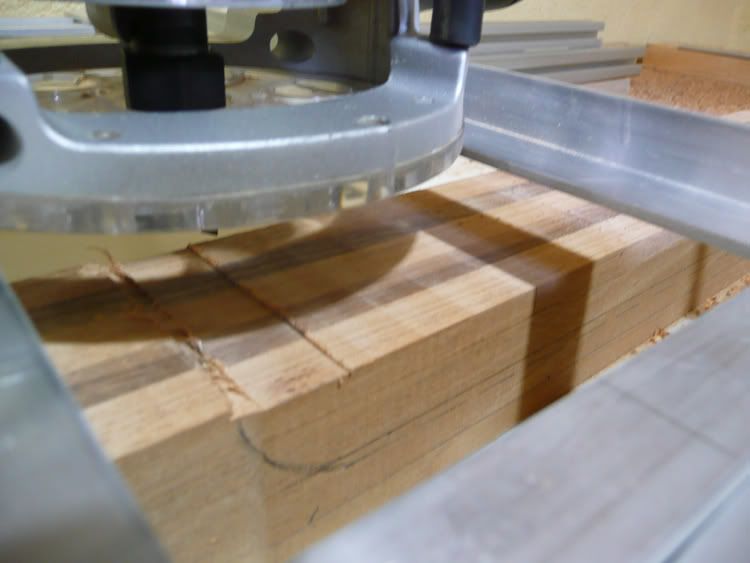
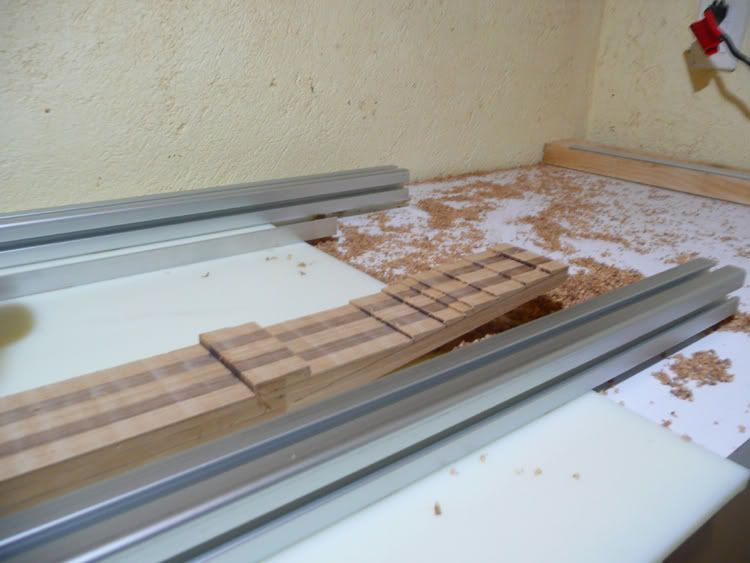
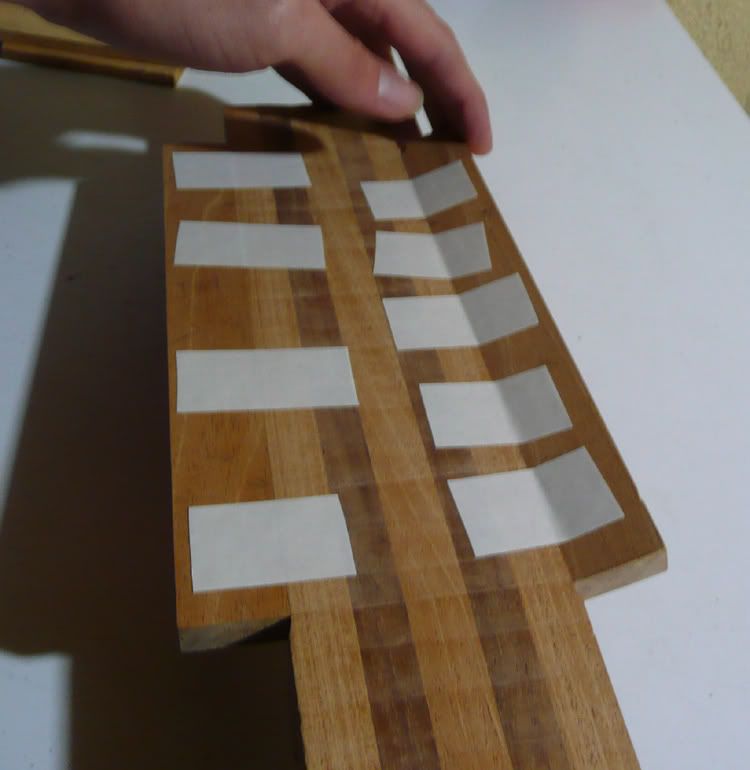
Ok, now it was time to cut the fretboard taper.
First problem was, I can "cut" extremely straight lines, but I can't be precise on where those really straight lines go... So I cut a piece of MDF, and used it as a straight template to cut.
And passed it through the router table:
I then squared the sides of the wings and the laminate using the same method.

That's the 2nd roll of double stick tape used...
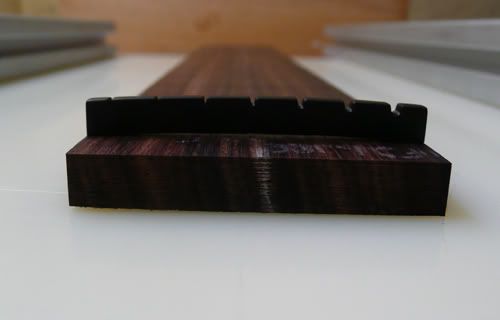
Routed the top of the laminate to acomodate the cocobolo top. (I only salvaged 3mm of the top)
The top fits perfectly under the fretboard.
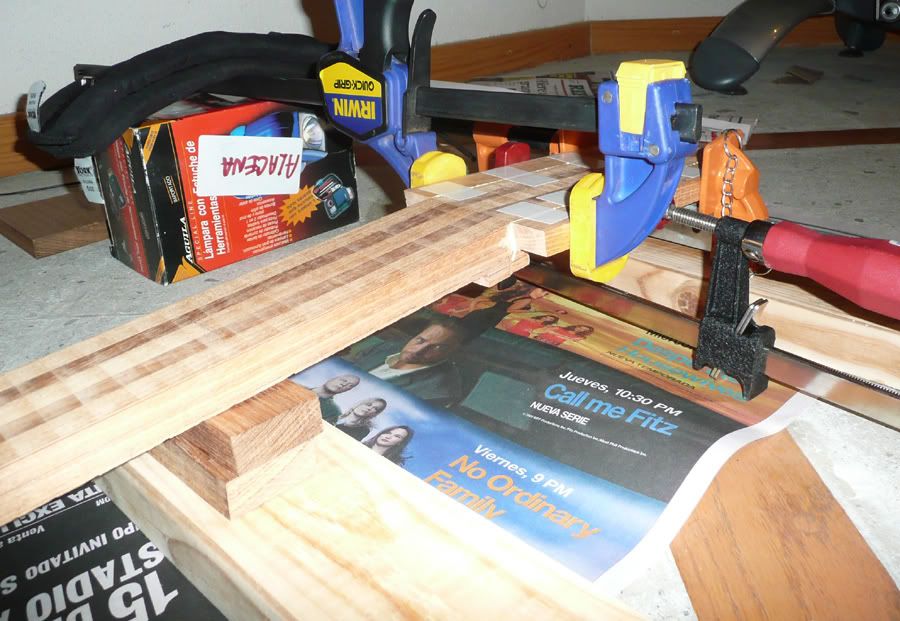
Time to glue the wings to the laminate. I wanted to place some dowels, since I am not entirely sure of how it would hold with just glue.
So I made a nifty little tool with a block of wood and a vernier to mark the "height" at which I would drill.
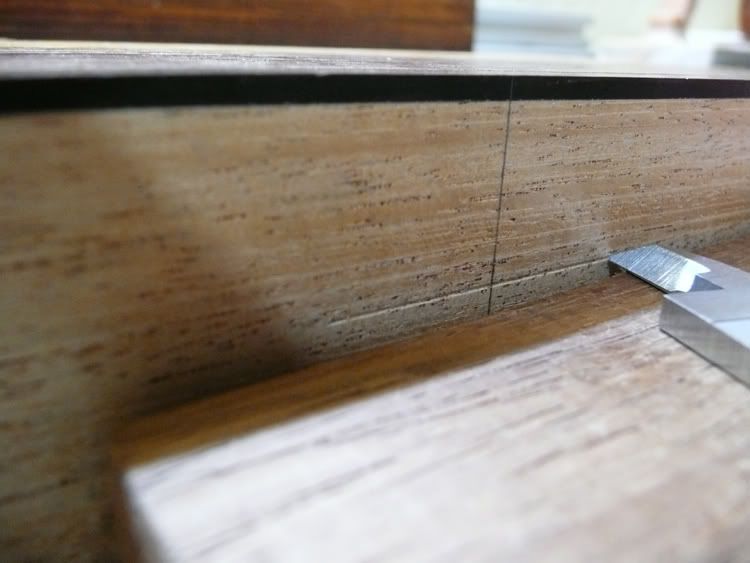
Drilled, and placed the dowels:
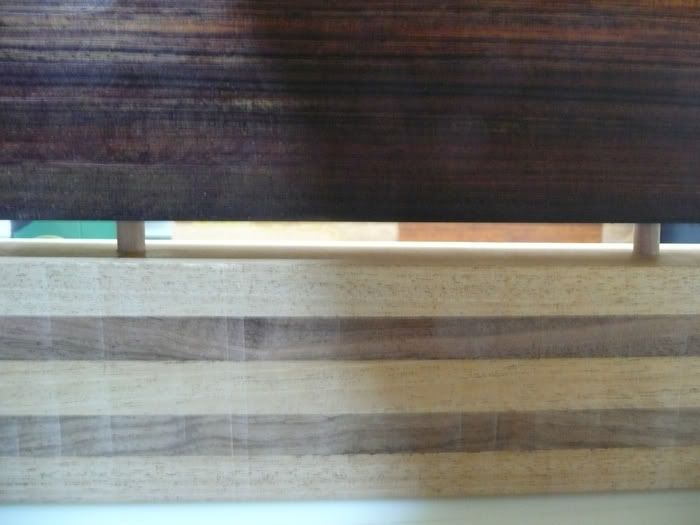
Perfect fit!
-
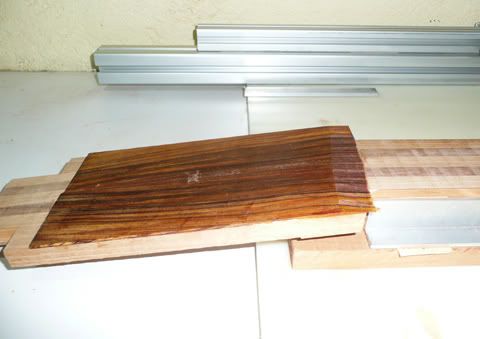
Ok, now I needed to route the top. As I mentioned earlier, it came in rather bad shape. It was poorly cut, and it warped beyond belief.
This also got the ironing treatment, and then it was time to route it.
hmm, apparently I dont have pics of the top completely flat...
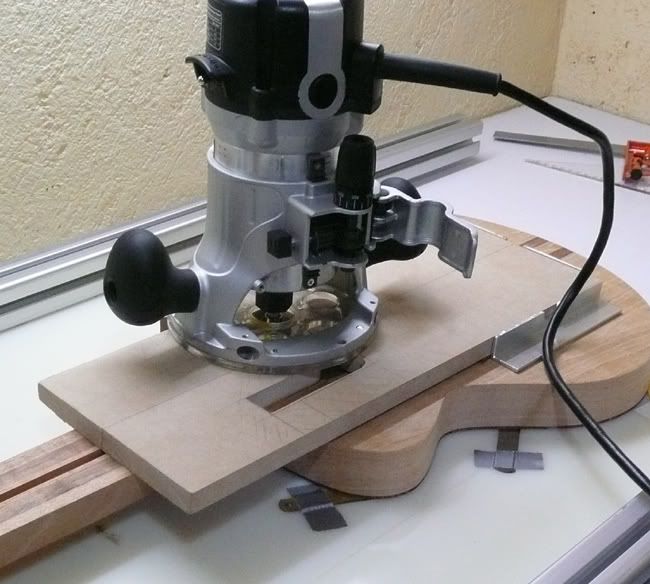
Anyhow, I then routed the truss rod channel.This part was tricky, since the headstock wings were already glued.
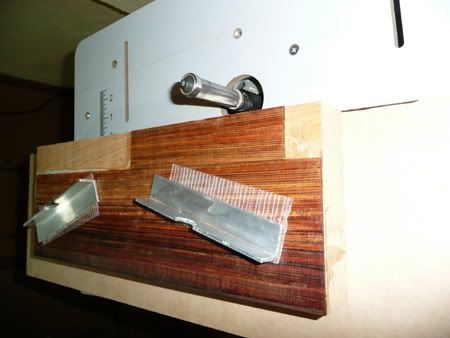
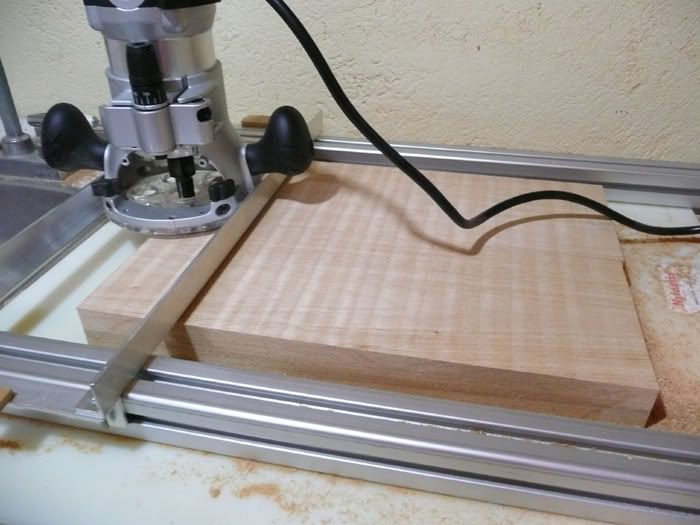
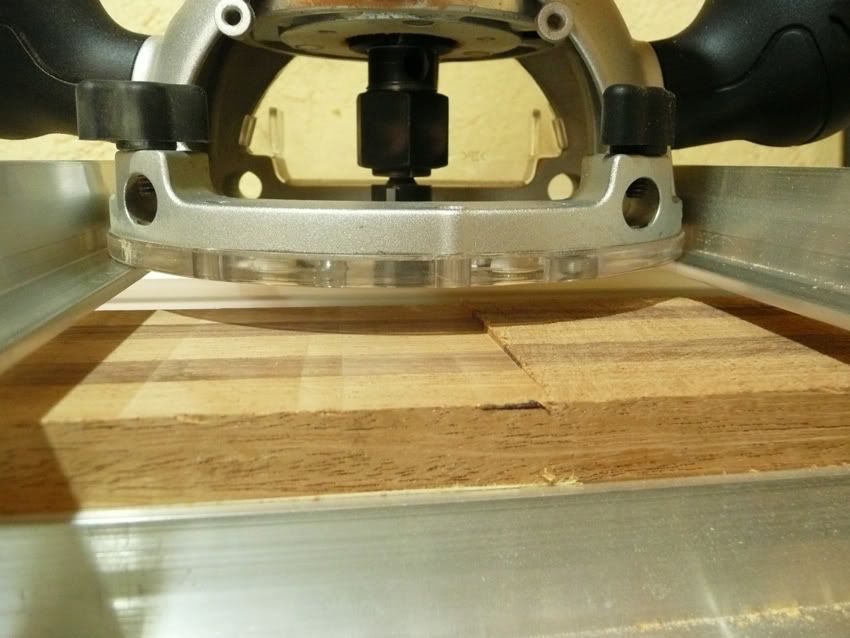
Bought a router table for $20, set some extruded aluminum on the table. Taped some aluminum onto the laminate:
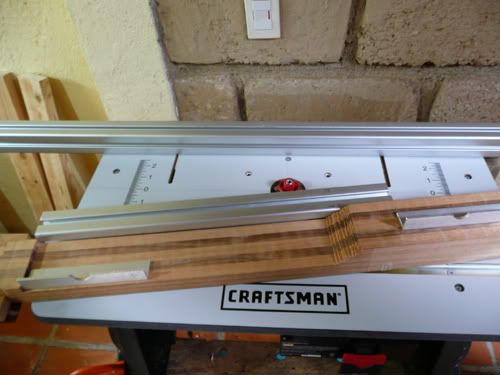
After the first 2 passes:
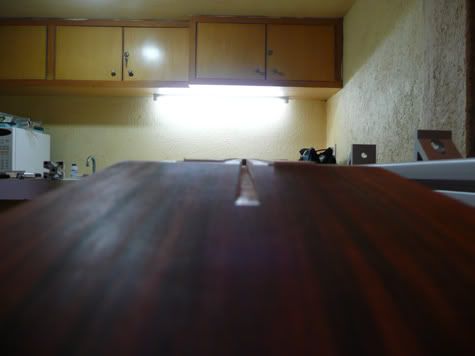
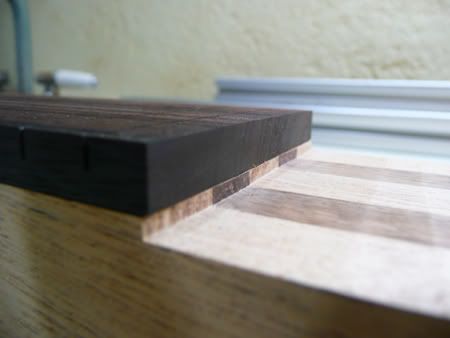
one more pass, and it's time to check the fit of the truss rod:
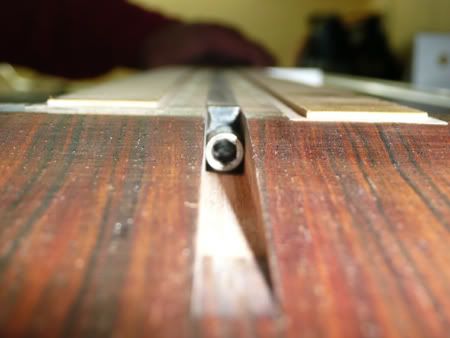
Gah, 1/128 of an inch to go.
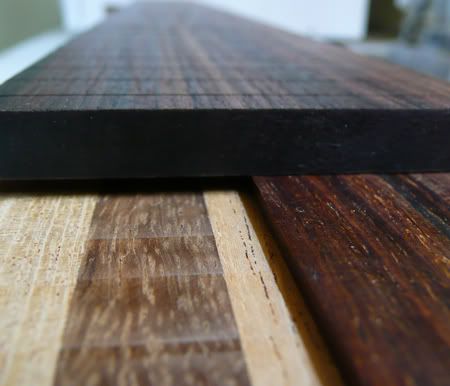
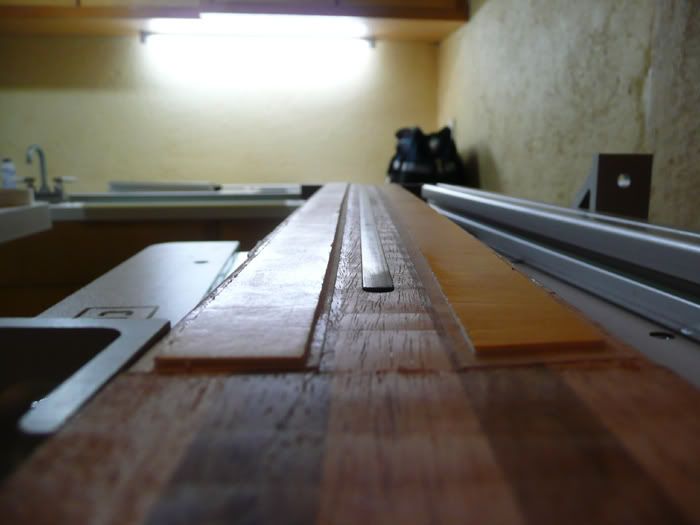
4th pass, and it fits perfectly!
Now I needed to glue the cocobolo backs to the wings.
Drawed the guitar on the wings, so I knew where to place the little bits of cocobolo.
And glued:
x2
-
Passed it through the super jig to plane both faces of the headstock:
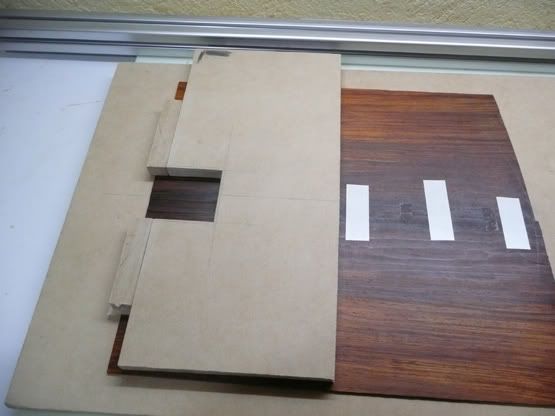
I now routed the cocobolo pieces for the back of the body, to get them even.
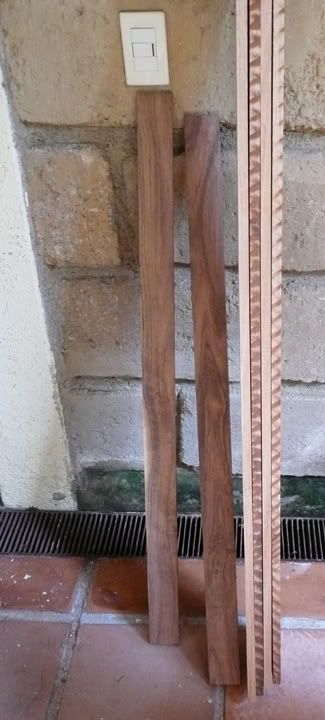
You probably noticed there are 4 pieces for the back. That's because the cocobolo boards werent wide enough to cover the back of the wings.
So I cut the pieces at a different height each. Then I took the bookmatching piece of the other board where they needed to be wider.
I know I explained that badly, but this pics should help.
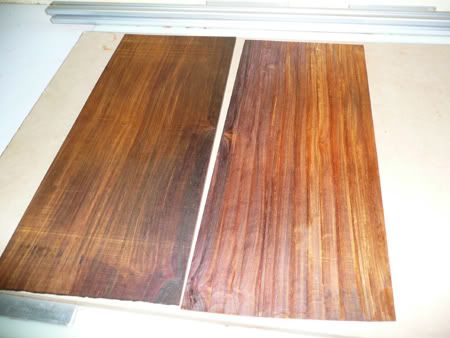
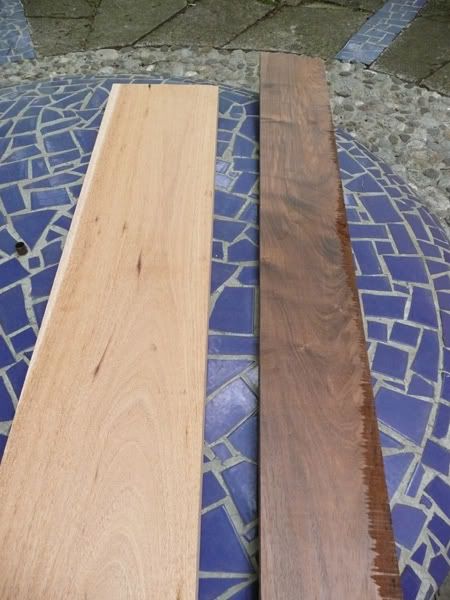
The boards looked somethign like this, before being cut:

They arent wide enought o cover the back of the wings:
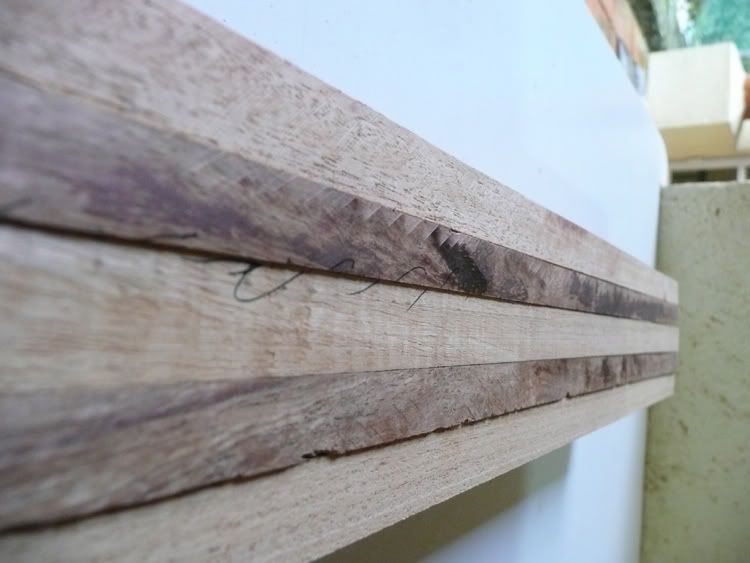
But if I take the bookmatching part from the other board, I can cover it up, without it being noticed.
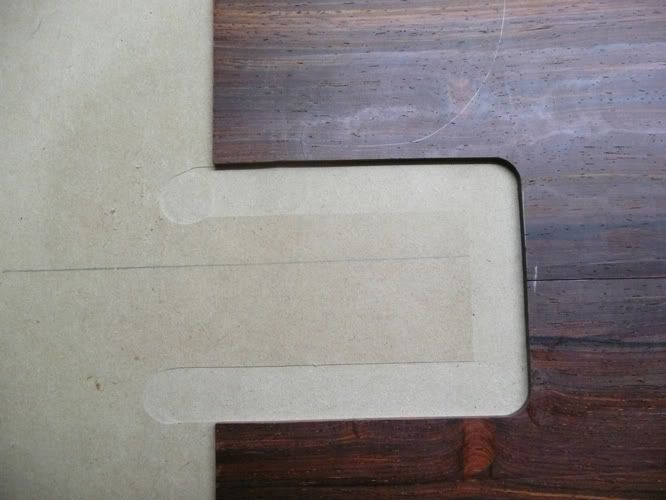
I just had to make some cuts on the wood to better match the grain... like this:
way better:
I then glued the headstock plate. the tape is just to prevent glue from seeping through the middle.
The idea was to have a bit of cocobolo as part of the neck. So it didnt end abruptly right before the nut.
So I passed it through the router:
-
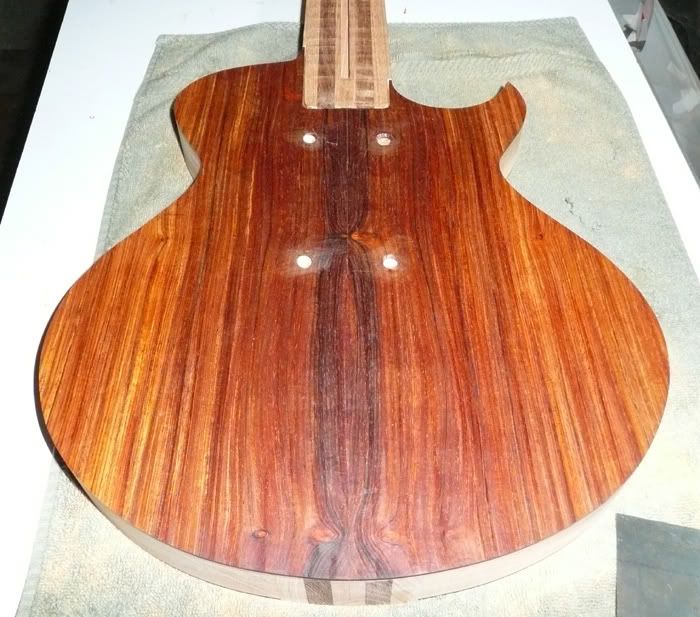
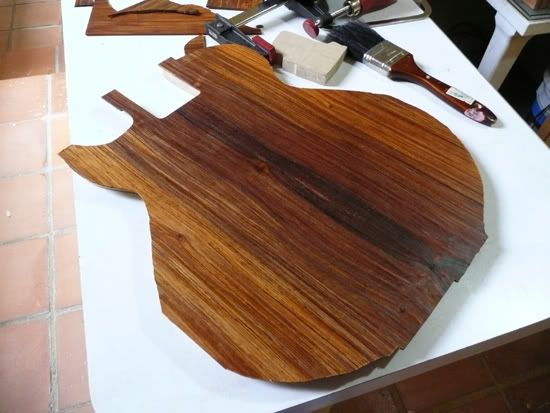
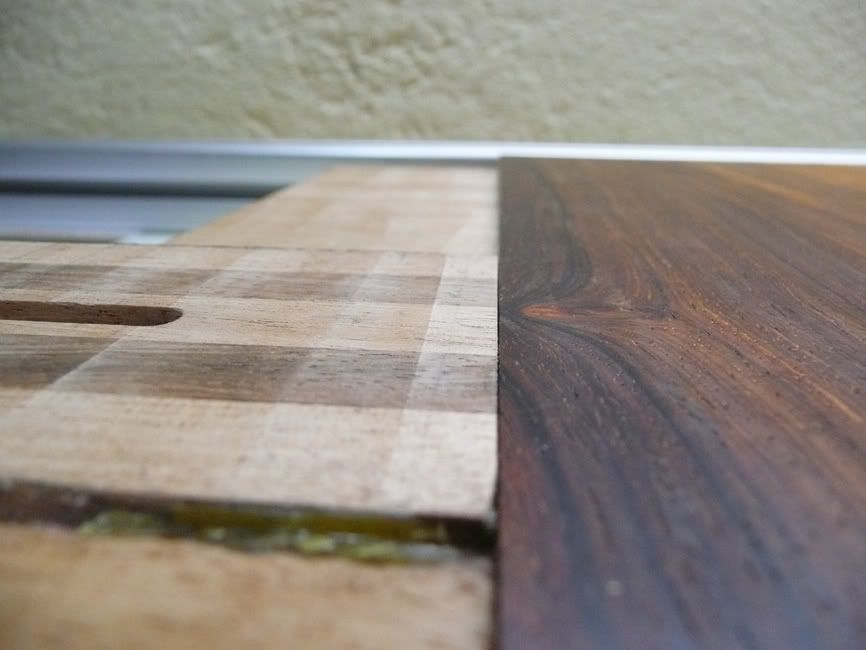
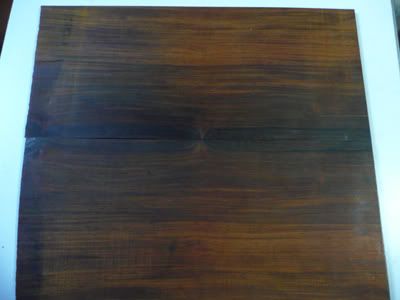
Routed those pieces, and this revealed what the wood actually looked like.
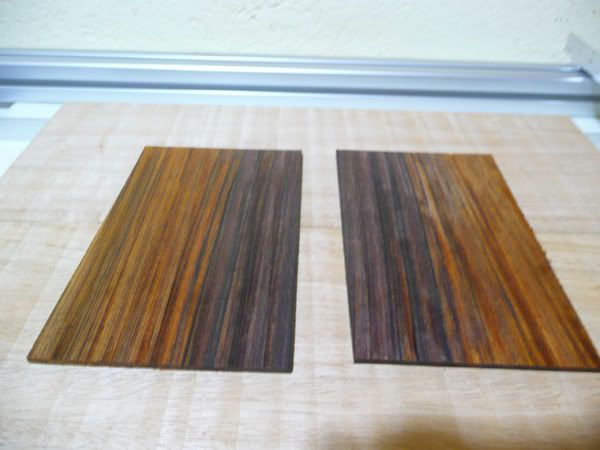
That color changed with time tho....
To this:
Btw, it's a matching bookmatched headstock.
Now I needed to remove a ton of wood from the back of the neck. I decided to abuse my router some more.
Time to make the headstock. I first routed the sides of the laminate to get the straightest face to glue de "wings"
This is what will be glued:
I first taped the wings to the laminate, so that they didnt shift with the pressure
This also allowed me to open it up like a book so I could apply the glue
And clamped it down. Note how each clamp rests on something so it doesnt pull on the neck sideways.
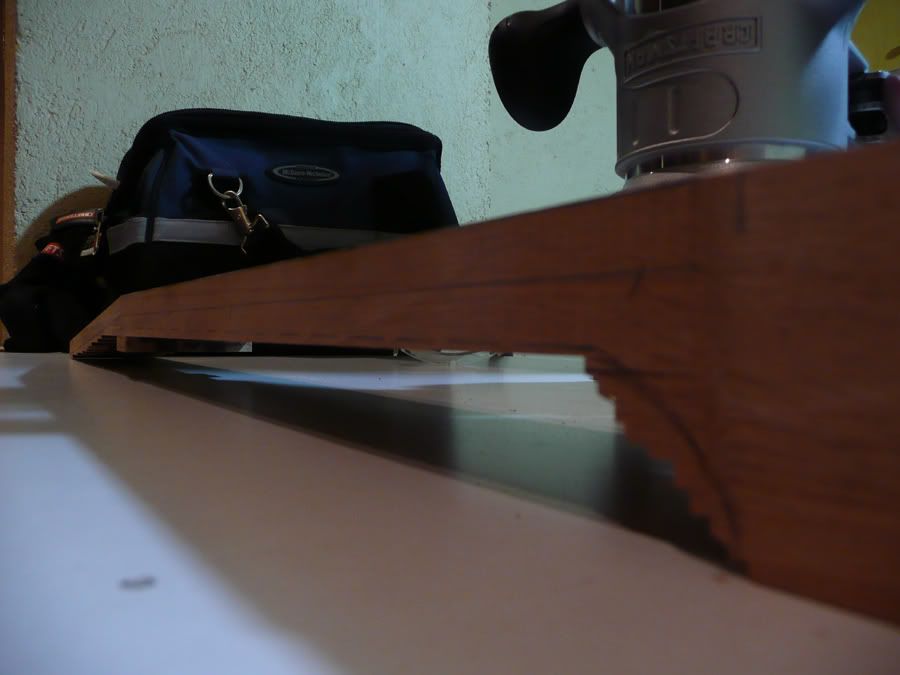
-
worked like a charm!
Now for the headstock angle. Cut it with a handsaw since I dont have a bandsaw or anything to power through such a thick piece of wood.
Since that face wasnt exactly the definition of straight, and it will have a plate on top of it, I started thinking of how to get it perfectly even. and planing is not an option for the laminates...
Here's an idea:
Ill make a rig that holds the laminate at an angle. And a raised base for the router! So chop chop, cut moar aluminum profiles!
As you can see, the laminate rests on the structure itself, which also clamps it down to prevent it from ratling,
Great successsss

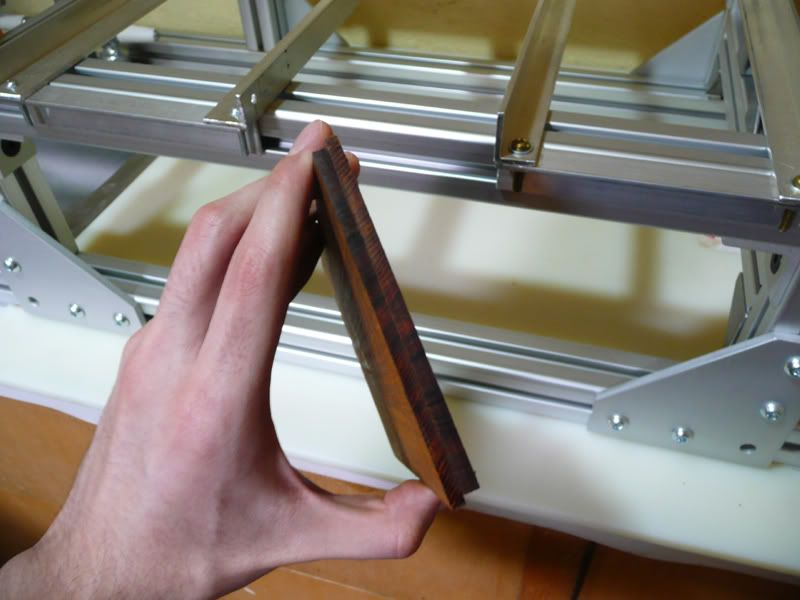
Ok, I now needed to get the cocobolo plate for the headstock ready. The cocobolo I got was rather poorly cut, and it also warped quite a bit.
This got me thinking, and I remembered seeing that acoustic guitars are made by heating the wood and bending it...
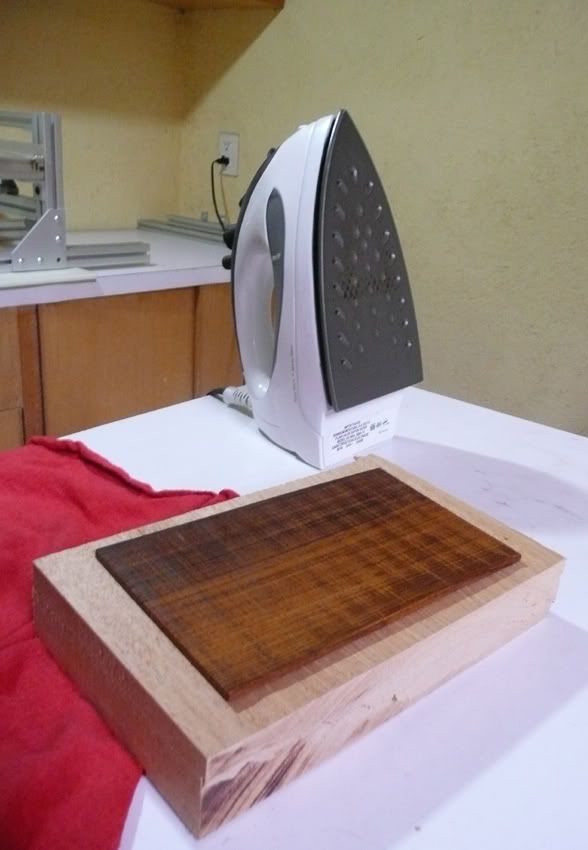
Placed some weights on them(all my clamps were being used at that moment)
Anywho, that worked out great:
-
First of all, a couple of you might have seen this build on another site, but I wanted to share it with the nice folks over here too.
Alright, earlier this year I thought I would attempt to build myself a guitar(and it's almoast done). Before this, my woodworking background went as far as using toothpicks. I didnt want to buy any books on building a guitar, since I wanted the full challenge of having to deal with the entire logistics involved, and coming up with solutions to the difficulties I encountered.
Enough introduction, here are the specs.
7 string.
scale:26.188
Fretboard: Indian Rosewood
Construction type: Neckthrough, 5pc laminate (mahogany/tzalam) tzalam is also known as mayan wlanut I believe.
Wings: Mahogany
Top: Cocobolo (matching headstock) the backs of the wings also are cocobolo.
Bridge: ToM (string through)
Finishing: Oil (almoast there)
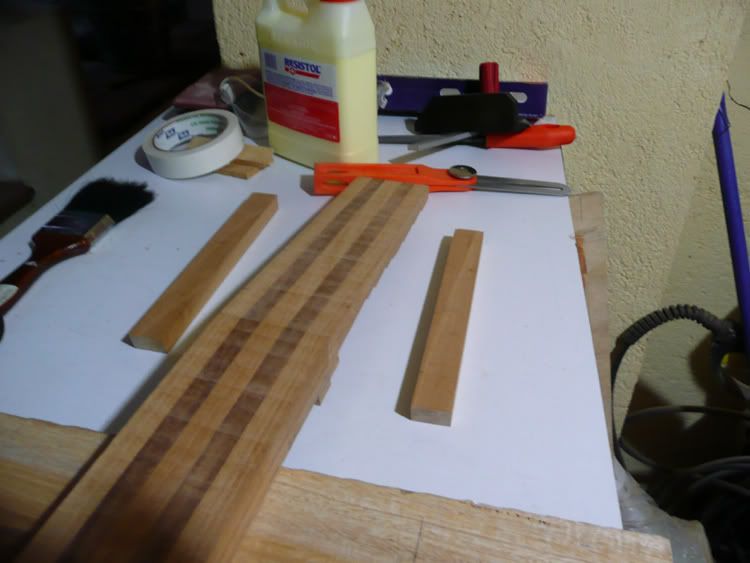
Ok, it all started with a trip to a lumberyard a block away from school. I bought a board of mahogany and another one of tzalam. Looked for someone who sold some exotic woods in Mexico(ironicaly this part took a long time), and started the build.
Eventhough Cocobolo grows in Mexico, it was incredibly hard to get it. All I could get was a back and sides set, and it was cut very poorly.
Made everything out of those 2 boards
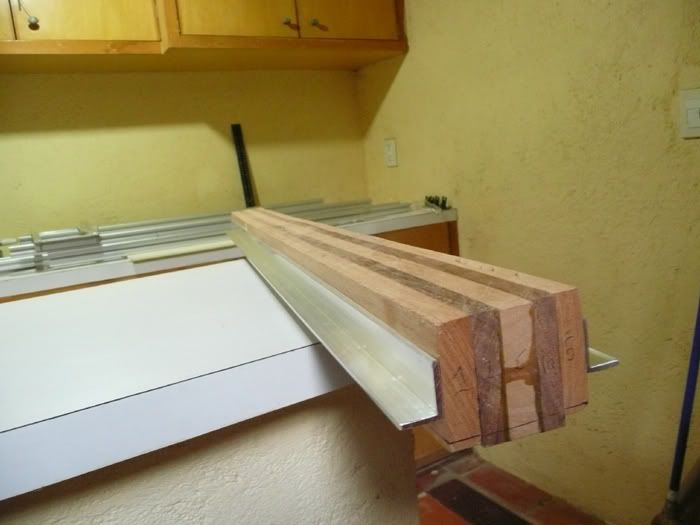
The wood for the laminate:
Planing so they fit perfectly:

perfect!
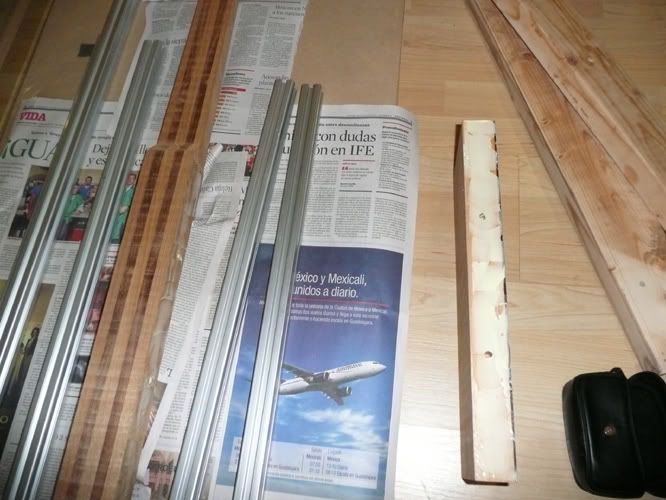
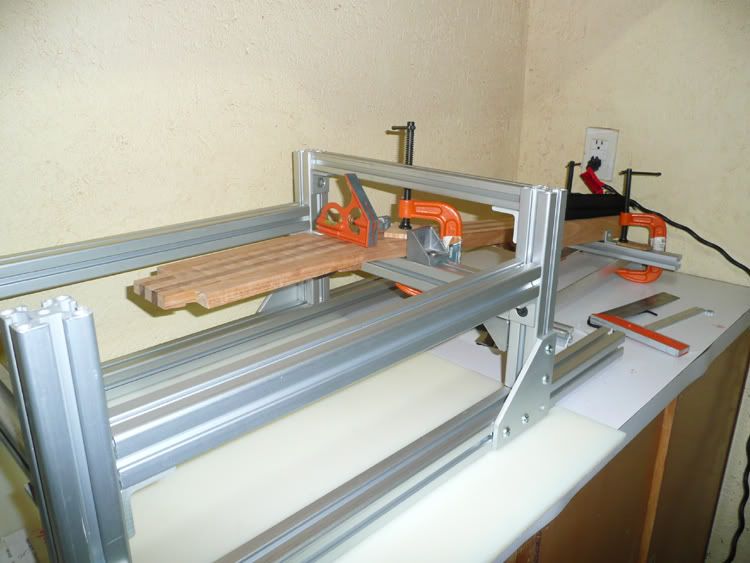
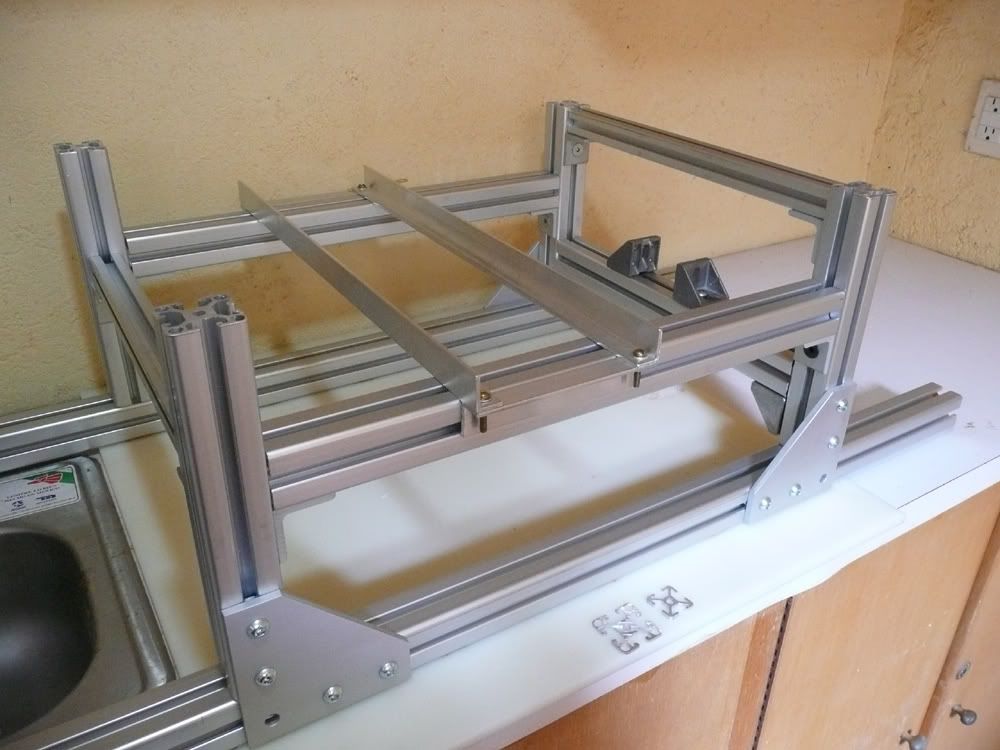
I then realized how important it would be for everything to be as precise as I could get it to be. Particularly since it's a neckghtough, every face needs to be perfect. I made a jig out of extruded aluminum profiles, which later on proved to be unvaluable.
leveled the wings:
Once the laminate was ready I cut it(handsaw all the way):
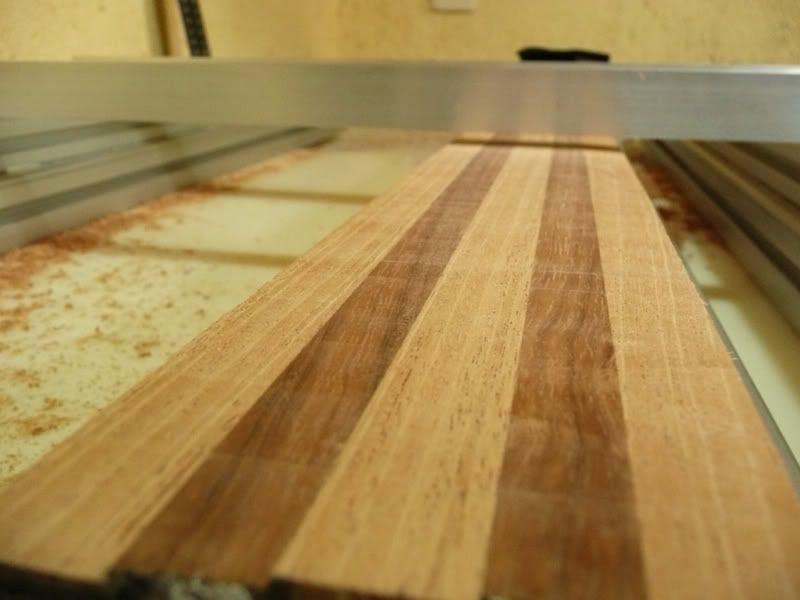
Now I needed to level the laminate to start working on it. I started with my planner, but I just couldnt do it as I would have wanted. The tzalam would just chip off, and I understood I needed to find another aproach to leveling it.
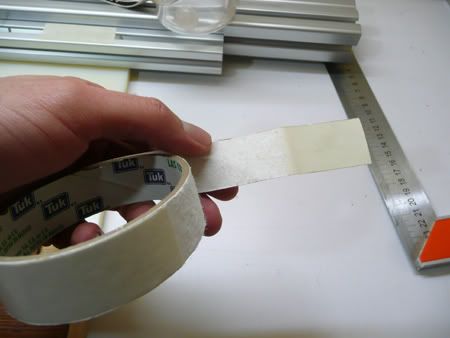
I first cut some aluminum and set them on the sides of the laminate to use as guides. Double tape did the trick as always.
Then with the help of some MS arrows made the rig:
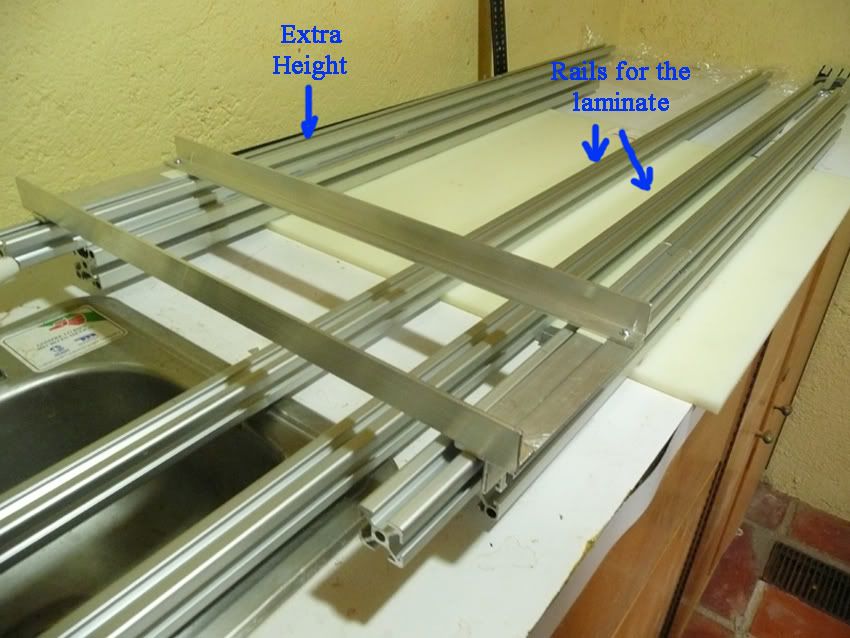
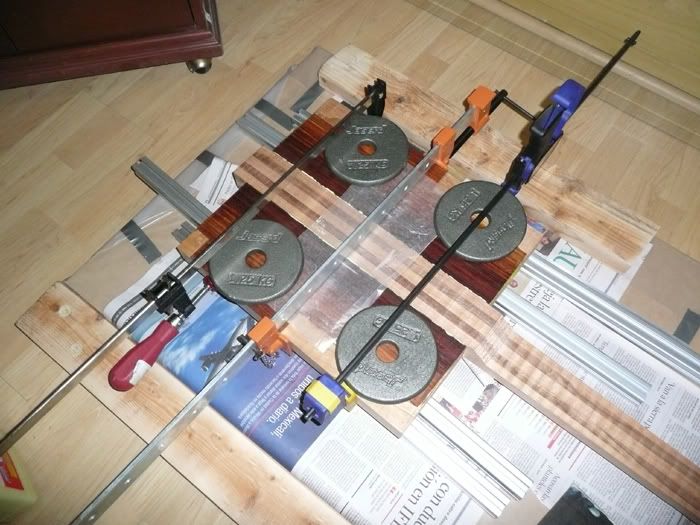
As the paint arrows show you, I set an extra profile on top of the base to get extra height, since the laminate is rather thick. AND, i set those "rails", so that I could slide the laminate on its guides, and be free to move it without changing the height a milimiter or so everythime it was moved.
Just look at it resting on it's rails!
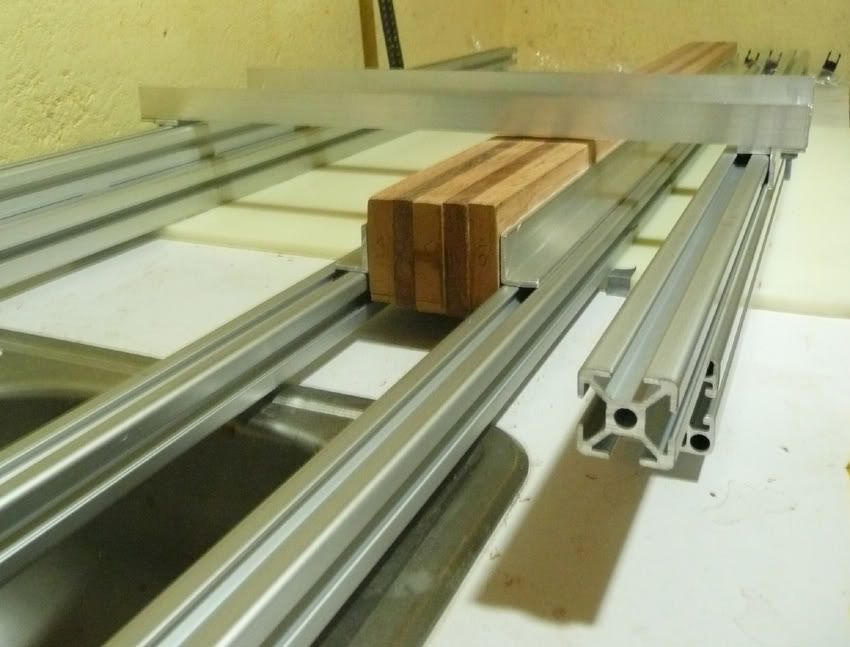
and route away!

First Build, And It's A 7
in In Progress and Finished Work
Posted
Well, I only found the teak oil nearish (3 hour drive, maybe 5 with holiday traffic).
I couldnt find the others in any other spanish speaking countries except for spain (actually Bilbao in Spain, and the dont speak spanish) and Costa Rica. And they dont ship it, since it cant go on a plane.
You would be amazed at how hard it is to find all of this stuff in here. I think Mexicanbreed already found that out too, haha.
Would gunstock oil work? I'm fairly confident that's the one oil I could find. (somehow, I find that sad )
)
I would probably have to use some porefiller on the mahogany and tzalam parts...