


Mattia
-
Posts
4,263 -
Joined
-
Last visited
Content Type
Profiles
News and Information
Tutorials
Product Reviews
Supplier Listings
Articles
Guitar Of The Month
Links and Resources
Forums
Gallery
Downloads
Posts posted by Mattia
-
-
Put some Tru-Oil or similar hardening/polymerized oil on there, don't trust it to just be 'OK' as it is. That, or learn to love the grungy look in a few years.
For the record, fully dried oil under lacquer can work just fine, but always, always test on scrap first. It's worked for me in the past, but these days I 'simply' pop the grain with some shellac.
-
Make templates out of clear 6mm perspex and draw all the features and the centre line on the reverse so you can see through the template and see the wood. Its also easier to work than mdf and wont cause you lung damage if you breathe in its sawdust!
OK, I am the smart arse who already suggested an alternative to MDF. MDF can cause SERIOUS damage to the Lungs, so avoid it especially in confined spaces where dust can be an issue.
While we're at it, let's clear up the fact that ALL WOOD DUST is carcinogenic, and can ultimately cause serious health damage, shall we? MDF is particularly nasty, true, but no dust, anywhere, ever, is safe. I don't have a shop, which means dust-creating activities are limited to days I can work outdoors, and even with wind in my back, I still wear a respirator.
-
I think Hiscock's strongest points are the writing, the concise (yet entertaining) read, and the fact he doesn't merely show you how to make a few different guitar models. He runs you through the whys, makes you think about the how, thus ensuring you a) think about what you're doing and
 draw up your own plans. I've flipped through the Koch, and it's pretty good, but MYOEG has stood the test of time for a reason. It's a very good basic text.
Personally, I can't stress how important drawing up your own plans for at least your first few guitars is; you work through everything on paper, think about every line an measurement, something that you may very well not go through fully if you 'simply' buy a ready-made plan.
Besides, designing on paper is cheap, and half the fun.
-
Isnt this to do with the density of the fibres in the wood? the less dense they are, the more susceptable to moisture, or summat?
I don't think you can generalize anything like that. Plenty of dense woods that are stable, plenty that, well, really aren't. Ebony's certainly less 'stable', at least initially, than rosewood, and it's certainly denser.
Each piece of wood is different, and how it reacts to humidity, etc. probably has most to do with how old/stabilized it is and the basic grain structure, which will vary from wood to wood (interlocking vs. straight vs. growing with pronounced twist), from tree to tree, and from piece to piece, also depending on how it was milled and dried.
It's a natural product, after all, with all the variability that induces. Any generalizations are just that; general. Each specific piece of wood will have to be evaluated individually. As a rule, if you find a nice, even-grained, stiff-feeling (flex everything you build with, you get a better idea of the variotion that exists, but don't worry about it too much) chunk of wood, no knots, no cracks, no shakes, no funny warp, and a good 'bonk tone' (if it ain't got any tone, chances are it won't make a great guitar, and/or that it's got some hidden flaws damping vibrations), you should be good to go.
-
Melvyn Hiscock's 'Make Your Own Electric Guitar' is a very complete book, and runs you through building three different kinds of guitars, trems, and a good chapter on design considerations and designing, which is also of key importance. You can build perfectly great guitars using only the info in that book. Fairly brief, quite complete, easy to read. I like, and I blame it for getting me started.
After that, peruse the various forums/websites/tutorials you'll find on the 'net, and ask your specific questions.
-
Since I'm building one, I have to say I appreciate the shape more, but it's not an 'instant loving it' shape. Some days, yes, some days no. Same thing I have with strats. it's that 'slightly too square' thing they both have going on that doesn't quite work for me, sometimes. Other times, it's just perfect. They're timeless classics, though, which ever way you turn it, and they've got a certain charm.
However, the Telecaster headstock is possibly the ugliest non-metal guitar 6 per side known to man (while the small, non 'Big Head' strat headstock is one of the nicest. Go figure).
-
Welcome mattia and thanks for the input. I have researched it on the web and over at MIMF. I haven't been there in a while and maybe now is a good time to pop in and research some more. I didn't realize a top would be so inexpensive (see my Carpathain Spruce thread) so now it has to be a go!!
PS: Your user name is freakin' me out - bad! eddiefletcher's bro was a member here and died 2 years ago....his user name was matia. When I first saw your name my heart stopped for a few seconds
Back on topic....sorry ed!
Woods don't gotta be super-pricey, y'know ;-)
Ah. Was warned of that, actually, but I can't figure out if I can change my name without re-registering. Mattia is my actual given name, and I use it on all the forums I haven't bothered using my full name one. Easier to remember that way.
-
Ok, I have never in my life used instrument laquer. I'm a very big proponent of the automotive(2-pack) clear coat. However, I've decided to mix things up a bit and give the instrument laquer a go. I bought stewmac's behlen nitro laquer. I have always read on the forum that you guys allow about a month before wet sanding and buffing. However, if you read the instructions that Stewmac has for their laquer, they say to only wait 4 days before wet sanding and buffing? Could this be true? Or is stewmac wanting you to rush it? I wouldn't want to wet sand the finish while it's still green. I know that the rule of thumb is if it still smells, don't sand it. However, everyone knows that finishes can still be green with no odor. Realize I haven't laid down the finish yet. I'm not even close to that stage. I'm just wondering if this 4 day thing is possible? If it is I'll be jumping for joy.
For Nitro...don't even think about it. Think 4 weeks, minimum. I won't even touch a waterbased finish with final wetsanding and/or buffing for 2 weeks, minimum (although I do wet-level before the final two flowout coats, after giving it a week to dry, minimize the work later).
If you've got catalyzed Poly working for you, why go for Nitro? What with it's ultimate isntability in the long term. I know which one I'd choose if I had the choice, and it's not nitrocellulose. How thin you apply the finish matters more than any 'mythical' properties the finish is supposed to have.
-
Thanks unclej. that's almost word for word what that guy has in his listing
I'm going to get a set and see what happens. I'm replacing a Sitka spruce top that sounded absoutely incredible before it was broken......
I'll post my progress and results as I go.
Carpathian is nothing more than European Spruce (Picea Abies) from the Carpathian mountains. It's a fantastic tonewood, highly sought-after, and generally more expensive than an equivalent grade of Sitka. Generally stiff, light, resonant, deeper, I'd say slightly richer taptone than Sitka, but then, I may be slightly biased towards the Euro, since I can get it more easily/cheaply than I can Sitka (I'm in NL, and Italy's not too far away..) Suited for fingerstyle as well as strumming, although it does take some time to 'play in' and 'wake up'. If you want to emulate the sound you had, stick with the same woods and copy the bracing pattern/basic dimensions.
Ed Dicks' AAA or HAA Sitka (Acousticwoods.ca) is top-notch, and very fairly priced, And Bob C (rctonewoods.com) has some pretty nice stuff too, although he's not quite so specialized in tops.
-
Thanks doug and thanks for getting back to me so fast! When you say to do it later I guess I'm a little befuddled. I can work a router better than most but a chisel and hammer after the fact seems daunting to me (I've always sucked at mortising hinges and such. I can't imagine hand mortising a tenon joint in my guitar body after it's built!) What do you mean when you suggest doing it later? Honestly, I've hand sanded a compound radius, done plenty of neck jobs and refurbished existing bolt-ons but I've never built a guitar from scratch so I'm not sure what you mean.
ARGH! Not hammer! Just chisel. Sharp, sharp chisel. Hog out excess with a drill, and clean up nicely with a chisel. Practice making fitting mortise/tenon bits (small, even, just holes to plug) with some scrap to get a feel for it, but don't whach the chisel with a hammer. That's just...crazy.
I fit set necks to my bodies before the top goes on, but only becase they go through to the bridge pickup. The rest of the body (top carve, etc) is essentailly finished by the time I get around to this bit. You can build the body without the neck pocket route, and add it later, no problems. That's all he's saying.
-
Reinforced mahogany (CF rods, pair of them), medium-sized neck carve, and it's all good. My acoustic in particular is rock-solid when it comes to tuning, and it's got the heaviest strings on it.
Laminated necks, particularly with mahogany as a main component, are very, very stable.
Having said all this, I don't think you can really generalize vis a vis species. Some maple is stable, some maple will warp all over the place. Some mahogany is great, while some will flex and move (not stiff enough) annoyingly much. I had someone who plays a strat almost exclusively (relatively 'flexible', bendable flatsawn maple, which he used while playing) comment on how 'stiff' the neck on one of my set-neck guitars felt, and that on the guitar I've built that I feel has the MOST flexible neck. So go figure.
Honestly, locking tuners and solid hardware will help a great deal as well.
-
Very cool Ed! I'll keep an eye on this one. I was looking at my Tacoma Thunderchief on Sunday and deciding if I should attempt a body re-build and reuse the neck or toss it. Since it's a bolt on I am leaning toward the rebuild using the existing body as a mold. The top and back are busted (thanks to UPS) and I hate to toss it. I think I could reuse the sides if I am careful enough in removing the top and back. Any suggestions on this from anyone?
I just checked new Tacoma (Fender) T-Chief prices and they are about $1000 street price......
Maybe buying a solid rosewood back and spruce top will cost me that much anyway. This is a BIG bass!!Keep at this one.....I'm looking forward to it!
If you can't repair at least the back (how bad's the cracking?), you should be able to get an EIR back set and material for a top for under 100 bucks, total. Ed Dicks at Acousticwoods.ca is one place to look, and Bob Cefalu at www.rctonewoods.com is a great guy to deal with, and has a ton of great acoustic woods (and some electric stuff, too).
To remove top and back, a blunt, but thin pallet knife, a clothes iron, and some patience should get you where you want to be. You might want to head over to the MIMF, register, and read their expansive section on repairs/acoustic construction.
-
Heh..thanks guys. I'm slowly getting to grips with the new (to me) forum software. Seems pretty intuitive, although at the rate I read/reply, the flood prevention's already annoying me...
-
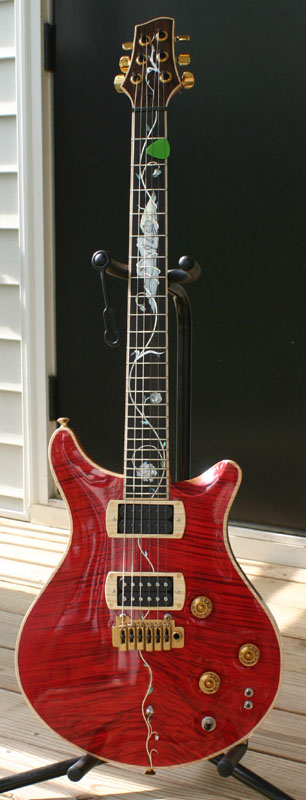
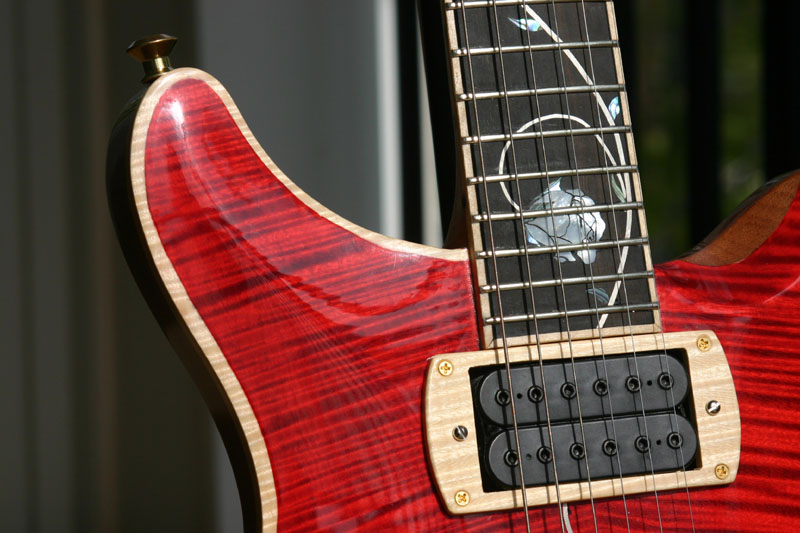
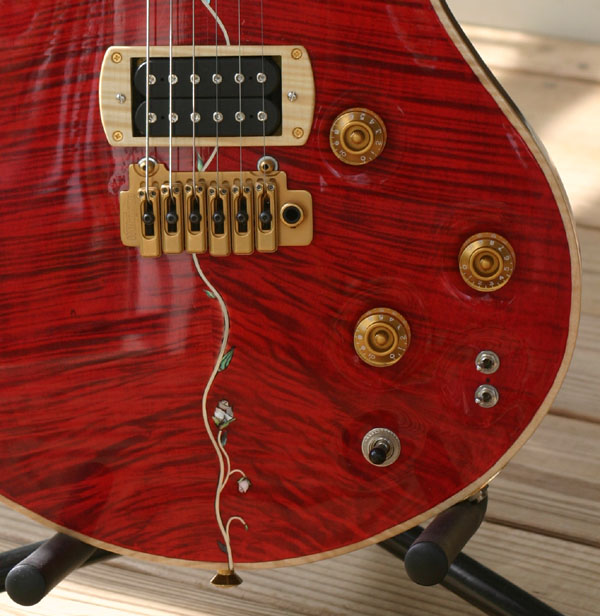
Red's a pain in the butt colour to photograph, but using flash and indoor, non-natural lighting is going to make things worse. The last guitar I finished was done in red (tinted clearcoat, though) with a black stain base that was mostly sanded out, fairly evenly, giving it a slightly 'irregular' but not unpleasant look, I find. Highlighted the grain a bit in certain areas, less in others. I still don't have huge amounts of experience with colour finishes, mostly because I prefer to go all-natural, all the time (ooer) when possible.
A few. This one's far, far too 'red':
http://www.xs4all.nl/~mvalente/guitarpics4..._finished02.jpg
This is a tad dark:
http://www.xs4all.nl/~mvalente/guitarpics4..._finished01.jpg
These two are about right, colour-wise, just one's (first one) in direct sunlight which gives it a bit too much reflectance (and I really should get smudge marks off before I take pictures of the instrument...):
http://www.xs4all.nl/~mvalente/guitarpics4..._finished04.jpg
http://www.xs4all.nl/~mvalente/guitarpics4..._finished03.jpg
-
Nice explanation. I've got a 'mathy' version kicking around somewhere that needs re-writing, but I'll get around to it eventually. I still double-check for each guitar I build, since I have yet to build two that are identical.
Re: fretboard width, something that applies to most acoustic guitars should work quite well for all instruments: width at 12th fret is the same as the string spacing. You've got the nut spacing, connect the dots, follow the line through, and voila, done.
-
Ideally, I inlay on slotted, radiussed boards that aren't quite finish-sanded anyway. Rough-radiussed, if you will. Bulk levelling is done with a file, then I go over the entire board with a wood radius block and some 220 grit paper, just a few strokes, which gets everything where it needs to be quite quickly.
-
Ditto on the MDF workability. It's awesome stuff for templates. You must have used old, water damaged rotting stuff.
Yes, I've noticed a number of posts from users who have good results from MDF. I found it OK for machining (it takes a router cutter and leaves a smooth finish) but when I tried to sand it it just went fuzzy and soft, and when I later tested out the template on scrap the guide bearing just sank into it.
The MDF I used was not brand new, I salvaged it - it looked and felt solid enough, but even so maybe it could have been damp. Or maybe MDF is good for many things but sanding it is a no-no? Like one of the earlier posts that said it's not a good idea to use a rasp.
Anyway, having read all these helpful posts I'll give MDF another chance - with some brand new stuff fresh out of the wood-shop!
MDF should be easy to route, cut, saw, and sand, although it can get a little 'fluffy'. I like to use it for initial templates, because it works predictably and evenly, and is just fine at handling template routing. however, if you want the template to really last, use the MDF tempate to make a master template out of quality birch ply or something similar. MDF is, ultimately, relatively disposable stuff if we're talking routing templates/high-impact situations. It's great for molds and similar. It won't hold up very well unless you finish it. And it's a Bit** to finish (drinks finish like there's no tomorrow..the radius dishes I made for my acoustic building being case in point).
The nasty, nasty thing about MDF is the carcinogenic dust, which is very fine, and gets EVERYWHERE. Evil, nasty, and something you definitely want to keep out of your lungs.
Actually, that's something that should always be mentioned:
SAFETY FIRST. This means not only smart use of power tools, hand tools, not working while tired/drunk/stoned/distracted, and clamping workpieces properly, but basic health-related safety. ANY TIME you're making dust (ie, any time you're working wood with anything but an edge tool, pretty much), you should be wearing good respiratory protection (disposable masks are often so-so), doubly if you're spraying finish. Life = great, treatment for naso-pharyngeal cancer and/or various pulmonary diseases = not so great. Eye protection and ear protection are crucial when using power tools. You're making a musical isntrment, so you want to be able to enjoy the music it makes.
-
I scarf all my necks, laminated or not, and have volutes on them as well. The scarf (when executed well) means less short grain/runout in the headstock (y'know, the reasons Gibsons are notorious for neck breaks), add a veneer on the head, and you hide half of it, add one to the back as well and you pretty much hide all of it, and it's stable to boot. The volute adds a bit of 'meat' to what is generally one of the weakest areas on a neck. Besides, I like the look and feel it gives me.
I tend to use small brads/staples to line up and hold the joints in place, and they work fine. It doesn't take much to prevent things from slipping around.
You can make an angled router setup (basically a wedge for your router to ride on) to do your scarf joint, but frankly, with a sharp handsaw, a sharpened plane or two, and a bit of practice, making a nice, tight joint isn't difficult. Add the fact that freshly planed surfaces make for the best gluing and you've got a winner.
Seriously, do yourself a favour and get a plane or two. Start with a block plane, then a jack, and learn to sharpen them up well. Particularly the block plane is an invaluable part of any woodworking project, IMO.
-
Hey, long time reader, first time poster. I've built a couple of neck-through-body guitars with moderate success, (well, except for the finishes, those don't look as great as I'd like, passable but not perfect. But I'm learning) Now, I'm trying my hand at a set neck. I've been reading up and looking at plans, but most of the plans I've seen have been for LP type guitars that are a good deal thicker than what I'm thinking of working on. (I'm thinking more along the lines of an SG) My question is, how deep do folks make the neck tenon into the body? Or rather, I suppose, how much thickness in the wood of the body below the neck tenon do most people leave when routing the pocket? Is there a potential stability issue here if there is not enough wood here? I hope I've asked this in a way that makes sense.
thanks!
I make my tenons fairly deep (in fact, I go through to the bridge pickup, but that's really not necessary), and nice and thick (say, half the body thickness, at least, if the neck joint/heel carving allows it). Make sure the joint is good and tight, and only remove as much wood as absolutely necessary for the neck pickup, and not a smidge more.
-
Jigsaw (don't have a bandsaw), router/sanding drum (robosanders are great) for the headstock, and hand tools for the neck. A good Sandvik half-round is great, and japanese-style hacksaw rasps work well, but my favourite tool for neck carving these days is a microplane rasp. Fast, clean finish, controllable, great stuff. Sandpaper for cleaning up/shoeshining the back, just to make sure everything comes out smooth.
A set of cabinet scrapers in various sizes is absolutely essential as well, and costs just a few bucks. Lee Valley has a nice selection of stuff.
 draw up your own plans. I've flipped through the Koch, and it's pretty good, but MYOEG has stood the test of time for a reason. It's a very good basic text.
Question About Laquer Finishes
in Inlays and Finishing Chat
Posted
OK, here's a question: why use Vinyl sealer at all? I've never used the stuff to seal, prefer to slap on some shellac, which does nice things to the grain, and is compatible with pretty much every finish on the face of the earth.
Wouldn't the 2-parts be self-sealing, anyway? Used as it's own sealer and all? I'd assume we're talking fairly high-solids, few coats needed materials here.