


xadioriderx
-
Posts
130 -
Joined
-
Last visited
Content Type
Profiles
News and Information
Tutorials
Product Reviews
Supplier Listings
Articles
Guitar Of The Month
Links and Resources
Forums
Gallery
Downloads
Posts posted by xadioriderx
-
-
i could be wrong, but i dont see much feedback coming from anything without a soundhole. e-coustics feedback badly. my artcore only feeds back because the nickle pup covers arent waxed to it, so its those that feedback, not the body. you shouldnt have an issue on it
-
yeah it wont be any louder, at least not noticeably so. i hollowed the heck out of my last 2 builds and theyre both just as quiet as my artcore, which is just as quiet as the strat
-
this works!
-
ah i think i misunderstood. a 1/2" top minus the carve would leave a side of less than 1/2". i was imagining something thicker, with and edge of 1/2. my bad!
ill have to try this carve thing one day =D
-
half inch seems excessive. its going to look like natural binding, and 1/2" seems a bit big! i would think 1/4" is better. but i havent done a carve top ever so what do i know =p
-
looks pretty sweet, looks like a paper mache template

-
wow that looks fantastic!
-
maybe its a bad idea, but couldnt you flip it over, slot it correctly, bind it so the old slots dont show
-
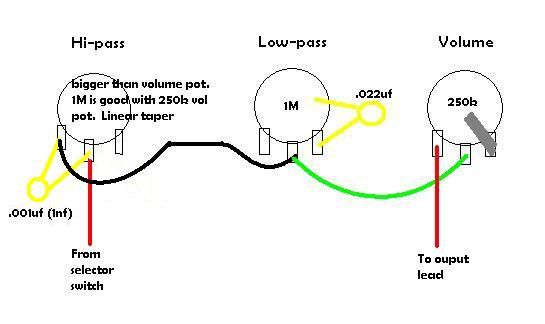
not a big deal, im working out how to make this hi-pass work, and maybe then i can have you erase the above post with the one that doesnt work. just so no one spends time trying it!
-
apparently we cant edit posts here, but the above hi pass doesnt work, sorry!
-
and an added bit of fun, a hi-pass tone knob the rolls off lows
-
thats awesome!
-
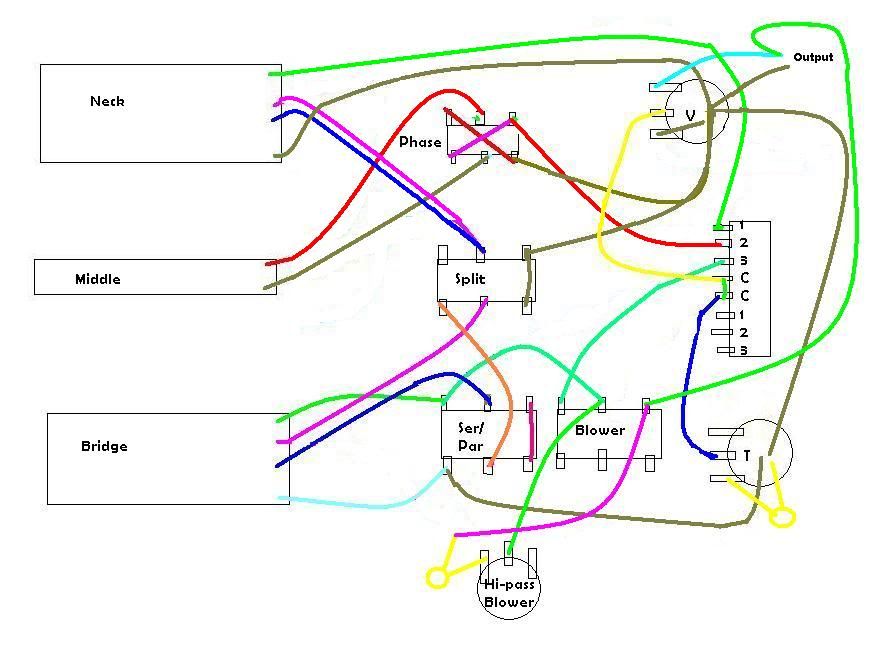
mostly because i spent quite a while doing it, so i figure more than just the person i made it for can benefit.
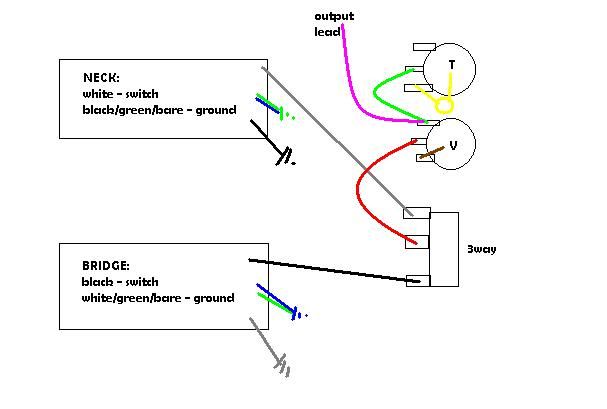
the details:
3 P/p pots
1 DPDT
HSH setup
5 way toggle
I didnt designate which switches are P/p and which is dpdt, thats up to whoever.
Phase reverse for middle single coil
Series/parallel switch for bridge humbucker bobbins
Split switch for splitting both bridge and neck humbuckers
Blower switch for bridge pup
Master tone
Master volume
Hi-pass blower pot for bridge pup - rolls highs straight to output (add in twang whenever you want!)
Often with this many switches and things there are flukes here and there, or dead settings that make no sound in the wrong combination.
im happy to say that the only fluke on this is when the coil split switch is set to split, but the bridge ser/par switch is set to parallel, it wont split the bridge, it will stay parallel. the normal setting should be in series, in which case it will split the bridge as desired.
enjoy =)
-
im surprised if you go clear you cant see the CA through it! do you buy the CA glue in big tubs then? i spent 9 bucks on a little bottle of it!
very thorough directions though, thank you, i will definitely change my routines!
-
if the neck is too low you can probably get away with just shimming the bridge side of the neck so it angles it back a tiny bit. usually a business card or piece of sandpaper is enough, but if its fairly low it may take something thicker. but that would avoid leaving any gap or nonsense visible along the bottom edge of the neck pocket
-
that will be fine, the volume thing is no big deal because you only have one volume. its the difference between independent and dependent volume control. its more important if you have multiple volumes.
if its out of phase, then in the middle position with both pups on, it will sound very thin, and not very good. youll know, trust me =p
-
-
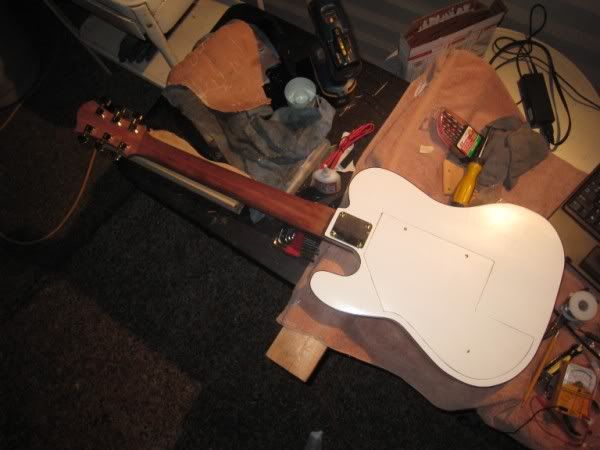
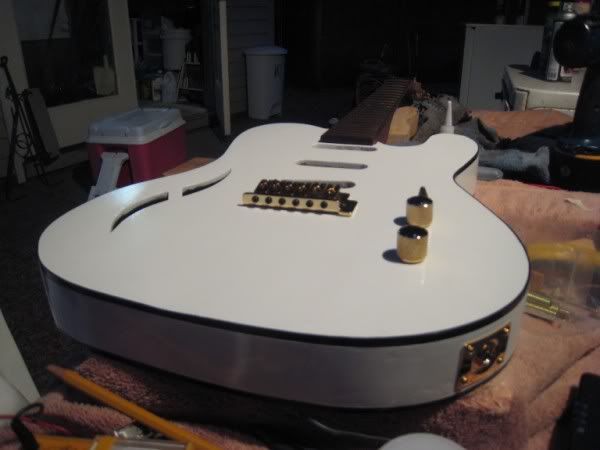
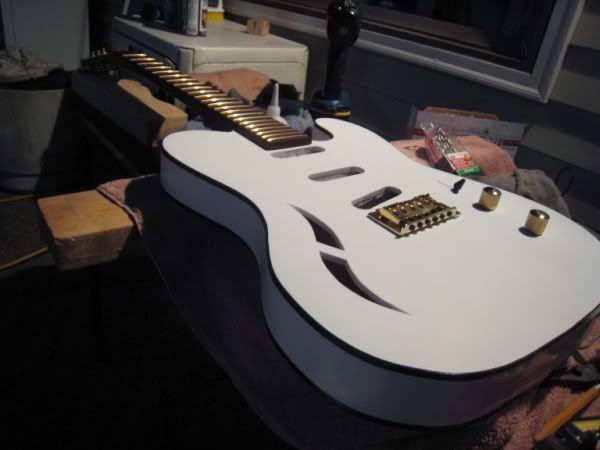
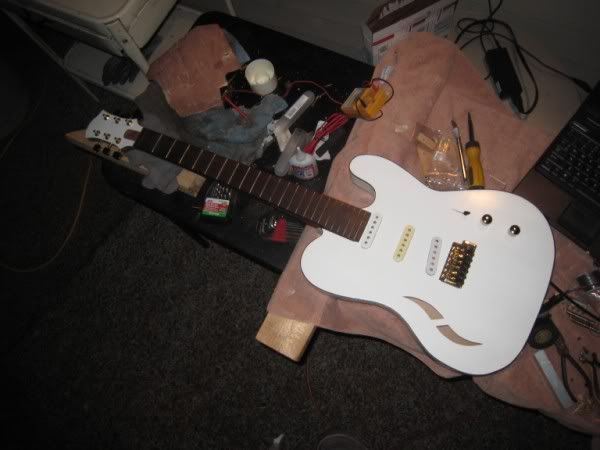
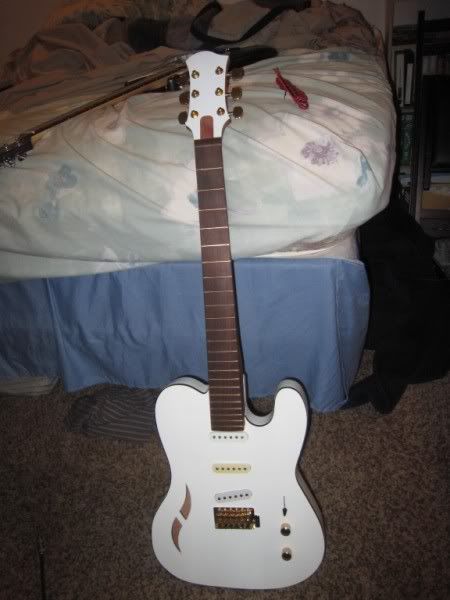
alright, remember, im not going to buff and polish or anything until i get back, so its shiny, but not perfect.
had to glue a block in to mount the back plate to - i gave in and mounted it with screws. 2 of the pups were cream, i only sanded one down to white. eventually ill just replace them anyways. the cream matches the gold... right? haha
and lastly i forgot screws for the tuning machines, so theyll just be a bit floppy for now... lol. theyre snug, you have to pull to spin em. oh well.
all i have left is to fit the nut, and adjust intonation. tomorrrrrow!

-
im gonna be honest, im good at wiring pickups, but i dont understand what the heck gibson is doing with the wiring on this thing. im getting mixed answers. its not a typical 3 or 4 conductor humbucker wiring, but its not a single coil or p90 wiring either.
first do you have a p94t and a p94r? if yes, the p94r is neck, p94t is bridge, and this is how to wire it:
it SAYS this will be hum cancelling. to me it looks like it makes it out of phase, but again i dont get what they were doing (and no one on the internet appears to either).
gibson says that makes it hum cancelling, so im gonna go with that. if it for some reason ends up being out of phase (and gibson lied), then reverse the black and white wires to put it back in phase. thats the best i can do. i spent the last hour searching for someone on google that understands p94 wiring, but everyone says different things, half of them think its like a normal humbucker (which its not).
let me know how it goes! looks great!
oh and remember to ground all pots to each other, yadda yadda =D
-
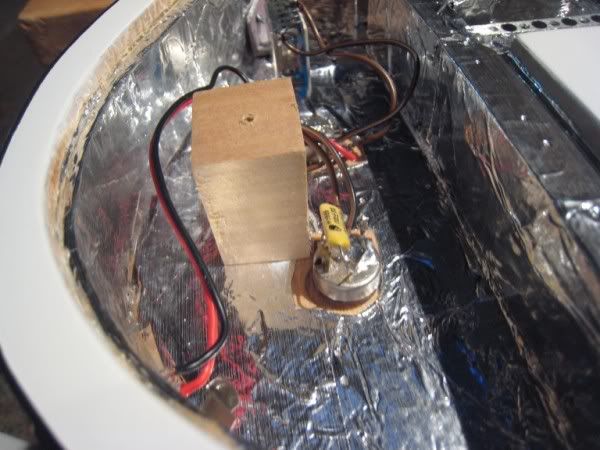
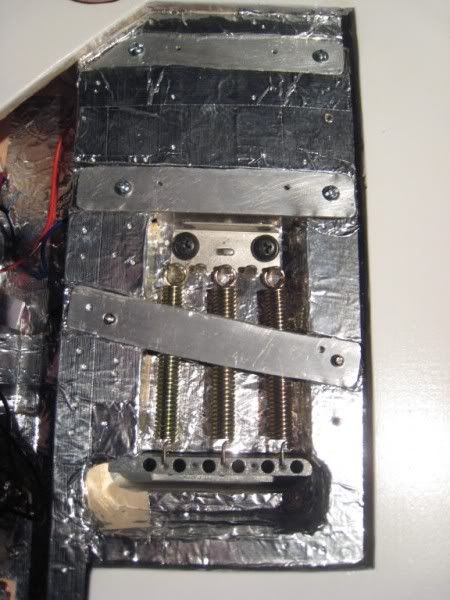
alright well i made a little truss cover today. had a pencil blank size piece of bubinga left, had to cut this little wafer out with a huge hand saw. that took a while and a lot of care... then shaped it up with some sand paper and tung oiled it.
the cheapo Xacto knives i bought at harbor freight had a big magnet strip to hold the blades in the box, so i took a little piece of that, glued it down inside the truss hole, then used some foam that came with a p90 i bought a while back and mounted a little piece of broken cheap-as-heck-xacto knife blade to it, and glued it to the truss cover. then an extra piece so it wouldnt swivel. came out pretty dandy for how cheap it was =p
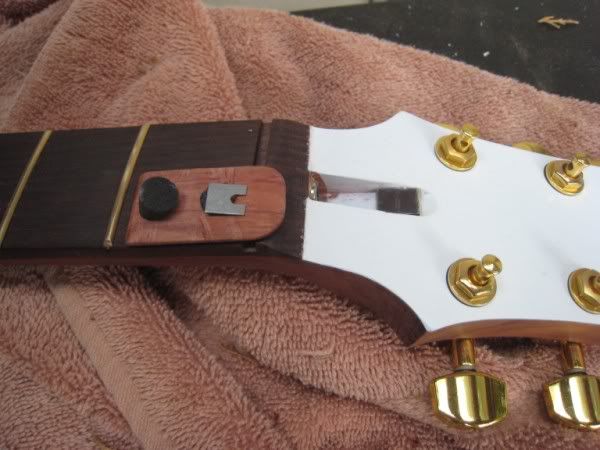
apparently im a moron and didnt take a pic with it actually on. except the last pic which doesnt show it well. oh well lol
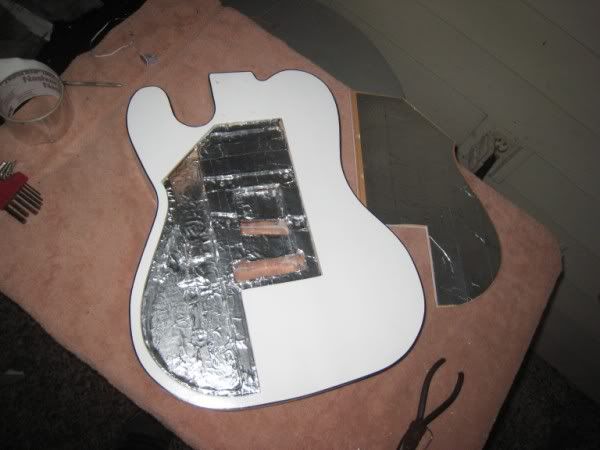
also did the shielding with aluminum tape.
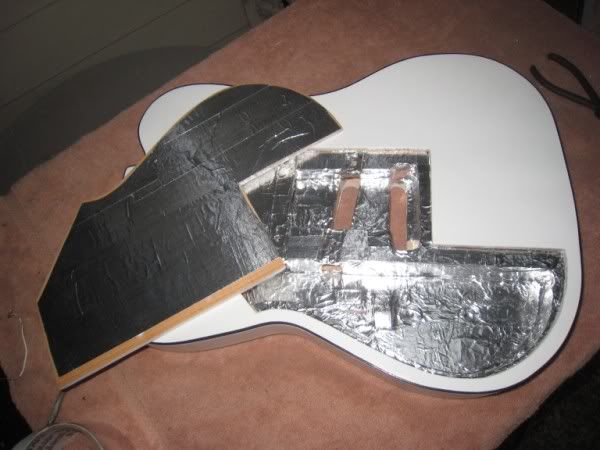
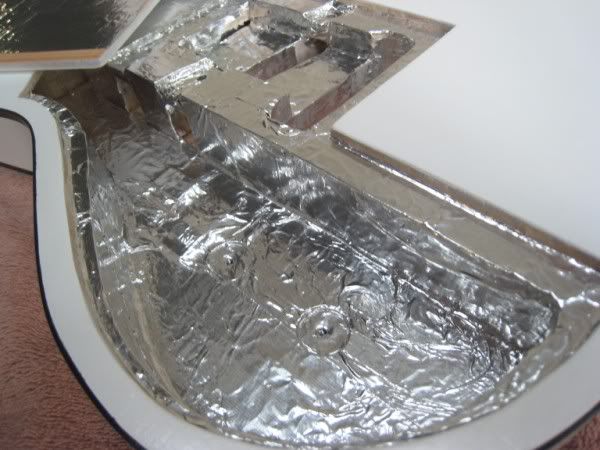
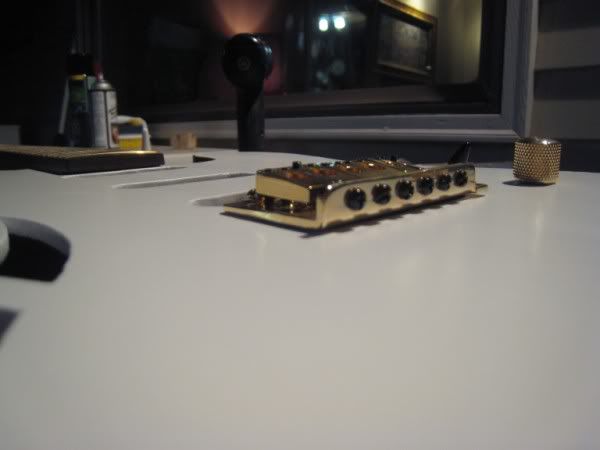
quick shot with bridge and neck sitting on it
-
wow, very interesting. i guess ill have to make some adjustments to my finishing process for the next one! thanks!
-
wouldnt that take a lot of glue?
-
sanding sealer isnt foolproof. i sanded well, did 2 coats of sealer, and a few cans of paint, still have grain showing in the texture. i think the plastic finish is all a hoax
-
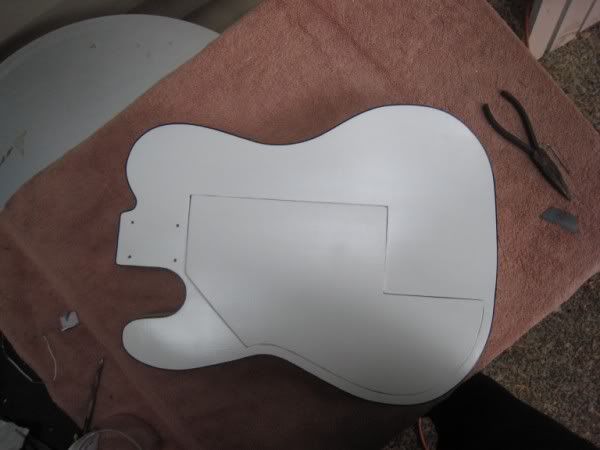
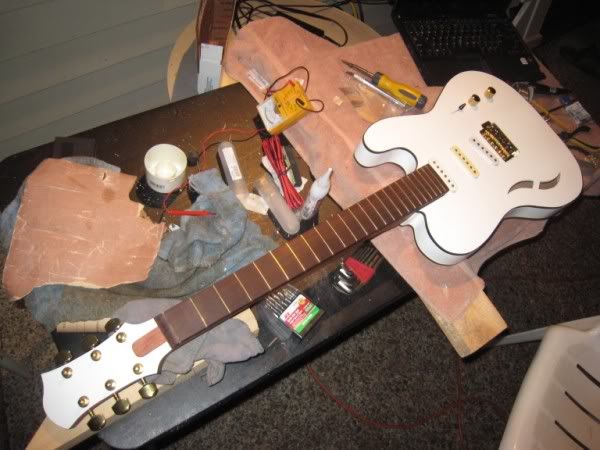
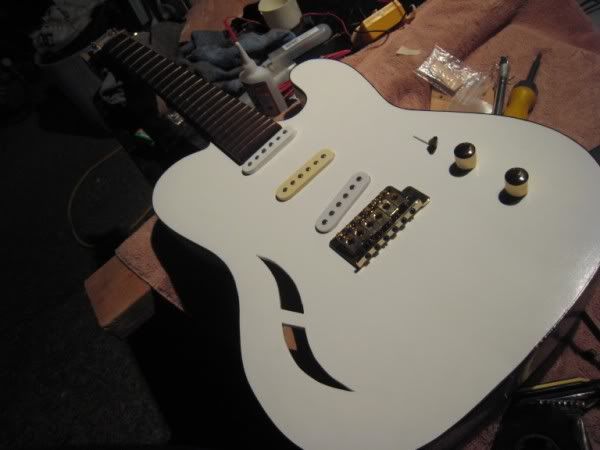
alright im done clearing for now, gonna let it set a while before putting hardware on now.
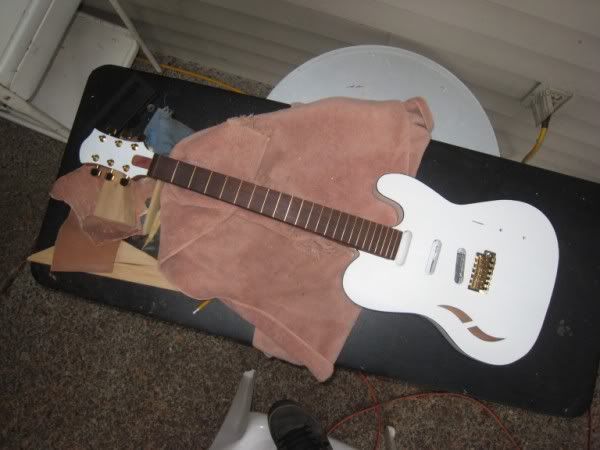
so i hadnt really put a lot of thought into the pickups so far, ive had them laying around a while (MIM strat pups). i will eventually get something better when i get back later, but for now these are going in.
2 things i hadnt considered with them - first, the covers are aged, not white. so i had to wet sand down to white, didnt work perfectly, but theyre white enough for now.
second, the bridge pup has the triangle base
 had to do some work and make it a normal straight base. its all good now though.
anyways, got those issues resolved.
also did some lemon oil on my fretboard. ohhhh it looks much better now =)

Another Build.
in In Progress and Finished Work
Posted
definitely do contours first. and that chambering isnt overkill. this is what i do:
as long as it doesnt end up neck heavy, and mine didnt