


xadioriderx
-
Posts
130 -
Joined
-
Last visited
Content Type
Profiles
News and Information
Tutorials
Product Reviews
Supplier Listings
Articles
Guitar Of The Month
Links and Resources
Forums
Gallery
Downloads
Posts posted by xadioriderx
-
-
i still think with a grain like that, id leave it. i like it. fully gloss just looks so... manufactured? or something
-
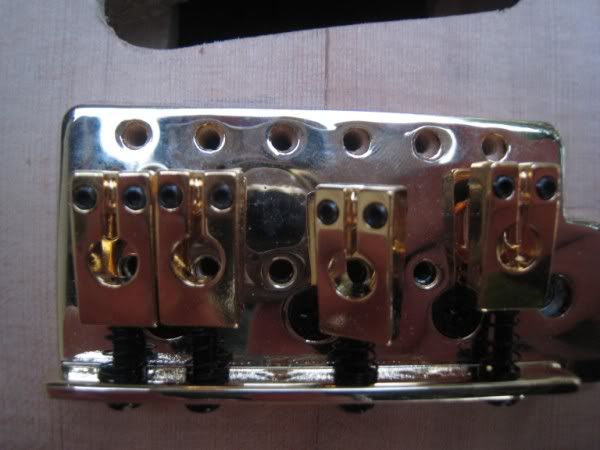
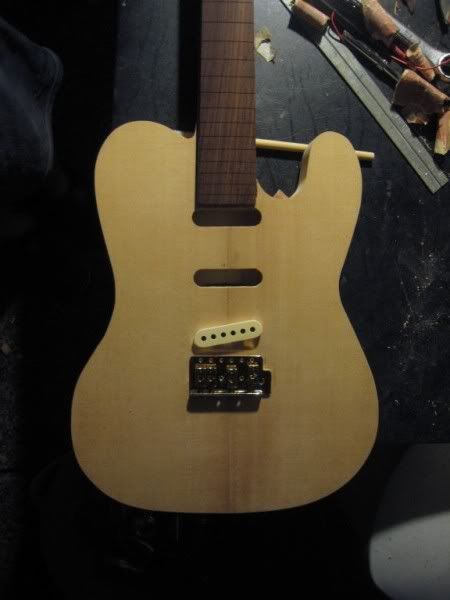
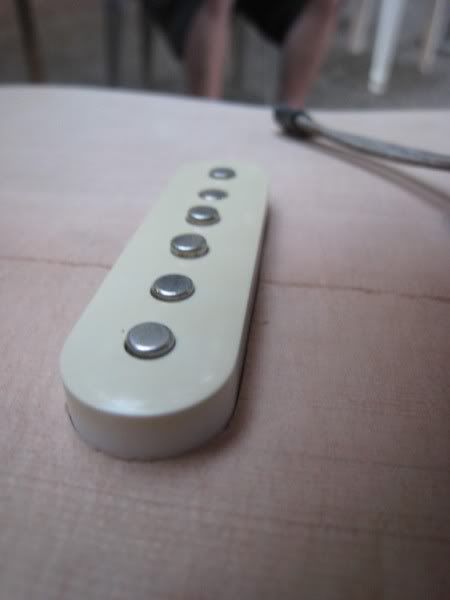
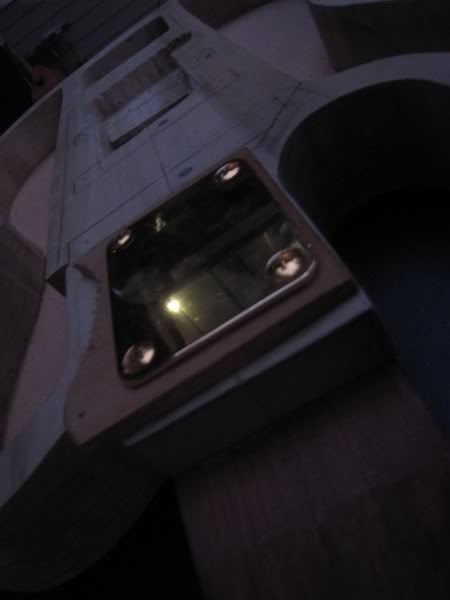
didnt have much time today, but got the screws for the bridge in place.
theyre perfectly centered to each hole, they just look off because of the camera angle.
-
thats alright, natural is cool =D
-
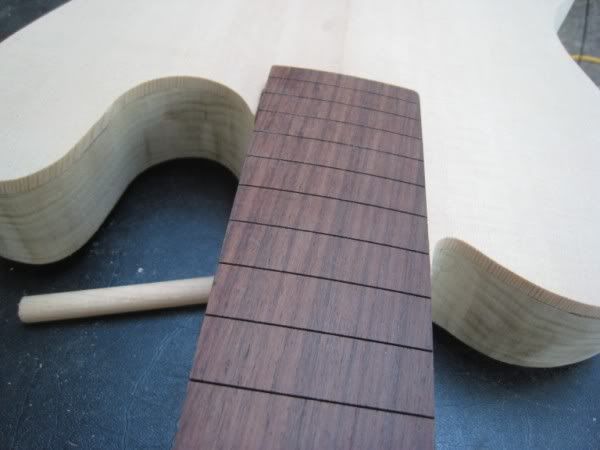
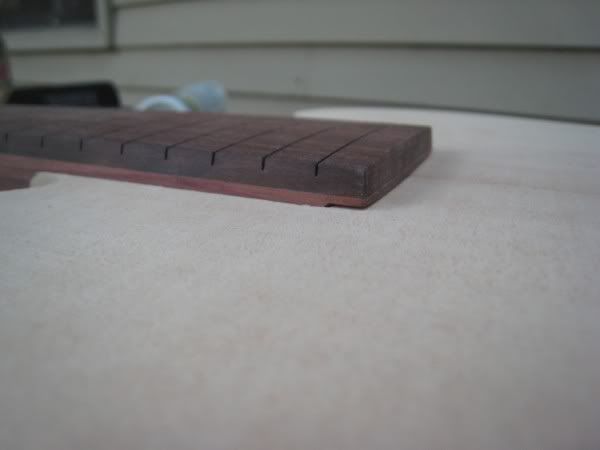
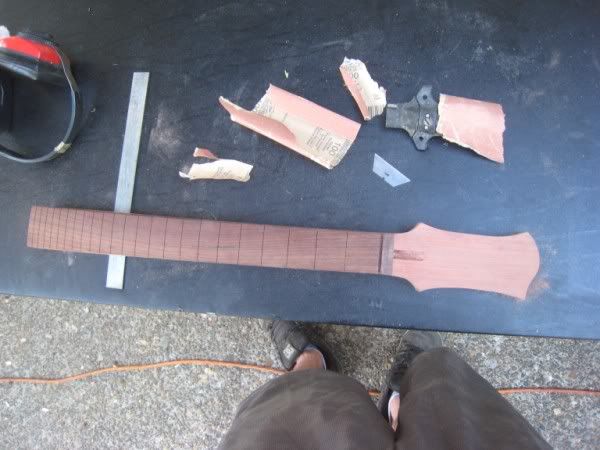
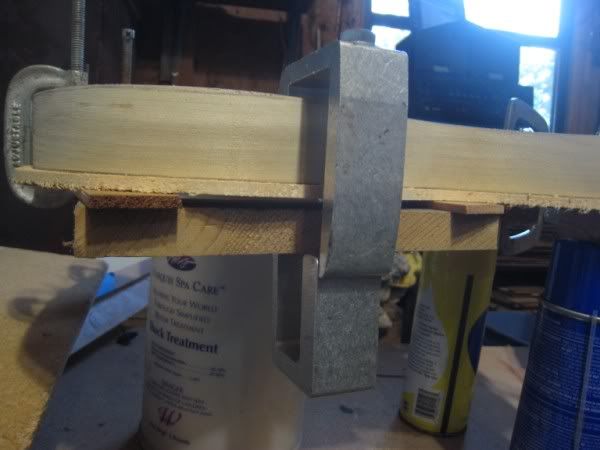
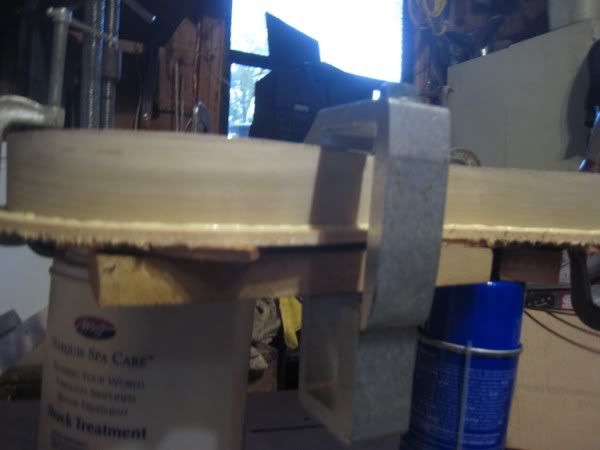
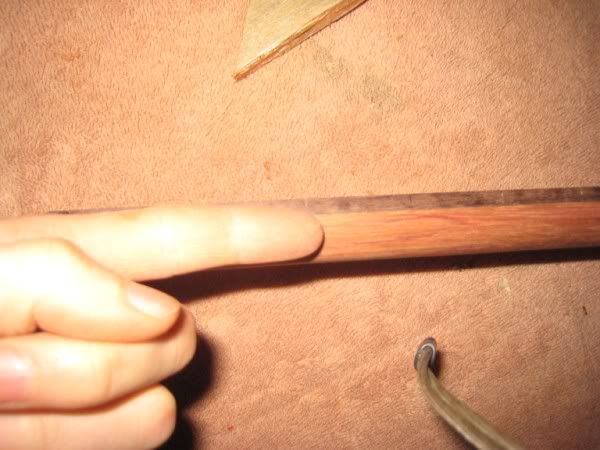
 the depth gauge was better for comparing the nut area to the 12th fret, but i was a litttttle afraid of its accuracy about actual depth
 but it got the job done i guess =p
-
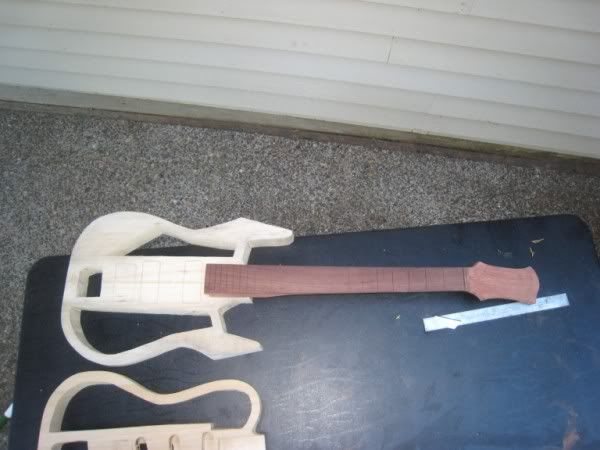
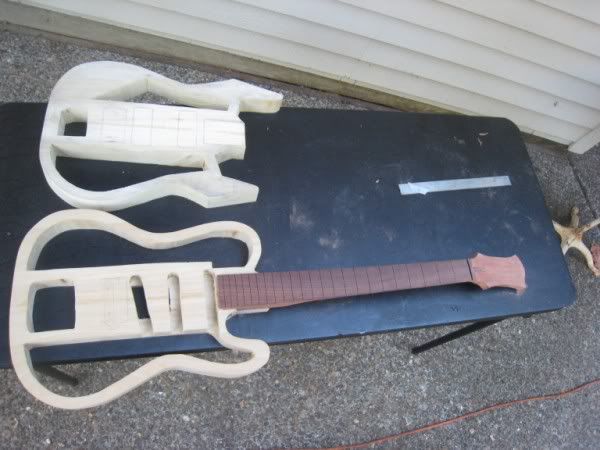
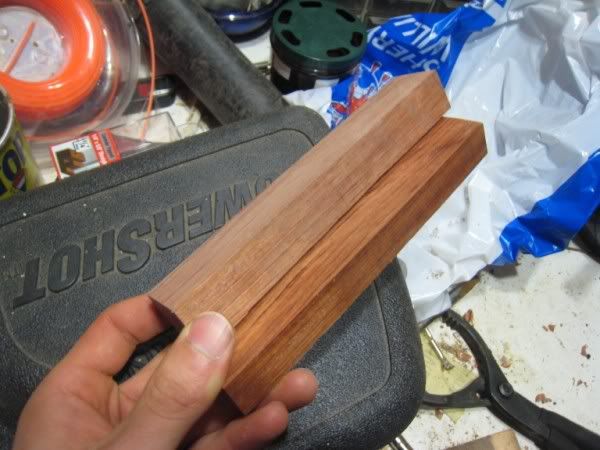
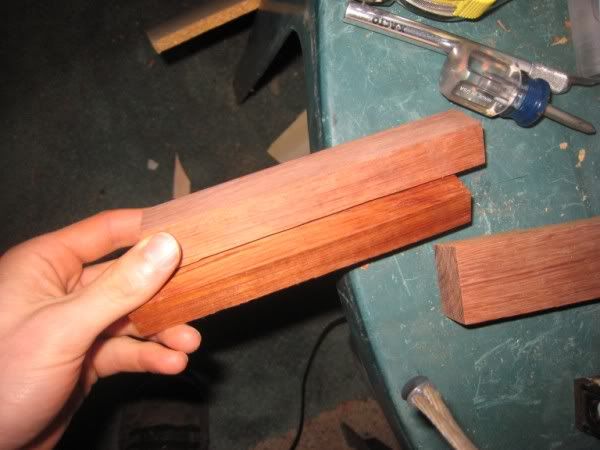
2 done, and 3 done! perfect fits, im excited!
-
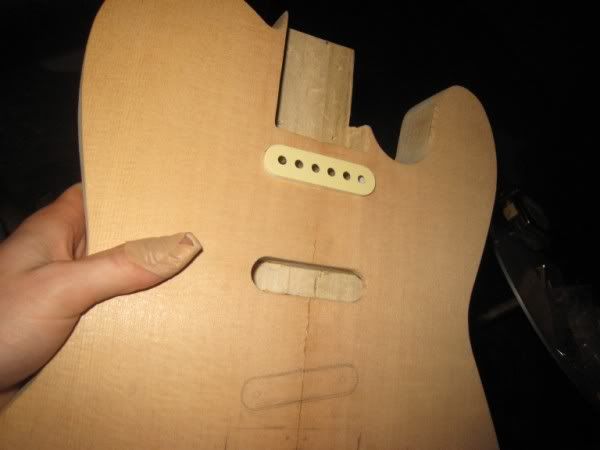
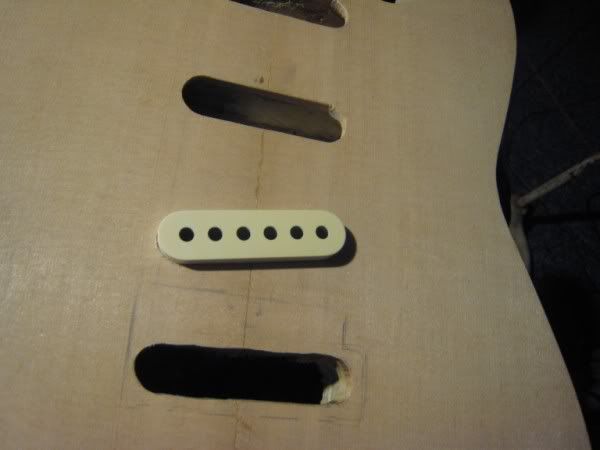
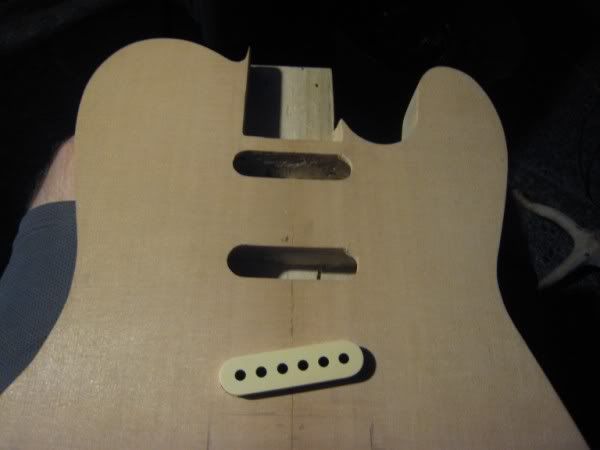
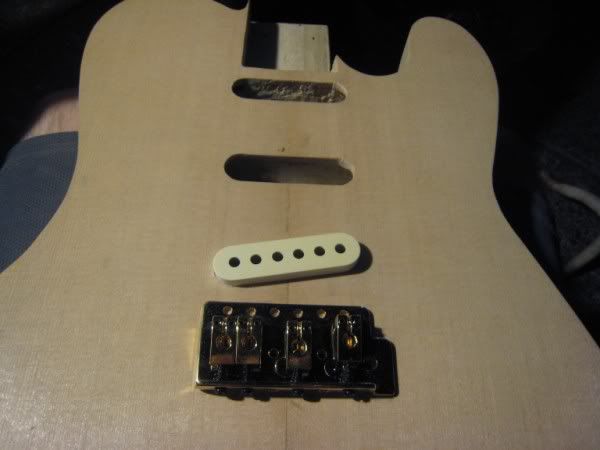
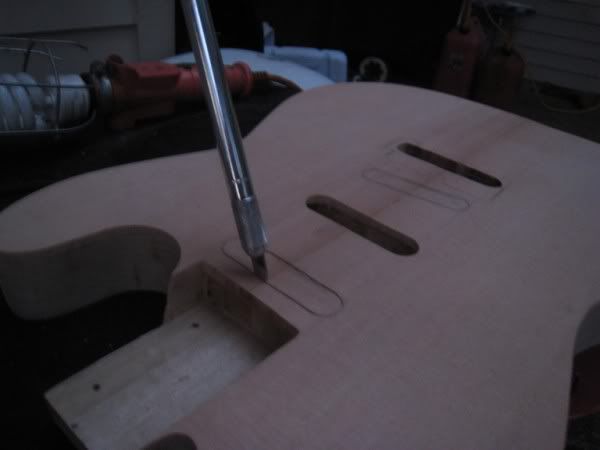
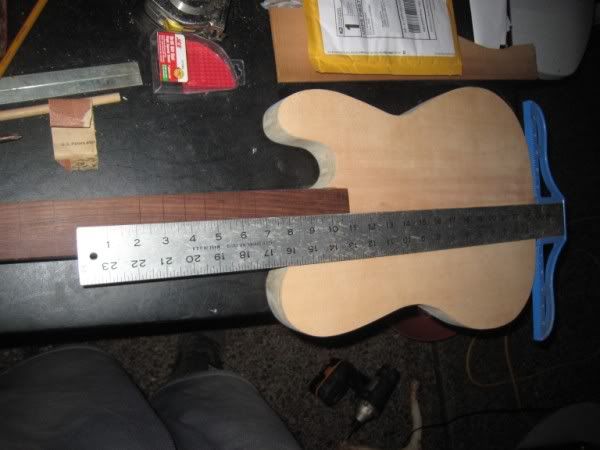
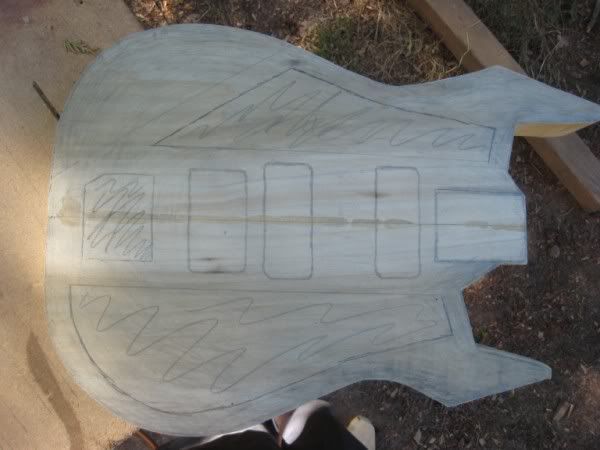
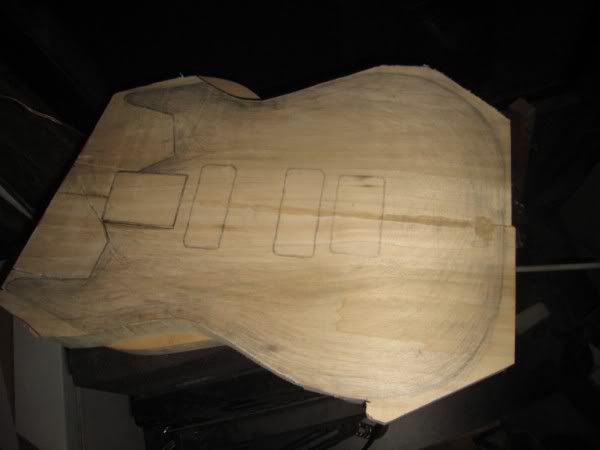
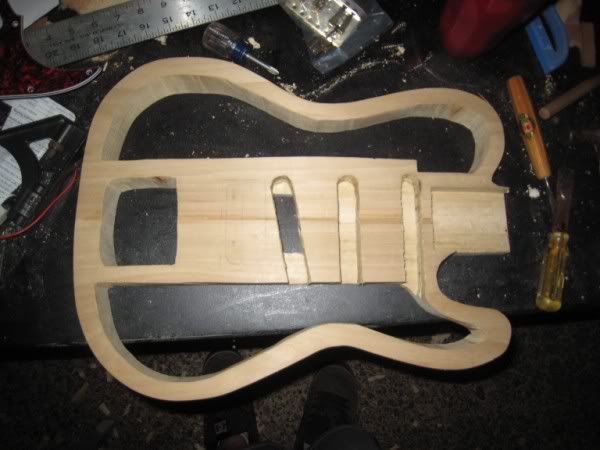
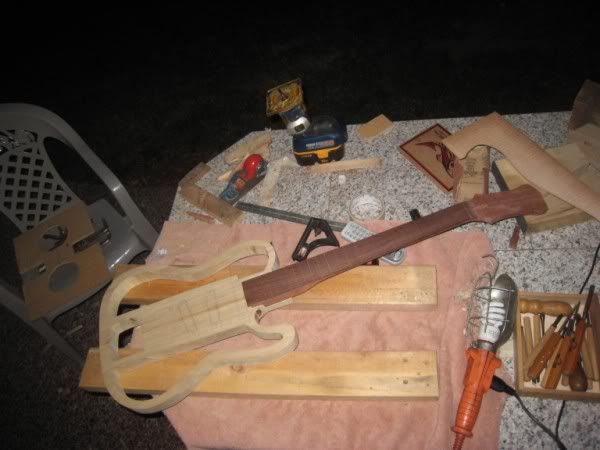
Alright, well i routed the bridge hole out from the top. its hidden so i didnt mind using my router freehand.
but the pup holes, those have to be perrrrfect. and i dont have templates, and since i would need a template to make a template, and then a router bit that would follow a template, i had to find a different route ("route" :haha: no pun intended) yeah im tired...
Anyways, heres what i did
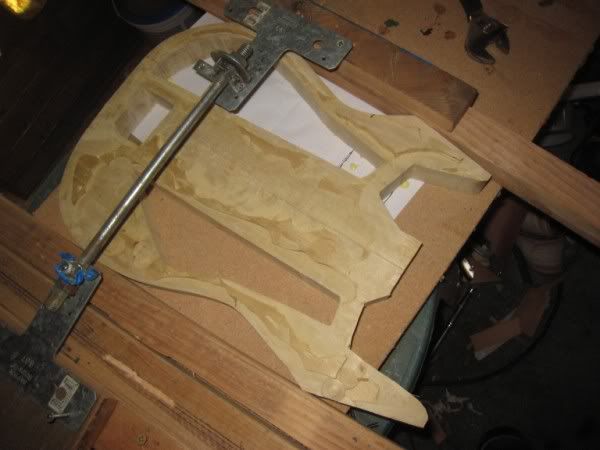
Xacto knife and hours of work. only one battle wound from it too!
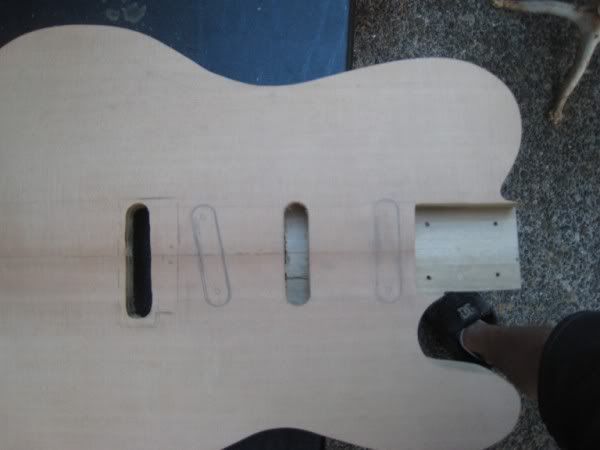
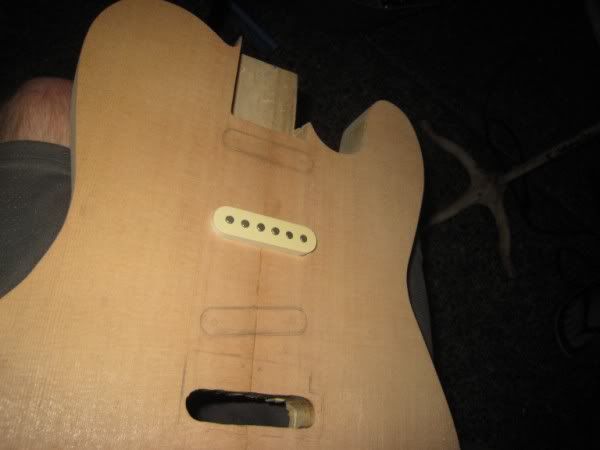


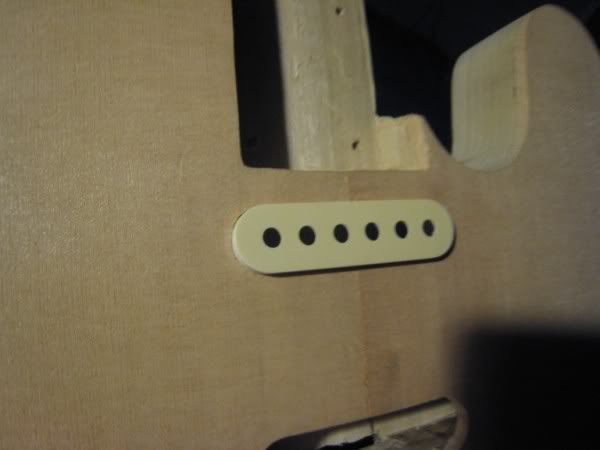
theres one done, perfect fit!
-
ended up not making the purfling cutter yet, but i will
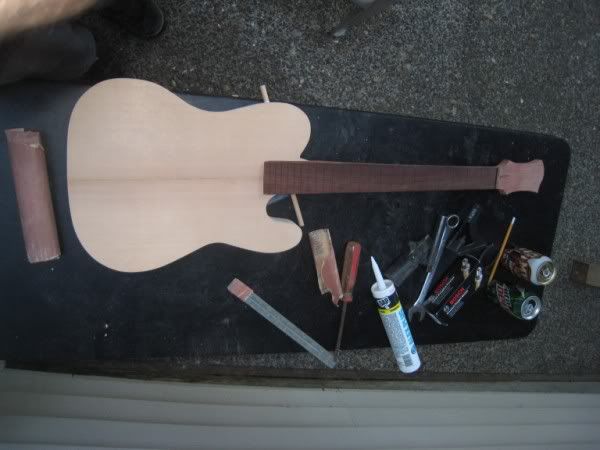
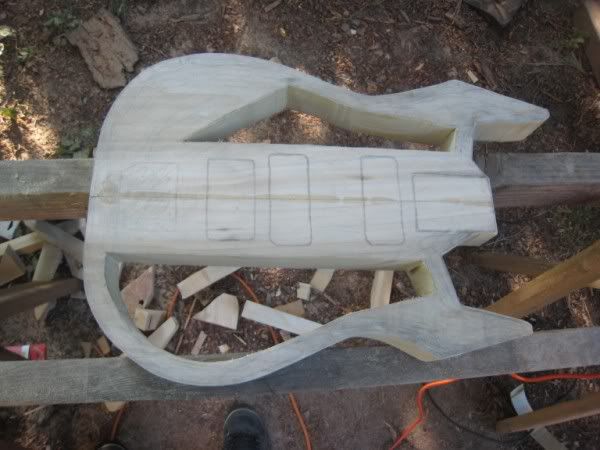
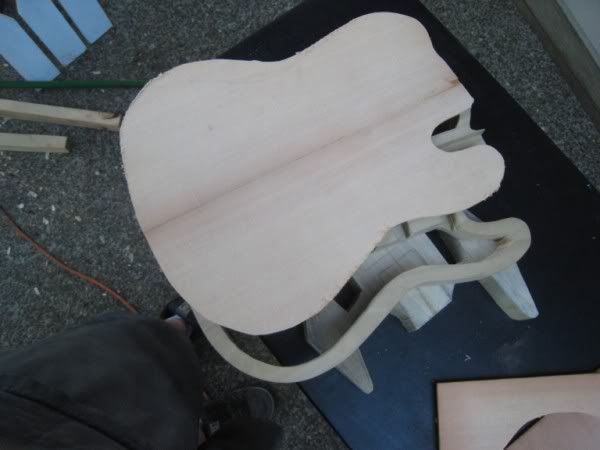
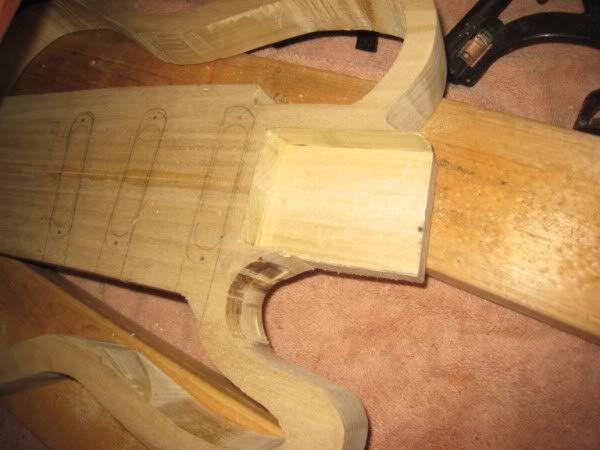
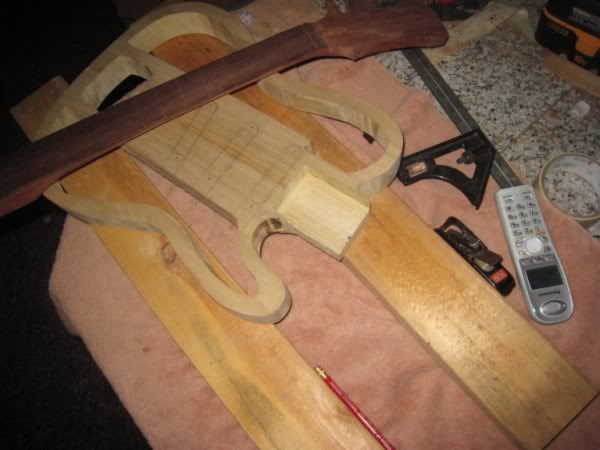
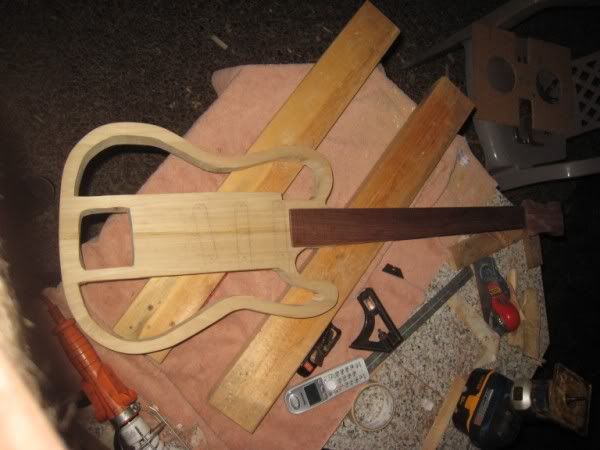
i got the cutaway all rounded out, neck pocket finished up, and got the neck bolted on!
looks like a guitar!
rounded
stillll rounded
slight overhang
because theres no back yet i made a place holder
and another glory shot =)
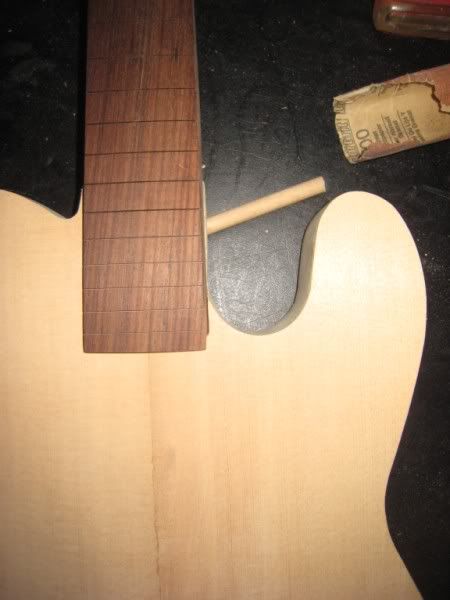
measured the middle of the fret, and it lines up perfect with the bookmatch seam. score!
-
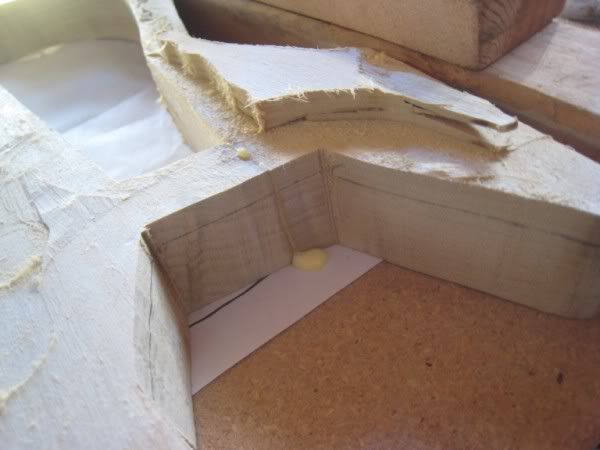
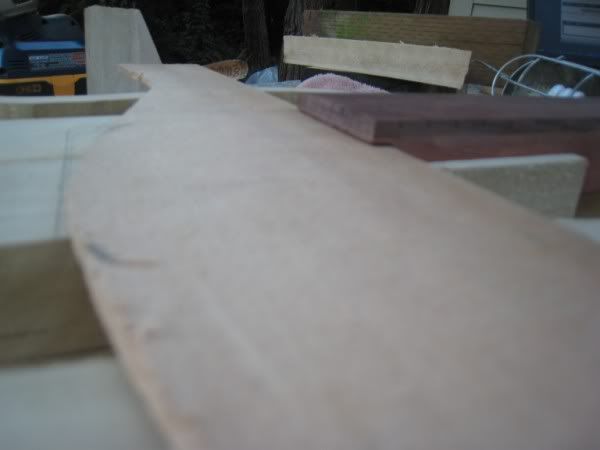
ughh, well today i had a small disaster. to thin out the body, i decided on using a router instead of the belt sander because the belt sander would take forever to take 3/4" off this.
thats not where the disaster happened. i managed that alright, i just had to leave a few pieces un-routed here and there for the router to sit flat on. then chisel the leftover pieces off, then belt sand the last little bit off.
well, apparently i chiseled too hard in the wrong direction with the body mounted to the table, unthinkingly. and it broke just above the neck pocket and just above where the rear strap pin would be. i sat there in shock looking at what i had done, then it occurred to me it would be alright.
you can see my thinning method, i had chiseled most of it off, then i was going to take it down about 1/8" more with the sander and smooth it out.
luckily it happened at 2 clean splits, and fits together seamlessly. so i setup my table as i do for gluing my bookmatched sets, and put a little wood glue on. when its all said and done the sides will be black, and it will have a 1/4" top and back on it so i am not worried at all about the integrity of the areas that broke. disaster, but curable!
-
that looks fantastic! it came out nice and even, great job! if you look really close you can kinda see where the issues were, but i dont think anyone will notice because it just looks like thats how the edges and contours are supposed to be!
now dontttt sanddd itt!
-
yeah, i have found the same thing, not to rush! im a very impatient person, and in the end it will show if you dont beat it!
i would say be careful just putting dye on the spots that are worn through, you run the risk of almost making it stand out more if you overlap a little around the edges of each spot.
im not super experienced with doing this kind of thing, but i would think if you did just a full coat, the spots might hide better than you think. i could be wrong though.
i suppose if you do spot touch-up, and then another full coat, you will probably be alright too. in the end, i think if its noticeable at all, it will only give it a slight "worn" look. and isnt that what most people want these days?
youve run into the easiest thing to do, sand too deep on corners. even if you try hard not to hit the corners/edges too hard, it will happen. happened to me after i did faux binding, and made a mess of it!
alternatively you could just continue to sand some in the middle and take the dye off more, then go over it from the beginning
-
never said i wouldnt like it, its just different from the other. it still looks great! i love that wood choice.
the orange just gives it a more vintage look, whereas natural is a different more... something else not vintage look
i still think it looks awesome!
-
alright i took over for the day. got the outline roughed better, and got it chambered out
left a spot for the forearm curve he wants. i will end up doing that as i did in my first build, cut a small groove in the back of the top wood so it will bend in a line. it wont be a rounded curve.
shaped for the most part, except around the horns
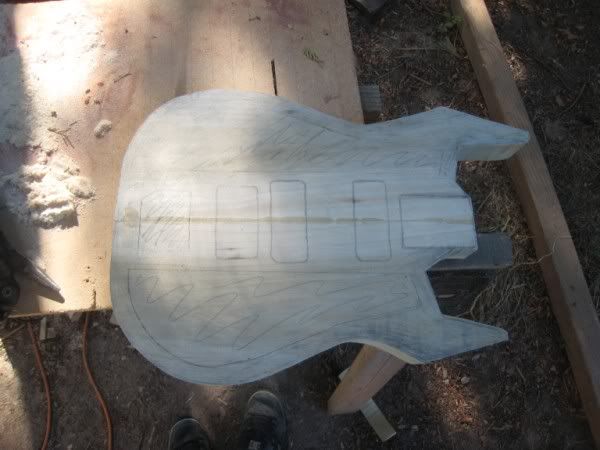
outlines for the chambers
no way in hell im jigsawing the whole thing. so i used a skilsaw to make as much of a dent as i could
two main chambers, left space for arm contour
all three chambers cut
threw the neck from my other build on. not a good headstock for this body
-
alright, got the top gluing on, the headstock finished shaping up, and my finger in pain!
a belt sander with super rough sandpaper on it, mixed with a knuckle, equals ouch and a lack of skin!
i chose two of my uglier spruce pieces, because they will be painted white, and had to get creative to make a few clamps go a long ways.
not big, but its deep and in a bad spot!

headstock
both projects
both projects, can see headstock shape with the body
roughly shaped for gluing
making one clamp do the work of two (not gluing yet)
clamp-a-licious!


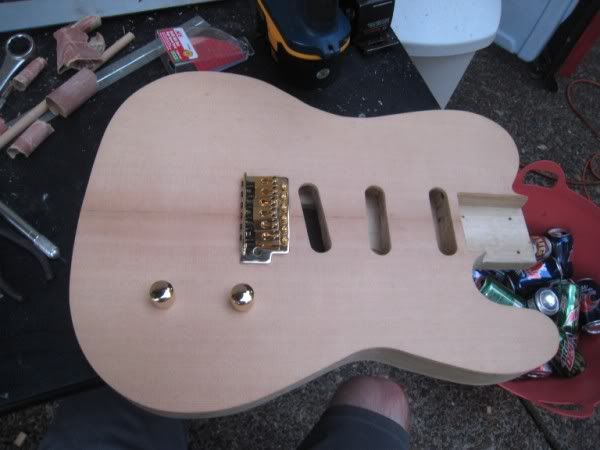
next ill go ahead and route through for the trem block, get the final bridge placement marked out, then route holes for the pups
-
looks great! im not sure how i missed that it was tele style when i asked that in my last post... haha
your thinline tele build vs my thinline-ish tele build. im going with a different shape instead of the F though.
and yours is much more precise
wish i could cnc, but all i have is a jigsaw and a belt sander, and a half-ass router that just likes to poke holes and not route -
Yep, Ive got 2 builds going on right now. the other one is for me, this one is for my brother.
He had an amazing 86 MIJ Strat black on black, black headstock, system III (?) trem with fine tuners and factory strat locking nut with the little switch... great guitar, got it for 300 bucks, in great shape. got stolen (or may have been pawned, was in a dark time of his life, a lot of drugs). Hes cleaned up now, and wants to learn again. So Im more or less walking him through this build, although ill end up doing a lot of the work probably.
Details so far:
Poplar core
Sitka spruce top and back
Dual Mighty Mite P90's
Transparent charcoal to solid black burst
Black Hardware
Hardtail bridge (learning, so no use for trem yet)
Unsure of the neck wood yet, rosewood or ebony fretboard, 3x3 headstock (offset probably)
3 way switch, 2 vol, 2 push/pull tone
push pulls control phase reversal of bridge, and series/parallel for both together
So far hes only gotten the outline traced and partially cut. he works slower than i
i may have to get it going for him to start getting into it
-
how the pup will start to go in. nice and easy!


and the back, again, mostly chisel work, luckily i can smooth the bottom out with the router as long as i get it down to about 1/8" deep
and you can see the panel outline.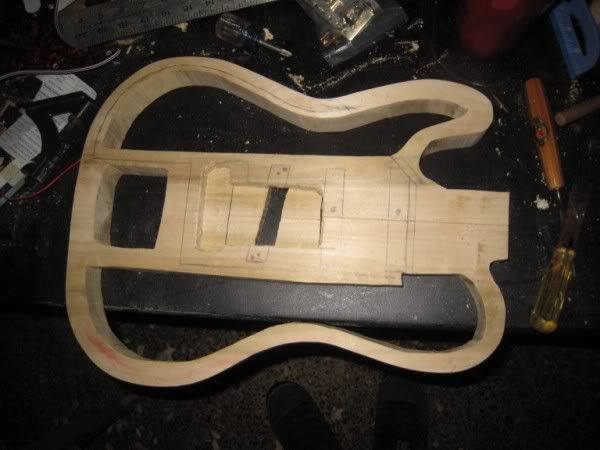
-
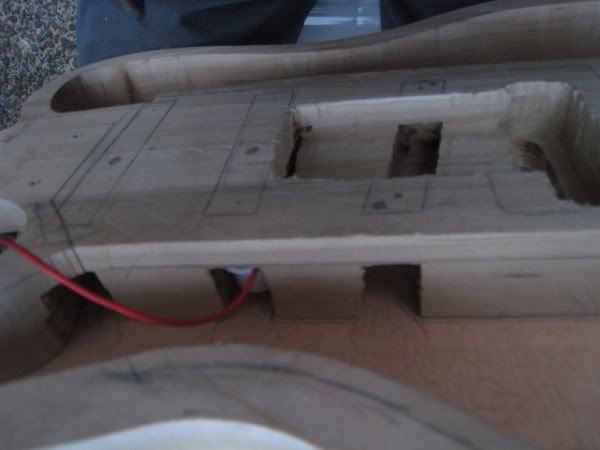
did a little work today. pup areas routed out on the core, trem claw cavity mostly routed out. been planning on the whole pup mounting thing. looks like, similar to my last build, im going to have one big removable panel on the back. this time i wont put the output jack on the back though. you can see the outline where the panel will be. and rough estimate of where the aluminum plates will be to hold the pup adjustment screws. i will have to recess them into the core a little so the panel sits flush.
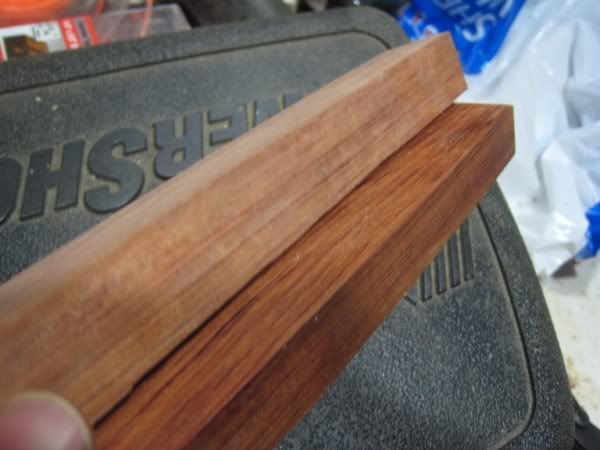
Also, heres the bubinga test chunks with 2 coats of tung oil. i dig!! comparison of raw and with tung oil
and i FINALLY get the good router (meaning one that ACTUALLY works) back tomorrow. this stupid battery one doesnt actually route poplar, is just burns it and doesnt move. the only way i could do them was to make a bunch of small holes around the edge, and chisel it out. so this is mostly just chisel work. same with the trem cavity on the back. i will do a much more neat job for the top where you can actually see in the end. you can also see that the trem claw and the route overlap ever so slightly, but it wont interfere with the pickup when mounted.
-
as is, the balance point is between the 18th and 19th frets which is in the heel. of course the body will be heavier with hardware and a top and back, so this means it shouldnt end up too neck heavy like i was worried about if i mount the strap at the front of the heel
-
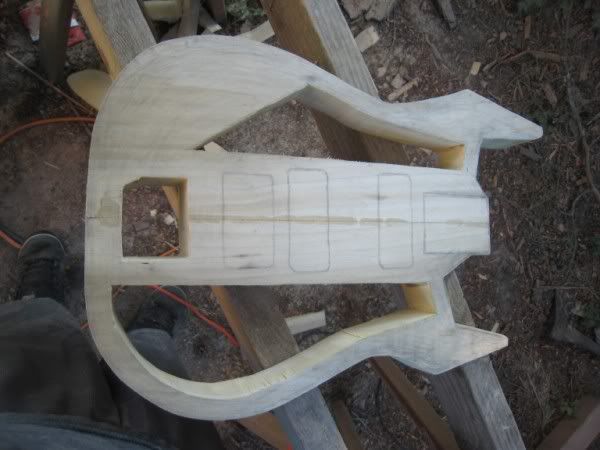
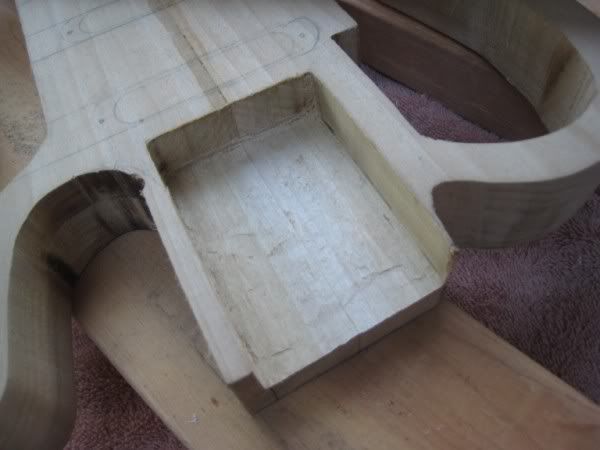
Alright, got the neck pocket shaped out for the most part. just have to round the corners out when i get the top on.
My router sucks, dies really fast, has no power. so i did it the hard way. chisel.
i got it as much done with a chisel as i could, then used the router to finish it off.
spent a bunch of time getting it tight on both sides, then realized that i hadnt finished the lower cutaway and most of that area actually was going to be gone *rolls eyes*
but its snug as a bug in a rug, and i can pick up the guitar with the neck set in the pocket. pretty happy with it! =)
with the extra chunk on the lower side
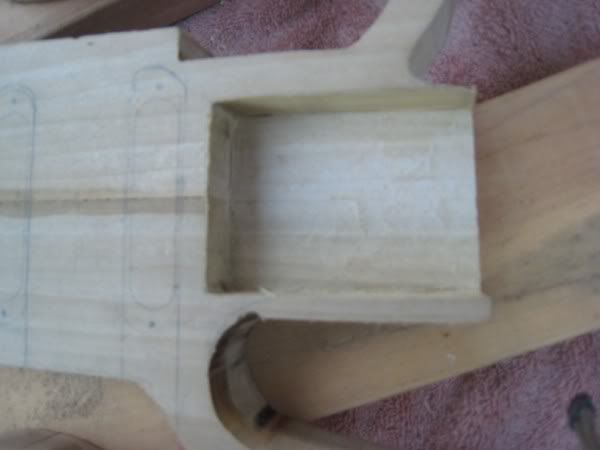
and without. still need to cleanup the inside of the cutaway

and with a chunk of spruce on top, slight overhang of fretboard
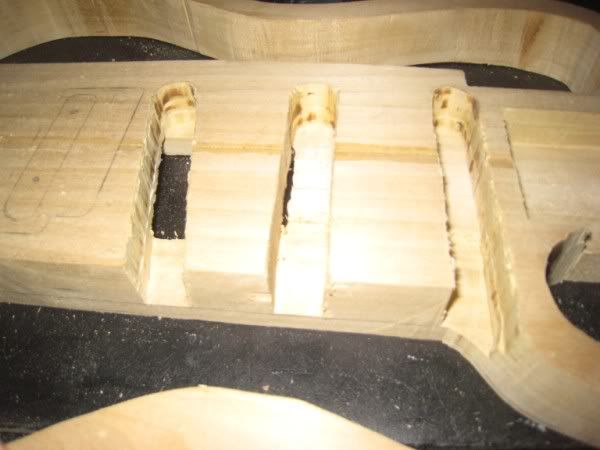
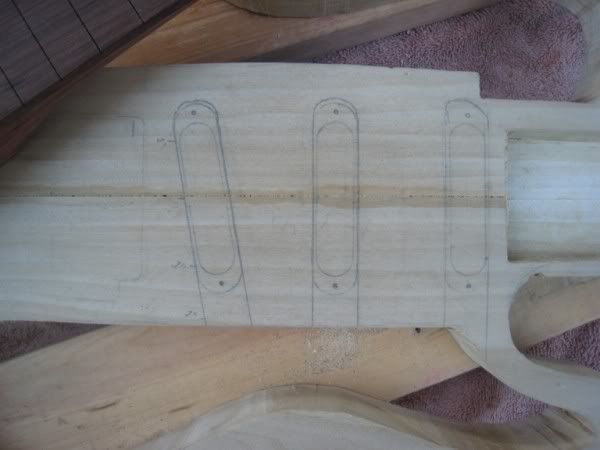
and this is how i will route, about an inch deep, for the pickups to be set and slid into place. got it all planned out today!
-
cool cool, any idea on body design yet?
-
oh i youtubed varitone. interesting!
i almost never use my tone controls, but im sure some people could add one, and then add some onboard effects, and just go nuts
-
never heard, whats it do? lol
-
xadioriderx:
I would rather you post a link to this thread than repost the files, as I am not a member at the other forums and thus would be unable to answer questions that may arise. There is no actual copyright issue at stake - I just could not provide clarification on any confusion that may arise from the files.
no problem, i will just post it on my page, a link to here, and also a link to the toxicity thread thats on here. its all very good stuff to know.
if i hadnt read your post, i wouldnt have gone back out to my current build and thinned out my bubinga neck more, i would have left it as thick as it was. now i have:
3/4" thick! I definitely will be paying more attention to this stuff for future builds, great info!
-
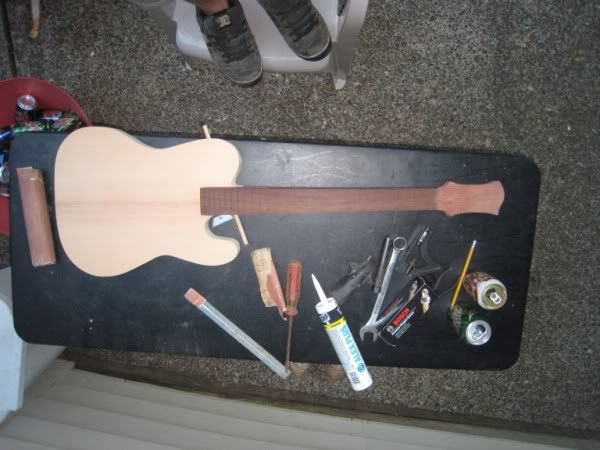
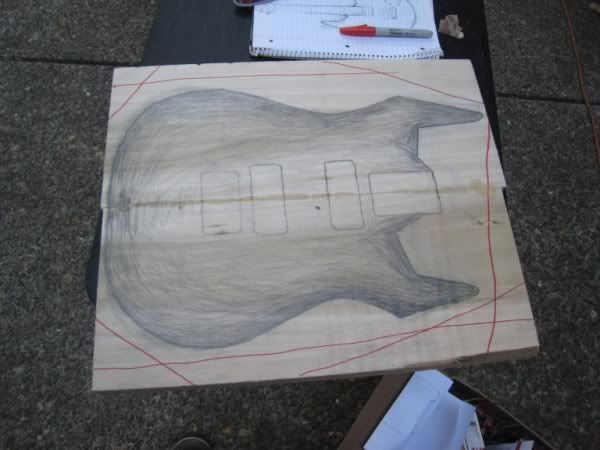
alright, well its time to start the body work.
i dont like pickguards
i dont like direct mount pickups where the routes are wider than the pickup
this means what? time to get creative.
i will have routes in the top the same size as a pickguard would have, just enough for the bobbin to get through. underneath, in the core, i will have one side routed so that when its all together, i can drop the pickup in at an angle through the top, then slide it back into place, like this:
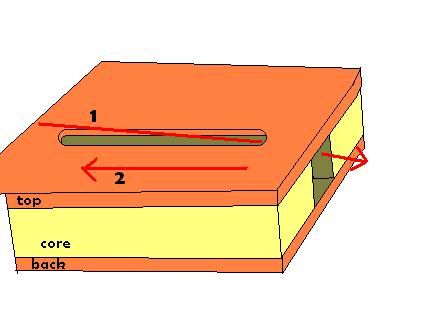
after that, i will have holes accessible from the trem cavity in the rear with springs in them, then a plate mounted over it that screws will go through. essentially it will be the same as a normal pickguard mount, except from the rear, and instead of a pickguard it will be a plate. so from the front just the pup is visible.
 the depth gauge was better for comparing the nut area to the 12th fret, but i was a litttttle afraid of its accuracy about actual depth
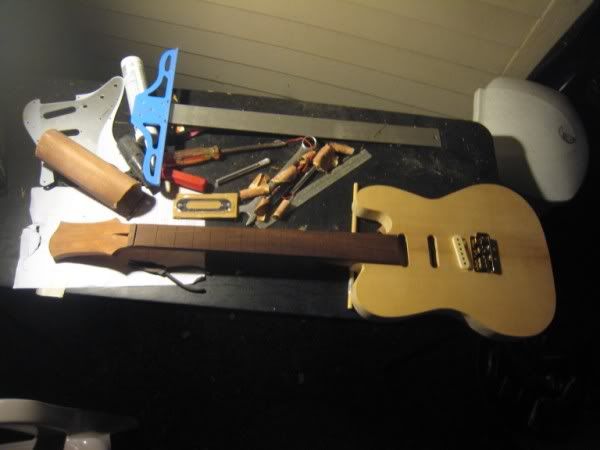
First Build - 6-string Singlecut
in In Progress and Finished Work
Posted
very interesting body shape, looks neat!