


chunkielad
-
Posts
289 -
Joined
-
Last visited
Content Type
Profiles
News and Information
Tutorials
Product Reviews
Supplier Listings
Articles
Guitar Of The Month
Links and Resources
Forums
Gallery
Downloads
Posts posted by chunkielad
-
-
I use Createx paints (autoair range) a lot and they're water soluble so no nasty smells. They can be airbrushed or hand painted and are shipped from a guy named Pete Millichamp (Top fella!)
Check out the UK website createxuk
-
Could anyone please tell me what length of single action truss rod would be needed for a 'caster neck?
I have some at 15.5" (without the adjuster nut - 16.5" with it) which seem to be about 1" shorter than it seems they need to be. They fit about 1.5" in from the heel end and 0.5" in under the nut. Is this OK or does it need to be longer?
-
Well it appears that our great UK postal service have lost the maple and the tuners! Marc has sent me replacements that will arrive tomorrow. Hopefully they'll turn up after i take my step daughter for her GCSE results and before i take her to Leeds for the Festival!
Big thanks to Marc at iGuitars who has replaced without question and turned it round quick.
-
Interesting thread to go with an interesting guitar!

Klar - wow! What a machine. I'm not going to be going out and buying a guitar that looks like this but i've got to admire your willingness to be different and the ability to make something so unusual. Keep it up!
-
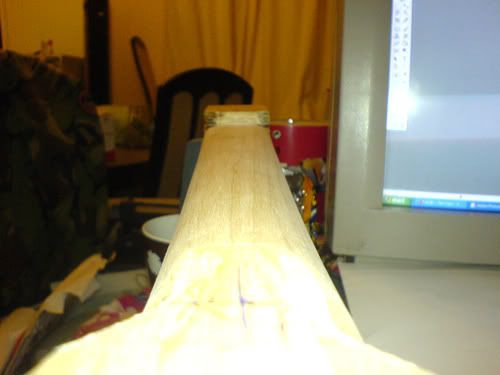
Finally made some progress...
I've glued up the body blank (mahogany and Ash) and started on the neck whilst I await my quilted maple top.
Here's the pics...
http://s100.photobucket.com/albums/m37/chu...caster%20Build/
All in photobucket so as not to fill up the site but I had to post my first go at a neck profile - still a way to go but I'm happy so far!
Ain't they a pain in the ass to photograph?
-
Ya know I love how straight forward Drak is!
I agree with him too. It'd be very expensive and very heavy to do.
-
You are coming on great guns - i have to practise bursting myself. I've heard that the burst definately softens when you spray the clear so keep that in mind. Good progress either way!
-
That's not a bad job there mate. One thing I did notice is that at the bottom of the heel there seems to be a little gap as if the heel is rounded over a bit.
I saw a luthier working on a Martin accoustic and to get the neck to fit, he put rough sandpaper between the heel and the body and dragged it until they fit like a glove.
-
I think I'd just sand the whole thing back and start again or atleast that area of the guitar - if it's on the back, sand the whole back.
-
Pics aren't working mate.
-
Try putting some oil on the back of it where you have a cut off.
Don't do this where you will be gluing though.
You'll find it darkens and colours up nicely.
-
Found someone stateside who does it
http://www.conservationresources.com/Main/...ection35_03.htm
Based in Virginia.
Interesting product - I might have a go myself.
-
Both the soap and the heat could cause that problem. It has happened to me before and it was a heat issue. I had left the part in my shop window all day an it got extremely hot.
-
I've always though craft supllies to be expensive to be honest.
-
The two saddle one looks great. New post asking for measurements me feels!
Only kidding - any 6 string owners out there want to measure nut to saddle on each string please? I'll be tuning E-E on this baby!
-
My supplier for this one is 'iguitars' on ebay - Marc is also on UKGB under the name iguitars.
He's got some lovely flamed pieces on the bay at the minute but I got the last quilt on there - he may well have some more though.
-
I have some 5mm (just under as it's been presanded) quilt maple coming and was considering doing a chamber on the tele. Is 5mm going to be strong enough or will it need support?
-
Actually a 15mm spacing makes the bridge 75mm
6 strings means 5 gaps between the strings 5X15mm = 75mmDoh - here's me working on 6X! I am a dozy one - that'd be great then.
The whole idea of a wooden, homemade bridge strikes me as a good idea - something else made and not bought on the guitar. How do you go about inntonation then though?
-
Extremely short and fat! I told him he needs to sing as he's not built for bass!
Well he is because he's really fat and for some reason, every cover band I see has a fat bassist! A 15mm string spacing makes the neck about 90mm at the heel! That's 1.5 times the size of my start and the bass he has now!
We're trying to get closer to the 70-75mm mark. The gap (or lack) between strings really isn't an issue - just that he wants a thinner neck width.
-
If you have illustrator or Corel Draw, photograph the Pickups and then import the image into the program. Then scale it up to full size. I do this by drawing a box over the image that fits something of known size.
i.e. you can measure how far apart the screw holes are so measure them and draw the box to touch the screw holes as measured.
When you change the size of the box to full size, it will scale by a % and that will be reported back to you. Copy this % and paste into the scale for the image x and y axis. The image is now life size. Delete the box you drew and then draw a life size image by tracing the outline of the pickup in the image.
This is then priunted out on any standard printer and you can use it as the cutline on some MDF - one template ready to go!
-
Looks like a good job to me! Great job. My second project is going to have a neck made by me - you up for it too? Go on, you know you wanna!
-
Cheers guys - I think this is going to be on for a bit of experimentation!
I might buy some saddles and test out the theory of using a guitar bridge on his old knackered bass he has lying around. If that works, then that's an easy option isn't it? I like the whole 'making the bridge' thing though so it may be worth trying both.
-
You could always do a 'drop top' where you make the guitar body and heat/steam a thinner cap (maybe 5mm) onto the shape including the forearm contour.
-
My Bro wants 34" scale anyway so there's no issue with 'what it is' and I hear what you say Wez - I suppose you're right there.
Those individuals are the perfect soilution I'll keep my eye out closer to the time I start the build to see if there's any available over here.

Back Problems
in Solidbody Guitar and Bass Chat
Posted
Would a chambered (hence lighter) guitar not be a good option for him? maybe a smaller body design and chambered too?