


Robbinst
-
Posts
269 -
Joined
-
Last visited
-
Days Won
20
Content Type
Profiles
News and Information
Tutorials
Product Reviews
Supplier Listings
Articles
Guitar Of The Month
Links and Resources
Forums
Gallery
Downloads
Posts posted by Robbinst
-
-
Thanks for the comments guys, lovin the positive feedback!
After the epoxy cured for 24 hours I ran it through the drum sander a few times and got every thing all cleaned up
stencil of the carves
roughed them in, them still need some more attention
-
Chain is being epoxied in and now I have to wait the 24 hours for its to cure
Its a little messy but should clean up nice once dry
-
I've been busy but I got a few more things done
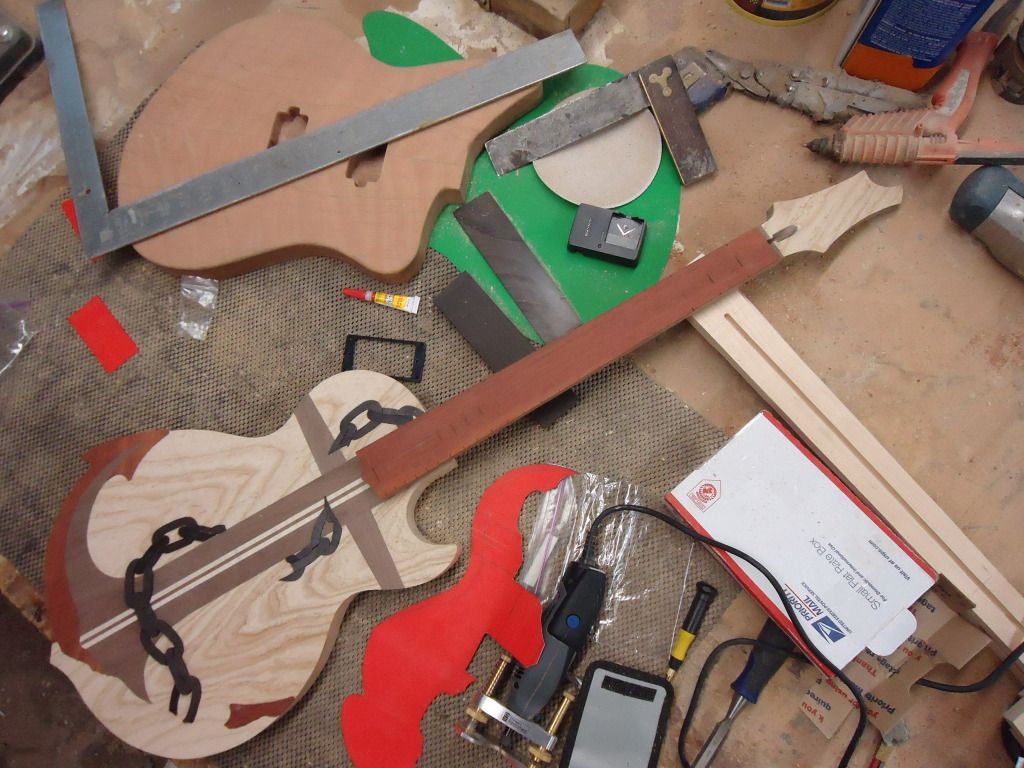
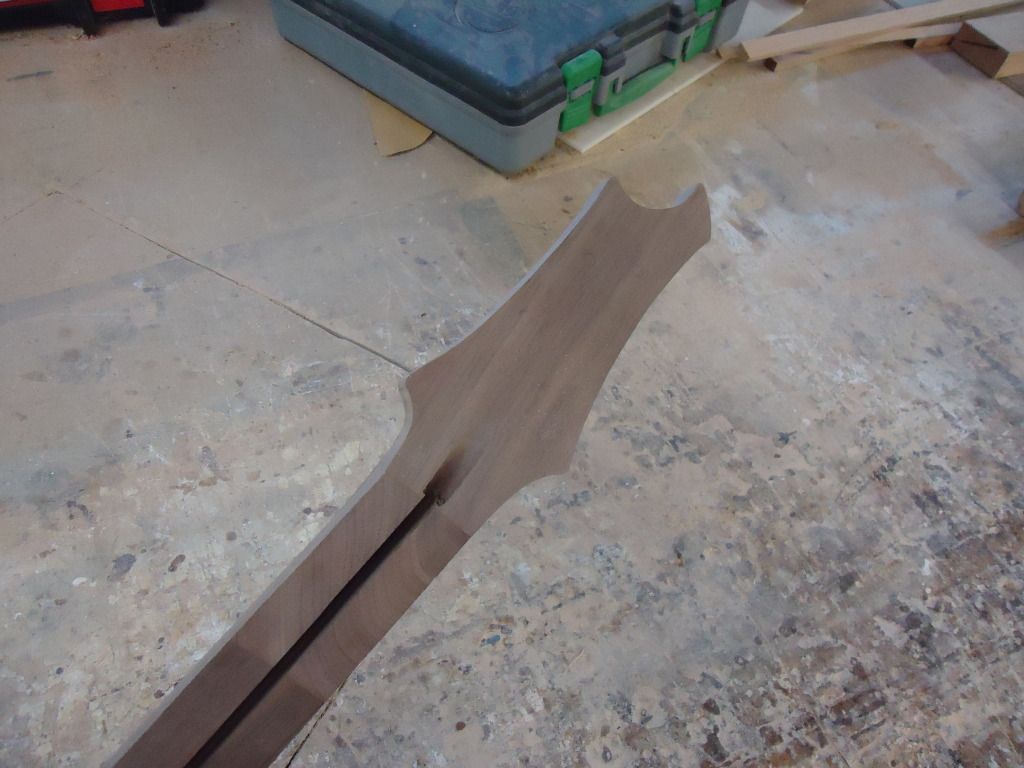
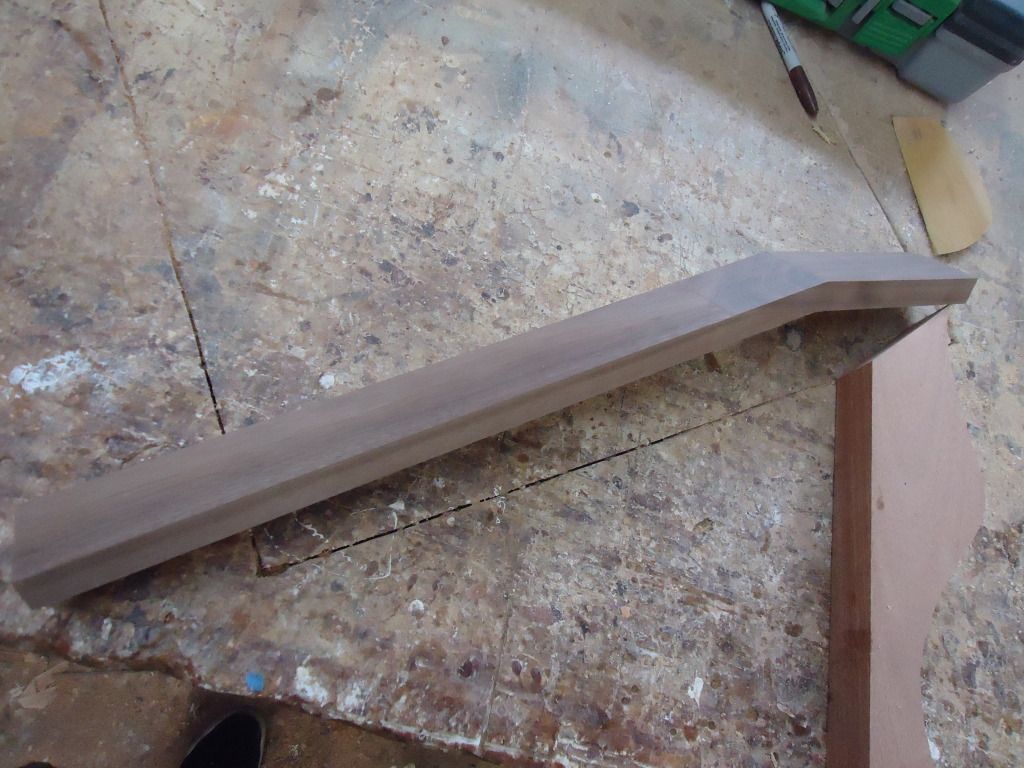
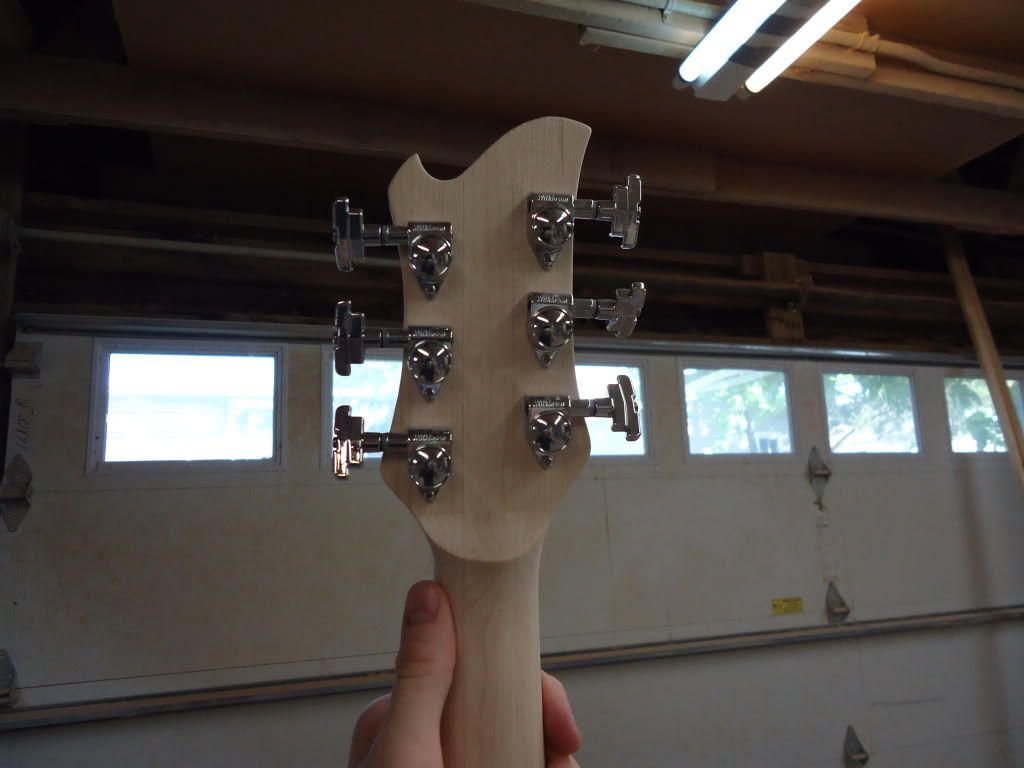
rough cut neck and headstock
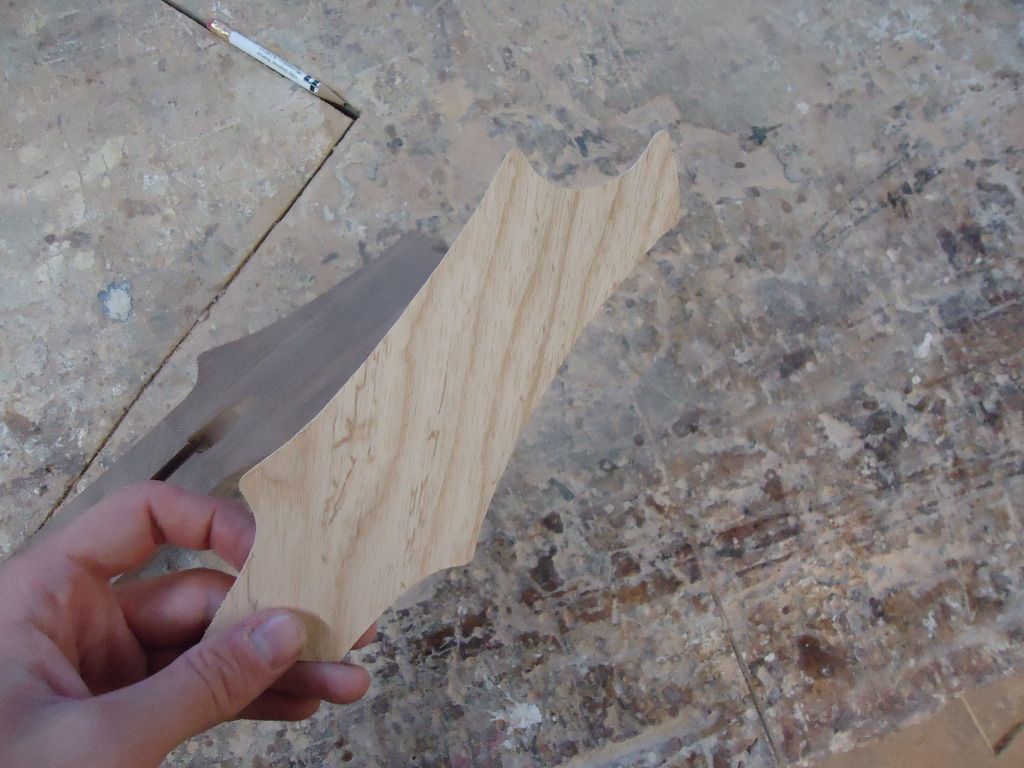
Ripped a thin piece of swamp ash from the body scraps for a headstock veneer
-
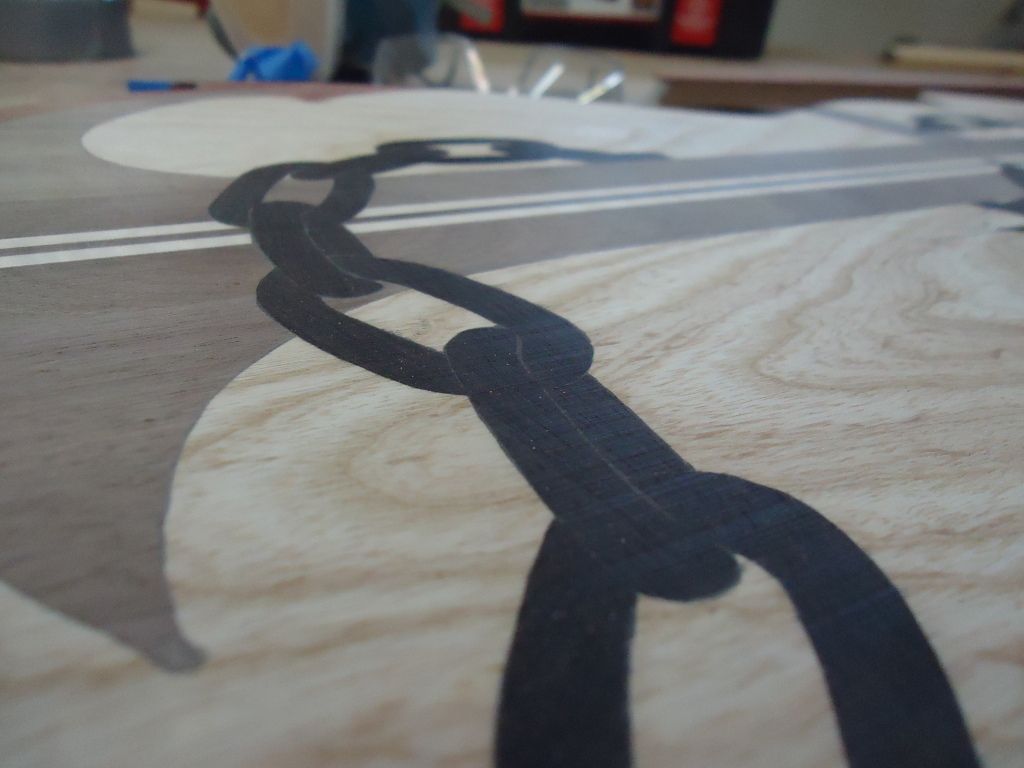
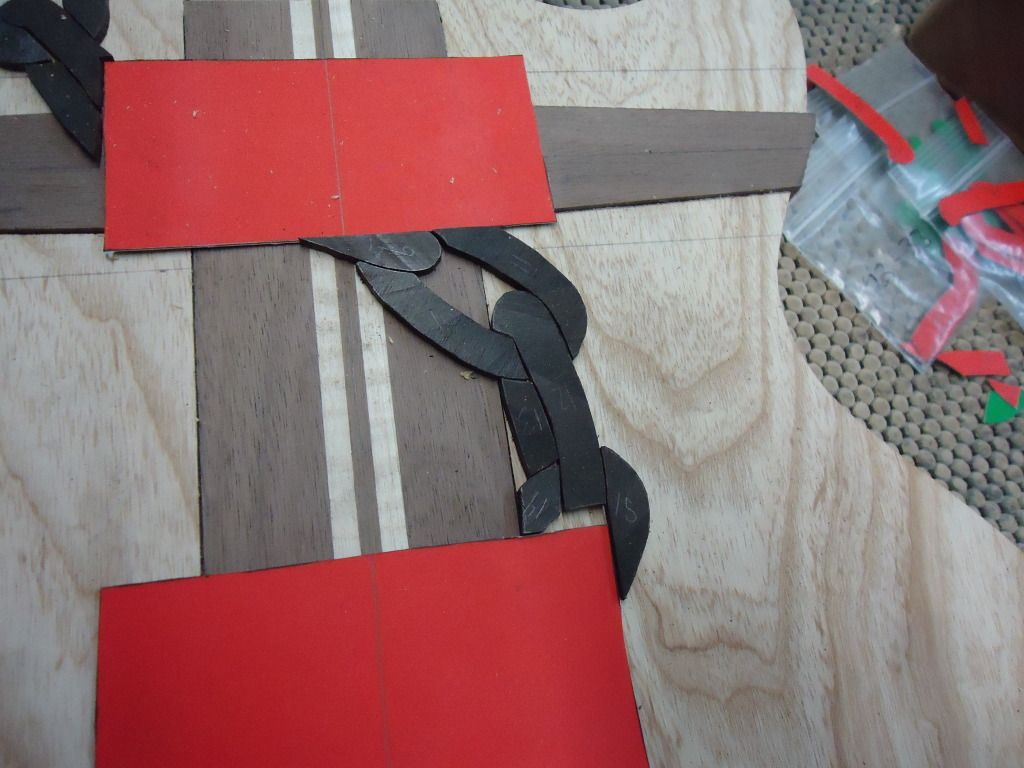
Finally got all 33 pieces of the chain cut out, took awhile but I think it was worth it.
Making the templates which were a pain to keep track of
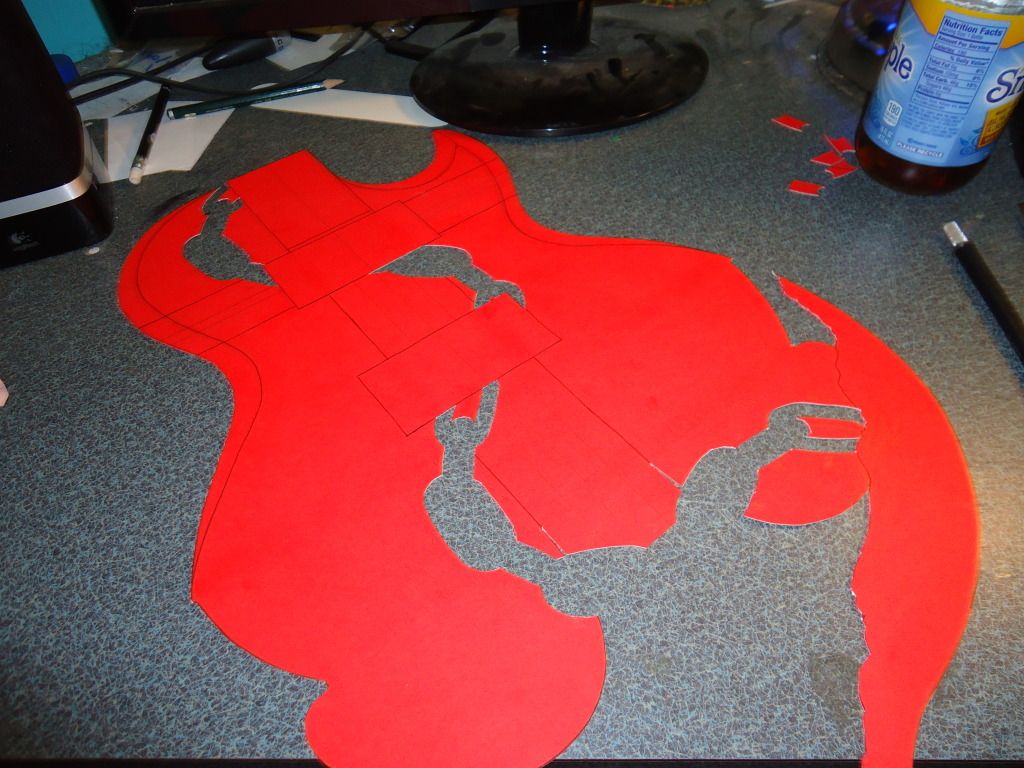
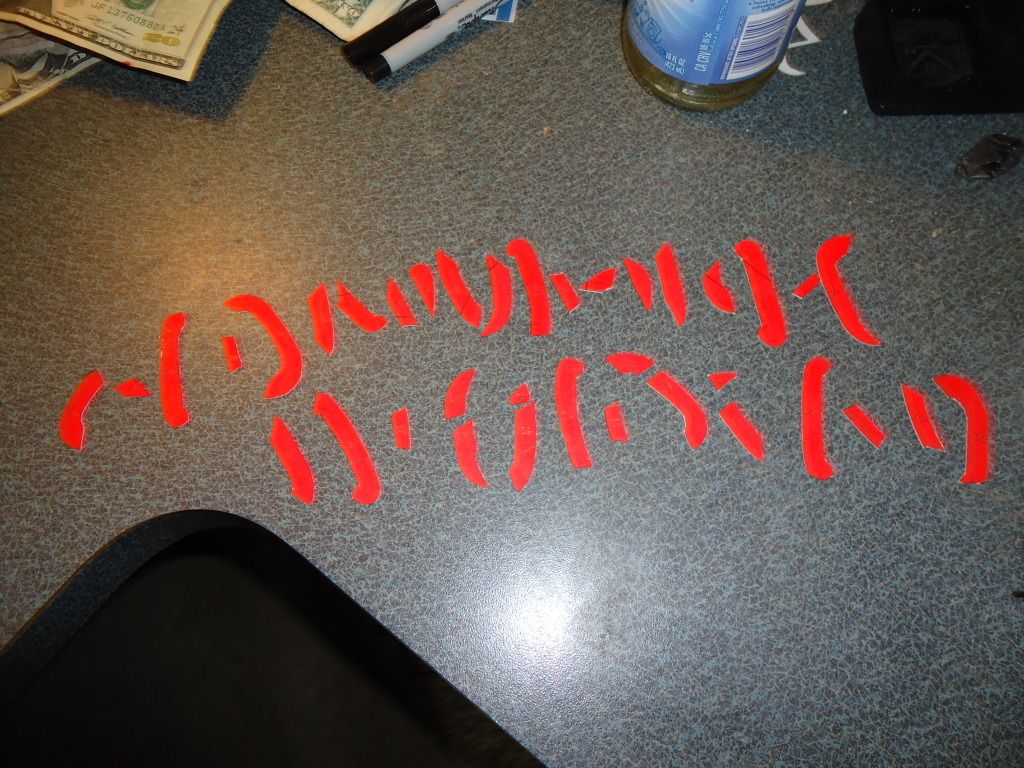
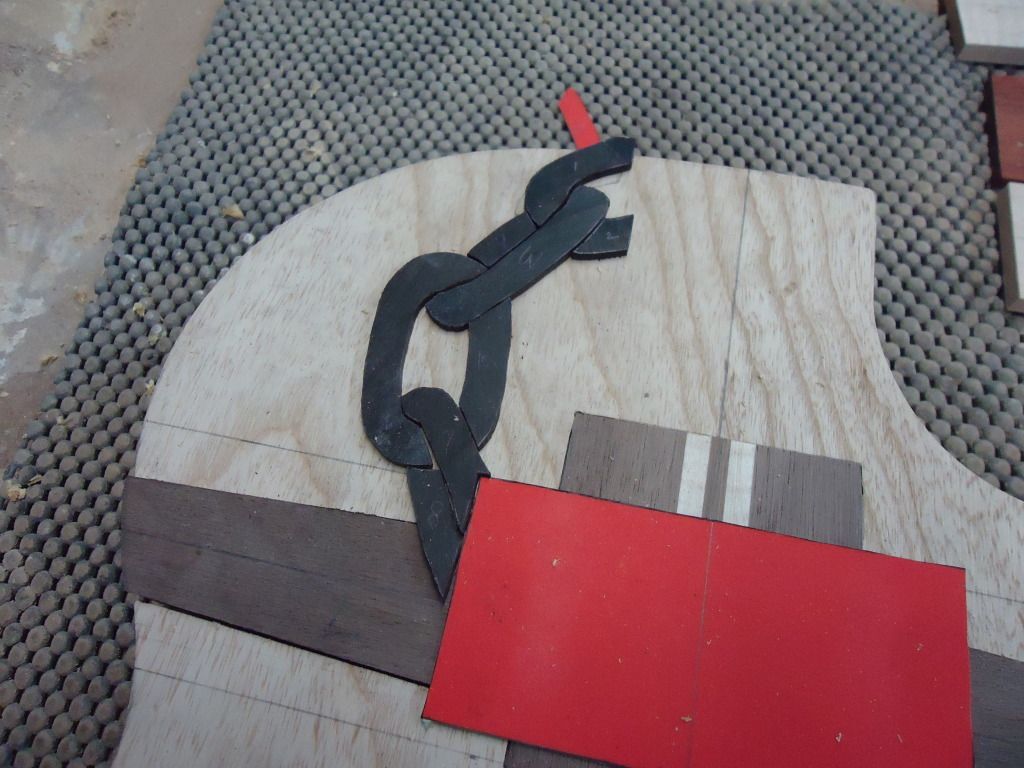
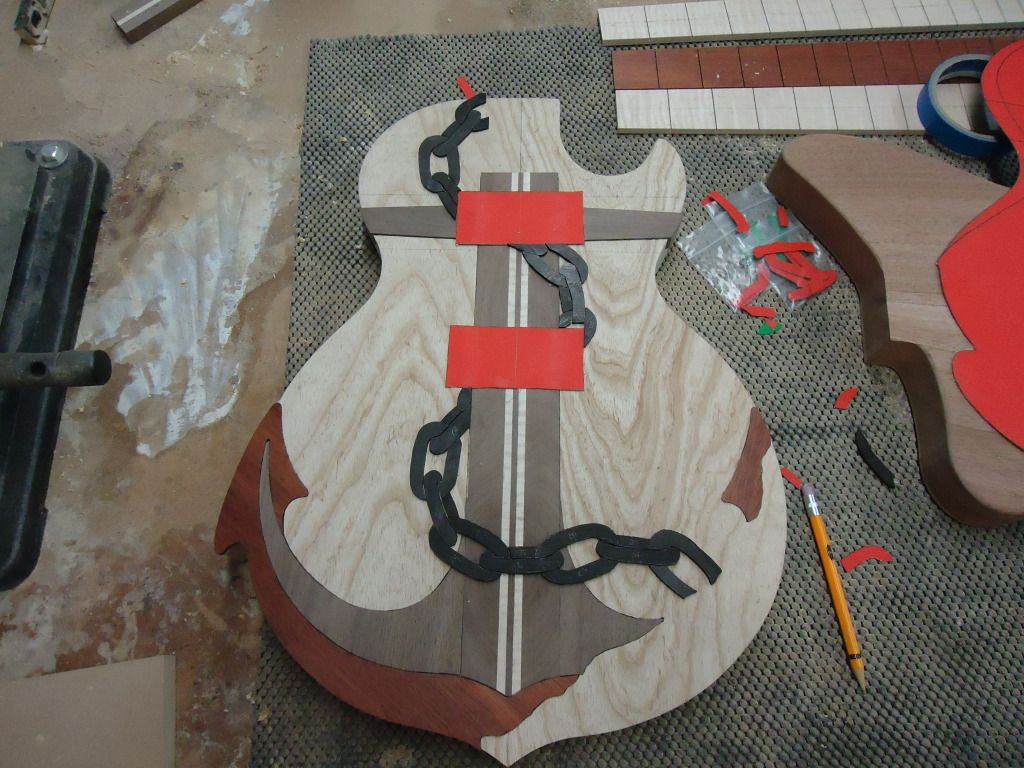
Tomorrow I'll start epoxying everything in then sand it flush
-
 1
1
-
-
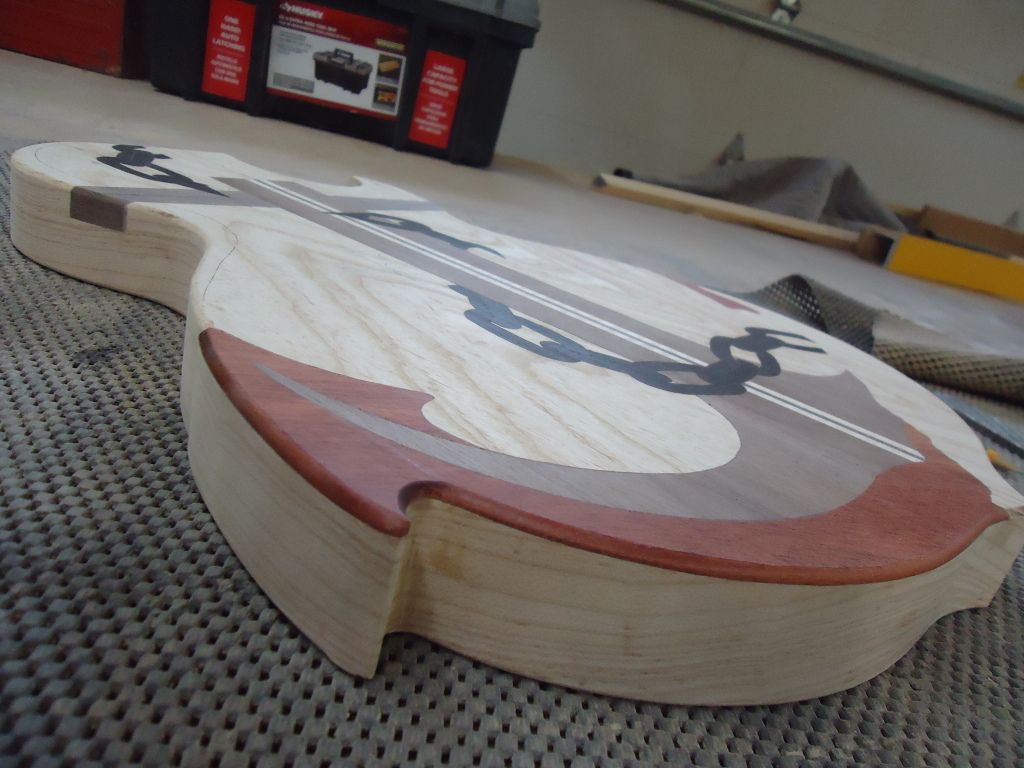
I routed out the cavities for the anchor pieces today and I'm pretty happy with how they fit.
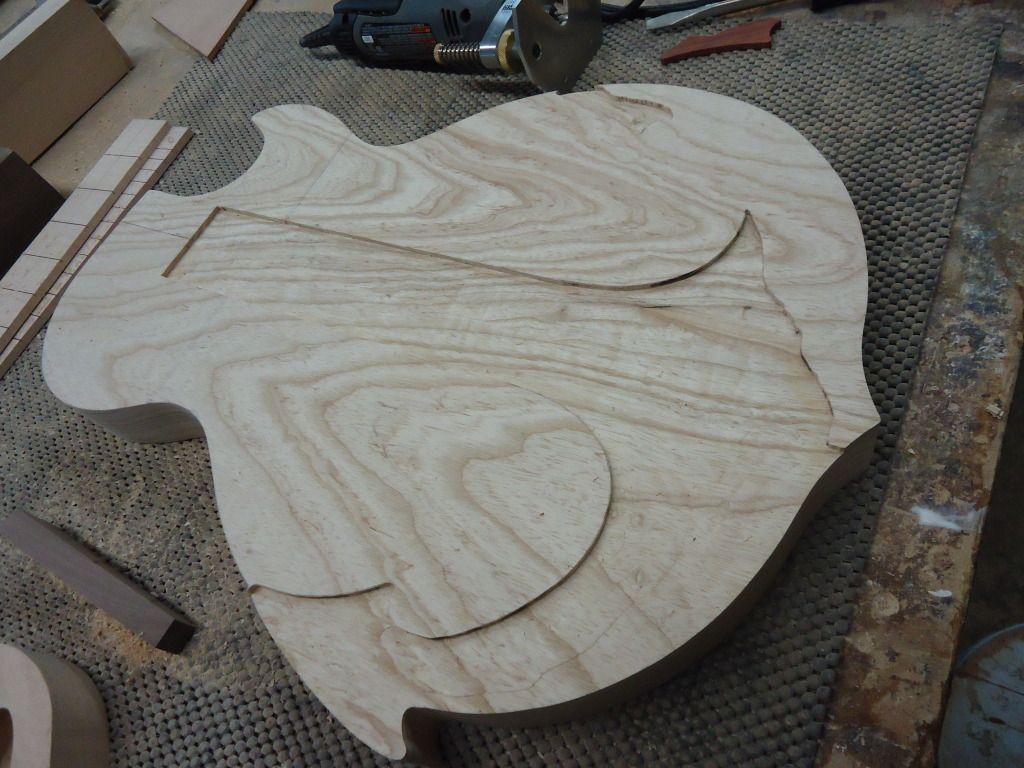
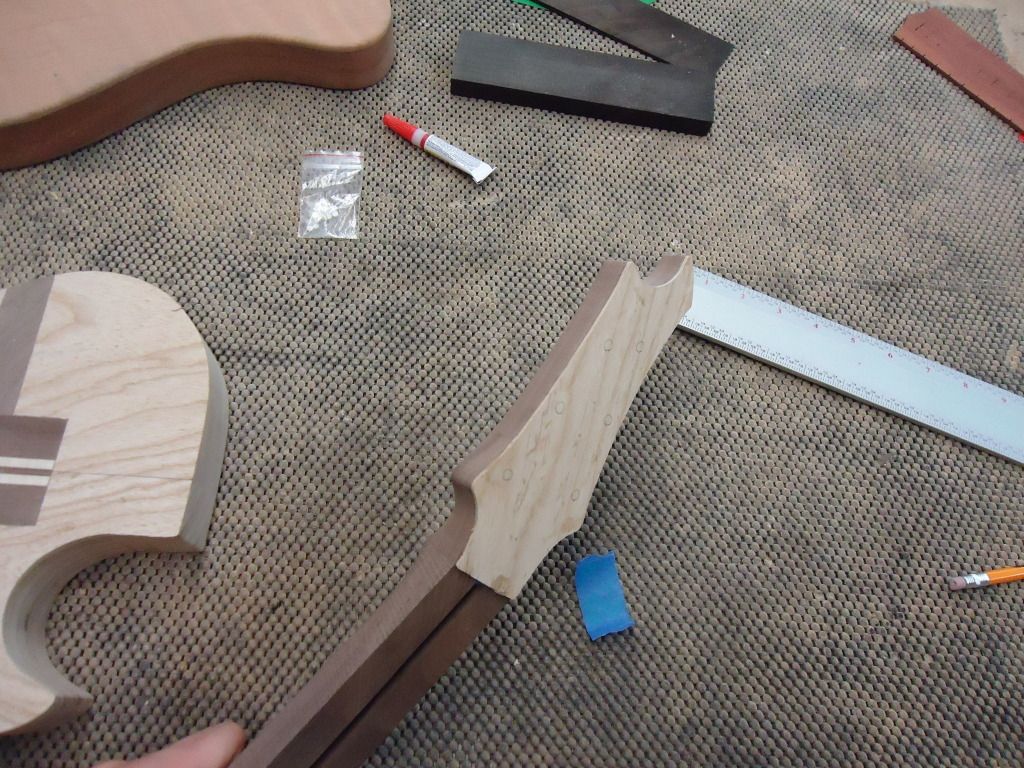
I also managed to get the neck cut and glued up
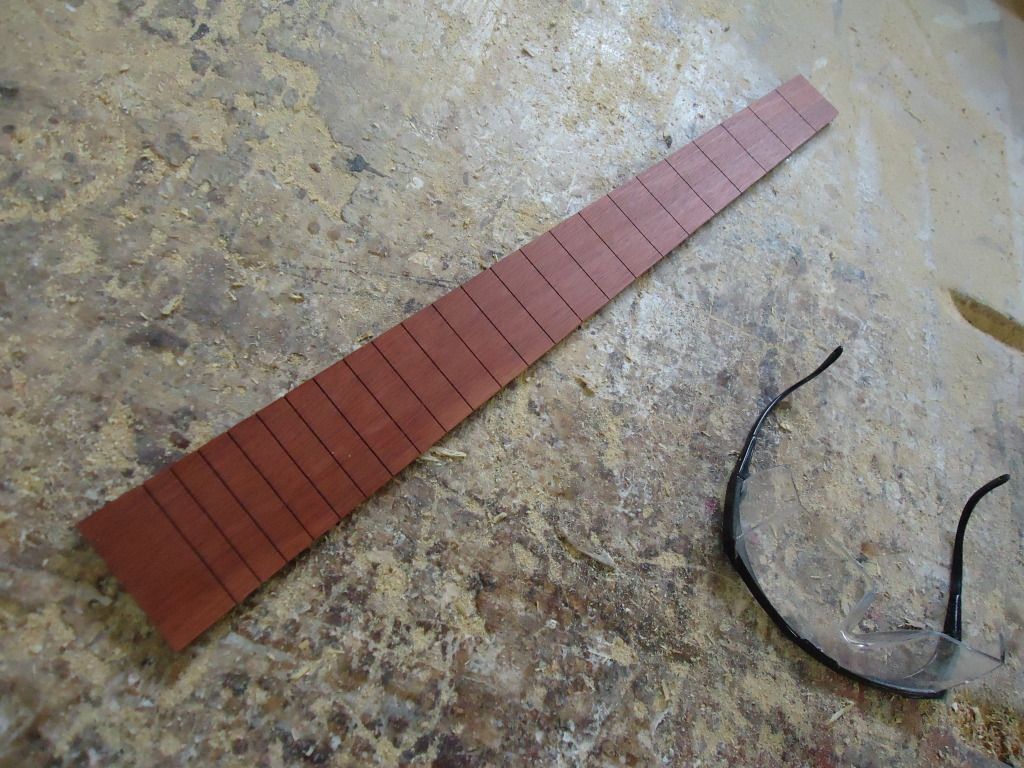
As well as the fret board
My next step is to mix the three different colors of epoxy I'll need and glue the pieces in, then it will be time to tackle the chain
-
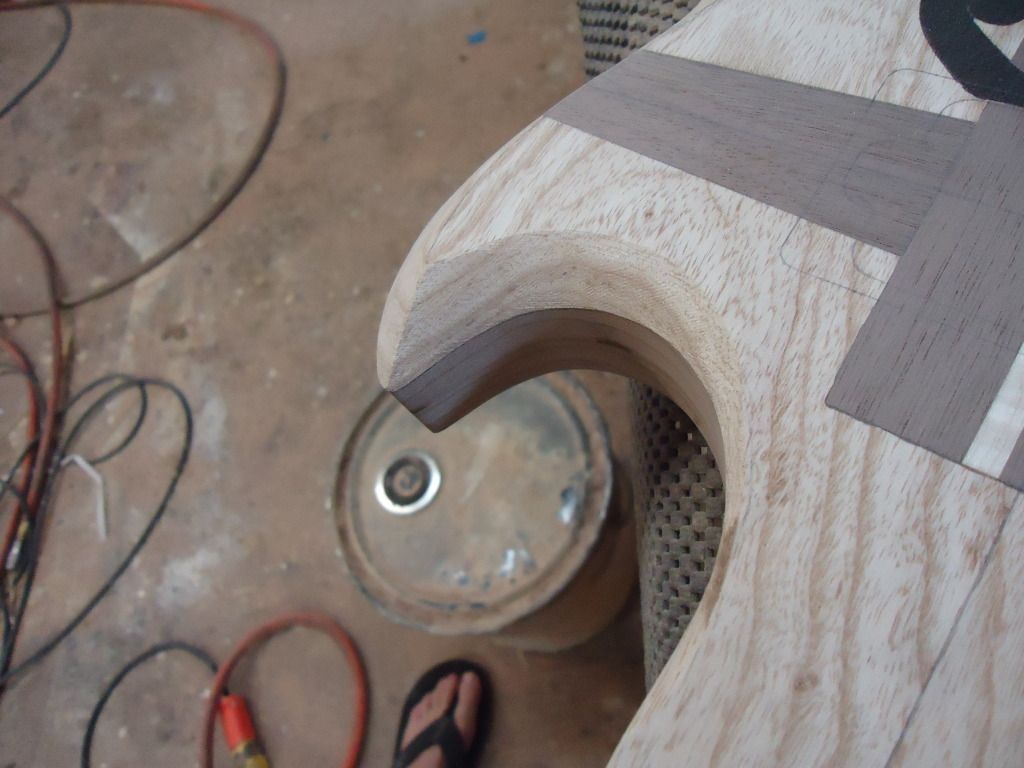
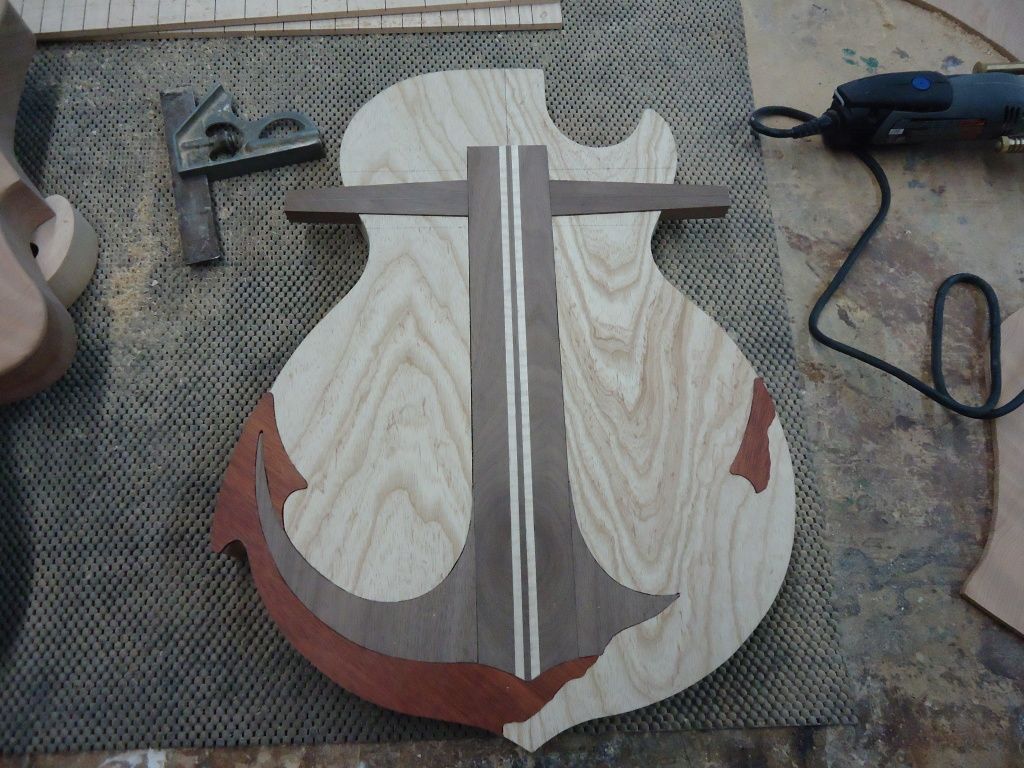
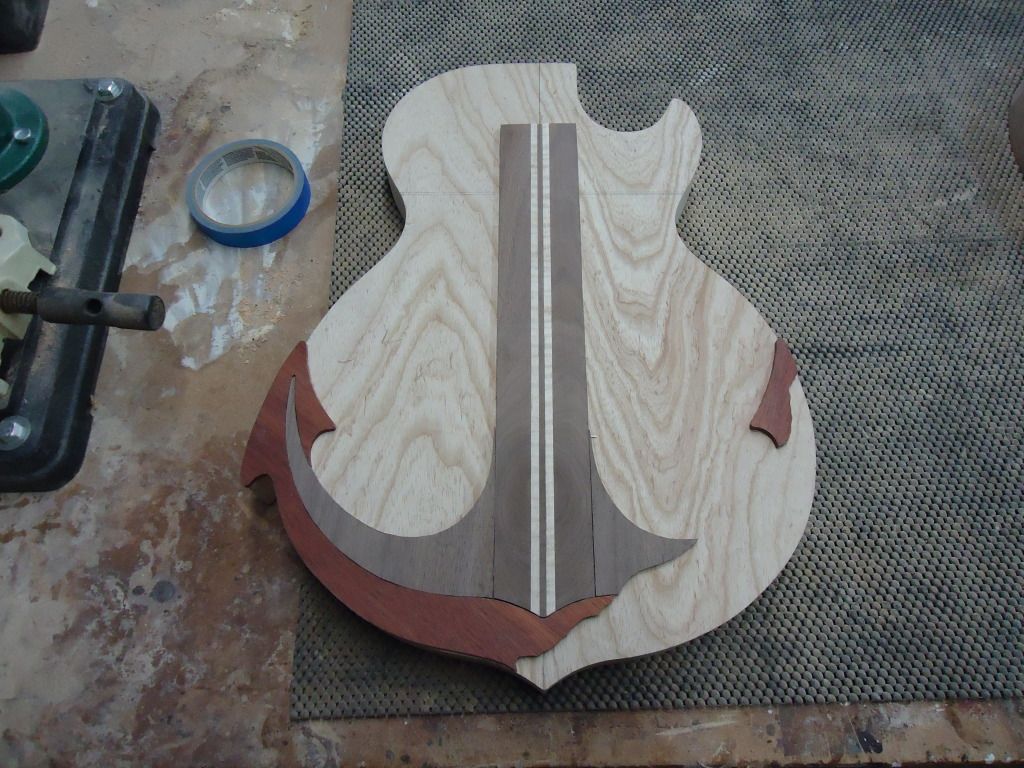
I see what your saying Charlie, its hard do to space limitations because the humbucker goes right in that area also. I think I am going to make the cross bars slightly thinner and taper them to the ends but i wont have room for the ball ends. Those sides will also have a bevel which you can kinda see in the first pic. That is why the cross bar is thicker, so i dont carve through it. Thanks for the thoughts!
-
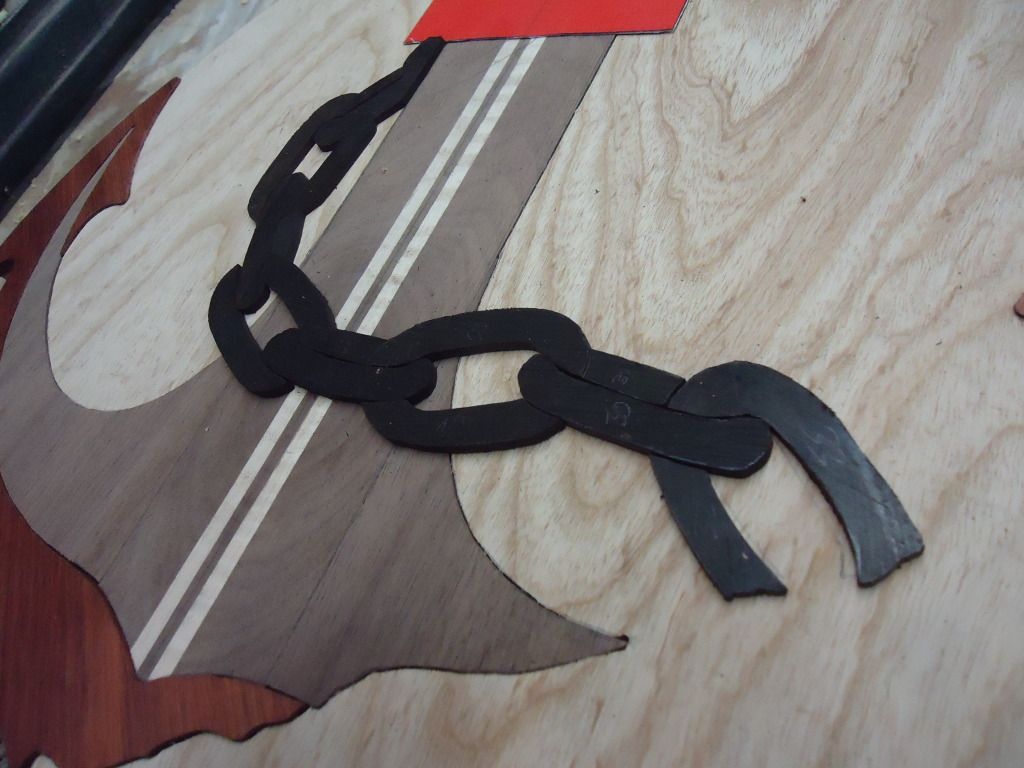
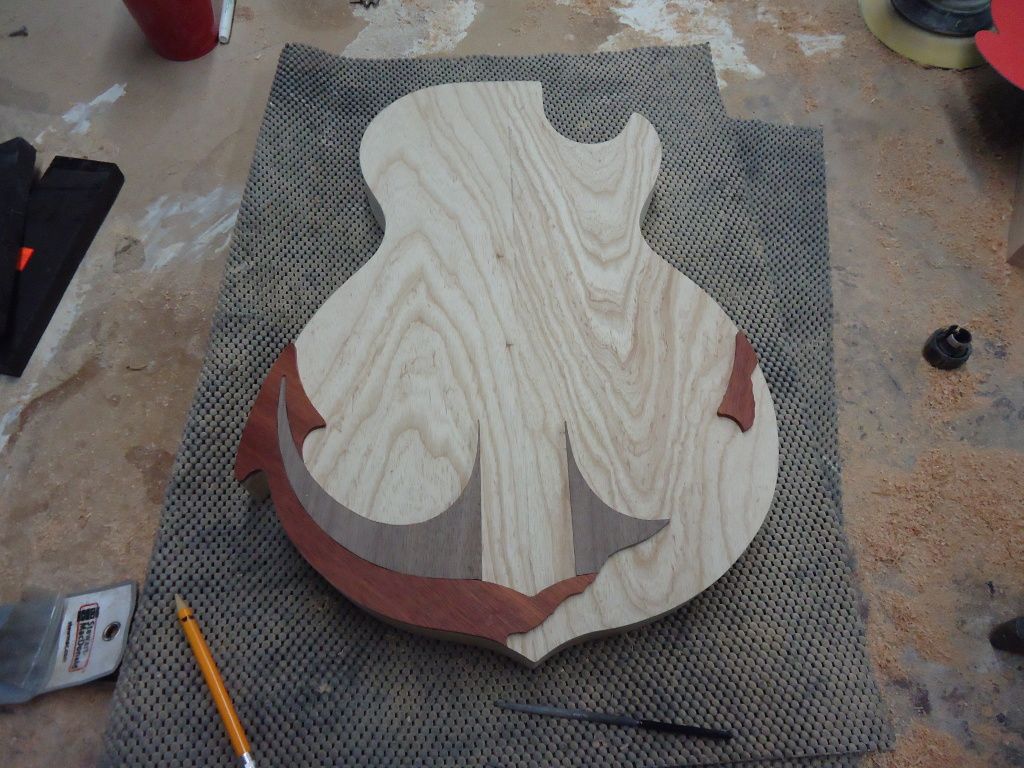
I think I'm inlaying the center shaft first then inlaying the other peices off of that. Once the anchors in I will come in with the ebony chain and inlay that then cut the pickup cavities and other stuff
-
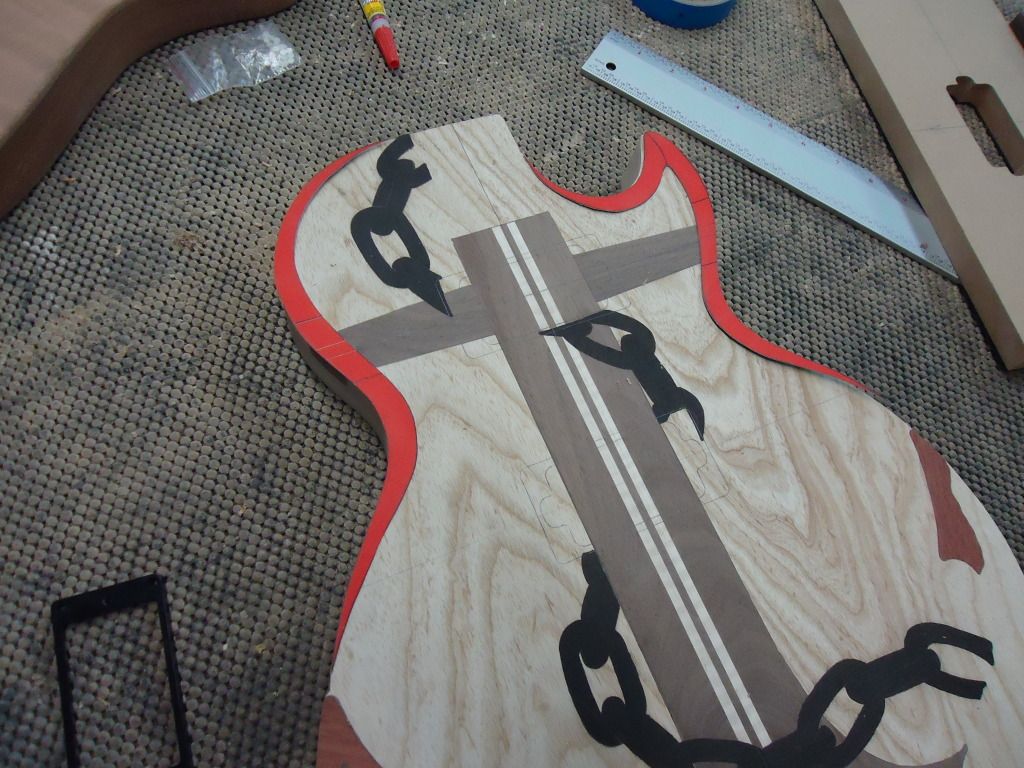
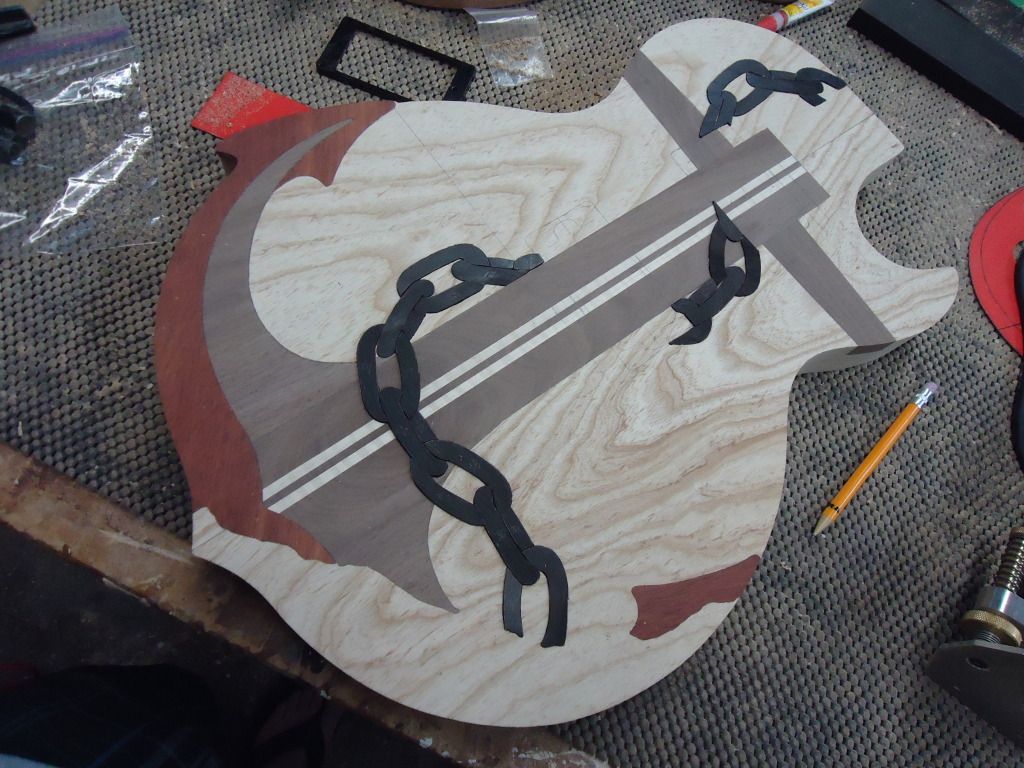
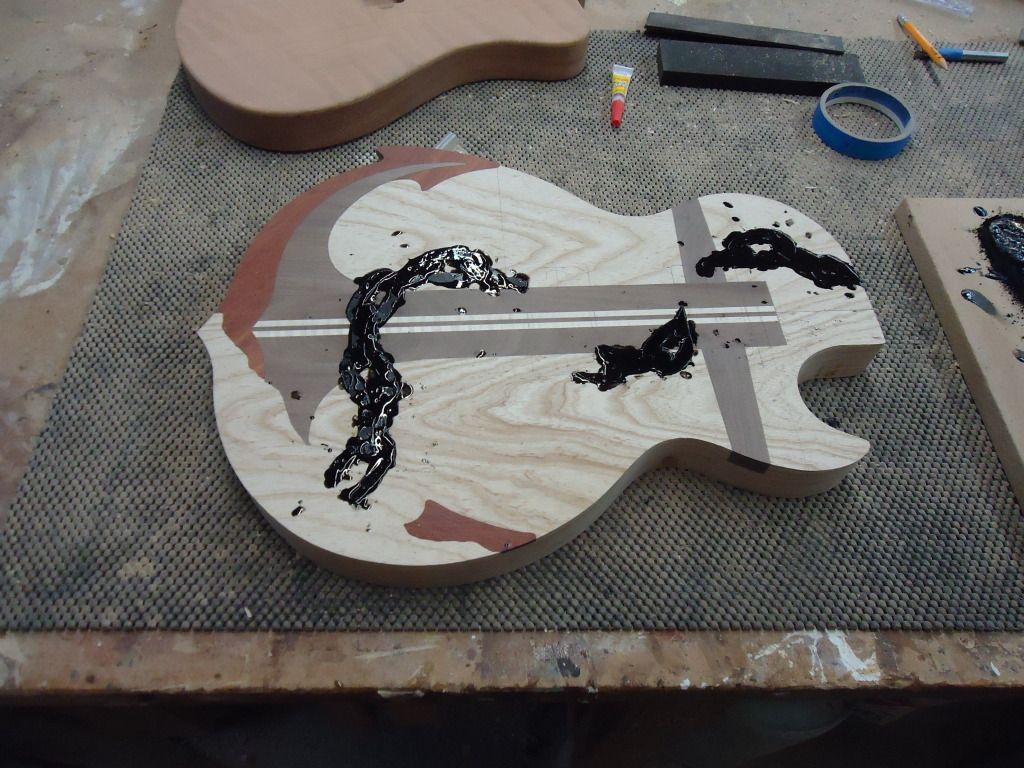
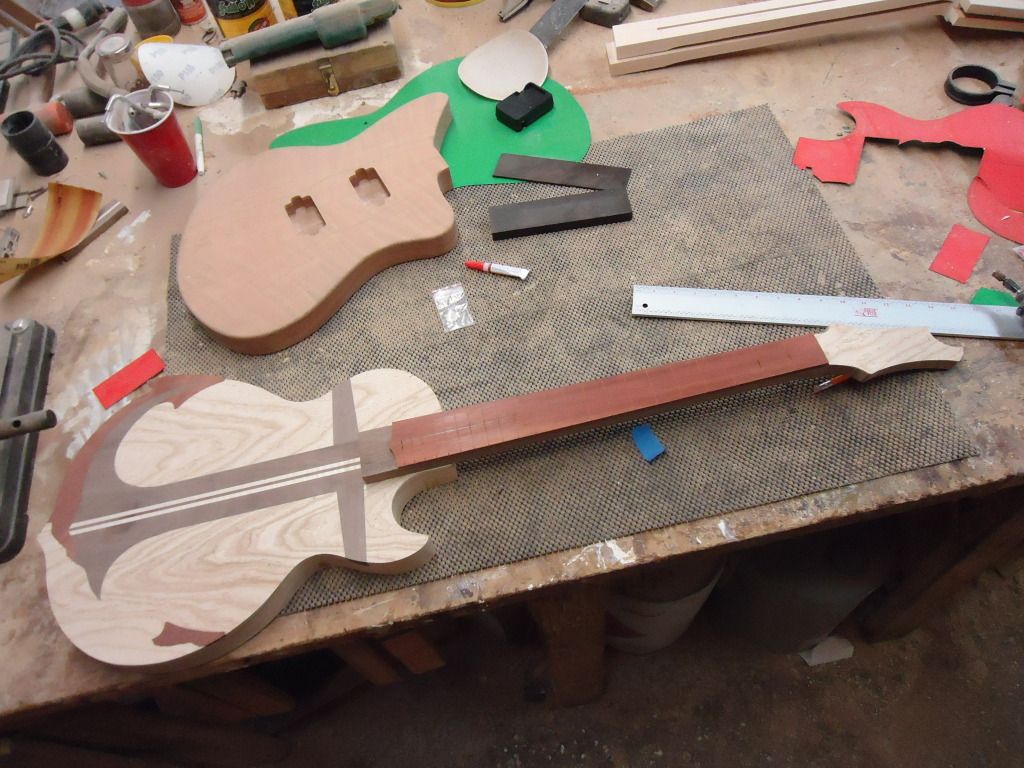
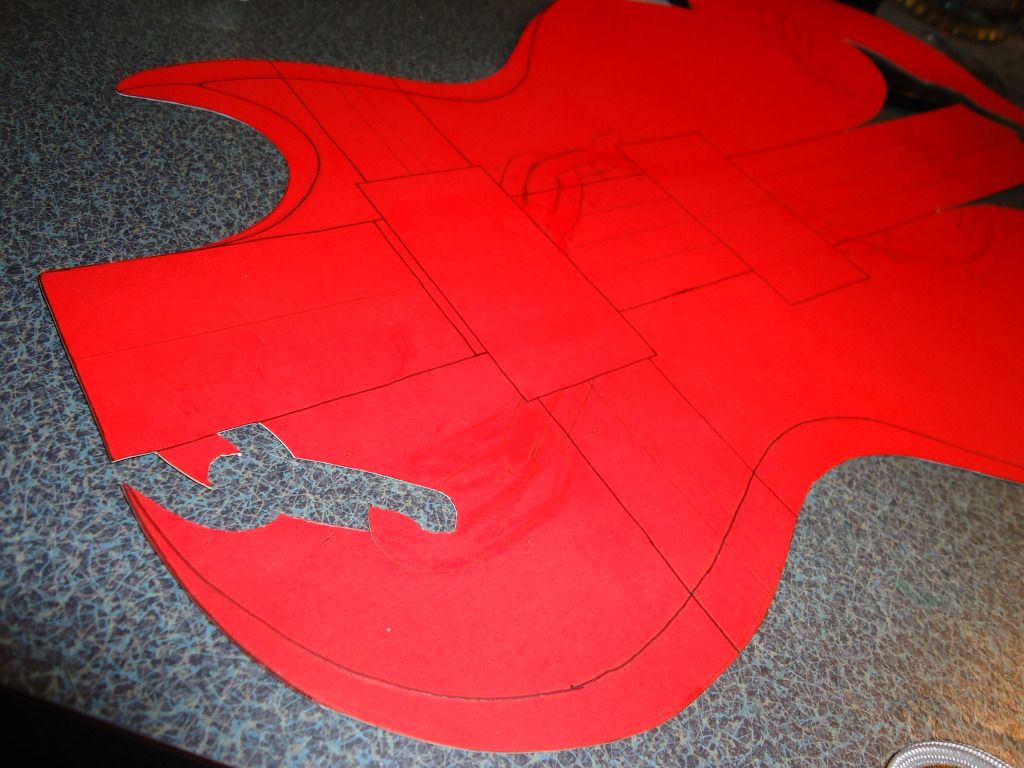
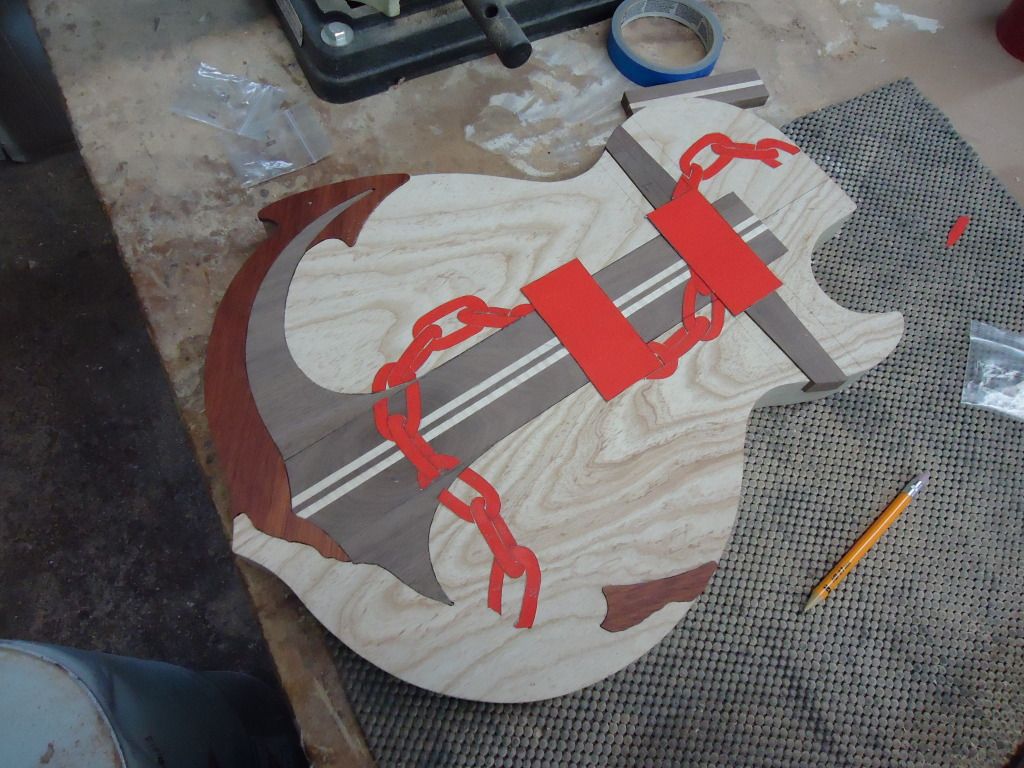
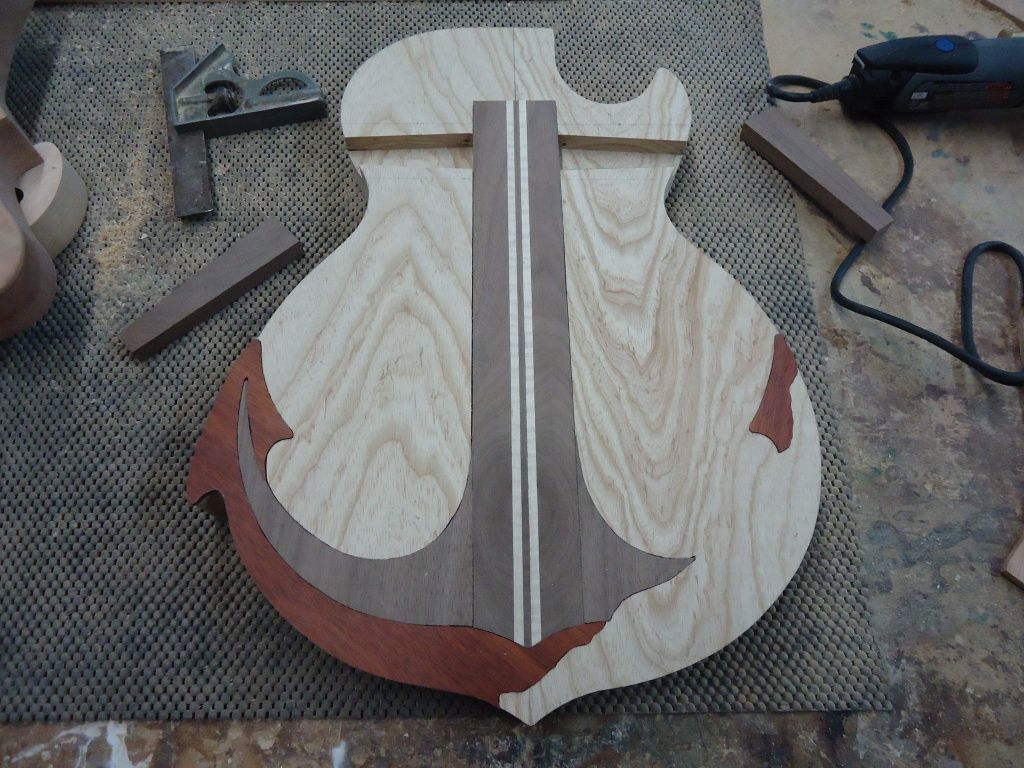
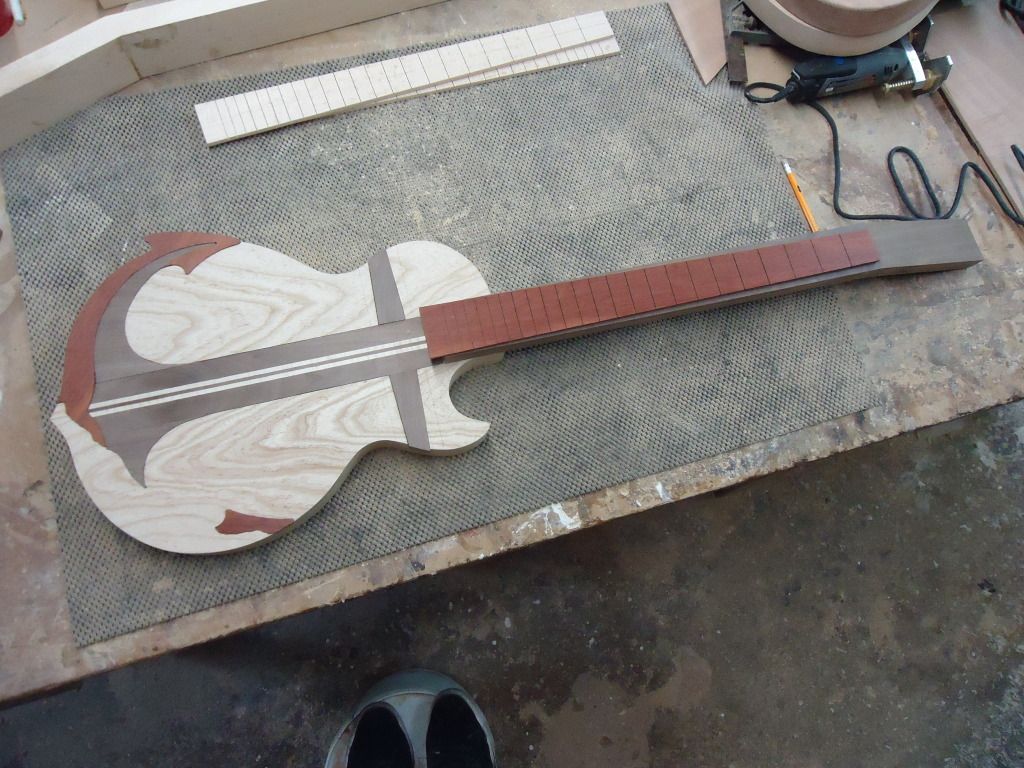
Here is one more I'm working on at the moment. It's a LP based design that I am building for a friend of mine. It has an ash body and will be inlaid with bloodwood, walnut, curly maple and ebony. He requested the I integrate an Anchor into the design so here what I've got so far:
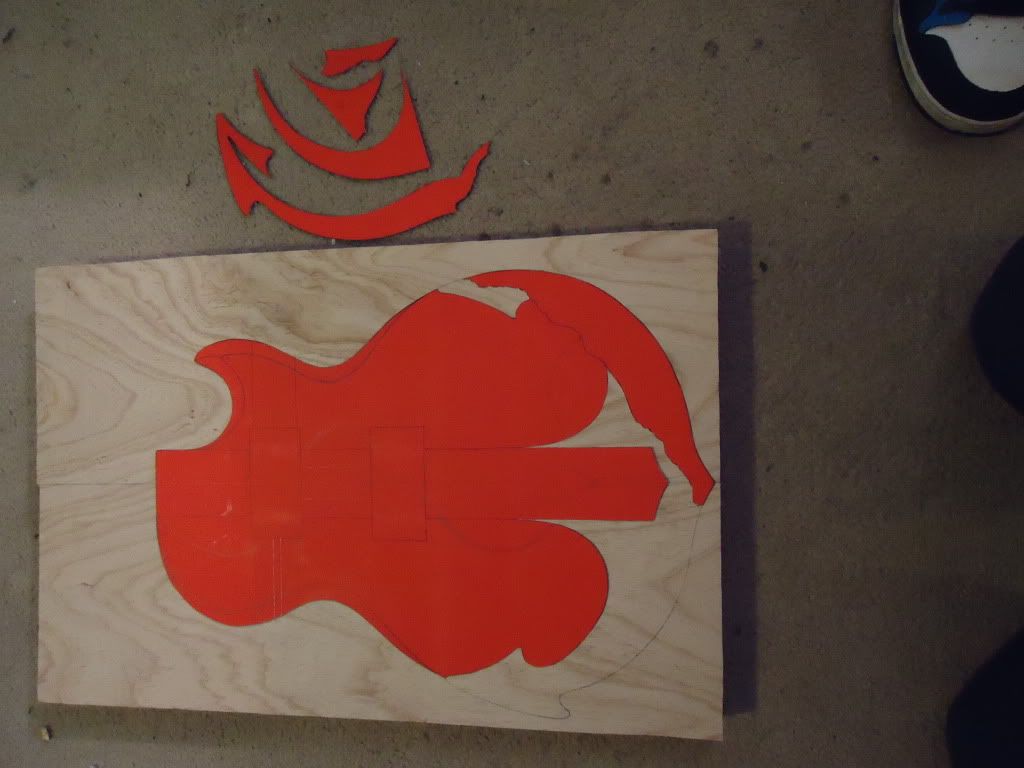
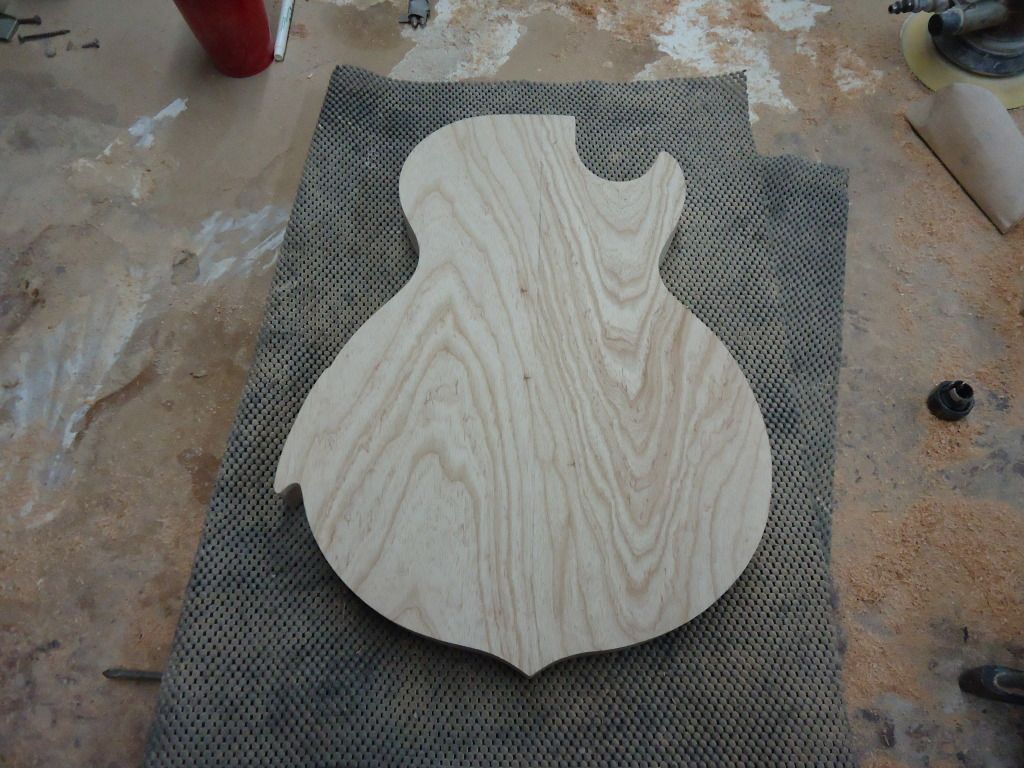
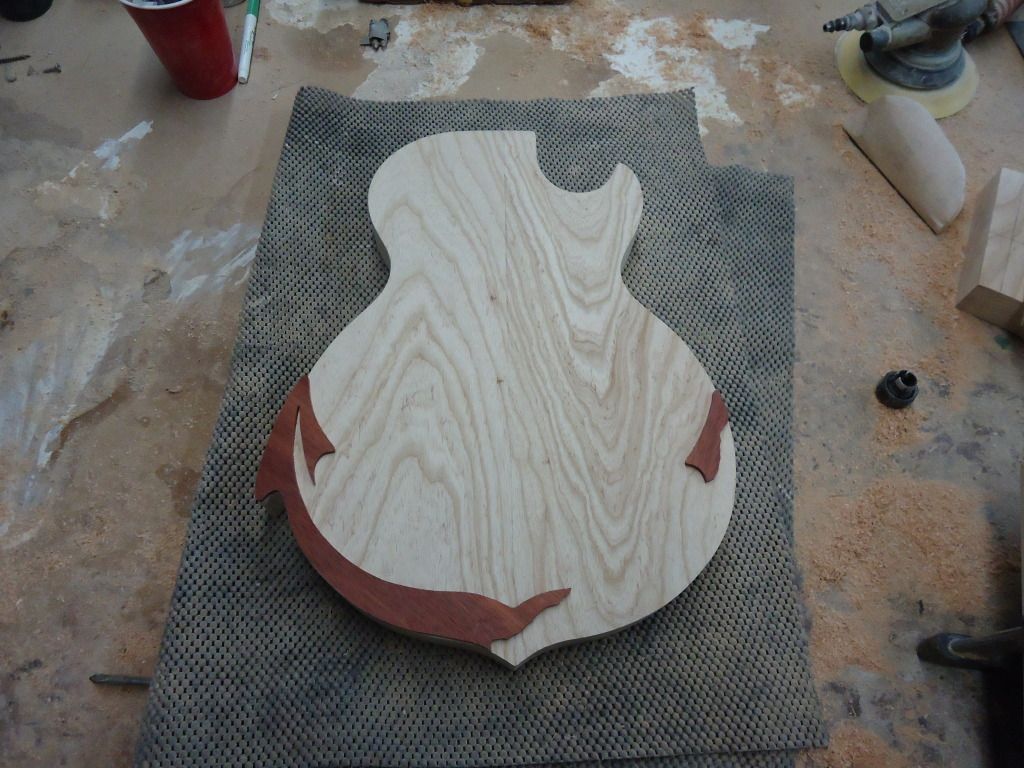
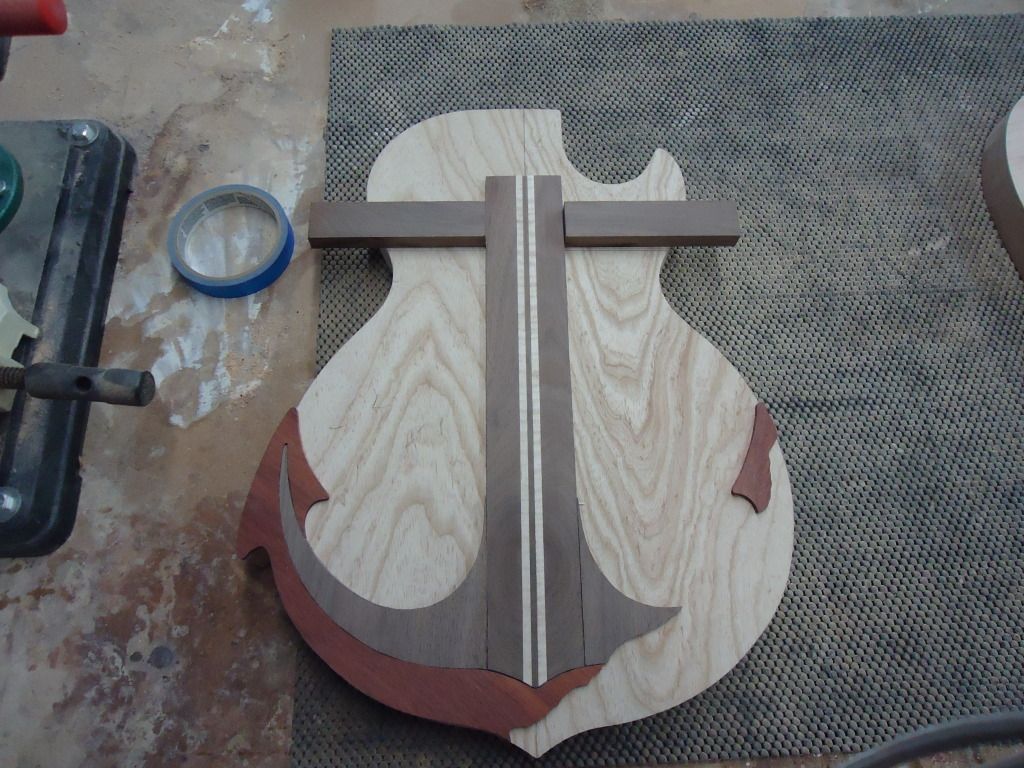
The ebony will be used for a chain that wraps around the design. When its done the anchor should appear to be buried into the guitar. Really hope I can pull off the image in my head.
-
2
-
-
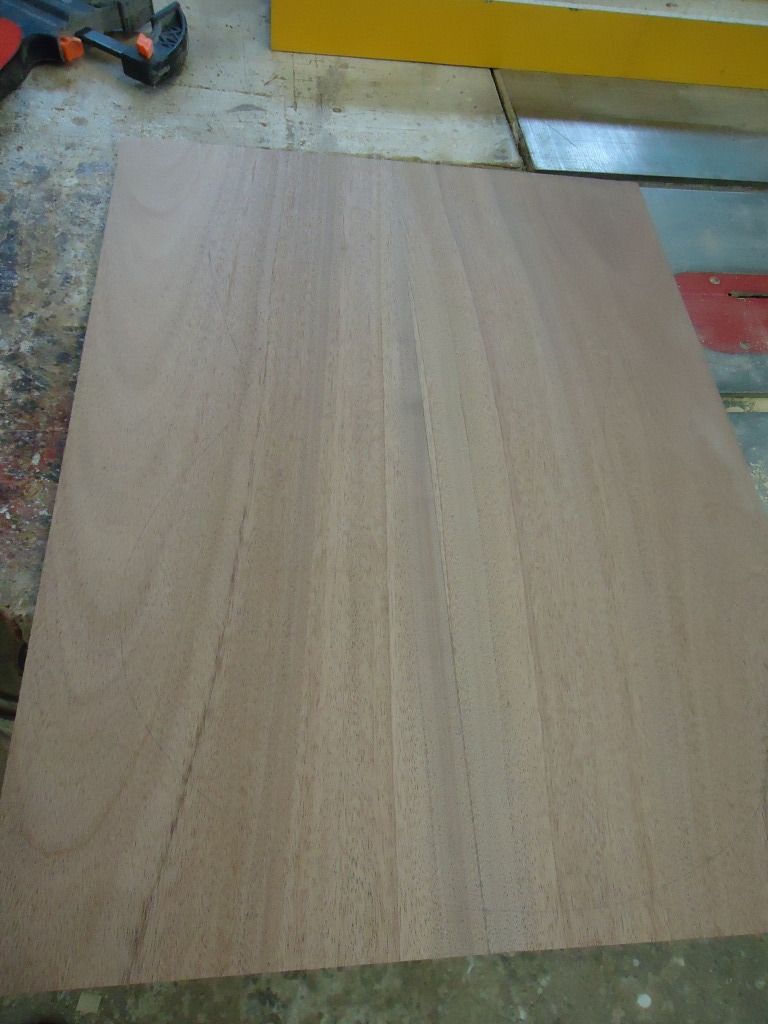
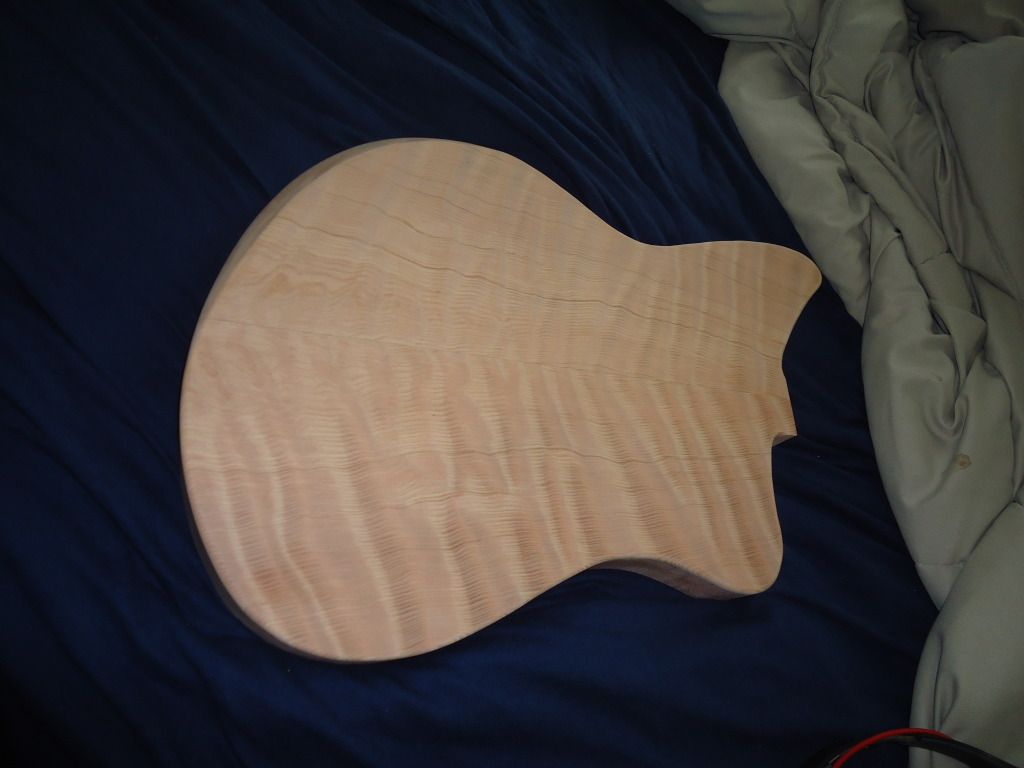
Red mahogany body blank
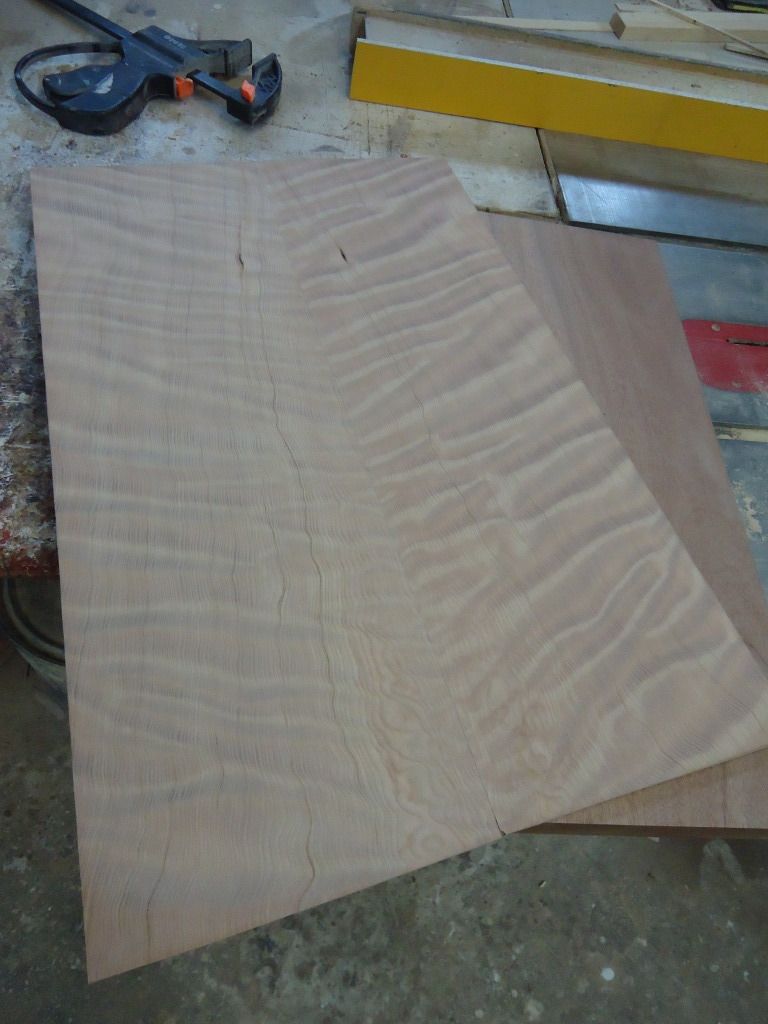
Curly redwood from Oregon Wild Wood
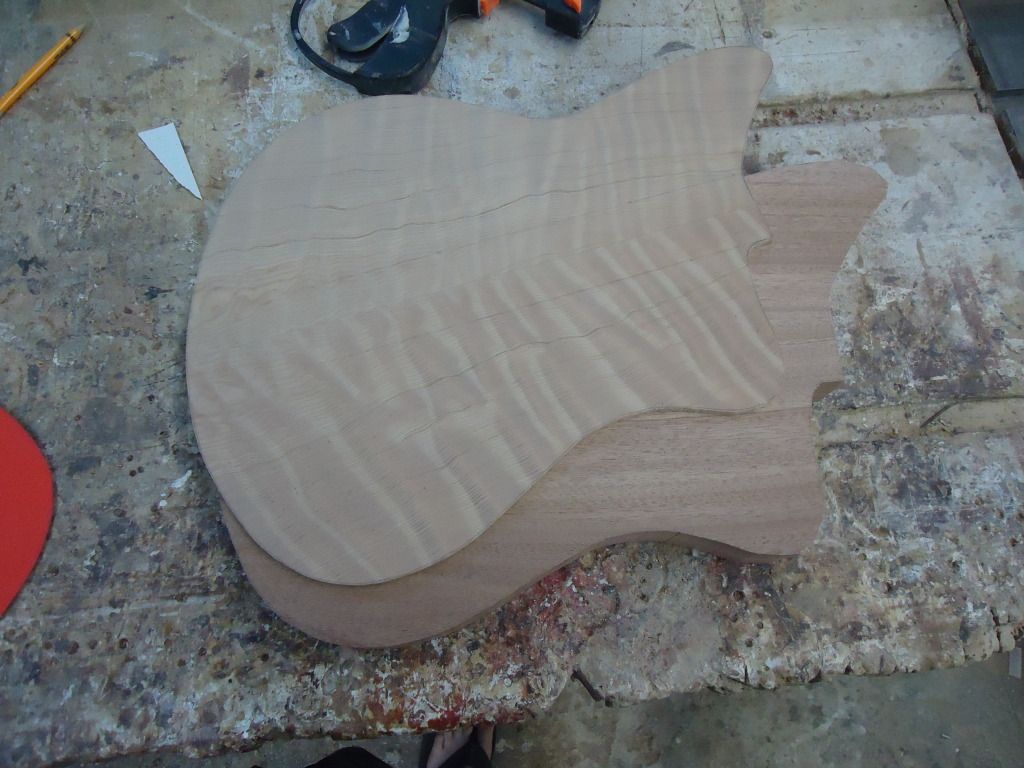
Body and top cut to shape
Clamp time
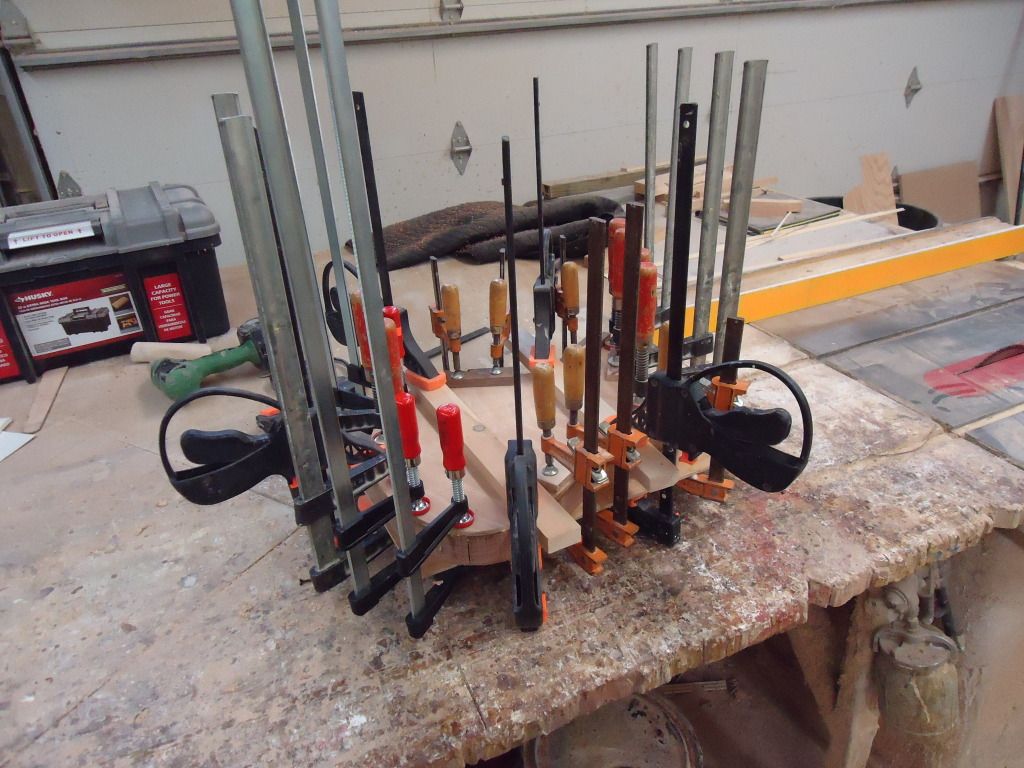
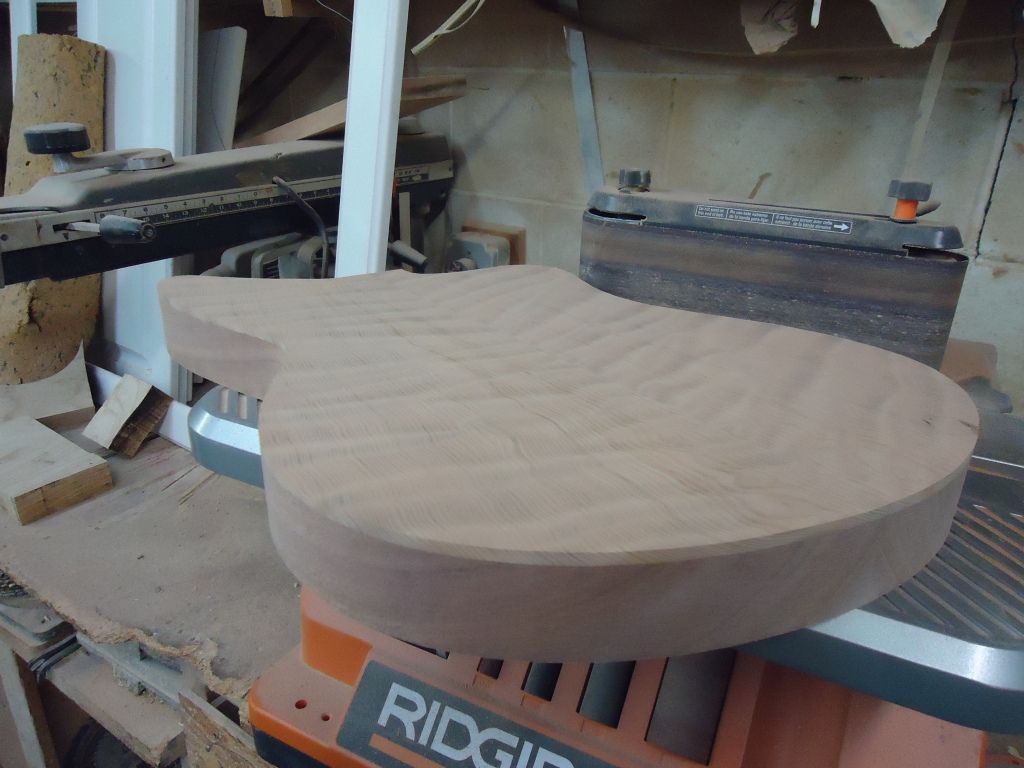
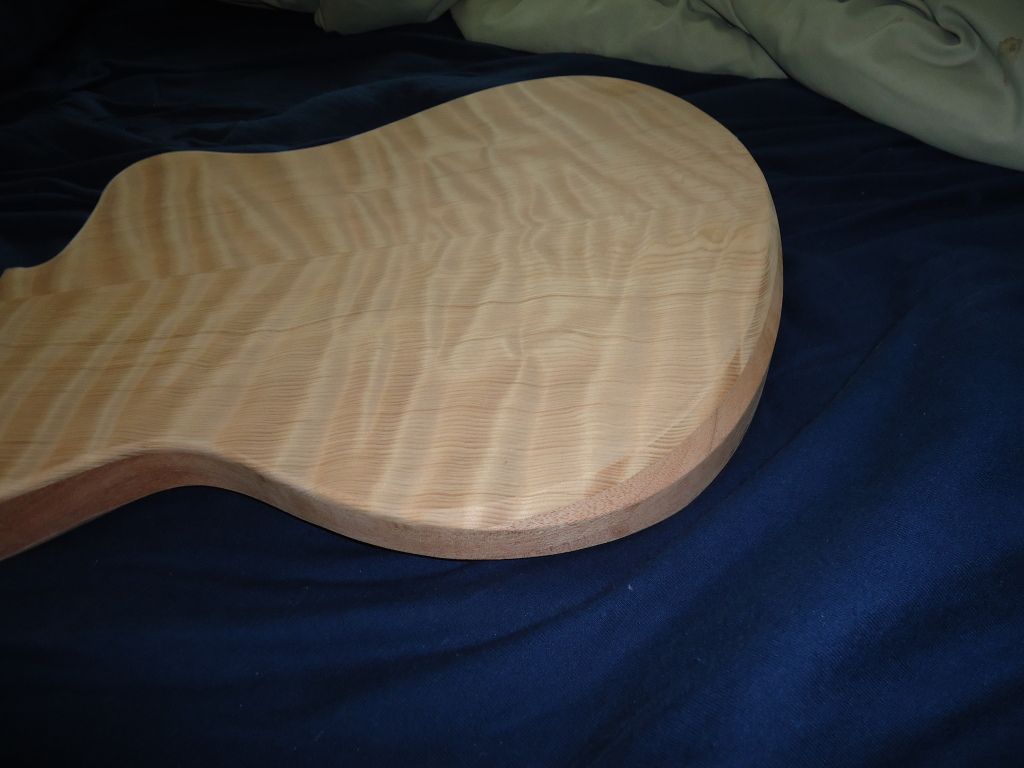
Roughed in some of the carves

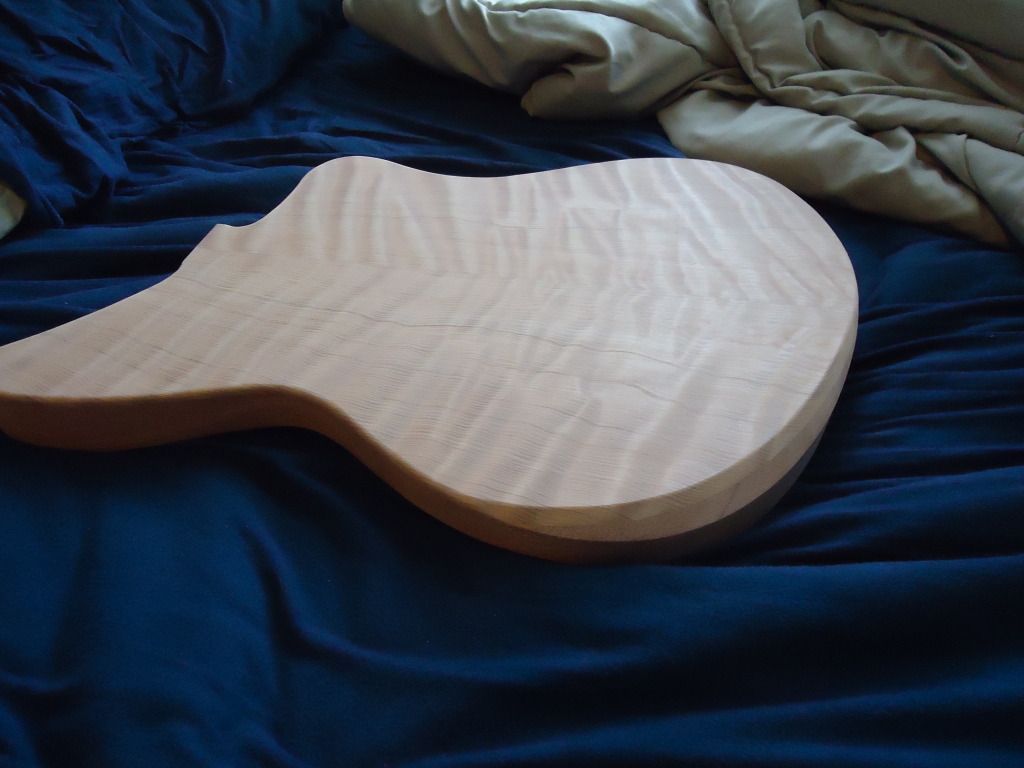
More coming soon!
-
1
-
-
Well this one is finally done, sorry for the delay but here's what I ended up with
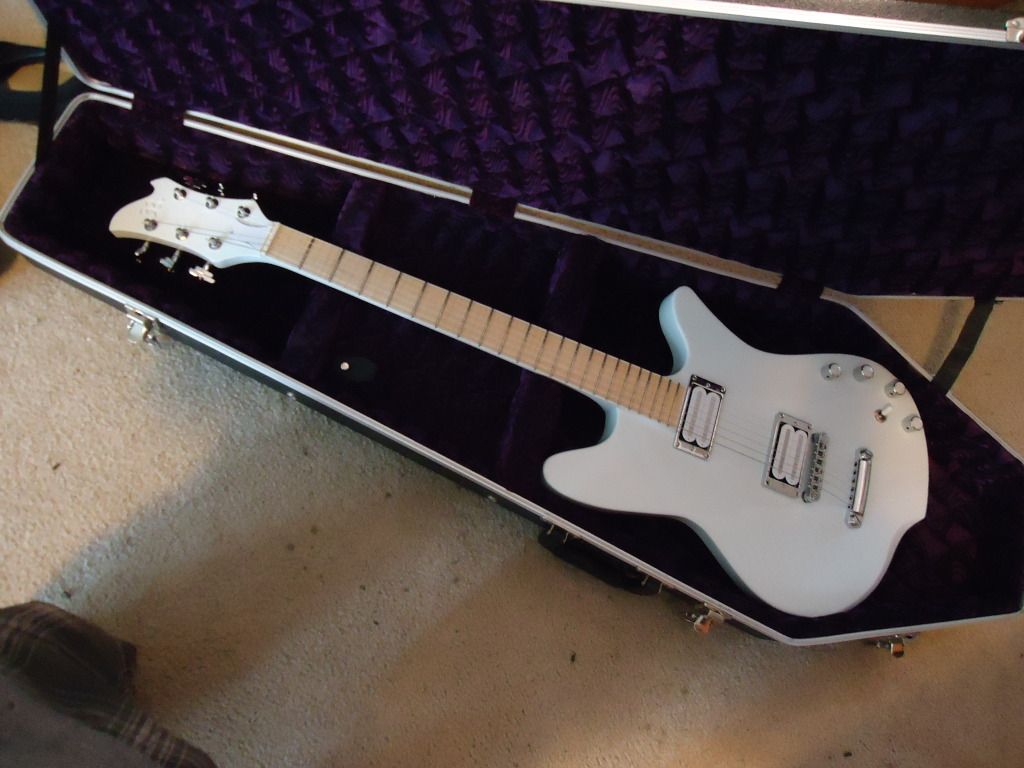
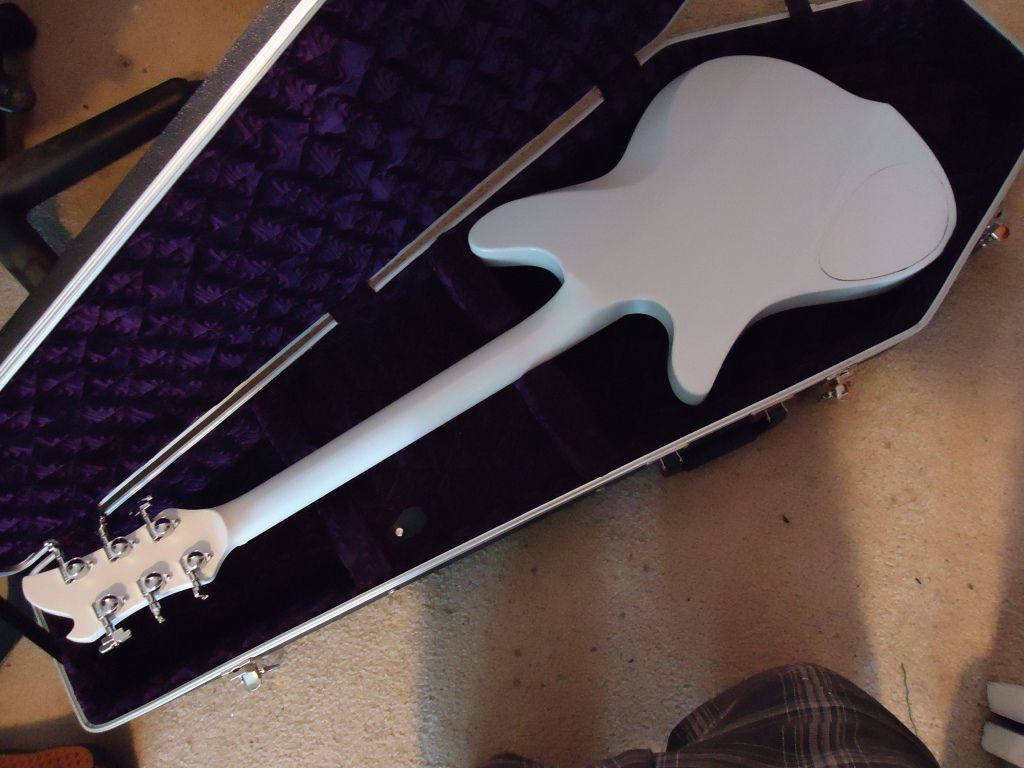
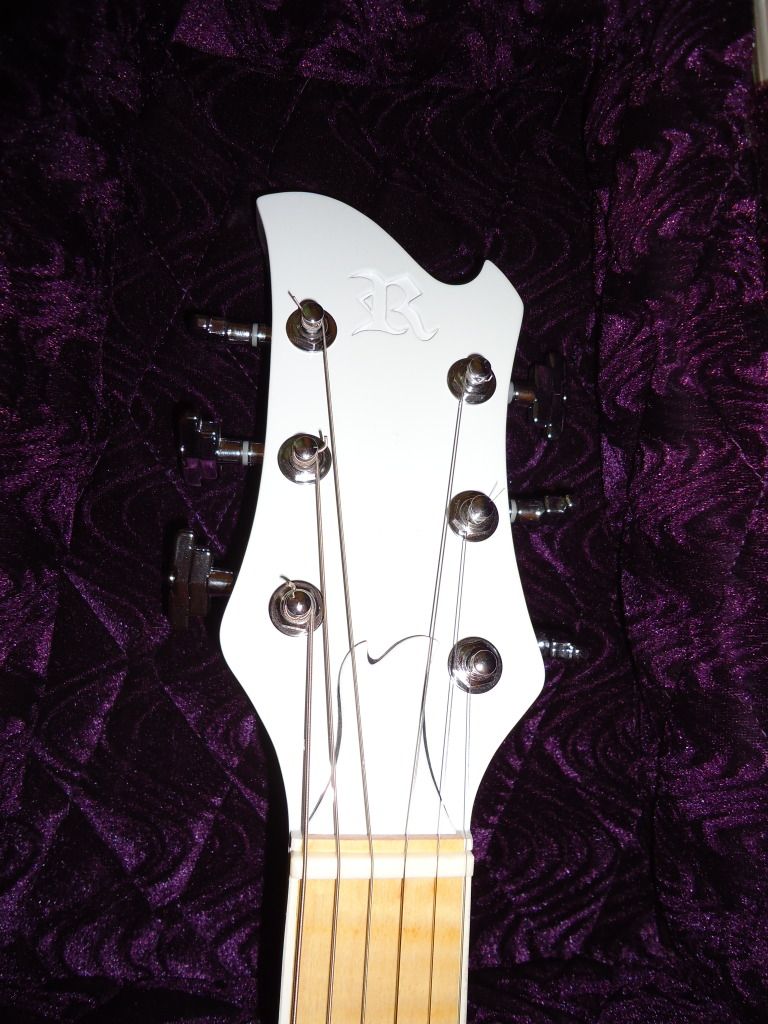
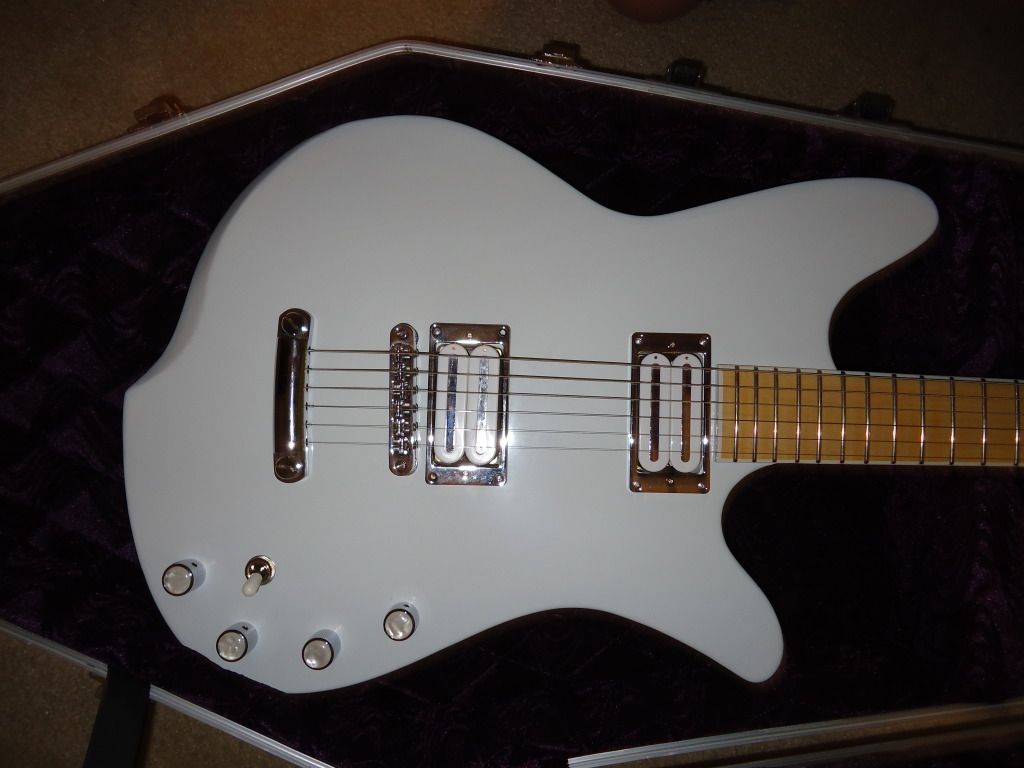
It sounds pretty good even with just guitarfetish pups in it and it feels really good while playing. I'm pretty happy about how it turned out but I cant wait to progress further with the next one. Thanks for looking guys!
-
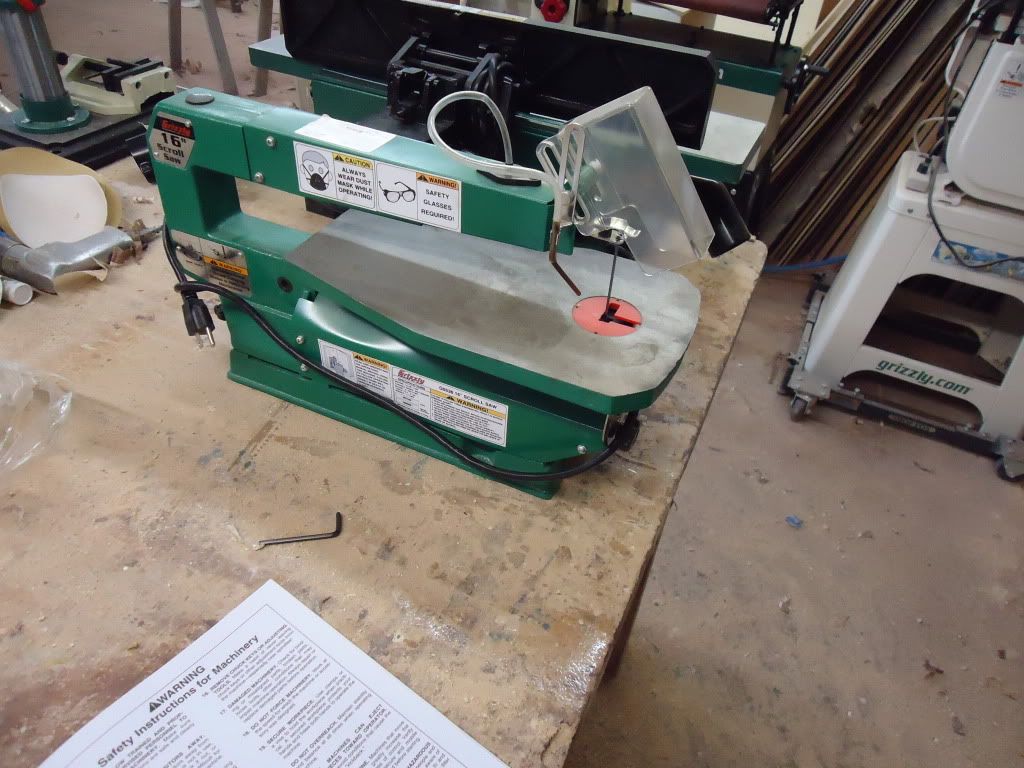
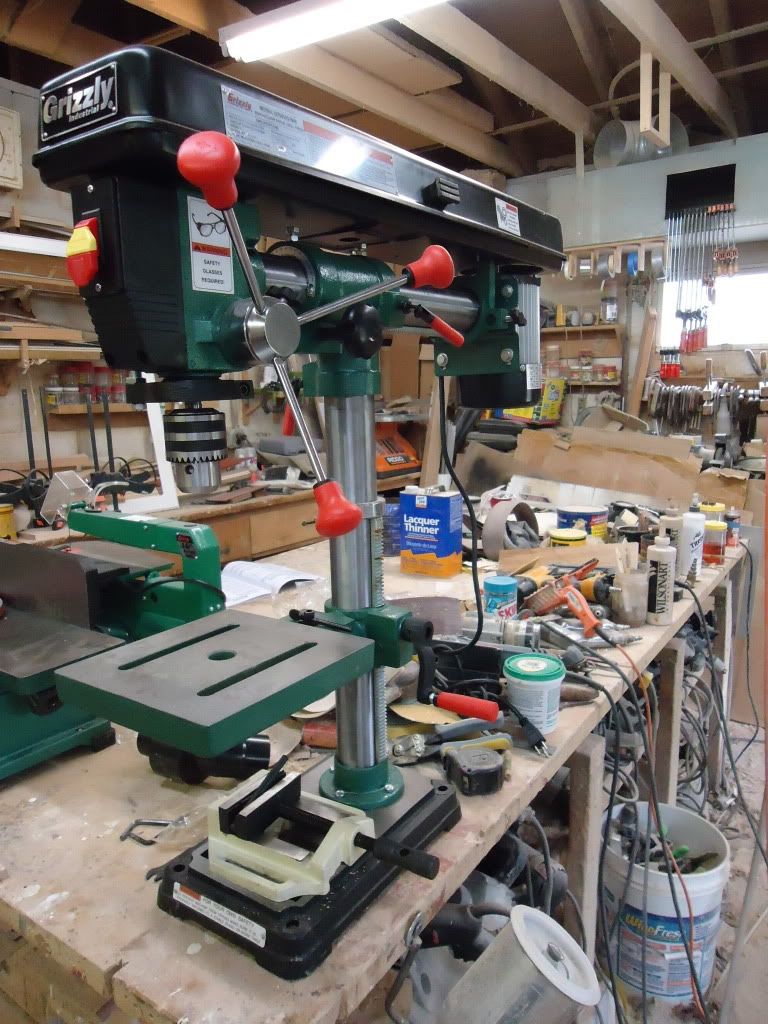
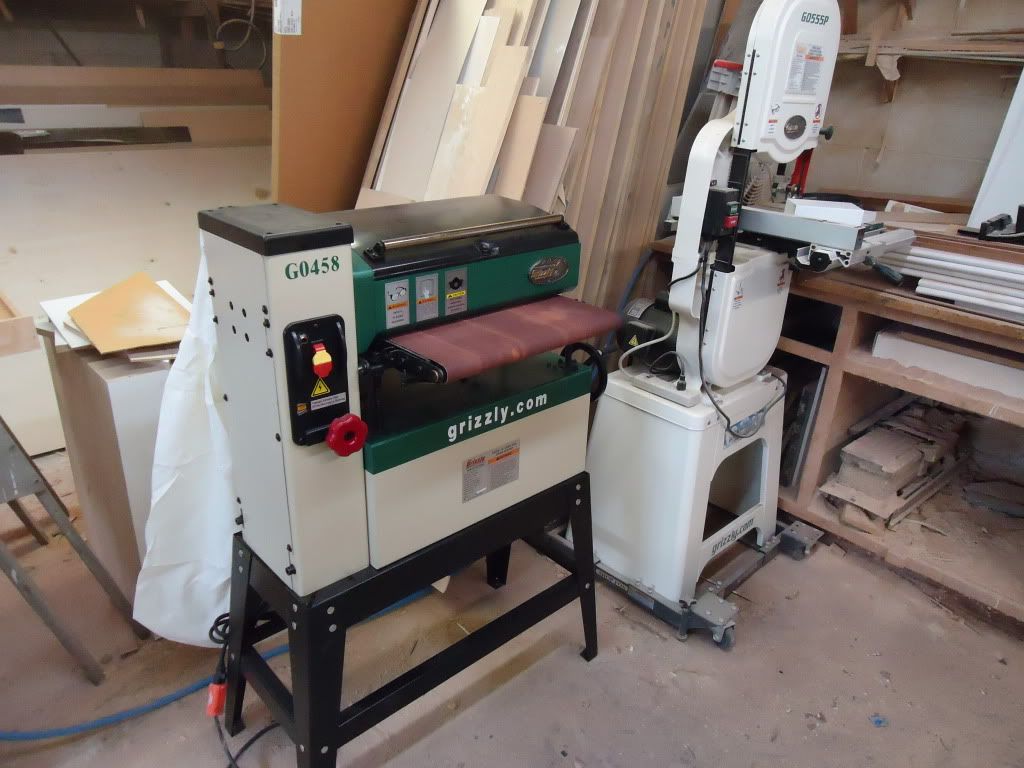
Hey guys! Last Friday morning I got up at 4am to drive 4 hours to the Grizzly warehouse in Pennsylvania for their scratch and dent sale. While I only got a 16" scroll saw from the scratch and dent tents ($25 bucks rather then $150!)I went a little crazy in the show room. Here is what I ended up with:
The scroll saw (works great!)
6" table top jointer (on sale for $195)

A Massive table top drill press that can be angled and has an adjustable throat up to 34" (on sale for $255)
18" open end drum sander [posing with my 14" bandsaw that I already owned](on sale for $850)
Family photo
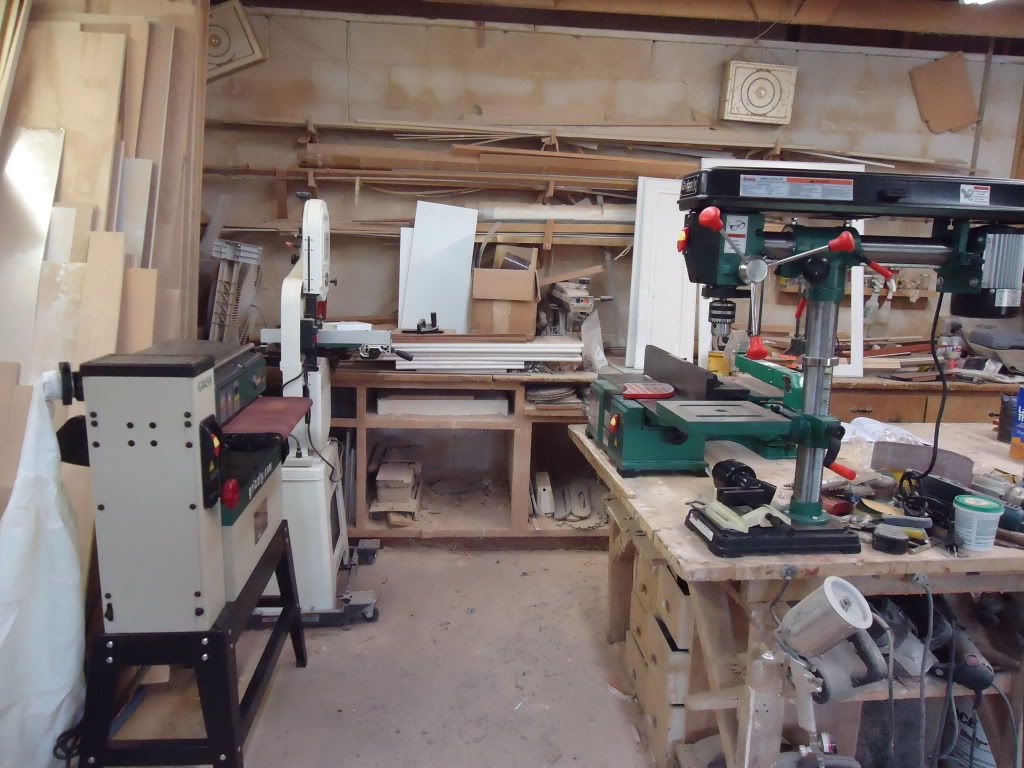
My wallet is beyond empty right now but by making the trip I saved $550 between discounts and no shipping. It cost about $100 in fuel so my final savings was about $450 so it was definitely a worth while trip! I have had good experiences with grizzly tools, they are not made in the US but I find that their quality is very good for their prices. Okay that's my show and tell for today, Thanks for looking!
-Tyler
-
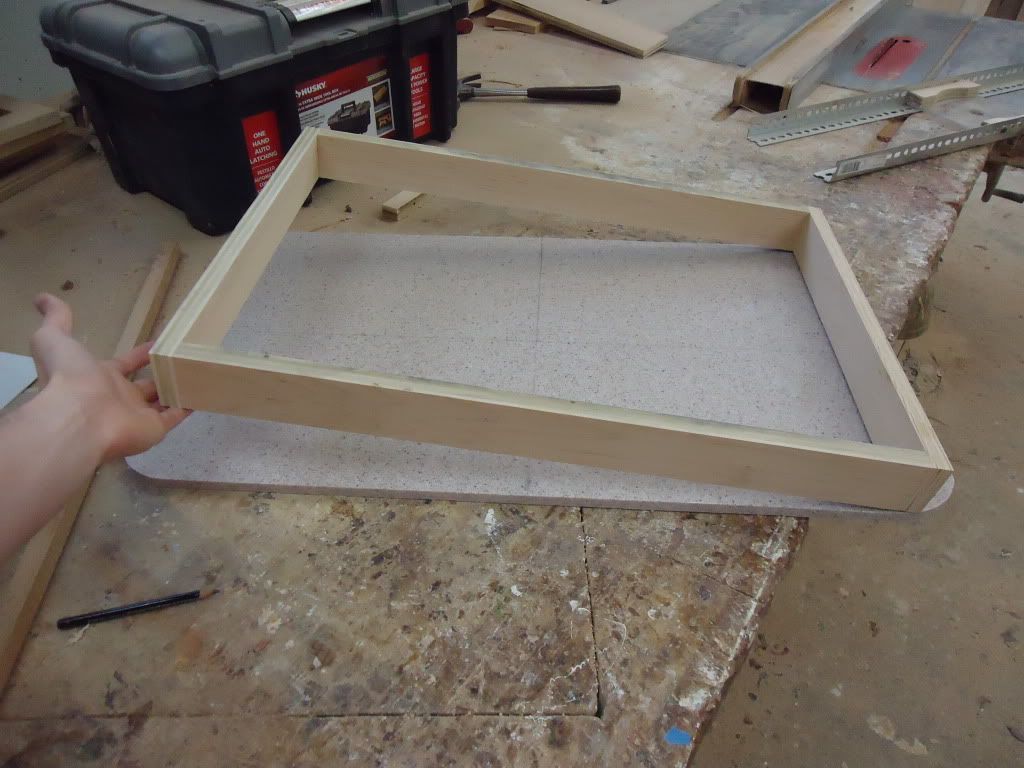
I didn't have serious issues with flexing. While the surface was not perfectly smooth it was taken down and made dead flat with my plane in about 30 seconds so that's nothing really to complain about. I am considering welding an "x" bracing on both sides of the router base that extend to the end of the rails, or putting smaller pieces of the "L" iron across them in a ladder formation to strengthen it. I'm not sure which might offer more rigidness though.
-
We'll guys its been awhile since I made this but I thought I should fill you in on what happened with this jig. The bearings became clogged very quickly which hindered the movement of the rails and the whole point of this thing was to have very smooth operation while cutting. So any way I decided to admit defeat and put together a slightly simpler jig. Here is what I ended up with
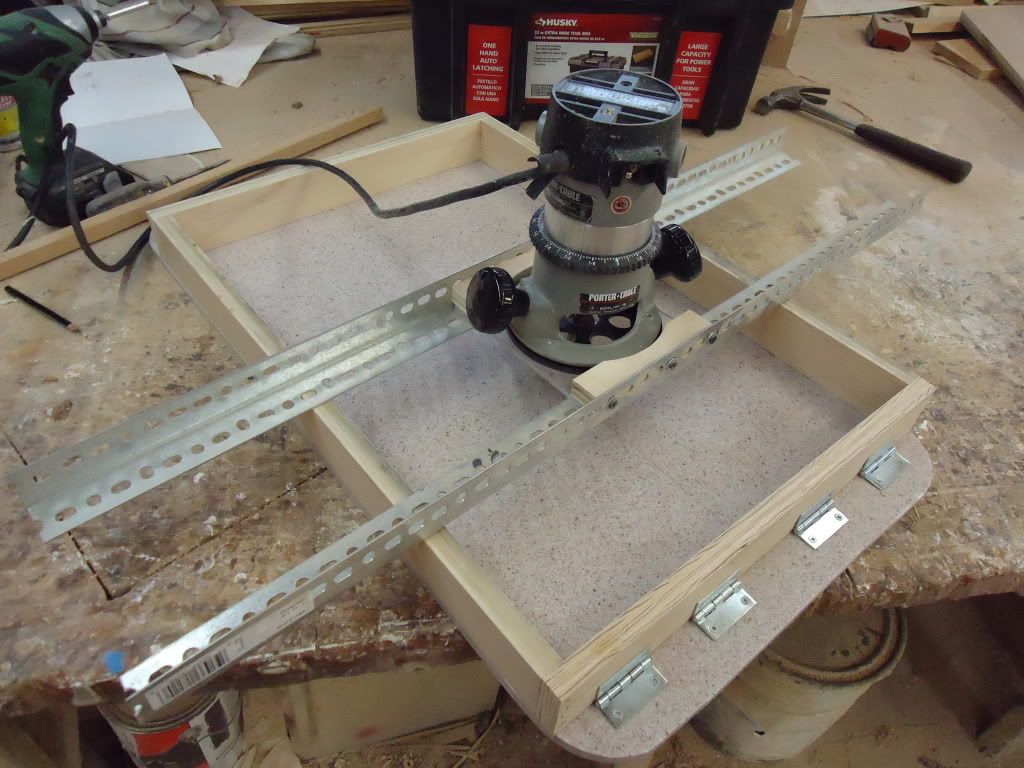
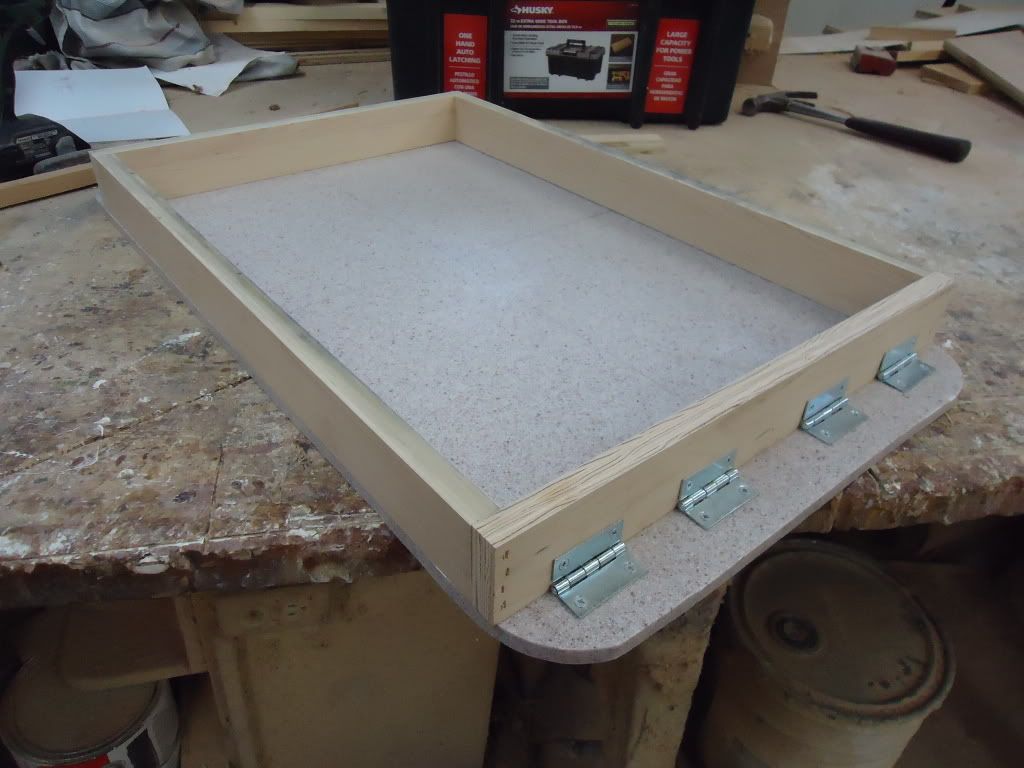
I used a piece of 3/4" Corian I had in the shop to ensure a flat base and attached it using hinges on one side to allow for angled cuts
I used plexi and angled iron things to make a sled for the router to ride on.
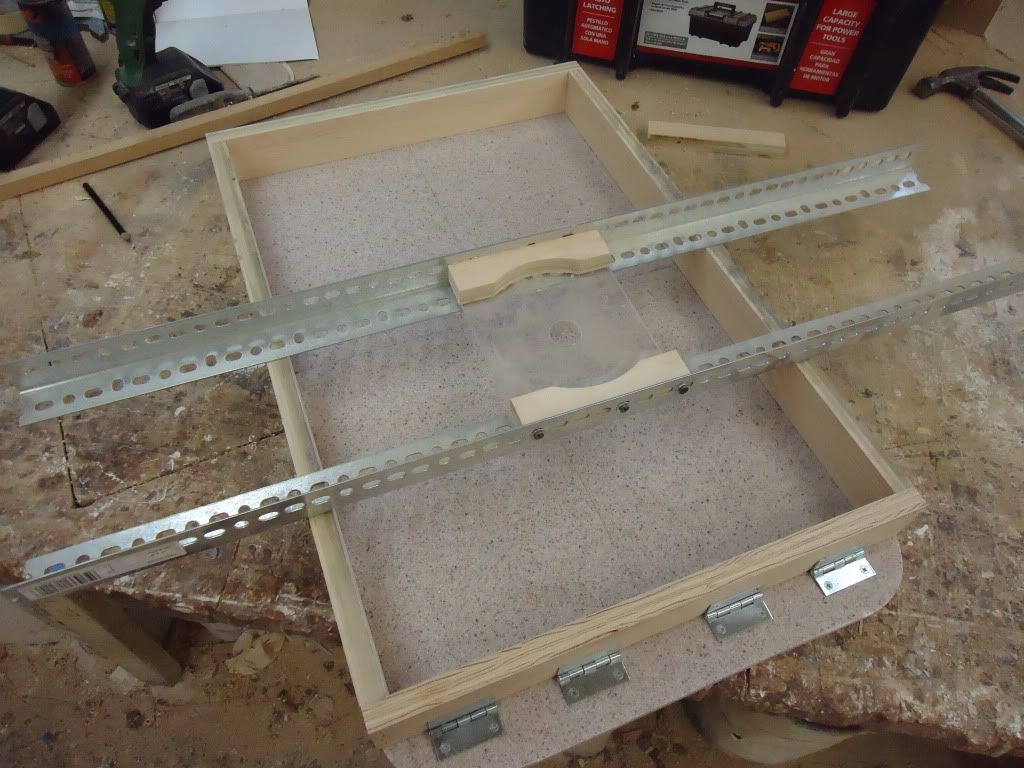
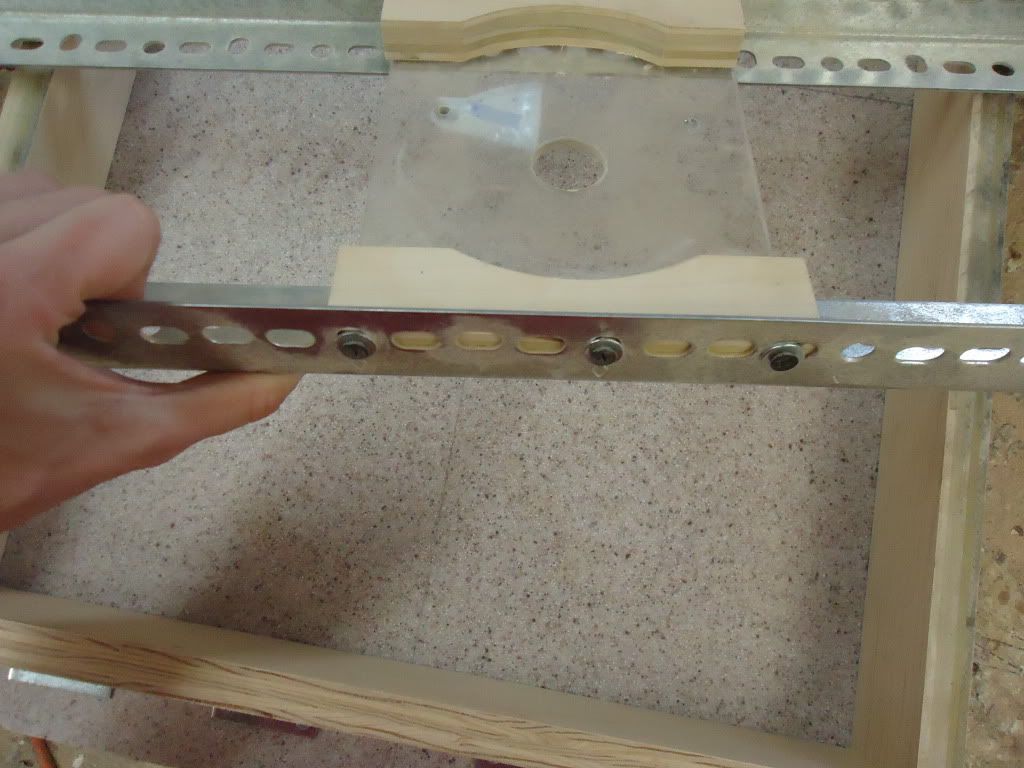
I could not just screw the plexi to the rails because the screw head would be sticking out and stop the sled when the screw collided with the fence. I cut pieces of wood to fit around the router and screwed the plexi to those in spots where the head of the screw would line up with the holes in the rails but not protrude to the other side. I then screwed the wood to the rails from the side rather then the bottom so there is nothing to stop the sleds range of motion.

While this is not as fancy as my drawer slide jig it works a lot better and was a lot simpler to make. I have thicknessed 2 bodies and cut a few pup cavities with it so far and it works great.
-
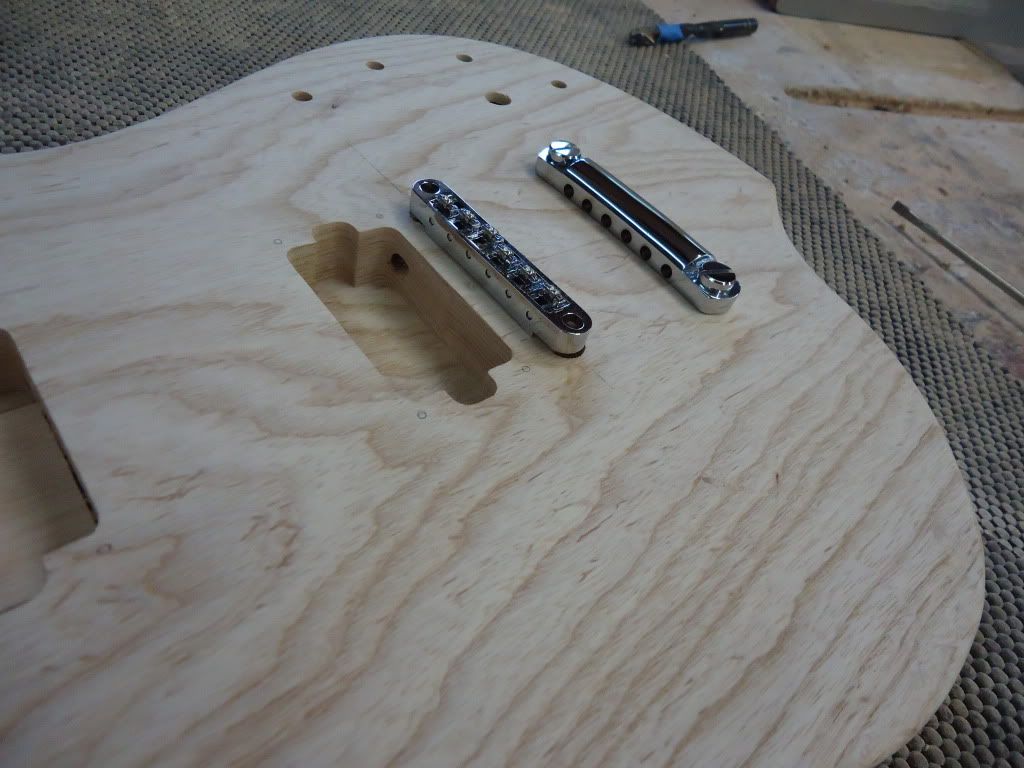
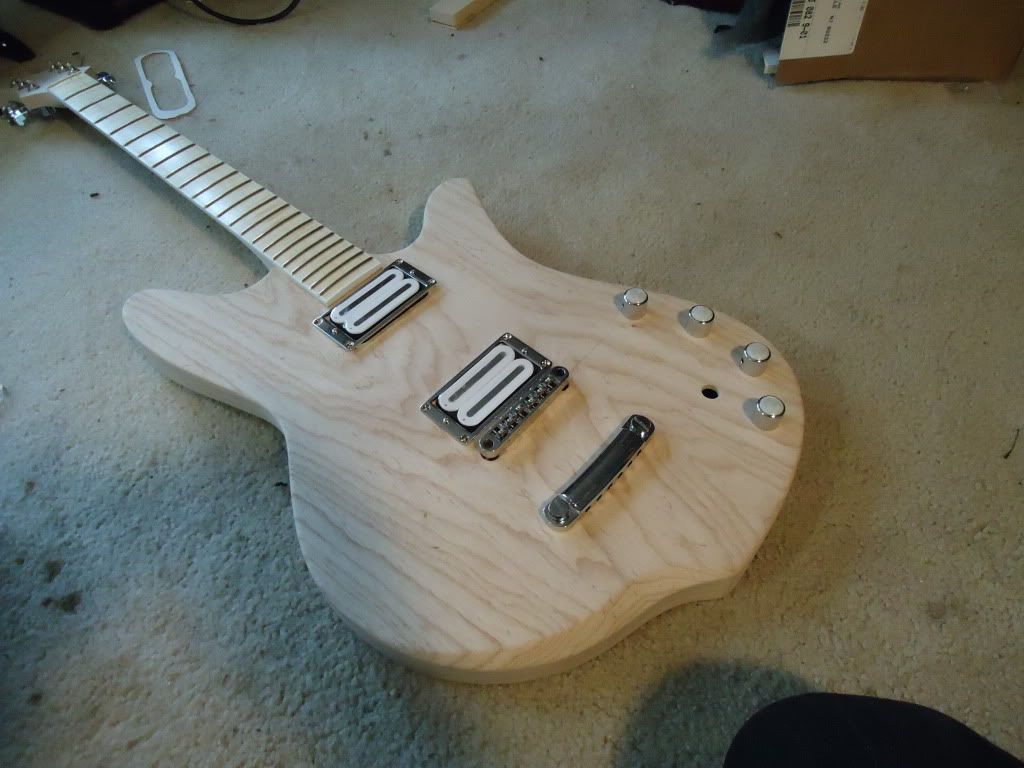
Hey guys I put some of the hardware on to get an idea of how it is going to look. I'm not sure if I'm feeling the rail pickups but maybe I'll like the them better once the body is painted to white to match. I'd like to hear your thoughts on them too so let me know what you think!


-
I got 50mm bobbins from GuitarpartsUSA
-
Thanks for the info RAD, I'll do some more research on this and pickup making in general. The 6500 turns left roughly 1mm of space between the wires and the edge of the bobbin. It looks like it filled pretty nicely.
-
Wow that's crazy.How much did that stuff cost you? Seems like it would be a lot of money.
So I just put together my first humbucker and my meter is reading 5.3k, it seems a little low. I have 5500 turns on the screw bobbin and 6500 on the slug bobbin with 42 gauge wire. Does this seem right or did I mess up somehow? This first one is basically an experiment so I can try everything out and get the feel for it.
As I was typing this the timer went off so I was able to take it out of the waxing pot and test again and now it reads 5.9
-
Yeah the calculator is not as fast as I would like. I think if I go any faster then 550-600rpm it stops counting but it gets the job done though. do you think you could you post a thread like this about the optical sensor and counter when you get it together? Ideally that is the setup I want but I'm not sure how to go about it.
-
I'm going from memory so this is estimated but all the materials are pretty cheap.
Sewing machine- $10 from a friend. You can find old ones for really cheap at goodwill or even yard sales
Wood base- Free. Scrap 3/4 plywood I had laying around
Plexi- free. Used scraps from other projects
Nuts and bolts- Free. Once again found these in my shop
Micro switch- $3 and change, from radio shack
Calculator- $9 from staples. This is where it got a little expensive for me. They were not all 9 bucks and some I even found but I would say I have about $35 in calculators before I got it to work. This is what I'm trying to help others avoid.
I think that's everything but if you see something else I neglected let me know. So I have roughly $48 all together into this thing and if you can get the calculator I used and follow the connections you could probably make this for less then $25, which is a hell of a lot better the paying $400 for stewmac's winder.
-
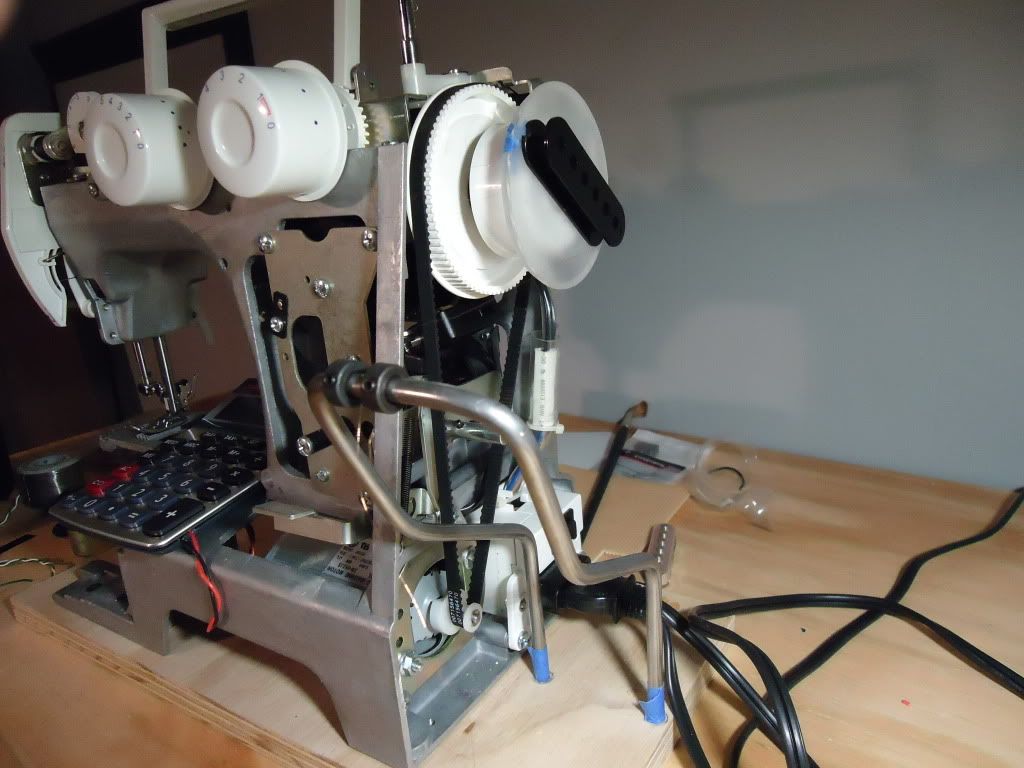
I wanted to show you guys my pup winder that I made from an old sewing machine and a calculator and provide any info that I can just because I had a hard time finding everything to make mine (I went through about 8 calculators before I got it right
 )
)
I made a plate out of plexi that the bobbin rides on and it stays on using double sided tape.
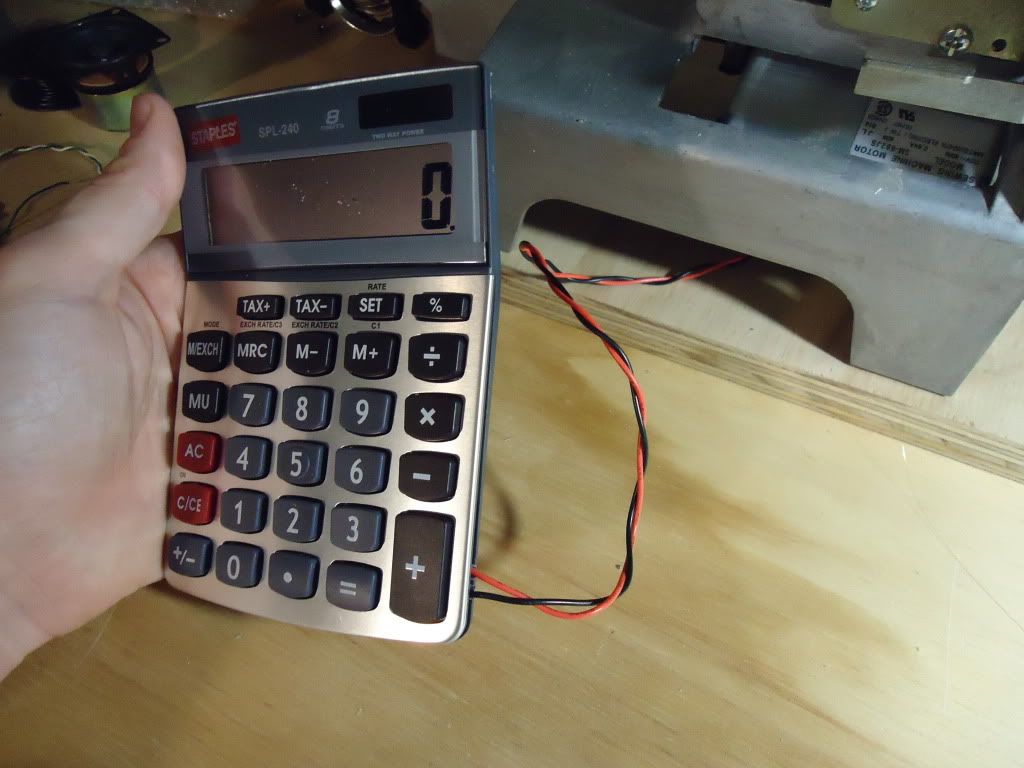
Here is the calculator. It has two wires connected across the equals key that are attached to a micro switch. If you hit "1+1" then "=" it will count up by one for each push.
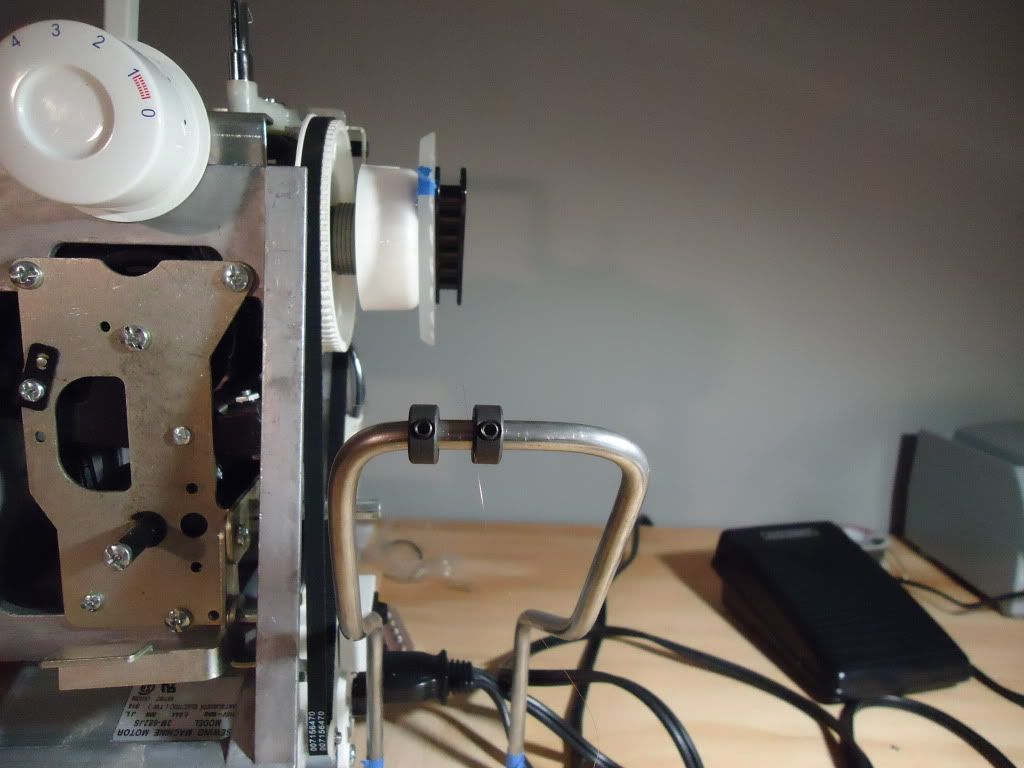
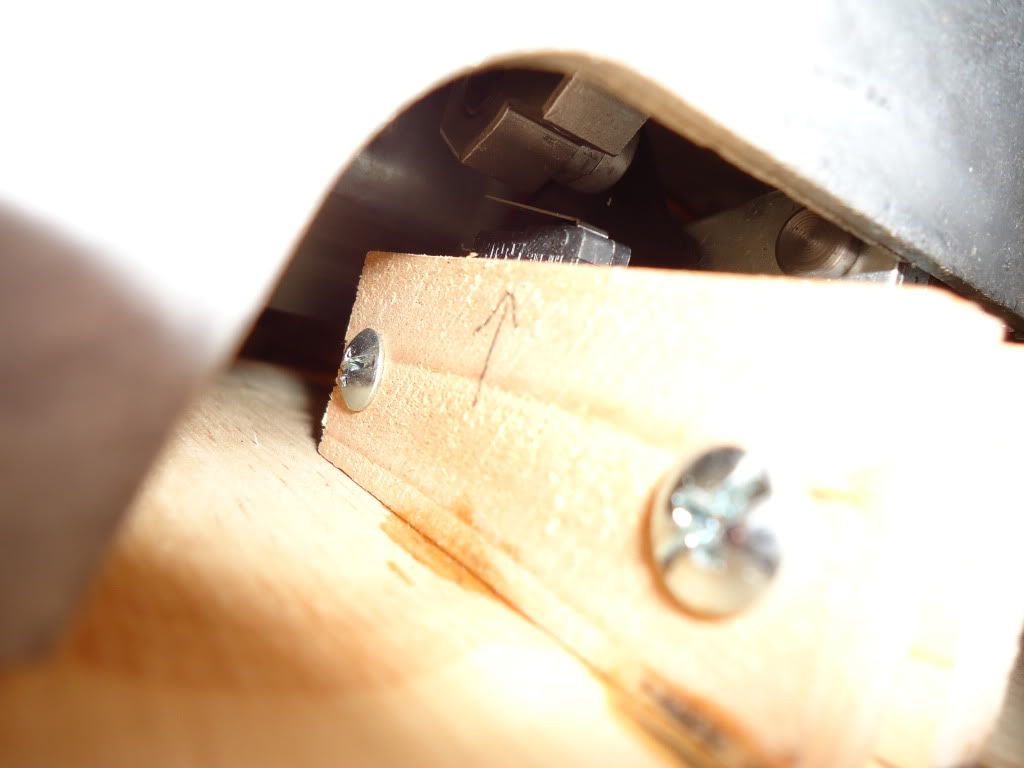
The micro switch takes the place of the equals key and is positioned under the sewing machines piston so that every time it rotates, it will press the switch causing the calculator to count one revolution. In this pic you can see the micro switch which is clamped between 2 small pieces of wood and two sets of nuts and bolts. You can also see the bottom of the piston right above the switch
This calculator is from staples and is model SPL-240. Most sites/ threads just tell you find a calculator and solder to the "=" key connection points. Well these things are not marked and for the most part the locations don't make sense, at least to me. Like I said, I went through about 8 calculators trying to find the right solder points (I also had a few slips with my exacto knife while trying to free the board from the case and ended up taking out important wires.) So hopefully this will help you out so you can avoid the cost and frustration that I went through. If you get this exact calculator, lightly scratch off the protective material with an exacto knife and solder to the two wires to the connection points I circled in this pic
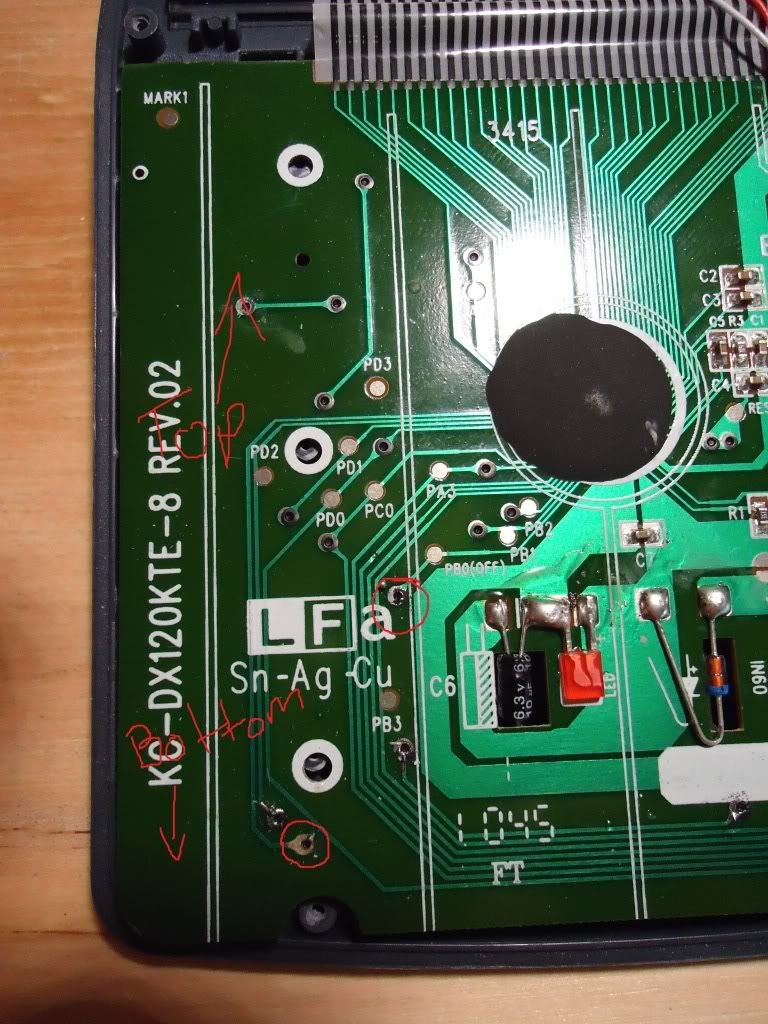
It should work and it will let you avoid cutting the plastic rivets holding the board in place and having to spend time searching.
And here is the first bobbin I wound on the machine with 7000 turns

My sewing machine at full speed spins about 750rpm which was a little fast for the calculator, so I just press the button down about 3/4 of the way down and cruise at a steady pace. 7000 turns took about 13mins and I stopped every once in a while to check how the bobbin was filling up. Its tough getting used to dealing with such fragile wire but hopefully I'll get the hang of it before go broke paying for the stuff.
I mostly just wanted to cover the calculator issues in the post since that was the most frustrating part for me but I would be more then happy to answer any other questions you guys might have. Thanks for looking!
-Tyler
-
Following
-
That's amazing what you can do with some stencils and a steady hand. I actually thought the metal grate was real at first. Nice work!
-
Wow that's so intricate, it must have taken forever to cut all those pieces and then keep track of them all. It looks awesome though!Can I ask your method of cutting(jeweler saw/ scroll saw?) and about how long it took?
Hah I feel kind of dumb explaining the inlay the way I did, I did not see your work prior and wasn't sure if your were a beginner or not...and your obviously not at all
-
Demonx- Your picture next to your post caught my eye(The really cool looking "S"). I was just curious as to how you did that? It looks really awesome!

 )
)
The Anchor
in In Progress and Finished Work
Posted
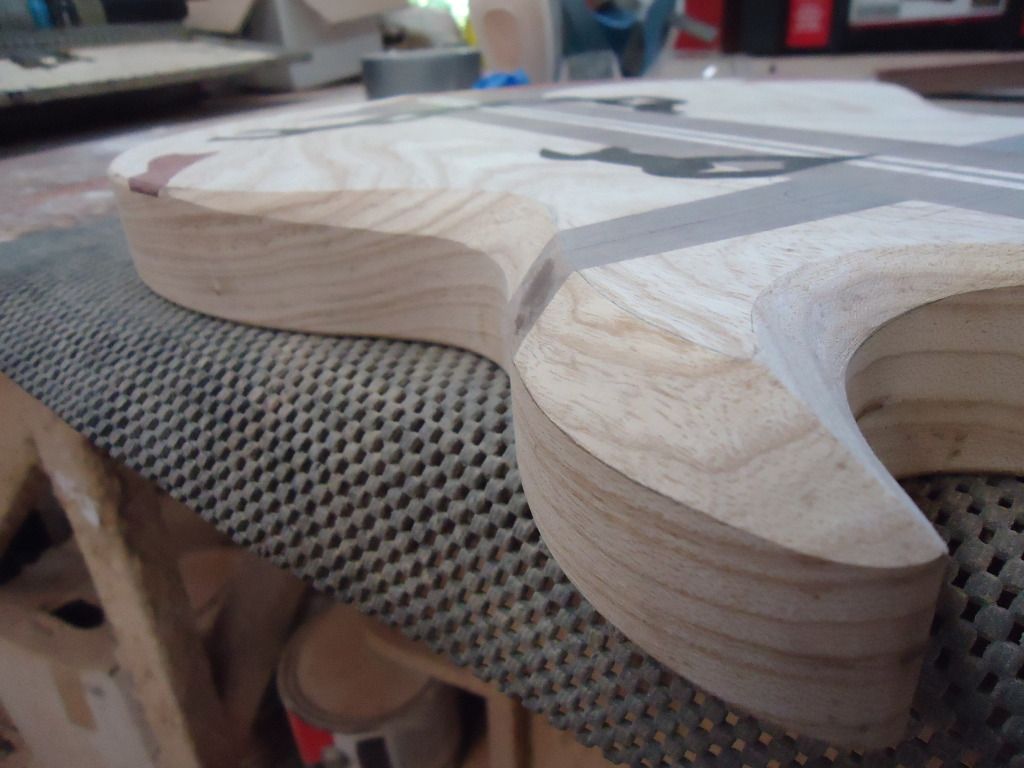
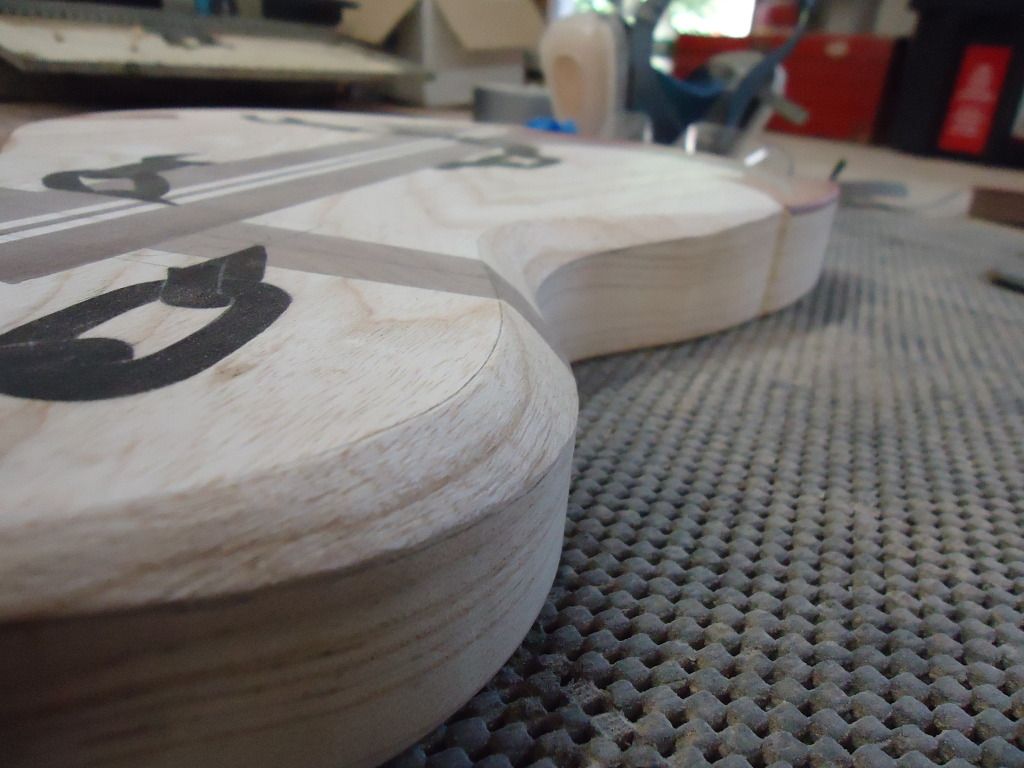
Cleaned up the body and got the rear carve done today
marked out
and cut
I'm not happy with the fret board. Using the 8in stewmac radiusing sanding blocks has left me with a board whose thickness varies from one end to the other. Rather then fighting to get it back to where I need it I'm going to take a day to make a router jig and save me a lot of time and frustration in the future.
I think I'm going to do a version of this: