


agent_zed
-
Posts
26 -
Joined
-
Last visited
Content Type
Profiles
News and Information
Tutorials
Product Reviews
Supplier Listings
Articles
Guitar Of The Month
Links and Resources
Forums
Gallery
Downloads
Posts posted by agent_zed
-
-
seems a waste to start again when its looks so nicely done. what about a complete rethink and do something like this (not my guitar sadly just googled it). or anything like that. simple rectangles etc or can't this be done now you have frets on? haven't done inlays in mine as too scared at the moment (maybe next time).

-
i don't know about guitar paints as such but on a car i would say to try a bit of cellulose thinners on a cloth. if it goes black then you are working with cellulose. Then i'd try on the white. again if it goes white you have celly. but hopefully the white is 2k which shouldn't come off with cellulose thinners. in which case you could just rub the black off with thinners which would hopefully cause less potential damage than sanding.
anybody see a problem doing that?
-
Not sure if you have sorted it yet but as others have said sounds a bit like an earthing problem as you are grounding it through the lead.
simple things first - move it back where it was. does it go quiet again?
move it towards certain areas of the room. does it get worse at certain places.
You could try ferrite rings on the leads http://www.ehow.co.uk/how_7636890_use-ferrite-ring.html they are pretty cheap http://www.maplin.co.uk/ferrite-rings-29788?c=maplin&utm_source=gcs&utm_medium=gcs_search&utm_campaign=QT26D&utm_content=Amateur+Radio+Accessories
just loop them through the cable. These are the same principle as the plastic lumps that are on computer cables/usb cables etc. They just remove interference.
My peavey tnt150 hums sometimes and i give it a thump on the front and it quiets down. so there must be a loose connection somewhere.
If the above doesn't work
If oyu are realatively happy with electrics unplug it (leave it for ages as capacitors hold charge) and open it up and have a look for dry joints (little cracks in the solder) where capacitors are soldered to the board and check any earth straps to the frame.
Only do this if you are really happy with electrics - have it turned on and with an electrical screwdriver (insulated all the way down) gently tap the capacitors and listen for a change in the hum. You can sometimes find a dry joint this way. You can also get freeze spray to cool capacitors which often highlights the problem one as they work better when cold. My hi-fi amp had a failing transistor that worked fine when hit with freeze spray.
Seriously only open it up if you 100% happy to do this, don't need you getting electrocuted. not sure what country you are in but in the UK modern fuse boxes have RCBs which should stop you getting properly shocked. If you don't have one then you can get plug in ones that do the same, which could be a worthwhile investment if gigging anyway for safety.
hth
-
cool thats where i was thinking for the plug, prob didn't describe it quite right but yep thats what i was thinking. I want to do that when i build my next one as i like the positioning and as you say makes sense for numerous reasons.
look forward to more pics
-
hmmm. maybe i'll give it a go. Its not that expensive for a precaution.
although might be a while for i get to paint as the UK is mostly covered in snow now. time for sledging

thanks
-
sorry if this is a dumb question (just starting building) but do i take it that the tabs at the ends of the guitar are purely for location whilst machining? Is this because you have a particular setup that needs this or is this a way that you'd advise even if just using simple tools? I've seen this on a few guitars being built on here.
Grain looks really nice and its an interesting rear. Where is the jack going? as it would be cool to have it on the back edge going down into the bit thats sticking out. if you get what i mean.
-
Hi,
Plasti-Kote is the canned stuff isn't it? I've always found cans take longer to dry than when i spray cellulose from a gun, think cans are acrylic aren't they. I normally get impatient and end up damaging it with a can. so now i leave it a long time.
I tend to flat back between coats with 1200 grit wet and dry with a bit of soapy water before the next coat. The soap breaks the surface tension and stops me pulling up the paint as without it the paper sticks. Although this has always been automotive so i guess you have to be very careful not to get water into the wood if you are going to try that. More than happy to be told not to do it this way on guitars, but it works on cars.
If i was spraying i'd normally thin the last coat an extra bit so that it gave a smoother final surface. can't really do that with a can though.
It'll continue to dry for a long time and get harder over a couple of weeks so be careful with it for a while, don't treat it rough. I guess for me if it was a warm day in the UK i'd leave it a good couple of hours, in the sun, when i was happy with the top coat before trying to flat it.
I've always had a reasonable surface on my car so i tend to just t-cut and polish it but there are loads of other slightly more abrasive polishing compounds you can use.
be really careful on the edges as its easy to sand through the paint where you are putting more pressure on.
good luck hope this is useful
-
i like your 'see what happens' technique
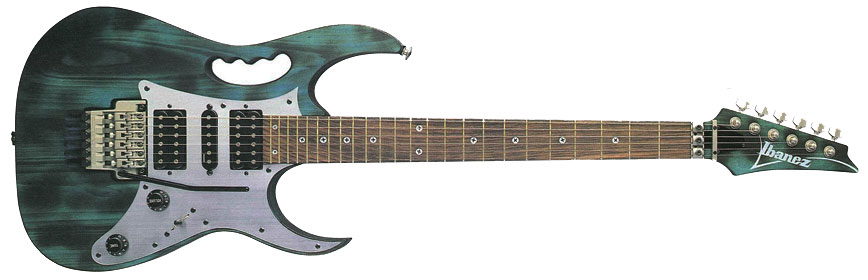
this strangly reminds me slightly of this ibanez with an industrial burnt/blue stained finish
-
ha i'd like to have a better reason but mainly as i lost the one i had and didn't have any spare fret wire. Have some now so at some point will sort that one.
although not sure my guitar playing is good enough to actually need that fret anyway
-

Got some barrel t's to hold the strings that need to go on soon. Also need to give the fretboard an oil as its currently unfinished with anything. probably have to also take off all the varnish
 as i've got mismatched colours where i re-sanded part of it.
 -
-
And here's the neck which i started a loooong time ago (about 15 years or so) which was my first attempt at this kind of thing. It's mahogany with some kind of unknown white wood fretboard. truss rodded from the rear with a strip of beech to fill the gap (which you can see in this pic).
I didn't have a fender headstock to copy so this is my guess at one which i remember using a fish flakes tub to do the end circle.
Carved this with a draw blade that my dad made out of an old file with welded on handles which always worked brilliantly.

-
so got round to taking a few more pictures
Just mocking up the hardware

won't be using the white plastic knobs. going to get some aluminium and turn some simple knobs on the lathe and a selector switch end.
-
awesome thanks. well you learn something everyday. So CA is cyanoacrylate then? aka superglue?!
Just looked at a few videos of it being used, would never have guessed it.
Lucky my brother works in the lab of a glue manufacturer, can see what he has
Will certainly be going this way as i want to get a real glassy finish. not sure how close i will get but always fun to find out
Also i had noticed that the grain on the 2 outer pieces of wood i've used are much more open than the centre section so i think it will be the only way to make the finish even.
thanks for the help
-
thanks for the reply. thats good as i was going to buy some sealer tonight so now i don't have to
i haven't filled the pores! i take it i should?! how do i go about doing that?
thanks
-
Hi,
sorry if this question has been asked before (did a quick search and didn't find the answer).
So i am getting ready to spray clear cellulose on my mahogany body and i haven't sprayed onto wood before. I read about sanding sealers.
Do i need to do this first and what do i need if so. Would something like this do http://www.ebay.co.uk/itm/1-x-150ml-Clear-Cellulose-Sanding-Sealer-Seals-Wood-Prior-To-Painting-/120945934635?pt=UK_DIY_Material_Paint_Varnish_MJ&hash=item1c28f0812b
If i do seal it do i just brush apply then flat back?
any advice appreciated.
thanks
p.s i'm experienced in spraying cellulose on metal and have safety equipment etc just never sprayed on wood.
-
Yeah it was that bit I was wondering about. Yeah that's a nice grain. Really nice guitar!
-
that is looking awesome. purely out of interest what is the reason for the thin front piece (stained blue) is it a different wood/grain or style wise to get the line around the edge? or something to do with sound? i'm pretty new to building guitars so don;t want to be missing something important
love the chamfers think my next one will be chamfered, went with round over this time.
nice job
-
wow thats awesome love the shapes and some amazing grains going on. Out of interest what is the reason for the scallops on the fretboard? is it something specific to an 8 string?
wasn't sure where to put the front button on mine but i think i'll put it in the same place as yours.
-
thanks glad you like it
yeah the lip on the horns was a bit of an evolution as i was building it. I didn't want to cut too much away from around the neck support but i wanted to get the front to be a single curve. I found myself liking it more and more so i left it. I am hoping it will just be a little feature unique to my guitar. you can't see it on these pics but the back of that area is smooth and then goes into the sharper edge of the lip. I just like the way it changes.
I was originally going to cut the bottom of the body out as a curve where the button goes to be a bit different and get small horns on that end too but not going to do that now. maybe next time.
looking forward to a bit of dry weather to start painting!
-
Although i like the sharp edges they would get damaged so quick that i rounded off the edges

And now i'm ready to paint. It's going to be as high a gloss as i can clear cellulose finish to show the grain.
hopefully haven't bored you too much and i hope you like it
will try and post some neck pics too.
-
getting closer to the final look with all the holes routed for the pots, selector and jack socket. The pots and selector are rear mounted so no bits showing to the front.

and the front

-
here's the back with the recess routed for the bridge tremelo springs.

and the front with the routings for the 2 single 1 humbucker config.

n.b. jack socket is not going there its just on top. Bought chrome surrounds for the pickup holes are they are front loaded and i don't want a scratch plate
-
which i then drew round a strat body to give me a starting point and then modified to a shape i wanted.

I wanted it to be more 'pointy' than a strat and be slightly different to other guitar shapes so i drew the above and started cutting with the jigsaw. I haven't seen anything identical to this shape so i am hoping it is mine and is the reason i've named it the 'little devil' as it has horns.
So with more cutting and a bit of routing we get to this


 as i've got mismatched colours where i re-sanded part of it.
A Real Beater.
in In Progress and Finished Work
Posted
sorry to hear you got ripped off, but hopefully karma will sort him out along the way.
As for the guitar looks really nice repair. How did you repair it?
I was trying to think what i'd do (being a complete beginner) and i was thinking perhaps i would have routed out the entire piece from the pocket to the rear and glued in a new piece. overkill?