


holzon
-
Posts
19 -
Joined
-
Last visited
Content Type
Profiles
News and Information
Tutorials
Product Reviews
Supplier Listings
Articles
Guitar Of The Month
Links and Resources
Forums
Gallery
Downloads
Posts posted by holzon
-
-
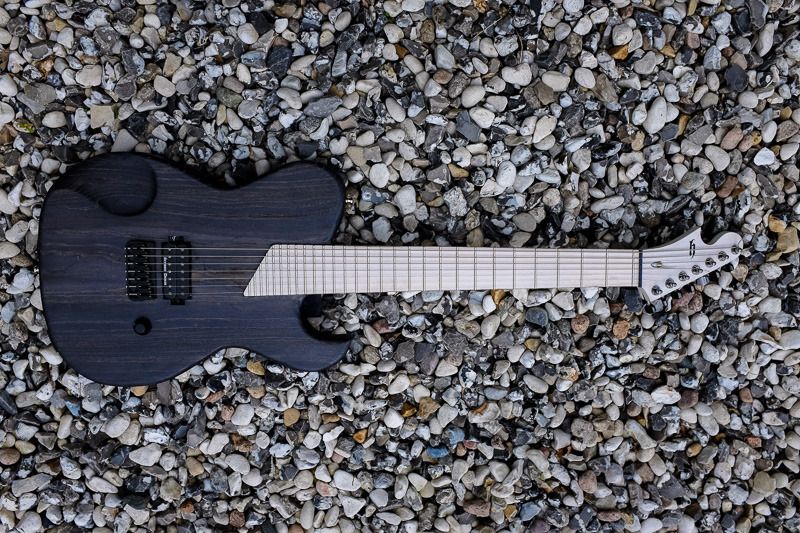
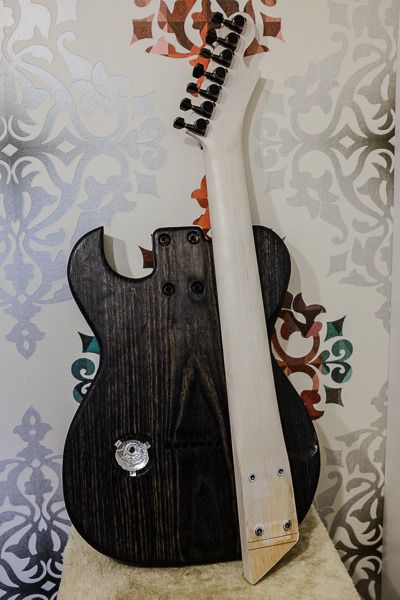
Holzaxt Helluvacaster 7
This is my first build, the original idea was to make a somewhat more metal Telecaster. Did the parts requiring power tools up at our summerhouse, the rest is mostly done in my living room and apartment patio.
I've always thought that more is more, so there's a lot of experiments in this, such as flat fretboard, zero fret, 26 inch, 7-string. It plays and sounds far above my expectations, but I will thin out the neck a bit more in the future when I get the time.
Specs:
Scale: 26"Body: Swamp ash, stained ebony, hard wax oilNeck: One-piece Maple, C-profile, flat radius, bolt-on, double-action truss-rod, white-washedBridge: Hipshot Fixed 7 0.125" blackTuners: Gotoh Rock Solid cosmo blackPickup: Seymour Duncan Black WinterFrets: zero fret + 24 frets + minifrets, Wagner extra jumboNut: Graph TechControls: Single knob for volumeBuild thread:
 Cheers,
Jens -
Eureka! Sticky finish of neck was fixed by a light rub of chalk.

-
Looking good this far. Now we are eagerly waiting to se how it looks after you put it together.
Thanks for the encouraging words SL!Lo and behold, it plays! Finishing up the mounting of the last hardware went pretty smoothly, ugly soldering that I conveniently hid with lots of tape...One problem I had not anticipated was the high E tuning peg being higher than the zero fret, doh! I solved it by winding on more turns of string than I usually do, phew! The pegs I bought also might have been for a regular head side, they go in reverse now which is kind of interesting ;-)Balance is great, pure luck I guess. One high fret on high E string, will give it a good bang later. Frets could have used some more polishing, there are some scratches that catch here and there. Kind of an experiment to see if it would be noticeable. It was! :-DNeck ended up a bit thick, since I was a bit scared of everything coming apart once stringing it up. I'm thinking of shaving some wood off later this summer if I get the time.The finish of the neck is still a bit sticky, even after sanding, so we'll see what happens there after playing it for a bit more.I went for Electrocution-safe, no ground to strings or bridge. Ended up super-silent, so I'm happy that still worked out good.Anyway, here are pics!Trying to nudge in the high fret-
 1
1
-
-
We have thus arrived at the epic moment of the neck being ready to be mounted to the body!
I seriously think the fret work has been the most painful part of the entire build. I would like to thank my wife and friends for understanding and support during the last two weeks of being non-communicably bent over my work bench, furiosly grinding frets.

I will never, ever, ever say that a guitar is expensive again. I would probably be willing to part from this guitar for say, $8000, just counting the ridiculous work hours I've put into it.

Next up is mounting neck, and then putting on the rest of the hardware and solder.
Getting closer to the critical point of stringing this baby up! Any bets on if it will be playable? Will the neck hold? Will the headstock hold? The suspense is killing me.
-
Herdins tak- och panelvitt, standard white. The plan was to put hard wax oil on top, but when trying it the oil ended up as a yellow sticky goo on top of the white wash instead of entering the wood.I like the result of that. What brand are you using?
Saw yesterday that Osmo has white pigment hard wax oil, so that would probably be my next pick for experiments :-D
-
If your stail is water based it should blur the edges nicely. It it is oil based, it will likely do nothing or gum things up a bit. If it's oil based you maybe able to blur the edges up with a bit of mineral spirits.
It's water based. I tried sponging on some water a couple of hours ago on part of the side, didn't seem to do anything unfortunately.
Who the hell looks at the side of a guitar anyway! :-D
I like your contour carves.
SR
Thanks, happy you liked em, happy I made em too, I think they do add something to this otherwise kind of blocky guitar :-)
Now I've got tingles in my right hand after sawing up the fret slots again. Stupid bastard to put whitewash in them in the first place... A bit worried I might be widening them too
-
Weather has been terrible for getting anything done, but I managed to squeeze in some work in the few hours of non-rain here and there.
First up is my jig(?) for planing the fretboard. My most excellent €5 pizza-stone serves double work here as a plane surface, after a serious discussion with my 6-year old that we would still be able to make pizza on it.
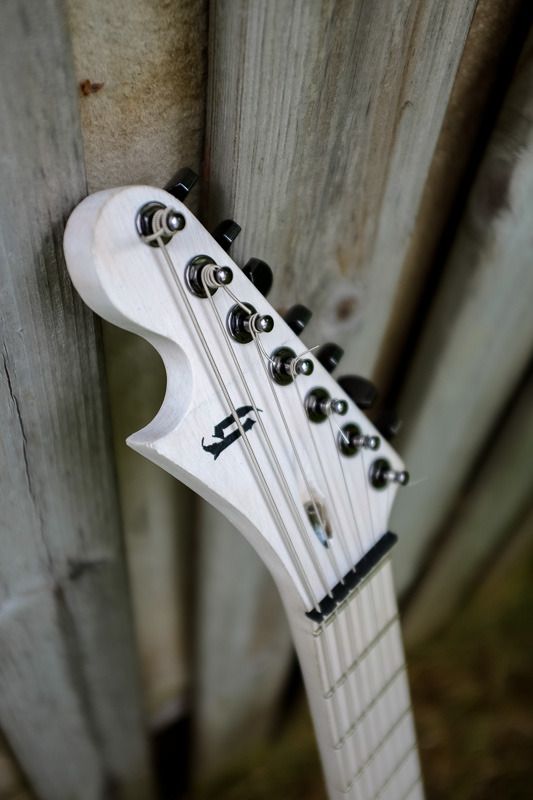
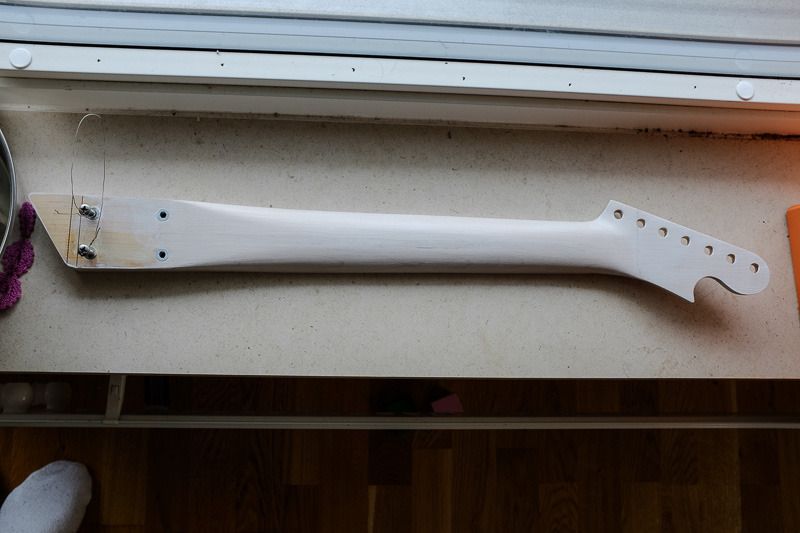
Next up was staining the neck a bit whiter, because Swedes put this goo on any wood they can. The final touch and feel is a bit more wet than I would like, but I'm thinking of giving it a very slight polish or sanding.

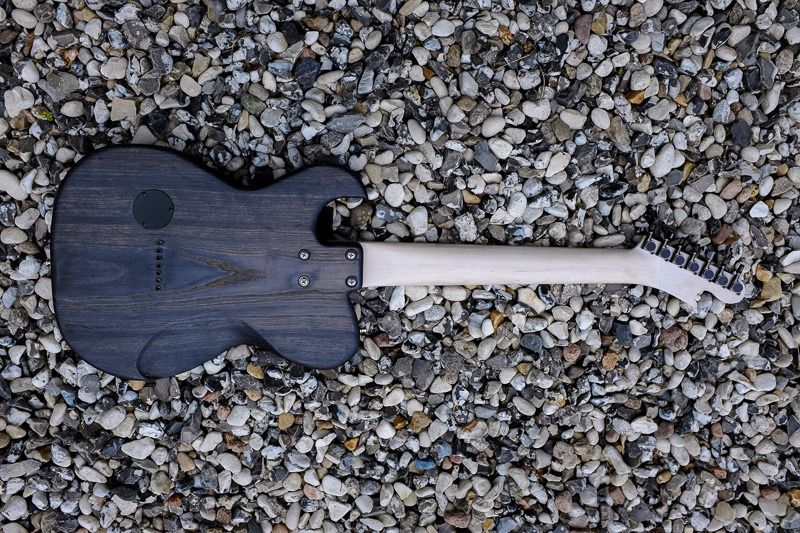
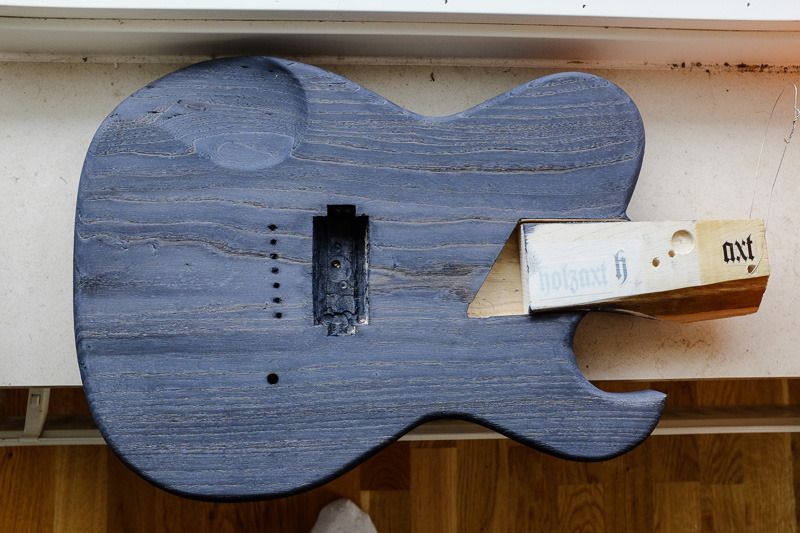
Next up was staining the body in Ebenholtz black. I had to dilute the stain quite a lot to get the kind of see-through I was looking for. I'm going to put on hard wax oil too, so it will probably end up a bit darker in appearance I speculate.
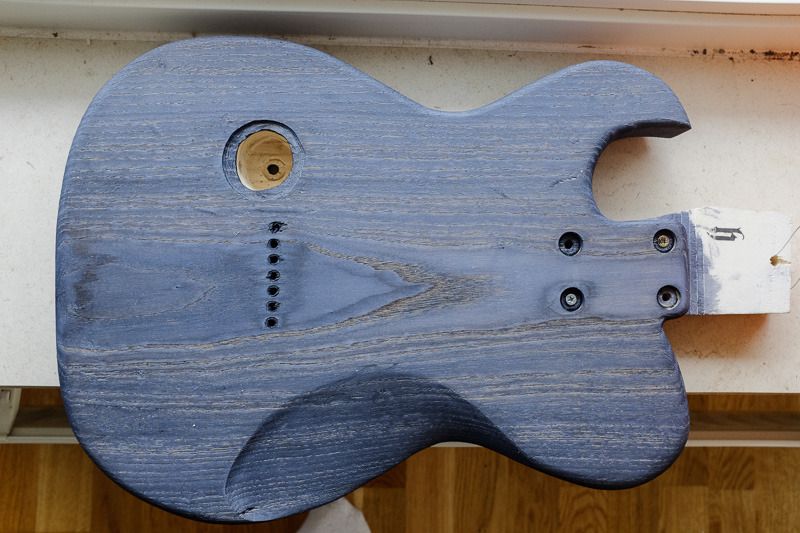
Next up is putting on the hard wax oil on the body, and setting up the neck. I have to find a new bucket of oil first though, the one I got had a tiny note saying 'New Formula! Not useable with stain'. Doh!
Question if anyone is good at staining:
The back came out lighter than the front, so I washed it down again quickly, but it did leave stain borders on the edge of the guitar. What happens if you just put on water on the edges, does it blur out the edges, our do I risk messing up the staining? It's not that obvious, so one option is leaving it.
-
Look at some of killemall8's builds to get an idea of how one could be shaped into your neck. His are much larger than what you could do but you could get an idea of how to shape it.
Yikes, those look really neat. No pressure!
As Scott says, there's lots of different arguments for doing the neck build in different orders. They all work OK. You'll probably settle into your own running order as you build more guitars.
I guess whichever way I went with this one, you guys would get your laughs, cause something sure will end up a hassle :-D
Minimum thickness of your neck is probably dependent on your timber choice and the depth of your trussrod route. With maple I reckon you'd be safe to go to depth of trussrod + 8-10mm + thickness of your fingerboard.
A year after routing the neck, measures and such aren't as clear anymore... I don't suppose you guys write up these kind of stuff in notebooks? ;-)
-
It's a good idea to carve the neck before giving radius to the fretboard... when you remove wood from the back of the neck, the remaining wood tends to stabilize according to the new shape, which means that the neck could get bent, including the front side... so you can loose the leveling. I usually wait about two weeks from carving to giving radius.
Yikes, gotta remember to let it rest then... I'm actually going for a flat fretboard just for fun, but I guess the thing will warp all the same.
I would make it cooler... 20-21 mm is the ideal thickness for a neck IMO (including the fretboard)... I usually give 15 mm to the neck + 5-6 mm to the fretboard. If the scarf joint is well done and the truss rod channel is the usual (about 9mm) should not be a problem. And you will not regret.
It's 23 mm now, I'll try shaving some more off of it then!
I prefer to fret first then shape the neck, mostly because it is still square and therefore sits still better whilst knocking in frets. Others like to shape the neck first. You can find arguments for both ways that make sense, but ultimately both work. Just think- all re-fret jobs are certainly done on finished necks.
I remember reading that somewhere, but what confused me a bit though was sculpting against that fret wire metal ends, it seemed a bit scary.Most two piece necks end up with the nut sitting on the top surface of the neck when butted up against the fretboard like Gibsons, and when in a slot like Fenders, they can be set to the depth of the neck surface or just slightly less than that. I use the headstock cap to create a little back edge, and butt it up against the board for a front edge. String tension is going to hold it in place and a little glue will keep it from going sideways. The only depth you need is enough to keep it in its proper position as the terminal end of the scale. 3/16" to 1/4" is a good target if you need one.
Thanks, targets like that was exactly what I was fishing for :-D
Everyone is scared to remove too much wood at the neck head join on their first guitars, it's the main reason for all those volutes we carve. You'll get more comforatable as you go......but volutes are still cool and give you confidence when making a thinner neck. You can keep wood thickness under your trussrod and still make the neck feel thinner by removing more wood to the sides of the centerline and maintaining a comforatble thickness right down the centerline.
I don't think I'm mentally prepared to volute anything :-D
I didn't plan for it, so I don't honestly know if there's any wood there to account for it, or do you guys manage to do it out of standard neck blanks?
Like said above, the thickness is like 24 mm maybe close to the angle.
Thinning out generally + the sides and trying to get a bit more forgiving join will be the plan I guess.
Thanks for the quick replies, much appreciated!
-
Ok, I interpreted the silence of the forum as "Of course stupid, you should sculpt the neck before fretting! sheesh..."
I was very happy to have a spokeshave, the rasp didn't do much damage on the hard maple neck. Rasp on the body though to get some bevels on the edges.
Next up is sanding neck and body. I have to order a new Graph Tech nut, the one I ordered earlier is too short :-(
Questions if anyone has the time:
1. What's the science in fitting a nut to a one piece neck? How deep does the slot need to be? Does it need to be recessed on both sides? I kind of mean if it's good enough if it's supported at the bottom and the side next to the fretboard, but the wood on the other side is removed.
2. I'm scared of removing more wood at the back of the neck/head angle. Ok for a first guitar, or do you recommend I get a smoother join when I'm at it?

-
Reviving this thread back from the dead! You probably thought that this guitar was fire wood, but I've slowly worked on it during the winter. I found a wood working group, but we're drinking coffee about as much as we're doing actual work
 I've sculpted a few ergonomic details for the body, like the beer belly shelf and the underarm rest. I mostly aimed for interesting curves, so I will probably not win any real ergonomy awards.Been doing some experiments with how to saw the frets cheaply, and after a few failures I settled for a pretty cheap zona saw. My fret wire tang was really thin and I had to thin out the saw a bit more even though it should be the same width (0.5 mm). After the thinning of the saw, it was a real pain sawing the frets, it really wanted to get stuck in the slits. I had to superglue the handle and wear a gym glove to be able to cope with sawing 30 something slits.I cut out thinner guide slits with one of those table saws at the wood work group. Looks quite good, but we'll see about the precision first later I guess when it's getting setup.Now the question for you experts... Do I bang in frets before sculpting the neck or after for one of these one-piece maple necks?
-
I like the trussrod drill jig. I think I am going to make something like that for myself. I still struggle with trussrod access holes being perfect. I want them as small as they can be and still work so I need to make a very accurate jig for them. The one I made slips to easy...
Thanks! The problem with my truss rod jig is that I needed to move the whole drill press for micro adjustments, and I didn't find a good way to get the neck guaranteed straight.
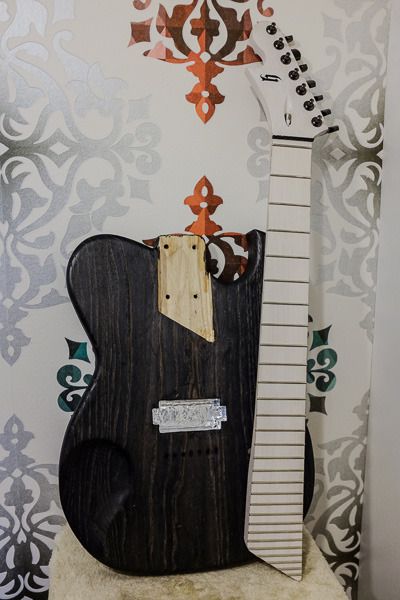
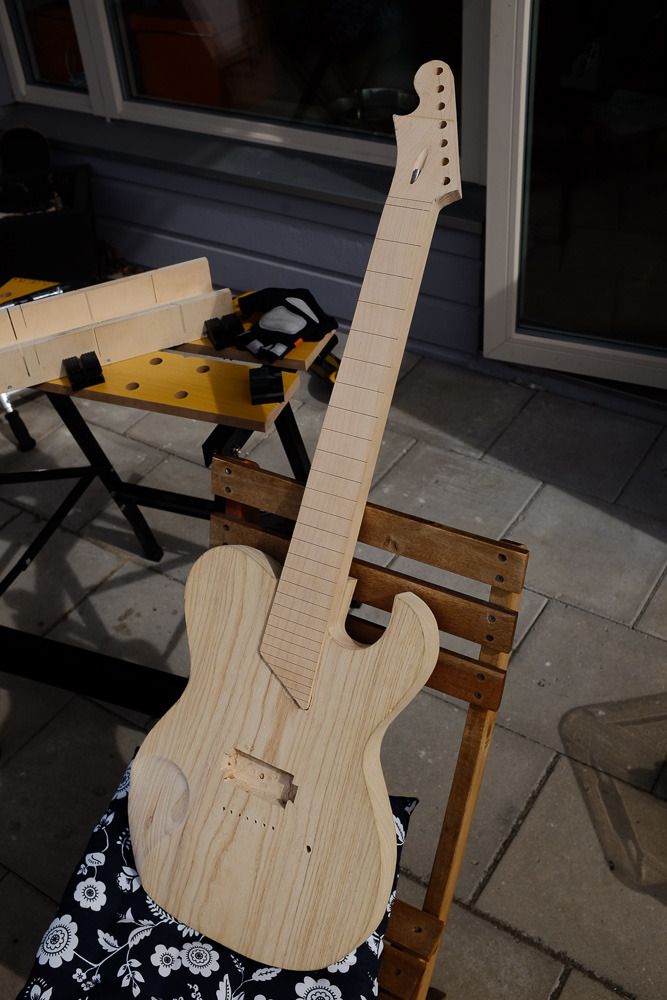
Almost back in civilization, so here are a few more pictures from the build. My time plan to finish a first guitar in two weeks was completely ridiculous in hindsight, so I opted to finish everything that required power tools instead. Shaping, fretting and finishing will be done at home. I didn't have time to clean up the pickup cavity, routing is probably the most difficult part of guitar building! It's like trying to paint but having a small door mounted on the brush, and you can only look through the keyhole.
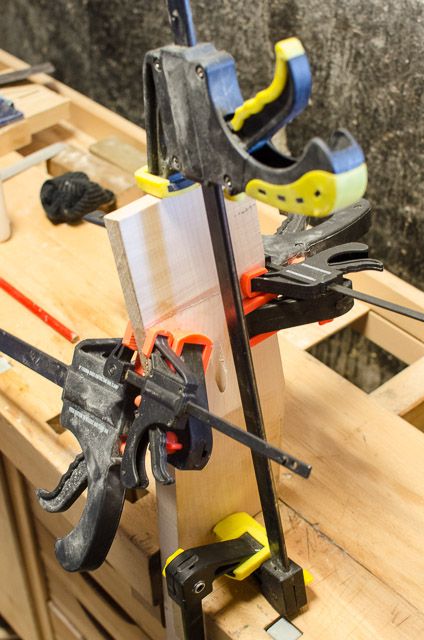
Thinning out the head, a pain to saw through the hard maple...
Glueing the head after leveling my rough sawing out... Still kind of wonky, but I blame that on my manual sawing of the 12 degree angle.
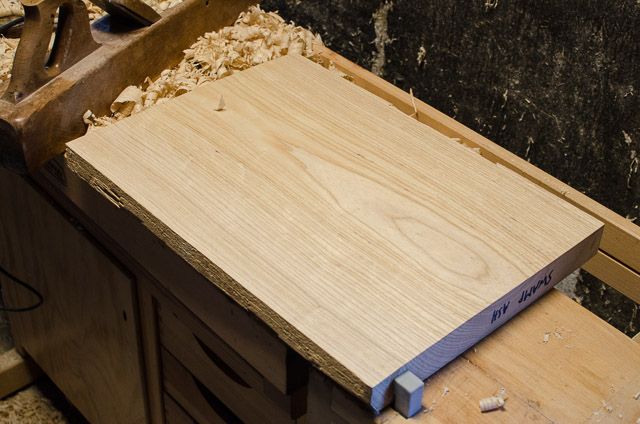
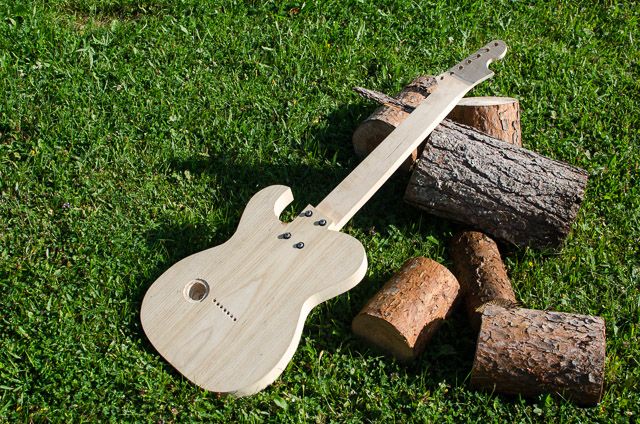
Planed the body blank, pretty nice figuration, so I'm happy I accidentally got the swamp ash instead of regular ash.
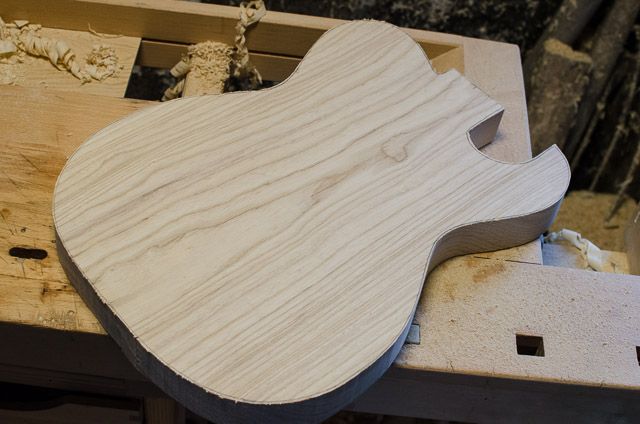
Cut out the body shape, a bit scared of sawing so there was quite a lot to file away later.
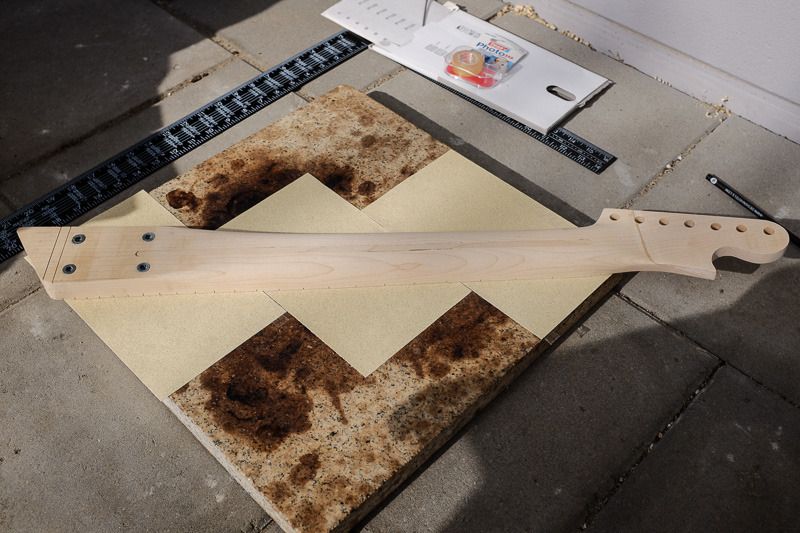
Neck ready for cutting. At the last minute I increased the head width by a cm, which was pure luck, as I later found out my head piece was way undersized when actually measuring the Gotoh tuning machines.
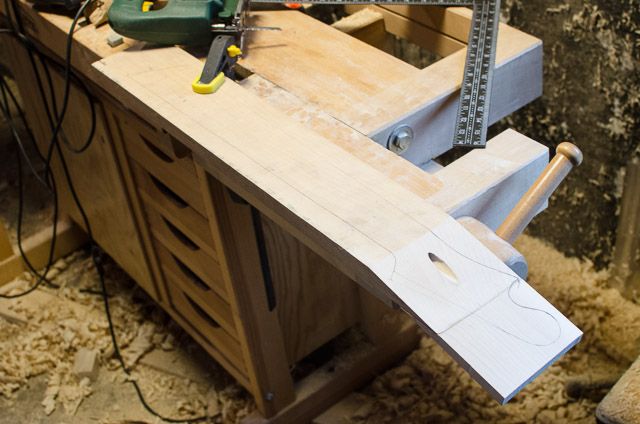
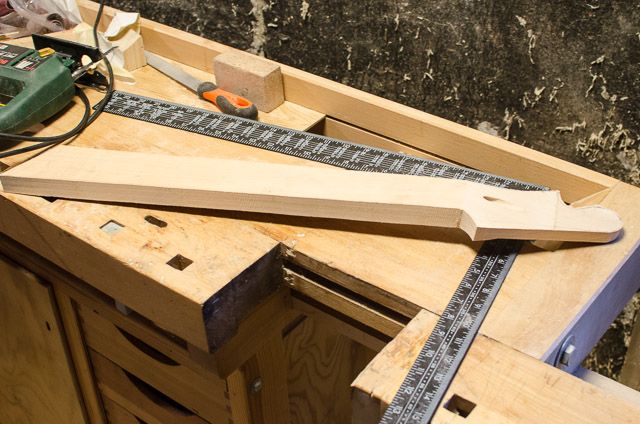
Neck cut out. I noticed the wing was a bit thick near the neck, so maybe I should have pulled the head shape further down, but I hope I can sculpt it thinner.
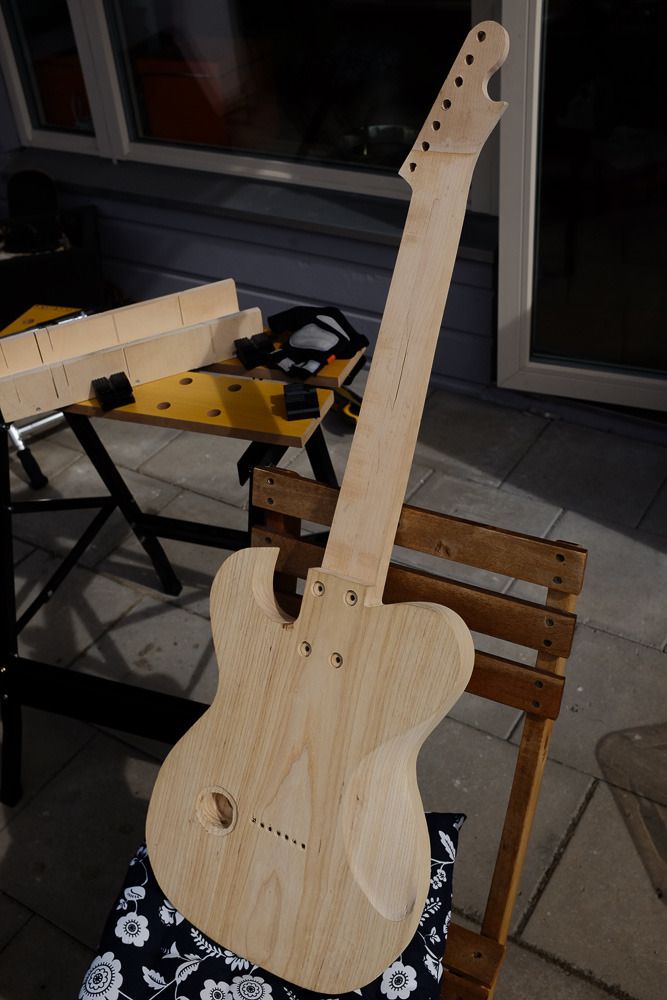
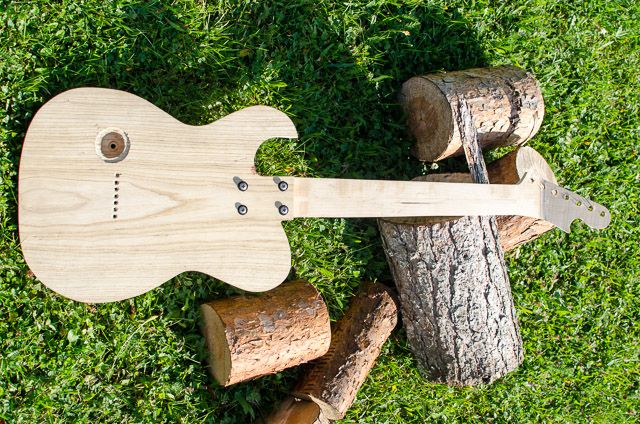
I then did routing and drilling of the body, fitting metal groovings in neck, and using bolts through the body, since I like to tinker with my stuff a lot.
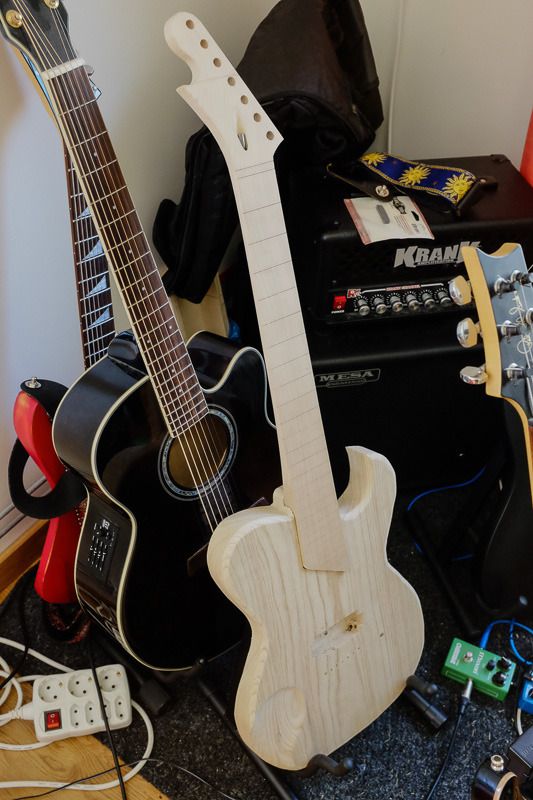
Here's the rough unshaped, unfinished guitar in all it's glory!
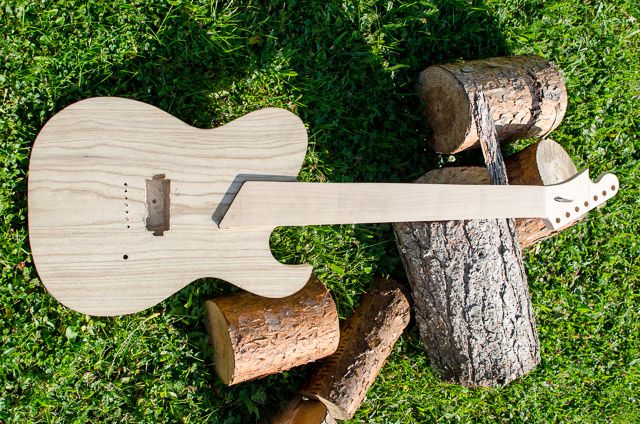
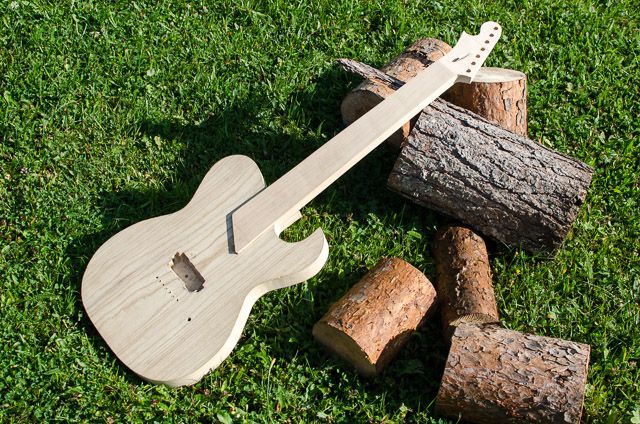
Next step is getting it home in one piece, and then finding the time to shape the neck and body.
-
Raining like crazy today, so I thought I'd try to update the build thread. Internet is crazy slow up here, linking over my iPhone on a very weak connection.First and second day was spent trying to clear up this mess. There used to be a carpenters desk somewhere under there 20 years ago. Also got some help bringing in a newer carpenters table that we sanded and put some hard wax oil on.
 Did some rough shapes out of plywood with measurements a mix from a Tele CAD drawing, my sketch, and some measurements from the few sevens I had at home.
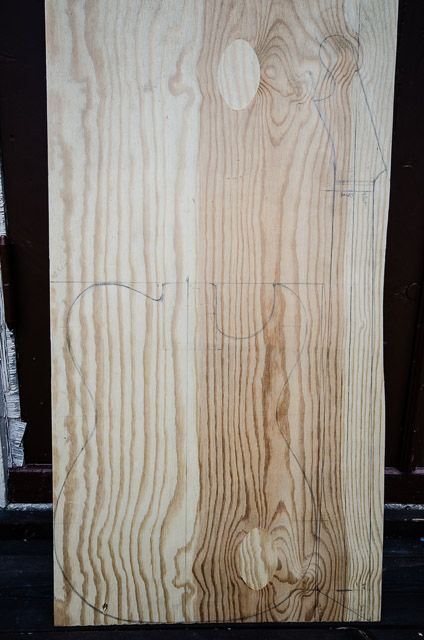 Making sure that I've measured roughly ok, and placing bridge, neck and pickup markings.
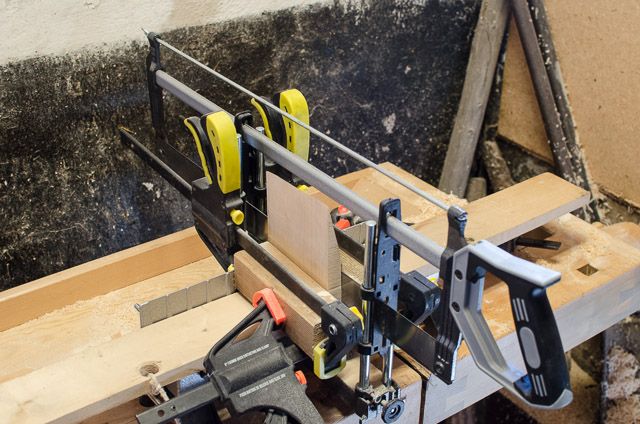
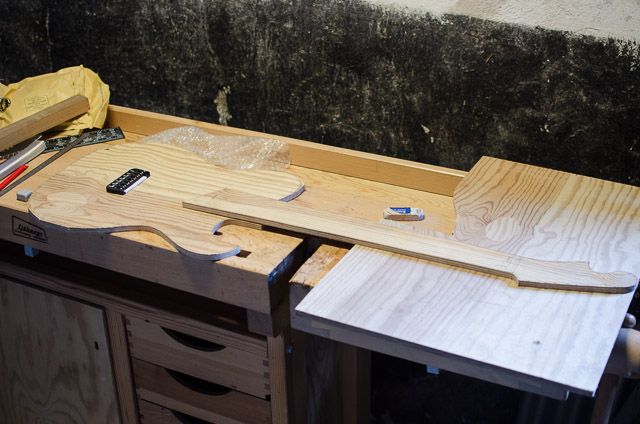 Routed out a channel for the truss rod with a thick board for support. First time ever with a router, phew! Still after trying on a few scrap pieces, the bloody router piece came loose in the hard maple of course. Didn't screw up the neck completely at least.
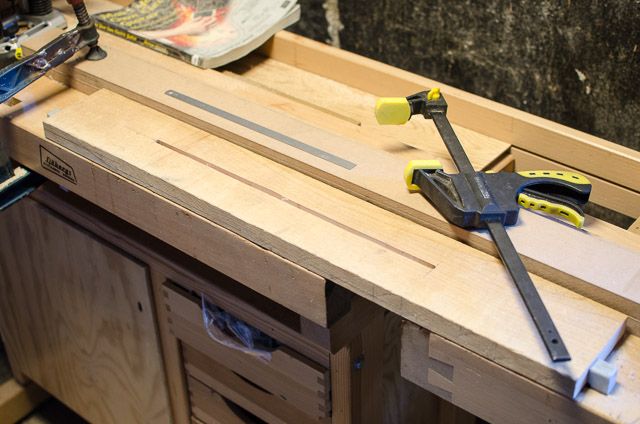 Don't weep now, but this is the only thing I could come up with to get the neck cut at 12 degrees something. It went surprisingly well, drifted maybe 0.5 cm, but I still have some leveling to do for sure...
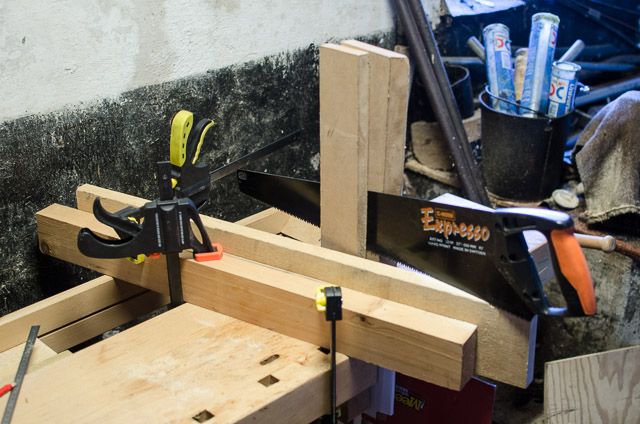 Another crazy setup, maybe I was just lucky drilling, but I managed to find the truss rod channel at least.
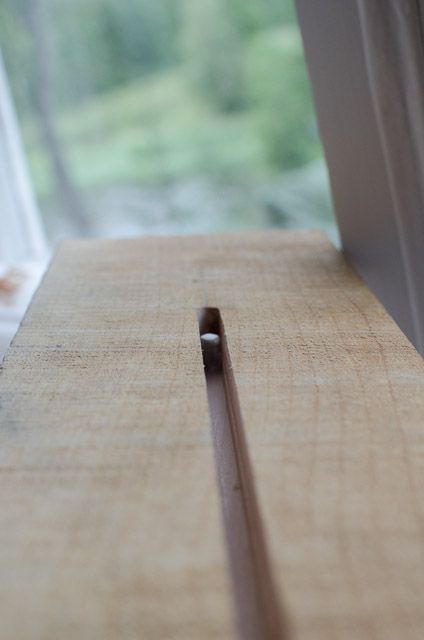
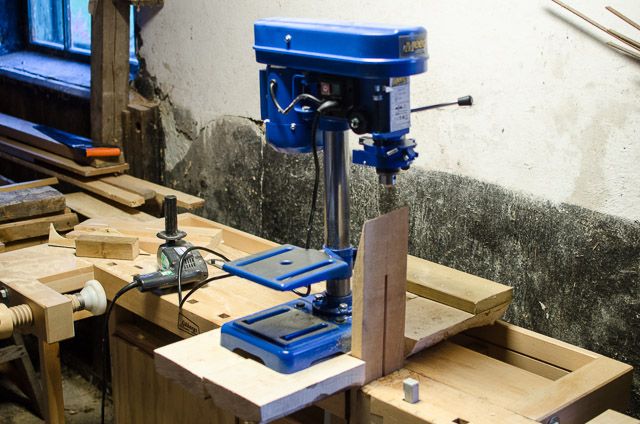 After some filing, the truss rod slides in from the head end, and sits very snugly. It's supported on both ends by the heel of the body and the truss rod channel ending quite early up towards the head.
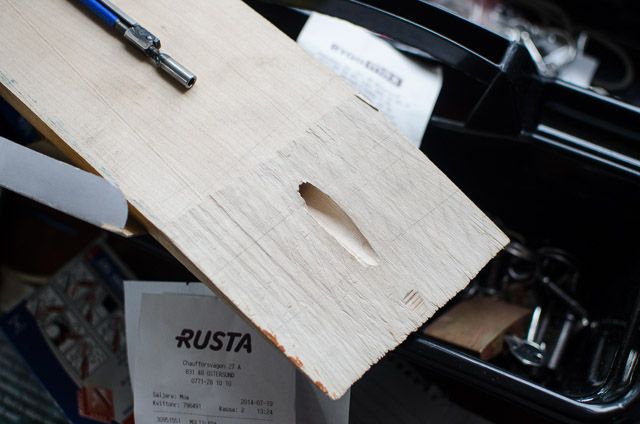
 Next step is getting the head piece on there, cutting out the main shape of the neck and salvaging a truss rod skunk stripe from the scraps!
 -
OK, the rod from Gitarrdelar need to be put in between a separate fretboard and a neck blank. So you need to either slice a bit of the neck blank or find a flame maple fretboard. I did a quick search and only found flame maple board blanks available with Perry Ormsby in oz land... He's a semi regular here under the moniker rhoades56 so you can shoot him a PM and ask. Some years ago, when I started building there were ample supply of flame maple fretboard blanks.
1" is generally too thin to slice off a fretboard if you also take in account that you need to clean up the surfaces that is being glued and that the saw blade, however thin it might be, eats away a bit of the wood.
Given that this i my first guitar build, I only opted for basic woods, so neck blank is regular american maple. Body being swamp ash is more of a happy accident where the retailer offered me that instead of standard american ash for the same price due to going on vacation the same day.
I'll drop by the local wood shop and see if they have any swedish maple or similar that I can get, I'm out of time to have any wood shipped before I leave for vacation/fabrication. I guess the backup plan is to skip fretboard until later, but I guess that halts shaping of the neck and stuff like that too.
-
...
Now to another question at hand: This is your first guitar, right? To do that build with a one piece neck and a traditional one-way truss rod takes for some serious planing, lots of jigs and requires (IMHO) quite a bit of experience. After almost 20 years of building guitarist that concept still scares me enough to keep me away from that. Add to that the extra step of making this a double action truss rod, I think that is too much for a first build. Have you really got the skills and understanding to get this done in a good way (please don't get me wrong, not trying to put you down here)? My sincere suggestion is that you question yourself why you want the one piece solution. Is it because you want a flame maple neck and fretboard look? If so you can get a separate flame maple fretboard and separate neck blank and use the much simpler solution with the truss rod sandwiched between those.
...
This comes out of my ignorance to the difficulties of guitar building.... I simply thought that a one-piece maple neck was in line with keeping things as simple as possible. Thanks for the heads up, I'm thinking of cutting off a fretboard from the back of my neck blank. Still, it seems like my blank is very tight as it is (30" x 4" x 1"), so we'll see how it goes.
I tried to keep the specs and design close to telecaster to keep it simple this first time, I think the only really dream features I put in there on purpose were the zero fret and the mini frets on the angled end of the fretboard. Any other bonkers features that you think will be impossible to build comes out of my ignorance.
I was under the impression that a double-action truss rod would allow me to do a straight rout on any kind of neck? This is the truss-rod I got (460mm), there weren't an awful lot to choose from:
http://gitarrdelar.se/images/RD003-460.JPG
Thanks a ton for the offer of help! I'm living in Gothenburg at the moment, and planning to start building the guitar up in Jamtland during my vacation, so unfortunately I will be way off to be able to claim any help.

+1 on the angled headstock with scarf joint. The old Gibson method of making an angled headstock from a one-piece neck blank requires a thicker blank to start with, wastes more timber (half the blank gets thrown away) and creates a headstock/neck transistion that can be prone to weakness. Scarfed neck joints have been used reliably for years by many manufacturers as a method of creating strong headstock/neck transitions and for their efficient use of timber. Don't be too concerned about the visible transition line - embrace it! Do what many builders here do and make it a feature by laminating some contrasting timber into the scarf.
But if you plan properly, you can get 3 necks out of a neck blank.
I usually get two neck blanks that I can cut as one piece with a 13 degree headstock, although I do laminate wood for strength, and one neck blank with scarf joint.
In terms of difficulty, my first neck was a scarf joint neck with 2-way rod, eye of ra inlay and sheduah fretboard. That was in 2005 and its one of the best necks you'll ever play on
I say do you you really want and take your time to do things right.
Because you'll be using a fixed bridge, go with the angled headstock and scarf joint. You'll have proper string pressure on the nut without having to resort to string tees or special staggered tuners. Scarf joints are also very strong and look nice IMO.
Woah, what size neck blanks do you use? I'm having difficulties figuring out how I will get one neck out of my blank! Good to hear that you got a nice neck done the first time. I'm at least aiming for building something that I wouldn't be ashamed of playing myself, and if everything goes to hell, my backup plan is to reuse the hardware for Helluvacaster II. My main goal is to keep all fingers, and hopefully learn a bit about do's and don'ts of guitar building for the next project... A working guitar would be a nice bonus!
-
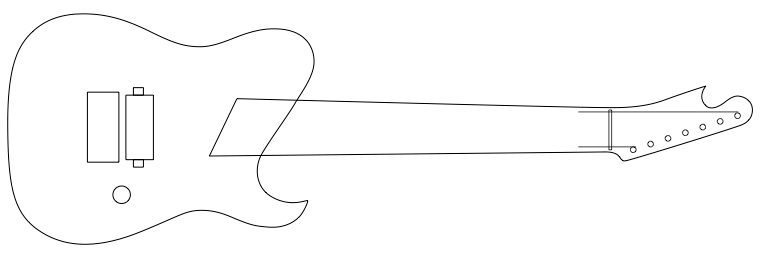
curtisa: Just to be clear, as I may use the incorrect descriptions for these things, here's kind of a similar neck to what i'm going for:
So the main difference, and worry, to me is that this neck has no explicit fretboard piece, whereas all the examples you posted had a rosewood fretboard or similar. In my mind I would have a split line all around the neck going on the front of the fretboard too. Would this joint be viable still?
-
Thanks for the feedback!
Although the sampling set might be too small for a statistically sound decision, sounds like angled based on your replies. I am a bit worried with the scarf joint without a fretboard piece to support it, didn't find any guitars online with a full maple scarf joint.
Now, what do I do with a can full of wax? You wouldn't wax the back of the neck either?
Thanks for the link RestorationAD, looks super useful with the routing tips and what not.
-
Hi!
After pushing this first guitar project for years, I've finally pulled the trigger and gathered all(?) the material and hardware. Actual building will start in a week, but I wanted to get it up here so that I could ask you guys a few questions before sawing the blanks to pieces. Here are the specs and design for your amusement and critique.
Rough sketch:
Specs:
Scale: 26"
Body: Swamp ash, stained blackish
Neck: One-piece Maple, C-profile, flat radius, bolt-on, double-action truss-rod
Bridge: Hipshot Fixed 7 0.125" black
Tuners: Gotoh Rock Solid cosmo black
Pickup: Seymour Duncan Black Winter
Frets: zero fret + 24 frets + minifrets, Wagner extra jumbo
Nut: Graph Tech XL Jumbo
Controls: Single speed knob for volume
Finish: Danish Oil + Wax
I had to source it from four different places, phew!
And finally the questions for you guys!
Q1. Angled or flat headstock? The design I am going for is basically a one-piece maple neck with reversed head. My blank seems to be too thin to make an angled headstock without a join. Do I do an angled headstock and live with the split line, or do a classic flat head? Would the B and E-string be able to be held down by a string tree, or would it pop free?
Q2. Would you oil and wax fretboard too?
Since this is my first build you'd better be praying for me, and maybe for the guitar too. Any critique or tips are most welcome, I'll need it for sure!
Thanks for reading if you got this far,
Jens


Helluvacaster 7
in In Progress and Finished Work
Posted
The sticky finish of the neck ended up being a dirt magnet, so I took the plunge to reshape and refinish it. The neck actually feels like a sweet guitar now and less of a shovel. I put a couple of coats of matte acrylic lacquer spray on top of the white wash, which seems to have done the trick, smoooooth! Lesson learned: if it feels sticky, it will make stuff stick!
Another fun accident was putting buckles into the back of the pot wen I finally figured It was time to fix it with a nut. Those things look solid, but apparently not... So I have some re-soldering to do, the pot is more like a kill switch at the moment. ;-)