


alexisguitars
-
Posts
14 -
Joined
-
Last visited
Content Type
Profiles
News and Information
Tutorials
Product Reviews
Supplier Listings
Articles
Guitar Of The Month
Links and Resources
Forums
Gallery
Downloads
Posts posted by alexisguitars
-
-
Thanks everyone, it was the nut height! Problem solved and plays great.
-
Thank you all for the advise and information. It seems like the nut height is the most probable perpetrator! I will try and lower it.
Cheers
")
Alexis
-
Hi everyone
I've just finished a telecaster project and I'm pretty happy with the body finish. However, I've run into a problem I haven't run into before. I set the intonation so the 12th fret is pretty bang on in tune, but the first fourfrets or so, particularly fret 1 and 2, are far too sharp. It affects all strings, and the first fret is really sharp, and it gets slightly better until it is pretty much in tune again further down the neck. It means I can paly a bar chord of an A or any bar chord beyond that, and it will sound in tune, but playing a standard shape chords, particularly D, sounds out of tune.
The neck was cheap, between £20-30 from ebay, so my guess is that the first few frets were fretted wrongly? Maybe just a couple mms out or something.
Is there anything that can be done about this?
Lucky the problem is with the neck, so it is cheap and easy to replace if needed.
Thanks
Alexis
-
Very cool build. Really interesting to see how the process with the set neck is done.
-
So I have here the guitar's first look. The journey of how it go there is documented on the blog https://alexisguitars.wordpress.com
But here you have it
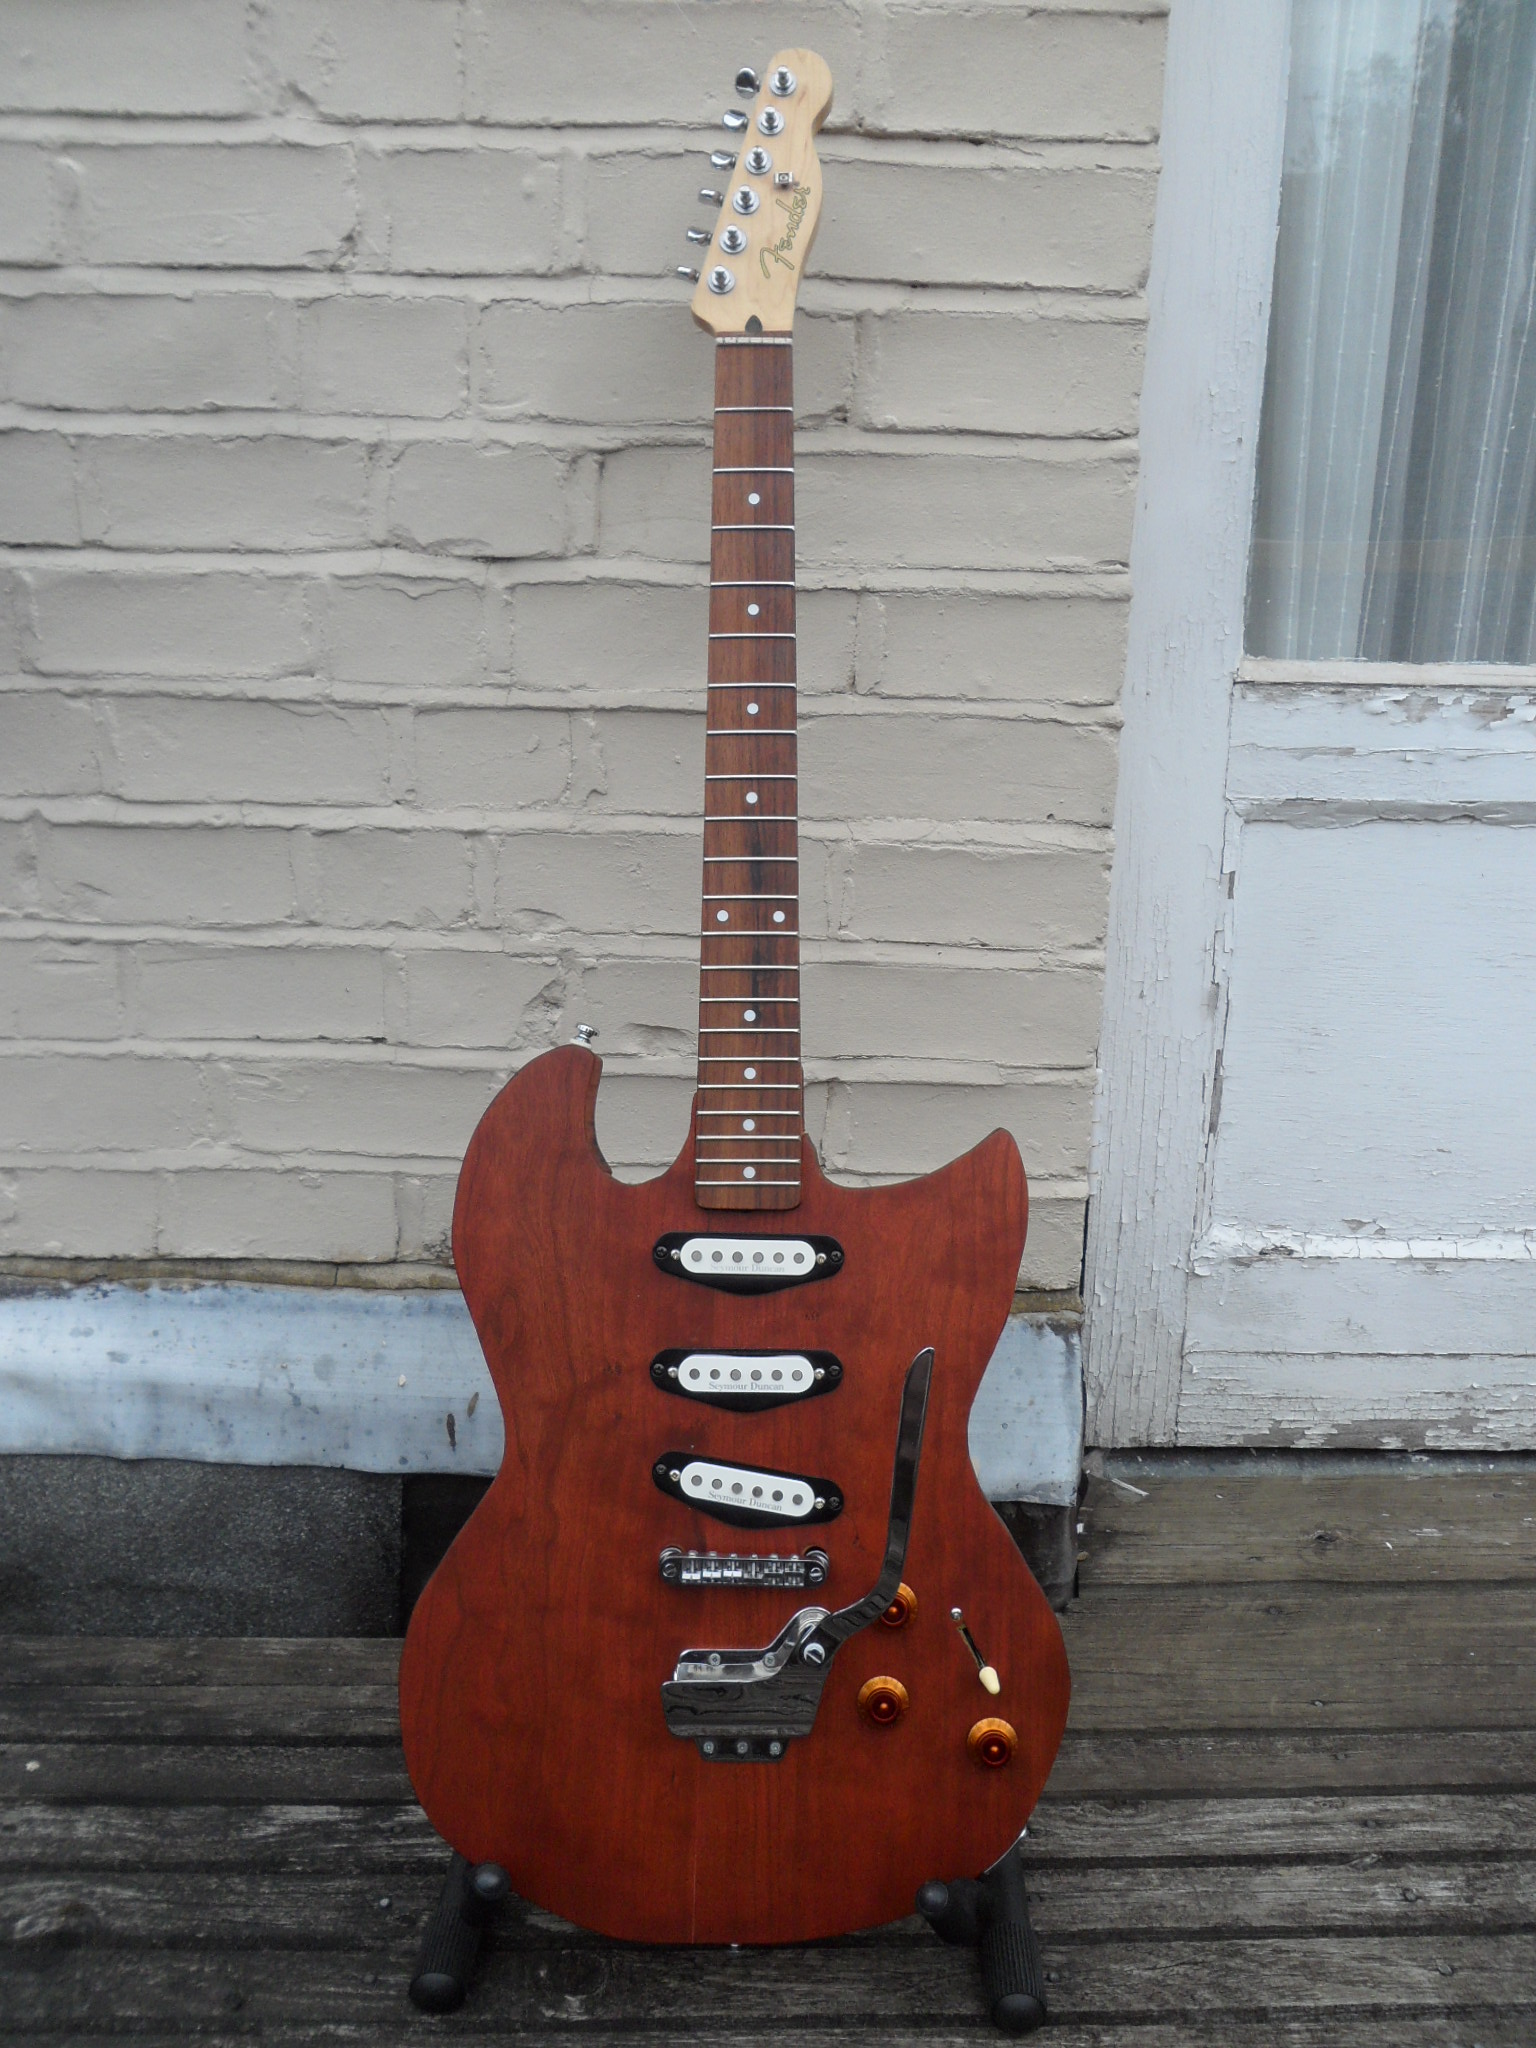
And a close up of the body:
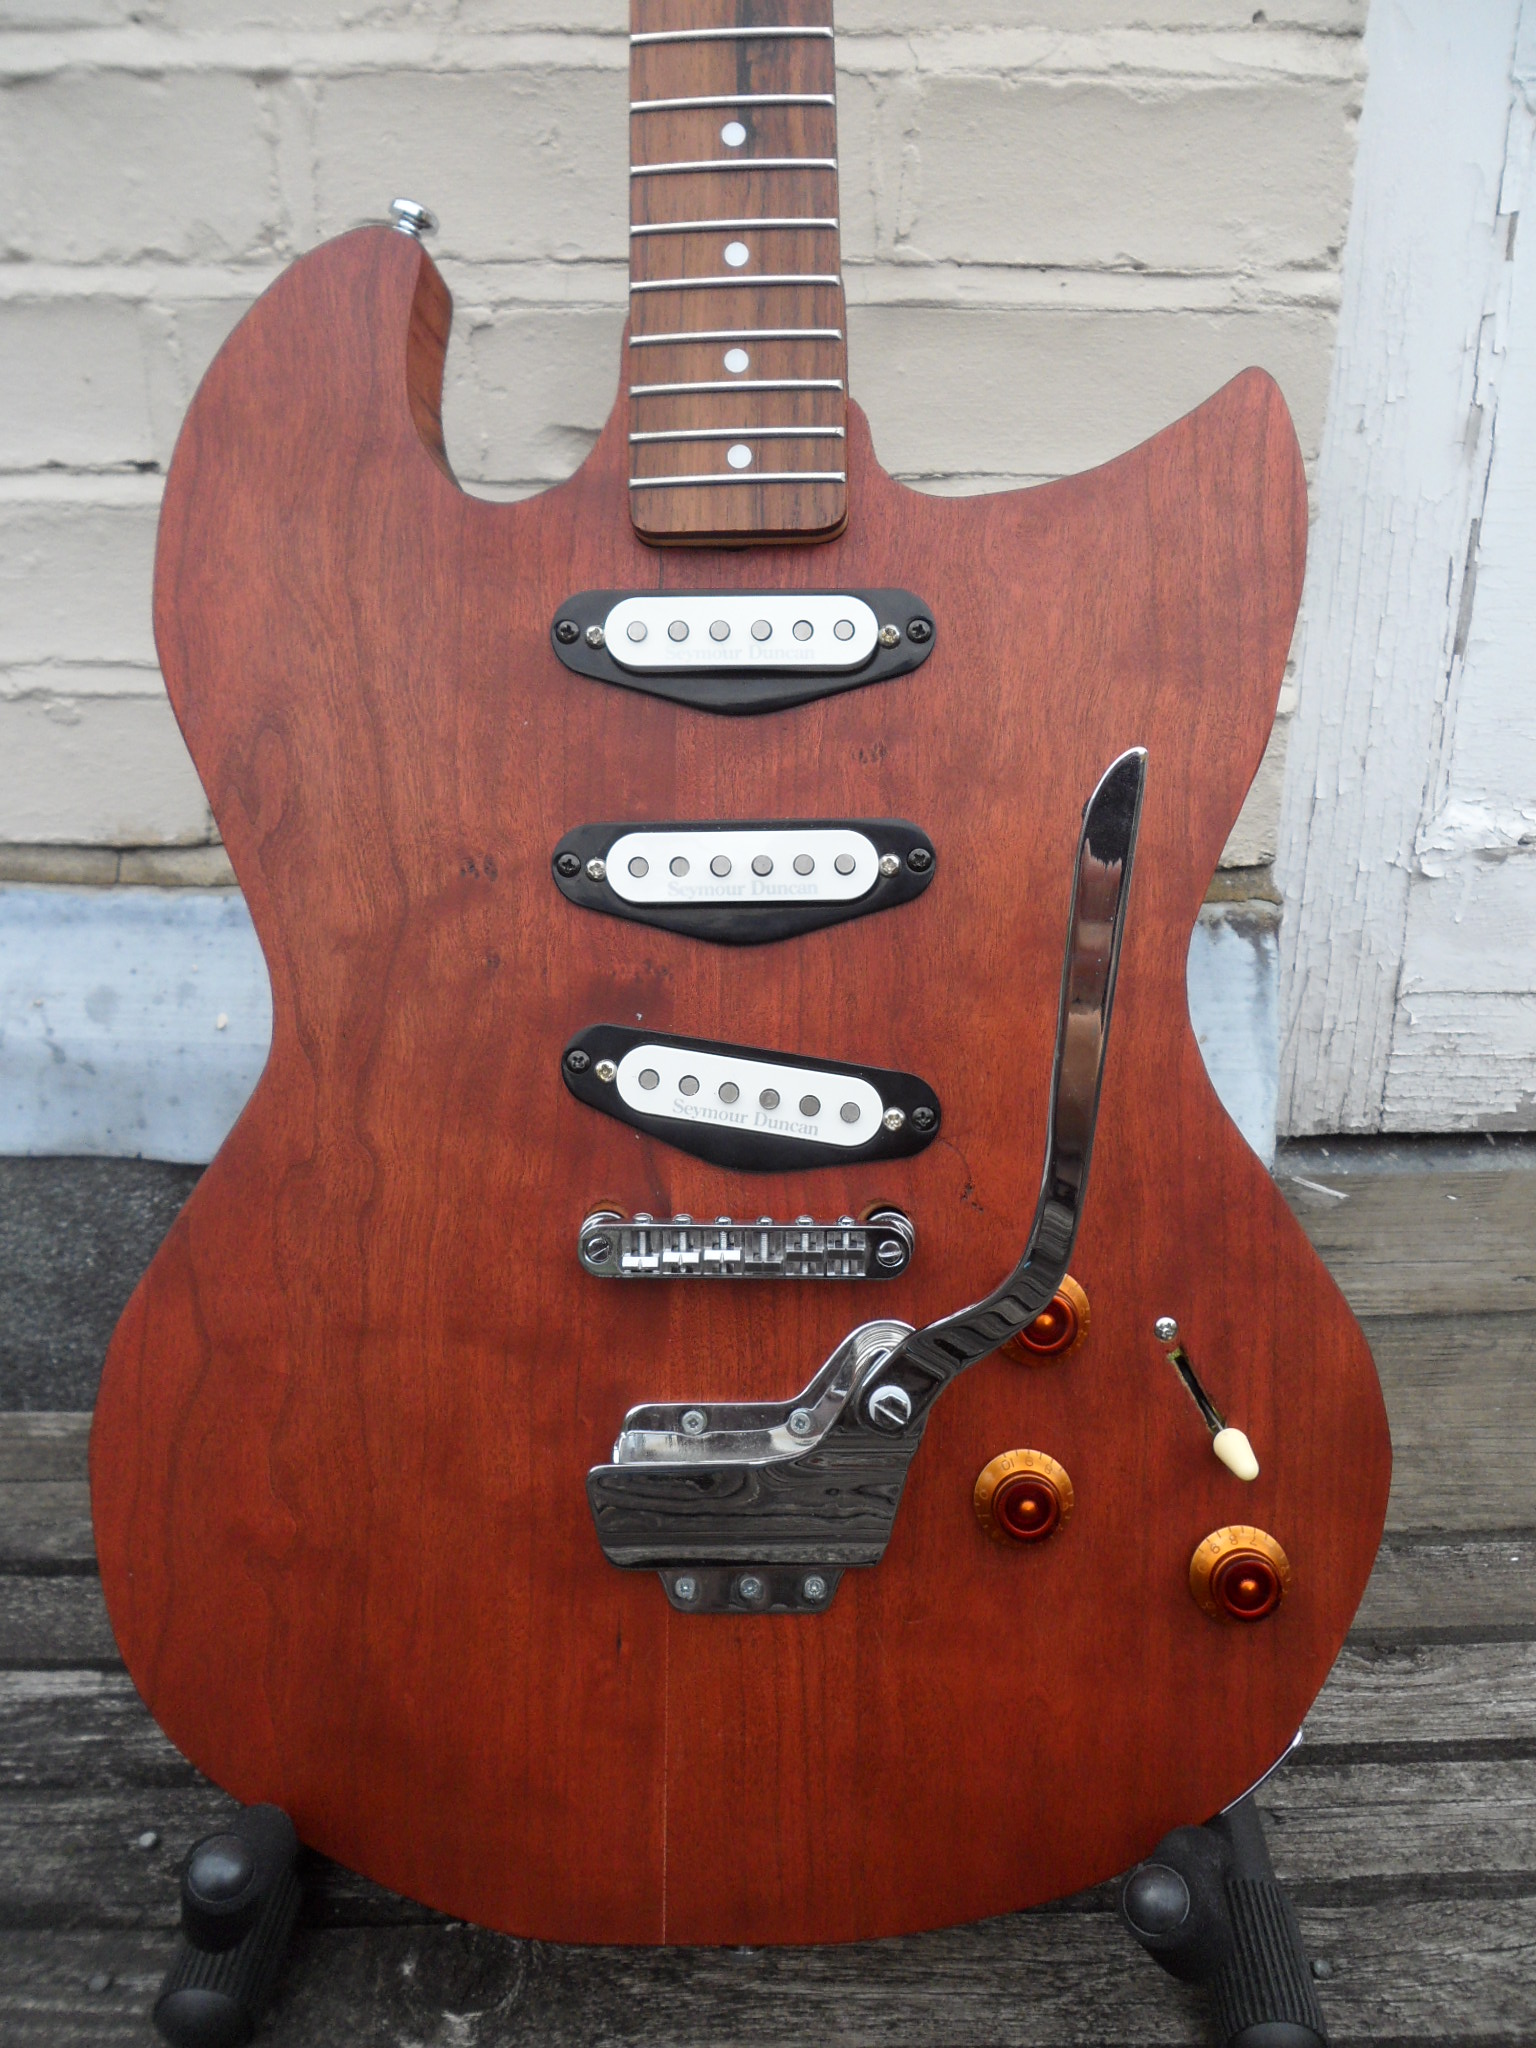
I'm very happy with how it turned out actually. The colour was achieved with Red Mahogany Stain. I can't remember how many coats though. I just put a few light coats of Satin poly to finish it off.
The colour was a bit blotchy and I don't know how best to have dealt with that. I didn't apply any product (grain filler, etc.) onto the guitar so I am sure that has something to do with it. I'm working on another guitar at the moment and it also came up blotchy (though that is basswood and I knew what I was in for with that one, no surprise there!) so any advise would be much appreciated! Although, I forgave myself for blotchiness on this first attempt haha!
Now this guitar has changed a lot since then! The neck changed another 2 times, and the bridge pickup changed to a humbucker. The whole wiring changed too as well as the bridge - you can see the bridge piece here is a little loose. That all got fixed and I will update on that shortly
Although that big hole (which the bridge piece is loosely sitting in) has left a scar 
-
Looking at those links cherry seems like a good shout. The sides of the guitar burnt quite a lot after the jigsaw cutting so Prospheta I think you just provided the final clue that it might be cherry haha.
I will be updating the blog soon so will have some more pics of progress to put on this thread this tonight or this weekend.
-
Thank you buddy!
-
Fantastic headstock design!
-
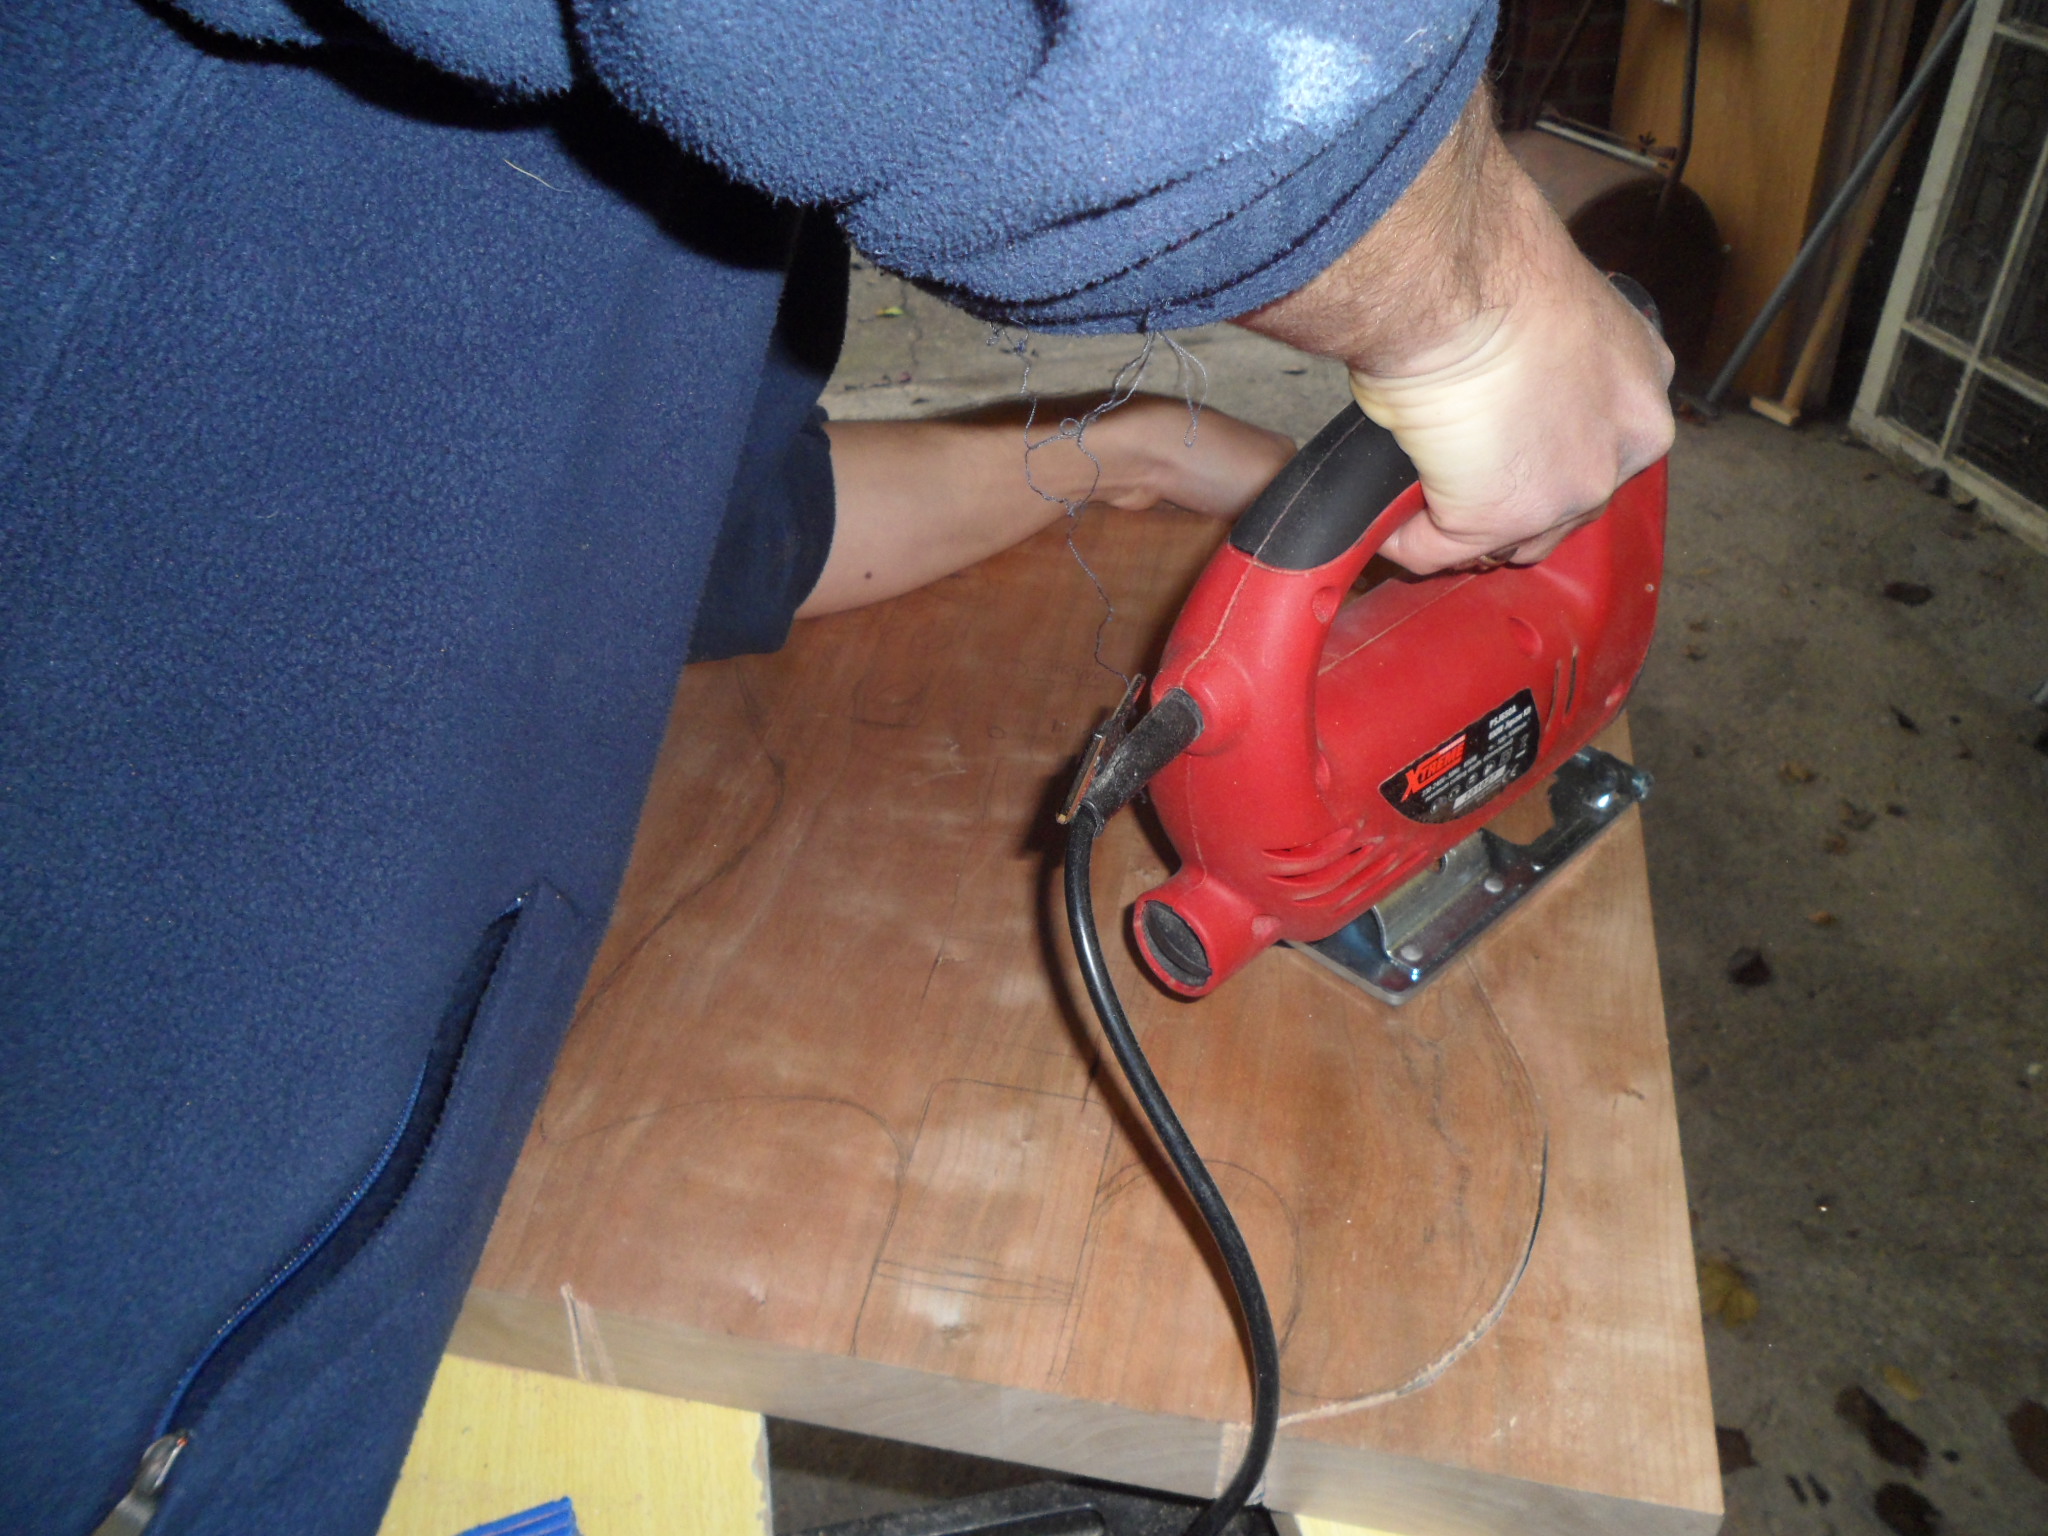
Looks good! You were cutting surprisingly close to the finished line with the jigsaw there....the blades on those are notoriously wander-y and prone to non-perpendicular cutting. It seems to have worked out okay though. I'd definitely consider working the sides more unless you're really into the rough kind of look. Have you used a router for shaping before, or is that something you're working up to attempting?
Thank you for the feedback
Yes, I learnt the hard way that the jigsaw isn't the most precise! I didn't even consider using a router for shaping. Perhaps for the next one! I am new to all of this really, so I am still learning the tools of the trade. Since this one I have worked on several other guitars doing maintenance work or putting kit s/spare parts together, but I've never cut out a body since so my next one I will definitely look into using a router.
This whole project has been trial and error, but I've been fortunate enough to learn a lot from it. I'm too attached to this guitar to go over the sides now. However, I am planning a second guitar with the same shape which I'm hoping to be more ambitious for and make it look smoother along the sides. Maybe even find a way to add some contour on it so it isn't a solid slab. I do like this guitar looking like a rough project though.
That's got some cherry like color and figure, but I'm not sold on the grain being cherry. I may have to do a little research.
SR
SR if you can identify the wood that would be so awesome haha I thought I'd never know what it is!
-
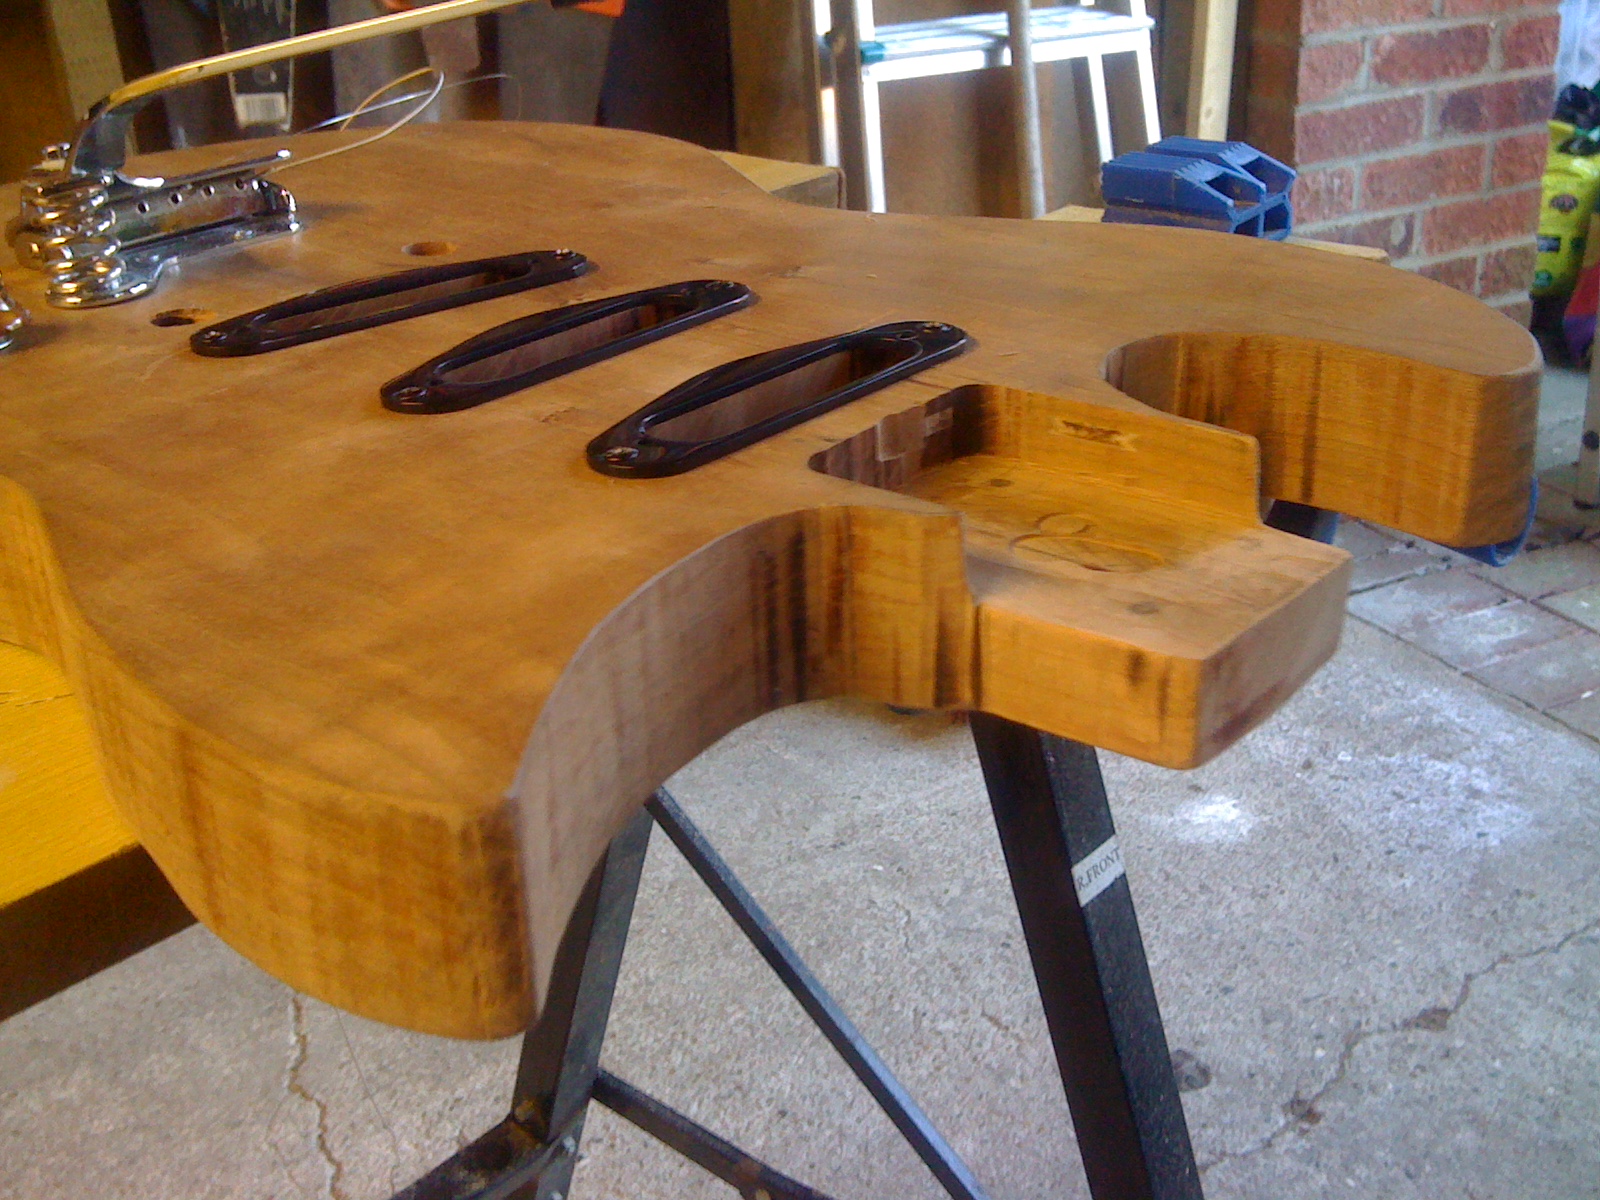
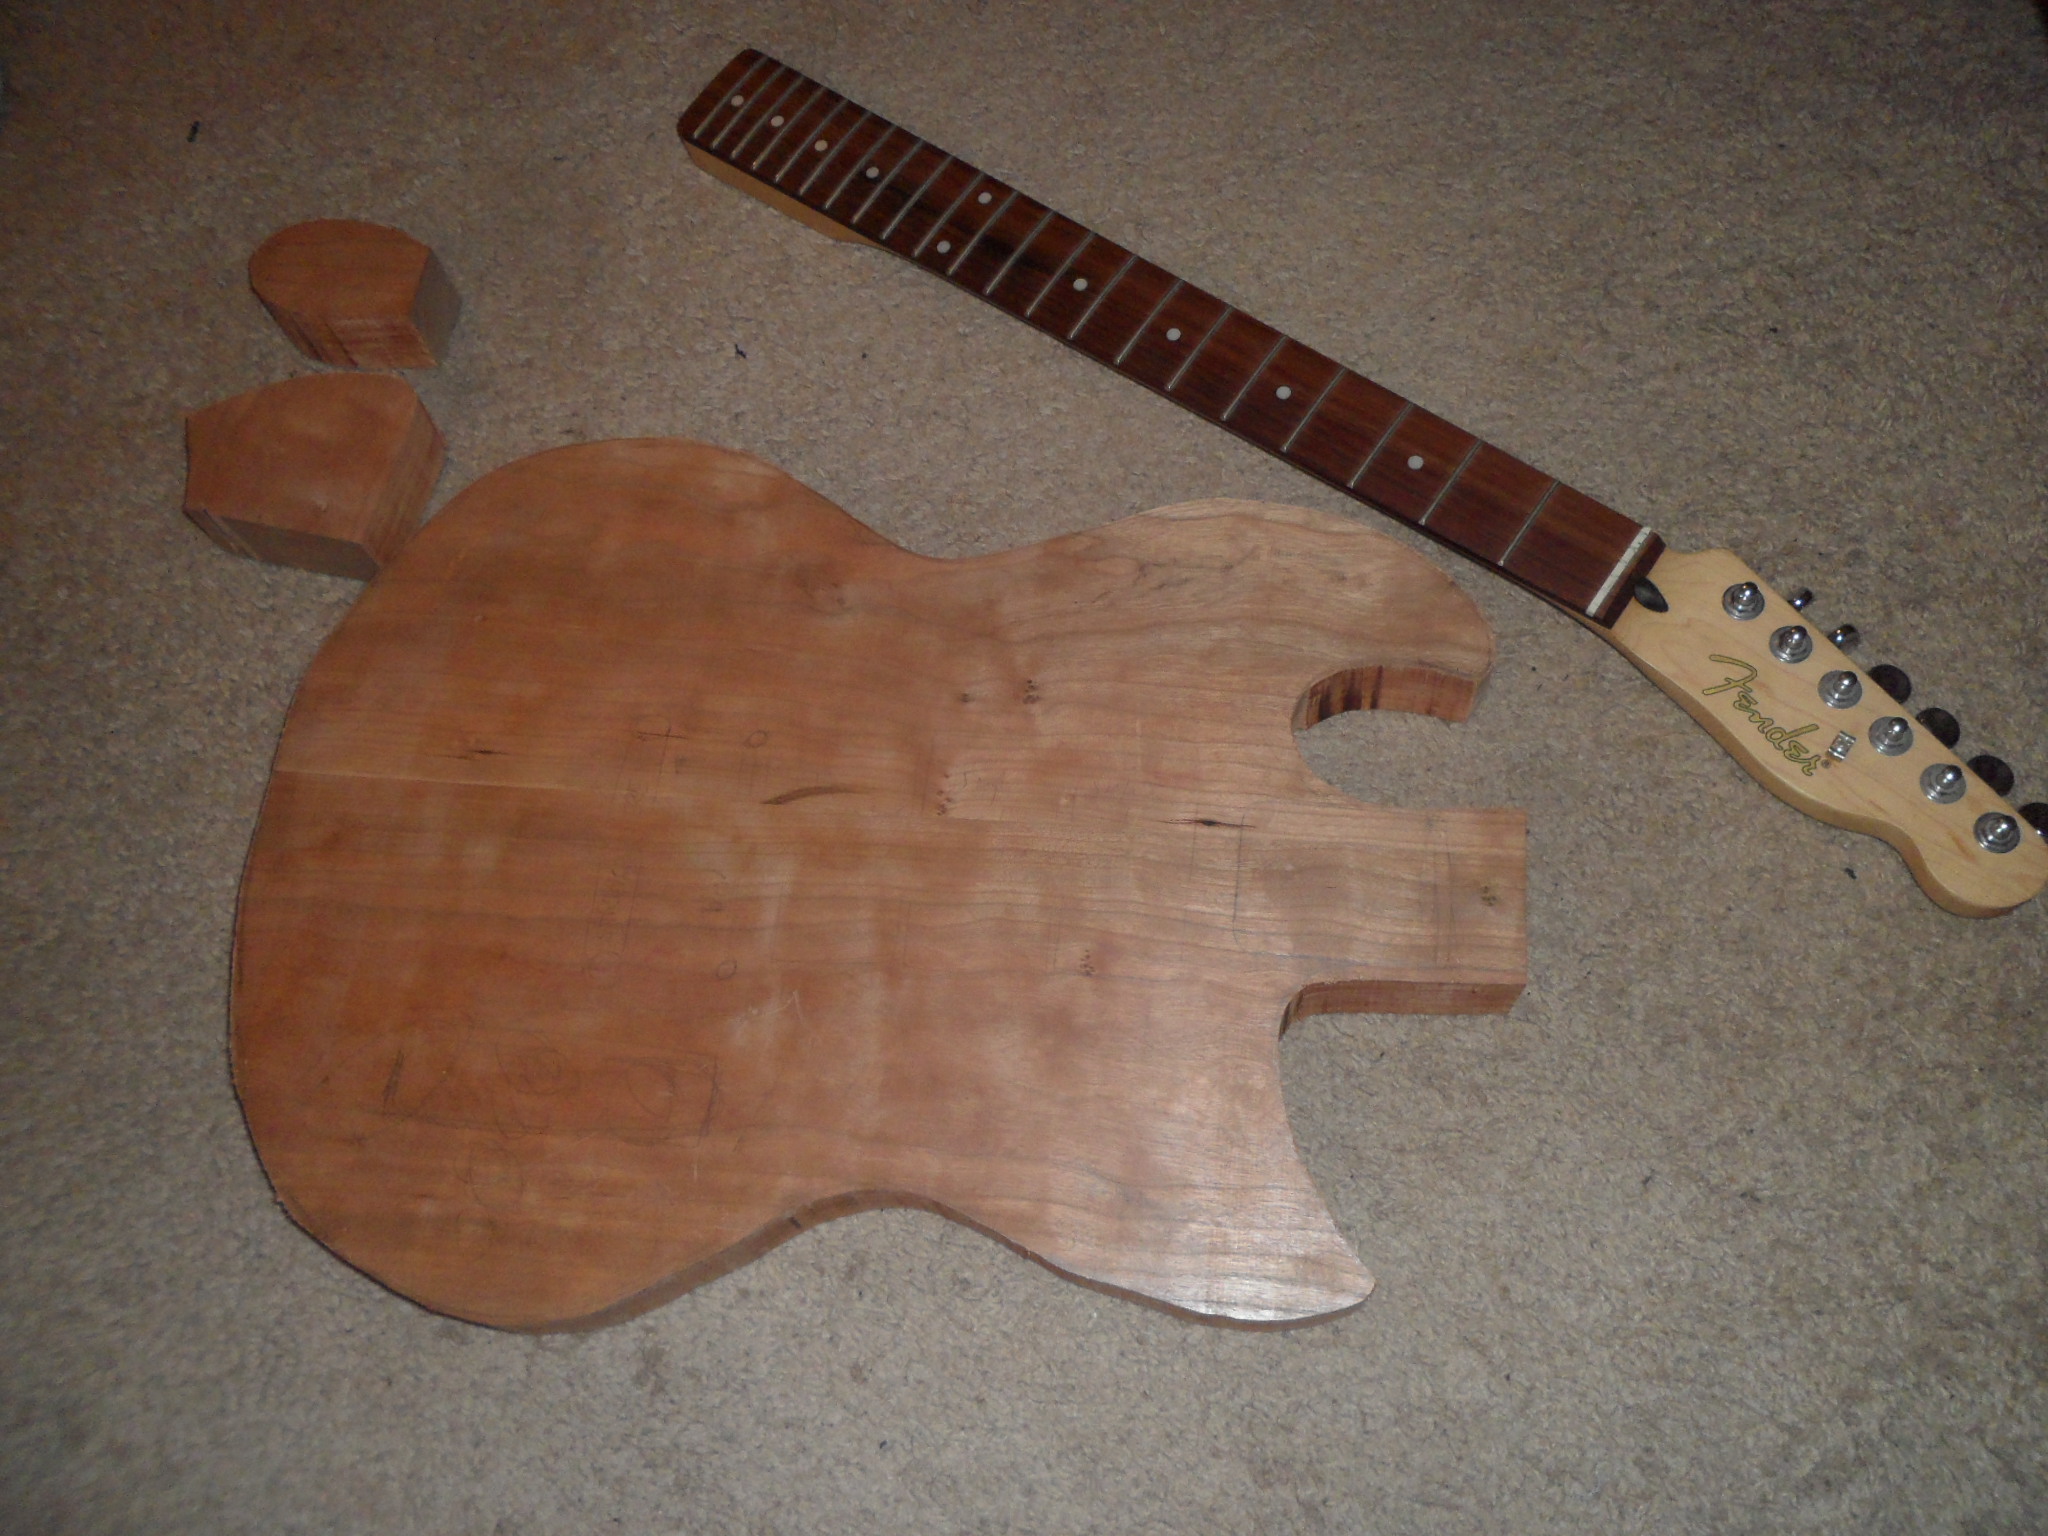
As you can see in the photos above, I drew out the design on a 2-piece blank. I don't know what wood it is, the person I got it from couldn't tell me, but it has nice grain and it's pretty heavy.
I just drew the design on by hand and used a jigsaw to cut it out. The edges aren't so smooth and there are a few areas along the sides where it isn't round, but a little angular. People have told me to sand it down or round it off, but I actually like that my first homemade guitar looks homemade.
The design was simply a combination of a strat, SG and les paul design and this is what I ended up with.
This was also the first time I used a router, so it took me ages while I carefully routed out the neck pocket, pickup cavities etc.
Speaking of pickups, *spoiler alert* this has now become and H-S-S guitar rather than standard S-S-S configuration.
Full details here: https://alexisguitars.wordpress.com/
-
Hi everyone, my first topic here. There are some awesome looking guitars in this thread, really inspiring stuff!
I wanted to share my guitar build. It was my first attempt at doing this and in using most of the tools so it has been an ongoing project for about 3-4 years (doing small bits here and there) while I fix my previous mistakes haha but that's all part of the fun! I hope it never ends, I'm addicted to this hobby now.
The final thing has gone through so many changes - three neck changes, different pickup configurations, different hardware. It has had quite a journey but one that I've loved every step of.
Here's a few pics of the start. I am uploaded these from my own blog, so as I update the blog I will update this thread.

I can only upload photos that have a URL, so I will update this thread as I update my blog. But for anyone interested in the step by step process of this, please take a look at my blog:
https://alexisguitars.wordpress.com/
You get a sneak peak of the finished thing at the top.
I will post the finished product shortly!
-
Beautiful finish on the body, I'm really getting into guitars with a different colour top to the back and sides, this one looks pure class.
-
This is an awesome guitar, I love the blue stain. Well done mate
")

My first build I'am proud of!
in In Progress and Finished Work
Posted
Awesome looking and sounding guitar! Thanks for sharing and look forward to seeing your future builds!