


Hydrogeoman
-
Posts
192 -
Joined
-
Last visited
-
Days Won
1
Content Type
Profiles
News and Information
Tutorials
Product Reviews
Supplier Listings
Articles
Guitar Of The Month
Links and Resources
Forums
Gallery
Downloads
Posts posted by Hydrogeoman
-
-
- Popular Post
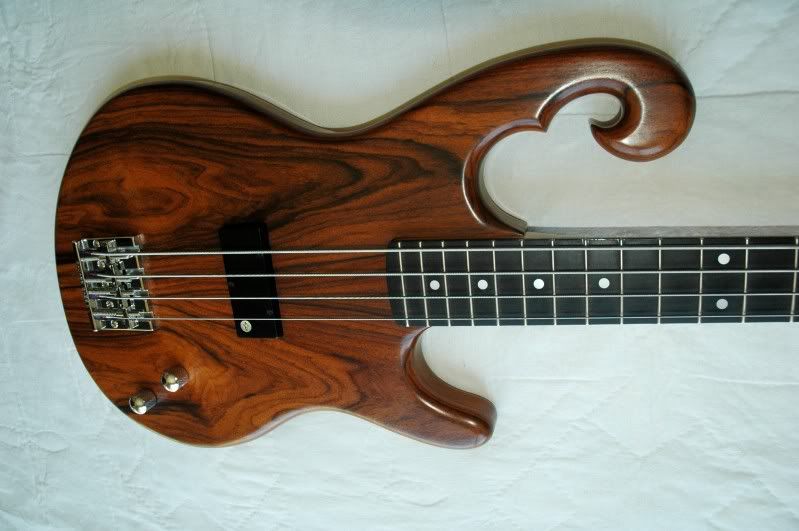
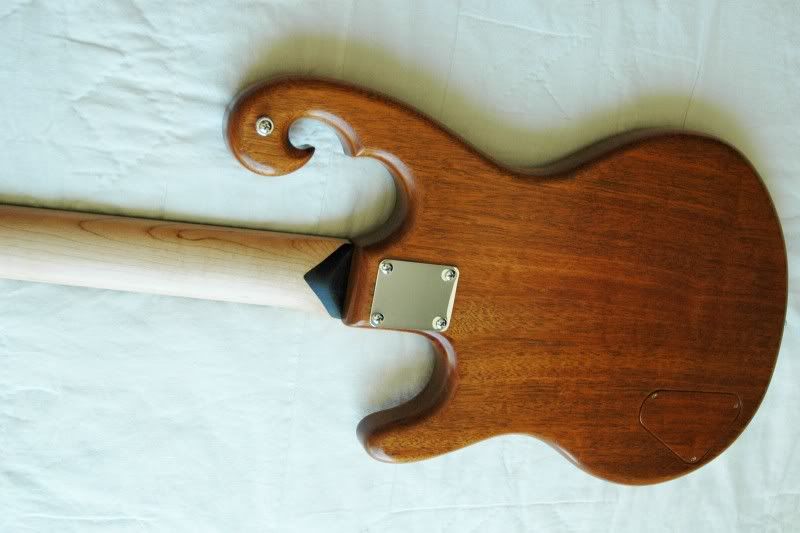
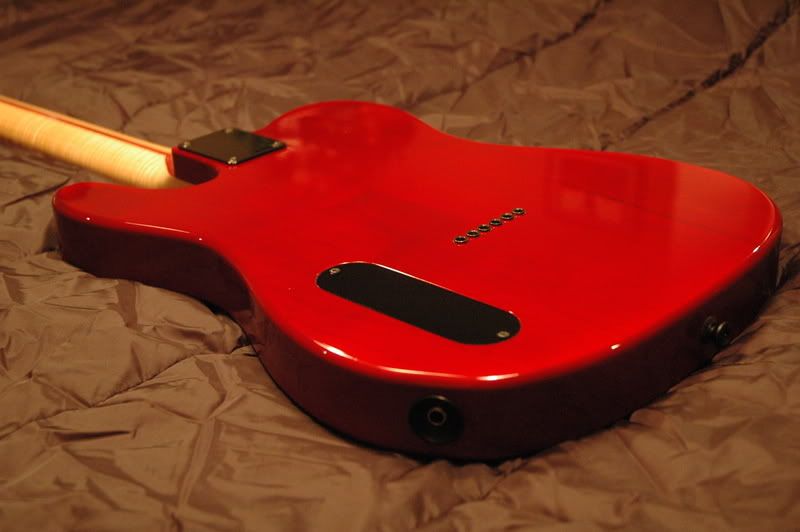
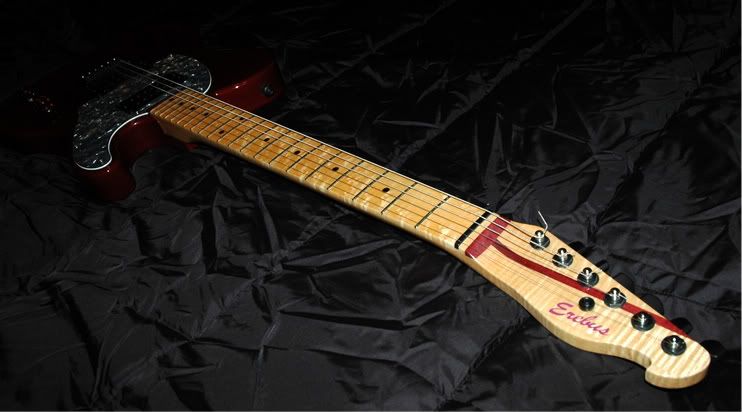
Erebus Escobar - built for Pyedawg keeper of the beat, Pablo C
Body - black walnut, beechwood, padauk
Neck - curly maple, padauk. Fretboard -birds eye maple
Pickup - GFS MM Pro Plus
Bridge - Hipshot KickAss
Tuners - Gotoh
Cheers - Hydrogeoman


-
 5
5
-
- Popular Post
Erebus #7
Hello All,
I build mostly for fun and for friends in my home shop. This one is my 7th effort, based on the 1957 Les Paul Jr. I did document this build and will be starting up a thread with all the gory details in the near future. Sorry for the less than professional pics. These were taken literally at the moment of birth on my work bench
 Cheers!
Specs:
- Korina neck and one-piece body
- Birdseye maple fret board
- 2-way truss rod
- Gabon ebony headstock veneer, neck heel, and a "screwless" control cavity cover
- Bone nut
- Kent Armstrong "hot" P-90 pickup. Set up with a coil tap to have outputs of 10K ohms and 14K ohms
- Vitamin Q 0.022 microfarad tone capacitor
- CTC volume 500k potentiometer and an Alpha 500k push/pull tone pot for the coil tap selection
- copper foil shielded control cavity
- Tone Pros locking wrap tail bridge
- Wilkinson "Waverly" style open-geared tuning machines
- 5-ply "snakeskin" pickguard and truss rod cover
- nitro lacquer finish


-
5
-
Thanks for the feedback. I forgot about the shellac being a great base for just about any finish. Plus, I love what it does to bring out the beauty of most wood species. - Cheers
-
Hello All,
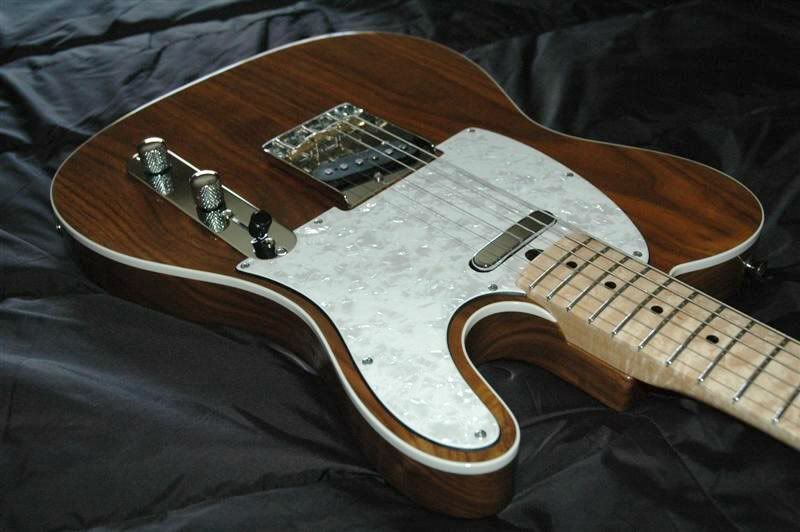
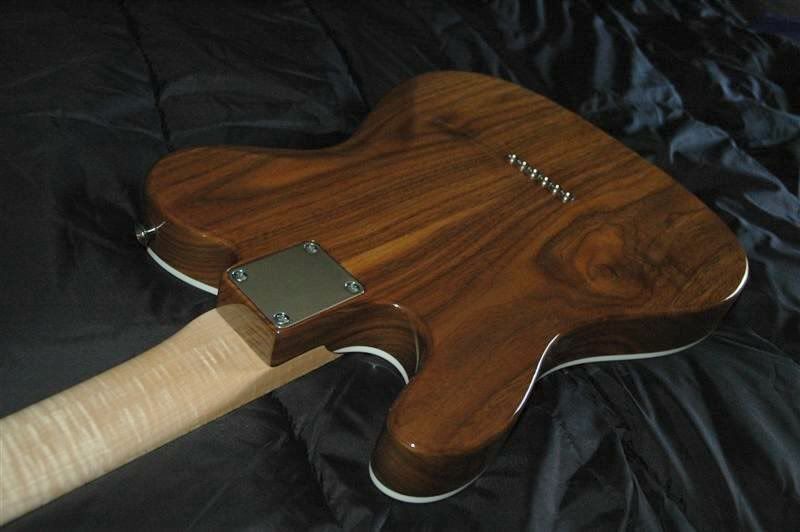
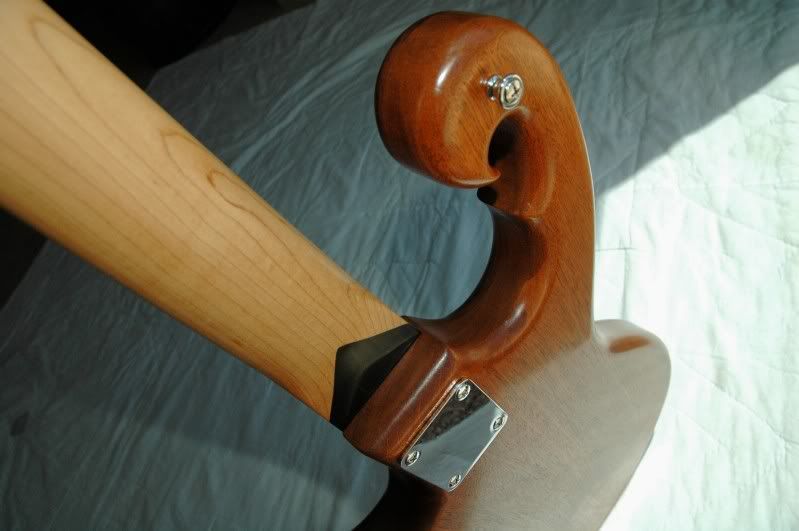
Been a long time since I last posted here. I am looking for opinions / advice about finishing a tele top (curly maple drop top) with gloss nitro lacquer but finishing the back and sides (padauk) with a wiping varnish.
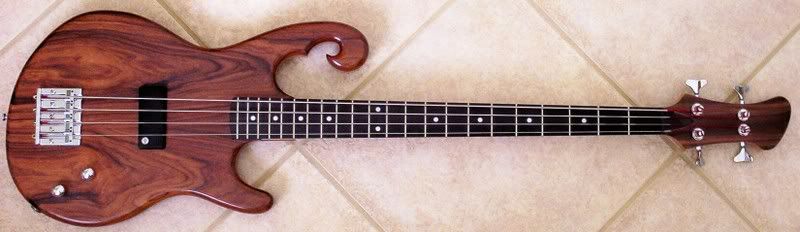
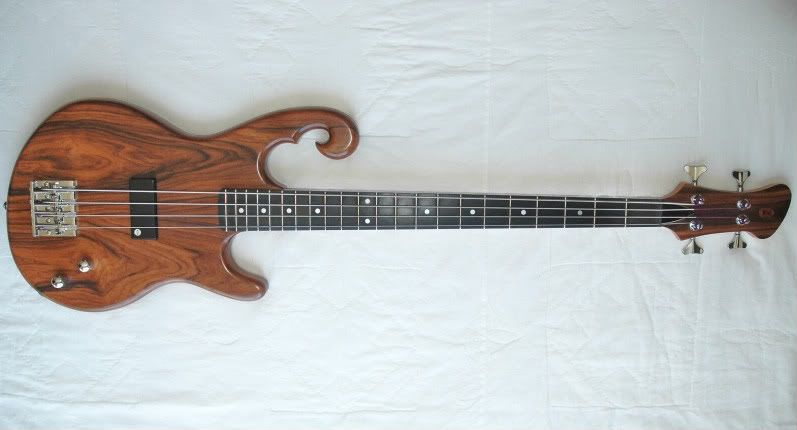
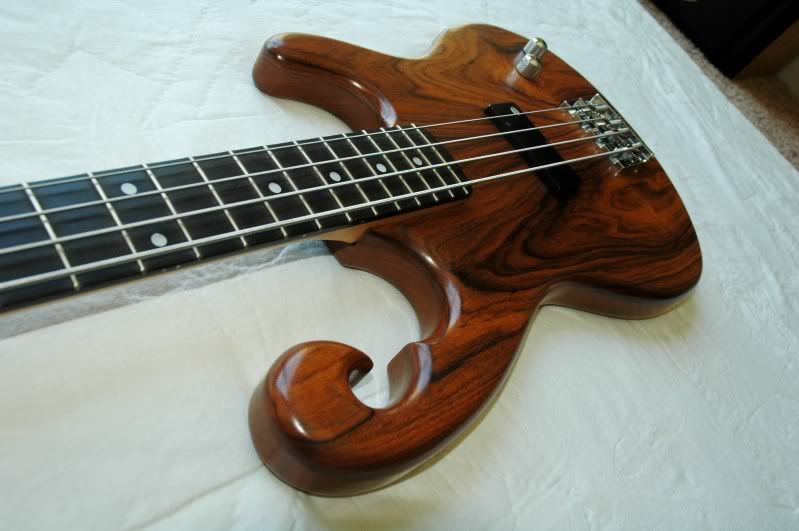
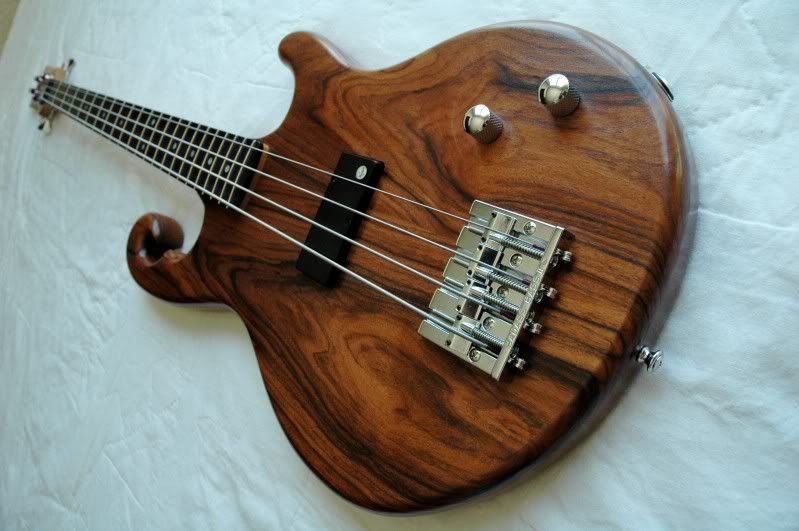
I recently tried an oil based urethane wiping varnish (General Finishes Arm-R-Seal) for the first time on a bass made of walnut, padauk, and maple and was really happy with the outcome. I did not grain fill and the padauk just looks amazing (to me anyway) finished this way. Here is a head shot of the bass with four coats of the wiping varnish:
.thumb.jpg.9f20b2dfb1fd2d9cd6a5087c9dd9c352.jpg)
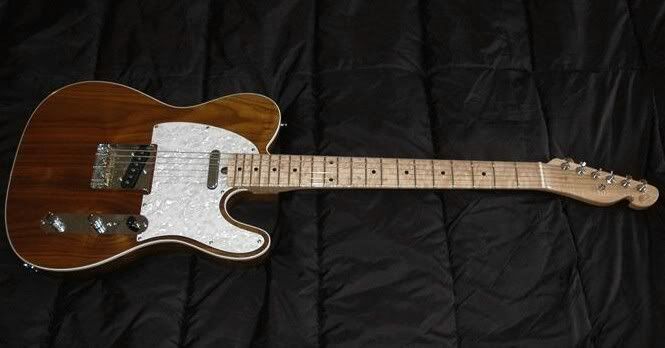
I want to keep that same open grain look of the padauk on this current tele build, but would like to have the curly maple top like glass, thus going with the nitro spray. Here is the subject tele body with an aged white mother of toilet seat binding.
.thumb.jpg.da6ded53b1225933878444fe434345ed.jpg)
I guess a few questions I have are:
1) Would having the two types of finish (lacquer and varnish) insult your senses?
2) Do you foresee any problems where the two finishes meet each other at the edge of the binding?
3) Have any of you tried something similar? I know some like to Tru-Oil necks and lacquer the bodies, but I have never seen a body with both types of finishes used.
Thanks for your thoughts / wisdom
-
come on Avenger, your critiques don't ruffle that many feathers - do they?
If you're gonna ask, I'll give up my thoughts. But you give up the right to be mad about them....
Yeah! that's what I am talking about! I am here to learn, and anybody who thinks and cares about this stuff enough to post over 4K times has my ear. Avenger, your comments are spot on. Thanks for the thoughtful review!
-
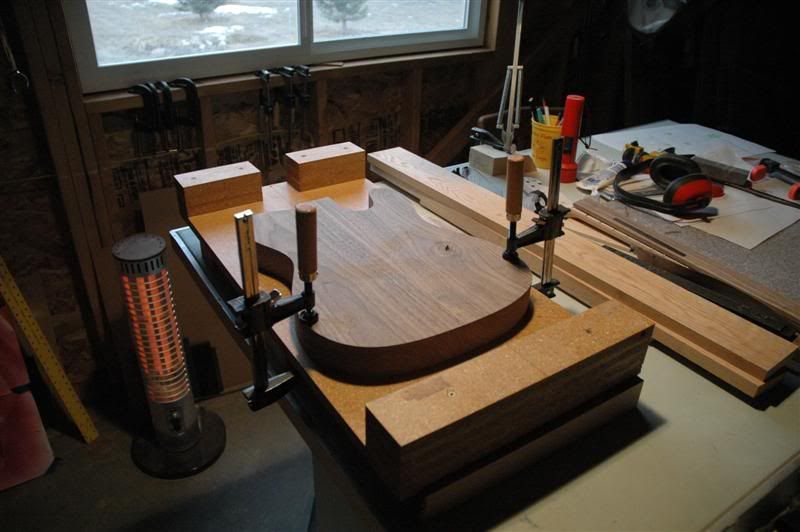
Very nice work! After you rough cut the body with your band saw, what method did you use to do the final shaping, e.g., template and pattern router bit, drum sander, etc?
-
Bosch jigsaw - 1590 EVS (corded) outstanding
Makita drill - LxT (18v lithium-ion cordless) outstanding
Ryobi router - RL180 2-hp plunge router. Gets the job done for the price, but I will probably go with a higher end brand next time.
-
My congrats to anybody on this site who is willing to put their work out to a community with so much talent. Whether you are a professional builder or hobbiest, this endeavor is fraught with the "workmanship of risk" vs. the "workmanship of certainty" (Pye,1995). Thanks to those providing feedback (come on Avenger, your critiques don't ruffle that many feathers - do they?!).
Wez and Swede, your points are well taken. This was my very 1st build, done some years ago, and was as complex a build (laminations, body carving, etc.) as my skills allowed at that time. I will, however, be taking that advice and incorporating it in the next bass build.
This month I was torn between Swede's and Scatter Lee's. For me though, the simplicity of Scatter Lee's build got the upper hand. I have a soft spot for Jr's/Specials and it would be the guitar I would reach for more often.
Cheers - Greg
-
-
This is "The Pete." Built for a dear friend and inspired by the Giffin/Schecter telecasters Pete Townshend used to play back in the 80s. Pure rock and roll.
The Specs:
Alder body
Curly maple neck with purpleheart center/accents and birdseye maple fretboard
Hand wound Kent Armstrong Z-Plus humbuckers. These are exact copies of the pups Kent used to wind for Pete. Mr. Armstrong was kind enough to wind this set for me.
Sperzel tuners
Mighty Mite hardtail
Graphtec nut
Nitrocellulose finish
Cheers,
Greg
and a few more clickies.......
Another angle of the top/neck join
-
Just thought I would throw this out here for any of you folks who are interested in the Stewmac luthier vise, actually known as a pattern makers vise. SM sells these for $136 US - you can get almost the identical vise here at a shooters supply house for 1/3 the price. Great deal. Merry Christmas - GPP
-
Thanks for all the good input guys. I think for this effort, I will probably go with what I know best - nitro. I will definately be shooting a nice thick base "just in case." Scrap pieces will be getting a good workout before any finish hits the real deal. Now if I only had a booth with heat! Maybe play with some waterbased dyes until temps warm up around here.
Cheers GPP
-
Thanks again for the info. My CAT gun worked great for a while but got "leaky" in a short period of time. I bought a rebuild kit for it and it fixed one of the leaks for only about 4 spraying sessions. But the biggest problem is the gun drips from the nozzle tip. Only a new needle will fix that. The needle had become deformed just from the pressure of the spring pushing it into the nozzle when the gun is "at rest.". The needles on these things must be very soft as it has done this to all 3 needles that came with the gun. Needless to say I was pissed and expected more from $150 gun.
My $10 Harbor Freight gun has held up better than the CAT. The HF gun does not produce as good of spray pattern as the CAT but at least I can spray bodies horizontal and not have to worry about paint dripping on to the guitar. Sorry for the off topic rant -
I will check out the Iwata. I want to stay with a mini HVLP rather than a "big boy" gun for the very reason you stated.
-
syxxstring - thanks for the brief tutorial. That is very helpful! I have never sprayed anything but nitro, but I am intrigued by the idea of trying the HOK poly. I have a CAT mini HVLP gun with 3 different tip sizes (not very happy with it BTW - kicking myself for not going with a SATA or other high end gun, but that is another story) so that would probably suffice for applying the finish. In terms of final finishing effort, i.e., wet sanding and buffing, how does the HOK poly compare to nitro? Can you suggest any good suppliers of the HOK finishes to check out? Thanks again.
-
It should not be a problem. I just put a 0.09" ebony backstrap on a slightly larger radius without a problem. I just wiped the wood with a damp cloth, folded a piece of tin foil over the wood, and heated it for a short period with a clothes iron. Once the piece was hot from the steam, I quickly glued and clamped with a shaped caul as you have mentioned. Left it clamped for 4 days as a precaution and it came out fine. Good luck!
-
See David Myka's tute in the reference section.
I've done it twice with good results. I've never tried the spray can over a template method because the dyeing techniques a la Myka & Roger Siminoff are straight forward & fun.
fanlee - I have read David's tutorial and I also have the Siminoff book. I guess my real question is how do you best obtain the color combinations in the picture. When I use a color wheel determine the resulting color combinations I come up with the following: lay down the yellow 1st, then red. it looks like you have to shoot A LOT of red to get back to a very red color (yellow + red = orange). Then if you shoot blue over the red you will get the violet edge.
I may be making this more complicated than need be, but another option, I guess, would be 1st laying down the yellow then mix a batch of clear lacquer with varying amounts blue toner and red toner to get the proper shade of purple and shoot the burst in this manner. Guess I will experiment when it warms up some (it was -20 F here this week!).
Any and all suggestions are welcomed finishers!
-
I am currently working on an LP style guitar for my daughter. I understand how burst finishes can be done, but this color scheme is what I am after and I am not sure what would be the best way to proceed. The top is a nice light colored curly maple. I am worried the transition from the purple to the reddish hue will be some weird color. I am sure it will take some experimenting, but any advice on color selection, blending, sequence, etc., would be appreciated!
Cheers - Greg

-
Just my 2 cents here. I finished my first bass with the wipe on Minwax poly. It is reasonably durable and as stated before, has a nice satin "sheen." I applied 8 thin coats and nothing else.
-
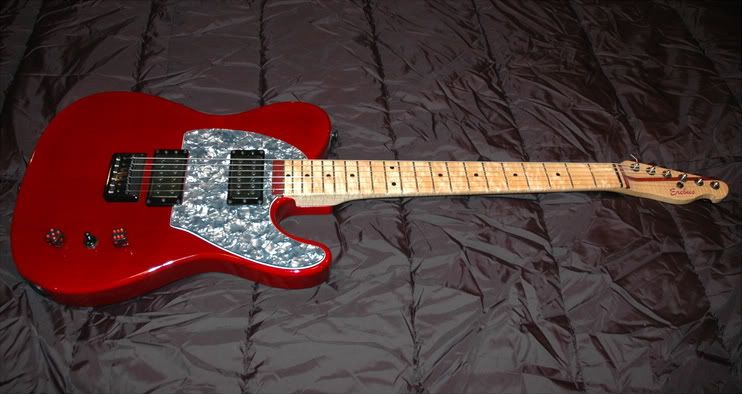
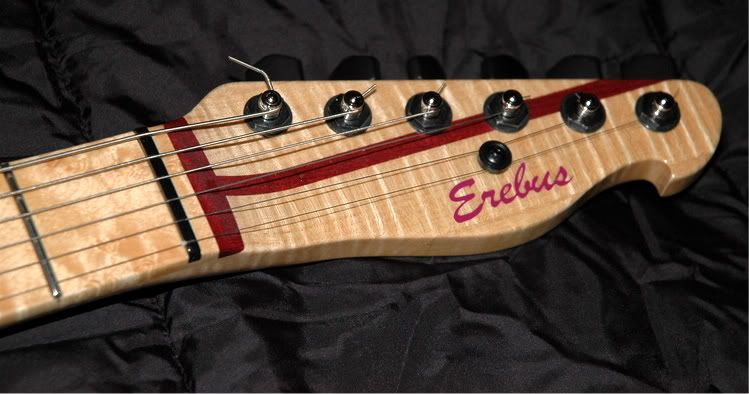
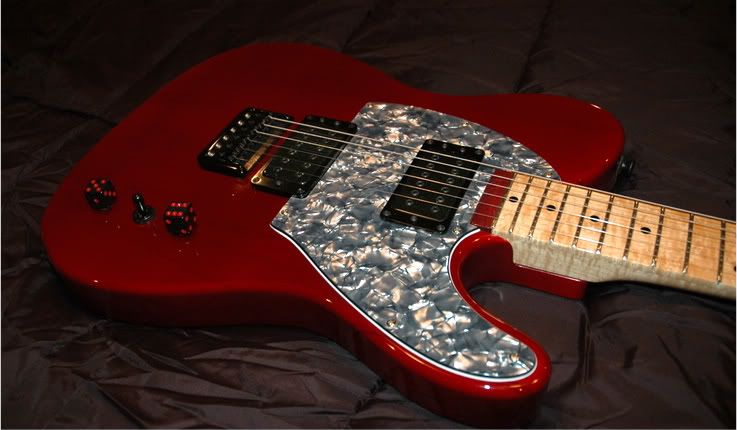
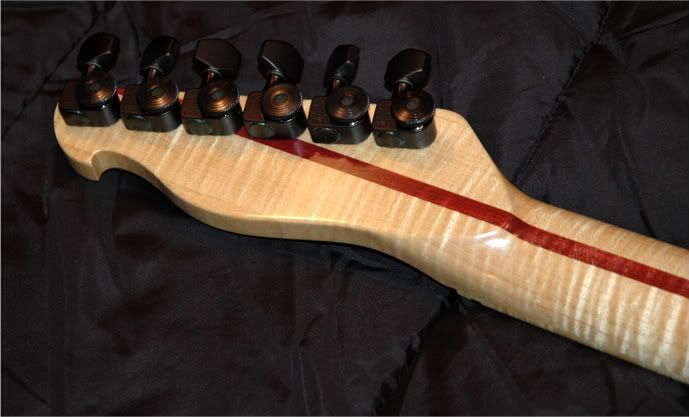
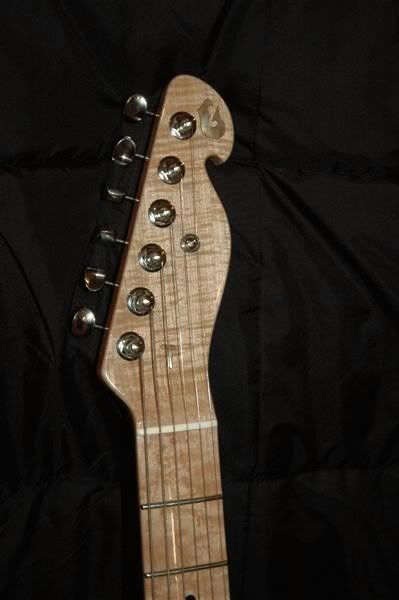
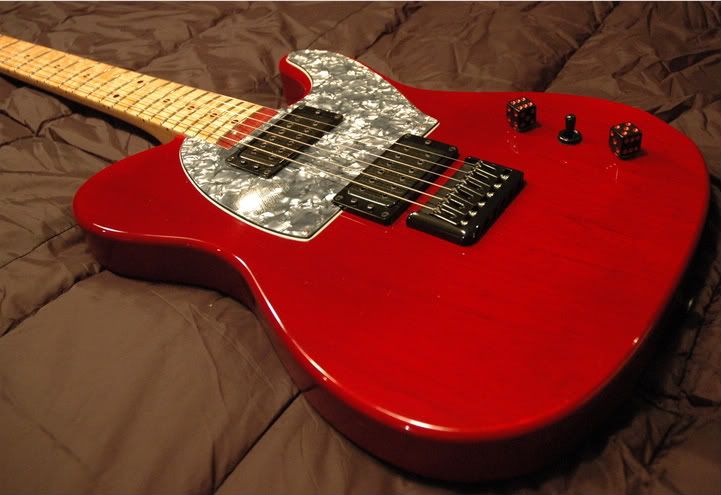
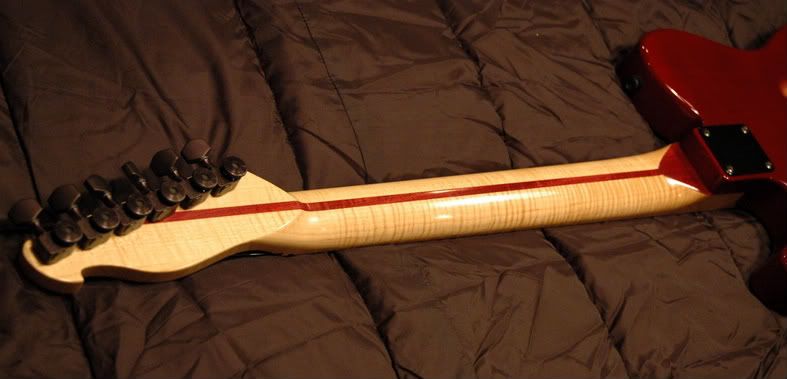
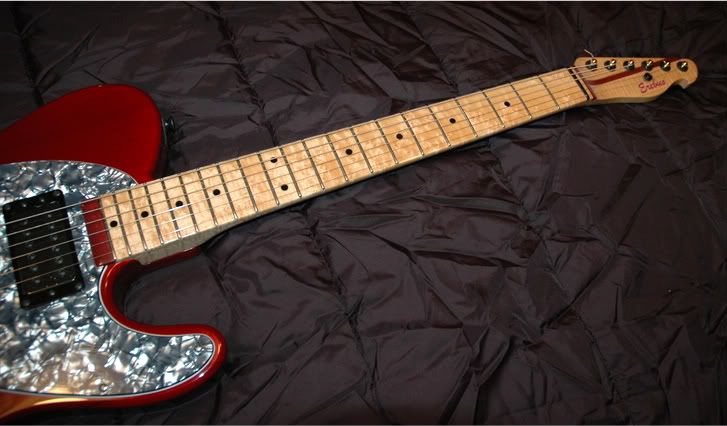
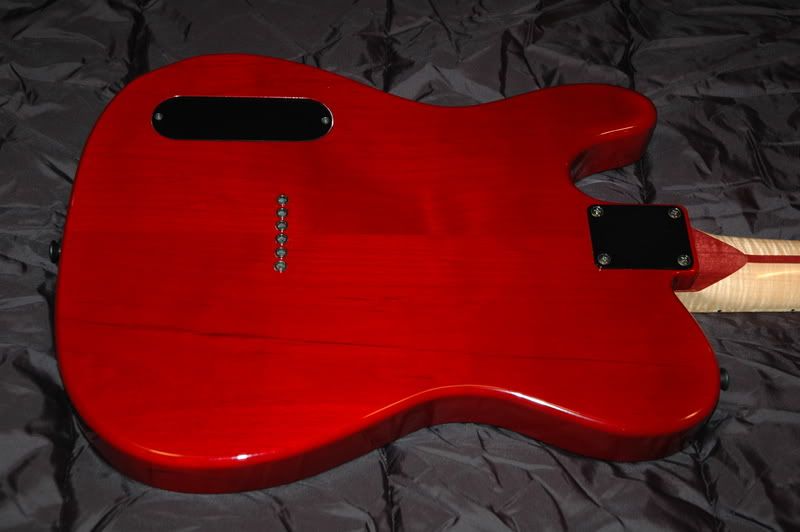
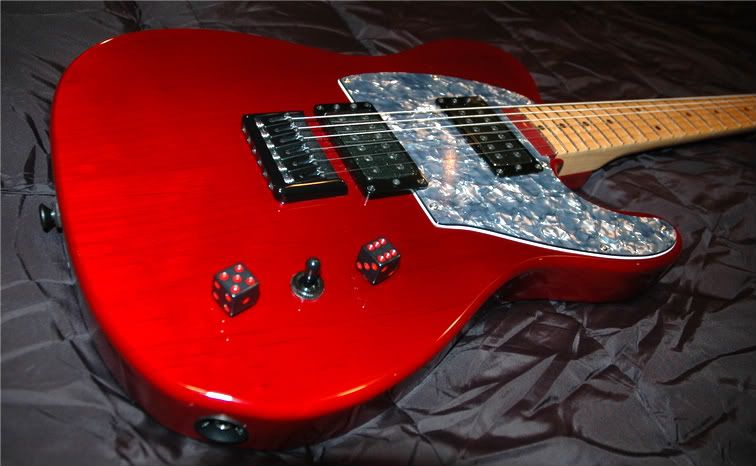
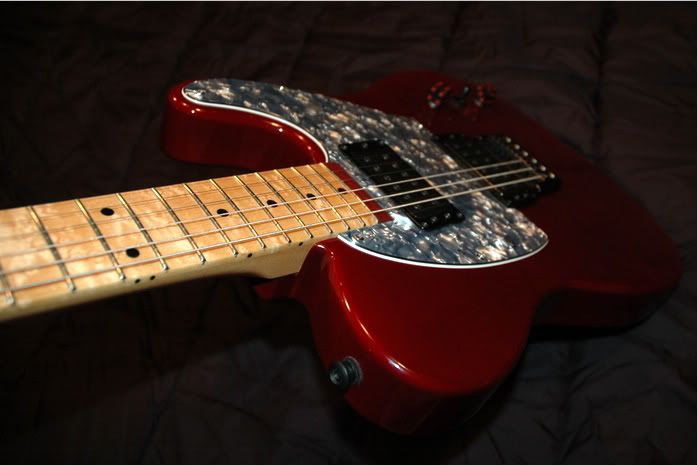
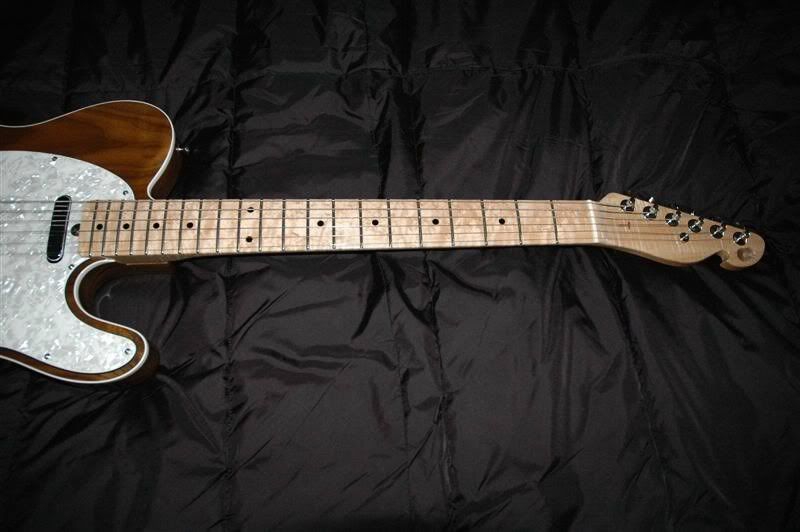
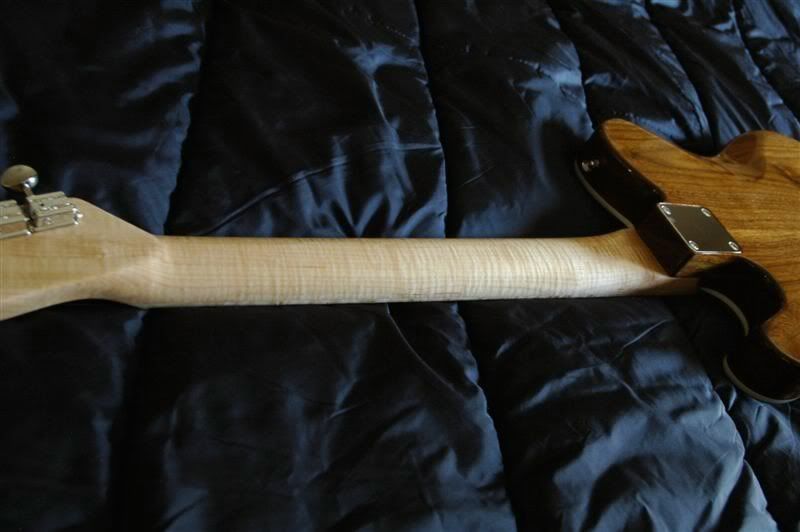
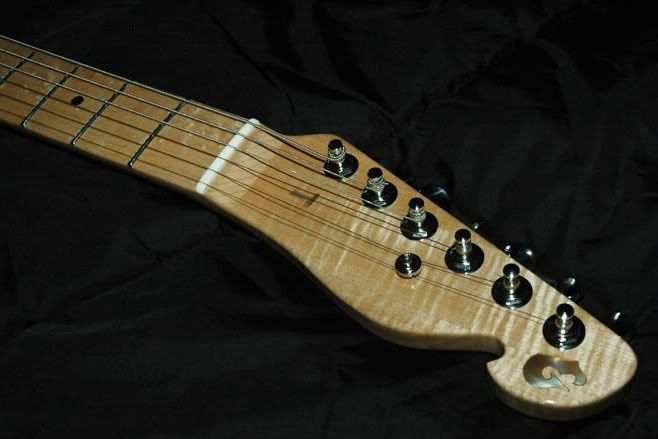
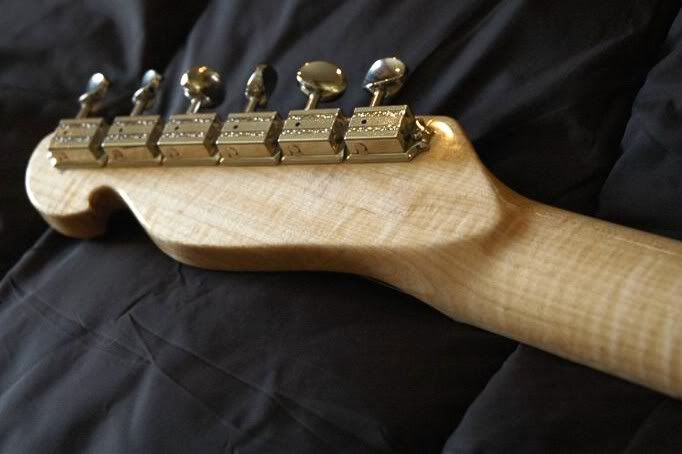
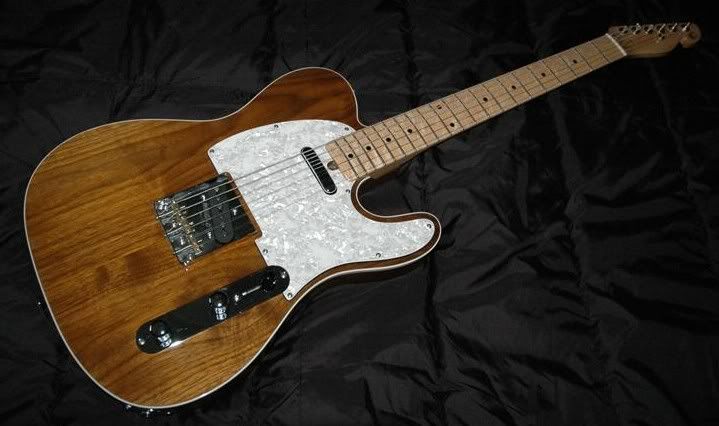
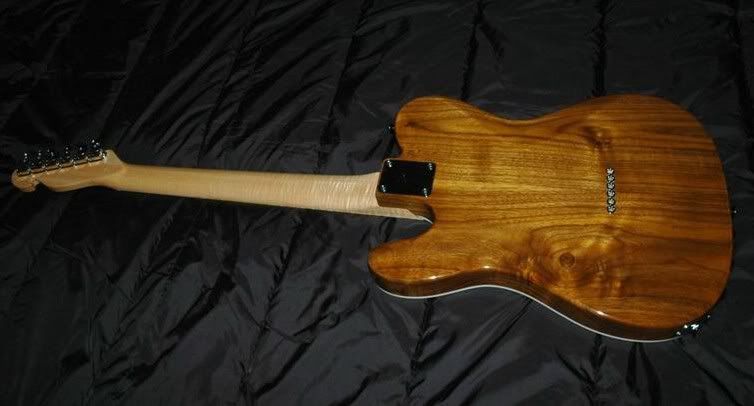
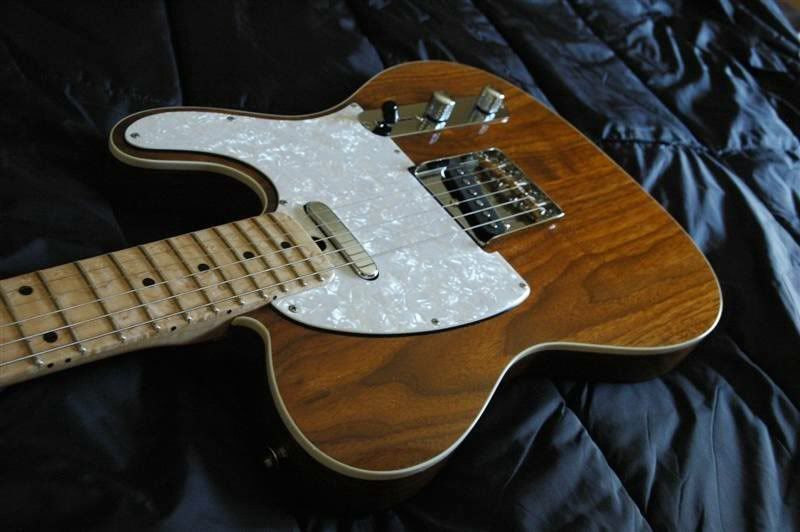
Erebus model "T" - It has been a while since I entered a guitar, so here goes. This is your basic tele made from walnut and maple. In keeping with a"green/sustainablility" theme, the body is from a plank of wood found in an old military building that was slated for demolition. It had a few knots, but I was able to work around most of them, the main one lying directly under the control cavity. Here are the specs:
3 piece curly maple neck w/ birdseye maple fretboard
American walnut 2 piece body
Grover tuners
Wilkinson compensated tele bridge
GHS pups
Gold pearl headstock inlays
Golden orange shellac finish with clear nitro clear coat over the shellac.
 out
outGreg
Here are a few more pics:
-
I would have thought using a radius block was a much better method for keeping everything uniform?
The problem with using a radius block is that...you will end up taking noticeably more material off the ends (ie: the frets will be taller in the center).
This happens because it is difficult to keep the block perfectly parallel to the centerline at all times. Radius blocks are fine for putting a rough radius on, but to get things nice and level you need something perfectly flat and use it to sand parallel to the strings.
I currently use a 12" x 4" piece of polished marble sliced from a marble bathroom tile, but I'm looking for a larger tile to use on basses. I actually round the edges and use it with the strings on to mill in the fallaway under string tension (poor-man's Plek).
Erik,
You lost me on the polished marble. How do you get the strings high enough to get such a thick leveler under them? I used a piece of angle-aluminum with sandpaper slipped under the strings on my last neck (ala Rick Turner). Works well.
-
They work great. I use 1/8" diameter ones. On this LP Jr I epoxied in a total of 4 - two in the body and two in the control cover. Just make sure the poles of the magnets are oriented correctly (like I didn't the first time
) otherwise your cover will be trying to pop out. I will probably never use screws again.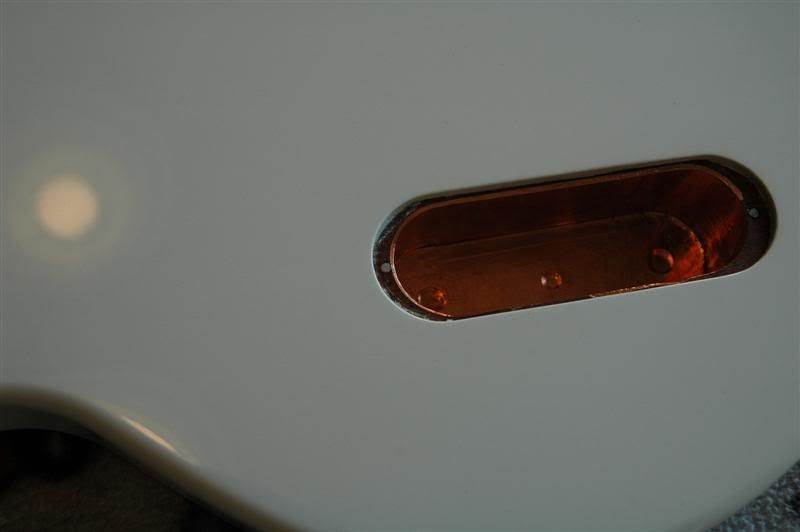
-
There is not a drawing for the single-cut LP Jr. But you can approximate from the LP standard drawing (which is on this site I believe, as Mick said) by adding a 1/4" to the cutaway. Can't explain it well, but the neck pocket stands a quarter of an inch proud of the treble side of the neck on the Jr.
-
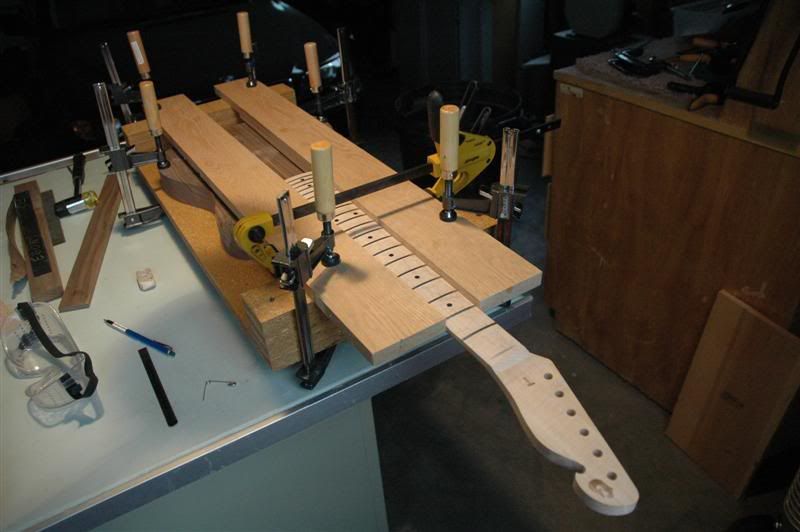
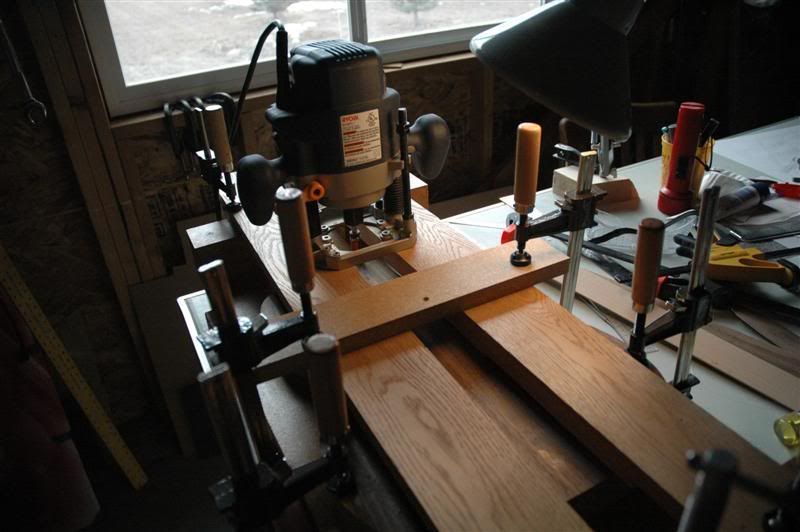
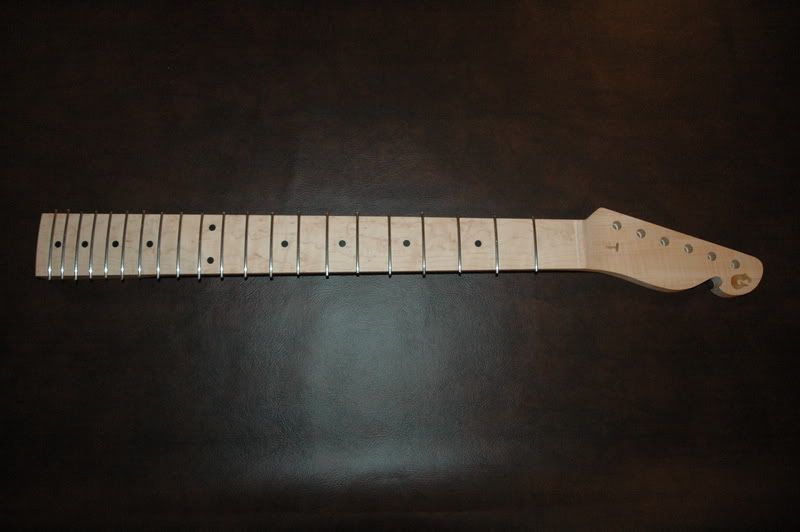
Today's pictures:
Thought I would start with a pic of where this build is at currently. Then the links to the few steps to get here.

Beveling the frets flush click
Begin setting up Myka's neck pocket jig (this was put together quickly as a prototype - I have not yet gotten around to making a nicer, more easily adjustable one). click
Clamping it in click
Laser level to align neck with centerline on body (I also use fishing line as a double check). click
Ready to route. click
Closeup before routing. click
Neck pocket route complete. Took cuts of about 1/8" at a time until final depth reached. click
Ready for the moment of truth. click
Ahh, fits like a glove. click
Well that comprises working on this for the last several weekends. Progress pics will probably be coming along at longer intervals. Until then, frequently wrong but seldom uncertain.
G
-
Thanks for the feedback guys. Good idea on the pdf Xanthus. I will put one together when this one is all done and make it available. It won't be a book like Erik's though - his is fantastic!
Looks Great Greg,
BTW I see you have the Dewalt scroll saw? Is it the model with parallel arm action like the variable speed DW788? If so, those are so smooth running that I have found you can use your Inlay blades in it. I tried my friends out and man was it cool.
Use a 1/8" backer for the inlay material and glue it to the backer using contac cement. Make the backer oversize so you have something to hold. when done use some acetone to remove the inlay from the backer piece. Just something I have tried and seems to work fine. Now if I can only get the routing part on such a small scale to work for me

Mike
Mike, thanks for the pearl inlay tip. I will have to try that next time I do some cutting. It will definately help eliminate the nice little grooves I always saw into my fingernails holding the workpiece
The scroll saw is a DeWalt DW788. It is a great saw. I use it mainly for headstocks and used it once to cut a body before I got a band saw. Definately a luxury to do tight cuts like this: bass "scroll."
I will have to give it a try with some very fine blades sometime. I once tried cutting a pearl piece with it using a blade that was far too stout for that kind of detail. The blade bound in the pearl and yanked the workpiece out of my hand in a blink - a very bone-headed move on my part.
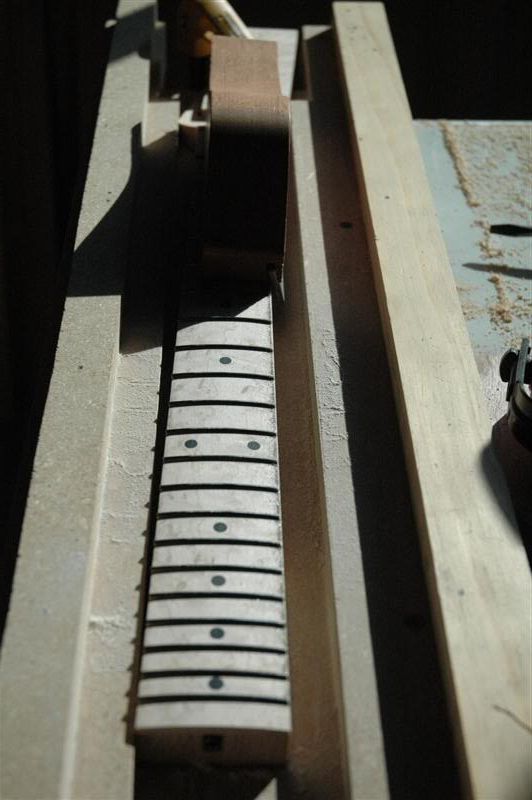
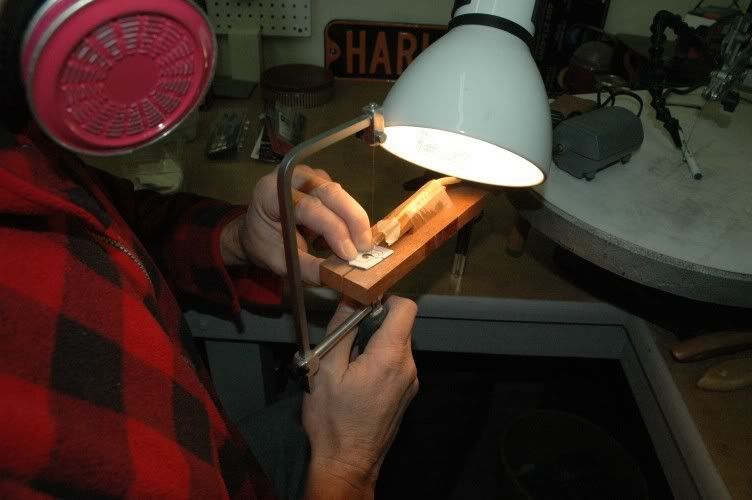
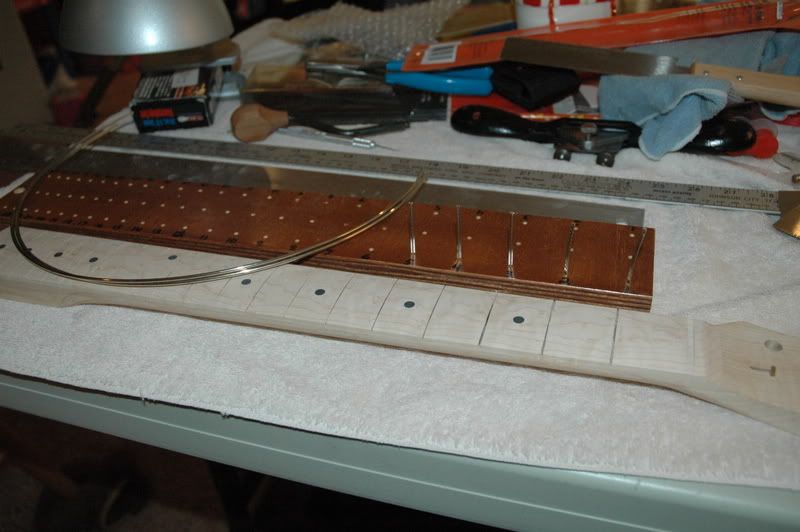
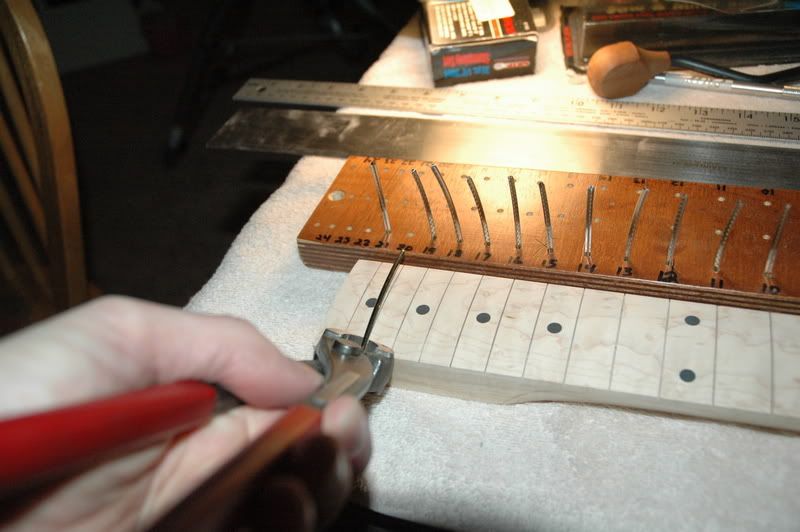
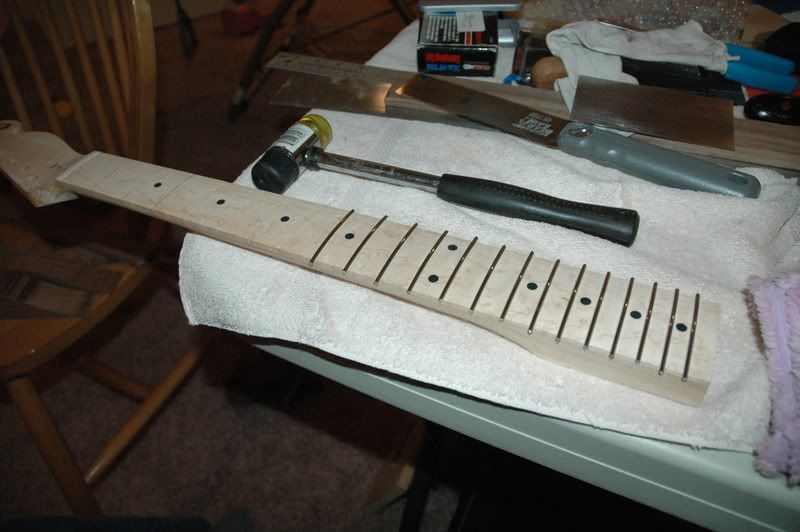
Fortunately I didn't catch my fingers in the blade but haven't tried cutting any pearl with it since that episode.Here are a few more progress pics on the tele. First pic is of the fretwire bender I built using Jay5's plans. Less than $10 invested and it works great. The metal plate is a sandwich of three pieces of galvanized lawn edging epoxied together.
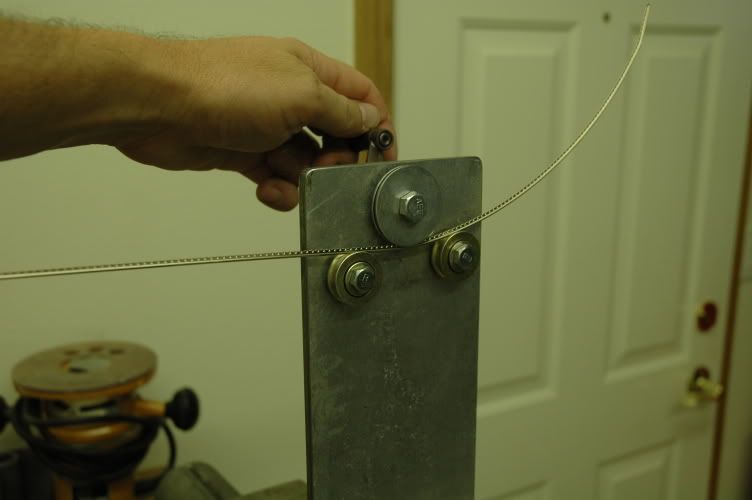
Radiused fretwire holder click
Cutting the wire lengths click
Pressing in frets. Using a Stewmac 7.25" radius caul held with the arbor made from Jay5's plans again and a Harbor Fright Arbor press. About $40 total investment (love to save money where I can) click
Here is an idea I would like to throw out. Has anybody tried mounting a torque wrench (the type that clicks when you reach your set torque) to their arbor press to try and ensure a consistent pressure on each fret that is being pressed in? I know there are variables such as the density and hardness variations you will see in the same piece of wood, so there may be instances where the fret does not seat all the way and requires additional torque, but I am thinking of testing this idea on the next neck I fret.
Getting there click
Fretted neck ready to be trimmed with the end cutter click
That's it for today! Cheers - G


.jpg.b17ab70307948aebb3494385ea3e6fc5.jpg)
.jpg.23ca590d9600f9fb44ad5d2e519e0a05.jpg)
 out
out
"Fish On" Fretless Bass Project
in In Progress and Finished Work
Posted
Just beautiful! Being a huge Carl Thompson / Les Claypool fan, I appreciate the "tribute" aspect of your design, but you throw in just enough of your own enhancements/ideas to make the basses truly "yours." Great work!