beltjones
-
Posts
146 -
Joined
-
Last visited
-
Days Won
6
Content Type
Profiles
News and Information
Tutorials
Product Reviews
Supplier Listings
Articles
Guitar Of The Month
Links and Resources
Forums
Gallery
Downloads
Posts posted by beltjones
-
-
Looks amazing, man. Totally inspiring.
-
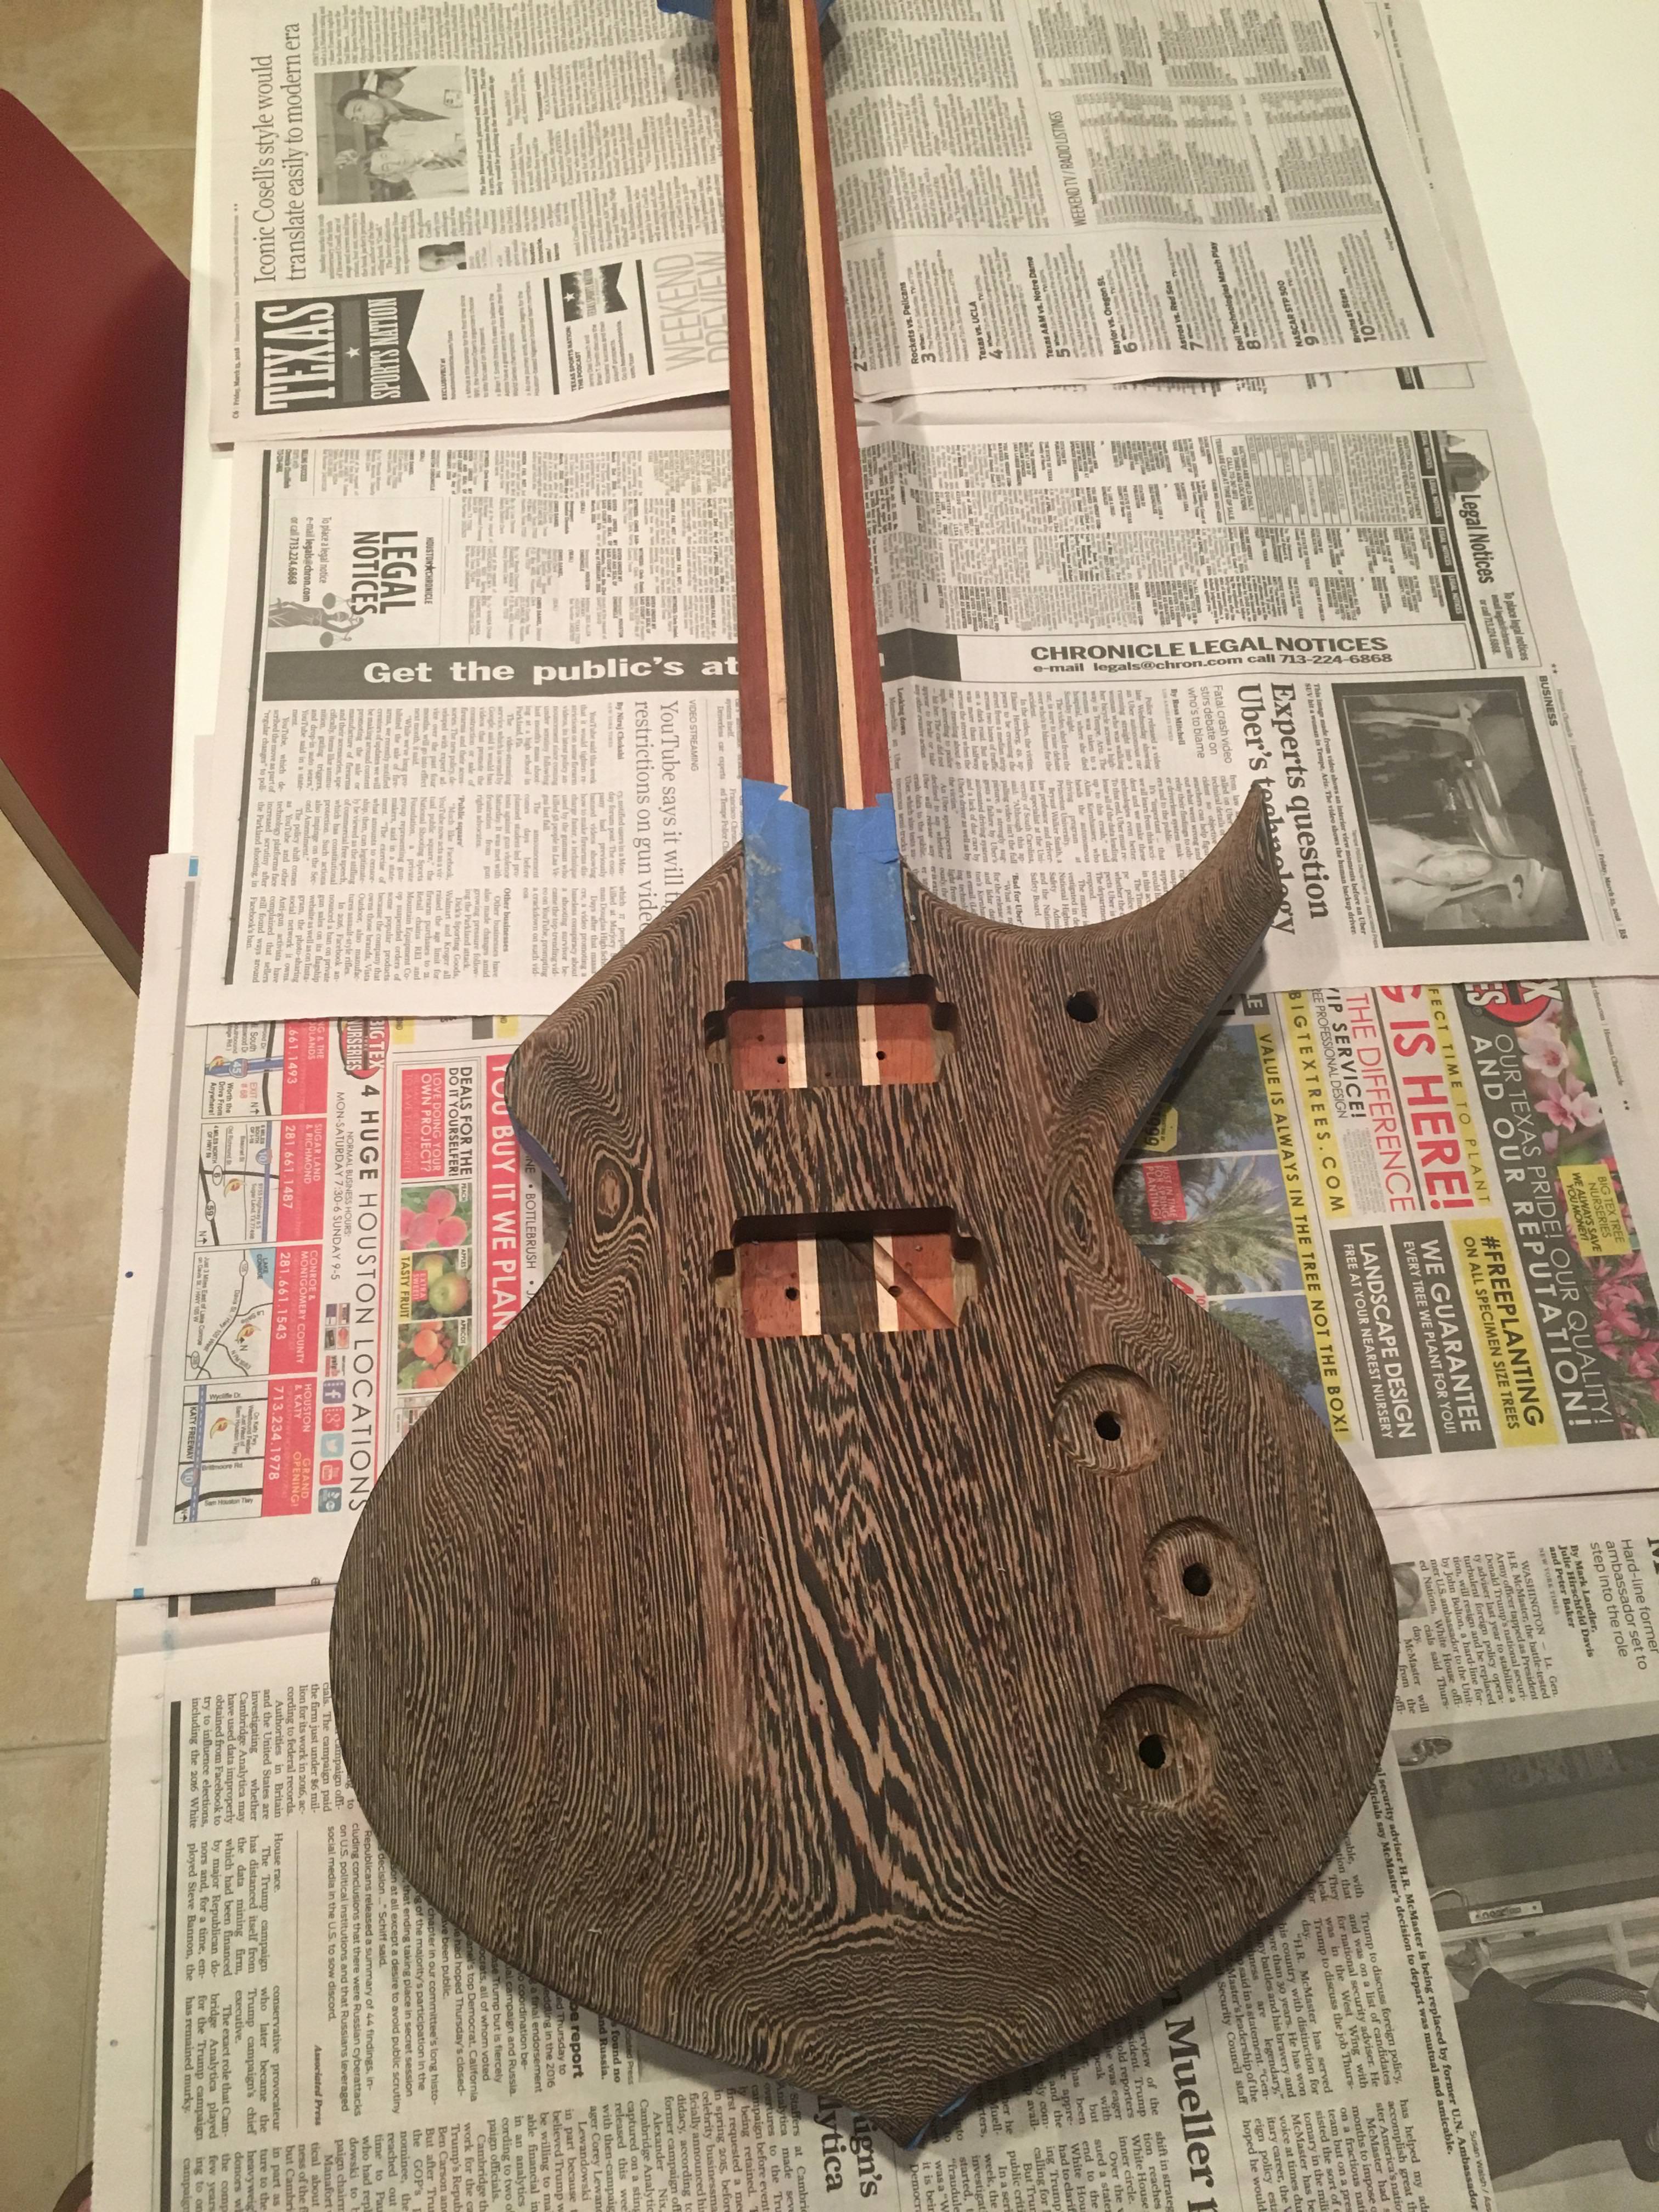
Not much progress today, just reamed the holes for the switch and pots and applied the first application of the wood bleach.
The instructions on the bleach say to let it stand overnight to dry, which I'm going to interpret as 12 hours of drying time between applications. I'll do another application tomorrow morning and possibly a third tomorrow night. Once I'm finished with the bleaching process I'm supposed to neutralize the chemicals with some vinegar diluted with water. Once that's dry, probably Sunday morning, I'm going to glue the fretboard to the neck. -
6 hours ago, curtisa said:
If you go down the latter path, just be sure that you've got enough meat underneath the top so that you don't accidentally punch through the bottom edge of the control cavity where the top has been carved down to meet the edge of the body. The last thing you want to do is have an unintentional ventilation slot in the front of the wenge underneath the controls.
That never occurred to me. I routed it last night and got lucky, apparently. I hope there isn't some paper-thin area, I'll have to check it thoroughly.
I got lucky a second time as well. I couldn't route deep enough in the switch cavity, so I had to finish with the forstner bit. I've used forstner bits a bunch of times, and I even used one to hog out material from the pickup cavities, so I've used a forstner bit on wenge. Well, something about the grain pattern on the wood in the switch cavity made it so I applied almost no pressure but the bit dug in and pulled itself through the wood at an incredible rate. I released the trigger on the drill immediately but still drilled about 1/4" into the wood in about a half a second.
-
Ok, I made the recesses a little wider and deeper, and fixed a wee bit of off-centeredness in the middle position.

Next I need to reduce the thickness of the top to about .300" in the control cavities. Right now it's about .5" in the control cavity and about .7" in the switch cavity. I can either use a forstner bit at each pot/switch position, or I can route the whole cavity down to the correct thickness.
Using a forstner bit would be fast and easy, but routing the whole cavity would make for a little reduction in weight, which would be nice. -
Ok, so the dipshit on Amazon who sold me the bad template replaced it with one he said was good, with correct center lines.
So I did a simple test - if the center lines are true, then I should be able to lay out the template on a cross and outline it, and then flip it around and outline it again, and basically trace over the same line.
Here is the original: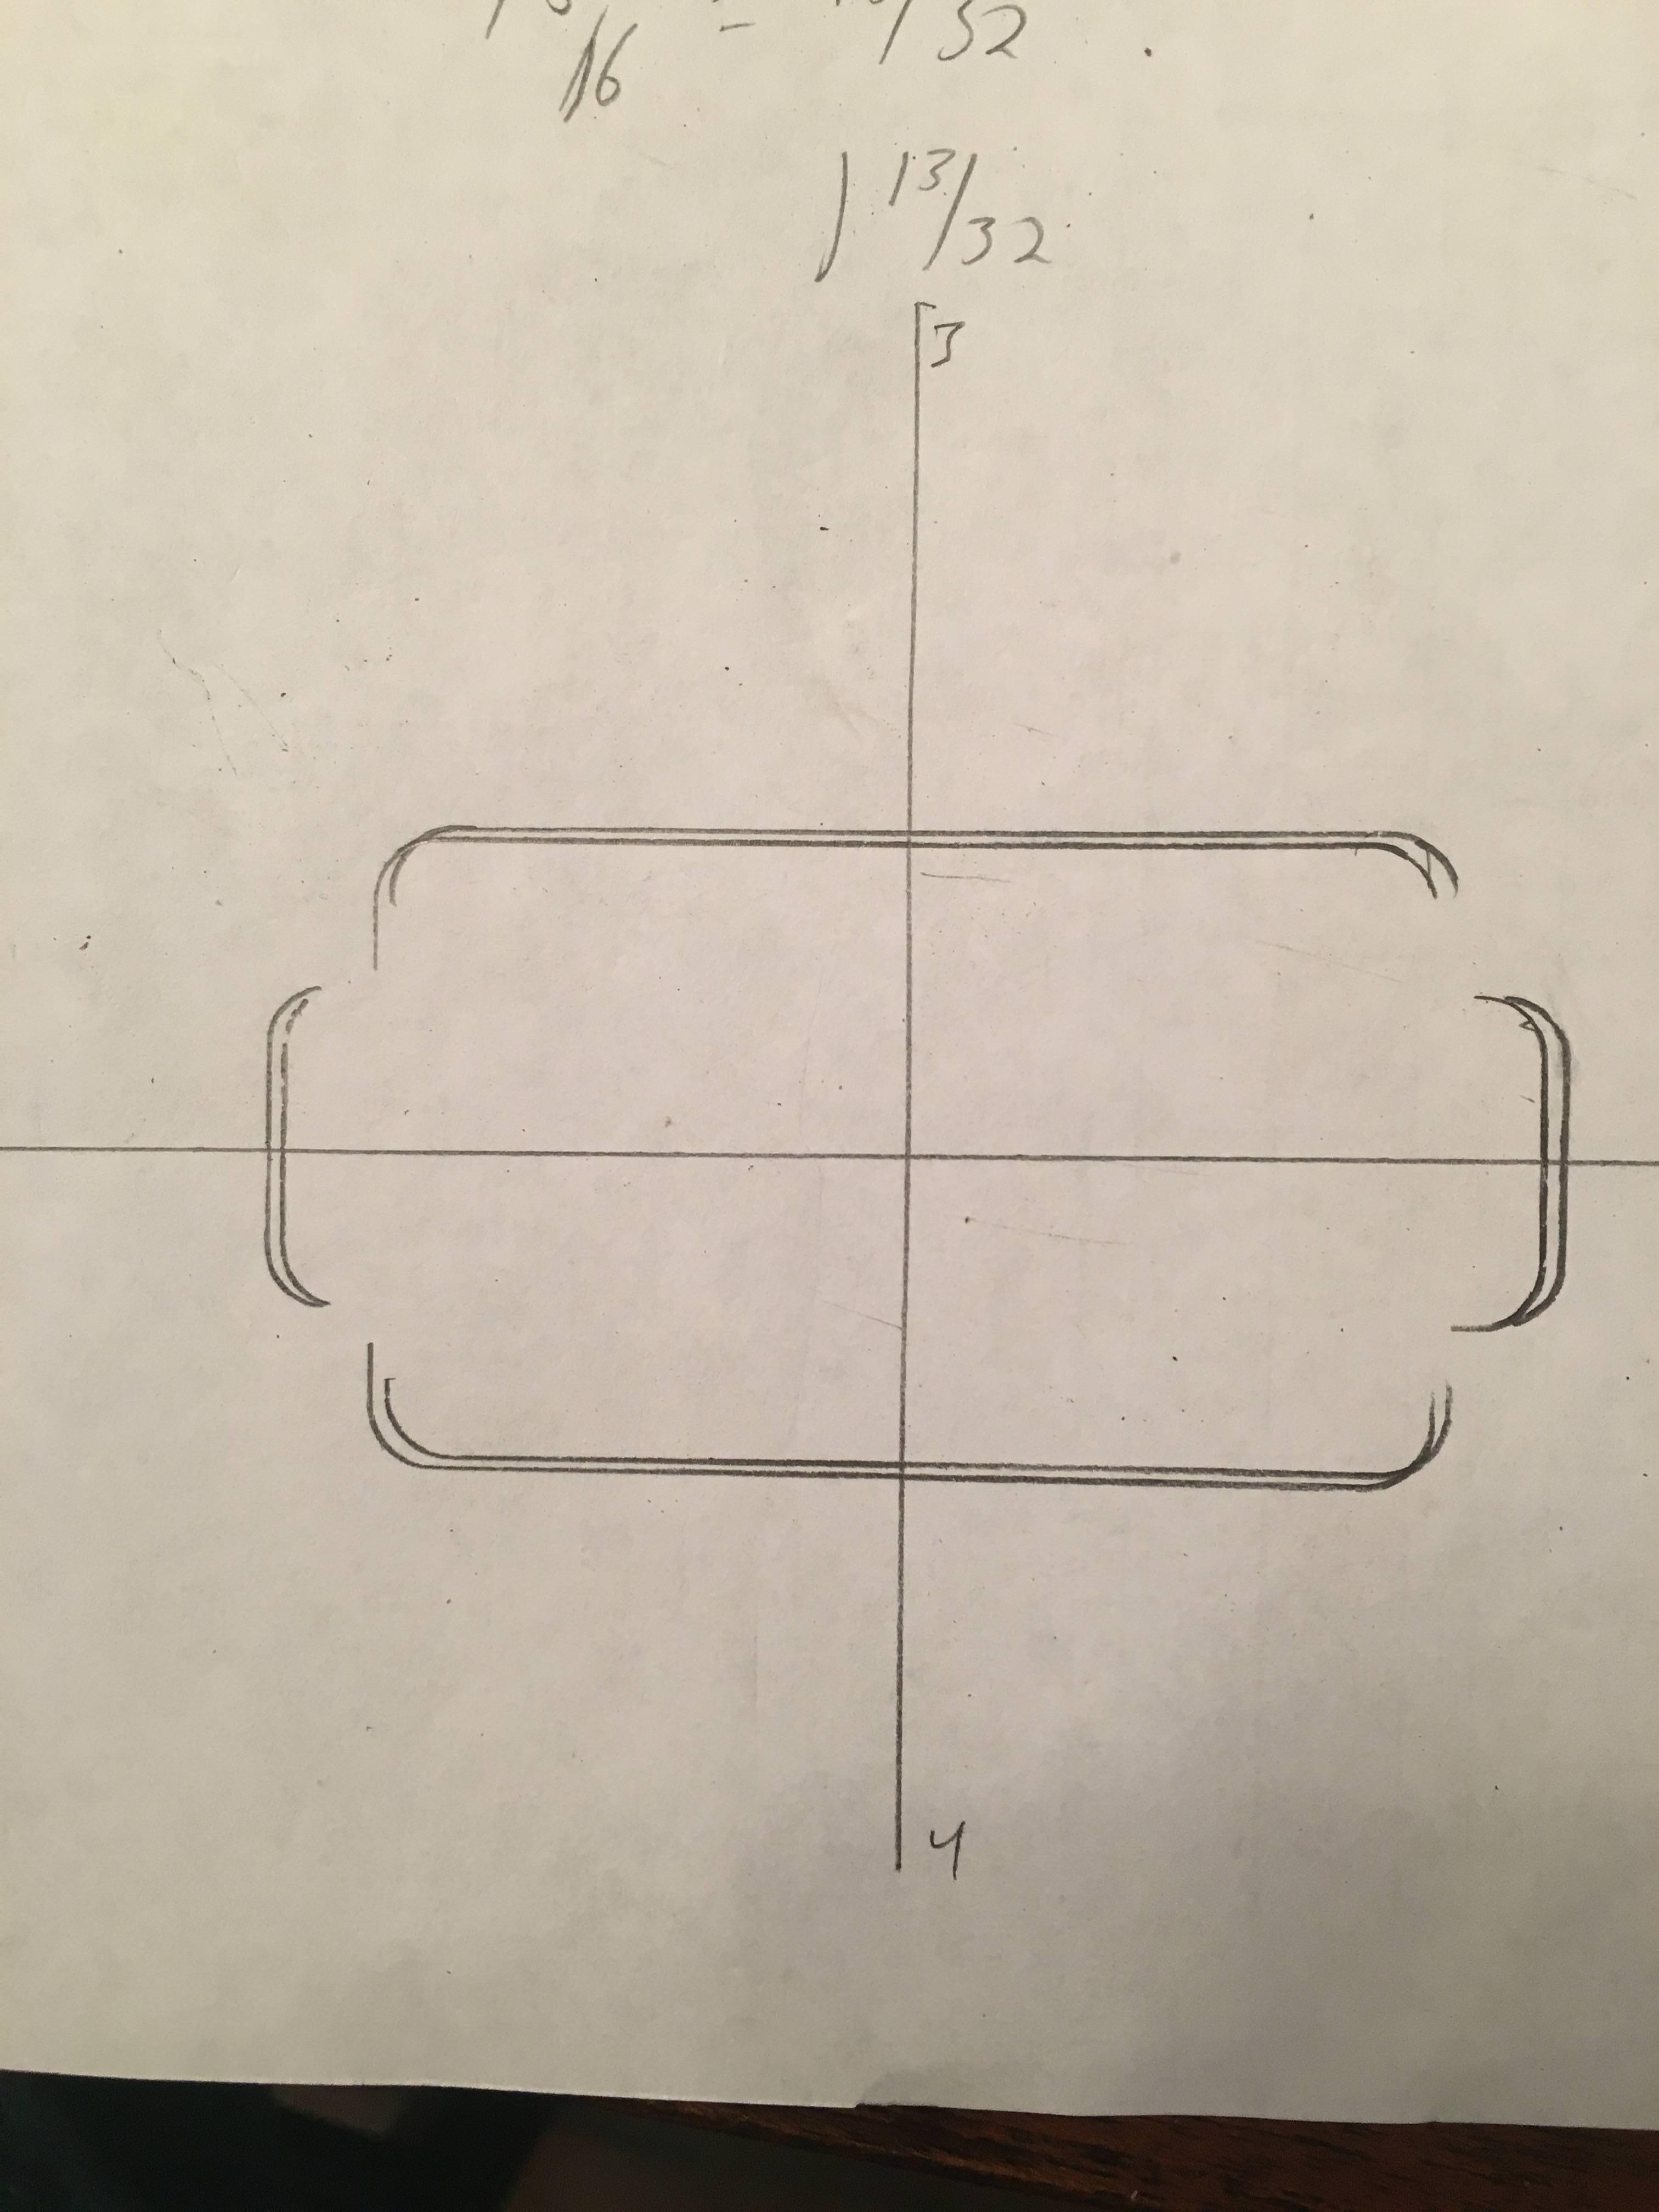
Here is the replacement: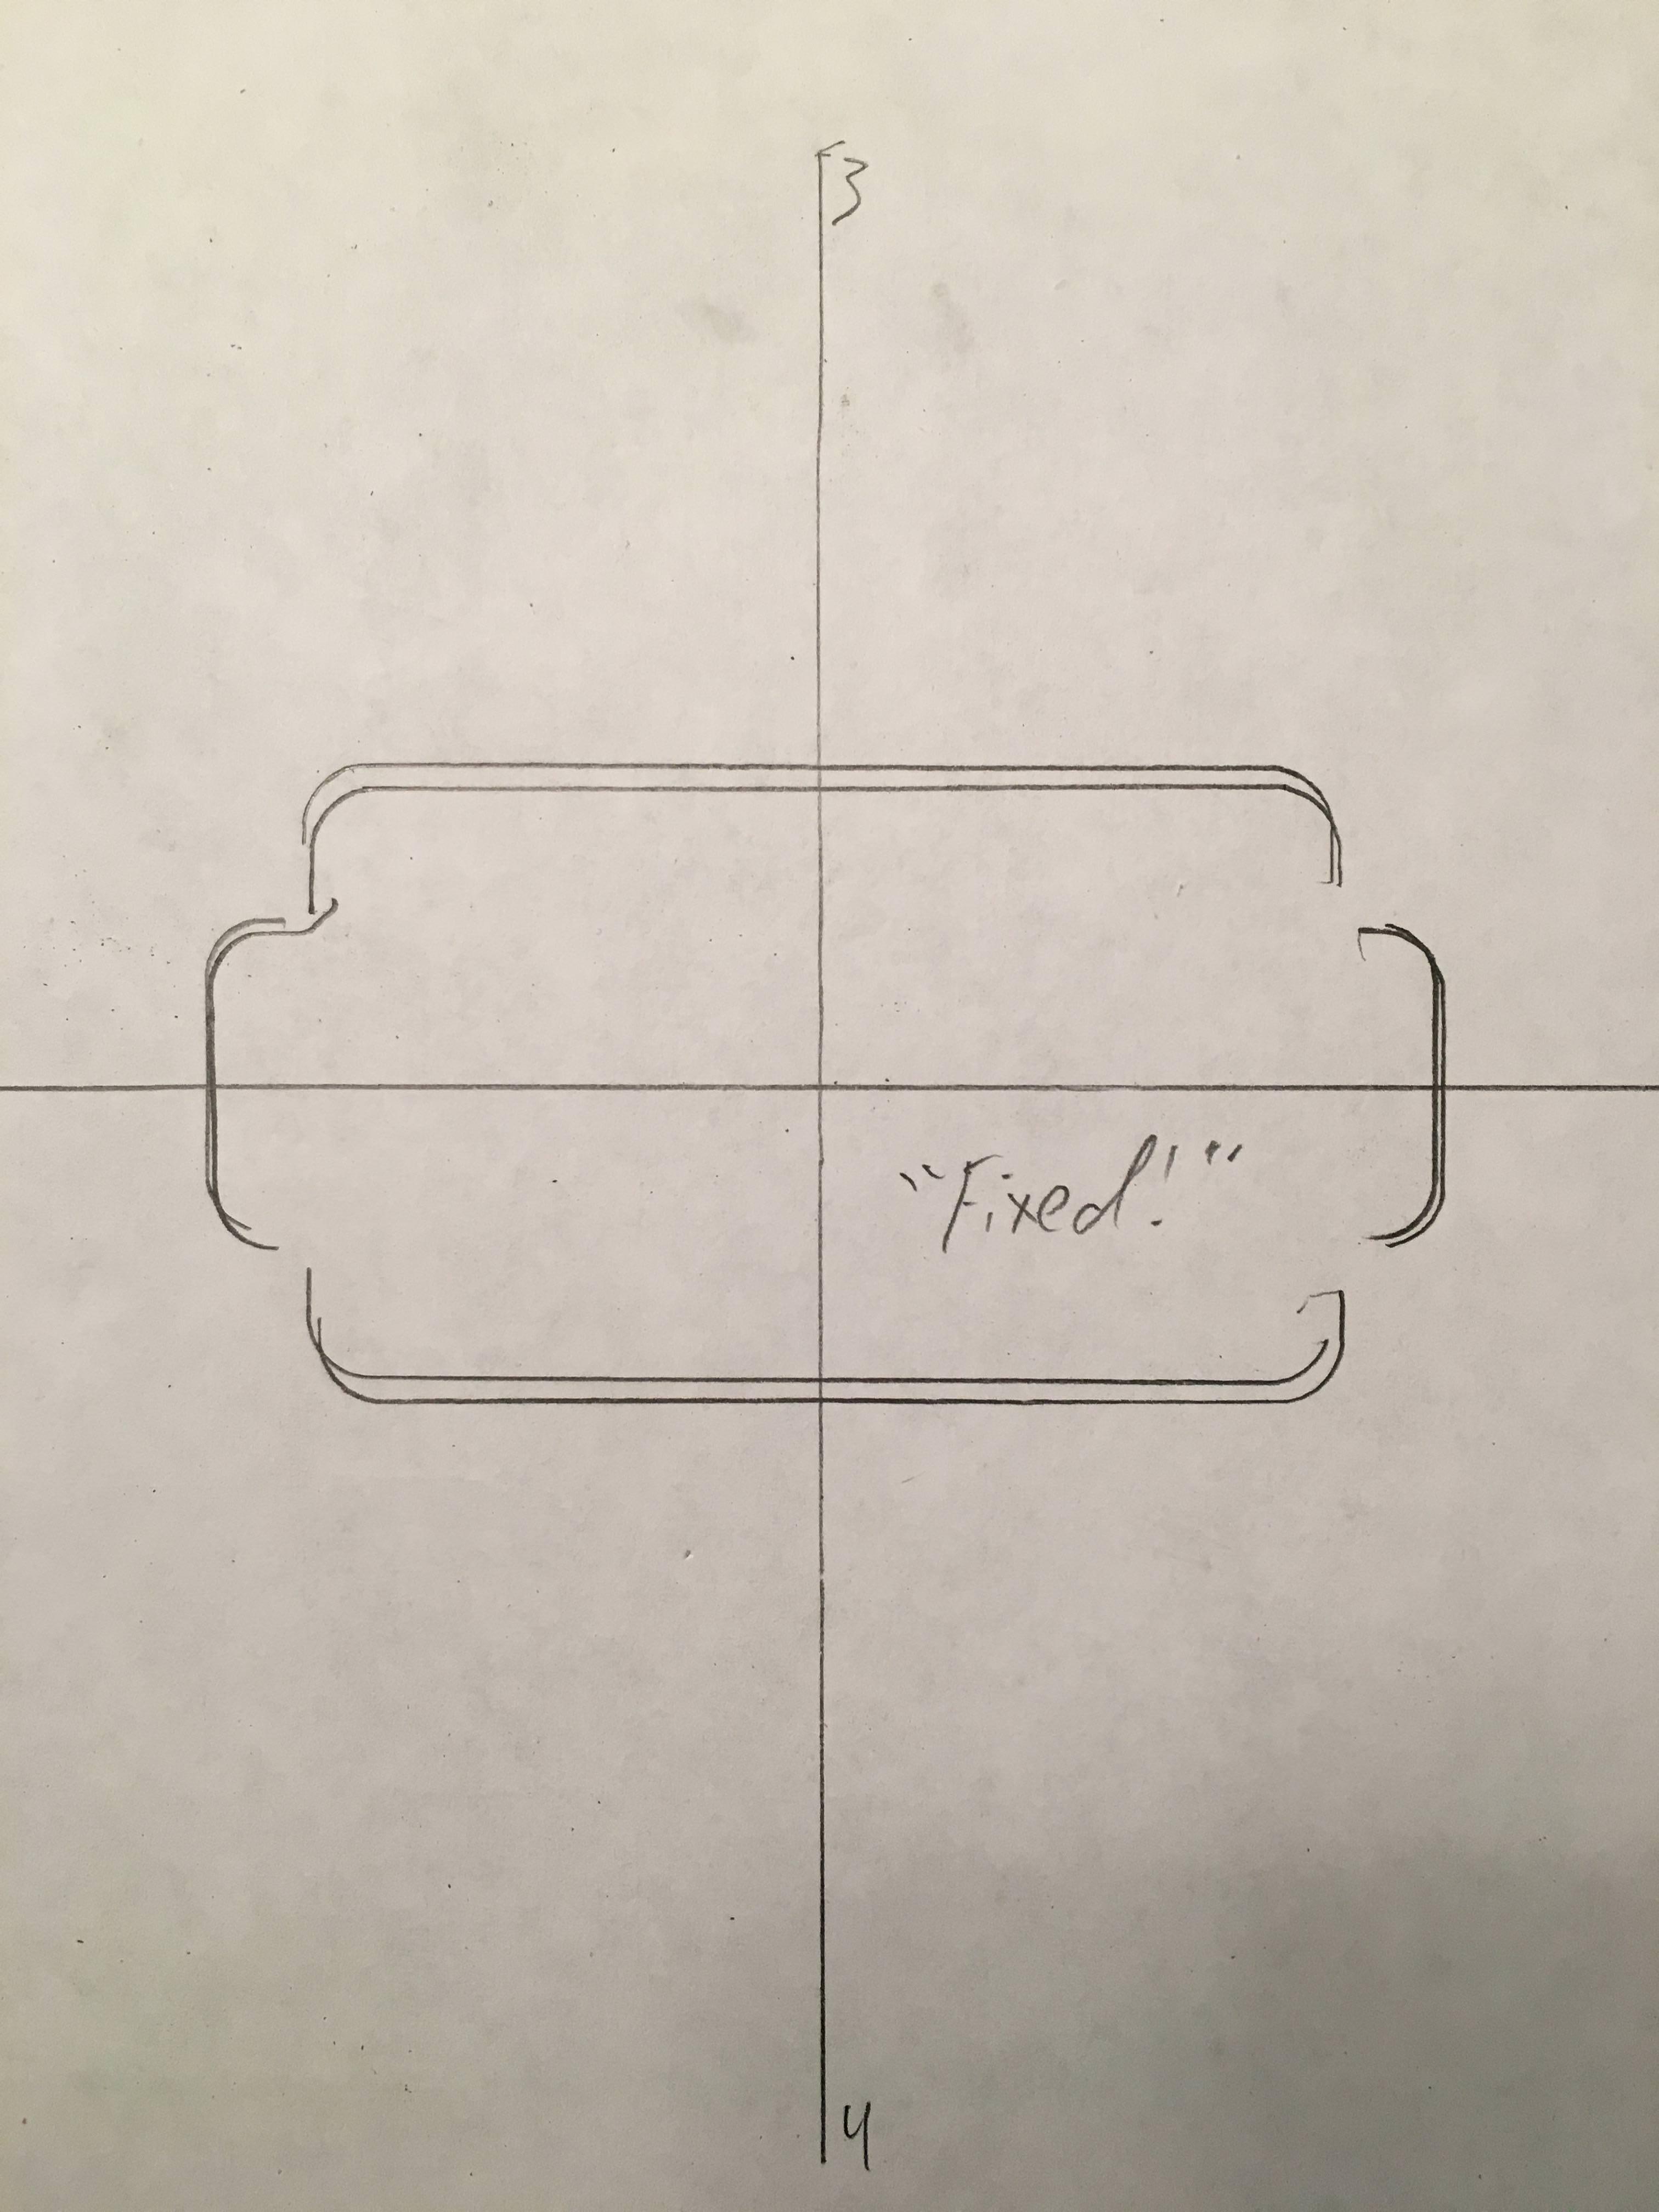
And here is what I did today - I'm trying to do PRS-style recessed knobs, but I think I need to do it again with a slightly wider and deeper route.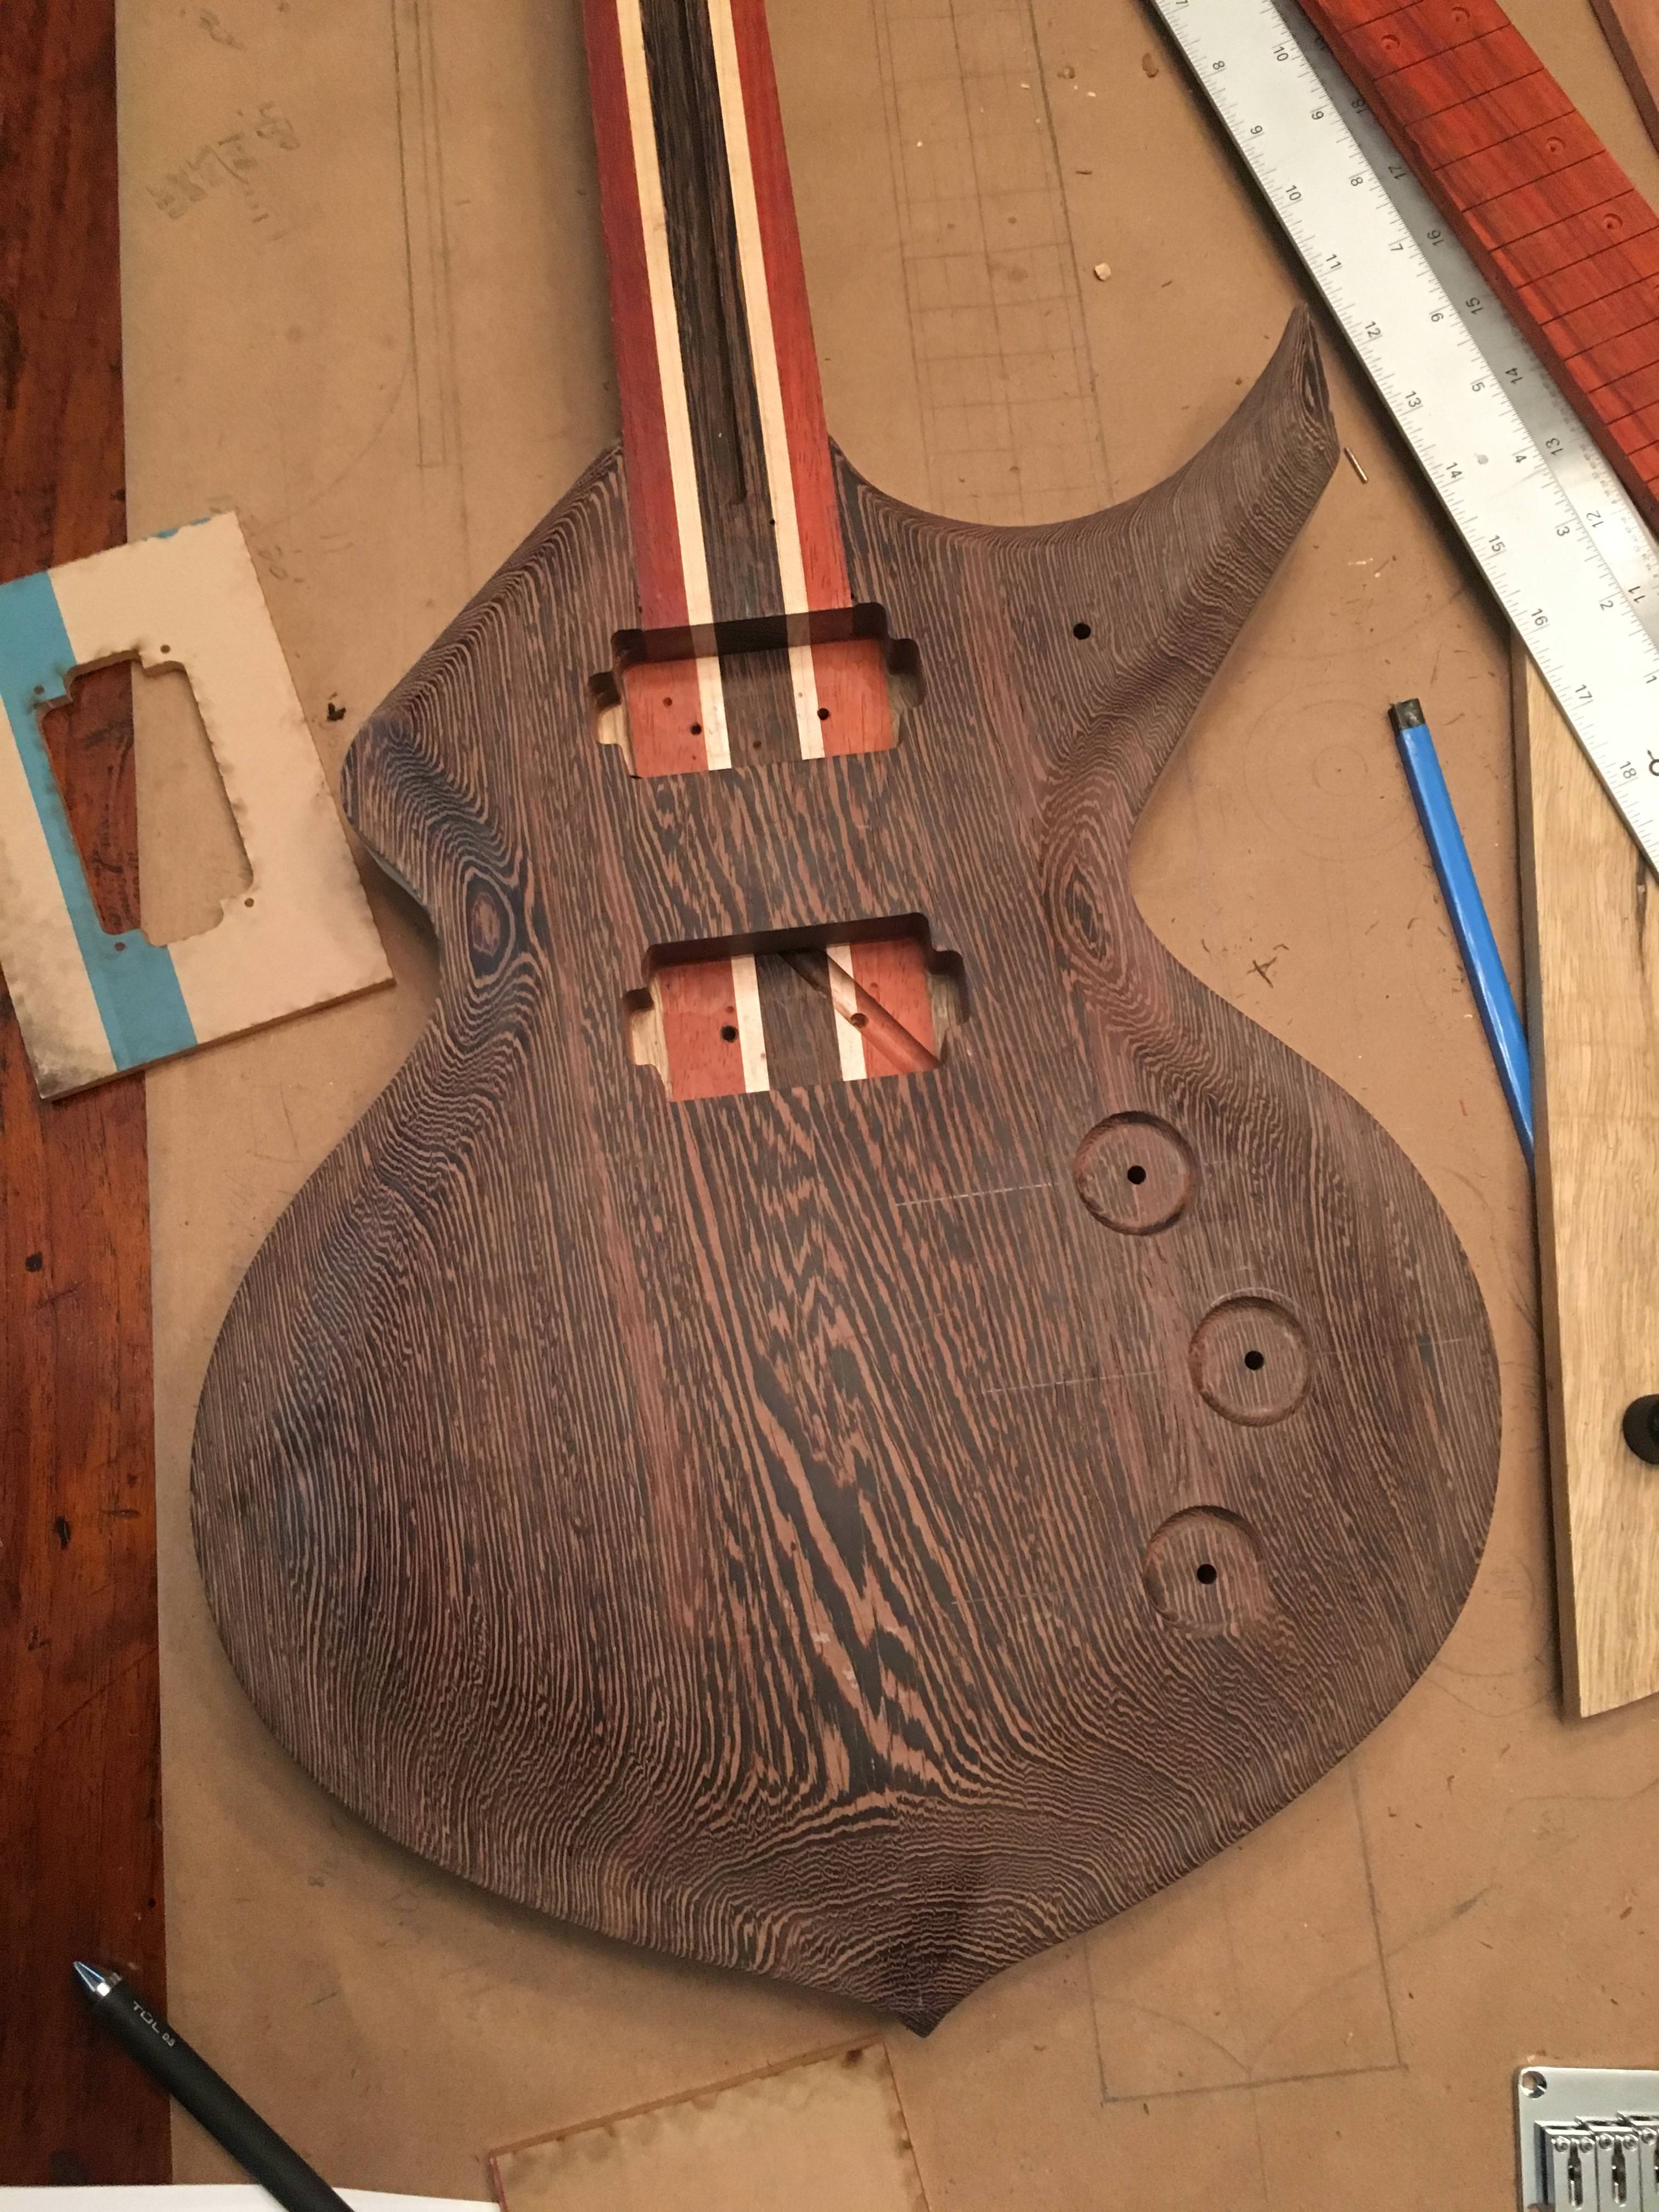
-
1 hour ago, ScottR said:
Yeah, I figured that...and I love the way the zigzags in the middle come together. Unless the grain is running at crazy angles, wenge doesn't gain much from book matching. Doing what you did is often more interesting. I've done several book matched tops and then erase the effect on the bottom six inches with a deep carve. You, on the other hand, didn't book match and then you carve it and the carved parts looks book matched.

SR
As my father always told me, it's better to be lucky than good.
-
1 minute ago, ScottR said:
It's interesting how the wenge top does not look particularly book-matched along the glue line--until you get to the bottom where you carved it down to that point, where it looks quite book-matched.
Usually it's the other way around.
SR
That's probably because it's not book matched - I bought a ~3.5' board and cut it in half.
-
Never mind. Sort of like how Tolkein said, "The tale grew in the telling," this guitar is growing more complicated in the building.
I'm going to do some PRS-style recessed knobs, which means I get to use my favorite tool again - the router.
-
Ok, phase 1 of the carve is complete.

I kind of like how steep the carve is at the waist of the guitar, but I want it to be a lot more gradual at the belly. I think I'm done with the grinder at this point, which is nice because it's like the router in that every second I use it I'm worried I'm going to slip and mess the whole thing up. I'll just use a random orbital sander with some 80 grit paper to blend everything together. Then I'll probably sand it up to about 220 or so to make sure it's in good shape and I like the contours.
The things I'm thinking about are the controls. I originally specced it for one volume, one tone, and the switch, so I made the control cavity big enough for those three components. Then later I decided to put the switch in the bottom horn, but I still made the control cavity big enough for three components. So I'm trying to decide whether to do volume/volume/tone, V/T/T, or maybe V/T/Kill switch. What else would be cool? (I already have a couple of push/push pots, I'm thinking about using one as a coil split and the other as a direct out).
After that it's time to do the carve on the back (just a basic belly cut), and then I'm going to bleach the wenge before I glue the fretboard on, which I expect I'll do over the weekend.
By this time next week it's going to look a hell of a lot more like a guitar.-
 1
1
-
-
Oh, and I sort of evened up the route for the pickups. I feel a lot better about it now.
-
1
-
-
Saturday I was marking locations for fretboard side dots with an awl when I slipped and stabbed it into my thumb. Sorry, no pics.
Sunday I finished marking and drilling fretboard dots and I started on carving the body with a sanding disk on an angle grinder.

I only "carved" for about 20 seconds before my son needed me and I gave up for the day.
I got some more carving done before my battery powered angle grinder conked out. Those things can really burn through a battery!

I'm going to do a similar carve on the other side, then do the bottom, then blend everything, then reassess and decide if I want to make the angle of the carve a little less severe. -
23 hours ago, ScottR said:
My current build actually has router bites on both sides of the neck pickup route. Small (yet gigantic to me) chip outs of unsupported grain coming out of the dog ears. Mounting rings were already part of the plan, and will cover them completely so I'm not going to do a thing about them. I'm not sure I even cussed when it happened.
SR
I've read through that thread front to back at least 3 times and never noticed.
-
1
-
-
3 hours ago, Andyjr1515 said:
Note the router bit-shaped gouge. No idea how that happened with the bearing bit fully inside the chamber. And the only thing I was routing was the bottom of the chamber - theoretically there was only a bearing anywhere near the sides...and this isn't a bearing gouge!
")
AND I've been doing this for some years now and apply all the normal precautions against slippage, moving the router before the bit fully stops, etc, etc, etc.

Happily, this is intended for standard black metal humbucker rings that will just cover the gouge...
Does that make you feel a bit better about your remarkable and impressive climb up the learning curve @beltjones ?
And maybe it explains better my oft-repeated statement 'I hate hand routers'

Thank you so much for sharing. I'm following your latest build closely - this makes me feel a lot better. It also makes me feel worse because I figured it was possible to eventually get good at using the router.
-
I lurked here for about six weeks before I finally signed up, then I made this thread because I wanted to pick the the collective brains of all the experienced people here. If someone else can learn from my mistakes, awesome.
What I didn't expect is for you guys to talk me off the ledge. Ok, I'll be taking a conservative approach with re-routing the pickups any further. I figure I can complete most of this build and "fix" the pickup route much later if necessary.
Ok, now I'm going to go search the forum for how y'all do your wooden pickup rings. Thanks everyone!
-
Ok, first the messed up template. I'm going to call it out of center by 3/64ths.

Now the messed up guitar.

I went ahead and routed the bridge pickup because regardless of how I fix the neck pickup route I'm going to have to do the same for the bridge pickup. Somehow I also slipped with the damn router when doing the bridge pickup. If you look closely at the left side you will see where the router bit somehow dug in a little bit. I didn't even feel it happen, and I was a pattern cutting bit, so I'm not sure what I did wrong. I think in the future when I need to route something on a guitar I'm going to find a homeless guy with a "will work for food" sign and have him do it, because I clearly can't be trusted.
Some ideas for fixes: #1 is to do what yall suggested which is just shift the template and even it up on the other side. (More routing - a recipe for disaster), or route the other side AND make some pickup rings out of contrasting wood (probably some flame maple I have), or here's what my hubris is telling me to do: route out two rectangles in the shape/ size of a pickup ring around each existing pickup cavity, and then take the flame maple and plug the holes. Then re-route the pickups into the maple, so the pickups will still be direct-mounted to the guitar, but it will kind of look like there are maple pickup rings around them. The odds of me pulling that off with any kind of success are close to zero, but at this point I kind of want to go for it.
Oh, and I used the router with a rabbeting bit to remove some material before I start the carving process for the top.
-
1
-
-
I'm so mad I haven't bothered to take pictures yet, but I will. I ordered a humbucker routing template from Amazon because I figured it would be cleaner than anything I could make. Well, the center line on the template was about 1/16" off, and of course I didn't notice until I routed the first pickup. I'm contacting the seller and telling them to check their CAD files and get back to me. For once I didn't mess up with the router and slip, and the template I purchased was jacked up. This is my luck...
-
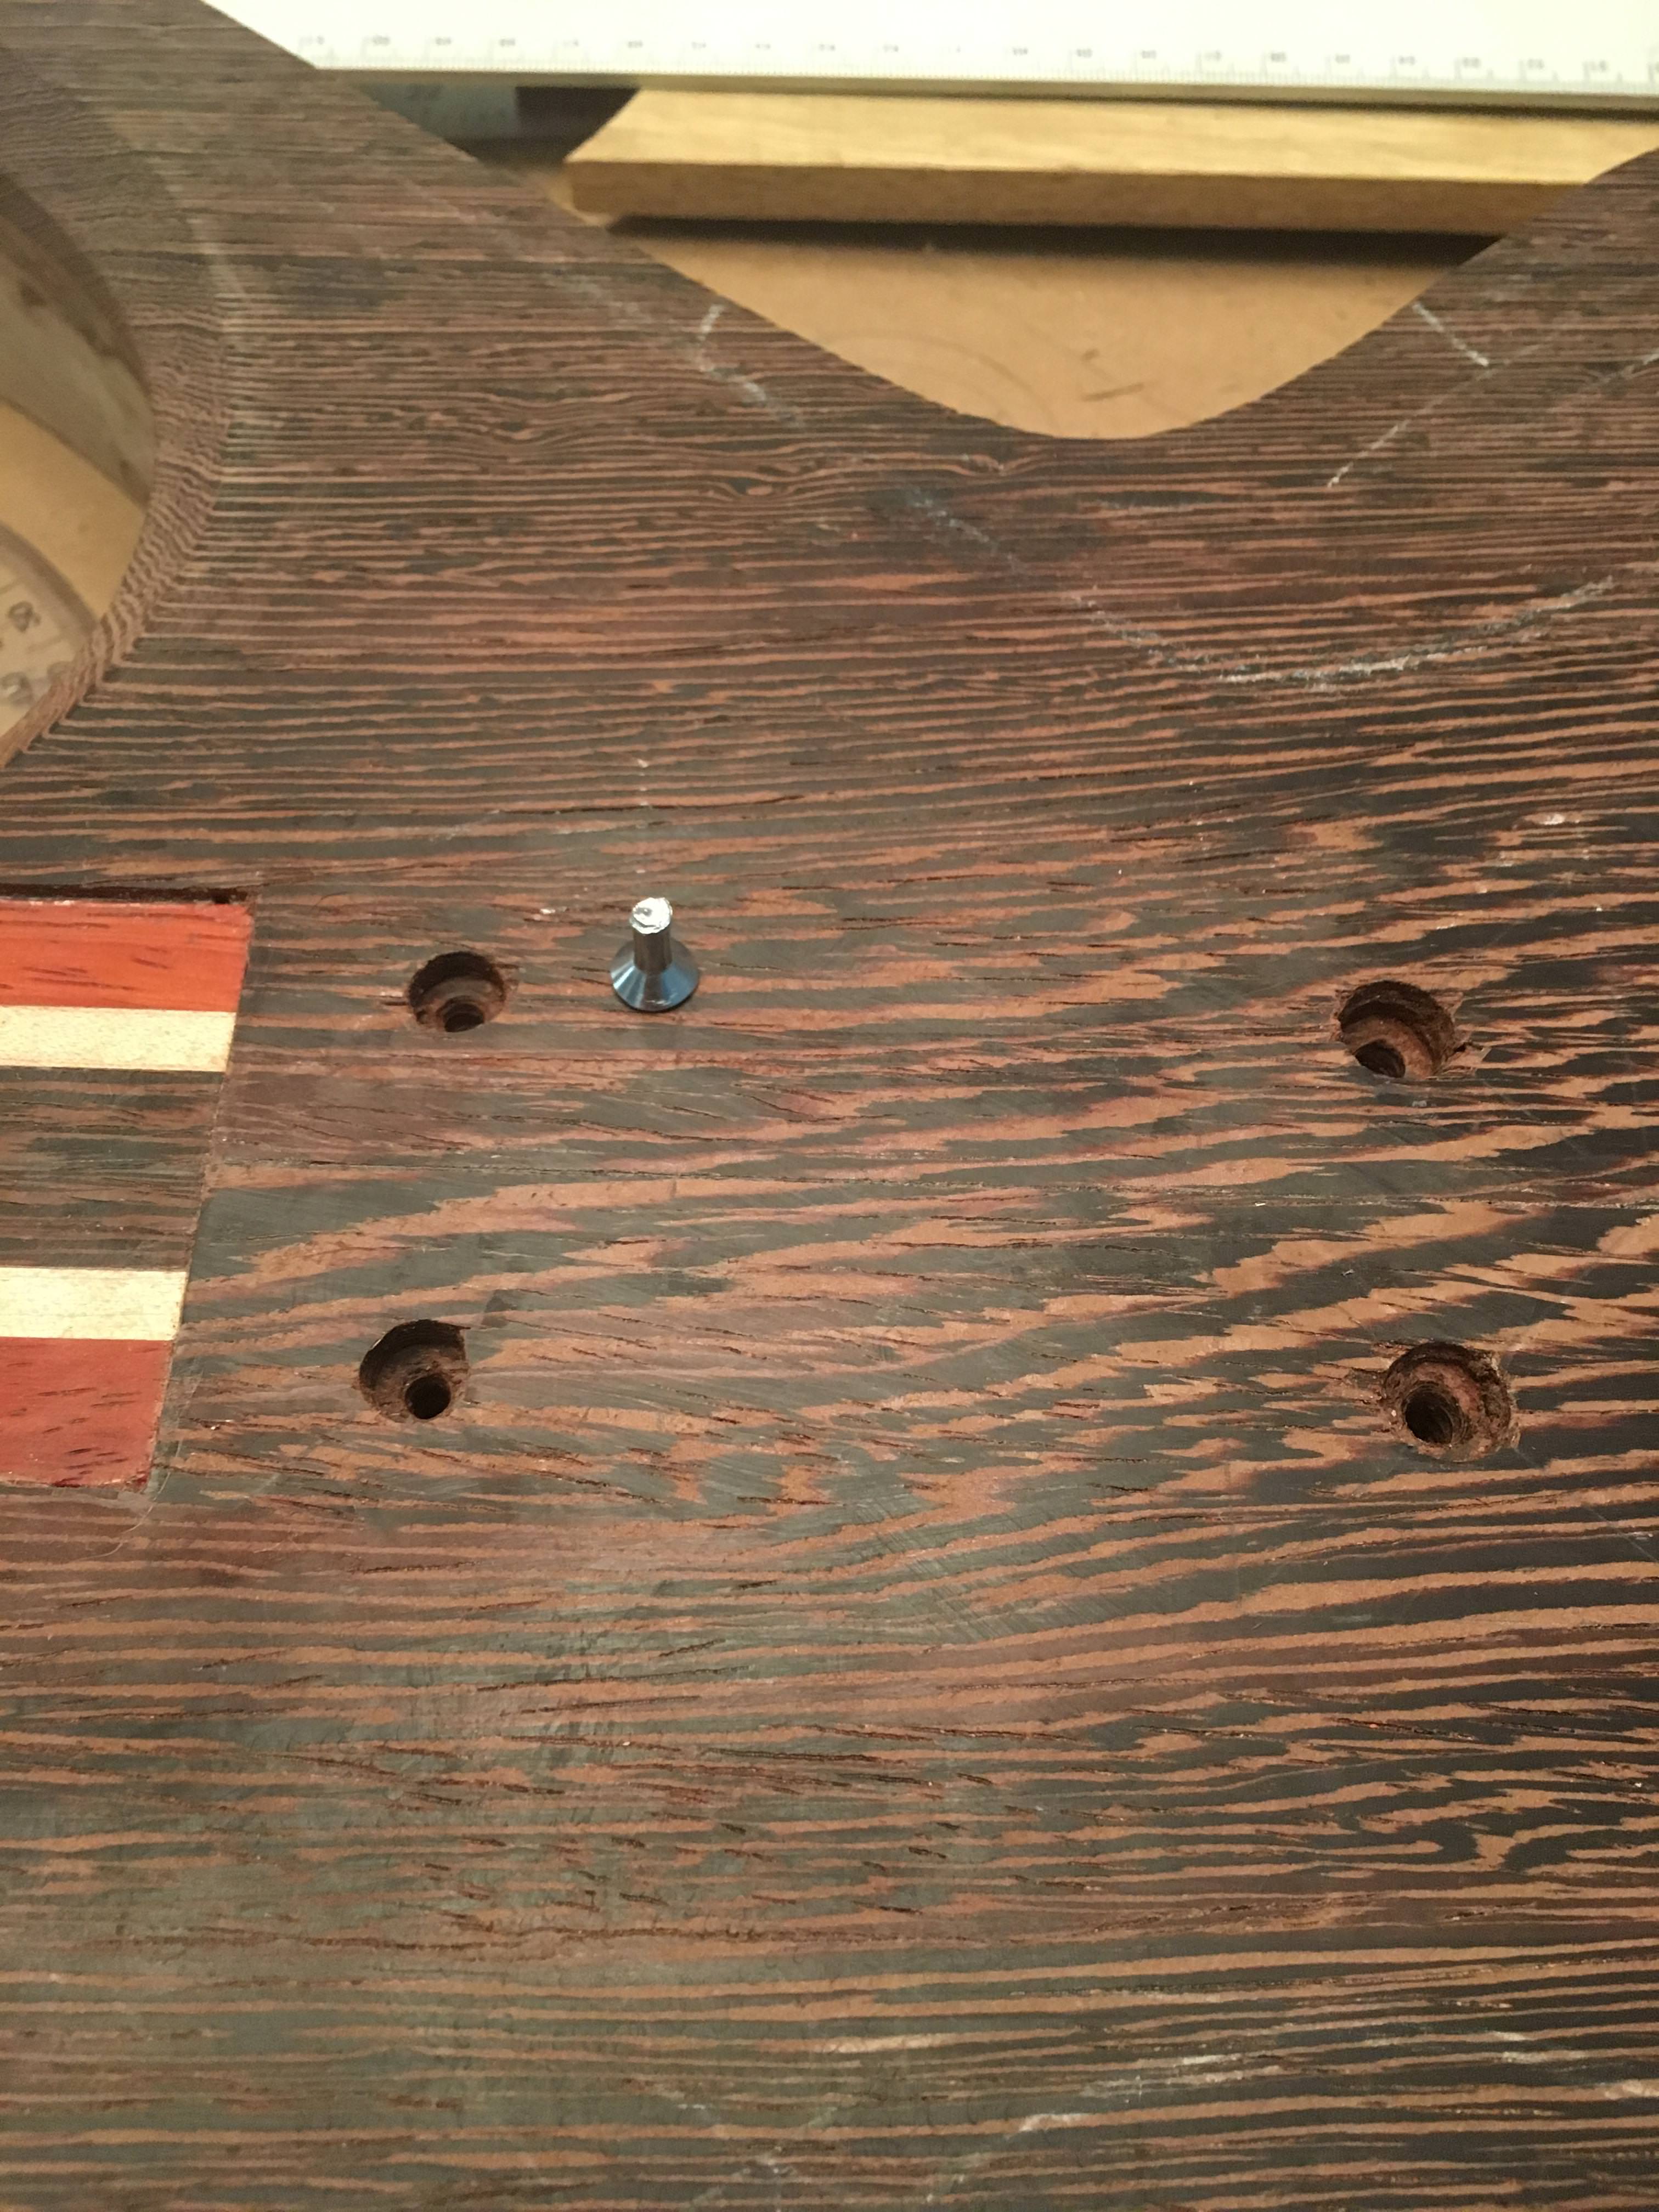
Ok, I got it out.
I first plugged in the soldering iron, and while it was heating up I whacked the screw once or twice with a center punch and a hammer. Then I grabbed a bigger forstner bit and hogged out more of the cavity-to-be. That allowed me to get in there with the regular vice grips (as opposed to the needle nose) and I was able to twist it out without using the soldering iron.
-
2
-
-
Ok, I'm going to give this a go.
I'll check back with you guys in a few hours and give you an update (which, knowing my luck / skill, is going to be something along the lines of, "Ok, so I accidentally de-laminated the entire guitar...").
-
Or, what I think I'm going to try first is heating the screw up with a soldering iron in order the break the glue's hold.
-
Someone suggested trying to thread a nut onto it with some red loctite or epoxy, or otherwise trying to get the chuck of a drill on it. If the vice grips won't budge it I don't think the drill will do anything.
I think the two ideas I like the best are Scott's suggestion of cutting a slot in the top, and if that doesn't work I'm thinking about putting a center punch on the screw and whacking it with a hammer, the idea being that there is glue holding the screw in place, and maybe I can break the seal.
-
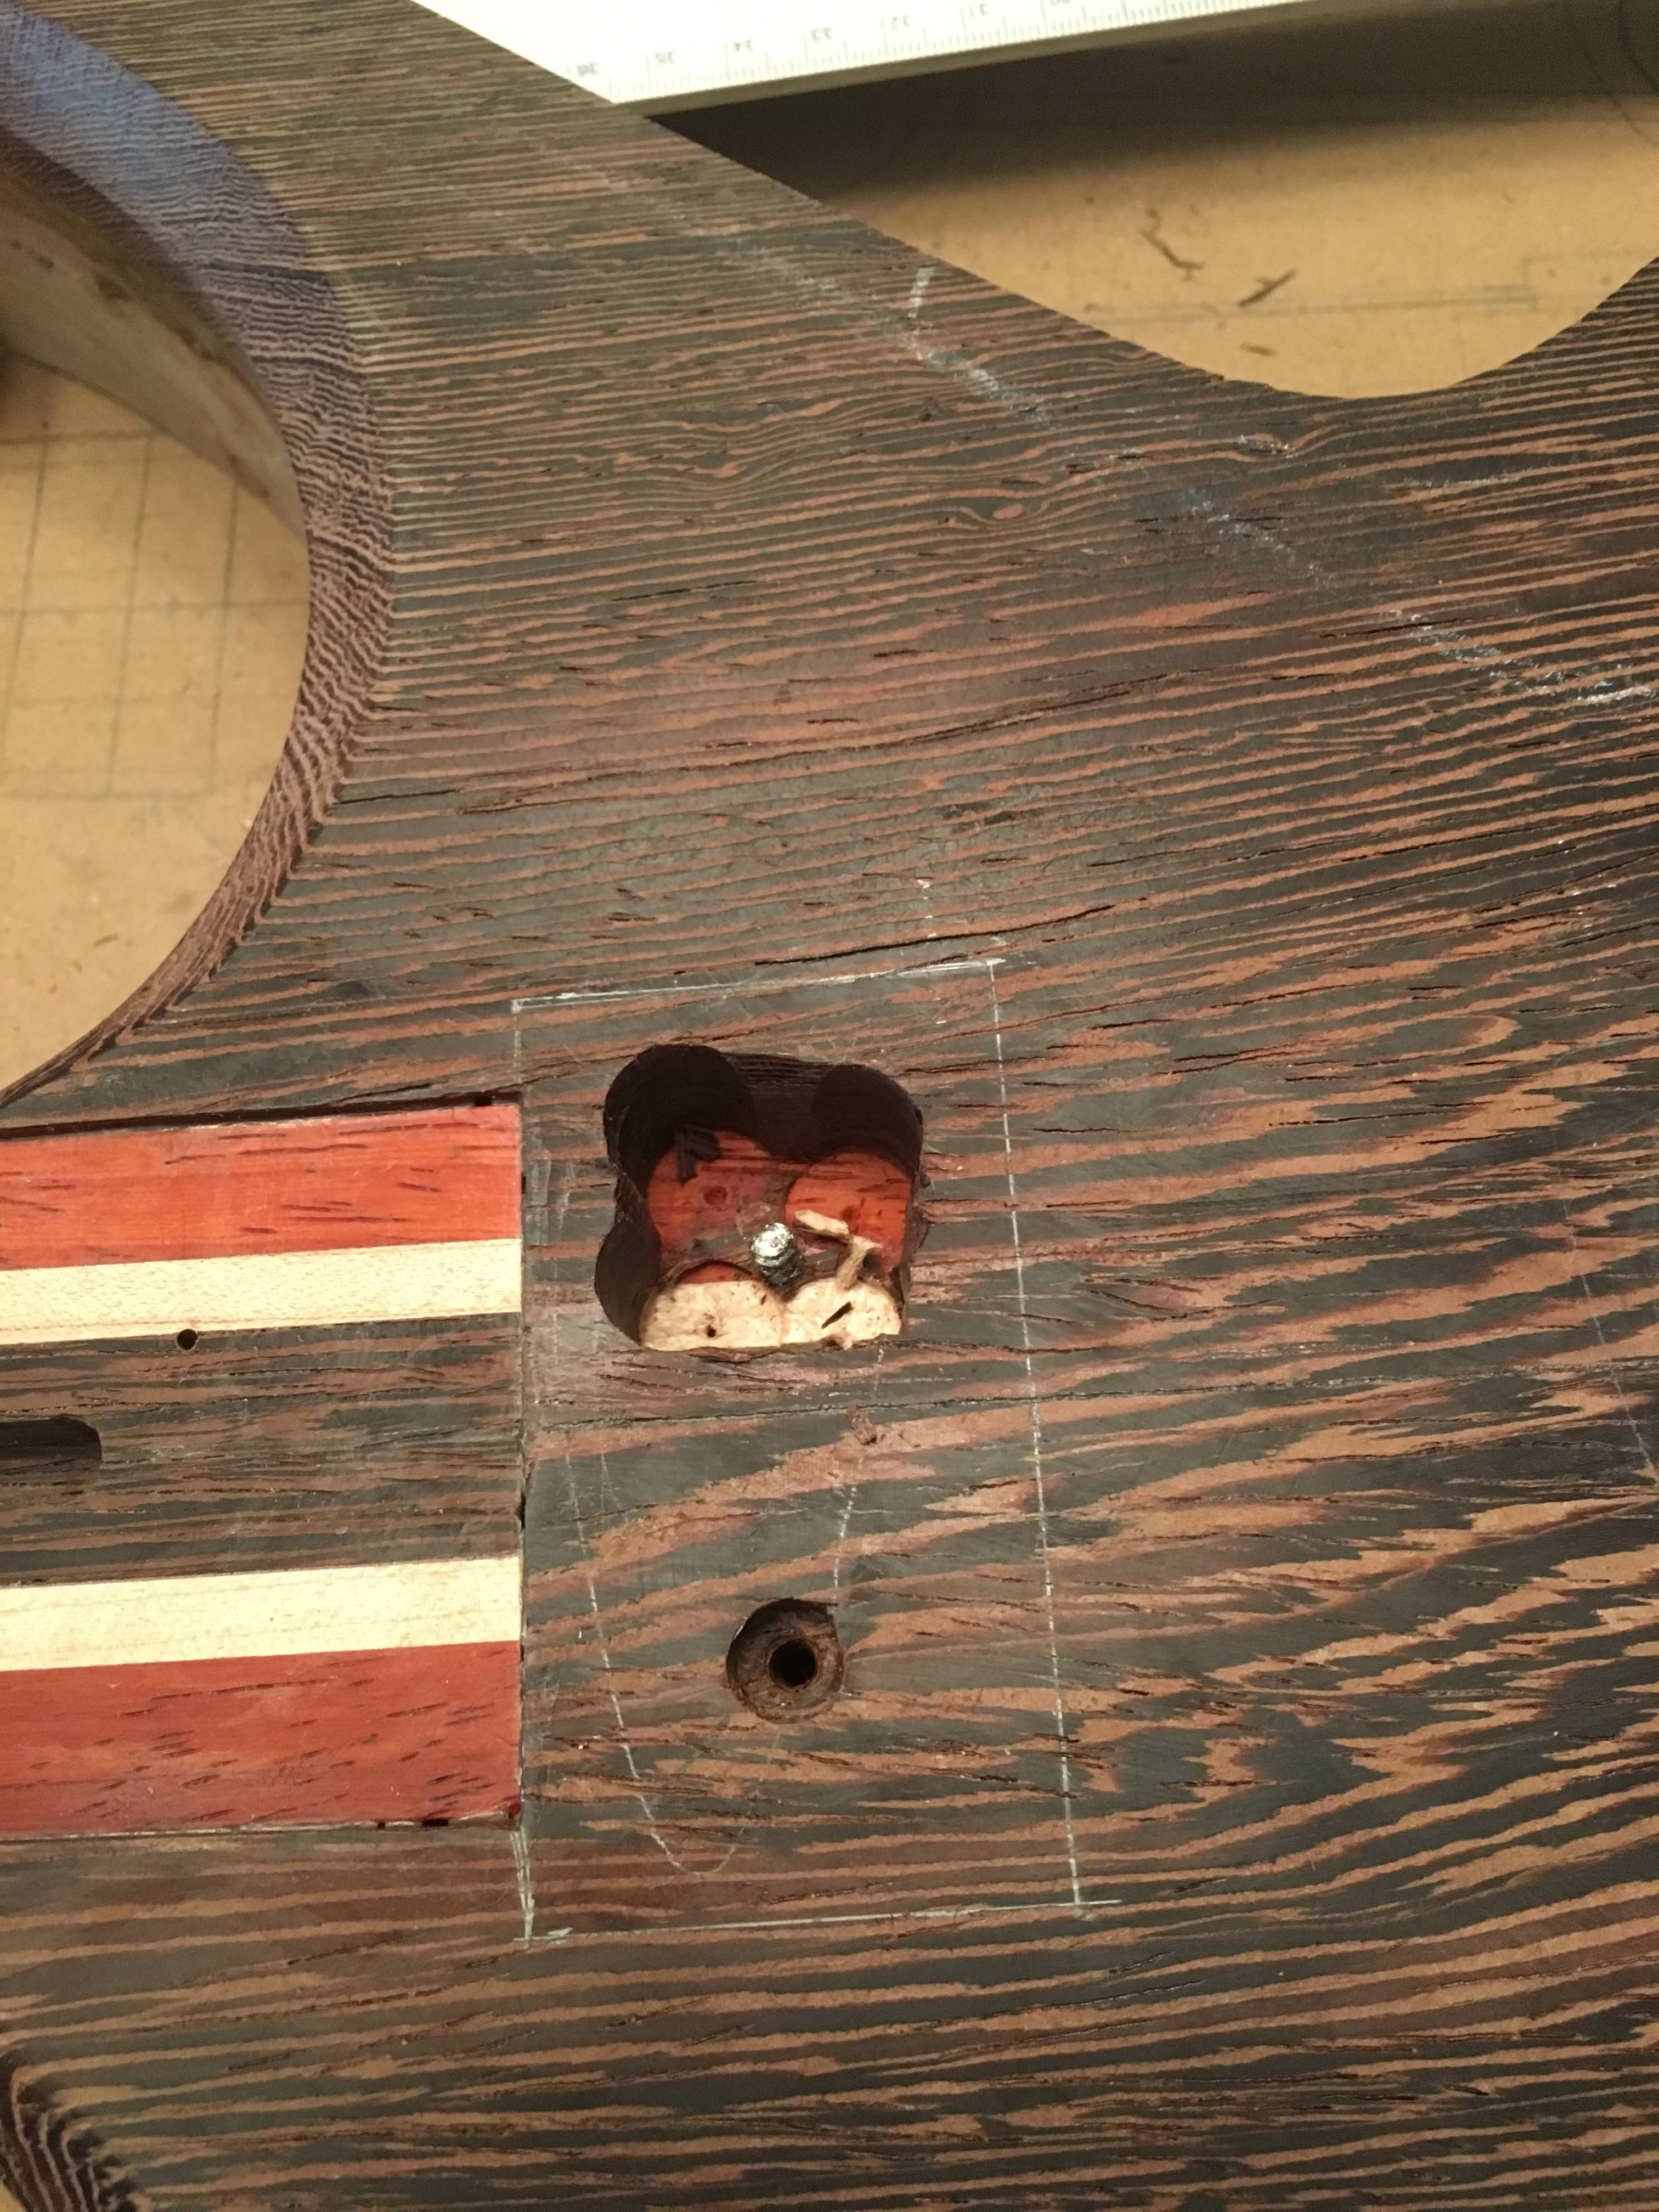
It's not budging. There is still about 1/2" of screw in the wood, and even if I clamp some vice grips on it. I can remove about another 16th of an inch of wood from the base of that hole, but I'm not sure that will make a difference. It might help if I have more room to get the vice grips on it, so I'm going to make that hole wider and keep trying.
-
I will admit that after reading the backstory at around midnight last night I woke up my 6 month old and held him.
I'm so sorry for your loss. I can't even imagine...
-
Aaaaaaaand this happened.
The rest of that screw is about 1/2" deep in the wood. What a fun new problem to solve!

Anyone have any tips? My first idea is to google "remove broken screw." My other idea is to use a forstner bit to remove wood as close to the broken screw as possible (I'll need to do that anyway in order to route pickup cavities), and then try to get at it with a pair of vice grips.
Or, as my dad's friend once told him, regarding removing an old dishwasher, "What I would do is, I would do whatever it took to get that thing out, and then fix whatever I broke."
-
17 minutes ago, ScottR said:
Holy crap. You must be up in the panhandle.
SR
Haha. Nope, I'm in Houston. It was 65ish and dipped to 48ish.


First Build, so many lessons learned
in In Progress and Finished Work
Posted
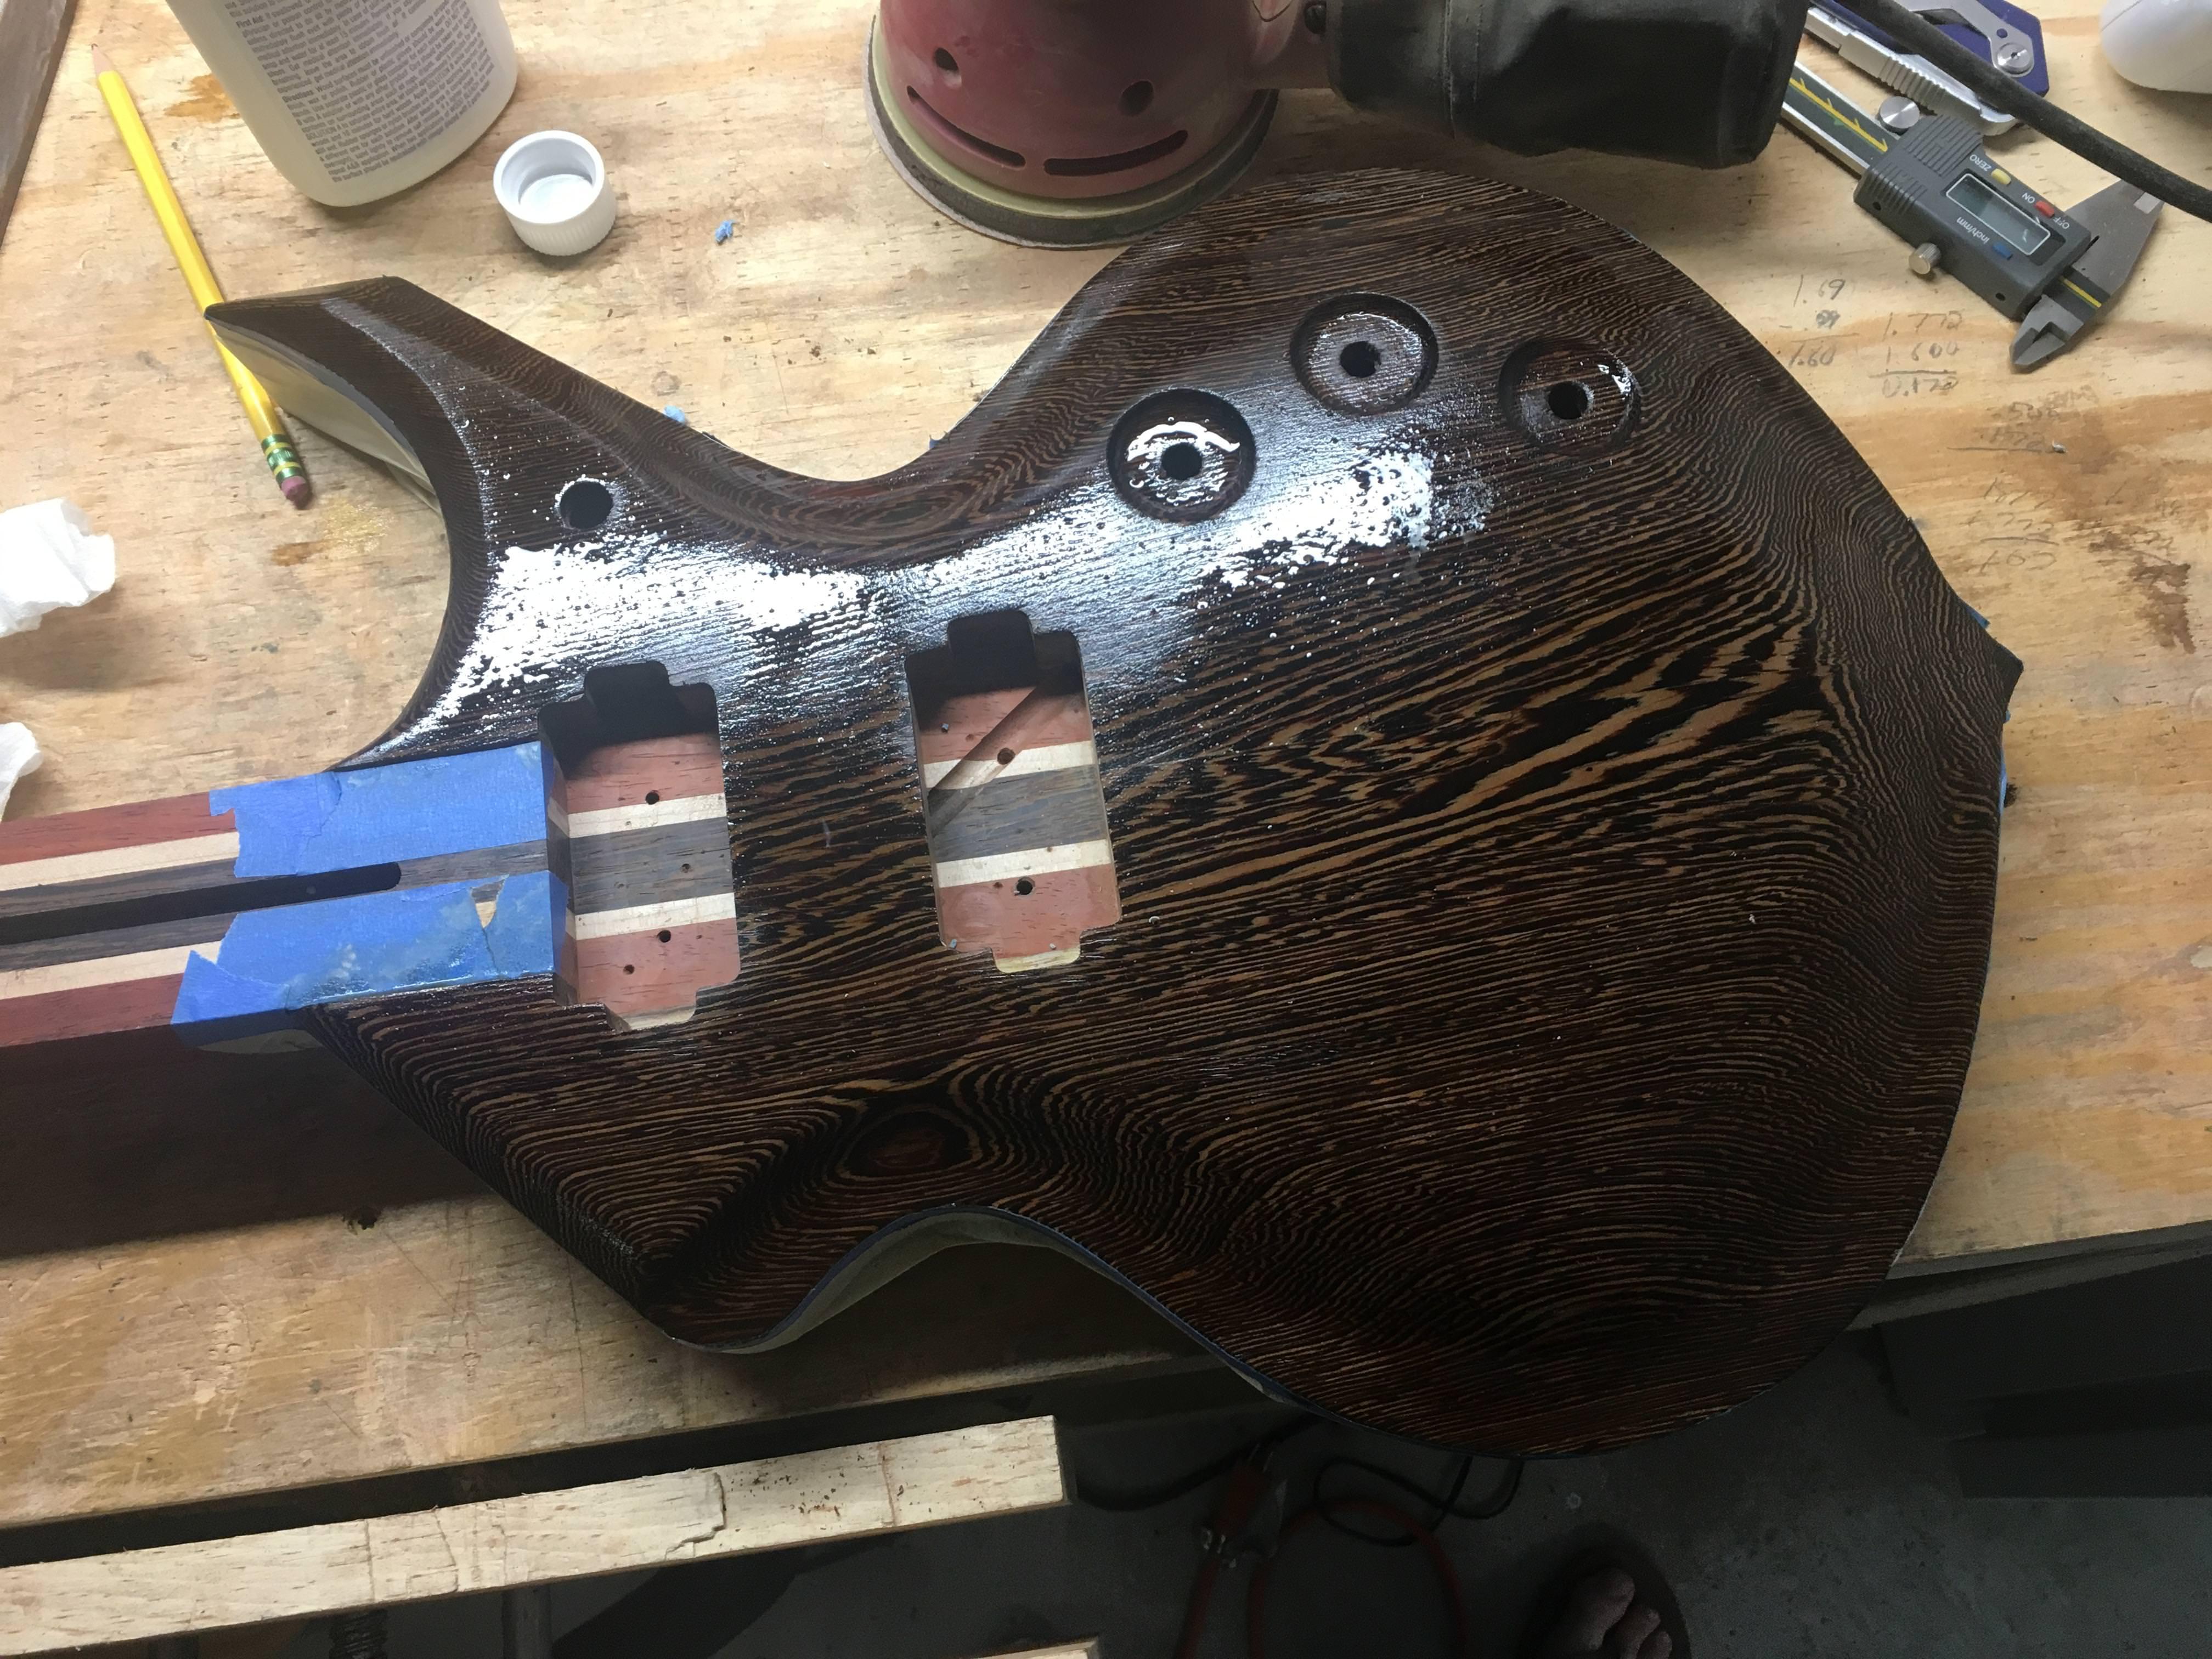
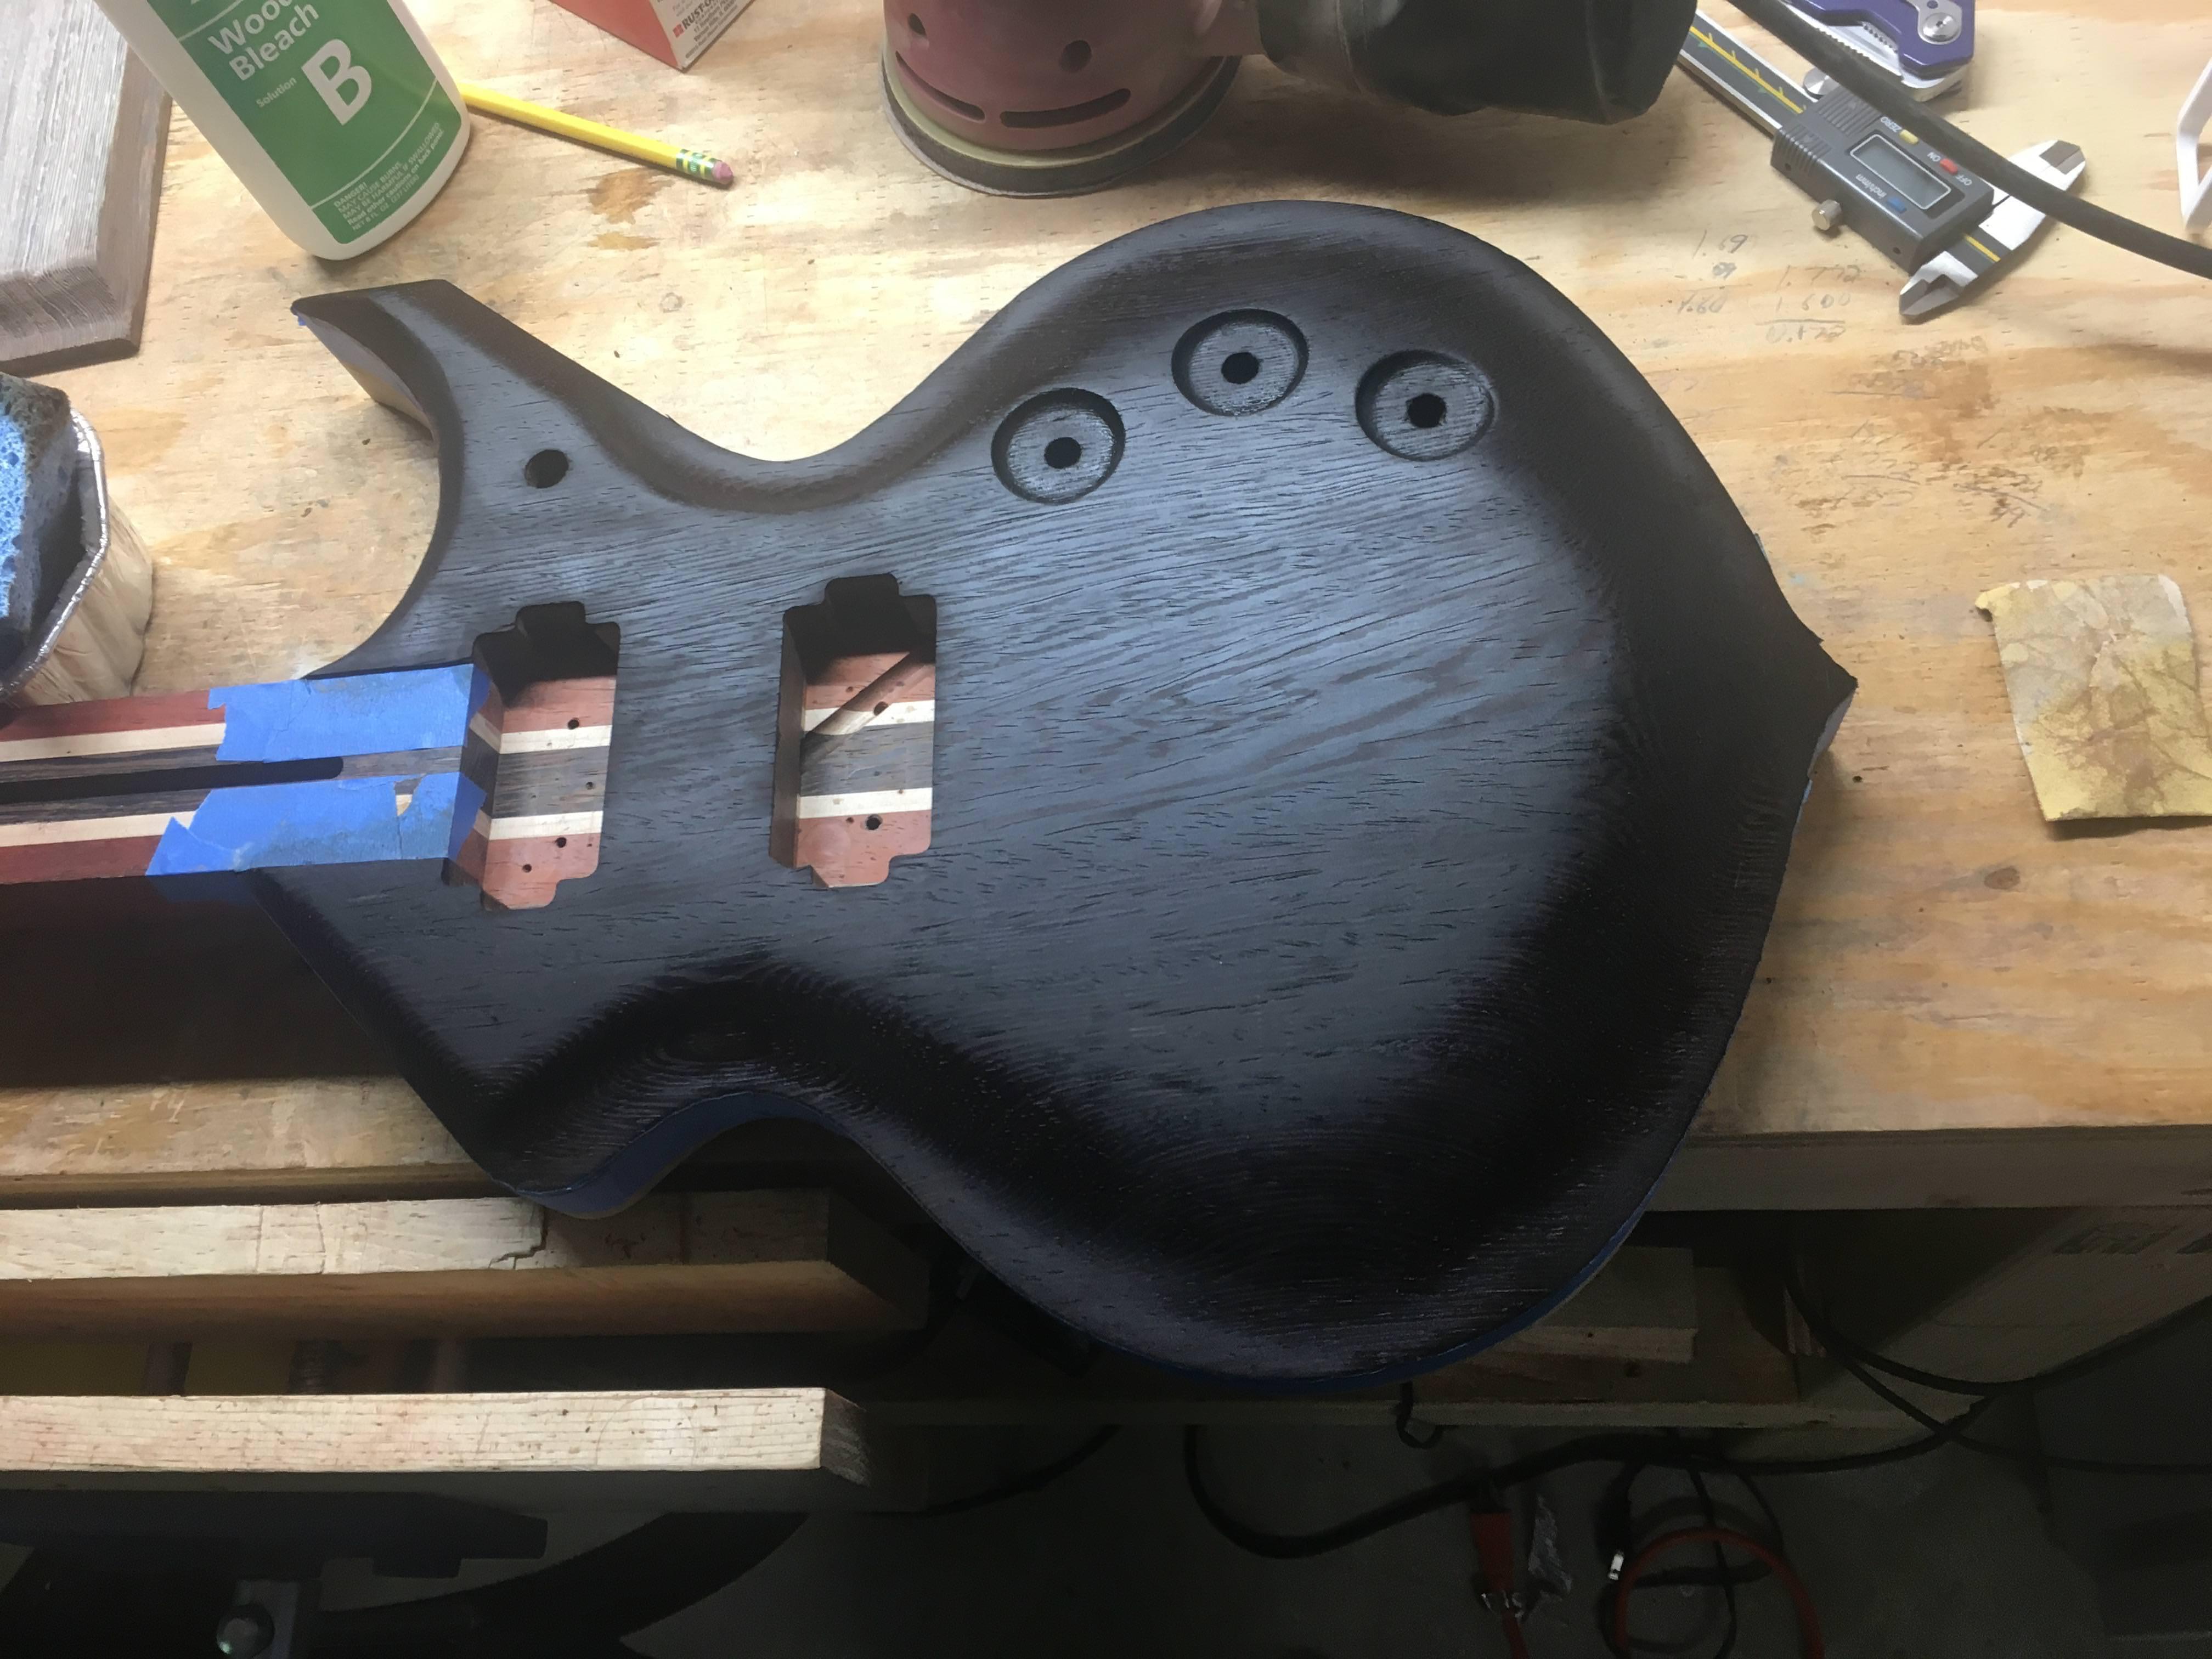
Coat one of bleach is dried, and coat two is applied.